Adjusting the seats
Front seats
Adjustment procedure
- Manual seat
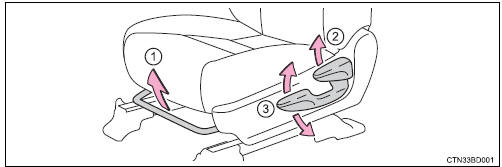
- Seat position adjustment lever
- Seatback angle adjustment lever
- Vertical height adjustment lever (driver’s side only)
- Power seat
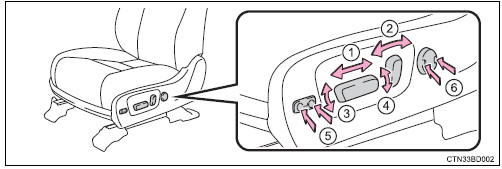
- Seat position adjustment switch
- seatback angle adjustment switch
- seat cushion (front) angle adjustment switch (driver’s side only)
- vertical height adjustment switch (driver’s side only)
- seat cushion length adjustment switch (if equipped, for driver’s seat only)
- lumbar support adjustment switch (driver’s side only)
 Warning Warning
Seat adjustment
|
Rear seats
Adjustment procedure
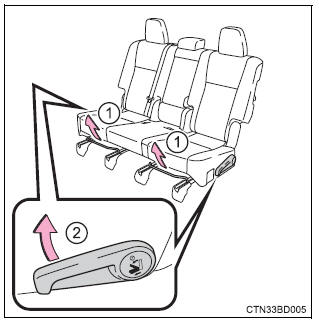
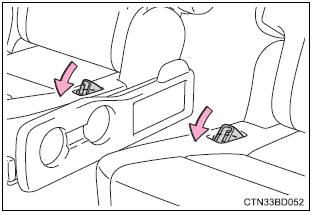
Second seats
- Without a side table
- With a side table
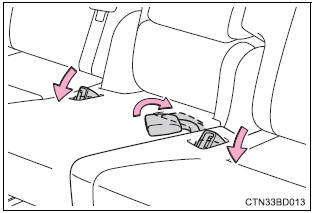
- Seat position adjustment lever
- seatback angle adjustment lever
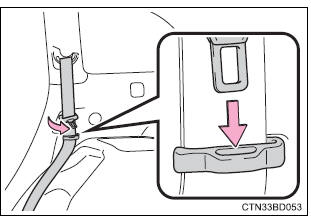
Pull the lever until the lock is completely released.
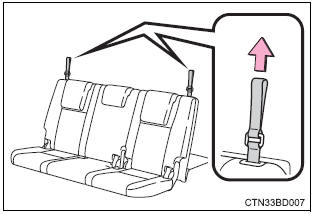
Third seats
Seatback angle adjustment strap
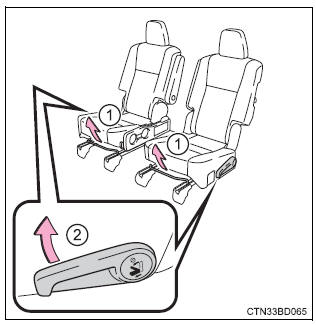
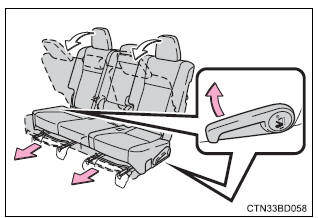
Moving a second seat for third seat access
Getting in the vehicle
Pull the lever and tilt the seatback forward.
Move the seat to the front-most position.
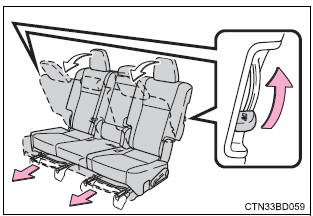
Getting out of the vehicle
Pull the lever on the side of the seatback and tilt the seatback forward.
Move the seat to the front-most position.
After passengers have entered/exited the vehicle
Lift up the seatback and slide the seat backward until it locks.
Folding down the second seats
Before folding down the second seats
- Stow the armrest.
- With a side table: stow the side table.
- Stow the second seat belt buckles.
- Without a side table
- With a side table
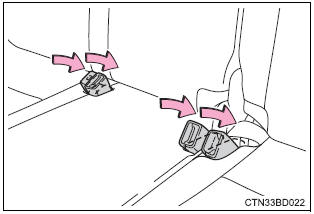
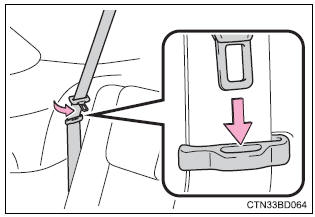
- Pass the outer seat belts through the seat belt hangers and secure the seat belt plates.
This prevents the shoulder belts from being damaged.
Make sure that the seat belts are removed from the hangers before using them.
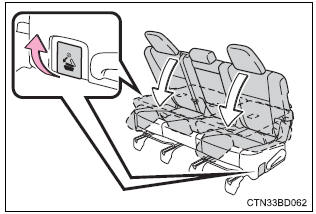
- Lower the head restraints to the lowest position.
Folding down the second seats
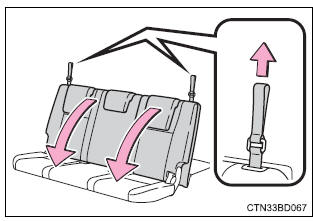
- Pull the lever and tilt the seatback forward.
Each seatback may be folded separately.
- From inside
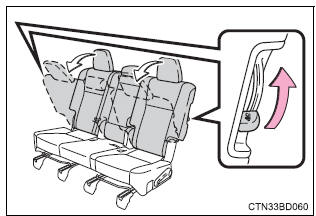
- From outside
- Pull the lever to unlock the seatback. The seatback will be folded down.
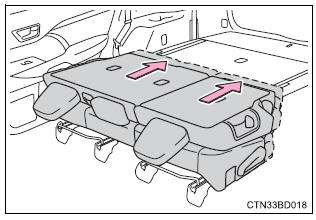
After folding down the second seats
Slide the folded second seats backward until they lock.
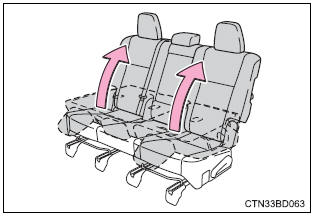
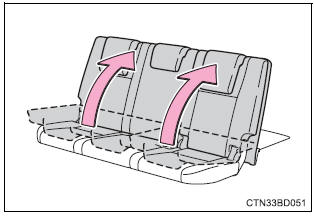
Returning the second seats
Lift up the seatbacks until they lock.
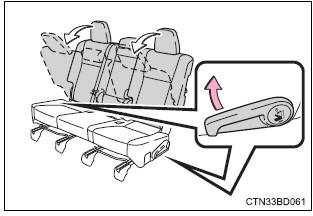
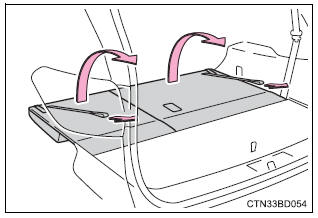
Folding down the third seats
Before folding down the third seats
- Stow the third seat belt buckles.
- Pass the outer seat belts through the seat belt hangers and secure the seat belt plates.
This prevents the shoulder belts from being damaged.
Make sure that the seat belts are removed from the hangers before using them.
- Lower the head restraints to the lowest position. (
Folding down the third seats
While pulling the straps, fold down the seatbacks.
Returning the third seats
- From inside
Lift up the seatbacks until they lock.
- From outside
Pull the straps and raise the seatbacks until they lock.
After using either strap, use the velcro on the end of the strap to attach it to the seatback.
 Warning Warning
Observe the following precautions. Failure to do so may result in death or serious injury.
Seat adjustment
After adjusting or returning the seats
Observe the following precautions. Failure to do so may result in death or serious injury.
|
Driving position memory
This feature automatically adjusts the driver’s seat and outside rear view mirrors to make entering and exiting the vehicle easier or to suit your preferences.
Driving position memory
Your preferred driving position (the position of the driver's seat and outside rear view mirrors) can be recorded and recalled by pressing a button.
Two different driving positions can be recorded into memory.
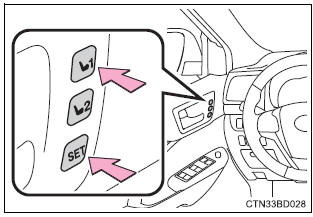
Recording procedure
- Turn the engine switch to ignition on mode.
- Adjust the driver's seat and outside rear view mirrors to the desired positions.
- While pressing the "set" button, or within 3 seconds after the "set" button is pressed, press button "1" or "2" until the buzzer sounds.
If the selected button has already been preset, the previously recorded position will be overwritten.
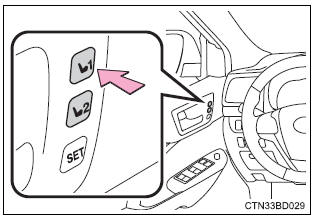
Recall procedure
- Check that the shift lever is in p.
- Turn the engine switch to ignition on mode.
- Press one of the buttons for the driving position you want to recall until the buzzer sounds.
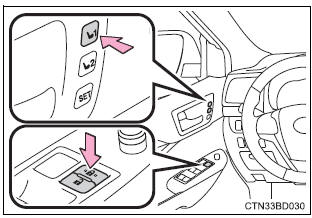
To stop the position recall operation part-way through
Perform any of the following:
- press the "set" button.
- Press button "1" or "2".
- Operate any of the seat adjustment switches (only cancels seat position recall).
Seat positions that can be memorized
The seat position, with the exception of the portions adjusted by the seat cushion length switch and lumbar support switch, can be recorded.
Operating the driving position memory after turning the engine switch off
Recorded seat positions can be activated up to 180 seconds after the driver's door is opened and another 60 seconds after it is closed again.
In order to correctly use the driving position memory function
If a seat position is already in the furthest possible position and the seat is operated in the same direction, the recorded position may be slightly different when it is recalled.
Memory recall function
Each electronic key can be registered to recall your preferred driving position.
Registering procedure
Record your driving position to button “1” or “2” before performing the following: carry only the key you want to register, and then close the driver’s door.
If 2 or more keys are in the vehicle, the driving position cannot be recorded properly.
- Check that the shift lever is in p.
- Turn the engine switch to ignition on mode.
- Recall the driving position that you want to record.
- While pressing the recalled button, press and hold the door lock switch (either lock or unlock) until the buzzer sounds.
If the button could not be registered, the buzzer sounds continuously for approximately 3 seconds.
Recall procedure
Carry the electronic key that has been registered to the driving position, and then unlock and open the driver’s door using the smart key system or wireless remote control.
The driving position will move to the recorded position.
If the driving position is in a position that has already been recorded, the seat and outside rear view mirrors will not move.
Cancelation procedure
Carry only the key you want to cancel and then close the driver’s door.
If 2 or more keys are in the vehicle, the driving position cannot be canceled properly.
- Check that the shift lever is in p.
- Turn the engine switch to ignition on mode.
- While pressing the “set” button, press and hold the door lock switch (either lock or unlock) until the buzzer sounds twice.
If the button could not be canceled, the buzzer sounds continuously for approximately 3 seconds.
Recalling the driving position using the memory recall function
- different driving positions can be registered for each electronic key. Therefore, the driving position that is recalled may be different depending on the key being carried.
- If a door other than the driver's door is unlocked with the smart key system, the driving position cannot be recalled. In this case, press the driving position button which has been set.
Customization
The unlock door settings of the memory recall function can be customized.
(Customizable features:
 Warning Warning
Take care during seat adjustment so that the seat does not strike the rear passenger or squeeze your body against the steering wheel. |
Head restraints
Head restraints are provided for all seats.
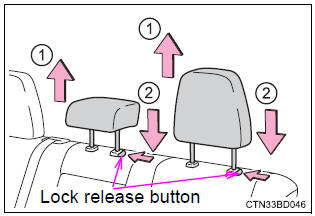
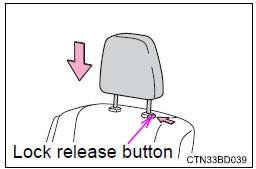
Front seats and second seats (with a side table)
- Up
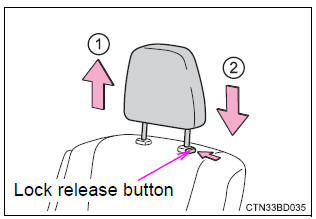
pull the head restraints up. - Down
push the head restraint down while pressing the lock release button.
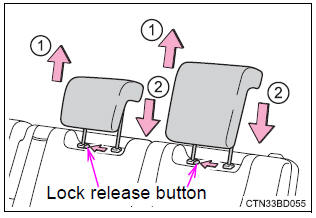
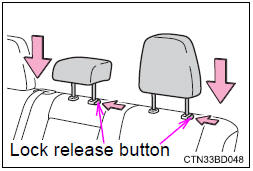
Second seats (without a side table)
- Up
pull the head restraints up. - Down
push the head restraint down while pressing the lock release button.
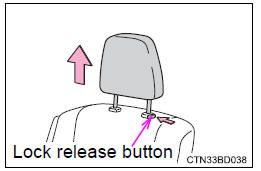
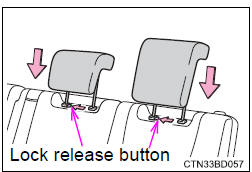
Third seats
- Up
pull the head restraints up. - Down
push the head restraint down while pressing the lock release button.
Removing the head restraints
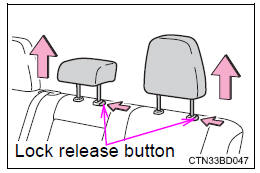
- Front seats and second seats (with a side table)
Pull the head restraint up while pressing the lock release button.
- Second seats (without a side table)
Pull the head restraint up while pressing the lock release button.
- Third seats
Pull the head restraint up while pressing the lock release button.

Installing the head restraints
- Front seats and second seats (with a side table)
Align the head restraint with the installation holes and push it down while pressing the lock release button.
- Second seats (without a side table)
Align the head restraint with the installation holes and push it down while pressing the lock release button.
- Third seats
Align the head restraint with the installation holes and push it down while pressing the lock release button.
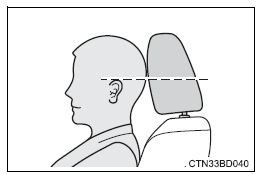
Adjusting the height of the head restraints
Make sure that the head restraints are adjusted so that the center of the head restraint is closest to the top of your ears.
Adjusting the third seat head restraints
Always raise the head restraint one level from the stowed position when using.
 Warning Warning
Observe the following precautions regarding the head restraints. Failure to do so may result in death or serious injury.
|
Download Manual