Seats, mirrors and steering wheel
Sitting safely
An ideal seat position that meets the needs of the occupants can make a vital contribution to relaxed, fatigue-free driving.
In the event of an accident, the correct seat position plays an important role. Follow the information in the following chapters.
Additional information:
Seats.
Seat belts.
Head restraints.
Airbags.
Seats
Safety information

Only adjust the seat on the driver's side when the vehicle is stationary
Move the backrest to its most upright position
Keep the travel path of the seats unobstructed when adjusting
Electrically adjustable seats
General information
The current seat position can be stored using the memory function.
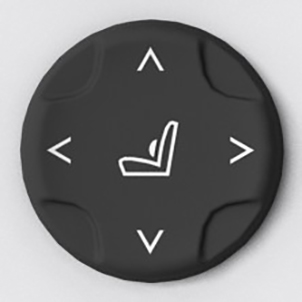
Overview
8

1
Thigh support
2
Longitudinal direction
3
Height
4
Seat tilt
5
Head restraint
6
Backrest tilt
7
Backrest width
8
Lumbar support
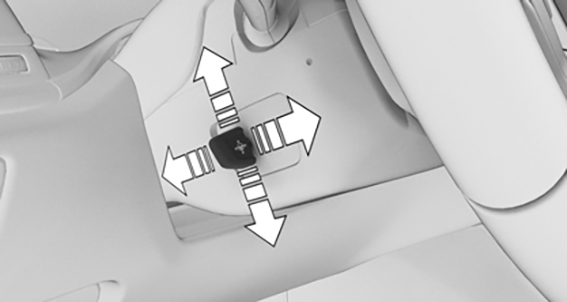
Longitudinal direction

Press switch forward or backward.
Height
Press switch up or down.
Seat tilt
Tilt switch up or down.
Backrest tilt
Tilt switch forward or backward.
Adjusting the seat position automatically
General information
The seat setting for the driver's seat is stored for the driver profile currently used. When a driver profile is selected, the saved position is set automatically.
Activating/deactivating the setting
"CAR"
"Settings"
"Seat comfort"
Select driver’s seat.
Select the desired setting.
Calibrating the front seats
General information
As soon as the electric seat setting no longer functions precisely, a Check Control message is displayed on the control display.
To restore the accuracy of the electric seat setting, the front seats must be calibrated.
Safety information
Keep the travel path of the seats unobstructed when adjusting
Calibrating the front seat
Press the longitudinal direction switch forward until the seat stops.
Press the switch forward again until the seat stops.
Readjust the seat to the desired position.
As soon as the message on the control display disappears, the calibration is complete. If the message remains active, repeat the calibration.
If this message is still shown after repeated calibration, have the system checked by an authorized service center or another qualified service center or repair shop.
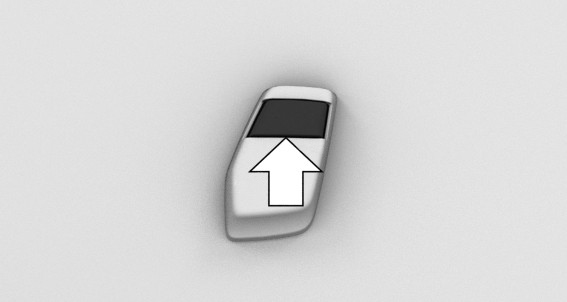
Thigh support
Multifunctional seat

Push the switch in the front or back.
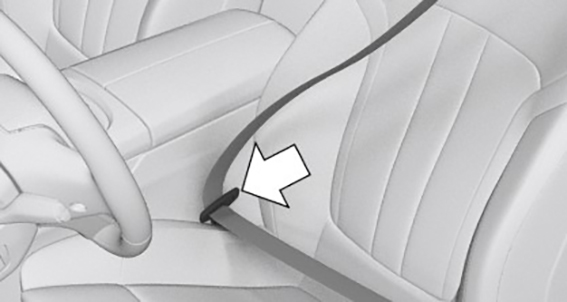
Sport seat
Pull the lever at the front of the seat and push the thigh support forward or back.
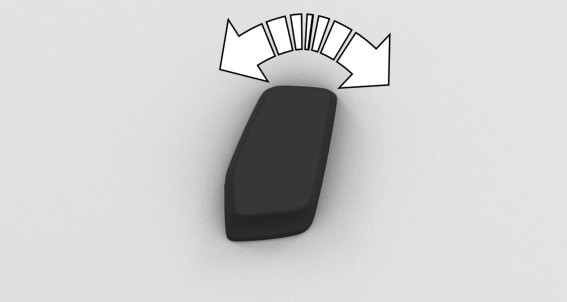
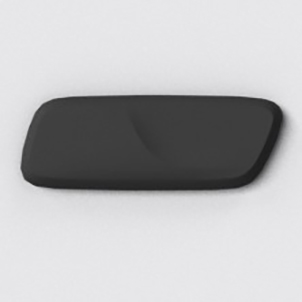
Lumbar support
Principle
The curvature of the seat backrest can be adjusted in a way that it supports the lumbar region of the spine. The lower back and the spine are supported for upright sitting position.
Adjusting
Press the front/rear section of the button:
The curvature is increased/decreased.
Press the upper/lower section of the button:
The curvature is shifted up/down.
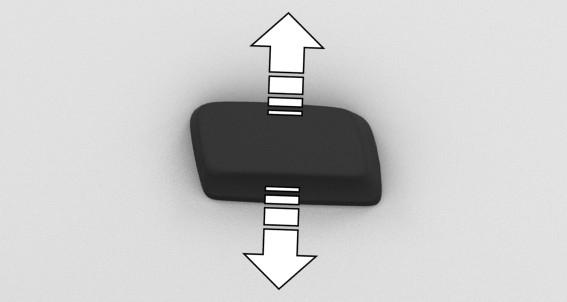
Backrest width
Principle
Adjusting the backrest width may improve side support when cornering.
General information
The backrest width is changed by adjusting the side sections of the backrest.
Adjusting
Press the front section of the button:
The backrest width decreases.
Press the rear section of the button:
The backrest width increases.
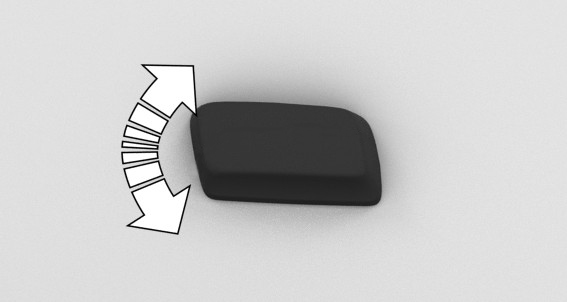
Upper backrest
Principle
The upper backrest supports the back in the shoulder region. A correct setting leads to a relaxed seat position and reduces strain on the shoulder muscles.
General information
If the driver's door is opened when the drive-ready state is switched off, the upper backrest moves into the basic setting.
Adjusting
Press the front section of the button:
The upper backrest is inclined forward.
Press the rear section of the button:
The upper backrest is inclined backward.
Seat belts
General information
Always make sure that seat belts are being worn by the occupants before driving off. The airbags supplement the seat belts as an additional safety device. The airbags do not replace seat belts.
All belt fastening points are designed to achieve the best possible protective effect of the seat belts with proper use of the seat belts and correct seat setting. Notes on sitting safely.
The two outer seat belt buckles of the rear seats are intended for the persons sitting on the left and right.
The center seat belt buckle of the rear seats is intended for the person sitting in the middle.
Safety information
Do not allow more than one person to fasten a single seat belt
Putting on the seat belt correctly
Lock the wider rear seat backrest
Do not change the seat belt system and have it inspected after an accident
Correct use of seat belts
Wear the seat belt tight to your body over your lap and shoulders, without twisting it.
Wear the seat belt deep on your hips over your lap. The seat belt must not press on your stomach.
Do not rub the seat belt against sharp edges, or guide it or jam it in across hard or fragile objects.
Avoid thick clothing.
Re-tighten the seat belt frequently upward around your upper body area.
Buckling the seat belt
Guide the seat belt slowly over shoulder and hip to put it on.
Insert the buckle tongue into the seat belt buckle. The seat belt buckle must engage audibly.
When the seat belt is fastened, the driver's and front passenger's belt straps are automatically tightened once after driving away.
Unbuckling the seat belt
Hold down the seat belt firmly.
Press the red button in the seat belt buckle.
Guide the seat belt back into its roll-up mechanism.
Middle seat belt in the rear
Buckling the seat belt
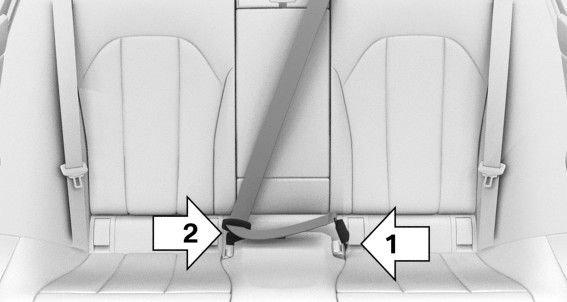
Pull the buckle tongue at the end of the belt out of the fixture on the rear shelf.
Insert the lower buckle tongue in the belt lock, arrow 1.
Insert the upper buckle tongue in the seat belt buckle, arrow 2.
The seat belt buckles must engage audibly.
Unbuckling the seat belt
Hold down the seat belt firmly.
Press the red button in the belt buckle.
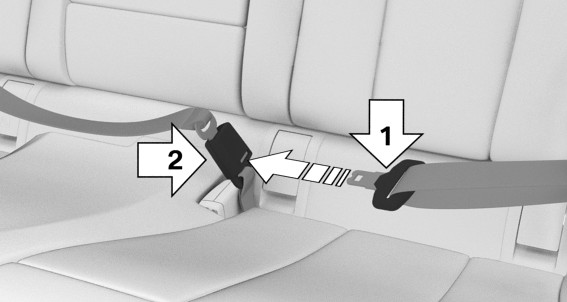
Open the belt lock, arrow 2, with the buckle tongue, arrow 1.
Guide the seat belt to the fixture on the rear shelf.
Seat belt reminder for driver’s seat and passenger’s seat
General information
The seat belt reminder is issued when the driver's side seat belt is not buckled.
The seat belt reminder is also active when the front passenger seat belt is not buckled or objects are on the front passenger seat.
The seat belt reminder is also activated when a passenger unbuckles a seat belt during the trip.
Display in the instrument cluster

The indicator light lights up and a signal sounds. Make sure that the seat belts are positioned correctly. The seat belt reminder can also be activated if objects are placed on the front passenger seat.
Seat belt reminder for rear seats
General information
The seat belt reminder is automatically activated each time the engine starts.
The seat belt reminder is also activated when a passenger unbuckles a rear seat belt during the trip.
Display in the instrument cluster
The indicator light in the instrument cluster illuminates after the engine is started.
The displays may vary depending on the equipment version and country variant.
|
Icon |
Description |
|---|---|
|
|
Green: the seat belt is buckled on the corresponding rear seat. |
|
|
Red: the seat belt is not buckled on the corresponding rear seat. |


Safety mode
In critical driving situations, for instance during emergency braking, the front seat belts tighten automatically.
If the driving situation passes without an accident occurring, the belt tension relaxes.
If the belt tension does not loosen automatically, stop the vehicle and unbuckle the seat belt using the red button in the seat belt buckle. Fasten the seat belt before continuing to drive.
Front head restraints
General information
The current head restraint position can be stored using the memory function.
Safety information
Adjust the head restraints correctly
Keep the travel path of the head restraint unobstructed
Do not attach objects on the head restraint
Adjusting the height
Press switch up or down.
Adjusting the distance
The head restraint is automatically repositioned when the upper backrest is adjusted.
Removing
The head restraints cannot be removed.
Rear head restraints
Safety information
Adjust the head restraints correctly
Keep the travel path of the head restraint unobstructed
Do not attach objects on the head restraint
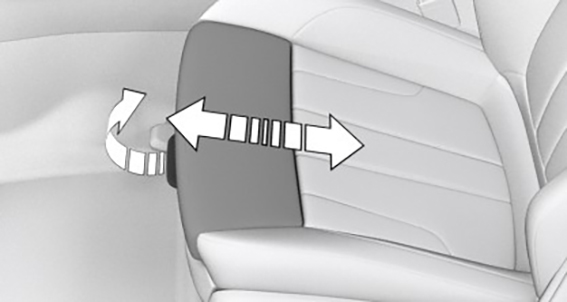
Folding down the center head restraint
To improve the view to the rear, the center head restraint can be folded to the rear. Only push the head restraint down if no one will be sitting in the center seat.
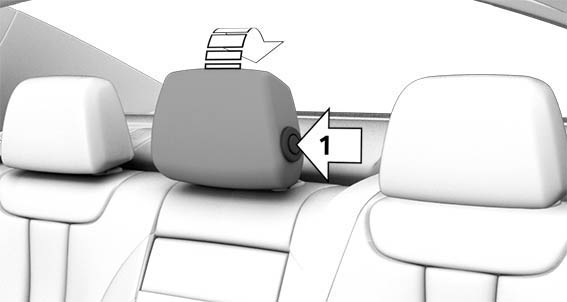
To the rear: press the button, arrow 1, and fold the head restraint backward.
Forward: fold the head restraint toward the front as far as it will go. Make sure that the head restraint engages correctly.
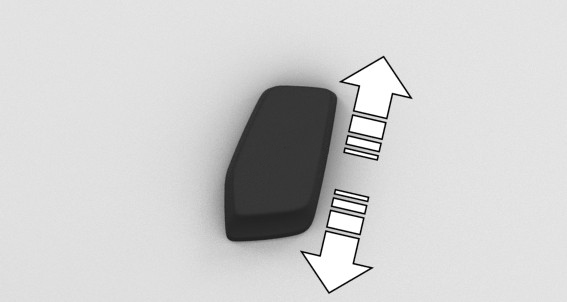
Adjusting the height
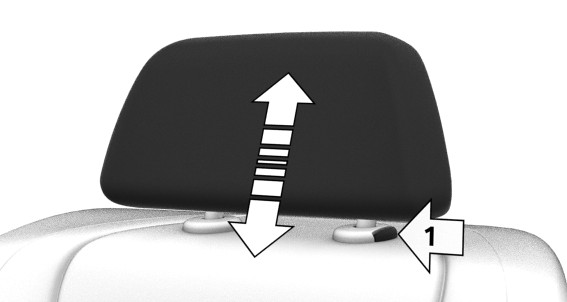
The height of the outer head restraints can be adjusted.
To lower: press the button, arrow 1, and push the head restraint down.
To raise: push the head restraint up.
After setting the height, make sure that the head restraint engages correctly.
Removing
The outer head restraints can be removed. Only remove the head restraint if no one will be sitting in the seat in question.
Fold down the rear seat backrest in question.
Enlarging the cargo area.
Raise the head restraint up against the resistance.
Press the button, arrow 1, and pull the head restraint out completely.
Installing
Proceed in the reverse order to install the head restraint.
After the installation, make sure that the head restraint engages correctly.
Exterior mirrors
General information
The front passenger's side exterior mirror is more curved than the driver's side mirror.
The mirror setting is stored for the driver profile currently in use. When a driver profile is selected, the saved position is called up automatically.
The current exterior mirror position can be stored using the memory function.
Safety information
Estimating distances correctly
Overview
1
2
3
4
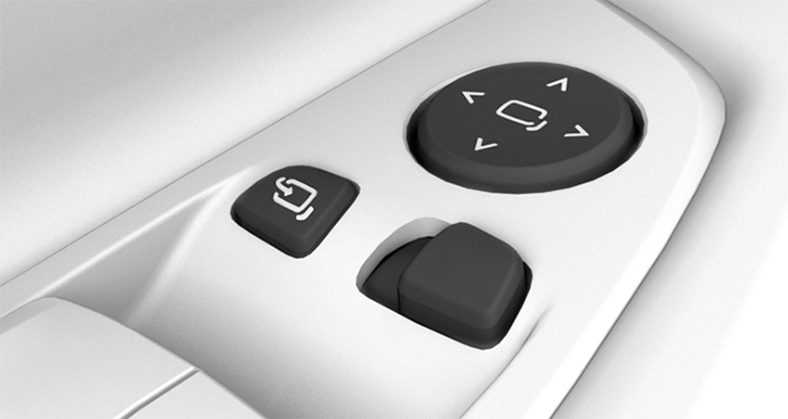
1
Adjusting
2
Selecting a mirror
3
Automatic Curb Monitor
4
Folding in and out
Adjusting the exterior mirrors

Press the button.
The selected mirror moves along with the button movement.
Selecting a mirror
To change over to the other mirror:
Slide the switch.
Malfunction
In case of an electrical malfunction, adjust the mirror by pressing the edges of the mirror glass.
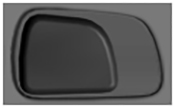
Folding in and out
Fold in the exterior mirrors in a car wash

Press the button.
Folding is only possible up to a speed of approx. 15 mph/20 km/h.
Folding the mirrors in and out is helpful in the following situations:
In car washes.
On narrow roads.
Mirrors that were folded in are folded out automatically at a speed of approx. 25 mph/40 km/h.
Automatic heating
Both exterior mirrors are automatically heated as needed and when the drive-ready state is switched on.
Automatic dimming feature
The exterior mirror on the driver's side is automatically dimmed. Photocells in the interior mirror are used to control this.
Automatic Curb Monitor
Principle
If reverse gear is engaged, the mirror glass on the passenger's side is tilted downward. This improves your view of the curb and other low-lying obstacles when parking, for instance.
Activating
slide the switch to the driver's side mirror position.
Engage selector lever position R.
Deactivating
Slide the switch to the front passenger's side exterior mirror position.
Interior mirror
General information
The interior mirror is dimmed automatically.
Photocells are used for control:
In the mirror glass.
On the rear of the mirror.
Overview
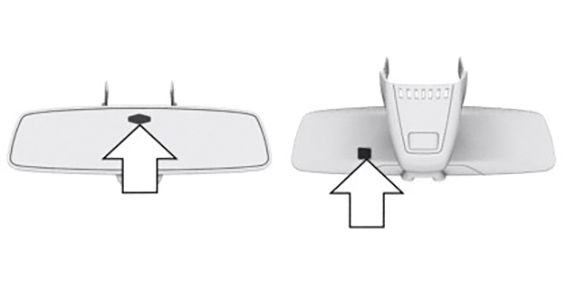
Functional requirements
Keep the photocells clean.
Do not cover the area between the interior mirror and the windshield.
Steering wheel
Safety information
Adjust the steering wheel while the vehicle is stationary only
Electric steering wheel adjustment
General information
The steering wheel adjustment is stored for the driver profile currently in use. When a driver profile is selected, the position is called up automatically when the drive readiness is turned on.
The current steering wheel position can be stored using the memory function.
To make it easier to enter and get out of the vehicle, the steering wheel moves temporarily into the upper position.
Adjusting
Press the switch to adjust the forward/back position and height of the steering wheel to the seat position.
Steering wheel heating
Overview
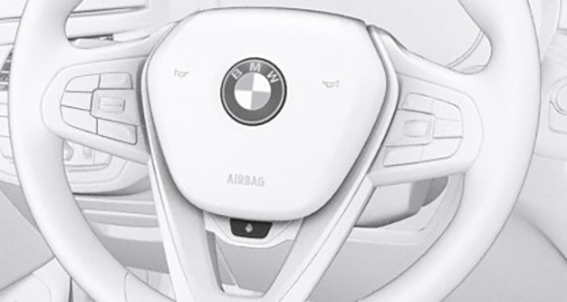
Button for steering wheel heating
Turning on/off

Press the button.
A Check Control message is displayed.
If the trip is resumed within approx. 15 minutes after an intermediate stop, the steering wheel heating turns on automatically if the function was turned on at the completion of the last trip.
Memory function
Principle
The following settings can be stored and, if necessary, retrieved using the memory function:
Seat position.
Exterior mirror position.
Steering wheel position.
Height of the Head-up Display.
General information
Two memory locations with different settings can be set for each driver profile.
The settings for the lumbar support will not be stored.
Safety information
Only retrieve the memory function when the vehicle is stationary
Keep the travel path of the seats unobstructed when adjusting
Overview
1
2
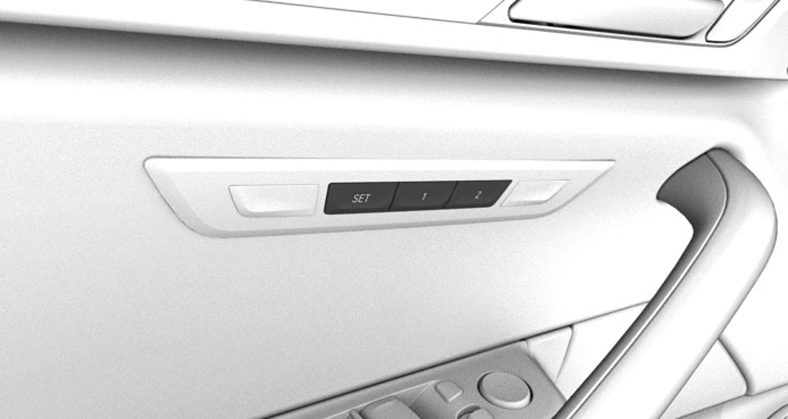
1
SET button
2
Memory buttons
Storing
Set the desired position.

Press the button. The lettering on the button is illuminated.
Press desired button 1 or 2 while the lettering is illuminated. A signal sounds.
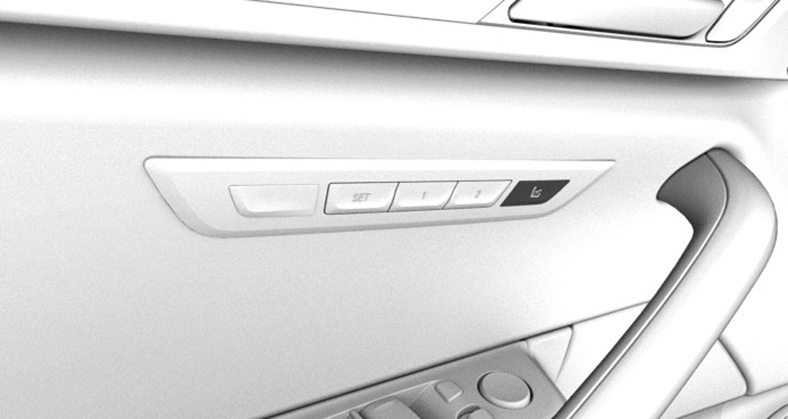
Calling up settings
Press the desired button 1 or 2.
The stored position is called up.
The procedure stops when a switch for setting the seat is pressed or one of the memory buttons is pressed again.
The adjustment of the seat position on the driver's side is interrupted after a short time while driving.
Massage function
Principle
Depending on the program, the massage function ensures relaxed muscles and better blood circulation and can avoid fatigue.
General information
Eight different massage programs can be selected:
Hip activation.
Upper-body activation.
Whole body activation.
Back massage.
Shoulder massage.
Lumbar massage.
Upper body training.
Whole-body exercise.
Overview
1
1
Massage function
Turning on

Press the button once for each intensity level.
The maximum intensity level is reached when three LEDs are lit.
Turning off
Press and hold the button until the LEDs turn off.
Adjusting the massage program
"CAR"
"Settings"
"Seat comfort"
Select desired seat.
"Seat massage"
Select the desired setting.
Seat heating
Overview
Front
1
2
1
Seat heating, left
2
Seat heating, right
Back
1
2
1
Left rear seat heating
2
Right rear seat heating
Turning on

Press the button once for each temperature level.
The maximum temperature is reached when three LEDs are lit.
If the trip is continued within approx. 15 minutes after an intermediate stop, the seat heating is turned on automatically with the temperature that was last set.
Turning off
Press and hold the button until the bar display on the climate control display goes out.
Active seat ventilation
Principle
Integrated fans in the seat and armrest areas provide a comfortable seat temperature.
Overview
1
2
1
Seat ventilation, left
2
Seat ventilation, right
Switching on active seat ventilation

Press the button once for each ventilation level.
The highest level is active when three LEDs are lit.
The ventilation switches back by one level after a short time.
Switching off active seat ventilation
Press and hold the button until the LEDs turn off.
Climate control rules
Principle
Depending on the equipment, some heating and air conditioning functions can be automatically activated depending on the outside temperature.
General information
The outside temperature at which the functions are to be automatically activated can be set via iDrive.
Activation is performed if the outside temperature exceeds or falls below the set temperature in the first few minutes after drive-ready state has been switched on. A new adjustment is carried out after the settings have been changed.
Depending on the equipment package, the following functions can be automatically activated:
Seat heating.
Steering wheel heating
Seat ventilation.
If the trip is continued within approx. 15 minutes after a stop, the functions are activated automatically with the levels that were last selected.
Functional requirement
Drive-ready state is switched on.
Activate/deactivate
"CAR"
"Settings"
"Climate control"
If necessary, "Automate habits"
Select the desired function.
Activate the desired rule.
Set the level.
Download Manual