Driver assistance systems
Speed Limit Info
Speed Limit Info
Principle
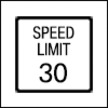
Speed Limit Info shows the currently valid speed limit in the instrument cluster and, if necessary, the Head-up Display.
General information
The camera in the area of the interior mirror detects traffic signs at the edge of the road as well as overhead sign posts.
Traffic signs with extra icons are considered and compared with the vehicle's onboard data. The traffic sign will then be either displayed or ignored depending on the situation in the instrument cluster and the Head-up display.
With the navigation system, the system takes into account the information stored in the navigation system and also displays speed limits present on routes without signs.
Information on the current map version can be found under Map update in the Navigation system chapter.
Additional information:
Map update.
Safety information

Observe surrounding traffic and adapt driving style
Overview
Sensors
The system is controlled by cameras behind the windshield.
Additional information:
Sensors of the vehicle.
Displaying Speed Limit Info
General information
Depending on the vehicle equipment, Speed Limit Info is displayed permanently in the instrument cluster or via iDrive.
Display
Speed Limit Info
|
Icon |
Description |
|---|---|
|
|
Current speed limit. |
|
|
No data for the current speed limit available. The displays may vary depending on vehicle equipment. |
|
|
Depending on the equipment, Speed Limit Info not available. |


If the detected speed limit has been exceeded, the indicator light will flash.
Settings
"CAR"
"Settings"
"Driver Assistance"
If necessary, "Driving"
"Speed Limit Assistance"
Select the desired setting.
The warning that is issued when a speed limit is exceeded may depend on the Speed Limit Assistant settings.
Additional information:
Speed Limit Assistant.
System limits
System limits of the sensors
Additional information:
Cameras.
Functional limitations
The system function may be limited and may provide incorrect information in the following situations:
For traffic signs that are fully or partially concealed by objects, stickers, or paint.
When driving very close to the vehicle in front of you.
In the case of navigation data that is invalid, outdated or not available.
In areas not covered by the navigation system.
When roads deviate from the navigation, such as due to changes in road layout.
In case of electronic traffic signs.
When passing buses or trucks with traffic signs applied to them.
When the traffic signs do not correspond to the standard.
When traffic signs that are valid for a parallel road are detected.
In the presence of country-specific road signs or road layouts.
Manual Speed Limiter
Principle
The system can be used to set a speed limit, for instance to prevent the vehicle from exceeding speed limits.
General information
The system can limit the speed, starting at 20 mph/30 km/h. The vehicle can be driven at any speed below the set speed limit.
Overview
Buttons on the steering wheel
|
Button |
Function |
|---|---|
|
|
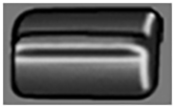
System on/off. |
|
|
Store current speed. Speed Limit Assistant: accept suggested speed manually. |
|
|
Rocker switch: Changing the speed limit. |
Operation
Turning on

Press the button on the steering wheel.
The current speed is adopted as the speed limit.
If the system is switched on while the vehicle is stationary or driving at low speeds, the speed limit is set to 20 mph/30 km/h.
The marking in the speedometer is set to the corresponding speed.
When the speed limit is activated, Dynamic Stability Control is switched on as necessary.
Turning off
Press the button on the steering wheel.
The system switches off automatically in the following situations, for example:
When the engine is switched off.
When Cruise Control is switched on.
When activating some programs.
The displays turn off.
Interrupting
If the reverse gear is engaged or in Neutral, the system is interrupted when rolling backwards.
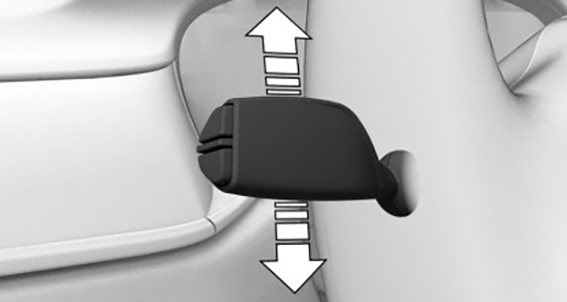
Changing the speed limit
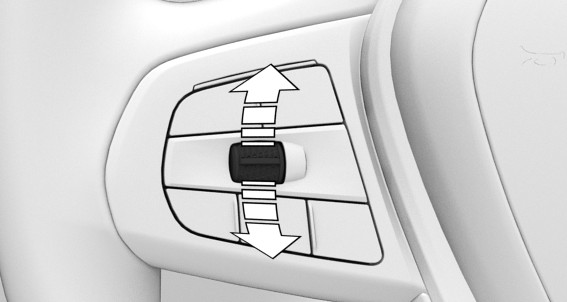
Press the rocker switch up or down repeatedly until the desired speed limit is set.
Each time the rocker switch is pressed to the resistance point, the speed limit increases or decreases by 1 mph/1 km/h.
Each time the rocker switch is pressed past the resistance point, the desired speed changes by a maximum of 5 mph/10 km/h.
If the set speed limit is reached or unintentionally exceeded, such as when driving downhill, the vehicle is not actively braked.
When the speed limit is set during a trip to a value below the current speed, the vehicle coasts until it drops to the set speed limit.
The current speed can also be stored by pressing a button:

Press the button on the steering wheel.
Exceeding the speed limit
When the vehicle speed exceeds the set speed limit, a warning is issued.
The speed limit can be exceeded intentionally.
Press the accelerator pedal all the way down to intentionally exceed the set speed limit.
When the vehicle speed drops below the set speed limit, the limit is automatically reactivated.
Warning when the speed limit is exceeded
Visual warning

If the speed limit is exceeded: the indicator light in the instrument cluster flashes while the vehicle speed is greater than the set speed limit.
Acoustic warning
If the speed limit is exceeded unintentionally, a signal sounds.
When the speed limit is reduced to below the current vehicle speed, the signal sounds after some time.
When the speed limit is intentionally exceeded by stepping on the accelerator pedal all the way down, there is no signal.
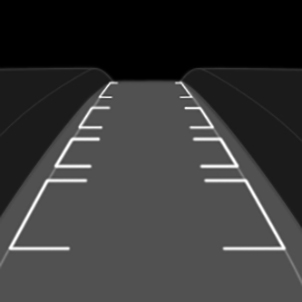
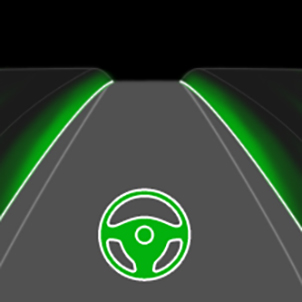
Displays in the instrument cluster
Display in the speedometer
Depending on the equipment, a mark in the speedometer displays the status of the system.
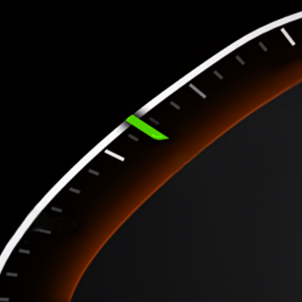
Green marking: system is active.
Gray marking: system is interrupted.
No marking: system is switched off.
Indicator light
The indicator light lights up: the system is switched on.
The indicator light flashes: the set speed limit has been exceeded.
Gray indicator light: the system has been interrupted.
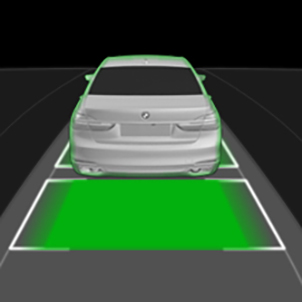
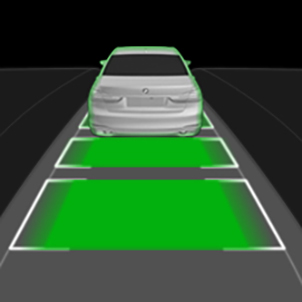
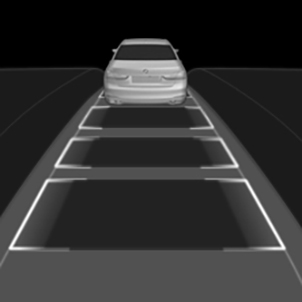
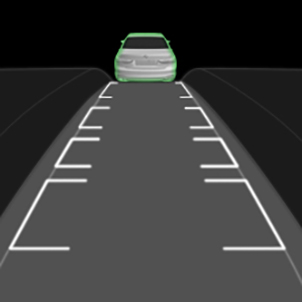
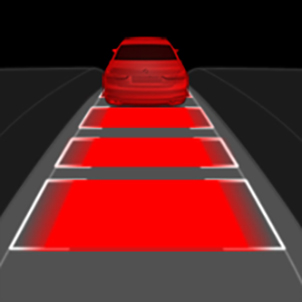
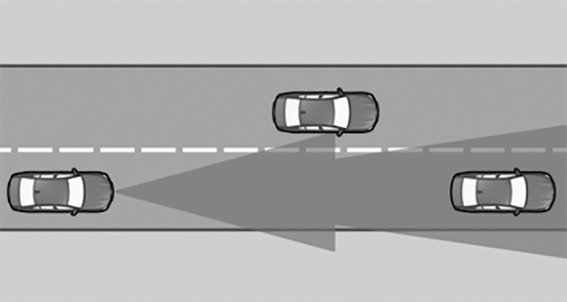
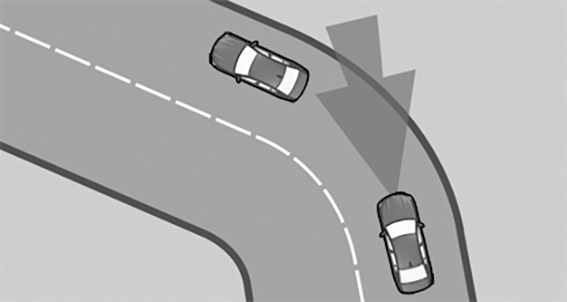
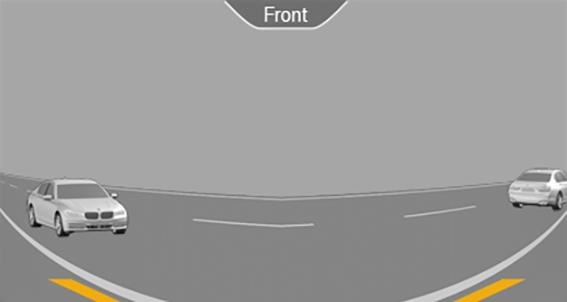
Active Cruise Control with Stop&Go function
Principle
Animation: Active Cruise Control with Stop&Go function

Using the Cruise Control, a desired speed and a distance to a vehicle ahead can be adjusted using the buttons on the steering wheel.
General information
The system maintains the set speed on clear roads. The vehicle accelerates or brakes automatically.
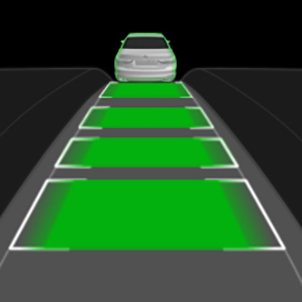
If a vehicle is driving ahead of you, the system adjusts the speed of your vehicle so that the set distance to the vehicle ahead is maintained. The speed is adjusted as far as the given situation allows.
The distance can be adjusted at several levels. For safety reasons, it depends on the respective speed.
If the vehicle ahead of you brakes to a standstill and then drives off again within a brief period, the system is able to detect this within the given system limits.
Depending on the vehicle settings, the cruise control settings may change under certain conditions.
Safety information
Also observe surrounding traffic and adapt driving style
Observe before exiting the vehicle
Observe surrounding traffic and adjust set speed
Observe surrounding traffic and actively intervene where appropriate
Switching off Cruise Control and Intelligent Safety systems
Overview
Buttons on the steering wheel
|
Button |
Function |
|---|---|
|
|
Cruise control on/off. |
|
|
Select function. |
|
|
Store current speed. Speed Limit Assistant: accept suggested speed manually. |
|
|
Interrupt cruise control. Continue cruise control with the last setting. |
|
|
Increase the distance. Switch Distance Control on/off. |
|
|
Reduce distance. Switch Distance Control on/off. |
|
|
Rocker switch: Set speed. |
Sensors
The system is controlled by the following sensors:
Cameras behind the windshield.
Front radar sensor.
Additional information:
Sensors of the vehicle.
Application range
The system is best used on well-maintained roads.
The minimum speed that can be set is 20 mph/30 km/h.
The maximum speed that can be set is limited and depends, for example, on the vehicle and the vehicle equipment.
The system can also be activated when stationary.
Turning on/off and interrupting cruise control
Assisted Driving Mode
General information
This button is used to switch the configured function on and off.

The button can be used to set the primarily used function.
Setting the function
When the system is active, press the button repeatedly until the desired function is selected in the toolbar. The toolbar for Assisted Driving mode is displayed at the bottom of the instrument cluster.
|
Icon |
Function |
|---|---|
|
|
Cruise Control with Distance Control. |
|
|
Depending on the equipment version, cruise control with distance control and Steering Assistant. |
The selected function is shown in green.
Turning on
Press the button on the steering wheel.
If necessary, set the cruise control.
The indicator lights in the instrument cluster light up and the mark on the speedometer is set to the current speed.
Cruise control is active. The current speed is maintained and stored as desired speed.
If necessary, the Dynamic Stability Control will be turned on.
Turning off
To switch off the system while stationary, step on brake pedal at the same time.
Press the button on the steering wheel:
With Steering Assistant.
The displays turn off. The stored set speed is deleted.
Interrupting manually
When active, press the button on the steering wheel:

With Steering Assistant.
If interrupting the system while stationary, press on the brake pedal at the same time.
Interrupting automatically
The system is automatically interrupted in the following situations:
When braking manually.
Selector lever position D is disengaged.
While M Dynamic Mode is enabled or Dynamic Stability Control is disabled.
While Dynamic Stability Control regulates driving stability.
When the vehicle is stationary, the seat belt is unbuckled and the driver's door is opened.
The system has not detected objects for an extended period, for instance on a road with very little traffic without curb or shoulder markings.
The detection range of the radar is impaired, for instance by contamination or heavy precipitation.
After a longer stationary period when the vehicle has been braked to a stop by the system.
Adjusting the speed
Maintaining and storing the speed
Press the rocker switch up or down once while the system is interrupted. The system will be activated.
The current speed is maintained and stored as desired speed.
The stored speed is displayed on the speedometer.
If necessary, the Dynamic Stability Control will be turned on.
The speed can also be stored by pressing a button.
Press the button.
Changing the speed
Press the rocker switch up or down repeatedly until the desired speed is set.
If active, the displayed speed is stored and the vehicle reaches the stored speed when the road is clear.
Each time the rocker switch is tapped to the resistance point, the set speed increases or decreases by 1 mph/1 km/h.
Each time the rocker switch is pressed past the resistance point, the desired speed changes by a maximum of 5 mph/10 km/h.
Hold the rocker switch in position to repeat the action.
Adjusting the distance
Safety information
Observe surrounding traffic and keep proper distance
Reducing the distance
Press the button repeatedly until the desired distance is set.
Instrument cluster will display selected distance.
Increasing the distance

Press the button repeatedly until the desired distance is set.
Instrument cluster will display selected distance.
Automatic adaptation of the distance
Depending on the equipment and national-market version: the system can be set so that the distance to the vehicle in front is automatically adjusted within the set distance. The system takes into account the traffic situation and ambient conditions, e.g. poor visibility.
"CAR"
"Settings"
"Driver Assistance"
If necessary, "Driving"
"Speed Limit Assistance"
"Adjust distance acc. to situation"
Continuing cruise control
An interrupted cruise control can be continued by calling up the stored speed.
Make sure that the difference between current speed and stored speed is not too large before calling up the stored speed. Otherwise, unwanted vehicle deceleration or acceleration may occur.
Press the button on the steering wheel with the system interrupted:
With Steering Assistant.
Cruise control is continued with the stored values.
In the following cases, the stored speed value is deleted and cannot be called up again:
When the system is switched off.
When drive-ready state is switched off.
Changing between Cruise Control with/without Distance Control
Safety information
Adjust the set speed to the traffic conditions
Changing over the Cruise Control mode
Switching Cruise Control without Distance Control off and on:
Press and hold this button.
Press and hold this button.
With Steering Assistant: switch on Distance Control:
Press the button.
After changing, a Check Control message is displayed.
Displays in the instrument cluster
General information
Depending on the equipment version, the displays in the instrument cluster may vary.
Display in the speedometer
Depending on the equipment, a mark in the speedometer displays the status of the system.
Green marking: system is active, the marking indicates the desired speed.
Gray marking: system is interrupted, the marking indicates the stored speed.
No marking: system is switched off.
Distance to vehicle ahead of you
Selected distance to the vehicle ahead of you is shown.
|
Icon |
Description |
|---|---|
|
|
Distance 1 |
|
|
Distance 2 |
|
|
Distance 3 |
|
|
Distance 4 This value is set automatically after the system is switched on. |
|
|
No distance control display, as the accelerator pedal is being pressed. |

Detected vehicle
|
Icon |
Description |
|---|---|
|
|
Green icon: A vehicle has been detected ahead of you. |
When the distance to the detected vehicle increases, the vehicle icon in the distance display will move away.
If necessary, drive off on your own, such as by stepping on the accelerator pedal or by pressing the rocker switch.
Indicator/warning lights
|
Icon |
Description |
|---|---|
|
|
Vehicle icon white: No distance control display, as the accelerator pedal is being pressed. |
|
|
Green icon: A vehicle has been detected ahead of you. The vehicle icon goes out if no vehicle in front is detected. Vehicle icon flashes green: Vehicle in front drove off. |
|
|
Gray icon: System interrupted. |
|
|
Icon flashes gray: The conditions are not adequate for the system to work. The system was deactivated but applies the brakes until you actively resume control by pressing on the brake pedal or accelerator pedal. |
|
|
Vehicle icon flashes red and a signal sounds: Brake and make an evasive maneuver, if necessary. |


Alternative displays
|
Icon |
Description |
|---|---|
|
|
Indicator light green: system is active. No indicator light: system is switched off. |
|
|
Vehicle icon flashes: The conditions are not adequate for the system to work. The system was deactivated but applies the brakes until you actively resume control by pressing on the brake pedal or accelerator pedal. |
|
|
The vehicle icon and distance bars blink red and an acoustic signal sounds: Brake and make an evasive maneuver, if necessary. |
|
|
System interrupted. |

Assisted Driving View
Depending on the equipment and national-market version, information for the system is displayed in the Assisted Driving View in the central display area of the instrument cluster.
Additional information:
Assisted Driving View.
Displays in the Head-up display
Set speed
Some system information can also be displayed in the Head-up display.

The icon is displayed when the set speed is reached.
Distance information
The icon is displayed when the distance from the vehicle traveling ahead is too short.
The distance information is active in the following situations:
Active Cruise Control switched off.
Display in the Head-up display selected.
Head-Up Display.
Distance too short.
Speed greater than approx. 40 mph/70 km/h.
System limits
System limits of the sensors
Additional information:
Cameras.
Radar sensors.
Detection range
The detection capability of the system and the automatic braking performance are limited.
For instance, two-wheeled vehicles may not be detected.
Deceleration
The system does not decelerate in the following situations:
For pedestrians or similarly slow-moving road users.
Depending on the vehicle equipment and national availability, for red traffic lights.
For cross traffic.
For oncoming traffic.
Merging vehicles
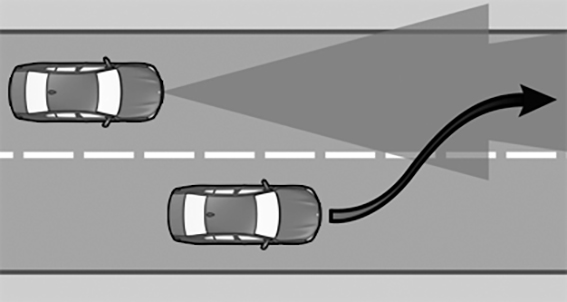
If a vehicle driving ahead of you suddenly merges into your lane, the system may not be able to automatically restore the selected distance. It may not be possible to restore the selected distance in certain situations, including if you are driving significantly faster than vehicles driving ahead of you, for instance when rapidly approaching a truck. When a vehicle driving ahead of you is reliably detected, the system requests that the driver intervene by braking and carrying out evasive maneuvers, if needed.
Cornering
When the set speed is too high for a curve, the speed is reduced slightly. Because curves may not be anticipated in advance, drive into a curve at an appropriate speed.
The system has a limited detection range. Situations can arise in tight curves where a vehicle driving ahead will not be detected or will be detected very late.
When you approach a curve the system may briefly report vehicles in the next lane due to the bend of the curve. If the system decelerates you may compensate for it by briefly accelerating. After releasing the accelerator pedal the system is reactivated and controls speed independently.
Driving off
In some situations, the vehicle cannot drive off automatically; for example:
On steep uphill grades.
In front of bumps in the road.
In these cases, step on the accelerator pedal.
Weather
The following restrictions can occur under unfavorable weather or light conditions:
Poorer vehicle detection.
Short-term interruptions for vehicles that are already recognized.
Drive attentively, and react to the current surrounding traffic situation. If necessary, intervene actively, for instance by braking, steering or evading.
Speed Limit Assistant
Principle
Animation: Speed Limit Assistant
Speed Limit Assistant supports driving at the speed limit. A suggested speed can be applied.
General information
When the systems in the vehicle, e.g., Speed Limit Info, detect a change of the speed limit, this new speed value can be applied for the following systems:
Manual Speed Limiter.
Cruise control.
Active Cruise Control with Stop&Go function.
The speed value is suggested as the new desired speed to be applied. To apply the speed value, the corresponding system must be activated.
Safety information
Also observe surrounding traffic and adapt driving style
Observe surrounding traffic and adjust set speed
Overview
Buttons on the steering wheel
|
Button |
Function |
|---|---|
|
|
Accept suggested speed manually. |
|
|
Rocker switch: Set speed, refer to Cruise Control. |
Turning Speed Limit Assistant on/off
"CAR"
"Settings"
"Driver Assistance"
If necessary, "Driving"
"Speed Limit Assistance"
"Speed limits"
Select the desired setting:
"Adjust manually": detected speed limits can be applied manually.
"Show anticipation": Depending on the national-market version: current and upcoming speed limits are displayed in the instrument cluster without being applied.
"Show current limit": current speed limits are displayed without being applied in the instrument cluster.
"Off": depending on the national-market version, Speed Limit Info and Speed Limit Assistant will be turned off.
Displays in the instrument cluster
A message is displayed in the instrument cluster when the system and a driver assistance system are activated.
|
Icon |
Function |
|---|---|
|
|
Depending on the equipment version, the indicator light illuminates green, together with the icon for a speed control system: Speed Limit Assistant is active and detected speed limits can be applied manually for the displayed system. |
|
|
Detected change of a speed limit with immediate effect. |
|
|
Indicator light illuminates green: the detected speed limit can be applied with the SET button. After it has been applied, a green checkmark is displayed. |


Manual adoption
A detected speed limit can be applied manually for the active driver assistance system.
When the SET icon lights up, press the button.
Speed adjustment
Principle
It can be adjusted whether the speed limit is applied exactly or with a tolerance.
General information
You can configure a speed adaptation for all speed limits and an additional speed adaptation for speed limits up to 40 mph/60 km/h.
The additional speed adaptation for speed limits up to 40 mph/60 km/h can be activated or deactivated.
Setting the speed adjustment
"CAR"
"Settings"
"Driver Assistance"
If necessary, "Driving"
"Speed Limit Assistance"
To perform the desired setting:
"Adjust speed limits": set tolerance for the speed adaptation that affects all speeds.
"2nd adjustment up to": activate or deactivate additional speed adaptation.
"Adjust speed limits": With additional speed adjustment activated, set the tolerance for speed limits up to 40 mph/60 km/h.
Adapting to route
Principle
Depending on the national-market version, the system can be configured so that the vehicle adapts the speed automatically to the route.
For instance, the speed will be reduced in the following situations as necessary:
Before making turns.
Before a roundabout.
Before a curve.
Adjustment
"CAR"
"Settings"
"Driver Assistance"
If necessary, "Driving"
"Speed Limit Assistance"
"Adjust to route" or "Automatically adjust speed to route"
System limits
Speed Limit Assistant is based on the Speed Limit Info system.
Consider the system limits of Speed Limit Info.
Upcoming speed limits can only be accepted for the Active Cruise Control.
The system does not react or reacts to a limited extent to the route ahead in the following situations:
If the vehicle location cannot be clearly determined by the navigation system.
With wintry road conditions.
Additional information:
System limits of Speed Limit Information.
System limits of the sensors.
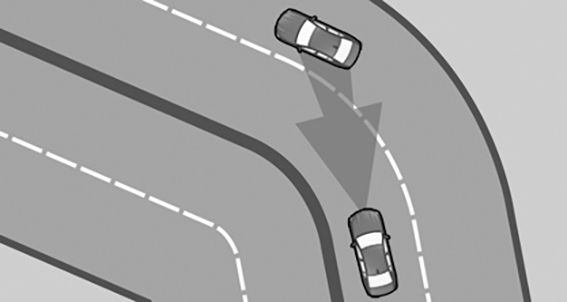
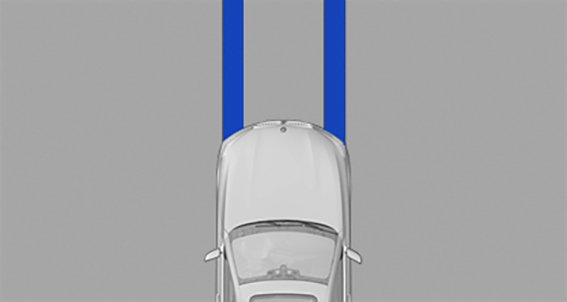
Steering Assistant
Principle
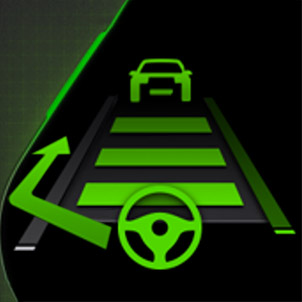
Animation: Steering Assistant with Traffic Jam Assistant
The Steering Assistant helps keep the vehicle in the lane. For this purpose, the system executes supporting steering movements, for instance when cornering.
General information
Depending on the speed, the system orients itself according to the lane boundaries or vehicles in front.
Sensors on the steering wheel detect whether the steering wheel is being touched.
Safety information
Also observe surrounding traffic and adapt driving style
Overview
Buttons on the steering wheel
|
Button |
Function |
|---|---|
|
|
Steering Assistant with Traffic Jam Assistant on/off. |
|
|
Switch function on. |
Sensors
The system is controlled by the following sensors:
Cameras behind the windshield.
Front radar sensor.
Radar sensors, side, front.
Radar sensors, side, rear.
Additional information:
Sensors of the vehicle.
Functional requirements
Speed below 130 mph/210 km/h.
Sufficient lane width.
Above approx. 43 mph, 70 km/h: lane boundary on both sides is detected.
Below approx. 43 mph, 70 km/h: lane boundary on both sides or a vehicle driving ahead is detected.
Hands on the steering wheel rim.
Wide curves.
Drive in the center of the lane.
Turn signal switched off.
The sensor system calibration process is complete.
Cruise Control with Distance Control active.
Seat belt on the driver's side fastened.
Forward Collision Warning active.
Pedestrian Warning active.
Side Collision Warning active.
Turning on/off
Assisted Driving Mode
General information
This button is used to switch the configured function on and off.
The button can be used to set the primarily used function.
Setting the function
When the system is active, press the button repeatedly until the desired function is selected in the toolbar. The toolbar for Assisted Driving mode is displayed at the bottom of the instrument cluster.
|
Icon |
Function |
|---|---|
|
|
Cruise Control with Distance Control. |
|
|
Depending on the equipment version, cruise control with distance control and Steering Assistant. |
The selected function is shown in green.
Turning on
Press the button on the steering wheel.
Adjust the Steering Assistant if necessary.

Steering wheel icon lights up gray.
The system is on standby and does not manipulate steering movements.
System activates automatically as soon as all function conditions are fulfilled.

Steering wheel icon lights up green.
The system is active.
With the system switched on, the Daytime Pedestrian Collision Mitigation system and the Side Collision Warning are activated.
Turning off
Press the button on the steering wheel.
The indicator goes out.
The system does not perform supportive steering wheel movements.
Interrupting automatically
The system interrupts the supporting steering movements automatically, for example in the following situations:
At a speed above 130 mph/210 km/h.
When the steering wheel is released.
When braking manually.
With strong steering intervention.
When leaving own lane.
When the turn signal is switched on.
When the lane is too narrow.
If a lane boundary is not detected for a certain period of time and no vehicle is driving ahead.
The Active Cruise Control is interrupted.
The seat belt on the driver's side is unfastened.
Steering wheel icon lights up gray.
The system is on standby and does not manipulate steering movements.
System activates automatically as soon as all function conditions are fulfilled.
Displays in the instrument cluster
|
Icon |
Description |
|---|---|
|
|
Gray steering wheel icon: The system is on standby. |
|
|
Green steering wheel icon: The system is activated. The system supports the driver in keeping the vehicle within the lane. |
|
|
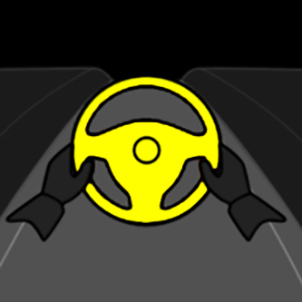
Yellow flashing steering wheel icon: Lane boundary driven over. The steering wheel vibrates where applicable. |
|
|
Yellow steering wheel icon and a signal sounds, if applicable: System interruption is imminent. |
|
|
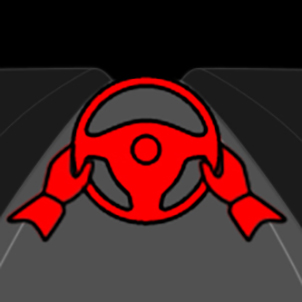
Depending on the equipment and national-market version: steering wheel icon flashes red or lights up red. A signal sounds: System is switching off. |
|
|
Yellow steering wheel icon: The hands are not grasping the steering wheel. The system is still active. |
|
|
Red steering wheel icon and a signal sounds: The hands are not grasping the steering wheel. System interruption is imminent. The system reduces the speed to a standstill if applicable. It is possible that the system will not execute any supporting steering movements. |


Depending on the equipment and national-market version, information for the system is displayed in the Assisted Driving View in the central display area of the instrument cluster.
Additional information:
Assisted Driving View.
Alternative displays
Depending on the equipment version, the displays in the instrument cluster may vary and are displayed as follows:
|
Icon |
Description |
|---|---|
|
|
Gray steering wheel icon: The system is on standby. |
|
|
Green steering wheel icon: The system is activated. |
|
|
Depending on equipment, yellow flashing steering wheel icon: Lane boundary driven over. The steering wheel vibrates where applicable. |
|
|
Yellow steering wheel icon and a signal sounds, if applicable: System interruption is imminent. |
|
|
Depending on the equipment and national-market version: steering wheel icon flashes red or lights up red. A signal sounds: System is switching off. |
|
|
Green steering wheel icon and lane boundary icon: The system supports the driver in keeping the vehicle within the lane. |
|
|
Yellow steering wheel icon: The hands are not grasping the steering wheel. The system is still active. |
|
|
Red steering wheel icon and a signal sounds: The hands are not grasping the steering wheel. System interruption is imminent. It is possible that the system will not execute any supporting steering movements. With Active Cruise Control, the system may reduce the speed. |
Displays on the steering wheel

The two LED lights above the buttons illuminate analogously to the displays in the instrument cluster:
Yellow: system interruption is imminent.
Red: system will be deactivated.
The steering wheel displays can be switched on/off if required.
"CAR"
"Settings"
"Driver Assistance"
"Steering Wheel Feedback"
"Light elements"
Displays in the Head-up display
All system information can also be displayed in the Head-up display.
System limits
General information
The system cannot be activated or meaningfully used in certain situations.
Safety information
Observe the system limits
System limits of the sensors
Additional information:
Cameras.
Radar sensors.
Hands on the steering wheel
The sensors cannot detect hand-steering wheel contact in the following situations:
Driving with gloves.
Protective covers on the steering wheel.
Narrow lanes
When driving within narrow lanes, the system cannot be activated or effectively used, for instance in the following situations:
In construction areas.
Depending on the equipment, with automatic formation of emergency lanes.
Within city limits.
Weather
The following restrictions can occur under unfavorable weather or light conditions:
Poorer recognition of vehicles and lane boundaries.
Short-term interruptions for vehicles that are already recognized.
Drive attentively, and react to the current surrounding traffic situation. If necessary, intervene actively, for instance by braking, steering or evading.
Assisted Driving Plus
Principle
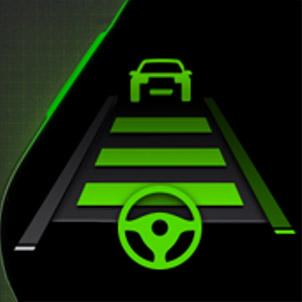
Animation: Assisted Driving Plus
Assisted Driving Plus supports the driver with vehicle control in traffic queues.
Supporting steering movements take place without the driver actively steering.
General information
The system uses the sensors of the Steering Assistant.
Safety information
Observe surrounding traffic and adapt driving style
Federal, state, or local laws may differ, and the use of this function may be prohibited or limited. Before use, check federal, state, and local laws.
Additionally, the notices for the Steering Assistant apply.
Additional information:
Steering Assistant.
Functional requirements
The functional requirements of the Steering Assistant are fulfilled.
Functional requirements.
The Steering Assistant is active.
The function is only available on certain street types, e.g. freeways.
Driving on a road without pedestrians or cyclists.
Sufficient lane width.
Lane markings and a vehicle driving ahead are detected.
Speed below approx. 40 mph/60 km/h.
The Driver Attention Camera in the instrument cluster detects that the driver is paying attention to the surrounding traffic.
The function must be available in the country in which the vehicle is driven.
Turning on

As soon as all functional requirements are met, Assisted Driving Plus will be displayed as an additional icon in the toolbar. The toolbar is displayed at the bottom of the instrument cluster.
Select Assisted Driving Plus with the button on the steering wheel.
The icon for Assisted Driving Plus is shown in green.
Two green LED lights are illuminated on the steering wheel.
The indicator light in the instrument cluster is shown in green.
The system begins to assist the driver with vehicle control.
Displays in the instrument cluster
|
Icon |
Description |
|---|---|
|
|
Indicator light green: system is active. |
|
|
Indicator light white: system is ready. |
|
|
Gray indicator light: the system has been interrupted. |


Alternative displays
Depending on the equipment version, the displays in the instrument cluster may vary and are displayed as follows:
|
Icon |
Description |
|---|---|
|
|
Indicator light green: system is active. |
Displays on the steering wheel
The two LED lights above the buttons illuminate analogously to the displays in the instrument cluster:
Green: the system is active.
Yellow: system will be interrupted.
Red: system will be deactivated.
System limits
General information
The limits of the Steering Assistant system apply.
Additional information:
Steering Assistant.
Driver Attention Camera
The limits of the Driver Attention Camera system apply.
Additional information:
Driver Attention Camera.
Automatic Lane Change Assistant
Principle
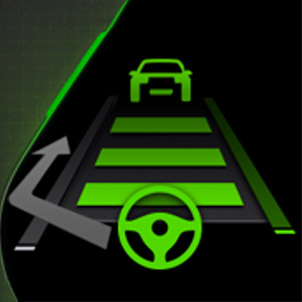
Animation: Automatic Lane Change Assistant
The Automatic Lane Change Assistant also assists when changing lanes on multi-lane roads.
General information
The system uses the sensors of the Steering Assistant.
Safety information
Also observe surrounding traffic and adapt driving style
Additionally, the notices for the Steering Assistant apply.
Additional information:
Steering Assistant.
Functional requirements
The functional requirements of the Steering Assistant are fulfilled.
Functional requirements.
Driving on a road without pedestrians or cyclists and with physical barriers to oncoming traffic, such as crash barriers.
Lane boundaries have been detected.
Maximum speed approx. 110 mph, 180 km/h.
The minimum speed is country-specific.
The function must be available in the country in which the vehicle is driven.
Switch lane change assist on/off
"CAR"
"Settings"
"Driver Assistance"
If necessary, "Driving"
"Steering Assistance"
"Automatic Lane Change"
Changing lanes
Ensure that the traffic situation permits changing lanes.
Press the turn signal lever in the required direction to the pressure point for signaling briefly.
A supporting steering movement in the required direction can be detected a short time later.
After the lane change, the system helps keep the vehicle in the new lane.
Canceling a lane change
The lane change can be canceled by steering movement into the opposite direction.
Displays in the instrument cluster
|
Icon |
Description |
|---|---|
|
|
Green steering wheel icon. Green arrow icon for lane-changing. The system carries out a lane change. |
|
|
Green steering wheel icon. Gray line for lane marking on the appropriate side. The system detected the lane change request. Lane change not currently possible. |
|
|
Depending on the national-market version: Green steering wheel icon. Gray arrow icon for lane-changing. Lane change not possible; functional requirements not met. |


Depending on the equipment and national-market version, information for the system is displayed in the Assisted Driving View in the central display area of the instrument cluster.
Additional information:
Assisted Driving View.
Alternative displays
Depending on the equipment version, the displays in the instrument cluster may vary and are displayed as follows:
|
Icon |
Description |
|---|---|
|
|
Green steering wheel icon. Gray line for lane marking on the appropriate side. Green arrow icon for lane-changing. The system carries out a lane change. |
|
|
Green steering wheel icon. Gray line for lane marking on the appropriate side. No arrow icon for lane-changing on the display. The system detected the lane change request. Lane change not currently possible. |
|
|
Depending on the national-market version: Green steering wheel icon. Gray line for lane marking on the appropriate side. Gray arrow icon for lane-changing. Lane change not possible; functional requirements not met. |
System limits
The limits of the Steering Assistant system apply.
Additional information:
Steering Assistant.
Parking assistance systems
General information
The parking assistance systems include different individual systems. The individual systems provide support with assistance functions, sensors and different camera views when parking and maneuvering or driving in reverse.
Additional information:
Park Distance Control.
Active Park Distance Control.
Automatic Parking Assistant.
Back-up Assistant.
Surround View with rearview camera.
Panorama View.
Cross traffic warning.
Remote 3D View.
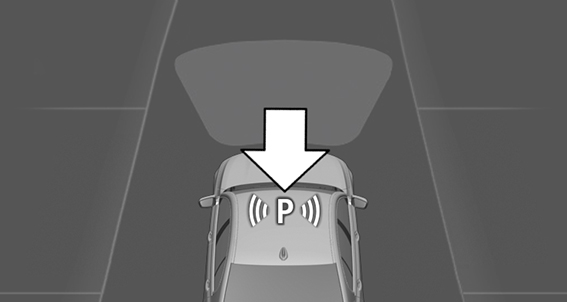
Park Distance Control
Principle
Animation: Park Distance Control
Park Distance Control assists with parking. Acoustic and visual warnings signal obstacles in front of or behind the vehicle.
General information
The range of the system, depending on obstacles and environmental conditions, is approx. 6 ft/2 m.
An acoustic warning sounds in case of an impending collision at a distance to the object of approx. 27 in/70 cm.
For objects behind the vehicle, the acoustic warning is issued as early as a distance to the object of approx. 5 ft/1.50 m.
Safety information
Also observe surrounding traffic and adapt driving style
Avoiding fast driving with Park Distance Control
Overview
Button in the vehicle
1
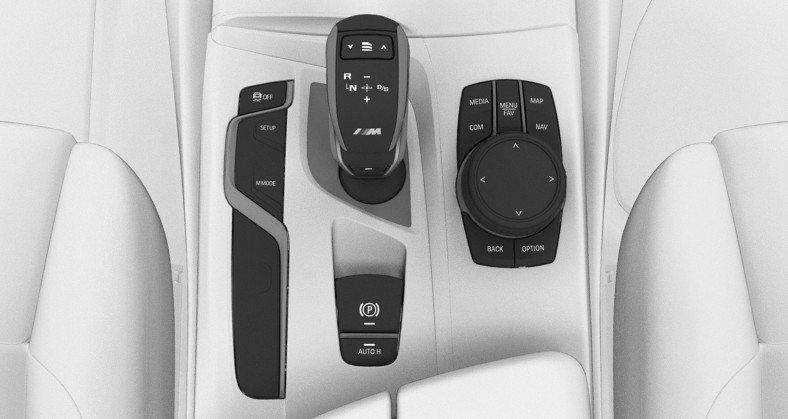
1
Park assistance button
Sensors
The system is controlled by the following sensors:
Ultrasonic sensors in the front/rear bumpers.
Depending on the equipment: ultrasonic sensors on the side.
Additional information:
Sensors of the vehicle.
Turning on/off
Turning on automatically
The system switches on automatically in the following situations:
With the engine running, when selector lever position R is engaged.
Depending on the equipment version: while approaching detected obstacles at a speed lower than approx. 2.5 mph/4 km/h. The activation distance depends on the situation in question.
You may switch automatic activation when obstacles are detected on and off.
"CAR"
"Settings"
"Driver Assistance"
"Parking and Maneuvering"
If necessary, "Automatic PDC Activation"
"Automatic PDC Activation"
Depending on equipment, an additional camera view is also switched on.
Automatic deactivation during forward travel
The system switches off when a certain distance travelled or speed is exceeded.
Switch the system back on, if needed.
Switching on/off manually

Press the park assistance button.
On: the LED lights up.
Off: the LED goes out.
The rearview camera image is displayed if the reverse gear is engaged when pressing the park assistance button.
Depending on the equipment version, the system cannot be switched off manually if the reverse gear is engaged.
Warning
Signal tones
General information
An intermittent tone indicates when the vehicle is approaching an object. If, for example, an object is detected at the front left of the vehicle, a signal tone sounds from the front left speaker.
The shorter the distance to the object, the shorter the intervals.
When the distance to a detected object is less than approx. 8 in/20 cm, a continuous tone is sounded.
When there are objects in front of and behind the vehicle at the same time, with a distance smaller than approx. 8 in/20 cm, an alternating continuous tone will sound.
The intermittent tone and continuous tone are switched off if the selector lever position P is engaged.
Depending on design version, the intermittent tone is switched off after a short time when the vehicle is stationary.
If an object approaches when the vehicle is stationary, the acoustic signal is reactivated.
Volume
The volume of the Park Distance Control acoustic signals can be adjusted.
"CAR"
"Settings"
"Driver Assistance"
"Parking and Maneuvering"
"Volume PDC signal"
Set the desired value.
Visual warning
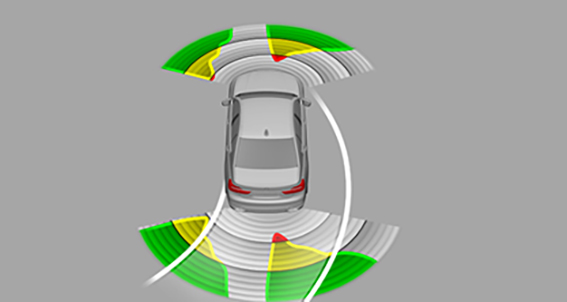
The approach of the vehicle to an object is shown on the Control Display. Objects that are farther away are already displayed on the Control Display before a signal sounds.
The display appears as soon as the Park Distance Control is activated.
The detection range of the sensors is represented in the colors green, yellow and red when obstacles are detected.
Pathway lines are faded in for better estimation of the space required.
When the image of the rearview camera is displayed, you can switch to the Park Distance Control or to a different view with obstacle markings if necessary:
Press the Controller to the left, if needed.
For instance "Park. sensors only"
Cross traffic warning: depending on the equipment, you will be warned in the Park Distance Control display against vehicles approaching in the front or rear from the side.
Additional information:
Cross traffic warning.
System limits
Safety information
Observe the system limits
System limits of the sensors
Additional information:
Ultrasonic sensors.
Limits of ultrasonic measurement
The detection of objects with ultrasonic measurements can run into physical limits, e.g., in the following situations:
With obstacles and persons at the edge of the lane.
Low objects already displayed, for instance curbs, can move into the blind area of the sensors before or after a continuous tone sounds.
Unwarranted warnings
Reaching the system limits can cause unwarranted warnings.
To prevent unwarranted warnings, for instance in car washes, turn off automatic Park Distance Control activation on obstacle detection.
Malfunction

White icon is displayed, and the detection range of the sensors is dimmed on the Control Display.
A Check Control message is displayed.
Park Distance Control malfunction. Have the system checked by an authorized service center or another qualified service center or repair shop.
Active Park Distance Control
Principle
The Park Distance Control brake function initiates emergency braking if there is an acute risk of collision.
General information
Due to system limits, a collision cannot be prevented under all circumstances.
The function is available below walking speed when driving in reverse or rolling backward.
A press of the accelerator pedal interrupts the brake intervention.
After emergency braking to a stop, further creeping toward an obstacle is possible. Proceed with caution. To move forward, lightly press the accelerator pedal and release as needed.
If the accelerator pedal is depressed longer, the vehicle drives off. Manual braking is possible at any time.
The system uses the ultrasonic sensors of Park Distance Control and the Automatic Parking Assistant.
Safety information
Also observe surrounding traffic and adapt driving style
In addition, the safety information for the Park Distance Control and the Automatic Parking Assistant apply.
Additional information:
Park Distance Control.
Automatic Parking Assistant.
Temporary switching off
The Park Distance Control brake function can be temporarily switched off:
Confirm the message on the Control Display.
During continued driving in this surrounding situation, no further emergency braking will occur.
Settings
It is possible to set which areas on the vehicle will be protected by the system.
"CAR"
"Settings"
"Driver Assistance"
"Parking and Maneuvering"
"Active PDC with braking interv."
Select the desired setting.
System limits
The limits of the systems of the Park Distance Control and the Automatic Parking Assistant apply.
If required, deactivate the system via iDrive where applicable.
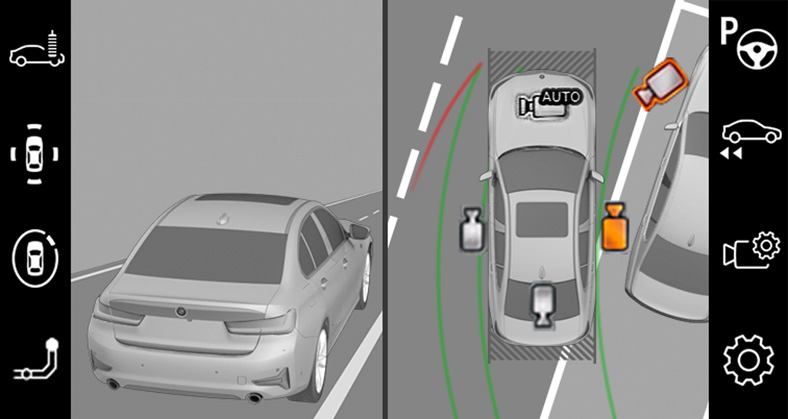
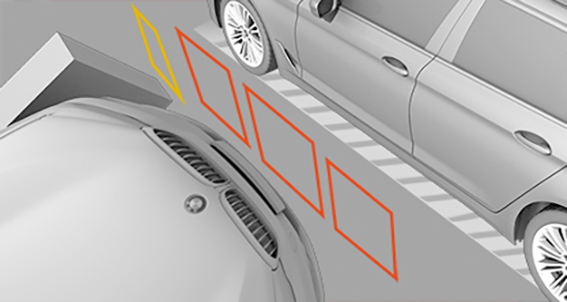
Automatic Parking Assistant
Principle
Animation: Automatic Parking Assistant
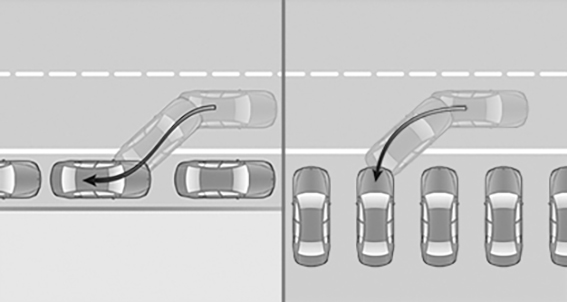
The Automatic Parking Assistant supports the driver in the following situations:
When parking parallel to the road, parallel parking.
When reverse parking perpendicular to the road, perpendicular parking. The system orients itself with the middle of the parking space.
General information
Handling
Automatic Parking Assistant handling is divided into three steps:
Turn on and activate.
Parking space search.
Parking.
System status and instructions on required actions are displayed on the Control Display.
Ultrasonic sensors measure parking spaces on both sides of the vehicle.
M Steptronic Sport transmission
The Automatic Parking Assistant calculates the best possible parking line and takes control of the following functions during the parking operation:
Steering.
Acceleration and braking.
Changing gears.
The parking operation is automatic.
Safety information
Also observe surrounding traffic and adapt driving style
Observe surrounding traffic and intervene where appropriate
In addition, the safety instructions of the Park Distance Control apply.
Additional information:
Park Distance Control.
Overview
Button in the vehicle
1
1
Park assistance button
Sensors
The system is controlled by the following sensors:
Ultrasonic sensors in the front/rear bumpers.
Ultrasonic sensors, side.
Additional information:
Sensors of the vehicle.
Functional requirements
For the measurement od parking spaces
Maximum speed while driving forward approx. 22 mph/35 km/h.
Maximum distance to row of parked vehicles: 5 ft/1.5 m.
Suitable parking space
General information:
Gap behind an object that has a min. length of 1.7 ft/0.5 m.
Gap between two objects, each with a minimum length of approx. 1.7 ft/0.5 m.
Longitudinal parking:
Minimum length of gap between two objects: own vehicle length plus approx. 2.6 ft/0.8 m.
Minimum depth: approx. 5 ft/1.5 m.
Perpendicular parking:
Minimum width of the gap: own vehicle width plus approx. 2.3 ft/0.7 m.
Minimum depth: own vehicle length.
The depth of diagonal parking spaces must be estimated by the driver. Due to technical limitations, the system is only able to approximate the depth of perpendicular parking spaces.
For the parking operation
Doors and trunk lid are closed.
Driver's seat belt is fastened.
Switching on with the button
Press the park assistance button.
The LED lights up.
The current status of the parking space search is indicated on the Control Display.
 Automatic Parking Assistant is activated automatically.
Switching on with reverse gear
Shift into reverse.
The current status of the parking space search is indicated on the Control Display.
If necessary, activate: "Autom. Parking"
Switching on via iDrive
The display of the rearview camera or the view of the Park Distance Control must be active.
Move the Controller to the right.
Activate the Automatic Parking Assistant on the Control Display:"Autom. Parking"
Display on the control display
System activated/deactivated
|
Icon |
Meaning |
|---|---|
|
|
Gray: the system is not available. White: the system is available but not activated. |
|
|
System is activated. |
|
|
Parking space search is active. |
|
|
The parking operation is active. The system takes over the steering. |
Parking space search and system status
 Automatic Parking Assistant is activated and parking space search is active.
Control Display shows suitable parking spaces at the edge of the road next to the vehicle icon. When Automatic Parking Assistant is active, suitable parking spaces are highlighted and an acoustic signal sounds.
If a diagonal or parallel parking space is clearly detected, the system automatically adjusts the suitable parking method. In the case of parking spaces suitable for parallel and diagonal parking, a selection menu is displayed. In this case, the desired parking method must be selected manually.
 The parking operation is active. The system takes over the steering.
Parking space search is always active whenever the vehicle is moving forward slow and straight, even if the system is deactivated. When the system is deactivated, the displays on the Control Display are shown in gray.
Switching signal tone for suitable parking spaces on/off
"CAR"
"Settings"
"Driver Assistance"
"Parking and Maneuvering"
"Automatic Parking"
"Alert if parking space detected"
Acoustic signals of the Park Distance Control
Depending on national-market version, an intermittent tone for Park Distance Control sounds during an automatic parking operation.
A continuous tone sounds when the distance to a detected object is less than approx. 8 inches/20 cm.
Parking using the Automatic Parking Assistant
Parking
Switching on and activating the Automatic Parking Assistant.
For this, engage the reverse gear or press the parking assist button and activate the system on the Control Display, if needed.
Automatic Parking Assistant is activated.
Pass the row of parked vehicles forward at a speed of up to approx. 22 mph/35 km/h and at a distance of maximum 5 ft/1.5 m.
The status of the parking space search and possible parking spaces are displayed on the Control Display.
Confirm the suggested parking space for the parking operation: select the parking space on the Control Display.
The system takes over the steering.
Follow the instructions on the Control Display.
At the end of the parking operation, selector lever position P is set.
The end of the parking operation is indicated on the Control Display.
Adjust the parking position yourself, if needed.
Canceling manually
The Automatic Parking Assistant can be interrupted at any time:
Press the park assistance button.
"Autom. Parking": select the icon on the Control Display.
Canceling automatically
The system is interrupted automatically in the following situations:
When the driver grasps the steering wheel or takes over steering.
Possibly on snow-covered or slippery road.
When there are obstacles that are hard to overcome, such as curbs.
When there are obstacles that suddenly appear.
The Park Distance Control indicates distances that are too small.
When a maximum number of parking attempts or the time taken for parking is exceeded.
When changing over to another function on the Control Display.
The turn signal opposite to the desired parking side is switched on.
If the trunk lid is open.
If doors are open.
When setting the parking brake.
During acceleration.
The brake pedal remains depressed for longer while the vehicle is at a standstill.
When unfastening the driver's seat belt.
A Check Control message is displayed.
Blinking display on the selector lever
The actually engaged transmission position can deviate from the selector lever position in some situations after function interruption. The display in the selector lever flashes.
Observe the display in the instrument cluster in these cases.
Additional information:
Displays in the instrument cluster.
Resuming
An interrupted parking operation can be continued, if needed.
Reactivate the Automatic Parking Assistant and follow the instructions on the Control Display.
Turning off
The system can be switched off manually:
Press the park assistance button.
System limits
Safety information
Observe the system limits
No parking assistance
The Automatic Parking Assistant does not offer assistance in the following situations:
In tight curves.
For parking spaces that are only marked with lines on the ground. The system orients itself according to objects.
For diagonal parking spaces.
System limits of the sensors
Additional information:
Ultrasonic sensors.
Functional limitations
The system may be limited in the following situations:
On bumpy road surfaces such as gravel roads.
On slippery ground.
On steep uphill or downhill grades.
With accumulations of leaves/snow in the parking space.
In case of changes to an already-measured parking space.
With ditches or edges, for instance an edge of a port.
Parking spaces that are not suitable may be detected or suitable parking spaces may not be detected at all.
Malfunction
A Check Control message is displayed.
The Automatic Parking Assistant has malfunctioned. Have the system checked by an authorized service center or another qualified service center or repair shop.
Back-up assistant
Principle
Animation: Back-up Assistant
The Back-up Assistant supports the driver when driving in reverse, for instance when driving out of tight or confusing parking or street situations.
The vehicle stores the driving movements of the last distance covered. This stored distance covered can be driven back with automated steering.
General information
The system takes control of the steering when driving in reverse along the stored route.
The driver controls driving the vehicle via accelerator pedal and brake.
The Back-up Assistant uses the operating elements and sensors of the Park Distance Control and the Automatic Parking Assistant.
Additional information:
Park Distance Control.
Automatic Parking Assistant.
Safety information
Also observe surrounding traffic and adapt driving style
In addition, the safety information for the Park Distance Control and the Automatic Parking Assistant apply.
Additional information:
Park Distance Control.
Automatic Parking Assistant.
Functional requirements
Drive forward without interruption to store the distance covered.
A maximum of 165 ft/50 meters are stored.
To store the distance covered, do not drive faster than 22 mph/36 km/h.
Dynamic Stability Control is activated.
Driving in reverse with automated steering
Press the park assistance button or shift into reverse gear when the vehicle is stationary and the drive-ready state is switched on.
Move the Controller to the right.
"Back-up Assistant"
The system takes over the steering.
Follow the instructions on the Control Display where required.
Take your hands off the steering wheel and carefully drive off using the accelerator pedal and the brake.
When driving in reverse, pay attention to the vehicle's surroundings, and if you encounter an obstacle, stop immediately and take over control of the vehicle. Follow the instructions for Park Distance Control.
Stop no later than when normal road traffic is reached and take control of the vehicle, such as by shifting to a forward gear.
At the end of the stored distance travelled, a signal will sound and a request will be displayed, also with the instruction to take control of the vehicle.
Canceling the Back-up Assistant manually
The assisted reversing by the Back-up Assistant can be canceled manually:
Via touchscreen: "Back-up Assistant"
Press the button.
Canceling the Back-up Assistant automatically
The system automatically cancels in situations such as the following:
When the driver grasps the steering wheel or takes over steering.
When engaging a forward gear.
During activation or intervention by driving control systems or assist systems.
After a few minutes when the vehicle is stationary.
The vehicle leaves the stored lane when reversing, for instance at maximum steering angle.
The view on the control display is overlaid with messages such as incoming calls.
System limits
When you reach normal road traffic or if you encounter an obstacle, stop immediately and take over control of the vehicle.
The maximum speed when driving in reverse is limited to approx. 6 mph/9 km/h.
If the maximum speed is exceeded, a warning is issued and the function may be canceled.
After driving a stored distance covered with major steering-wheel angles, the function of the system will be limited for the return trip.
In addition, the limits of the systems of the Park Distance Control and the Automatic Parking Assistant apply.
Different influences can lead to side deviations when driving the stored distance covered in reverse. For example, this includes the following factors:
Steering movements when the vehicle is stationary while storing the distance covered.
The speed is not adapted to the distance covered.
Certain road characteristics, such as gradients or inclines.
Surround View
Principle
Animation: Surround View
The Surround View uses various vehicle cameras, for instance, a rearview camera and front camera to assist with parking and maneuvering. Depending on the view, the vehicle's surroundings or a part of it is depicted on the control display.
General information
Several cameras capture the area from different selectable perspectives.
The following camera perspectives can be displayed:
The automatic camera perspective automatically shows the appropriate perspective according to the respective driving situation.
The rearview camera shows the areas behind the vehicle.
The flank view on the right and left shows the areas on the sides of the vehicle.
The free camera perspective, which can be moved via iDrive, shows defined perspectives on a circular path.
The Panorama View shows crossing traffic, depending on the gear currently engaged.
Safety information
Also observe surrounding traffic and adapt driving style
Overview
Buttons in the vehicle
1
2
1
Park assistance button
2
Panorama View on/off
Sensors
The system is controlled by the following sensors:
Front camera.
Top view cameras.
Rearview camera.
Additional information:
Sensors of the vehicle.
Turning on/off
Turning on automatically
The system is switched on automatically if selector lever position R is engaged when the engine is running.
The camera perspective suitable for the respective driving situation is displayed.
Additional information:
Park Distance Control, turn on/off.
Switching on/off manually
Press the park assistance button.
On: the LED lights up.
Off: the LED goes out.
Depending on the equipment version, the rearview camera cannot be switched off when the reverse gear is engaged.
Automatic deactivation during forward travel
The system switches off when a certain distance travelled or speed is exceeded.
Switch the system back on, if needed.
Display on the control display
Overview
8
9
1
Toolbar, left
2
Camera image
3
Automatic camera perspective
4
Movable camera perspective
5
Toolbar, right
6
Side view, right
7
Rearview camera
8
Selection window
9
Side view, left
Toolbar on the left
The left toolbar can be used for the direct selection of various views via iDrive. Move the Controller to the left, if needed.
 "Parking": around the vehicle.
 "3D view": available camera.
 "Car wash".
Side view
The side view can be selected for the right or left vehicle side.
This view shows the vehicle's side surroundings, making it easier to position the vehicle at the curb or with other obstacles on the side.
The side view looks from rear to front and, in case of danger, focuses automatically on possible obstacles.
Automatic camera perspective
The automatic camera perspective shows a steering-dependent view in the respective driving direction.
This perspective adapts to the respective driving situation.
As soon as obstacles are detected, the view changes to a fixed display of the area in front or at the rear behind the bumper or, if necessary, changes to a side view.
When reverse gear is engaged, the automatic camera perspective is, if necessary, exited and the system uses a fixed perspective of the rearview camera. If necessary, manually select the automatic camera perspective when reverse gear is engaged. The automatic camera perspective will be retained for the current parking operation.
Movable unobstructed camera perspective
With selection of the movable camera perspective, a circle appears on the Control Display.
By turning the Controller or via touch function, specified perspectives on the circle can be selected.
The current perspective is marked with a camera icon.
To leave the function, move the Controller sideways and select another camera view.
Toolbar on the right
Assistance functions can be activated and settings can be entered via the right toolbar via iDrive. Move the Controller to the right, if needed.
"Autom. Parking".
"Back-up Assistant".
 "Camera image":
 "Brightness".
 "Contrast".
 "Parking aid lines".
 "Obstacle mark.".
 "Settings": apply settings, for instance to use the activation points for Panorama View.
Rearview camera
The rearview camera helps when reverse parking and maneuvering. The area behind the vehicle is shown on the Control Display.
Selection window
The individual camera perspectives can be selected in the selection window via iDrive.
Parking aid lines
General information
Additional assistance functions can be shown in the camera image on the control display.
More than one assistance function can be active at the same time.
Pathway lines
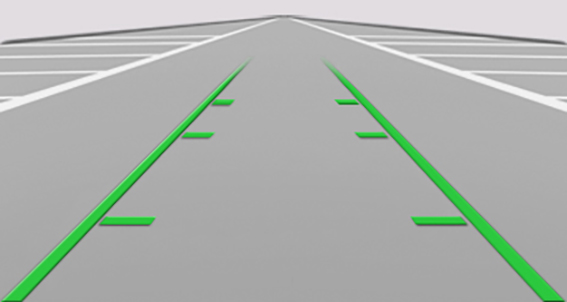
Pathway lines help you to estimate the space required when parking and maneuvering on level roads.
The pathway lines are continuously adjusted to the steering movements depending on the steering-wheel angle.
Turning circle lines
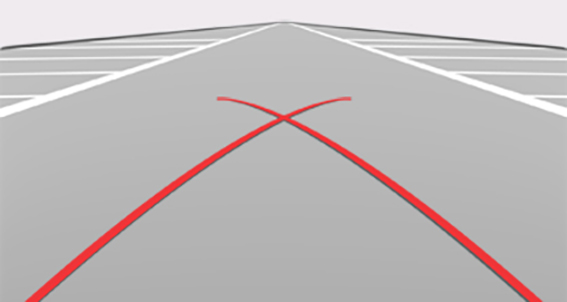
Turning circle lines can only be superimposed on the camera image together with pathway lines.
Turning circle lines show the course of the smallest possible turning radius on a level road.
Only one turning circle line is displayed after the steering wheel is turned past a certain angle.
Parking using lanes and turning circle lines
Position the vehicle so that the red turning circle line leads to within the limits of the parking space.
Turn the steering wheel to the point where the green pathway line covers the corresponding turning circle line.
Obstacle marking
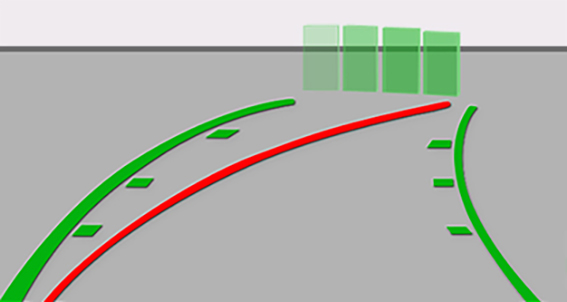
Obstacles behind the vehicle are detected by the Park Distance Control sensors.
Obstacle markings can be shown in the camera image.
The colored steps of the obstacle markings match the marks of the Park Distance Control.
Car wash view
The car wash view assists when entering a car wash by displaying the floor and the vehicle's own track.
Side protection
Principle
The side Park Distance Control is automatically displayed when the automatic camera perspective is turned on. The function shows obstacles located next to the vehicle.
Display
To protect the sides of the vehicle, obstacle markings are displayed on the sides of the vehicle.
No marks: no obstacles were detected.
Color marks: warning against detected obstacles.
Limits of the side protection
The system only displays stationary obstacles that were previously detected by sensors while passing them.
The system does not detect whether an obstacle moves later on. For this reason, at standstill, the marks are not shown anymore in the display after a certain time. The area next to the vehicle must be newly captured.
Door opening angle
Principle
If obstacle marking is activated, the Surround View indicates fixed obstacles that obstruct the opening angles of the doors.
The system does not provide a warning of approaching road users.
Display
The maximum opening angle of the doors is displayed in selector lever position P. As soon as the vehicle begins moving, the opening angles are replaced by parking aid lines.
Limits of the display
The vehicle's surroundings are distorted in the display for technical reasons.
Even if the icons for the door opening angles do not cross other objects on the Control Display, the following needs to be noted when parking next to other objects:
Because of the perspective, higher, protruding objects may be closer than they appear on the Control Display.
Setting brightness and contrast
Brightness and contrast can be adjusted with Surround View or Panorama View switched on.
Move the Controller to the right, if needed.
"Camera image"
Select the desired setting.
Functional limitations
The system can be used only to a limited extent in the following situations:
In poor light.
In case of soiled cameras.
With a door open.
With the trunk lid open.
With exterior mirrors folded in.
Areas with gray hatching with an icon in the camera image identify areas that are currently not shown, such as an open door.
System limits
System limits of the sensors
Additional information:
Cameras.
Non-visible areas
Because of the camera angle, the areas under the vehicle cannot be viewed by the cameras.
Detection of objects
Very low obstacles as well as high, protruding objects such as ledges may not be detected by the system.
Some assistance functions also take into consideration data from the Park Distance Control.
Follow the notes in the Park Distance Control chapter.
The objects displayed on the Control Display may be closer than they appear. Do not estimate the distance from the objects on the display.
Additional information:
Park Distance Control.
Malfunction
A camera failure is displayed on the Control Display.

A yellow icon is displayed and the detection range of the malfunctioning camera is displayed in black on the Control Display.
Panorama View
Principle
Panorama View gives you an earlier view of crossing traffic at blind driveway exits and intersections.
General information
Road users concealed by obstacles to the left and right of the vehicle can only be detected relatively late from the driver's seat. The cameras in the front and rear capture the side areas around the vehicle to improve the view.
Yellow lines in the screen display mark the front and rear end of the vehicle.
The camera image shows different levels of distortion in some areas and is thus not suitable for distance estimations.
Depending on the equipment version, the function can only be used when driving forward.
Additional information:
Surround View.
Safety information
Also observe surrounding traffic and adapt driving style
Overview
Button in the vehicle
1
1
Panorama View on/off
Sensors
The system is controlled by the following sensors:
Front camera.
Depending on the equipment: rearview camera.
Additional information:
Sensors of the vehicle.
Display on the control display

Press the button when the engine is running.
Depending on the driving direction, the image of the respective camera is displayed:
"Front": front camera image.
"Rear": rear camera image.
Depending on the vehicle equipment, cross traffic warning can additionally warn of approaching vehicles using radar sensors.
Additional information:
Cross traffic warning.
Activation points
Principle
Positions where Panorama View should switch on automatically can be stored as activation points provided that a Global Positioning System signal is received.
General information
Up to ten activation points can be stored.
Activation points can be used when driving forward for the front camera.
Storing activation points
Drive to the position at which the system is to be switched on, and stop.
Press the button.
Tilt the Controller to the right.
"Activation point"
The current position is displayed.
"Save activation point"
Activation points are stored with one of the following pieces of information if possible:
With the city/town.
With the city/town and the street.
With the GPS coordinates.
Using activation points
The use of activation points can be switched on and off.
Press the button.
Tilt the Controller to the right.
"Settings"
"Panorama View, GPS-based"
"Panorama View is displayed automatically when set activation points are reached."
Displaying activation points
Press the button.
Tilt the Controller to the right.

"Manage points"
A list of all activation points is displayed.
Renaming or deleting activation points
Press the button.
Tilt the Controller to the right.
"Manage points"
A list of all activation points is displayed.
Select an activation point as needed.
Select the desired setting.
Functional limitations
The Surround View functional limitations apply.
Additional information:
Surround View.
System limits
The limits of the Surround View system apply.
Additional information:
Surround View.
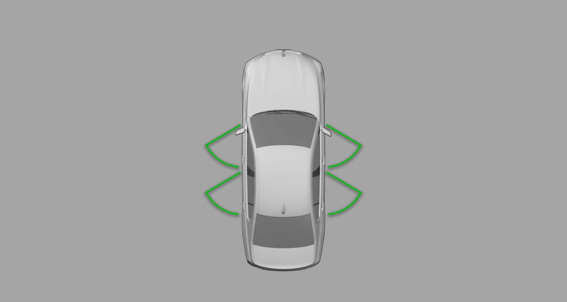
Cross traffic warning
Principle
Animation: cross traffic warning
At blind driveway exits or when driving out of perpendicular parking spaces, road users approaching from the side are detected sooner by the cross traffic warning than is possible from the driver's seat.
General information
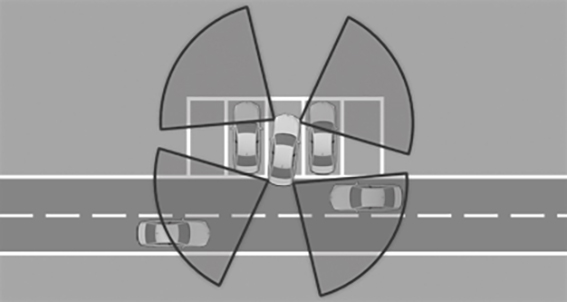
Two radar sensors in the rear bumper monitor the area behind the vehicle.
The system indicates approaching road users.
Depending on the vehicle equipment, the area around the vehicle in front of the vehicle is monitored as well. Two additional radar sensors are located in the front bumpers.
Safety information
Observe surrounding traffic and adapt driving style
Overview
Button in the vehicle
1
1
Park assistance button
Sensors
The system is controlled by the following sensors:
Radar sensors, side, rear.
Depending on the equipment: radar sensors, side, front.
Additional information:
Sensors of the vehicle.
Turning on/off
Activating/deactivating the system
With the button
Press the park assistance button.
Tilt the Controller to the right.
"Settings"
"Cross traffic warning"
"Cross traffic warning"
Via iDrive
"CAR"
"Settings"
"Driver Assistance"
"Parking and Maneuvering"
"Cross traffic warning"
"Cross traffic warning"
Turning on automatically
If the system was activated on the control display, it will automatically be turned on as soon as the Park Distance Control or the Panorama View is active and a gear is engaged.
If reverse gear is engaged, the rear system is switched on.
Depending on the vehicle equipment, the front system is switched on when a forward gear is engaged.
Switching off automatically
The system is automatically switched off in the following situations:
When the speed exceeds walking speed.
When a certain distance travelled is exceeded.
With an active parking operation of the Automatic Parking Assistant.
Warning
General information
The respective display is called up on the Control Display. A signal tone may sound and the light in the exterior mirror may flash.
Light in the exterior mirror
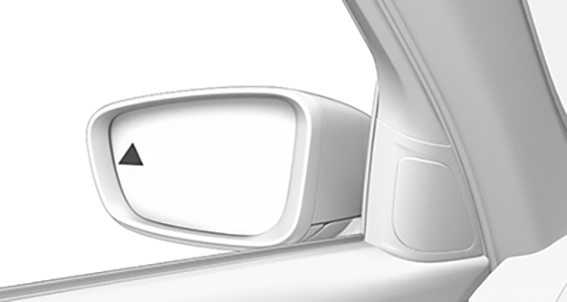
The light in the exterior mirror flashes if vehicles are detected by the rear sensors and your own vehicle is moving in reverse.
Display in the Park Distance Control view
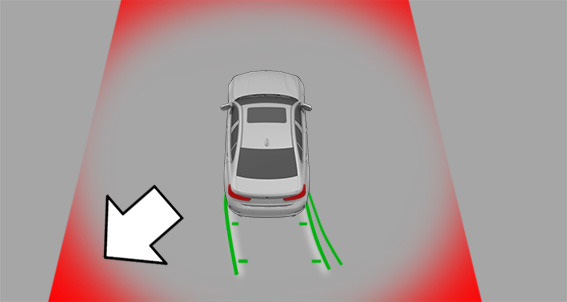
In the Park Distance Control view, the respective boundary area flashes red if vehicles are detected by the sensors.
Display in the camera view
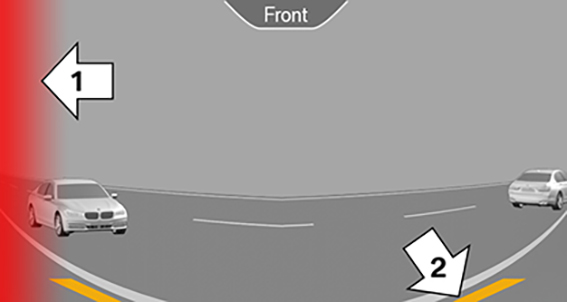
The respective boundary area, arrow 1, in the camera view flashes red, if vehicles are detected by the sensors.
Yellow lines, arrow 2, mark the bumper of your own vehicle.
Acoustic warning
In addition to the optical indicator, a warning signal sounds if your own vehicle moves into the respective direction.
System limits
System limits of the sensors
Additional information:
Radar sensors.
Functional limitations
The system may be limited in the following situations:
In tight curves.
Crossing objects are moving at a very slow or a very fast speed.
Other objects that hide cross traffic are in the capture range of the sensors.
Remote 3D View
Principle
The BMW app and the pictures of the Surround View cameras in combination with the corresponding equipment enable the display of the vehicle’s surroundings on a mobile device.
The function displays a snapshot of the situation.
Sensors
The system is controlled by the following sensors:
Front camera.
Top view cameras.
Rearview camera.
Additional information:
Sensors of the vehicle.
Functional requirements
Data transfer must be activated.
Data protection.
The BMW app must be installed on the mobile end device.
A driver profile with an existing ConnectedDrive account must be activated.
Driver profiles.
Switching the function on/off
Switching on/off with other functions
"CAR"
"Settings"
"General settings"
"Data privacy"
Select the desired setting.
Switching on/off individually
Pre-adjustment
"CAR"
"Settings"
"General settings"
"Data privacy"
"Select services individually"
"My BMW app & customer portal"
"Remote 3D View"
Turning on/off
"CAR"
"Settings"
"General settings"
"Data privacy"
"Individual selection"
System limits of the sensors
Additional information:
Cameras.
Functional limitations
The system may not be fully functional or may not be available in the following situations:
With a door or the trunk lid open. Dark fields in the display indicate areas that are not recorded by the system.
With manually folded-in exterior mirrors.
When other camera functions are being performed in the vehicle.
The vehicle moves faster than walking speed.
It may not be possible to use the function in every country.
For reasons of data protection, the function can only be used three times within two hours.
Download Manual