BULB REPLACEMENT
Replacement Bulbs Interior Bulbs
Exterior Bulbs
7
NOTE: Numbers refer to commercial bulb types that can be purchased from your authorized dealer.
If a bulb needs to be replaced, visit your authorized dealer or refer to the applicable Service Manual.
High Intensity Discharge Headlamps (HID) — If Equipped
The headlamps are a type of high voltage discharge tube. High voltage can remain in the circuit even with the headlamp switch off and the key removed. Because of this, you should not attempt to service a headlamp bulb yourself. If a headlamp bulb fails, take your vehicle to an authorized dealer for service.
NOTE: On vehicles equipped with High Intensity Dis- charge (HID) headlamps, when the headlamps are turned on, there is a blue hue to the lamps. This diminishes and becomes more white after approximately 10 seconds, as the system charges.
Halogen Headlamps — If Equipped
NOTE: Lens fogging can occur under certain atmospheric conditions. This will usually clear as atmospheric condi- tions change to allow the condensation to change back to vapor. Turning the lamps on will usually accelerate the clearing process.
NOTE:
The windshield washer reservoir may need to be rotated out of the way by removing the fastener.
Coolant reservoir (if equipped) will need to be reposi- tioned by removing the fasteners, and moving the unit out of the way.
 Turn the low or high beam bulb one–quarter turn counterclockwise to remove from housing.
Front Turn Signal Lamp
NOTE:
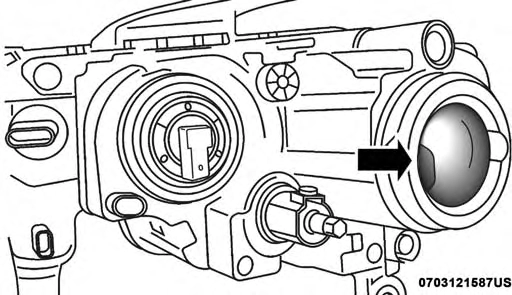
Rubber Boot Seal
NOTE: Ensure the rubber boot is properly reinstalled to prevent water and moisture from entering the lamp.
The windshield washer reservoir may need to be rotated out of the way by removing the fastener.
Coolant reservoir (if equipped) will need to be reposi- tioned by removing the fasteners, and moving the unit out of the way.
Front Fog Lamps
Please see your authorized dealer for service.
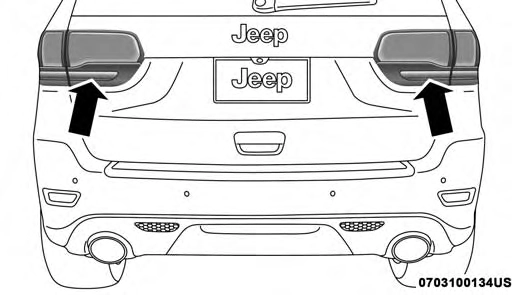
Rear Tail, Stop, and Turn Signal Lamps
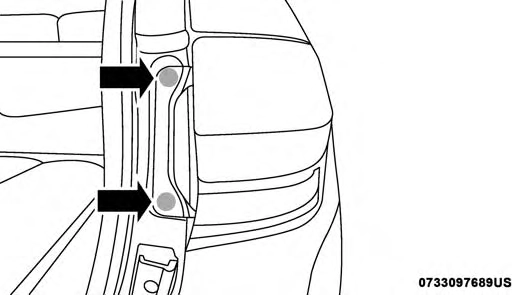 Tail Lamp Push Pins
Rear Of Tail Lamp
Rear Liftgate Mounted Tail Lamp
 7
7
Rear Liftgate Tail Lamps
1. Raise the liftgate.
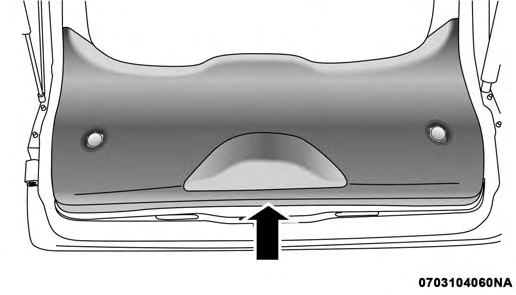
Liftgate Lower Trim
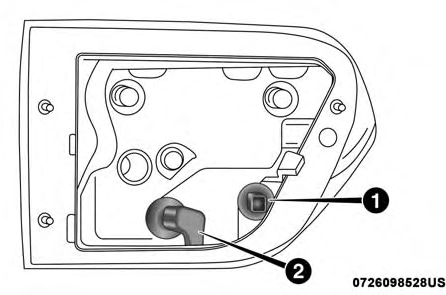
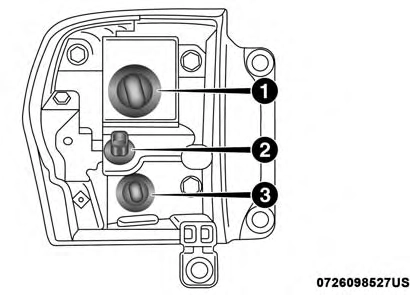
Rear Of Liftgate Tail Lamp
1 — Auxiliary LED Tail Connector – Do Not Remove 2 — Backup Bulb Socket
Center High-Mounted Stop Lamp (CHMSL)
The center high mounted stop lamp is an LED. Service at an authorized dealer.
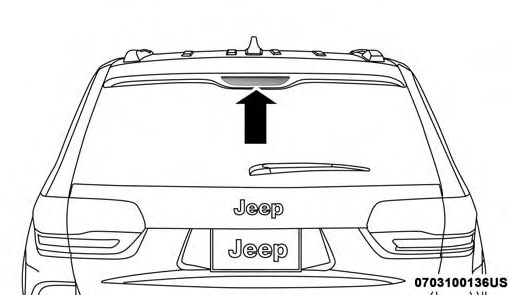
Center High-Mounted Stop Lamp
Rear License Lamp
The rear license lamps are LEDs. See your authorized dealer for service.
7
Download Manual