KEYS
Key Fob
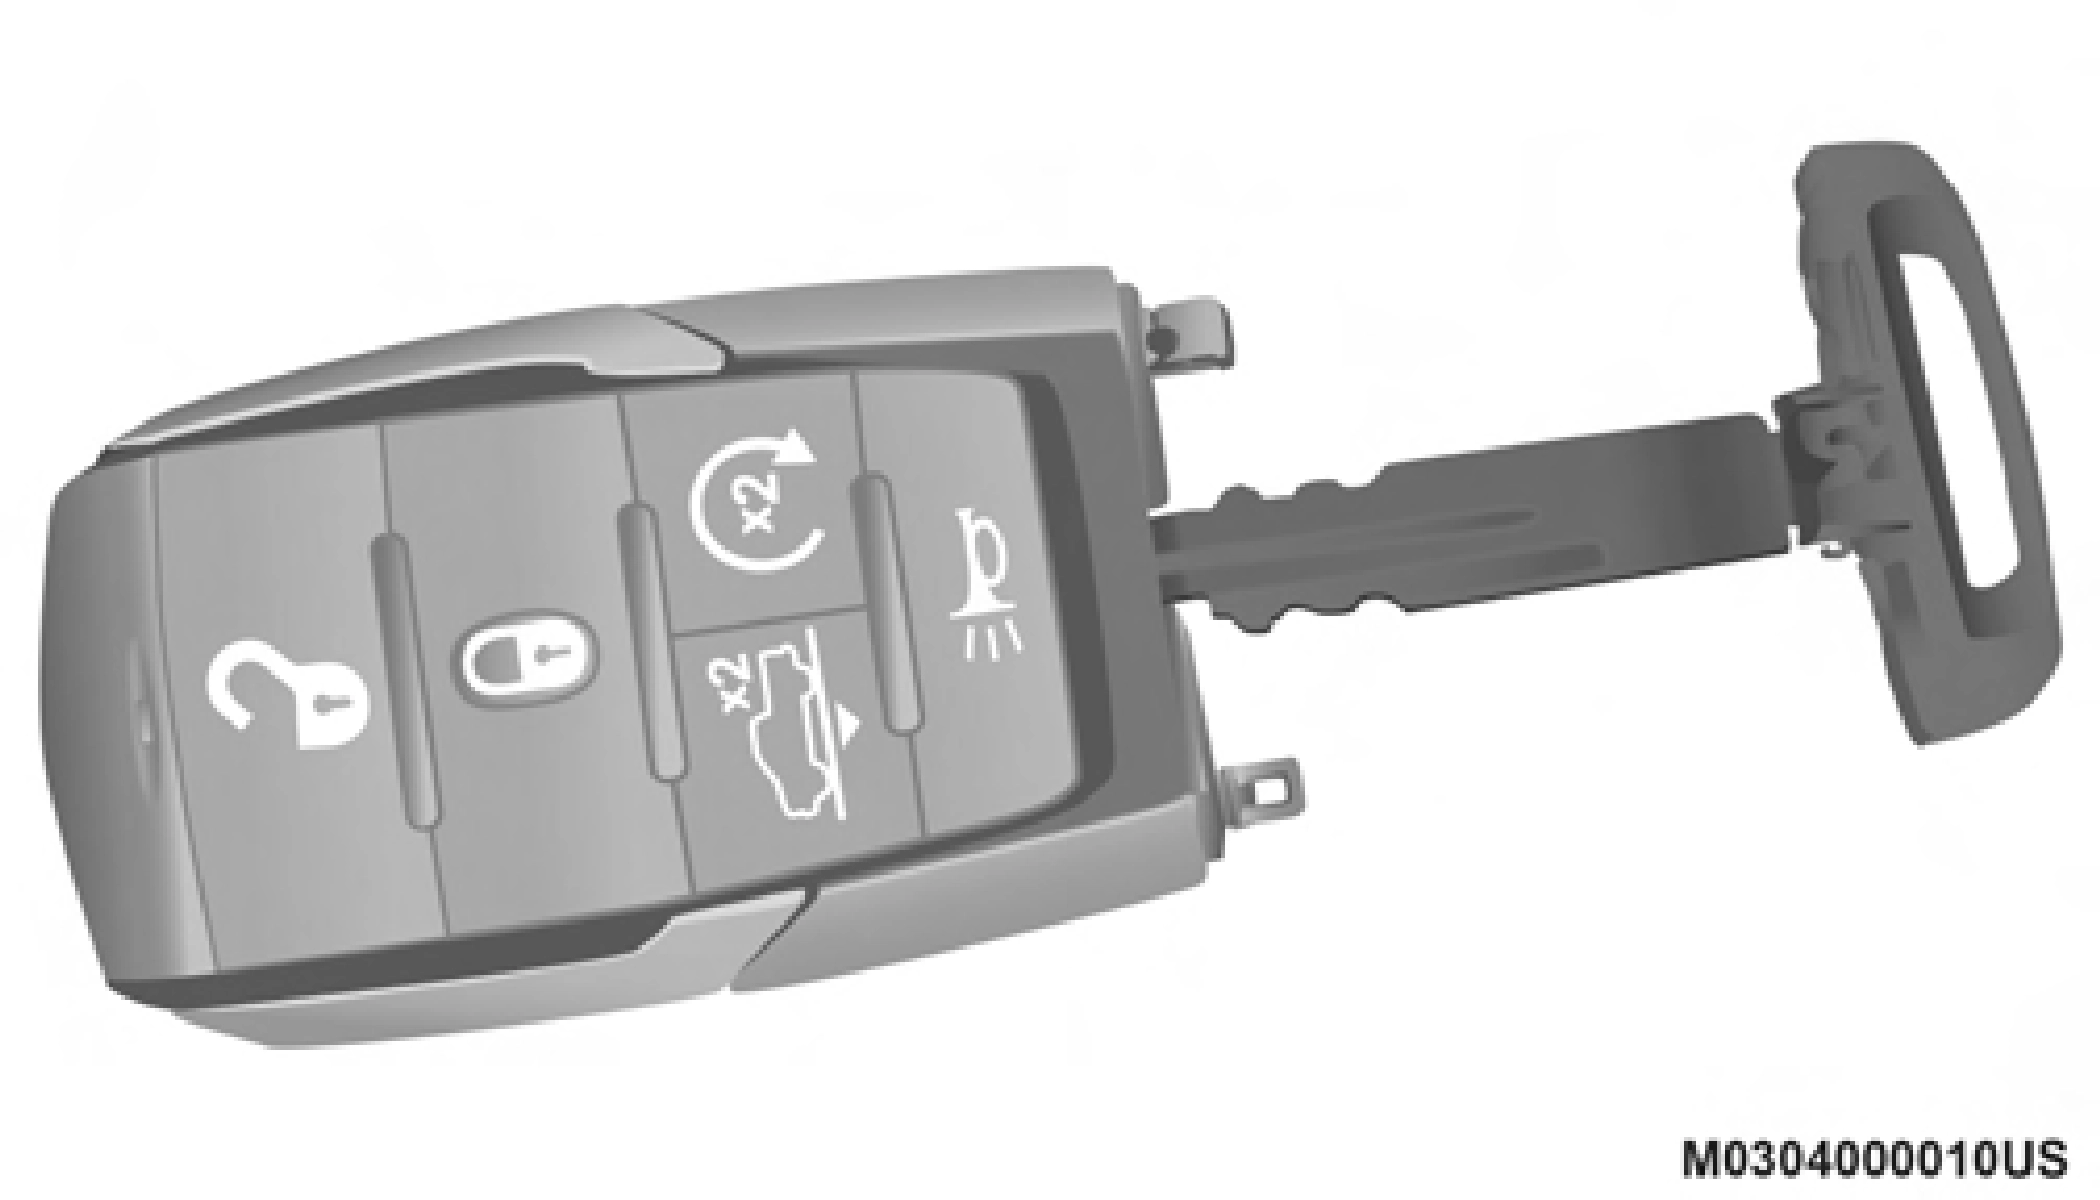
Your vehicle uses a keyless ignition system. The ignition system consists of a key fob with Remote Keyless Entry (RKE) and a START/STOP push button ignition system. The Remote Keyless Entry system consists of a key fob and Keyless Enter-N-Go feature.
NOTE:
The key fob allows you to lock or unlock all doors, tailgate, and the RamBox (if equipped) as well as activate the Panic Alarm from distances up to approximately 66 ft (20 m) using a handheld key fob. The key fob does not need to be pointed at the vehicle to activate the system.
NOTE:
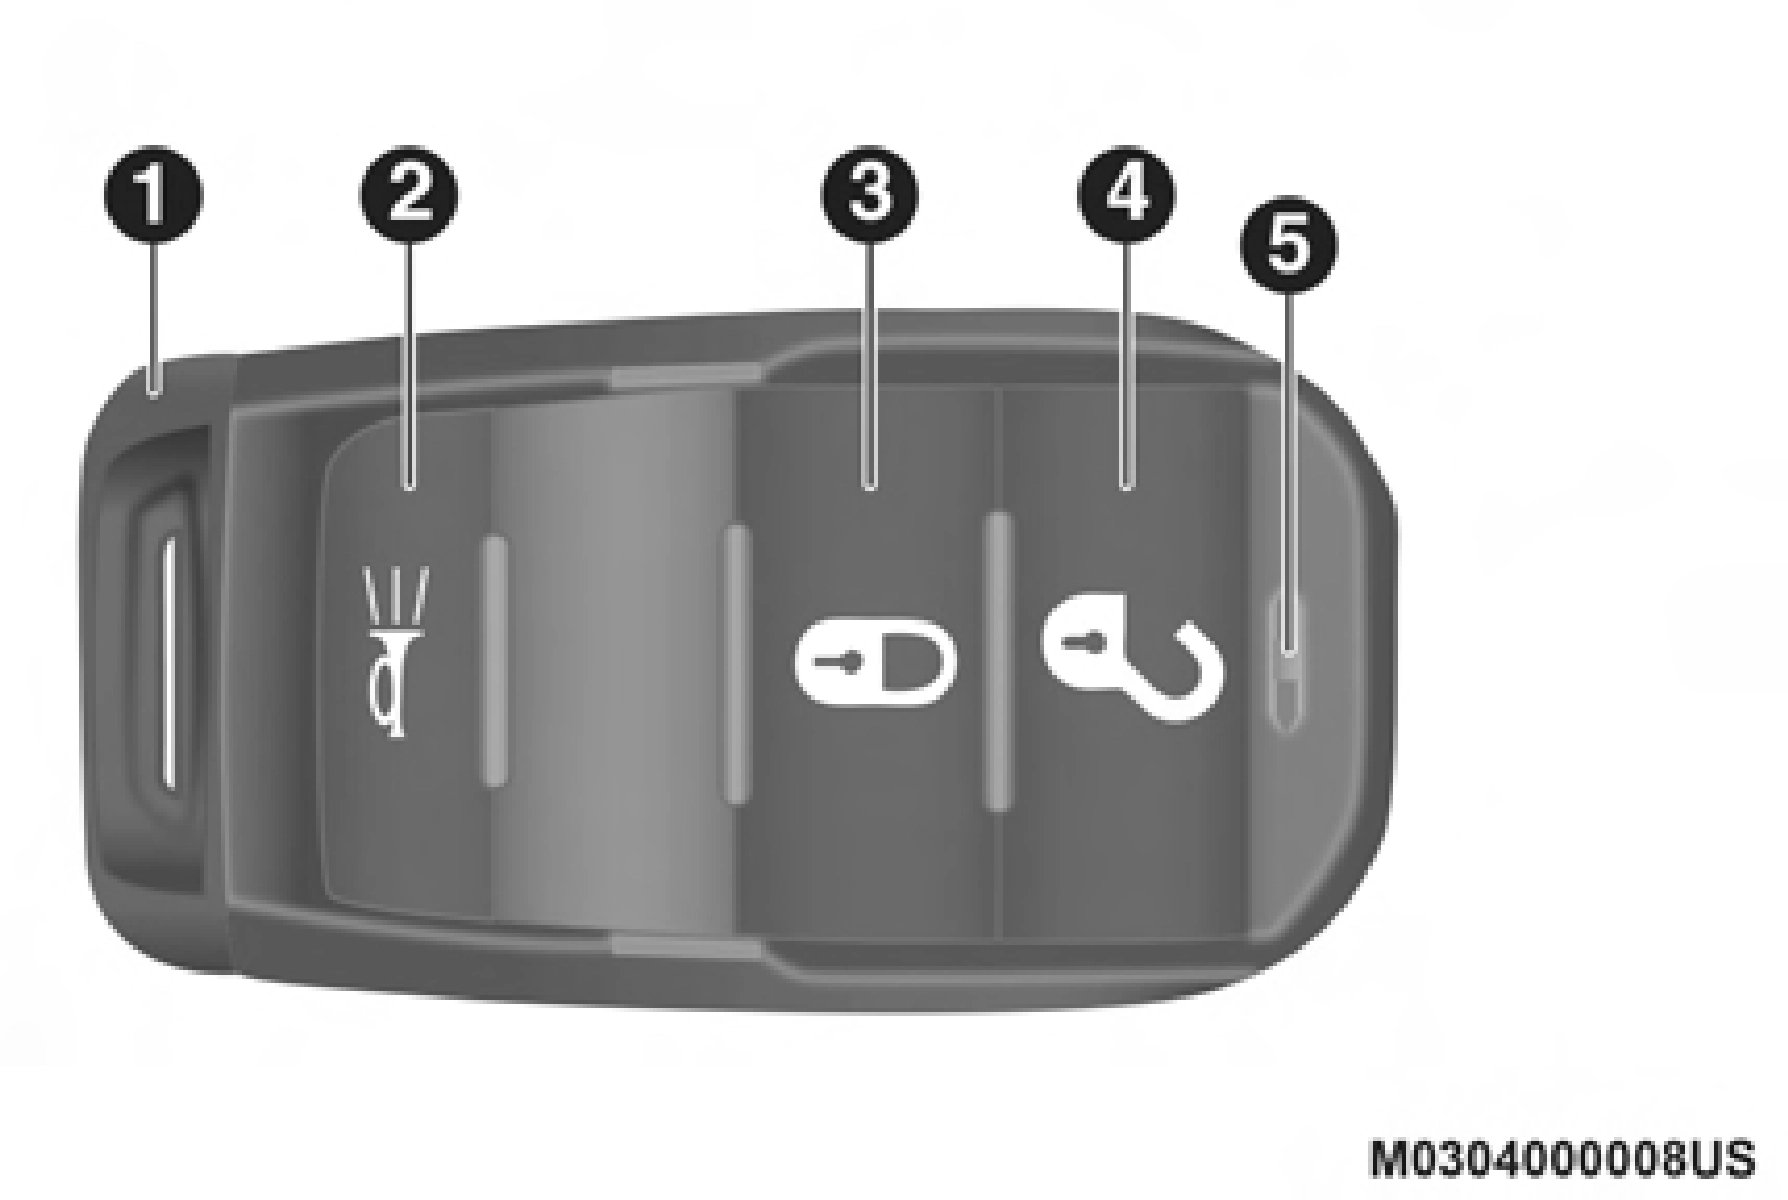
Key Fob
1 — Emergency Key 2 — PANIC
In case the ignition switch does not change with the push of a button, the key fob may have a low or fully depleted battery. A low key fob battery can be verified by referring to the instrument cluster, which will display directions to follow.
NOTE:
A low key fob battery condition may be indicated by a message in the instrument cluster display, or by the LED light on the key fob. If the LED key fob light no longer illu- minates from key fob button pushes, then the key fob battery requires replacement.
In a situation where the battery is low or fully depleted, a back up method can be used to operate the ignition switch. Put the nose side of the key fob (side opposite of the emer- gency key) against the START/STOP ignition button and push to operate the ignition switch.
Push and release the unlock button on the key fob once to unlock the driver's door. Push the unlock button twice within five seconds to unlock all doors, the tailgate and the RamBox (if equipped). The turn signal lights will flash to acknowledge the unlock signal. The illuminated entry system will also turn on.
NOTE:
The instrument cluster display or Uconnect Settings are setup for driver door first, otherwise this will unlock all doors.
Push and release the lock button on the key fob to lock all doors, the tailgate, and the RamBox (if equipped). The turn signal lights will flash and the horn will chirp to acknowl- edge the signal.
This feature will cause the horn to chirp when the doors are locked with the key fob. This feature can be turned on or turned off.
NOTE:
Pushing the lock button on the key fob while you are in the vehicle will activate the vehicle security alarm system. Opening a door with the vehicle security alarm system acti- vated will cause the alarm to sound. Push the unlock button to deactivate the vehicle security alarm system.
Refer to “Instrument Cluster Display” in “Getting To Know Your Instrument Panel” for further information.
To turn the Panic Alarm feature on or off, push the Panic button on the key fob. When the Panic Alarm is activated, the turn signals will flash, the horn will pulse on and off, and the interior lights will turn on.
The Panic Alarm will stay on for three minutes unless you turn it off by either pushing the Panic button a second time or drive the vehicle at a speed of 15 mph (24 km/h) or greater.
NOTE:
 For easy entry and loading, your vehicle can be lowered by pushing the key fob air suspension lowering button two times. When key fob lowering is
requested, the vehicle will send a series of chirps and flashes to alert the customer that the operation has begun and will continue these alerts until it successfully lowers.
The following conditions must be met for the vehicle to lower remotely:
NOTE:
Ensure the vehicle is clear of all objects, pets, and people prior to remote lowering.
Canceling Remote Lowering
Vehicle lowering can be cancelled at anytime. When vehicle lowering is cancelled, the vehicle will raise up to the next defined level and lock out the remote lowering feature until the ignition has been cycled ON/OFF.
To cancel vehicle lowering, push the key fob air suspension lowering button one time during the lowering process. When vehicle lowering is cancelled, the horn will chirp two times and the turn signal lamps will flash four times. Once raising is completed, the horn will chirp one time.
NOTE:
Refer to “Active-Level Four Corner Air Suspension System” in “Starting And Operating” for further information.
The replacement battery model is one CR2450 battery.
NOTE:
The coin battery should last a minimum of 3 years of normal vehicle usage.
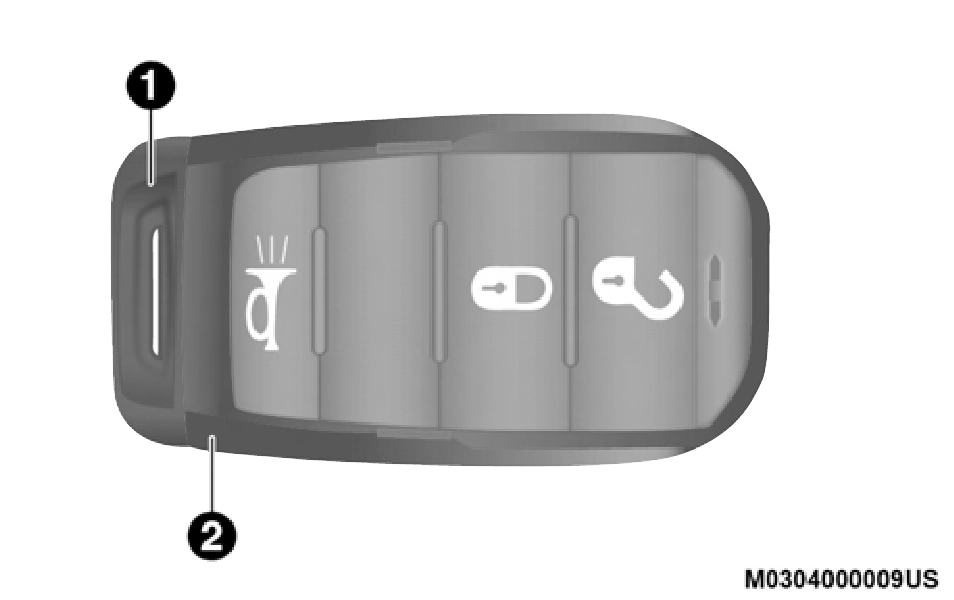
Emergency Key Removal
Emergency Key
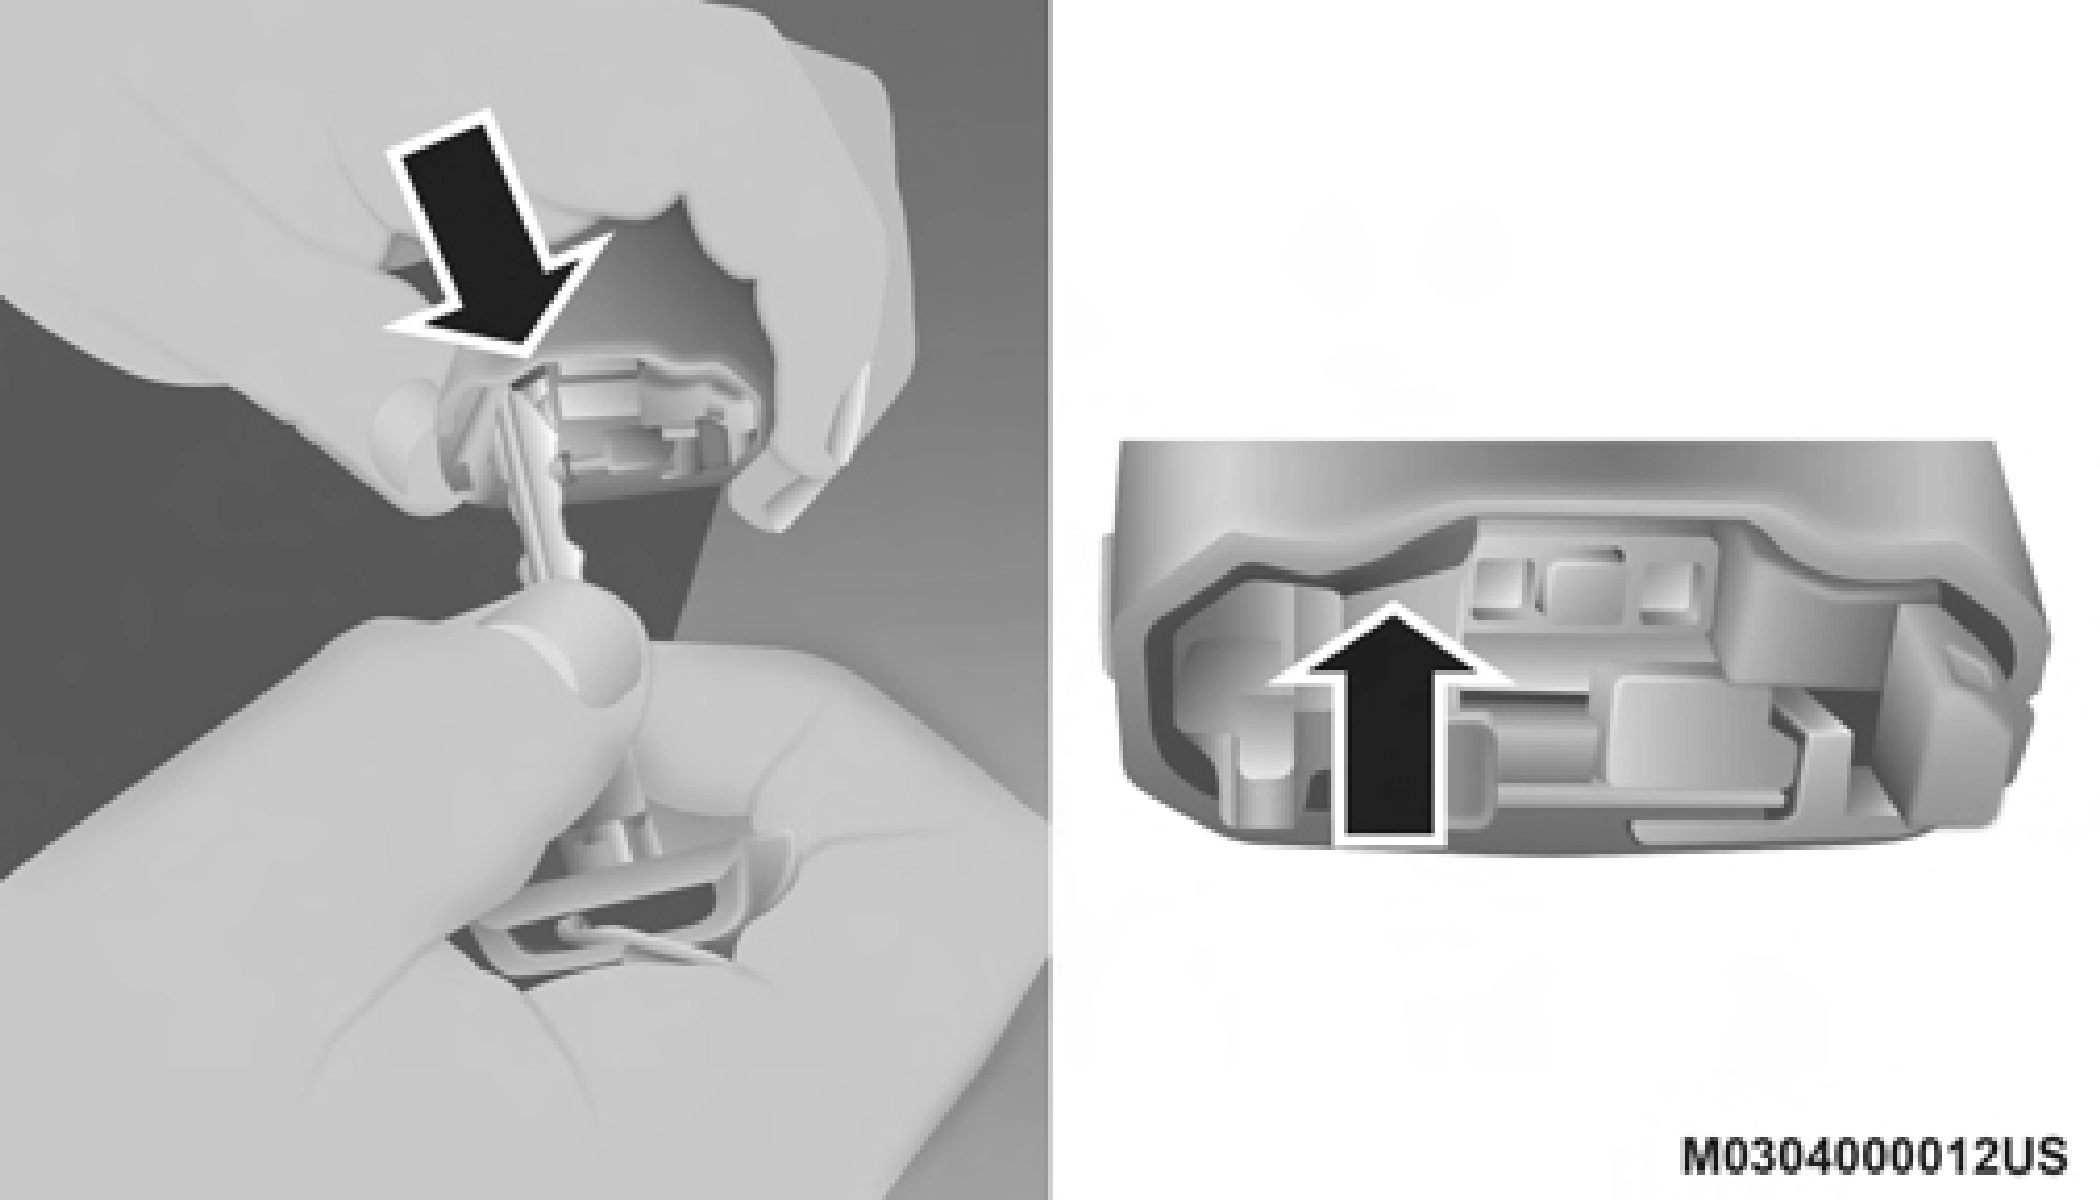
Key Fob Back Cover Removal — Left Side
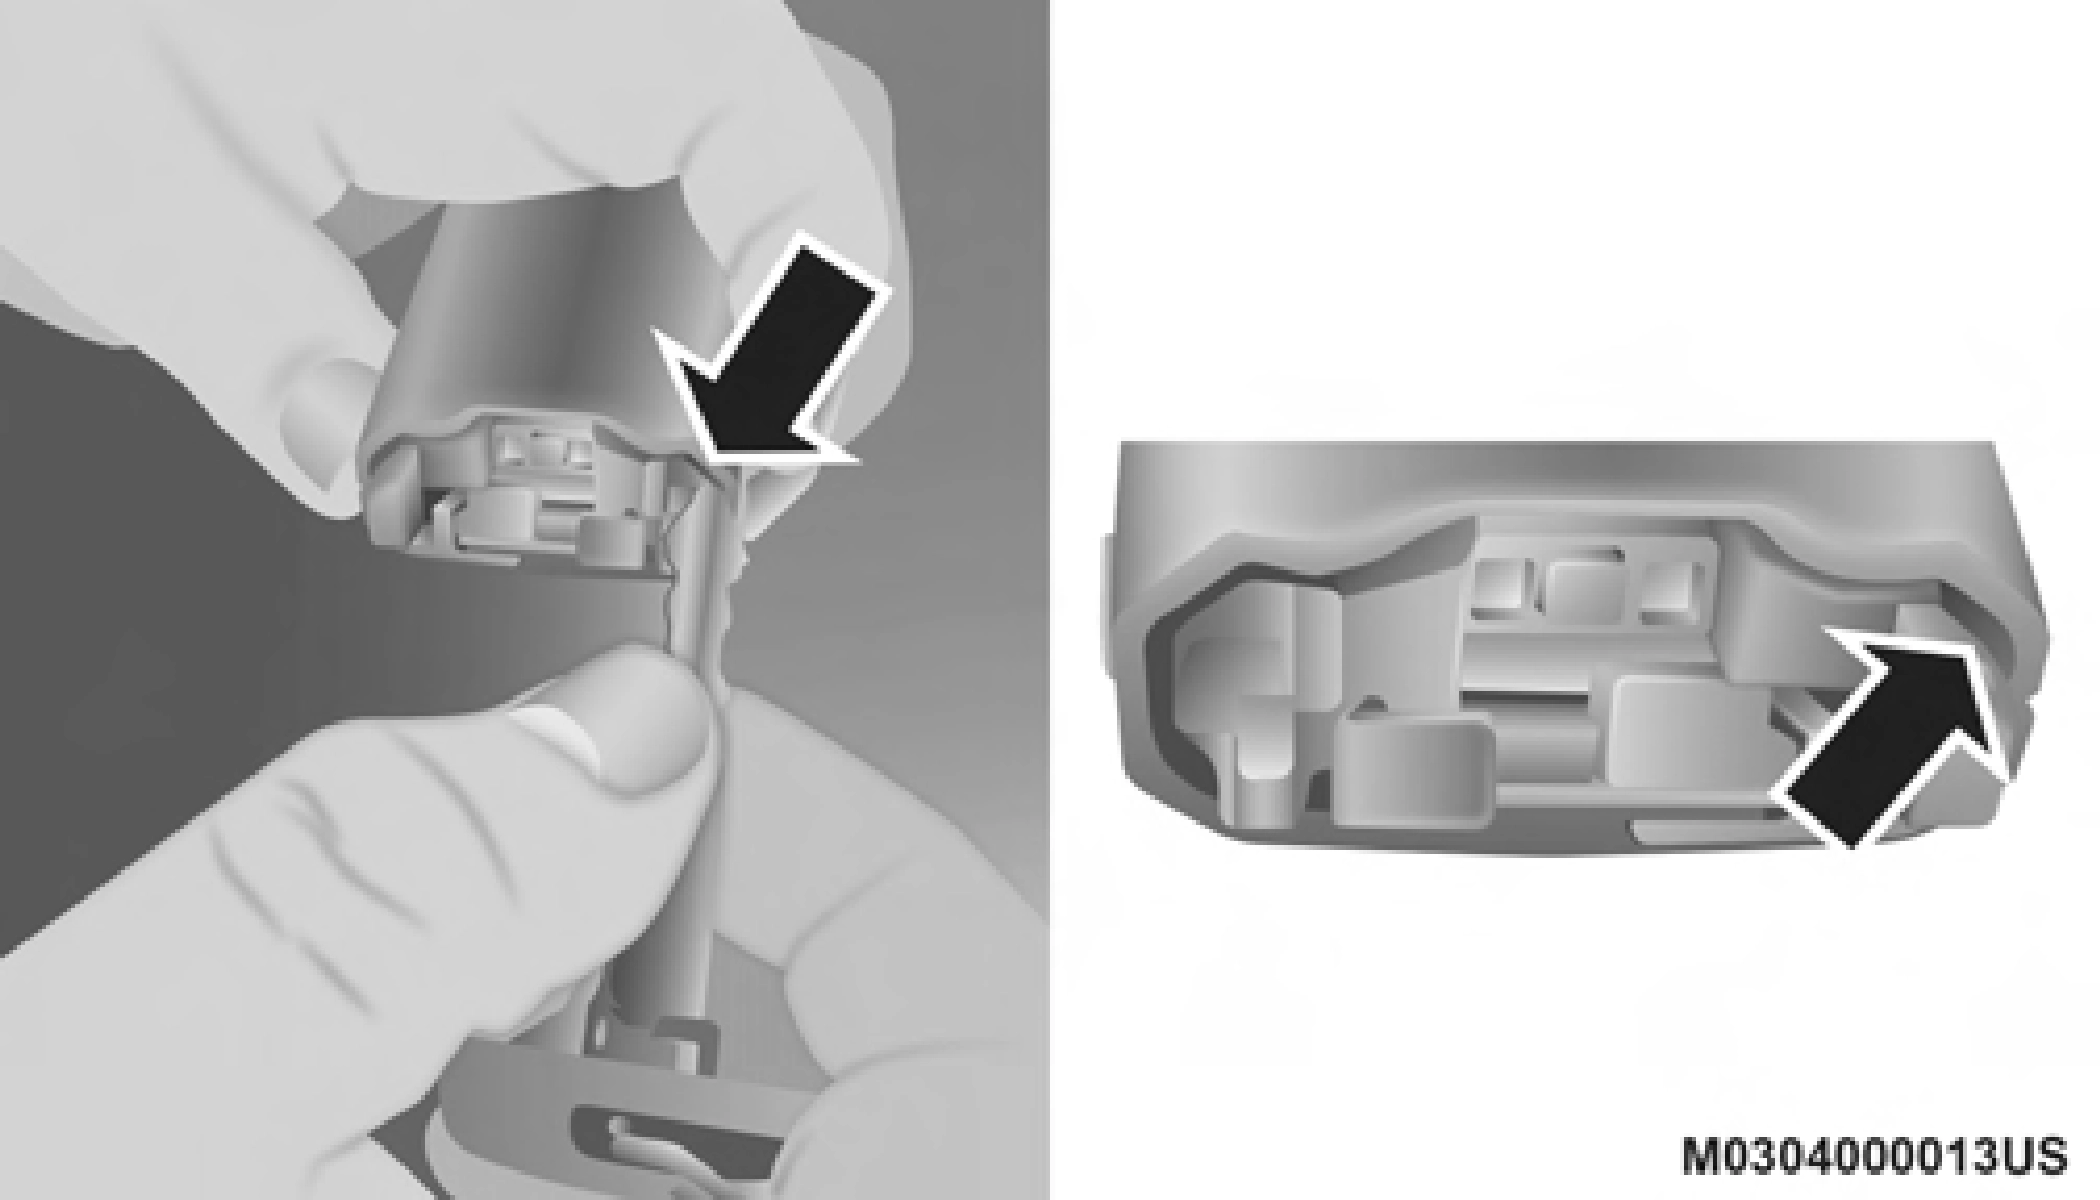 Next, locate the gap on the right side of the key fob, which is positioned further to the edge than the left side gap. Pry open the right side, and remove the back cover.
 Remove the battery by using your thumb to slide the battery downward and back toward the key ring.
2
Key Fob Back Cover Removal — Right Side
NOTE:
Key Fob Battery Location
When replacing the battery, ensure the + sign on the battery is facing upward. Avoid touching the new battery with your fingers. Skin oils may cause battery deterioration. If you touch a battery, clean it with rubbing alcohol.

Key Fob Battery Replacement
NOTE:
The key fob battery should only be replaced by qualified technicians. If the battery requires replacement, see an authorized dealer.
Programming the key fob may be performed by an autho- rized dealer.
NOTE:
Once a key fob is programmed to a vehicle, it cannot be repurposed and reprogrammed to another vehicle.
The following regulatory statement applies to all Radio Frequency (RF) devices equipped in this vehicle:
This device complies with Part 15 of the FCC Rules and with Innovation, Science and Economic Development Canada license-exempt RSS standard(s). Operation is subject to the following two conditions:
Le présent appareil est conforme aux CNR d`Innovation, Science and Economic Development applicables aux appar- eils radio exempts de licence. L'exploitation est autorisée aux deux conditions suivantes:
La operación de este equipo está sujeta a las siguientes dos condiciones:
NOTE:
Changes or modifications not expressly approved by the party responsible for compliance could void the user's authority to operate the equipment.
Download Manual