BULB REPLACEMENT
Replacement Bulbs
All of the inside bulbs are brass or glass-wedge base. Aluminum base bulbs are not approved.
|
Interior Bulbs |
|
|
Bulb Name |
Bulb Number |
|
Overhead Console Lamps |
TS 212–9 |
|
Dome Lamp |
7679 |
|
NOTE: For lighted switches, see an authorized dealer for replacement instructions. |
|
Exterior Bulbs |
|
|
Bulb Name |
Bulb Number |
|
Low Beam (Halogen Reflector Headlamp) |
H11LL |
|
High Beam (Halogen Reflector Headlamp) |
9005LL |
6
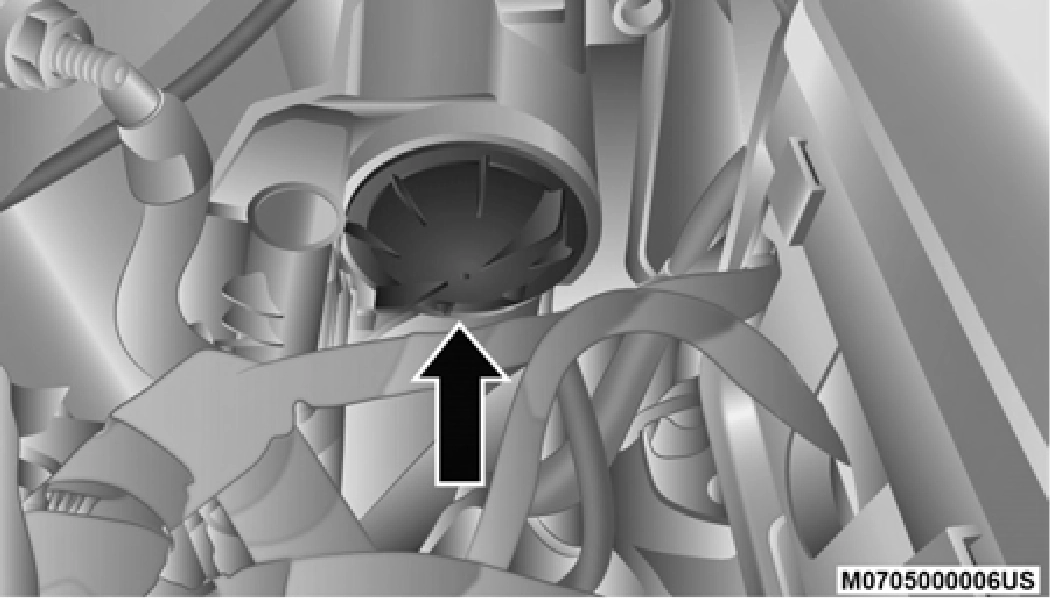
Low Beam
Passenger's Low Beam Headlight Cover
NOTE:
It may be necessary to remove/reposition Air Cleaner Assembly to access passenger side headlamp/side marker light bulbs.
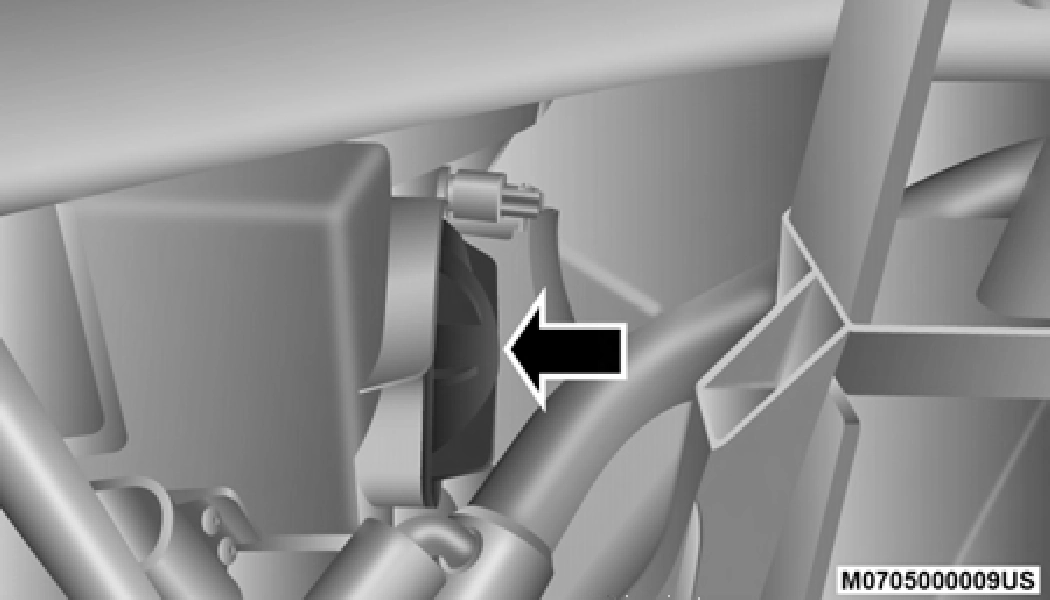
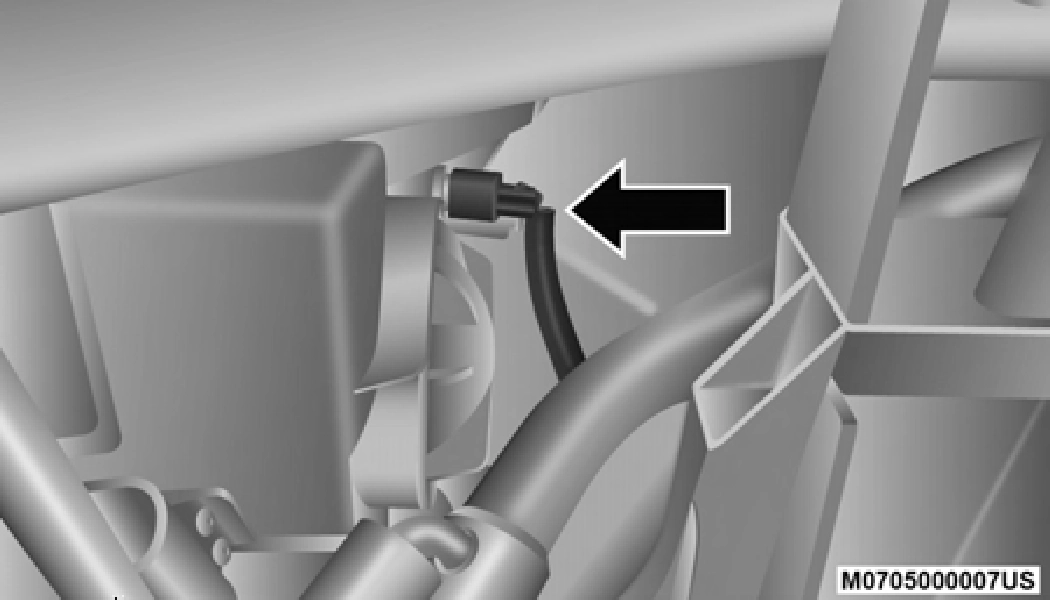
High Beam
 Look under the hood and behind the headlamp to find the high beam bulb access cover.
6
NOTE:
Driver's High Beam Headlight Cover
It may be necessary to remove/reposition Air Cleaner Assembly to access passenger side headlamp/side marker light bulbs.
Front Park And Turn
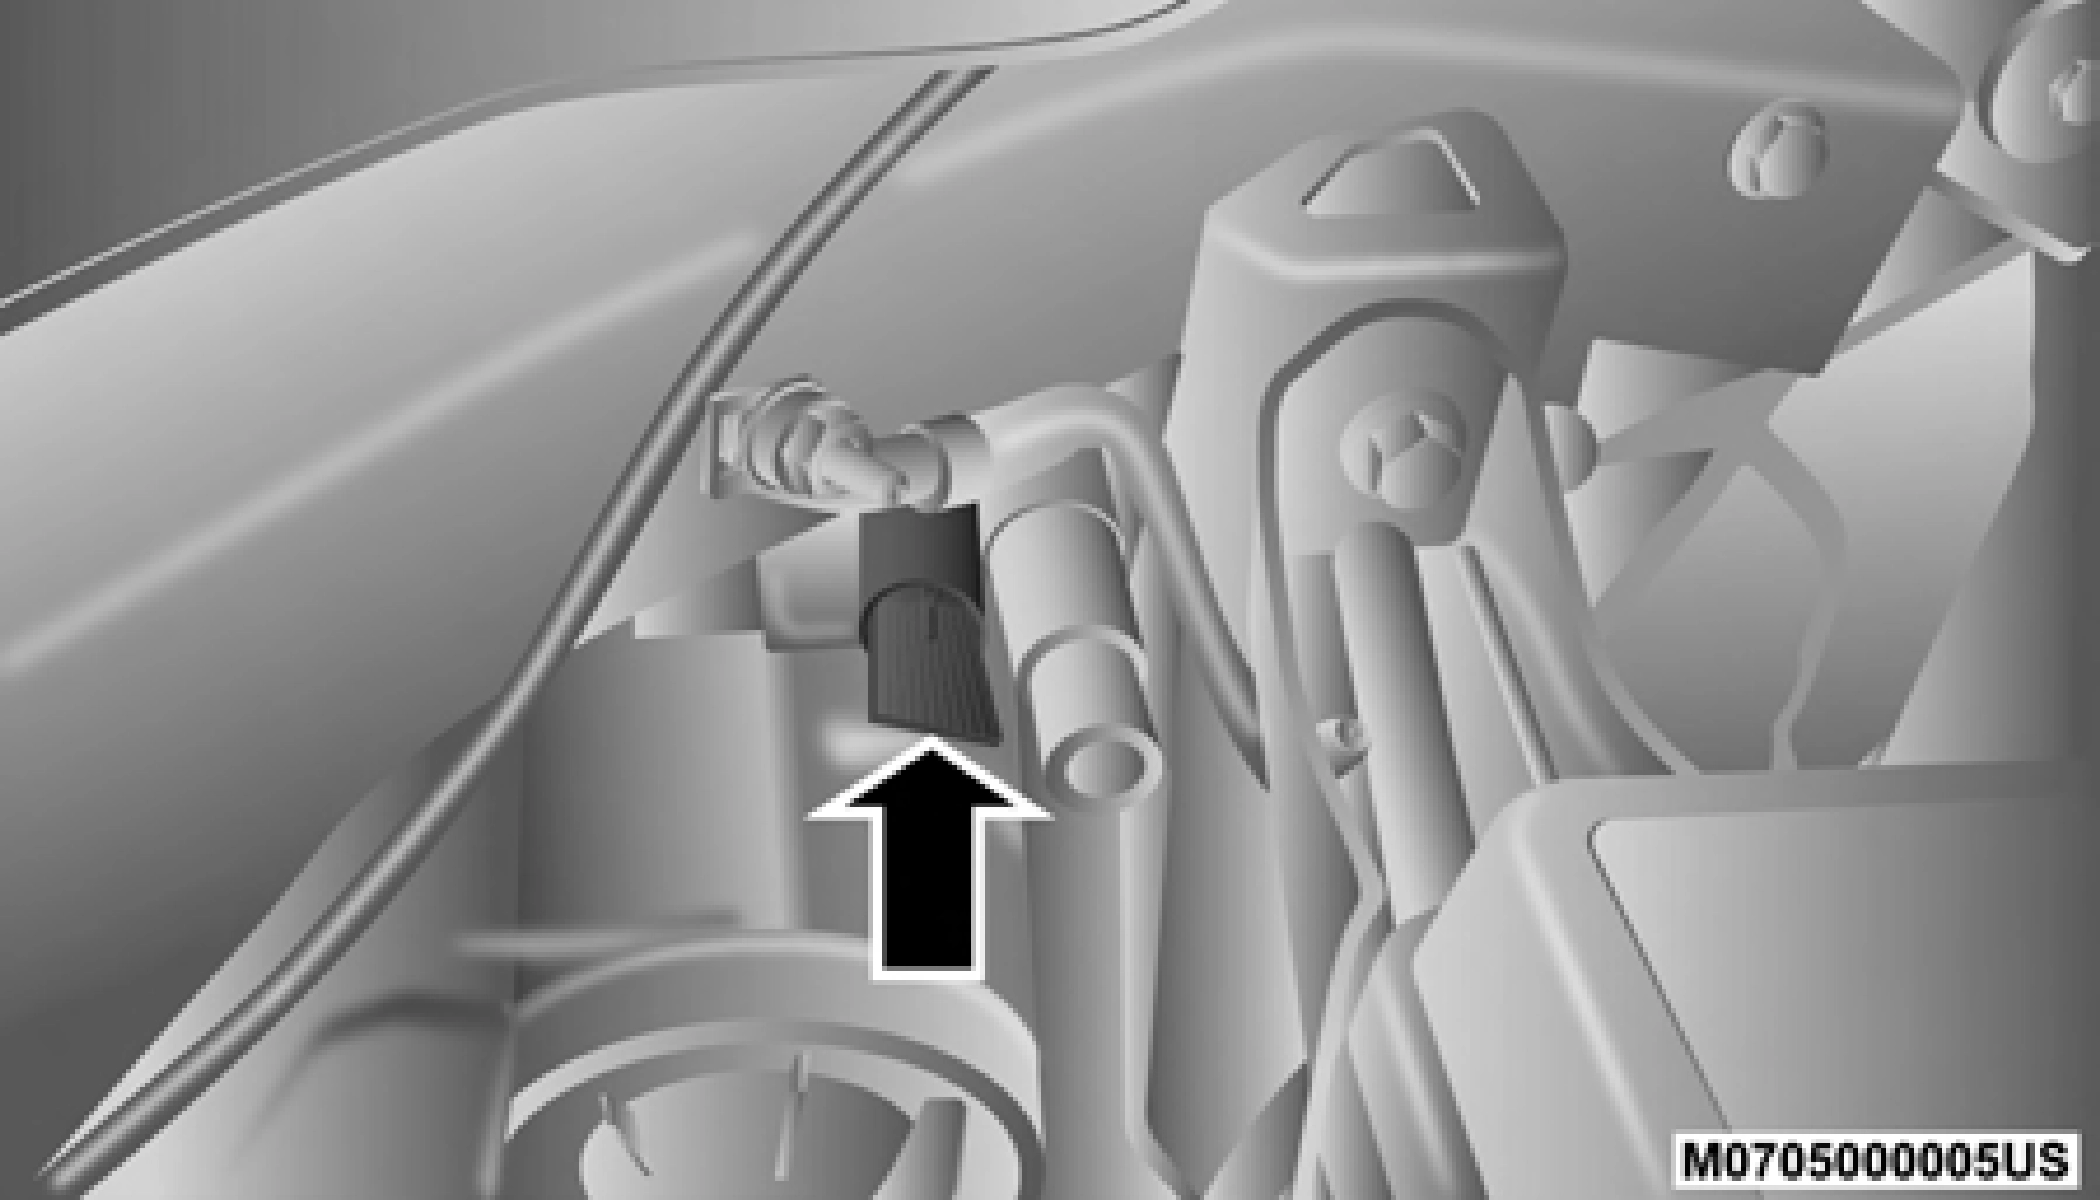
Park And Turn Socket
Side Marker Lamp
Passenger's Side Marker Lamp
NOTE:
It may be necessary to remove/reposition Air Cleaner Assembly to access passenger side headlamp/side marker light bulbs.
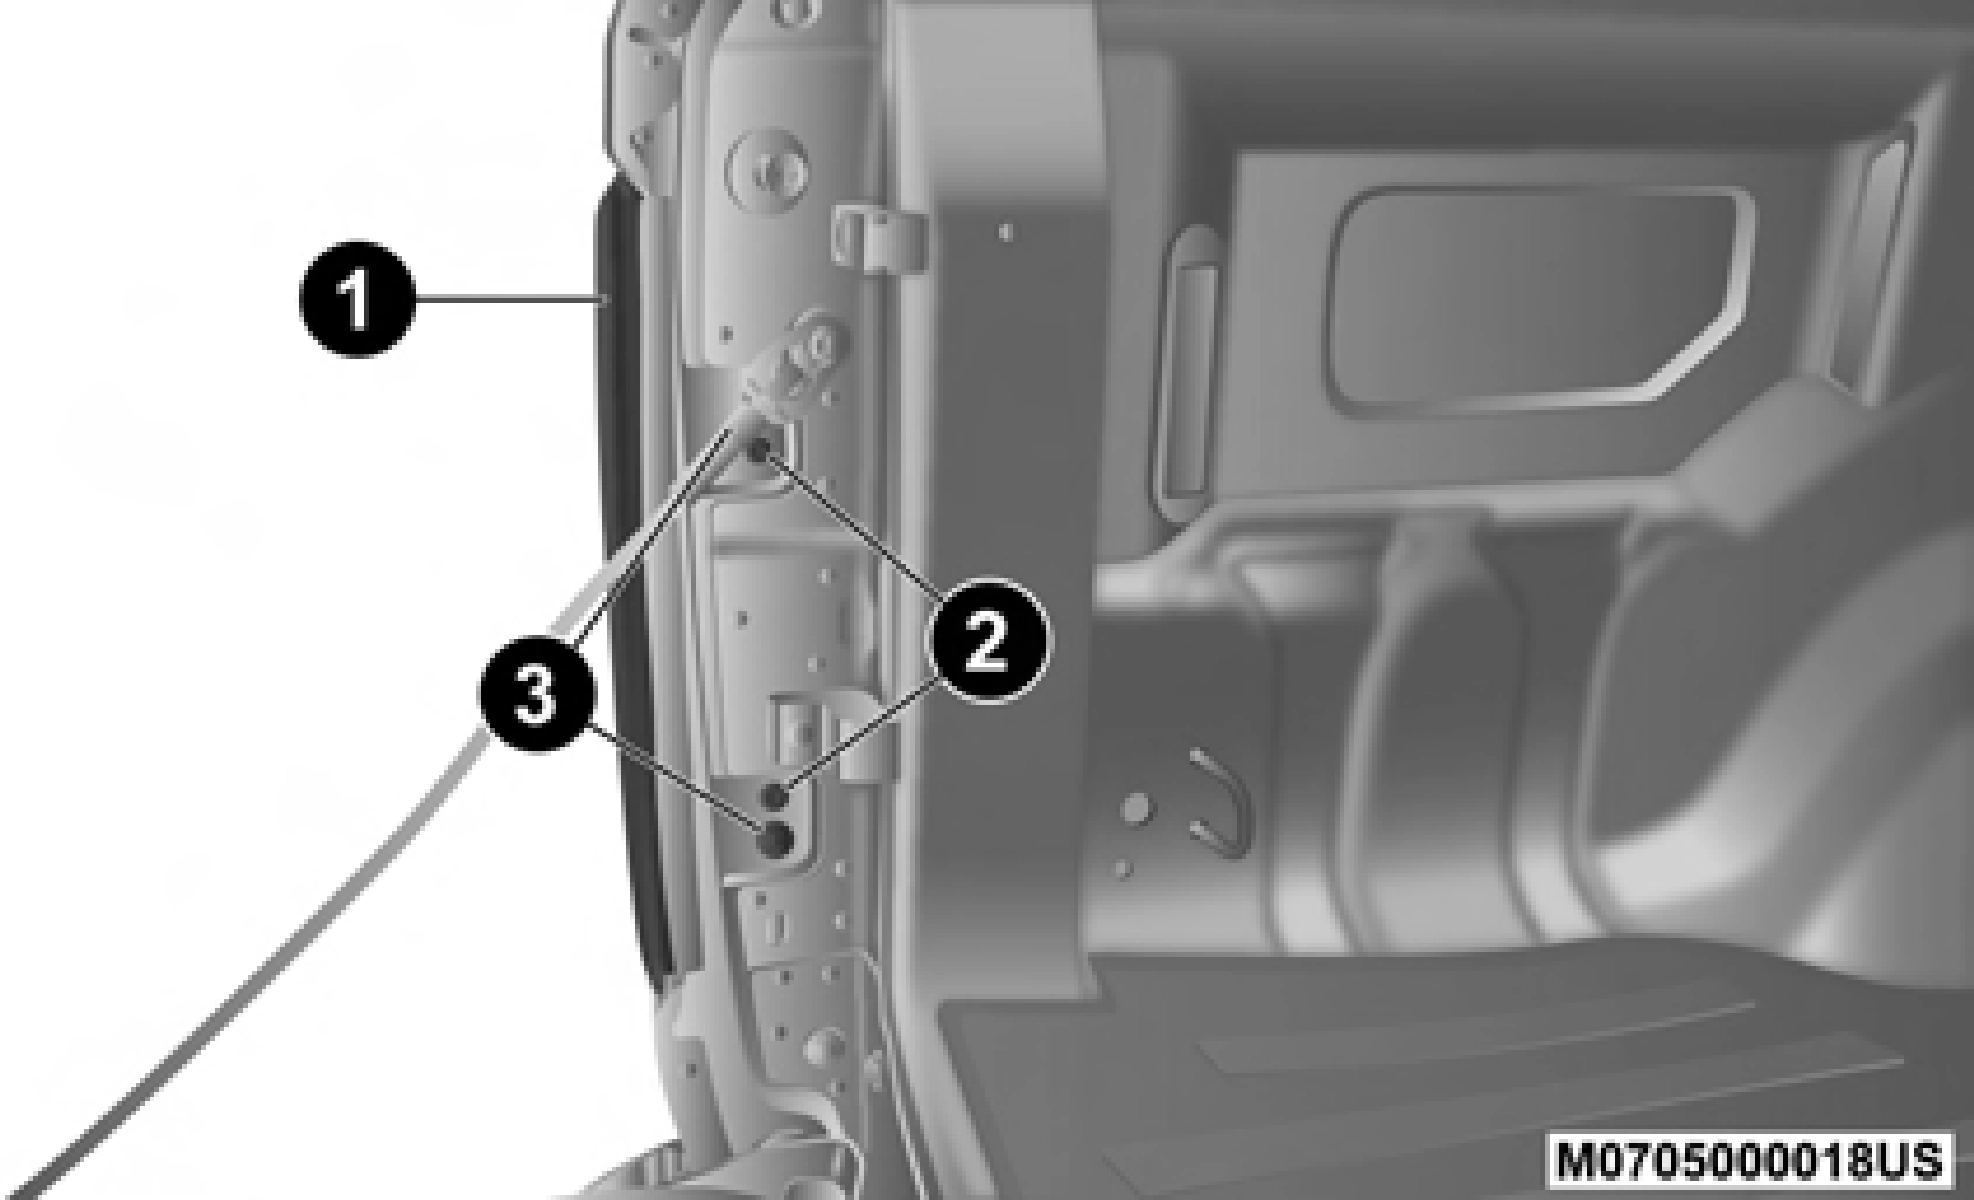 Remove the two screws and push pins retainers that pass through the bed sheet metal.
6
Tail Lamp Locations
1 — Tail Lamp 2 — Fasteners
3 — Push - Pin Retainers
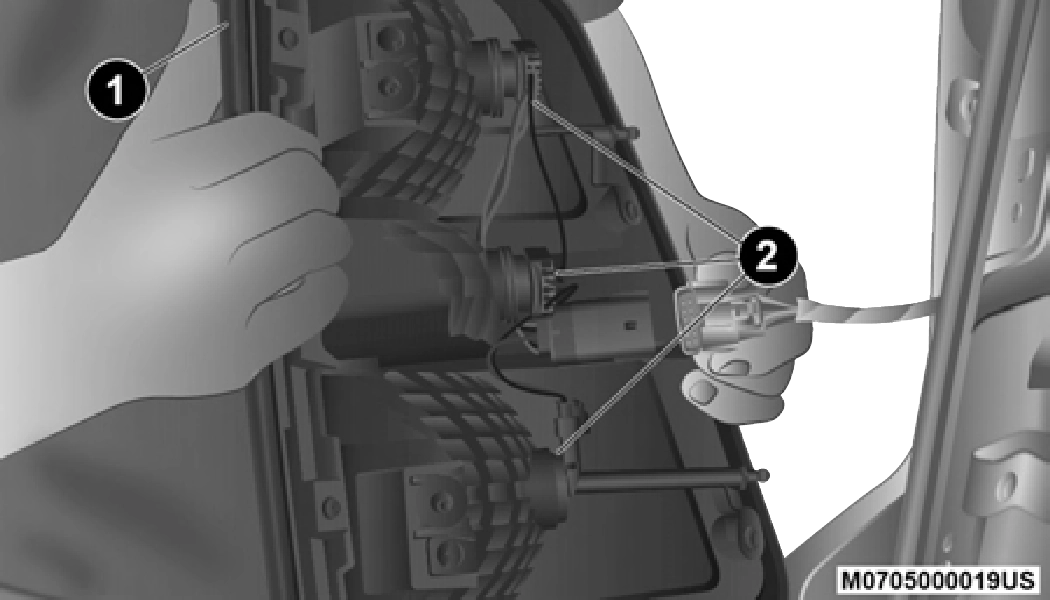
Tail Lamp Removed
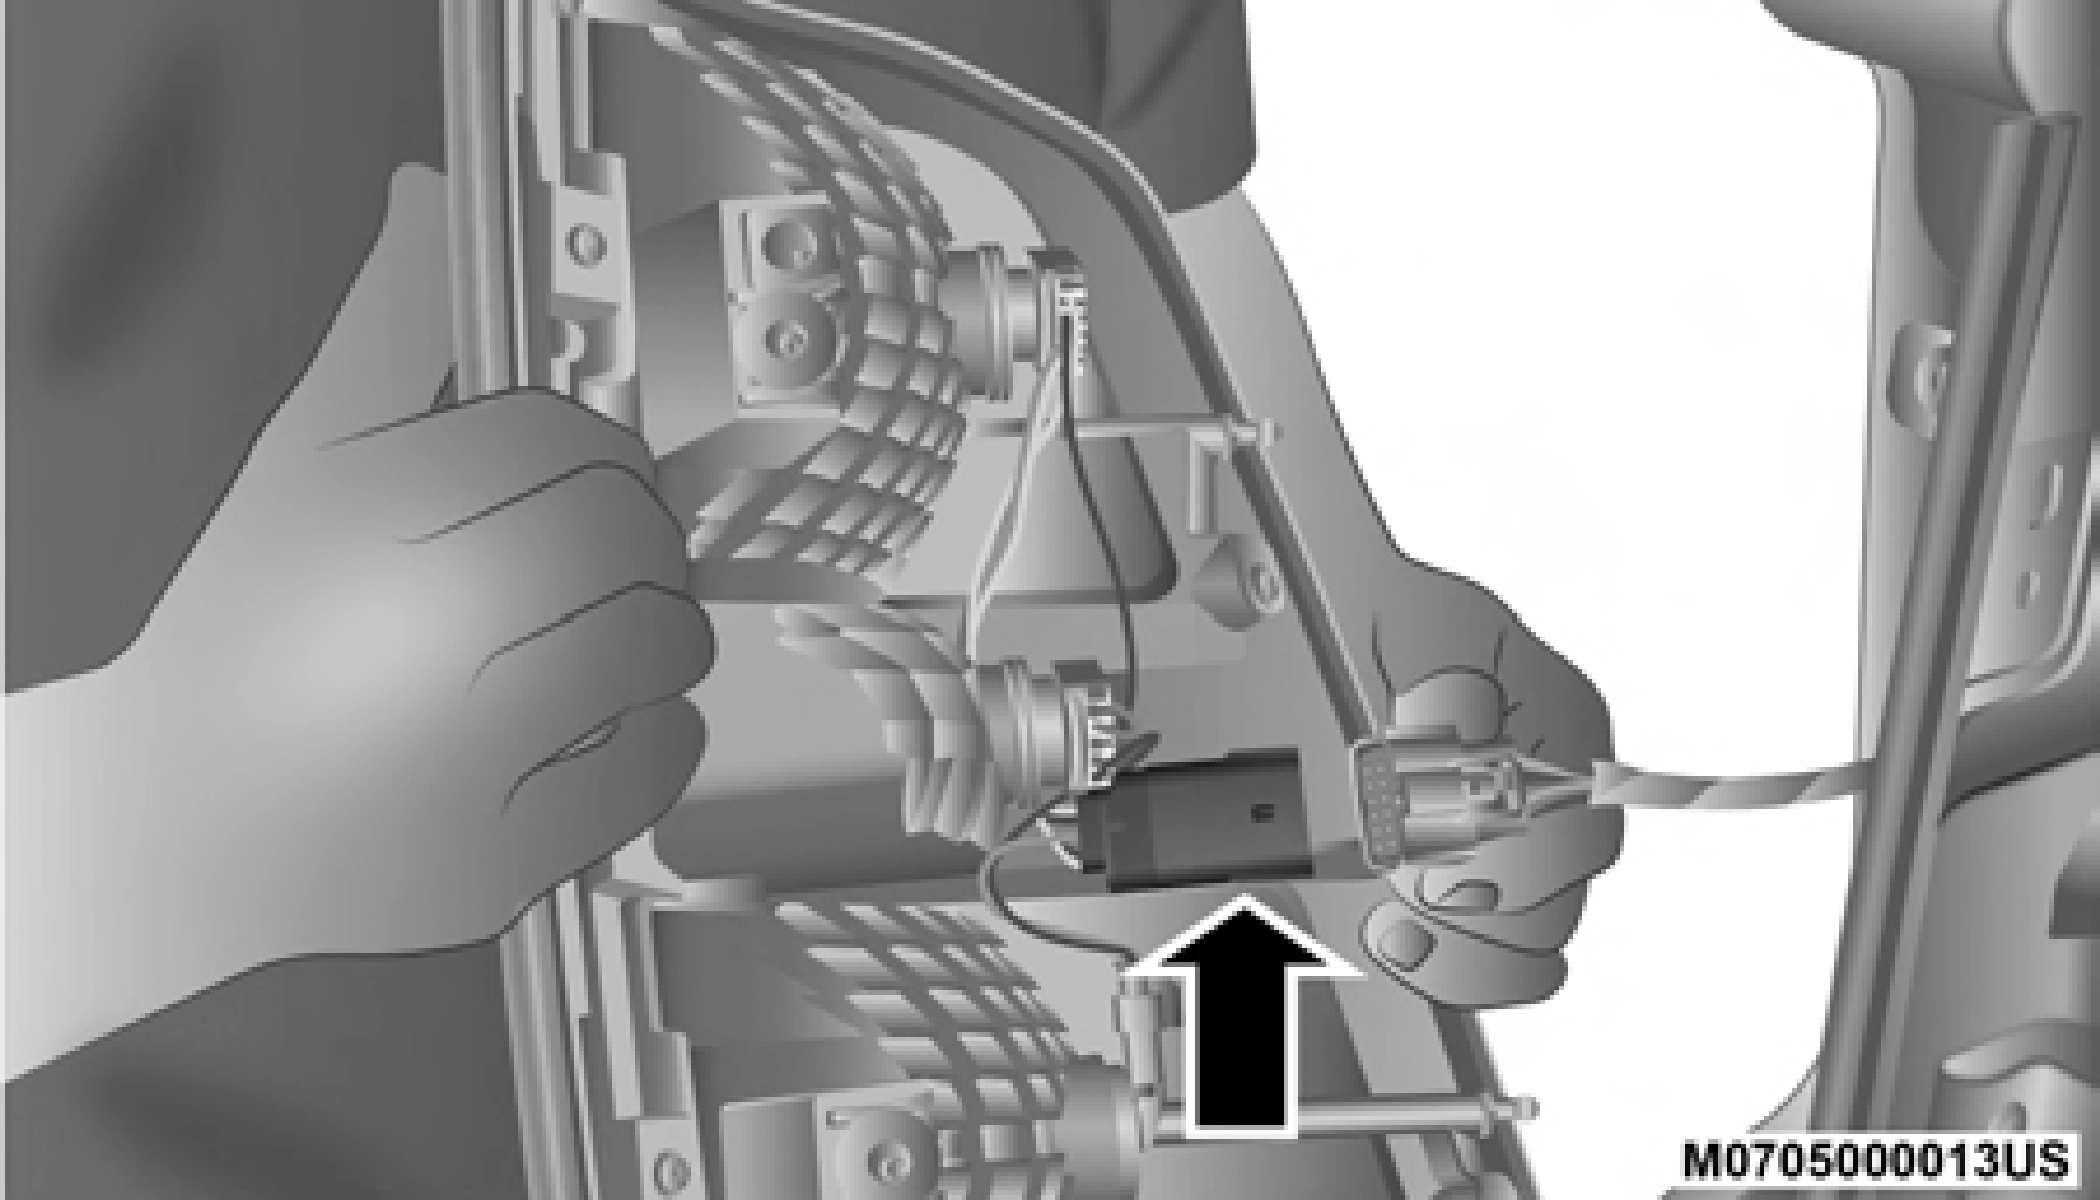
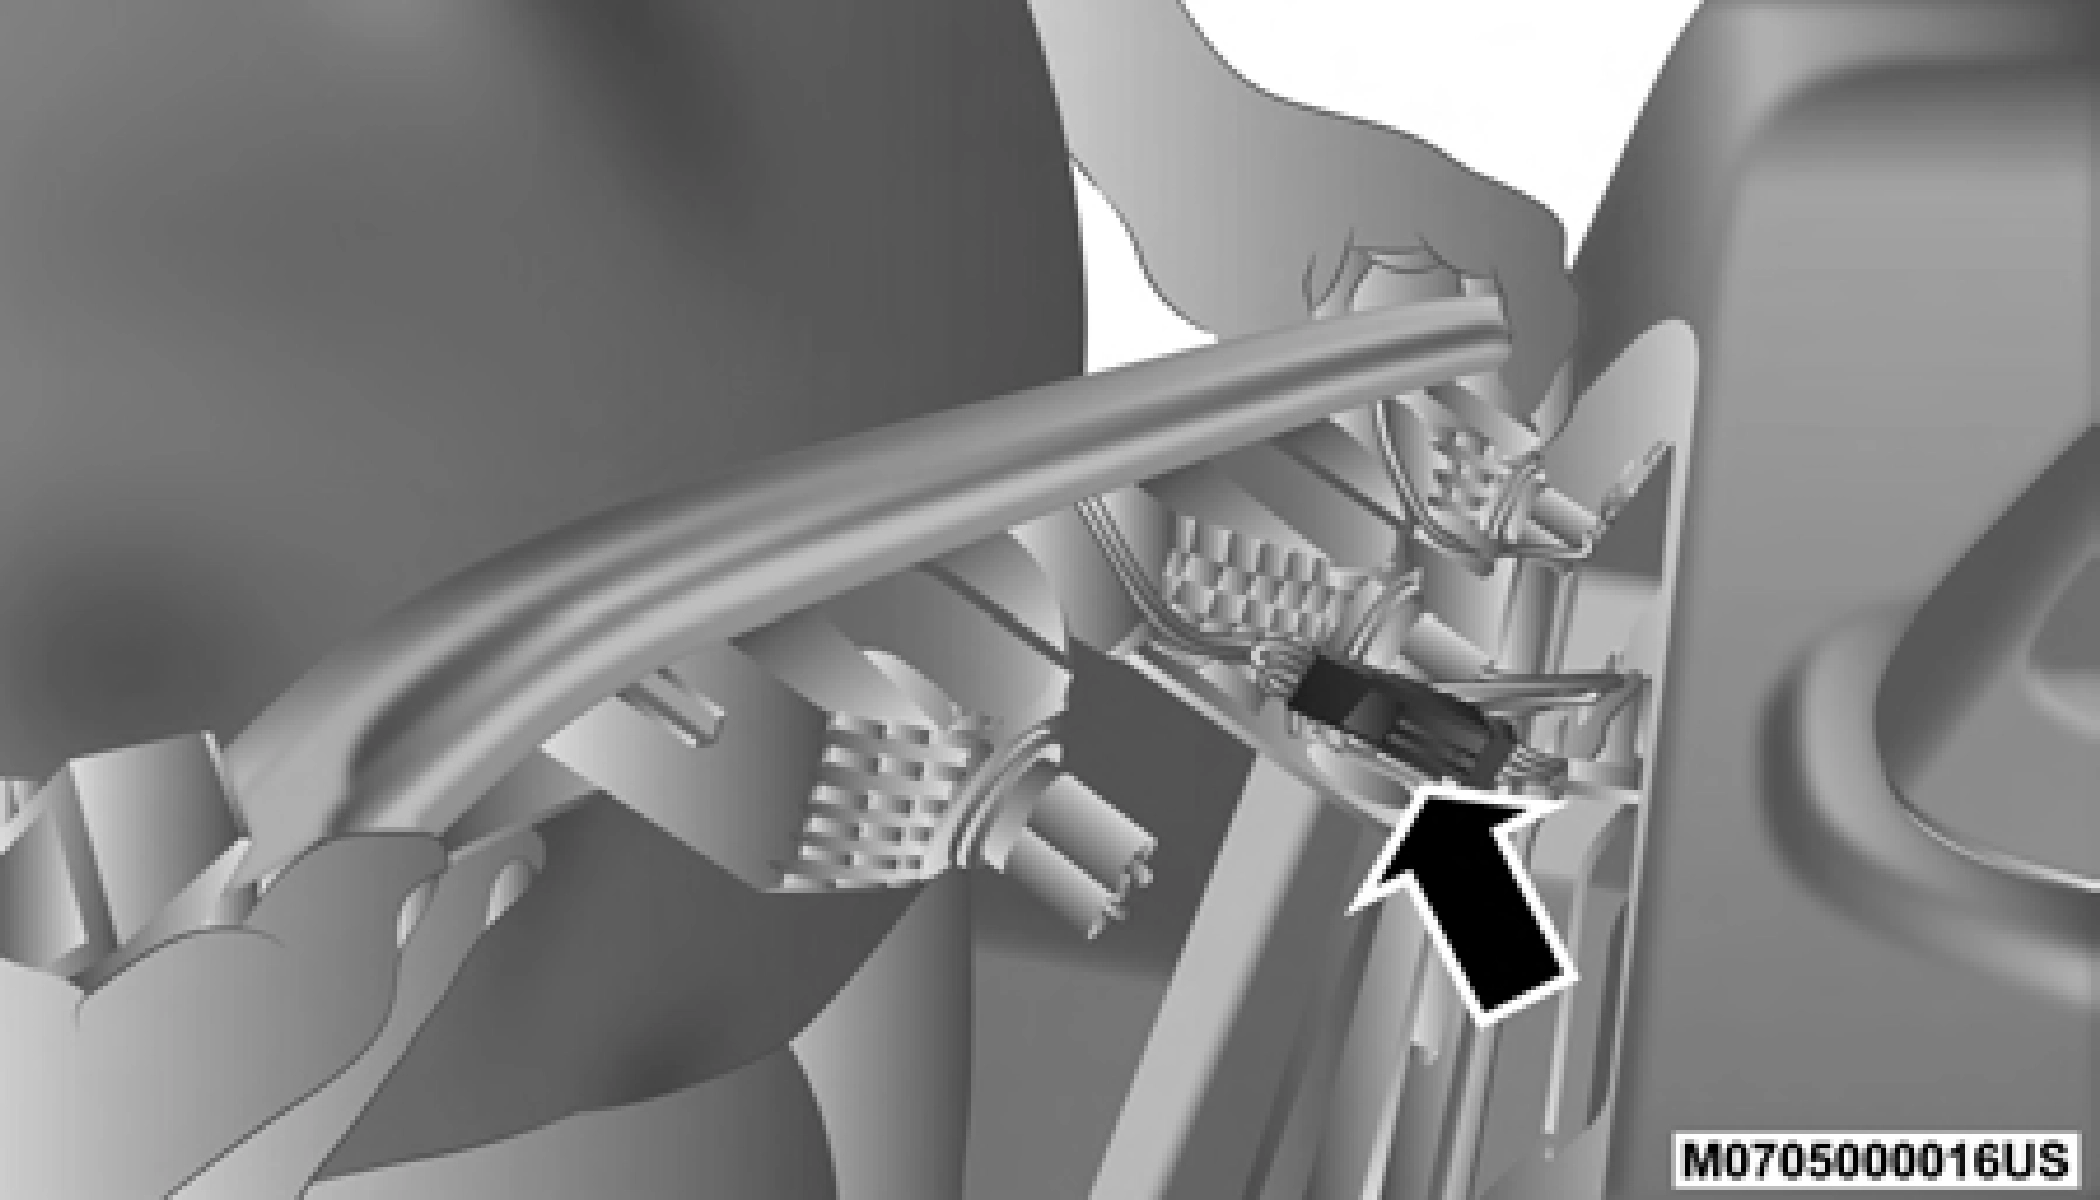
Wiring Harness Connector
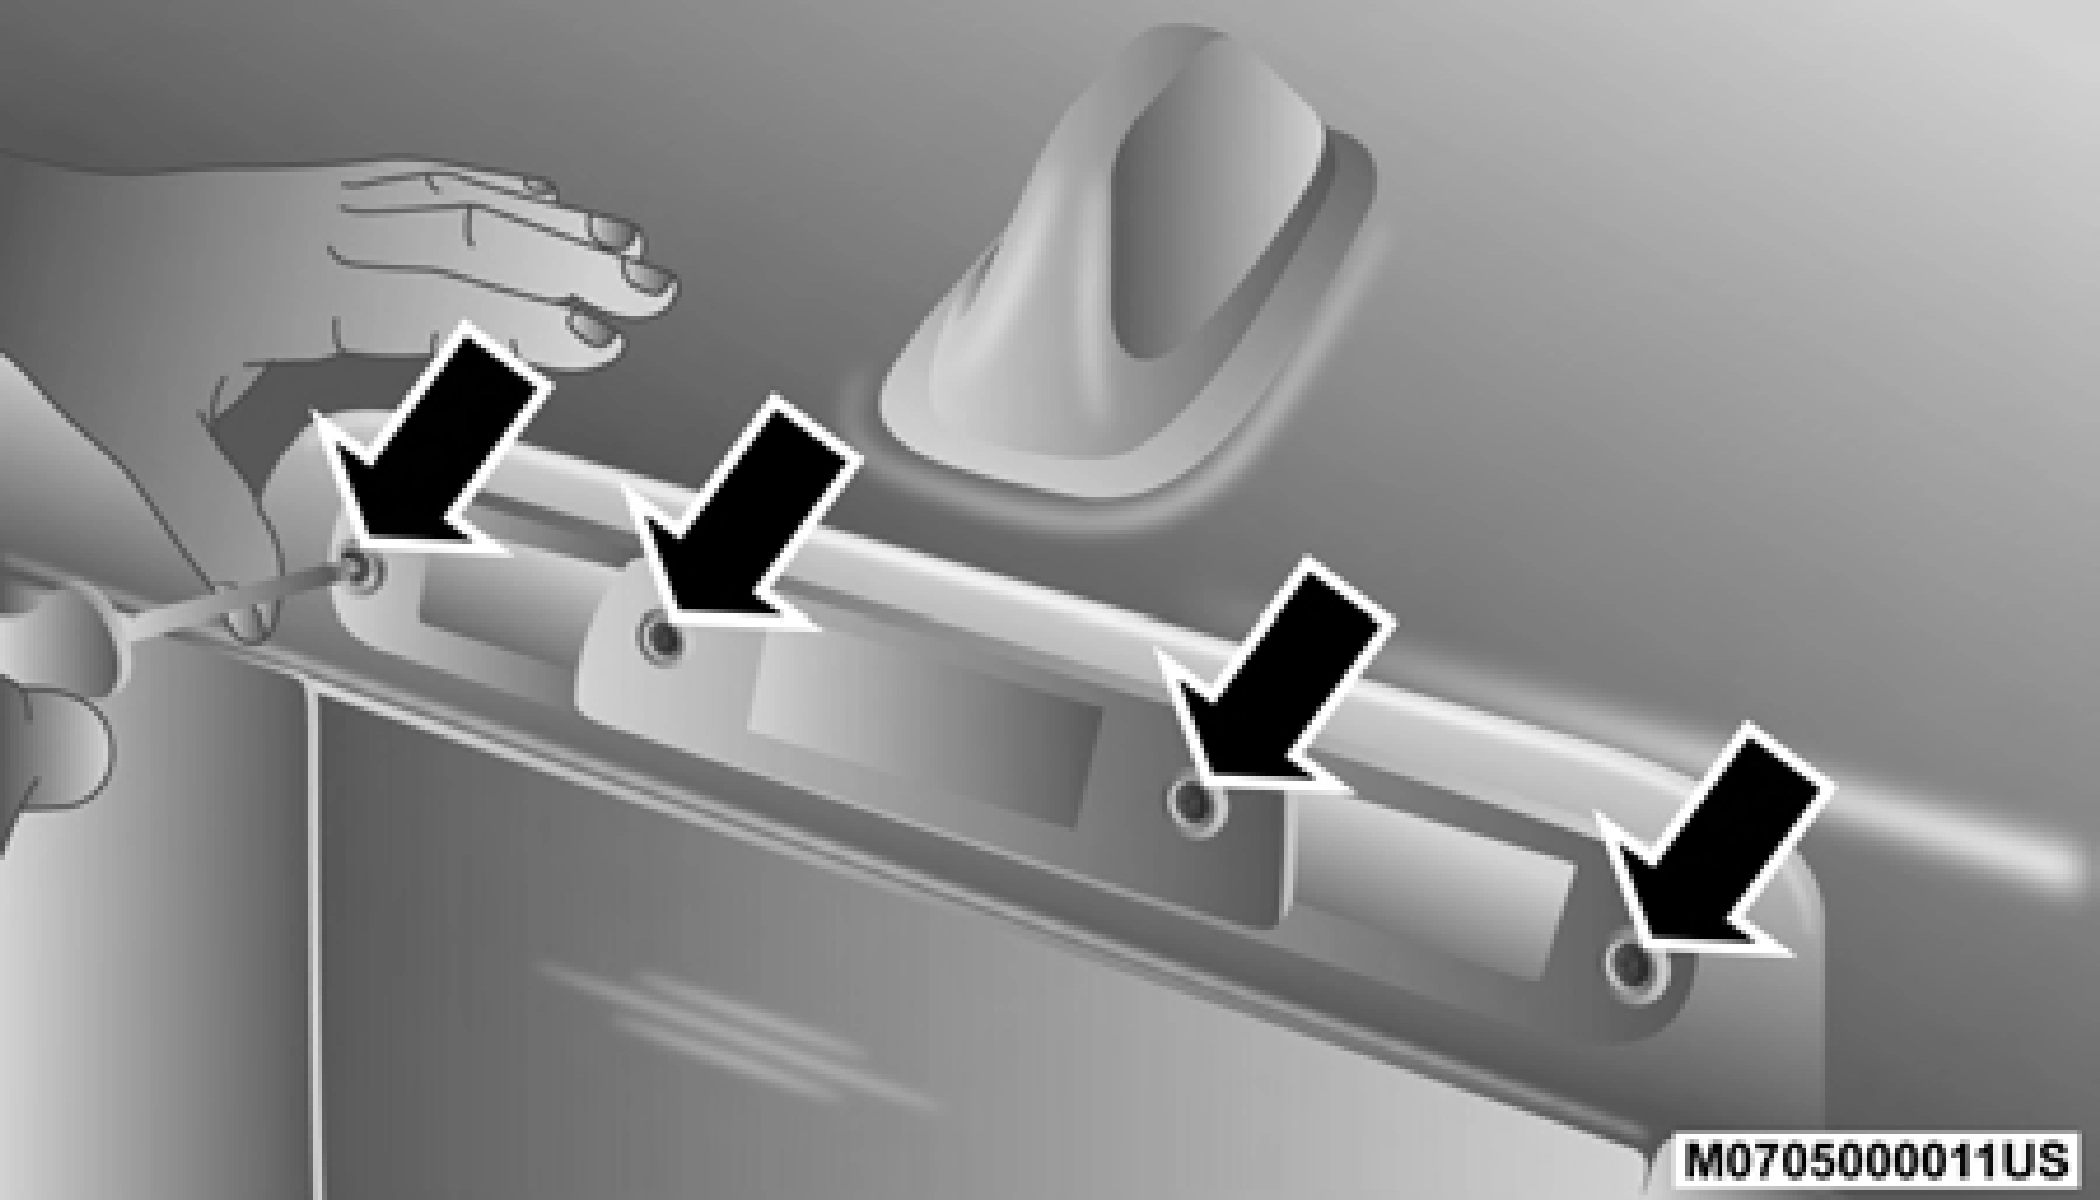
CHMSL Mounting Screw Locations
 6
6
CHMSL Connector Location
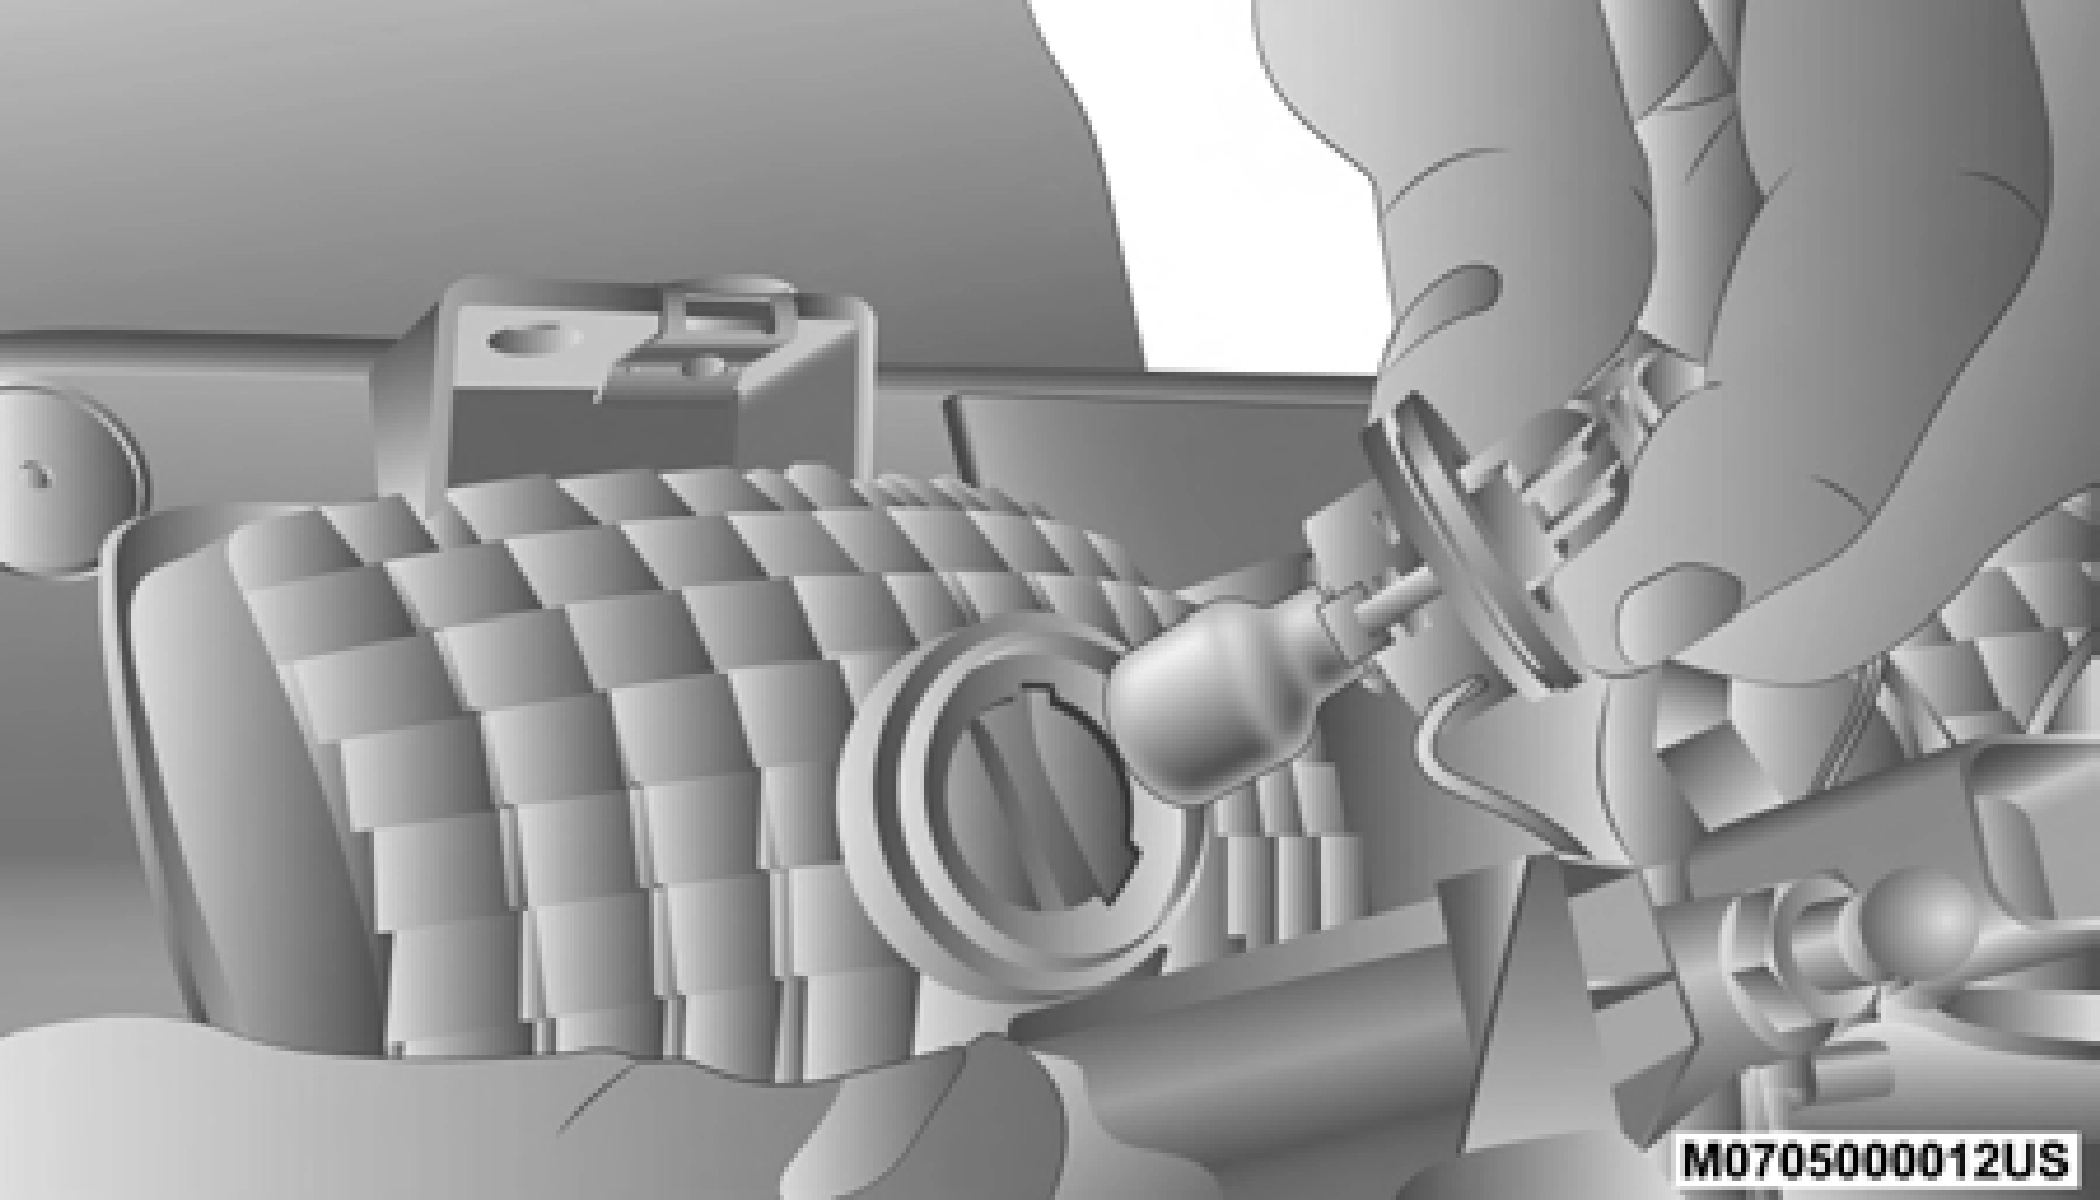
CHMSL Bulb And Socket
NOTE:
Download Manual