JACKING AND TIRE CHANGING
PREPARATIONS FOR JACKING
For vehicles equipped with Quadra-Lift, to disable the automatic leveling feature
page 167.
1. Park the vehicle on a firm, level surface. Avoid ice or slippery surfaces.
NOTE:
Passengers should not remain in the vehicle when the vehicle is being lifted or raised.
JACK LOCATION
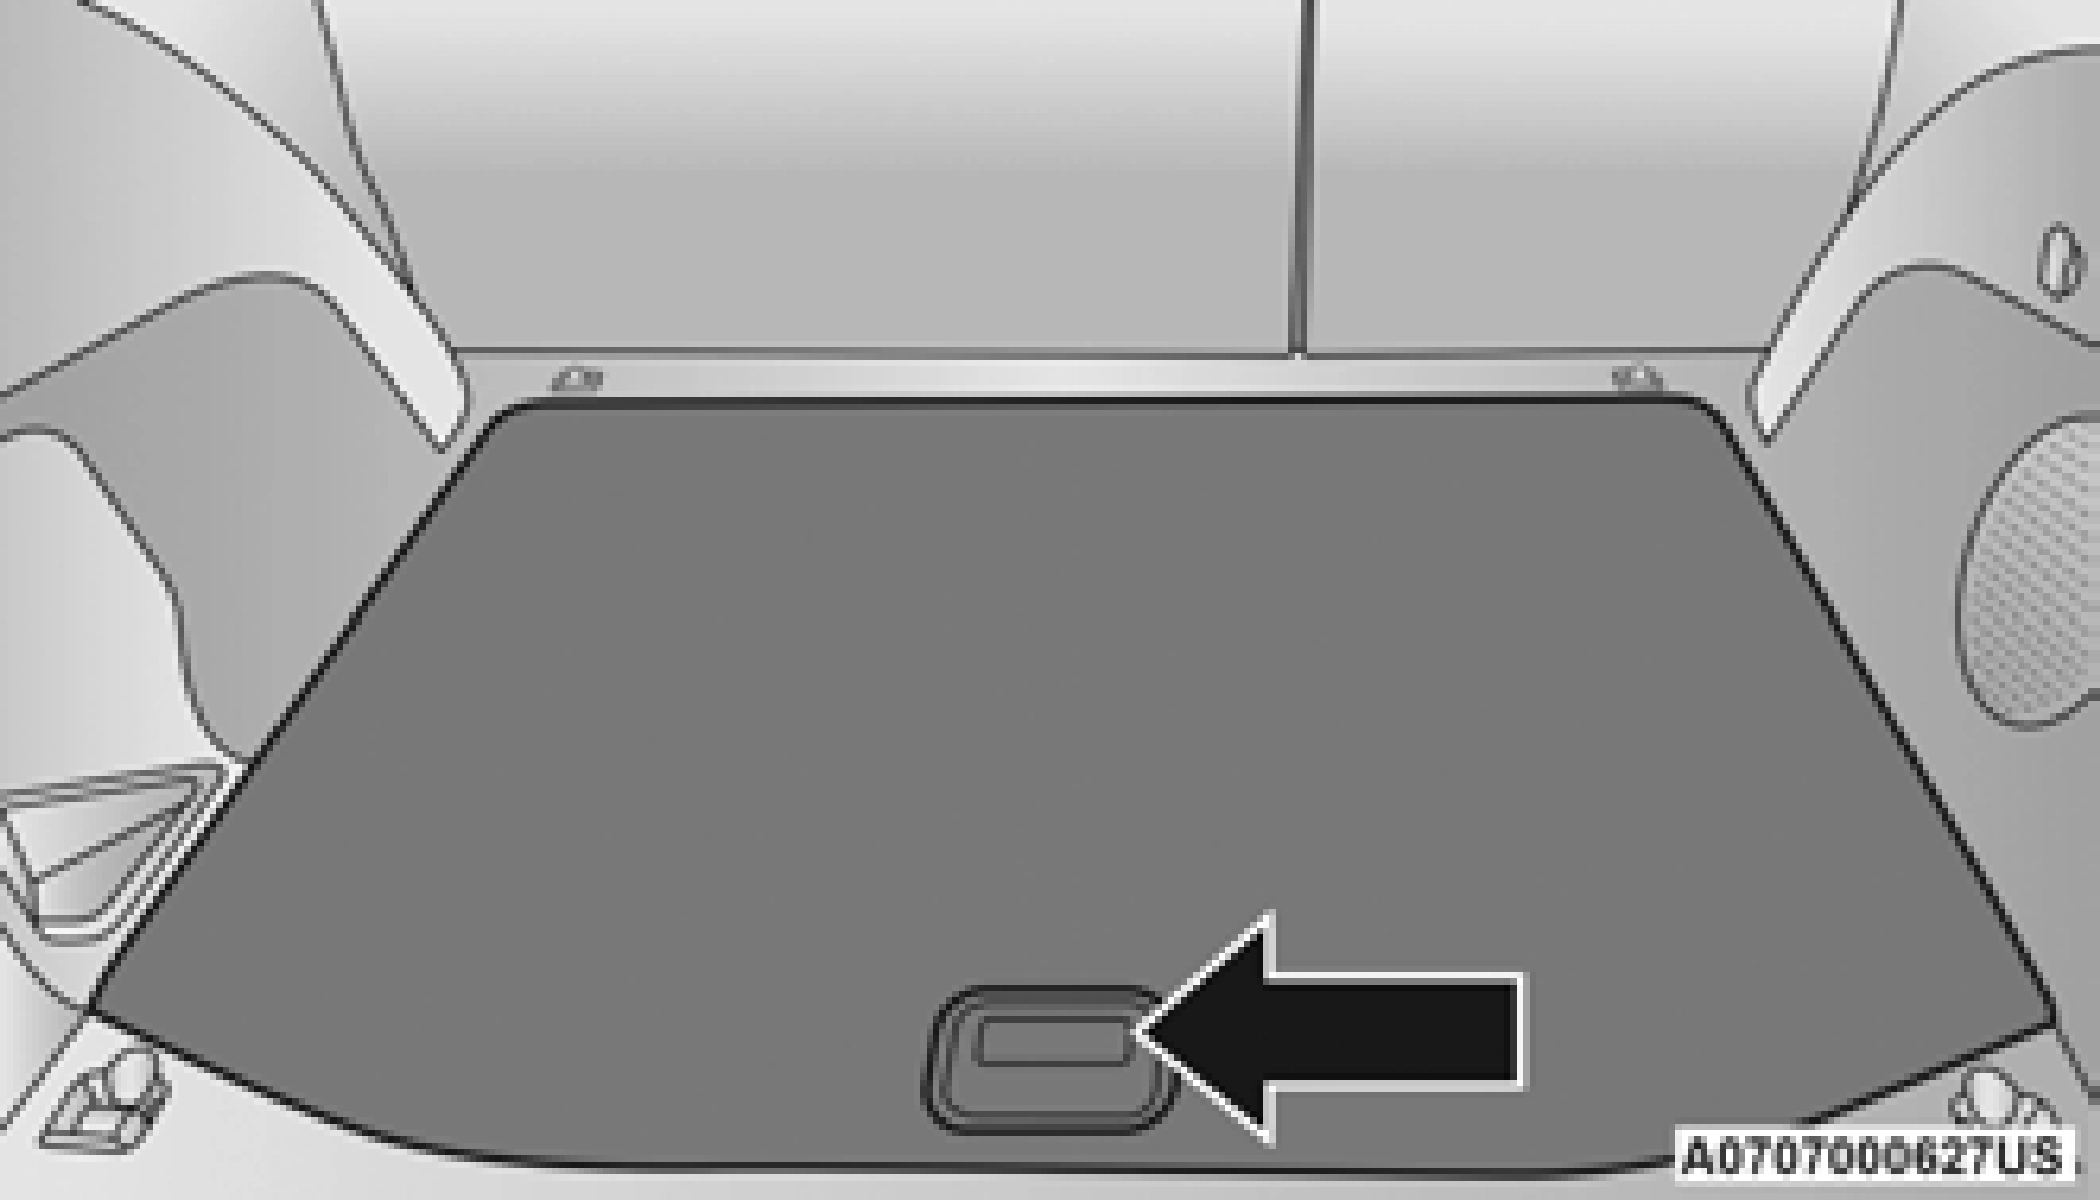 The scissor-type jack and tire changing tools are located in the rear cargo area, below the load floor.
SPARE TIRE STOWAGE — IF EQUIPPED
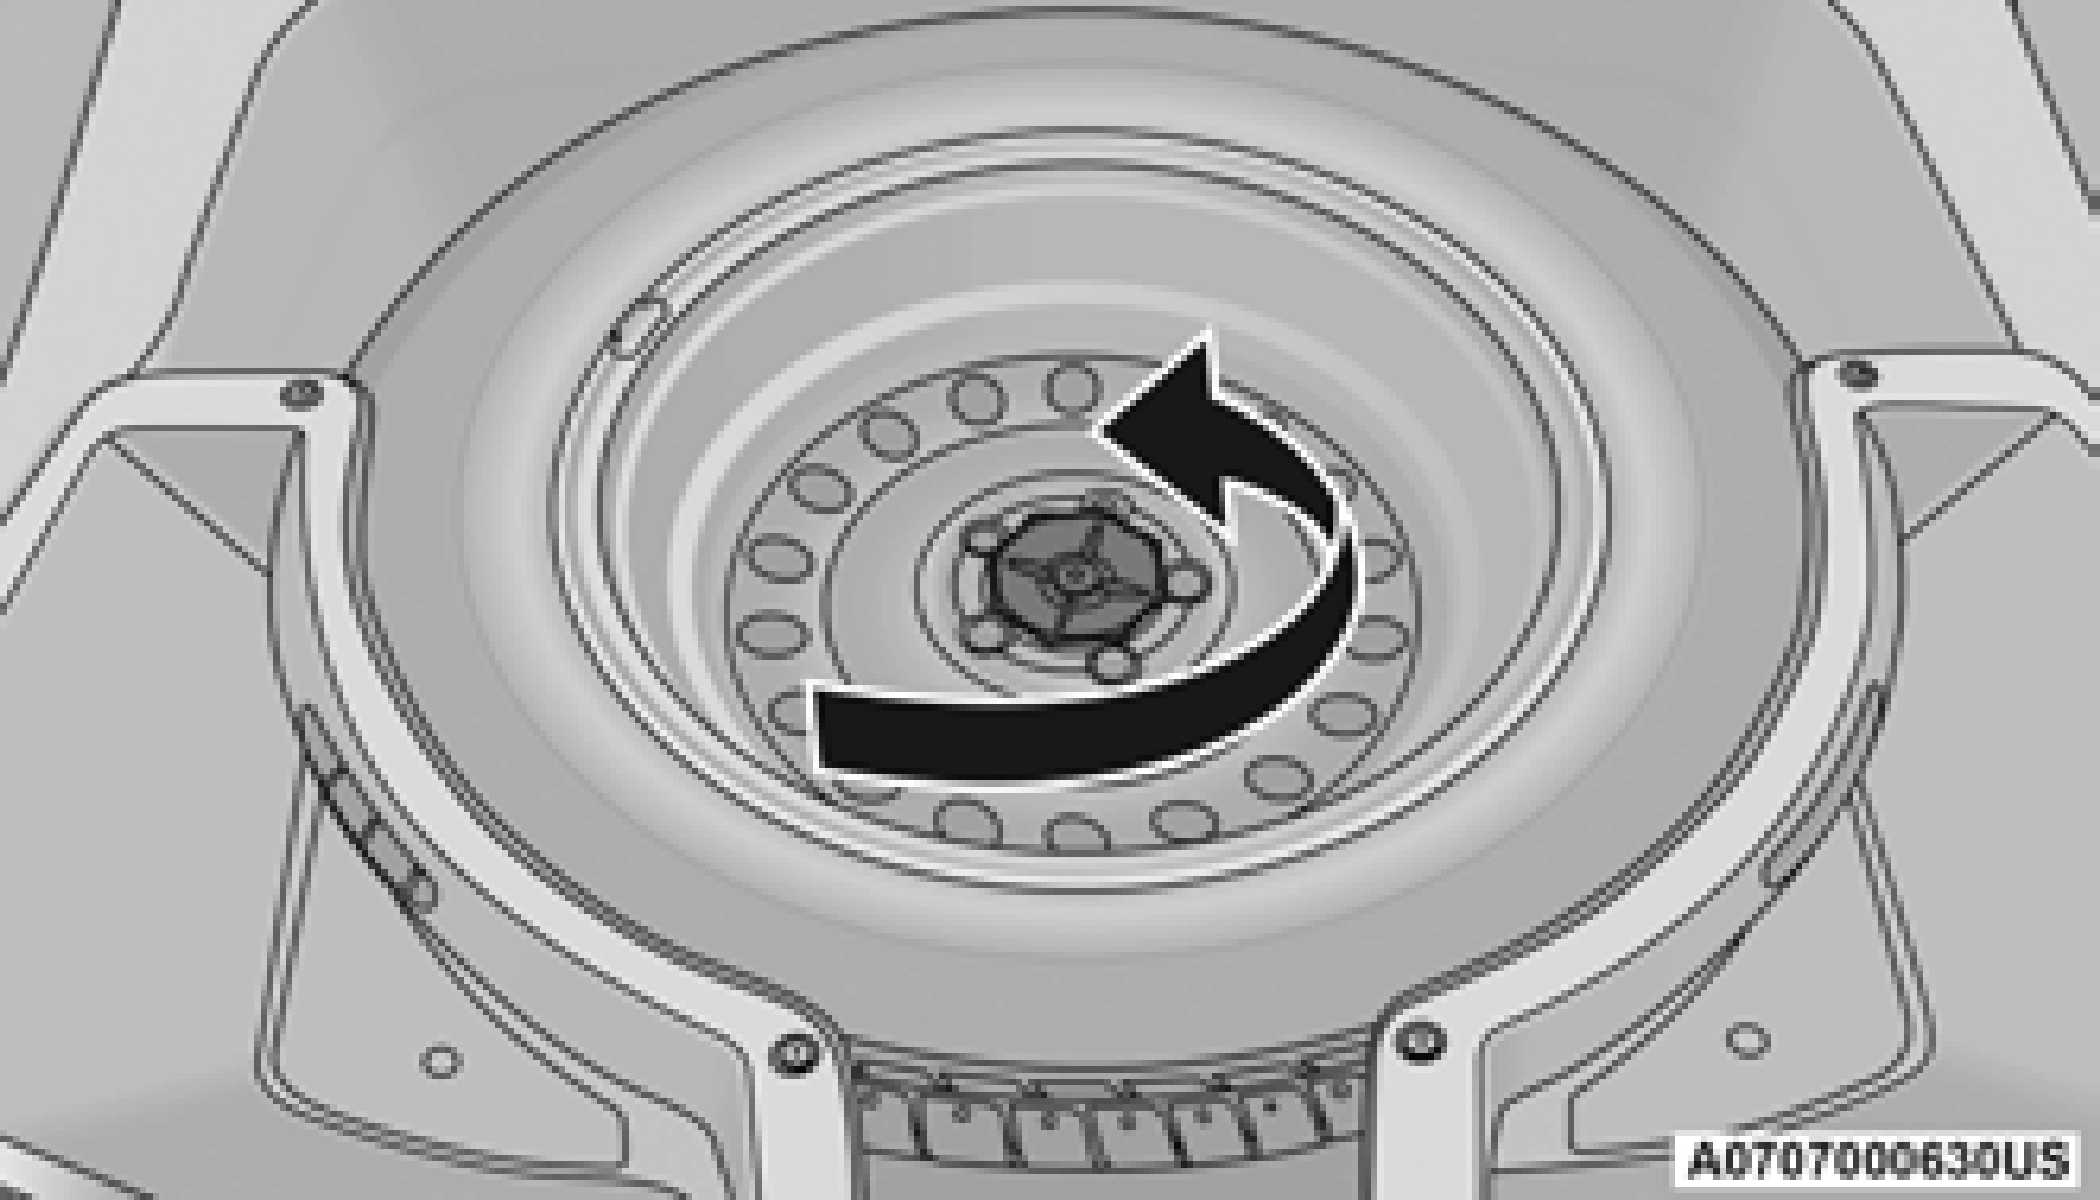
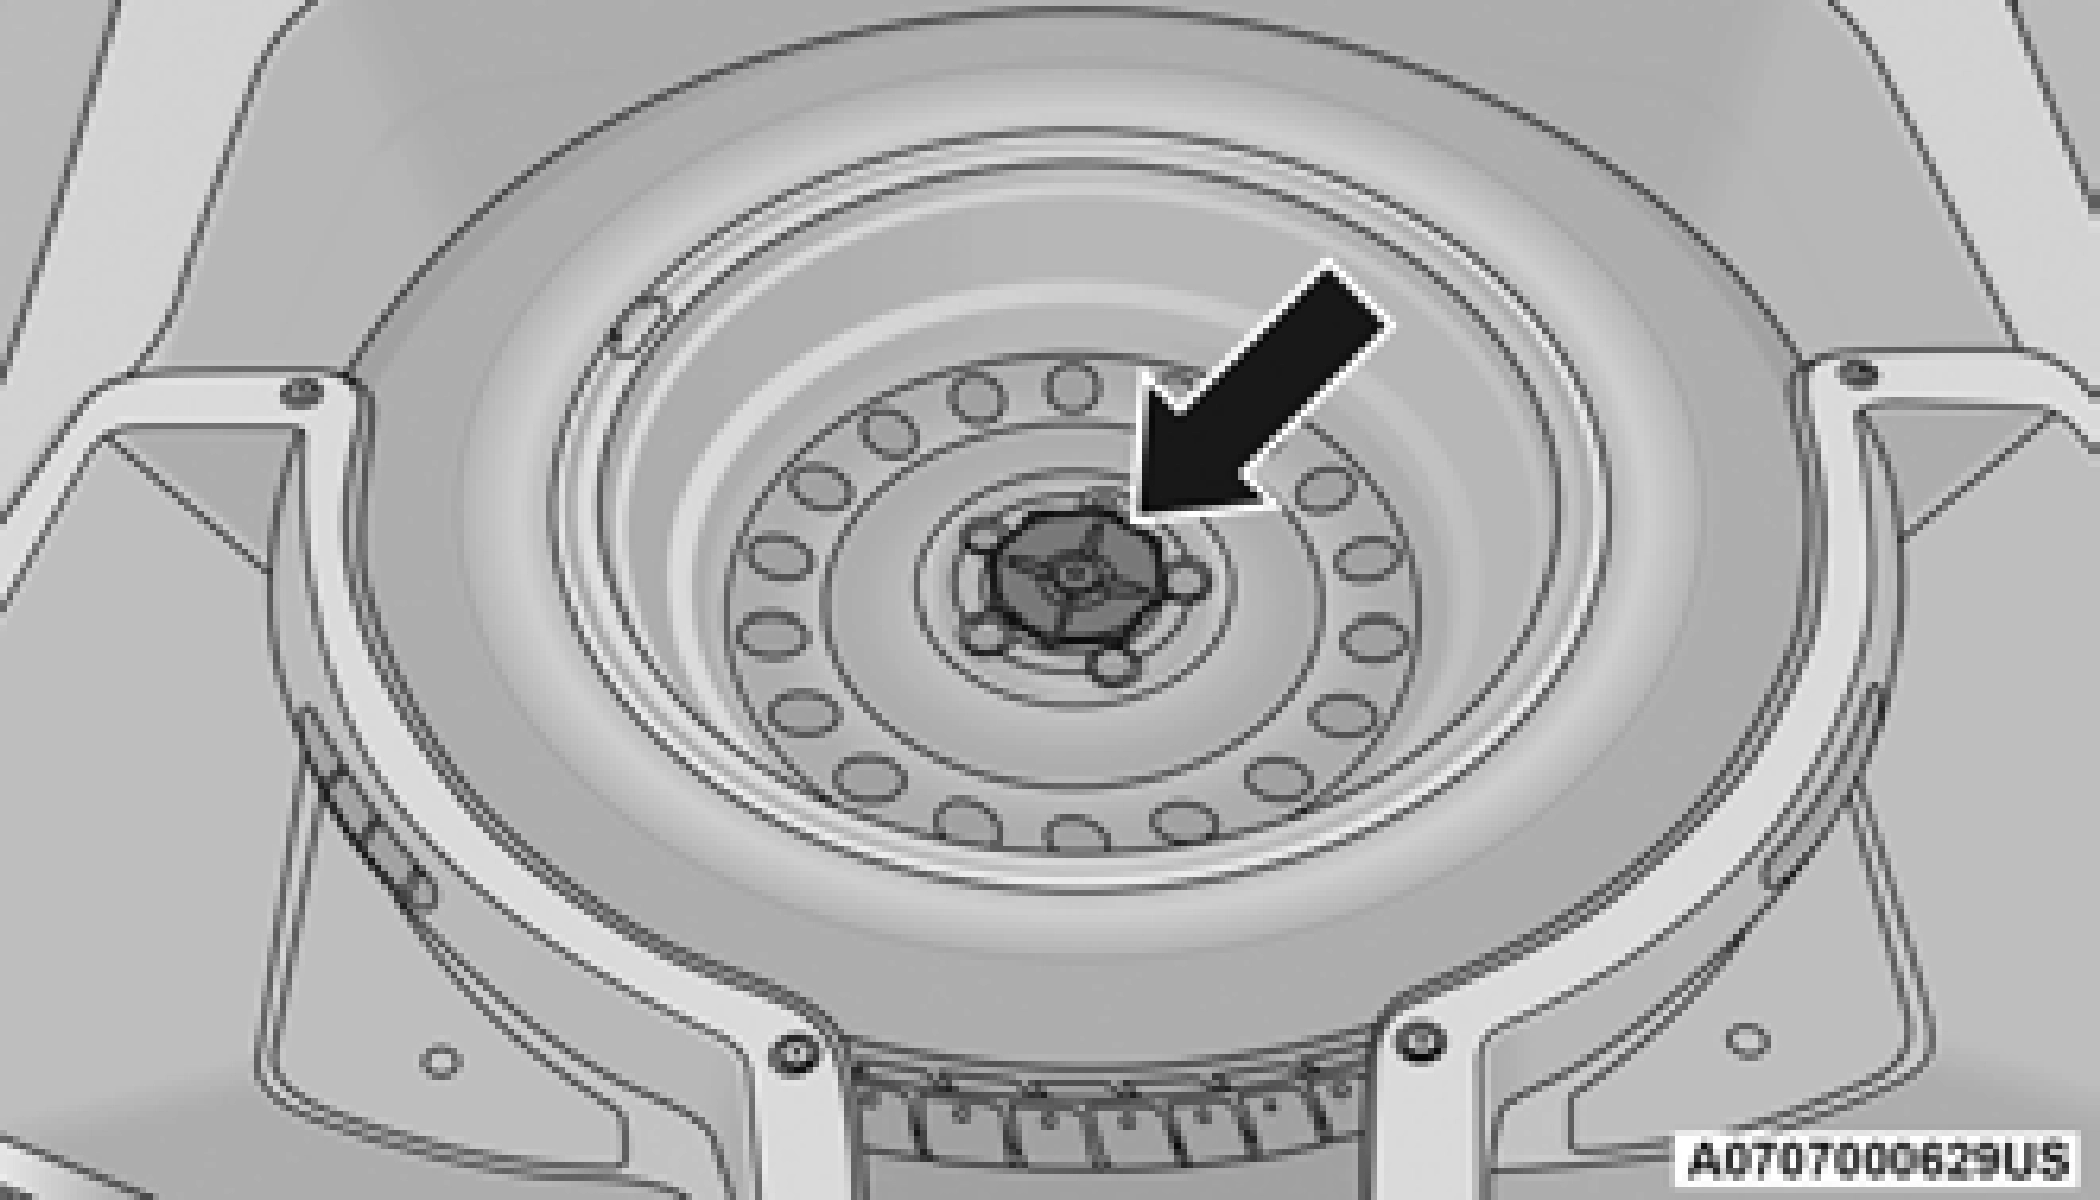 The spare tire is stowed under the load floor in the rear cargo area and is secured to the body with a special wing nut.
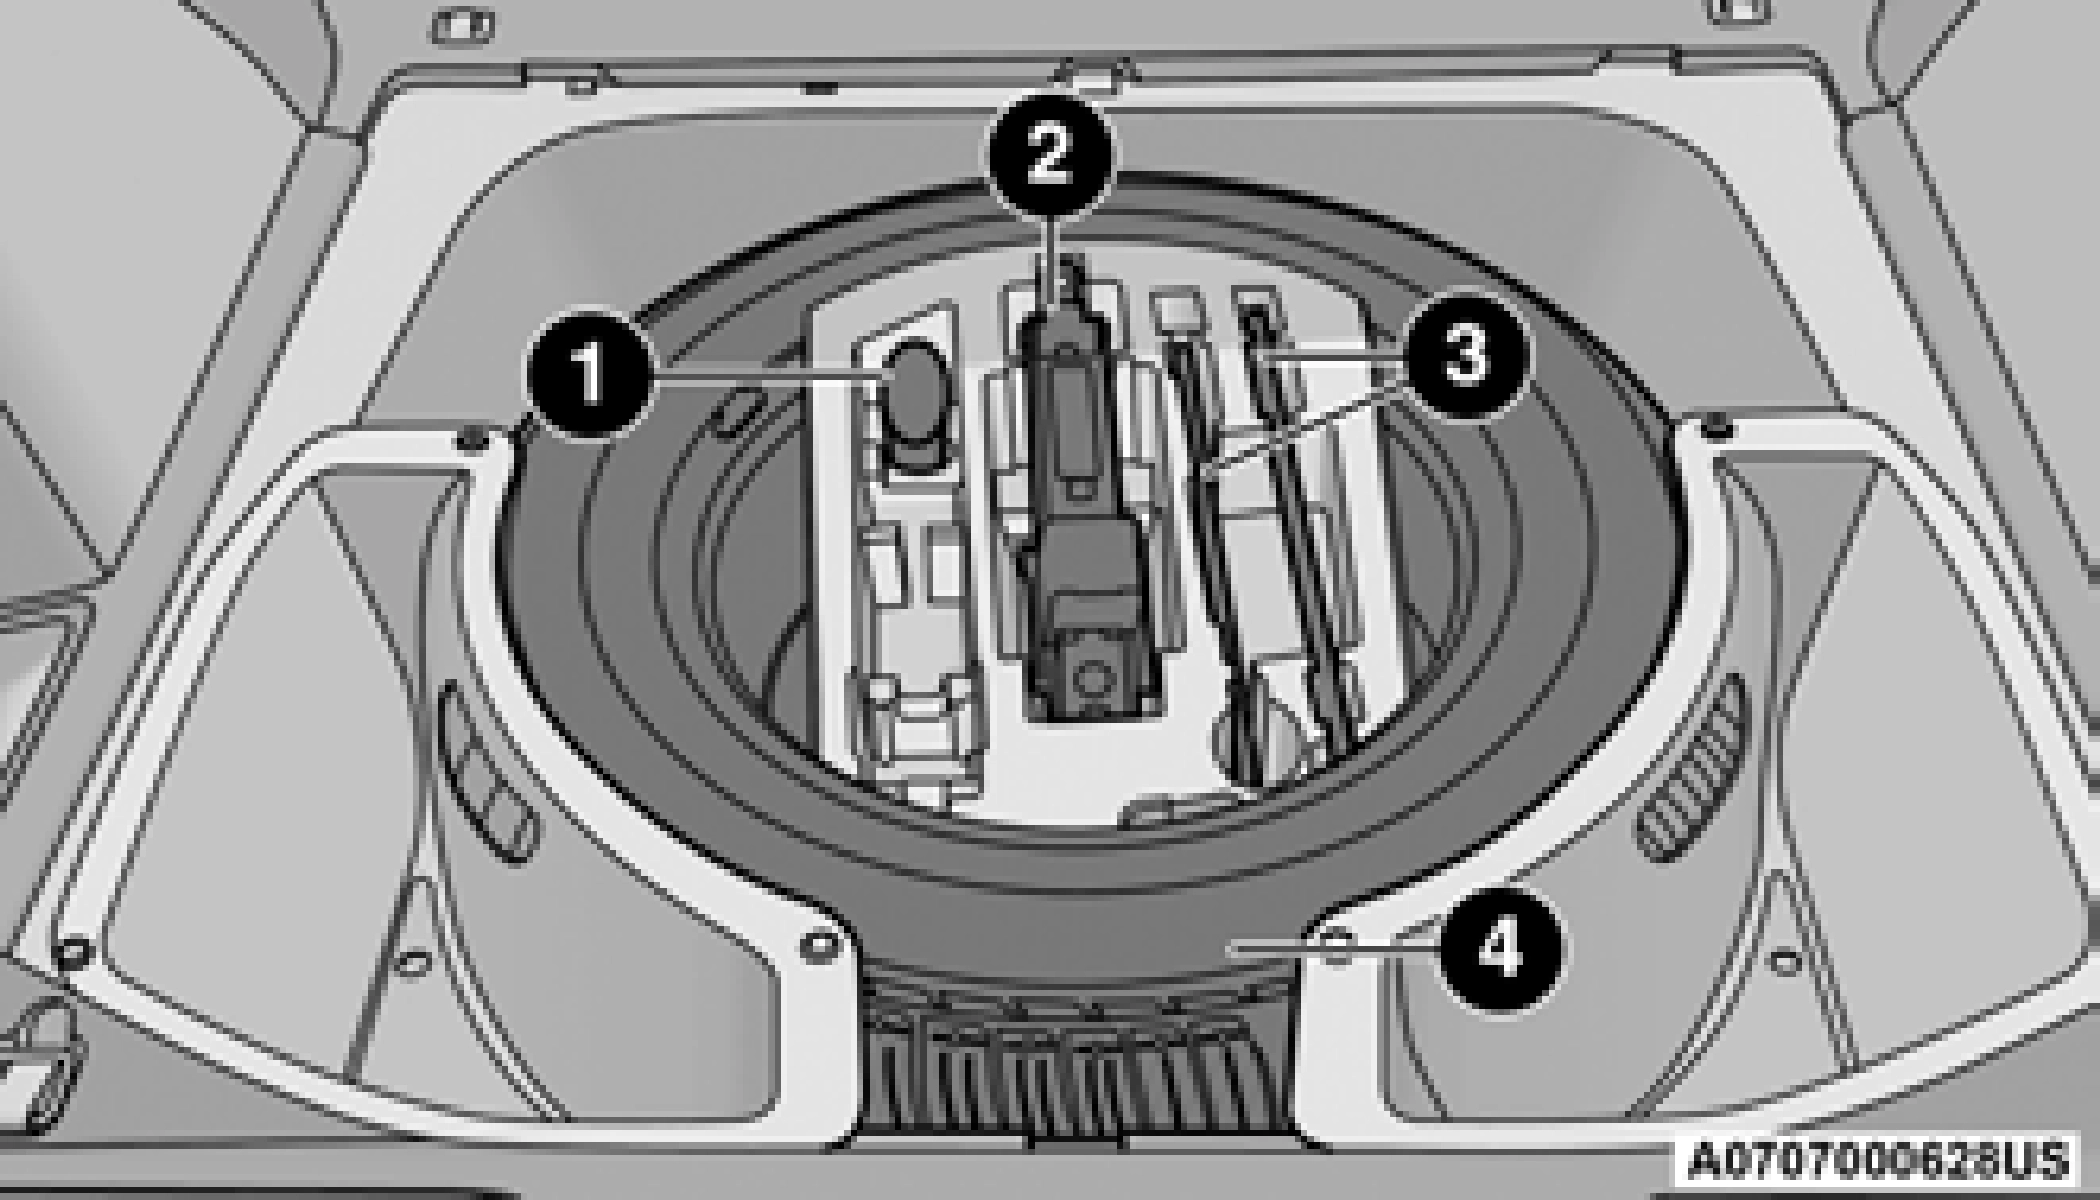
Spare Tire/Jack And Tools
1 — Capless Fuel Fill Funnel 2 — Jack
3 — Tire Changing Tools 4 — Spare Tire
7
JACKING INSTRUCTIONS
(Continued)
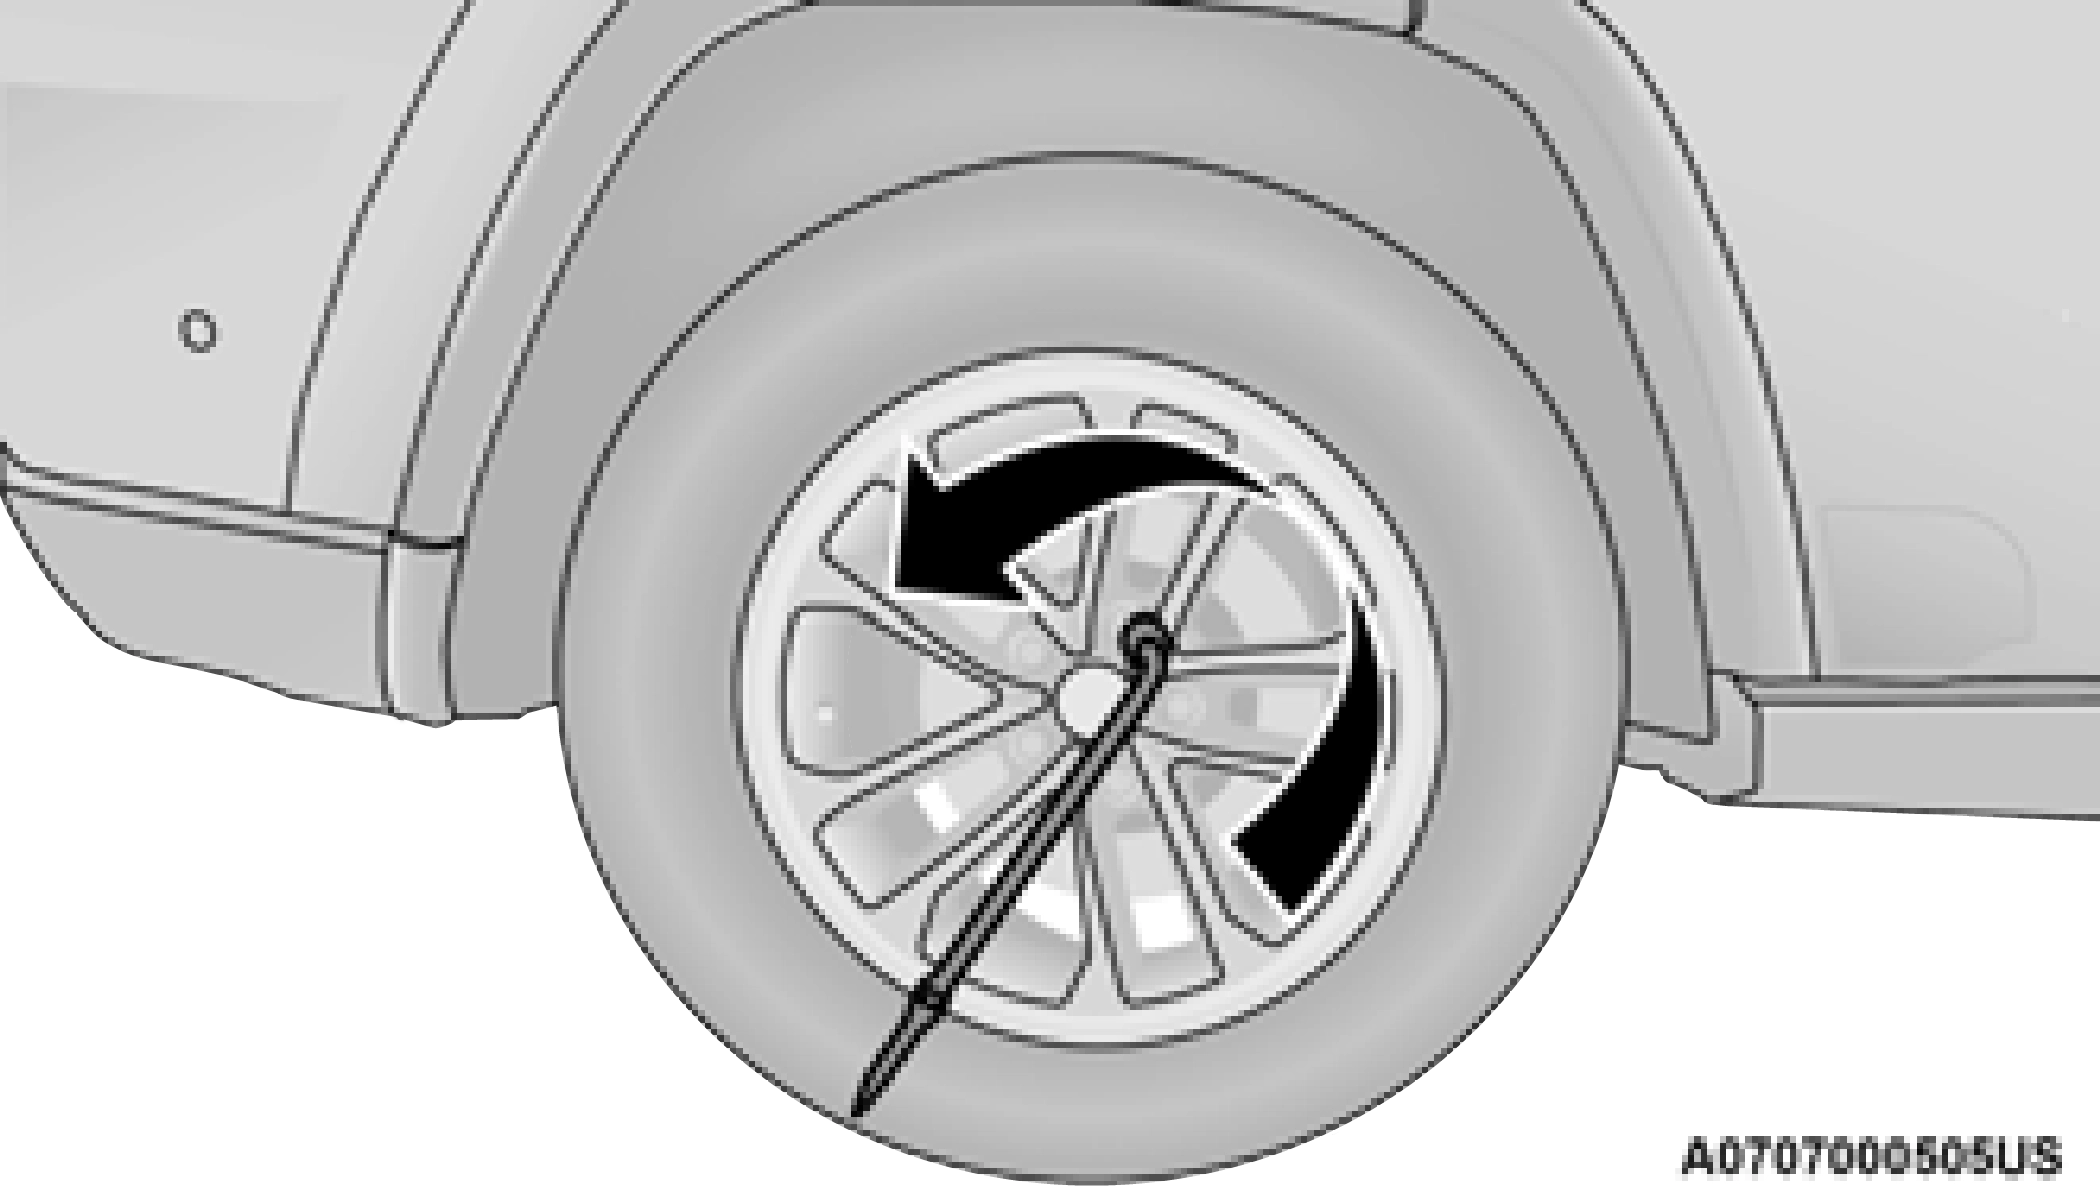
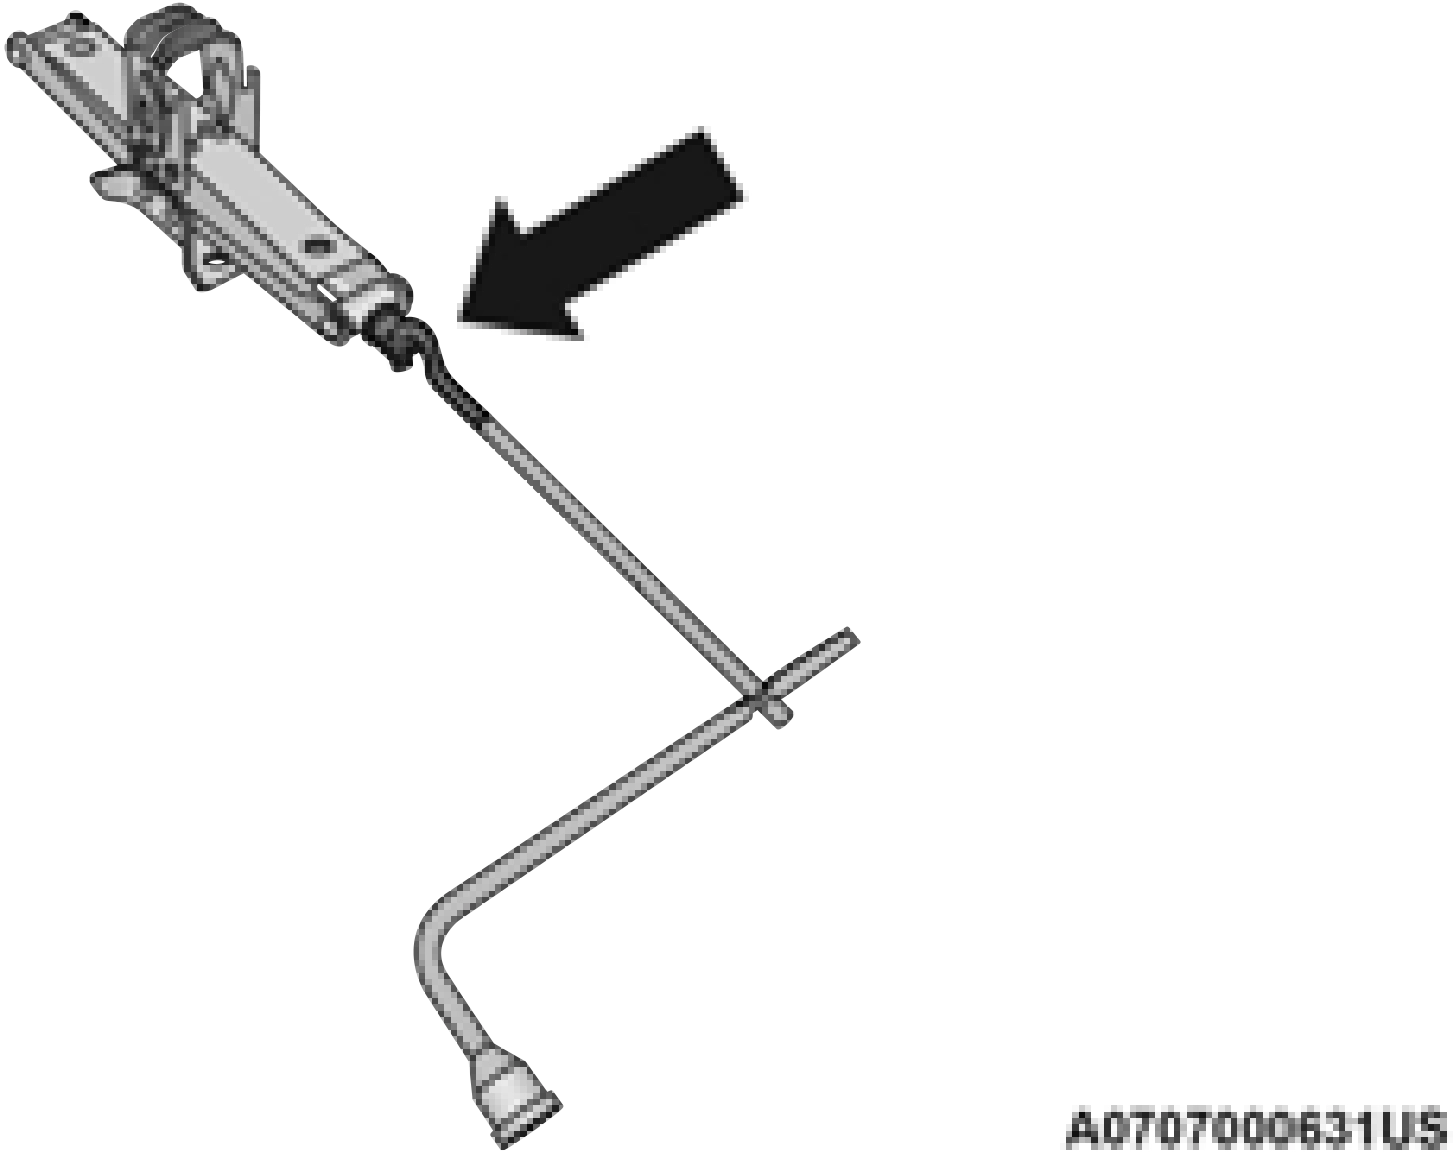
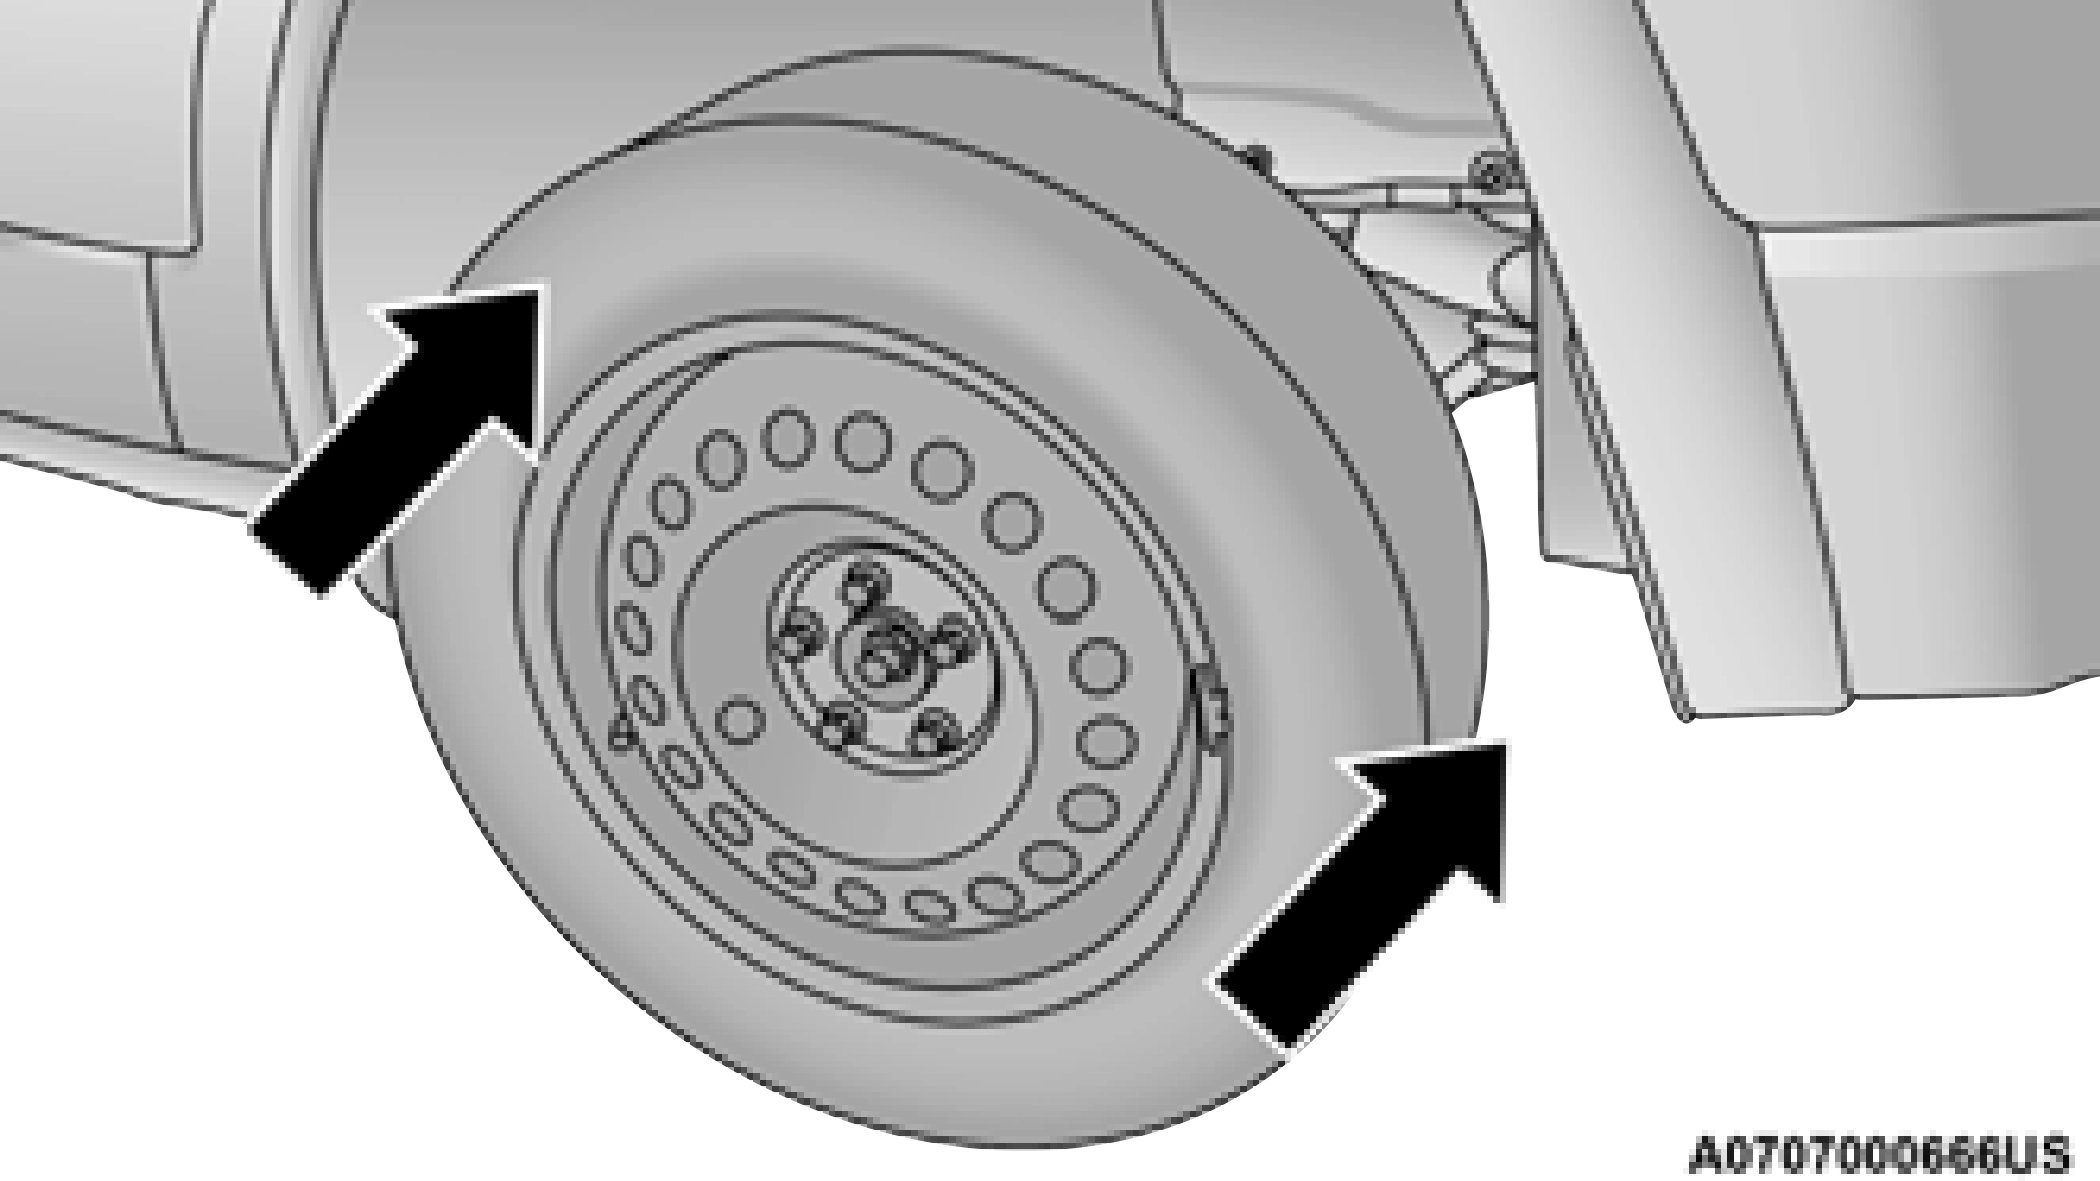
 Loosen (but do not remove) the wheel lug nuts, using the lug wrench by turning them counterclockwise, one turn, while the wheel is still on the ground.
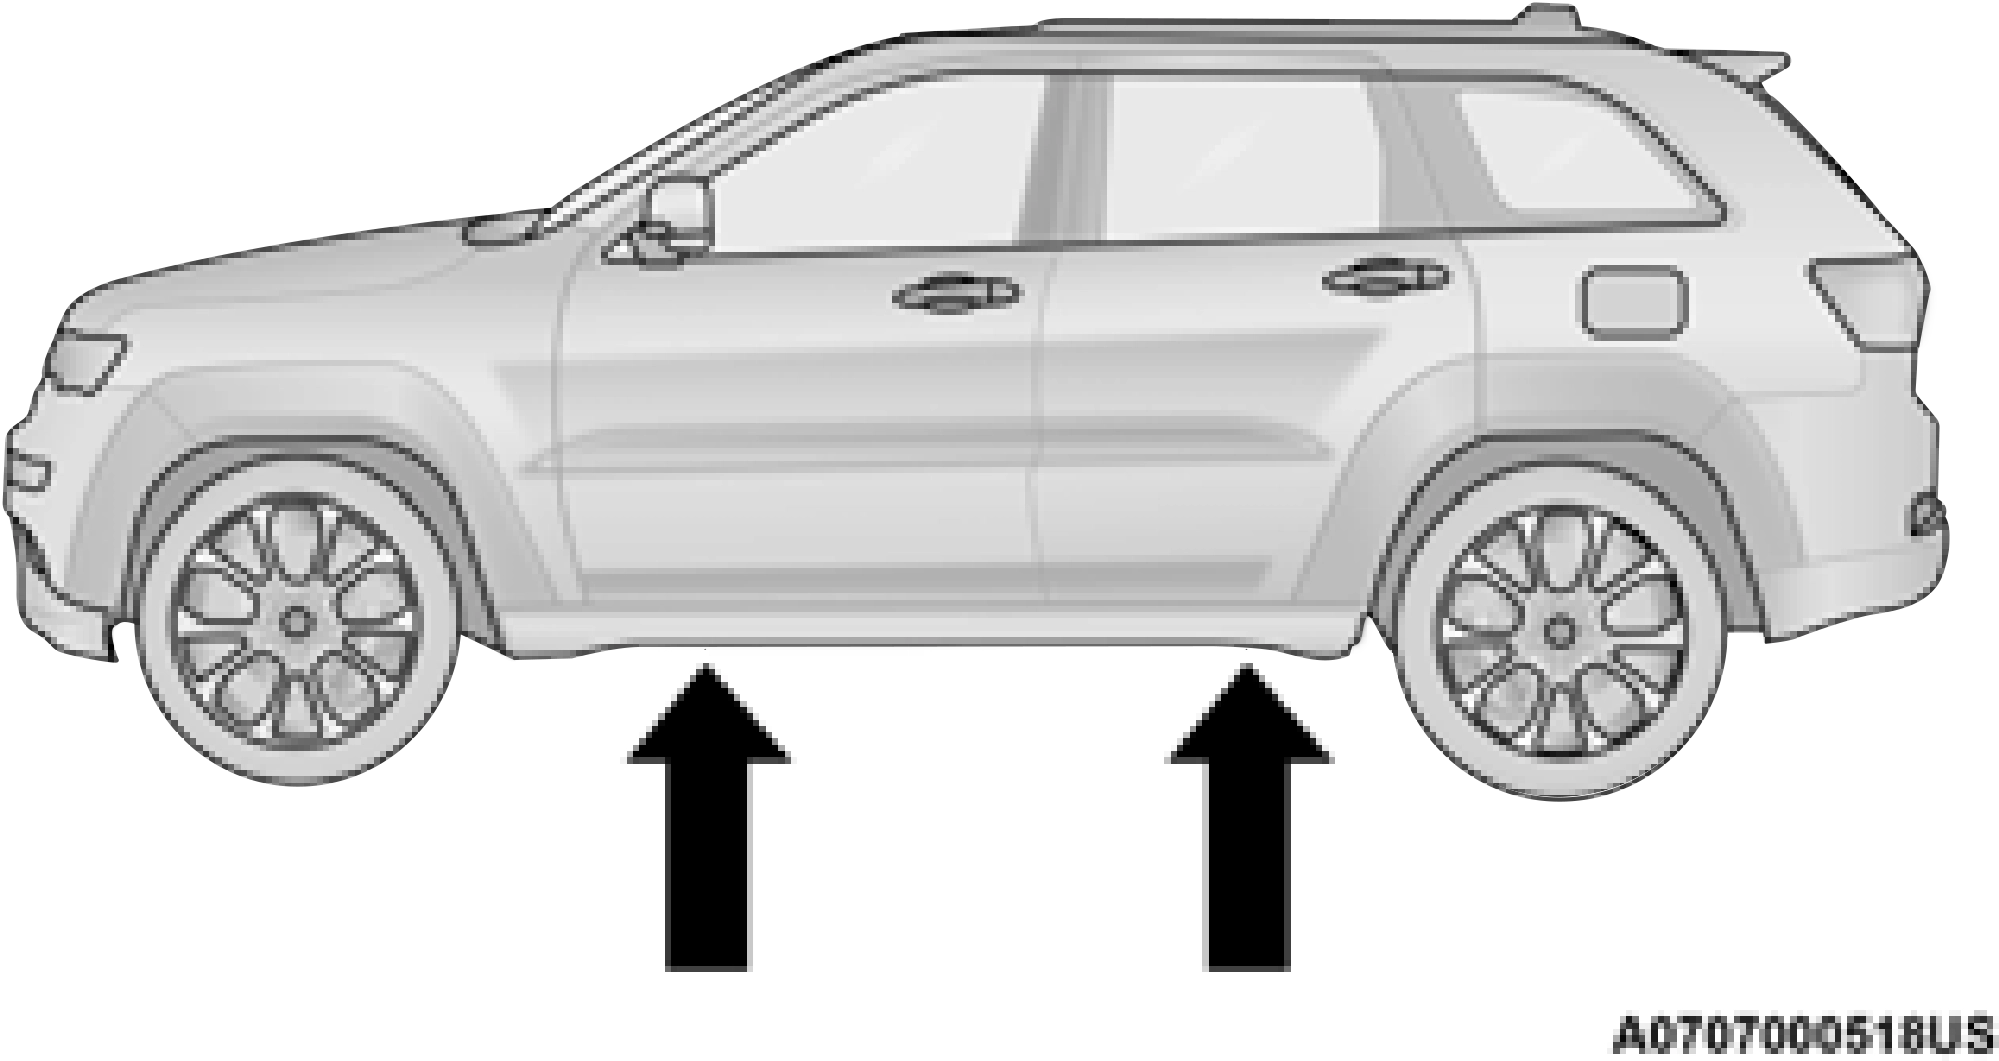
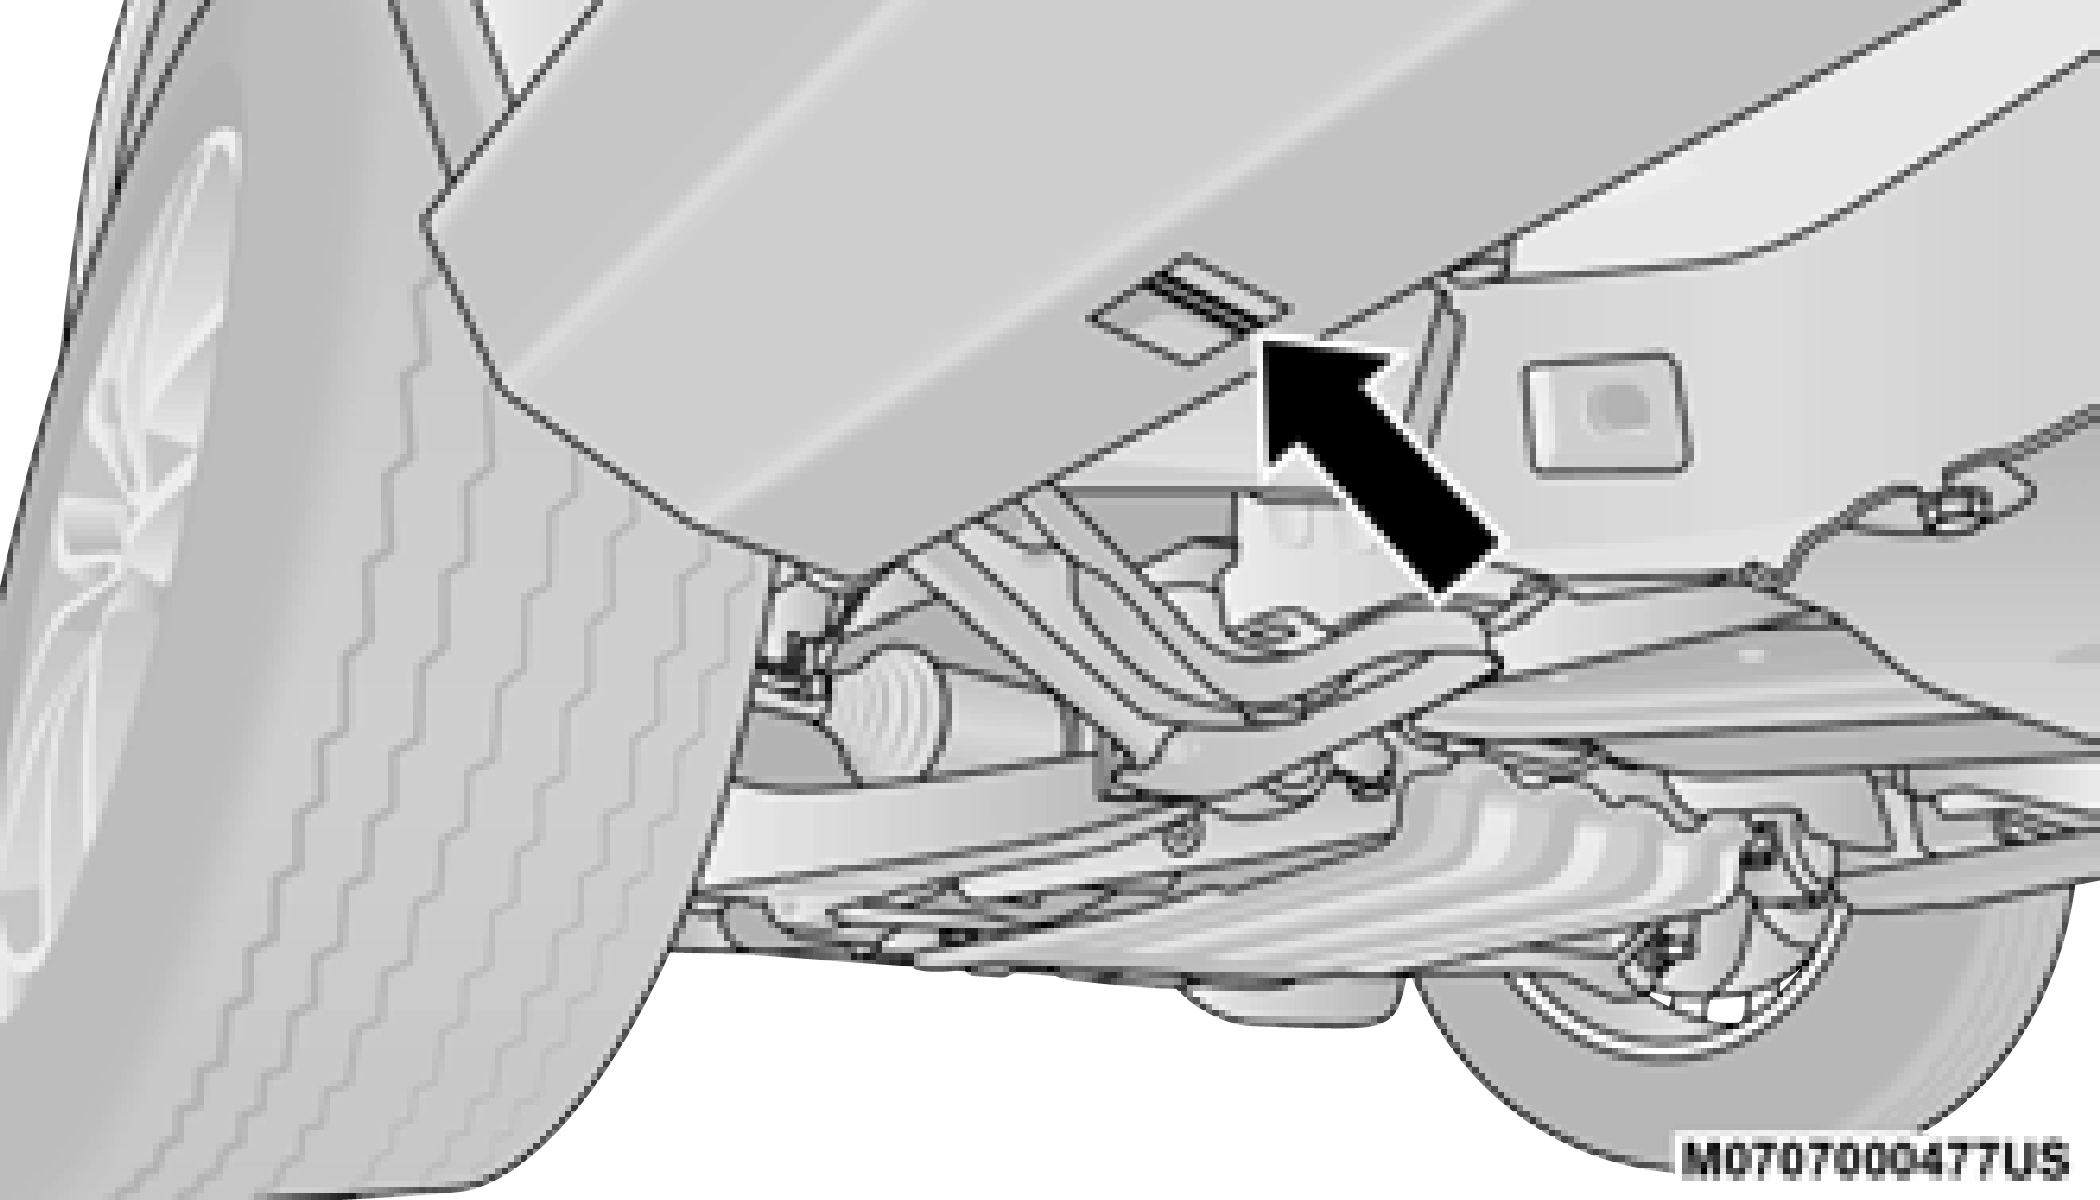
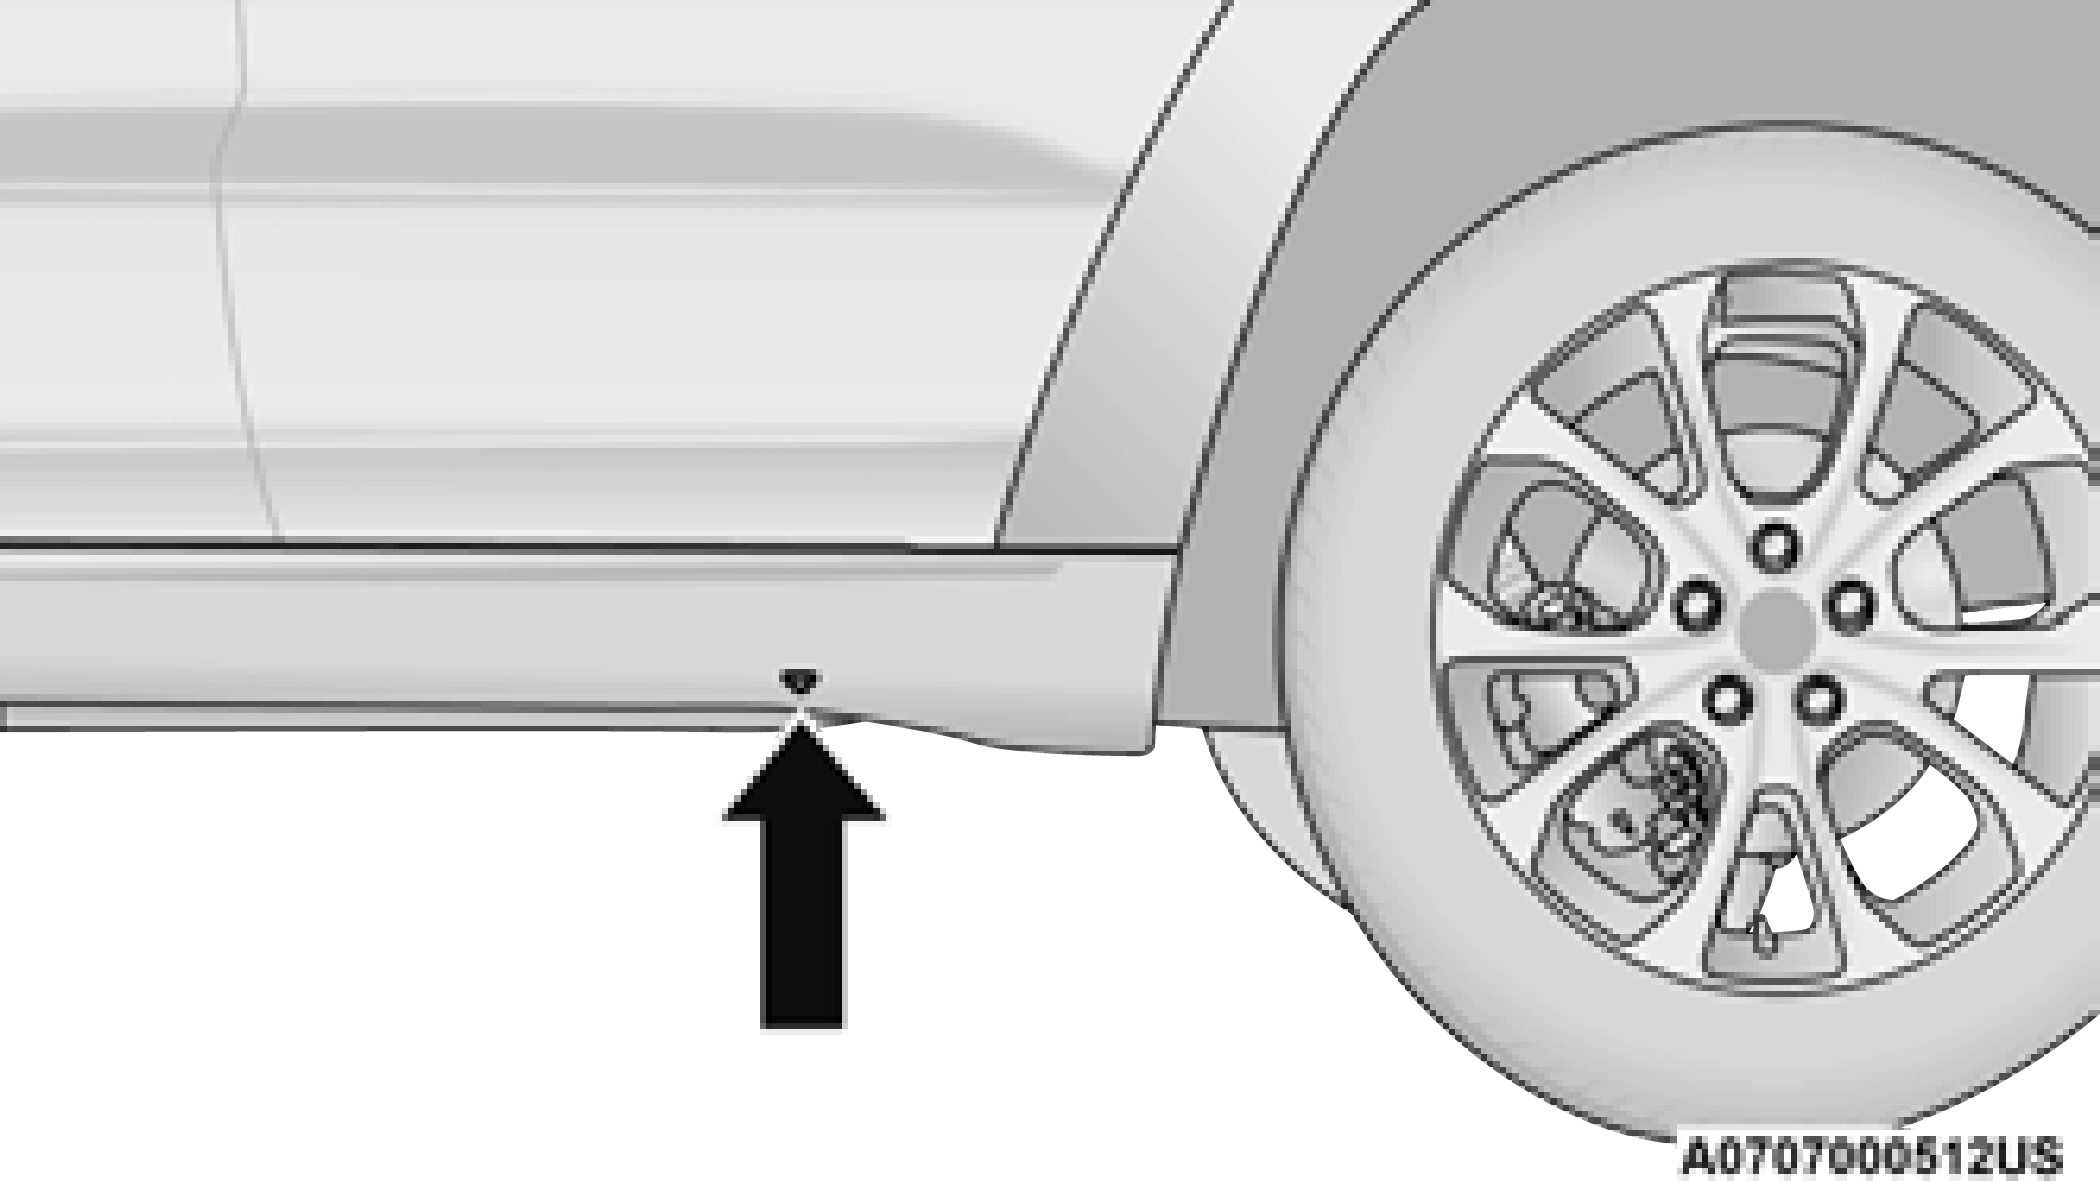
Jacking Locations
Depending on vehicle trim level, certain models come equipped with Rock Rails which have a different front lifting point location. Also, the triangular symbols are not visible for this trim package.
 7
7
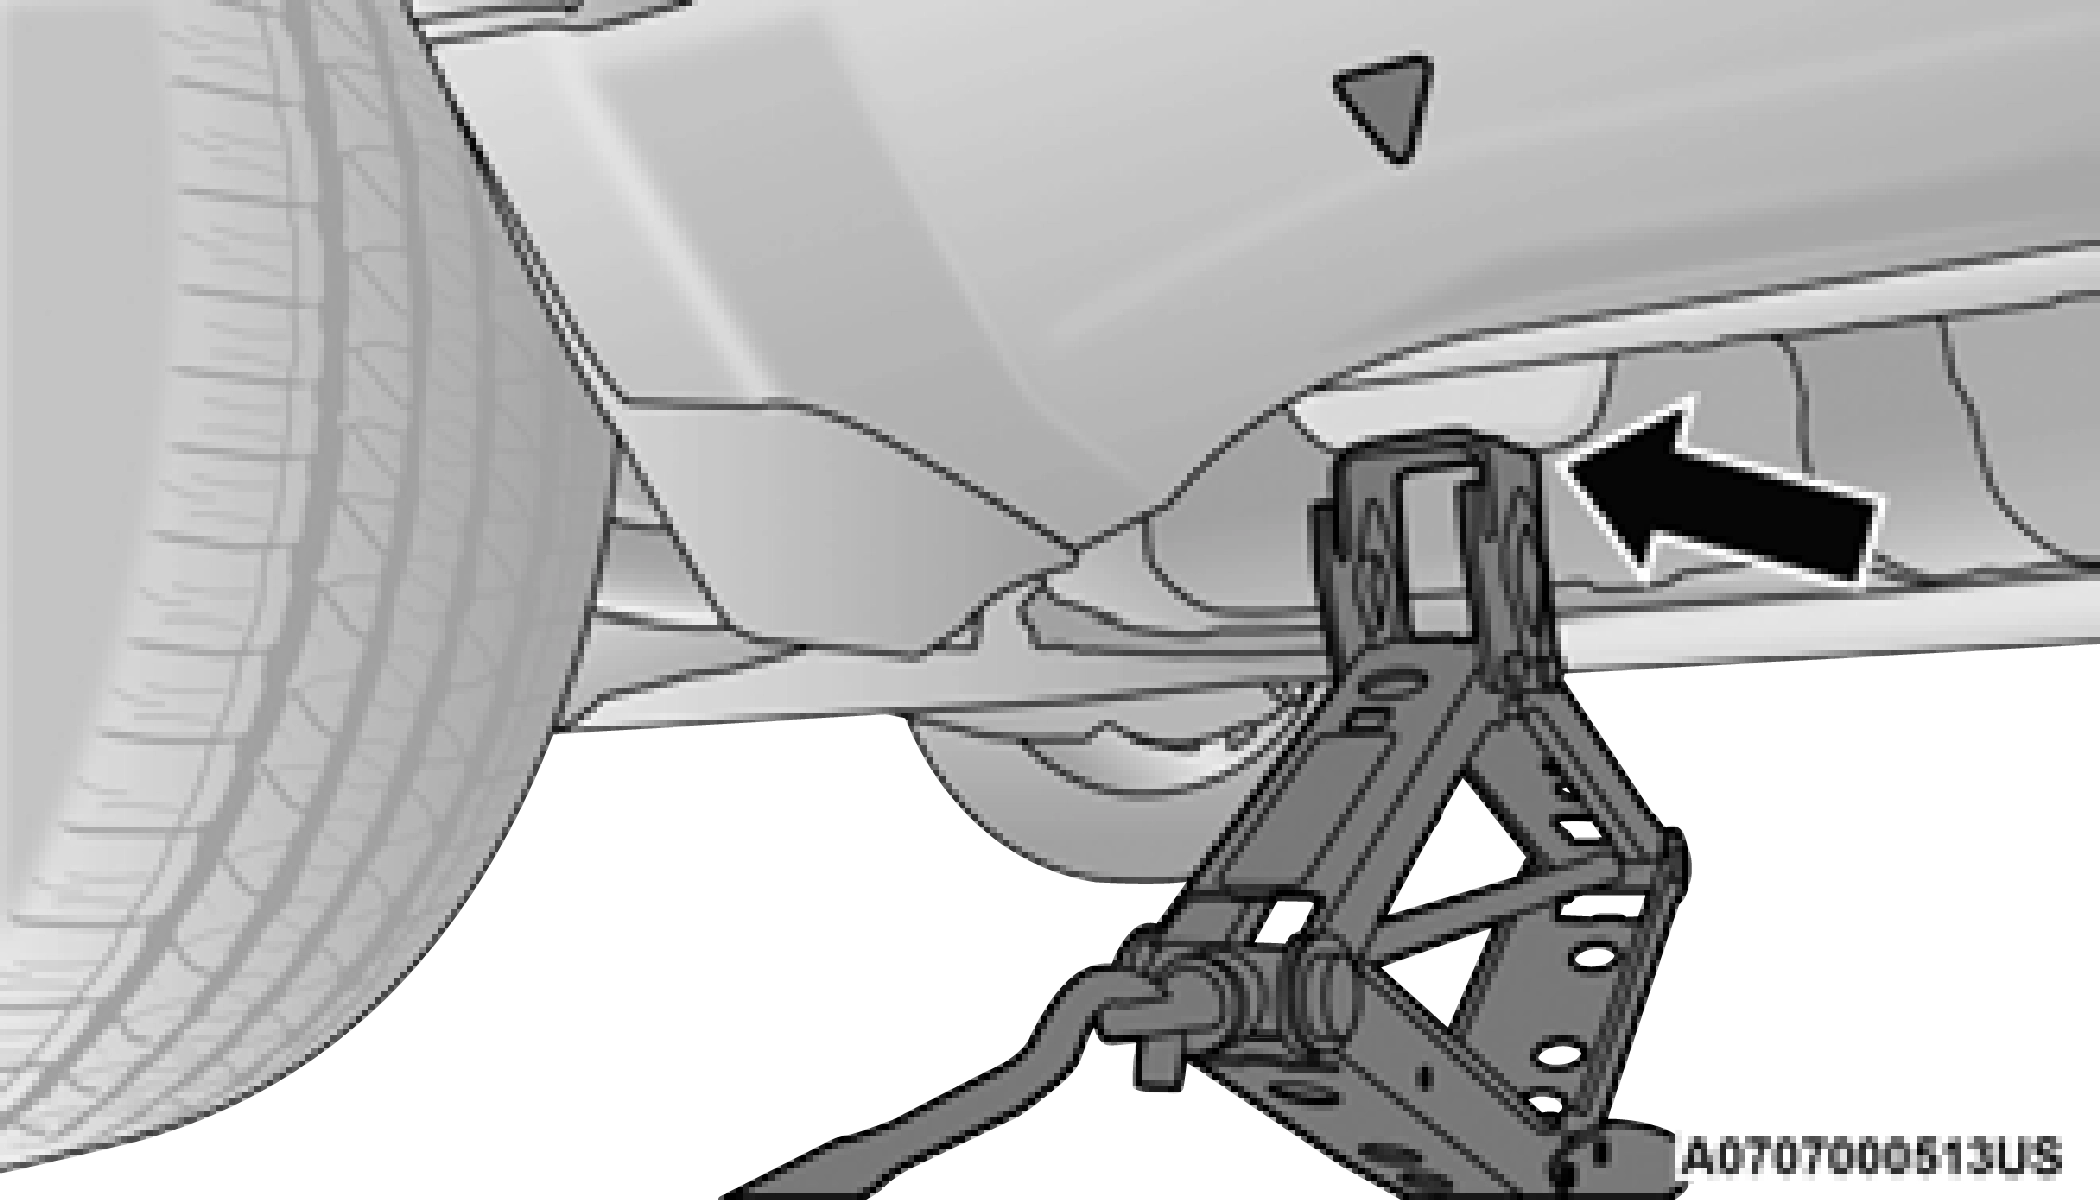
NOTE:
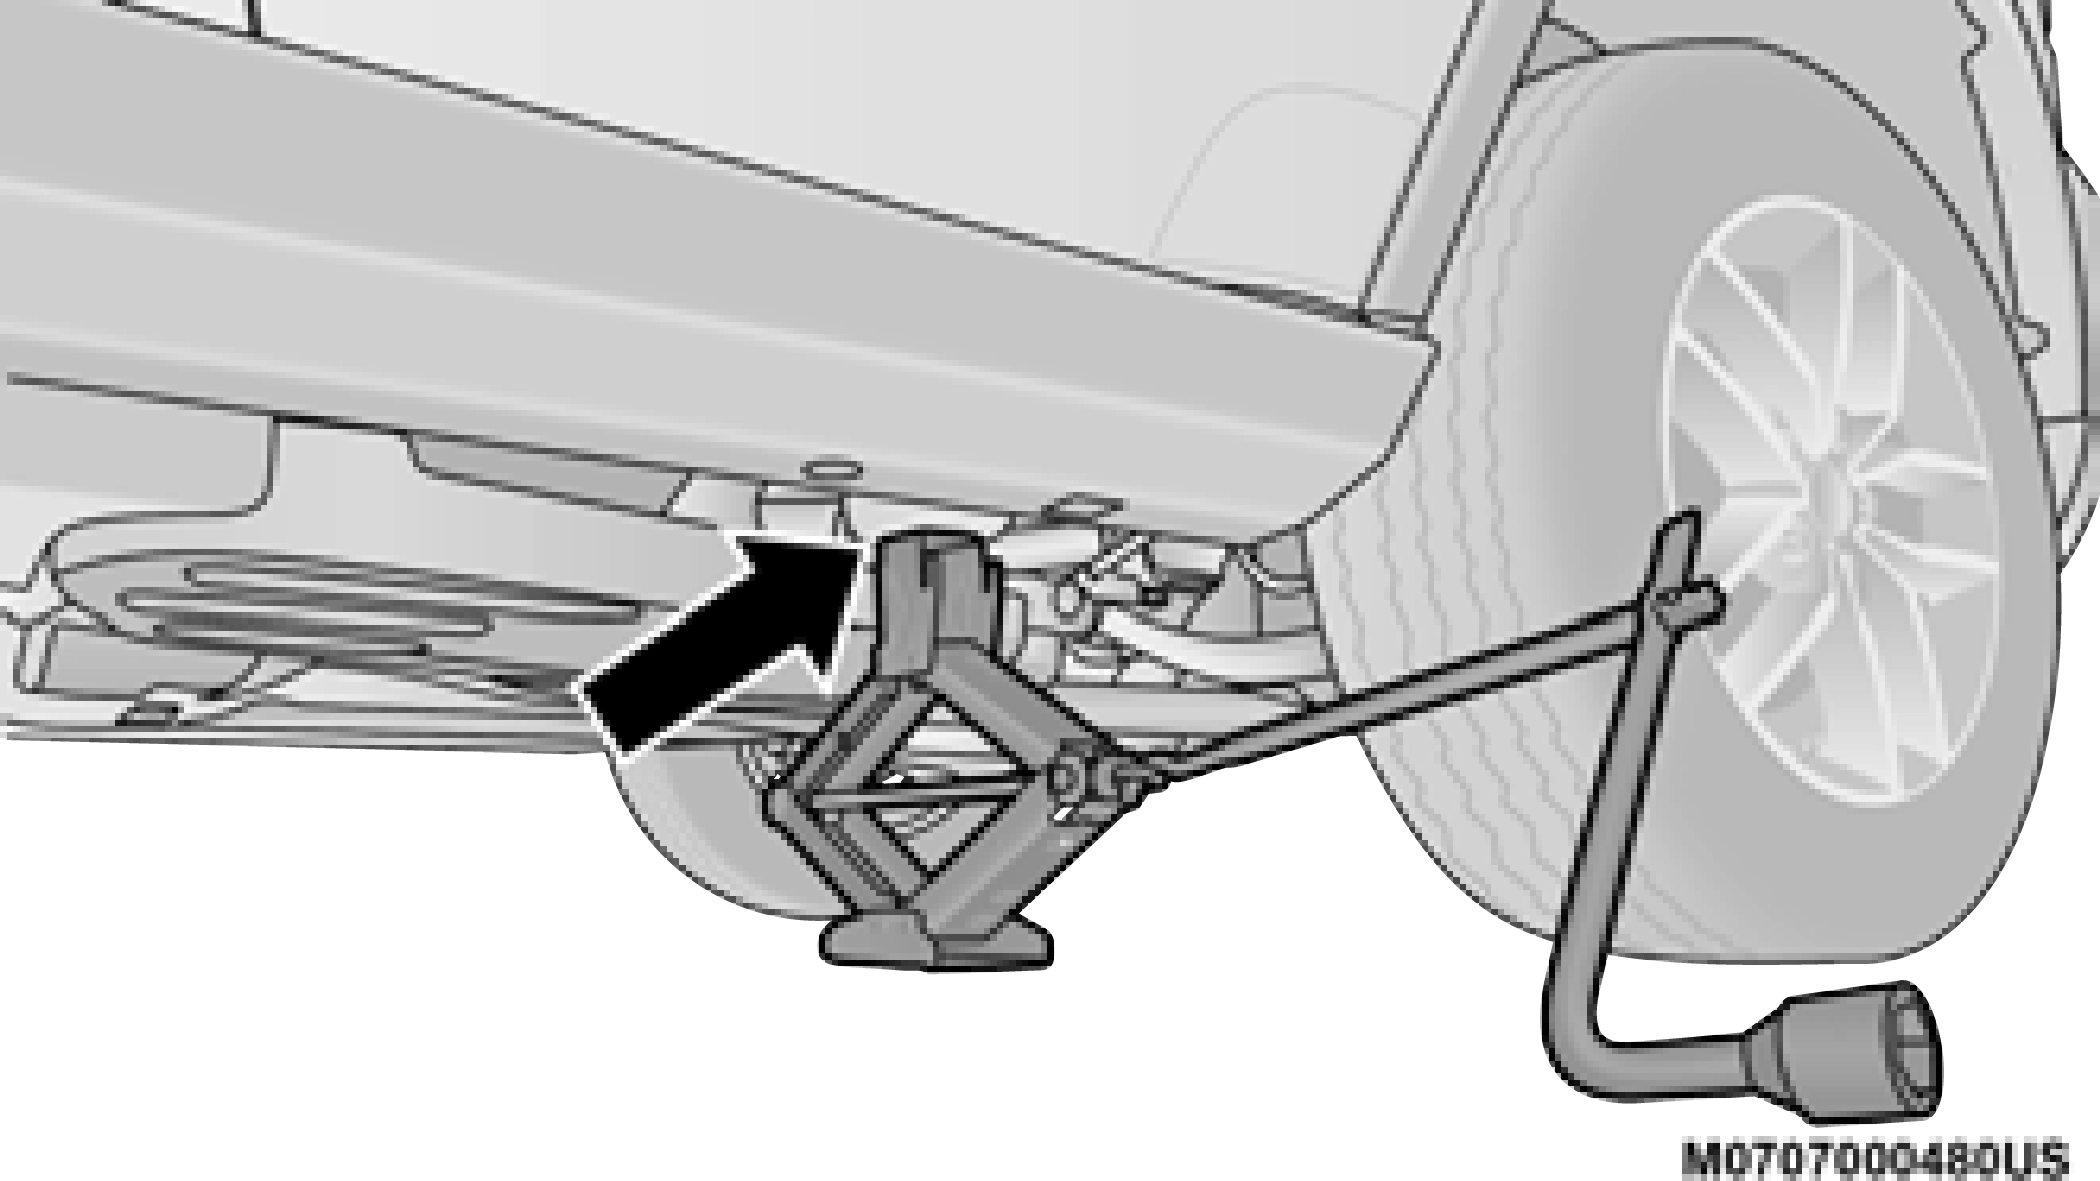
The jack must be placed straight on with handle facing outwards. See the following Front Jacking Location images for reference. The position of the front jack is the same for all trim levels.
Front Jacking Location - Rock Rail
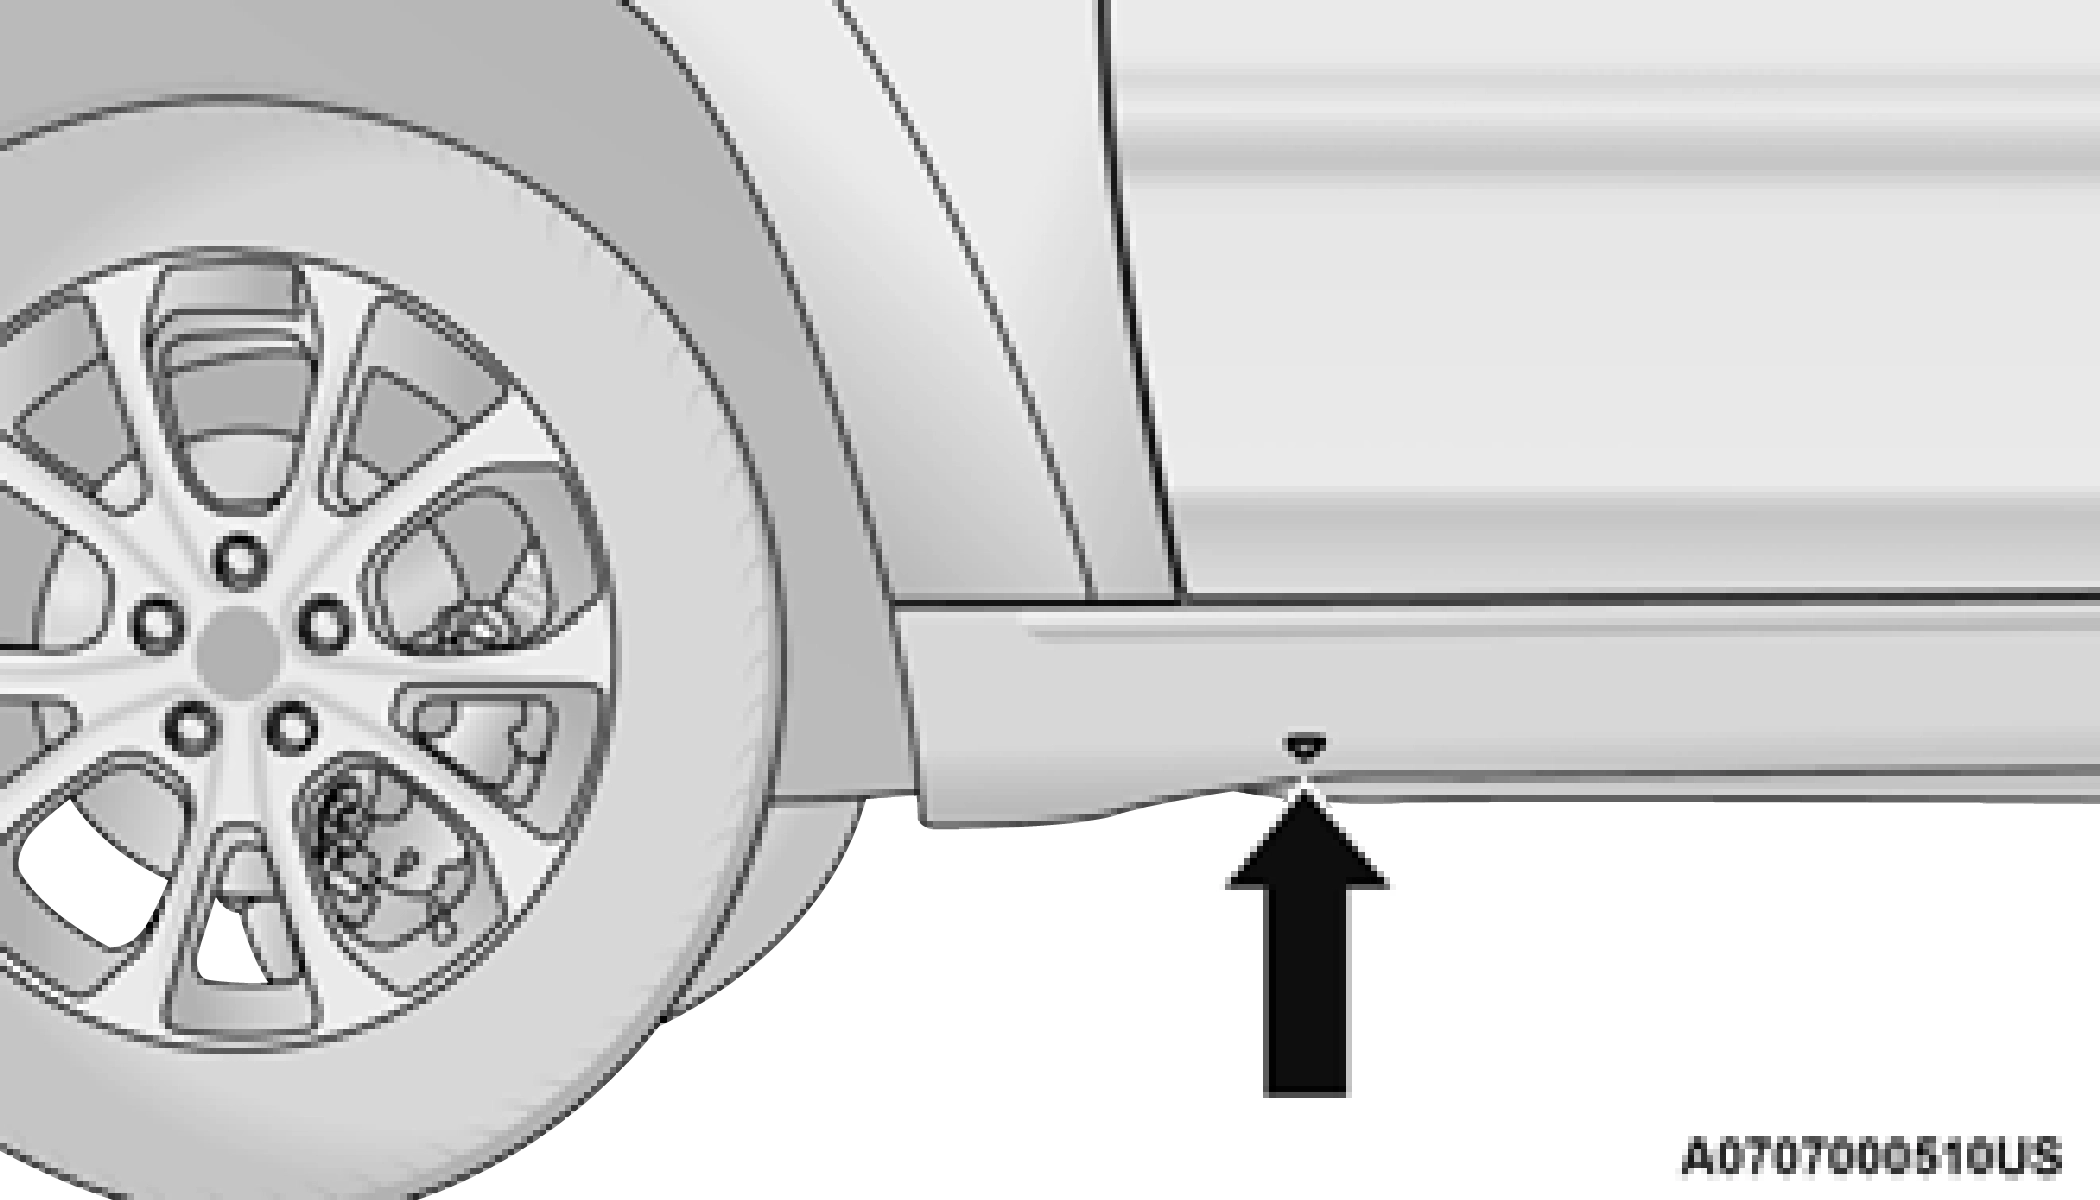
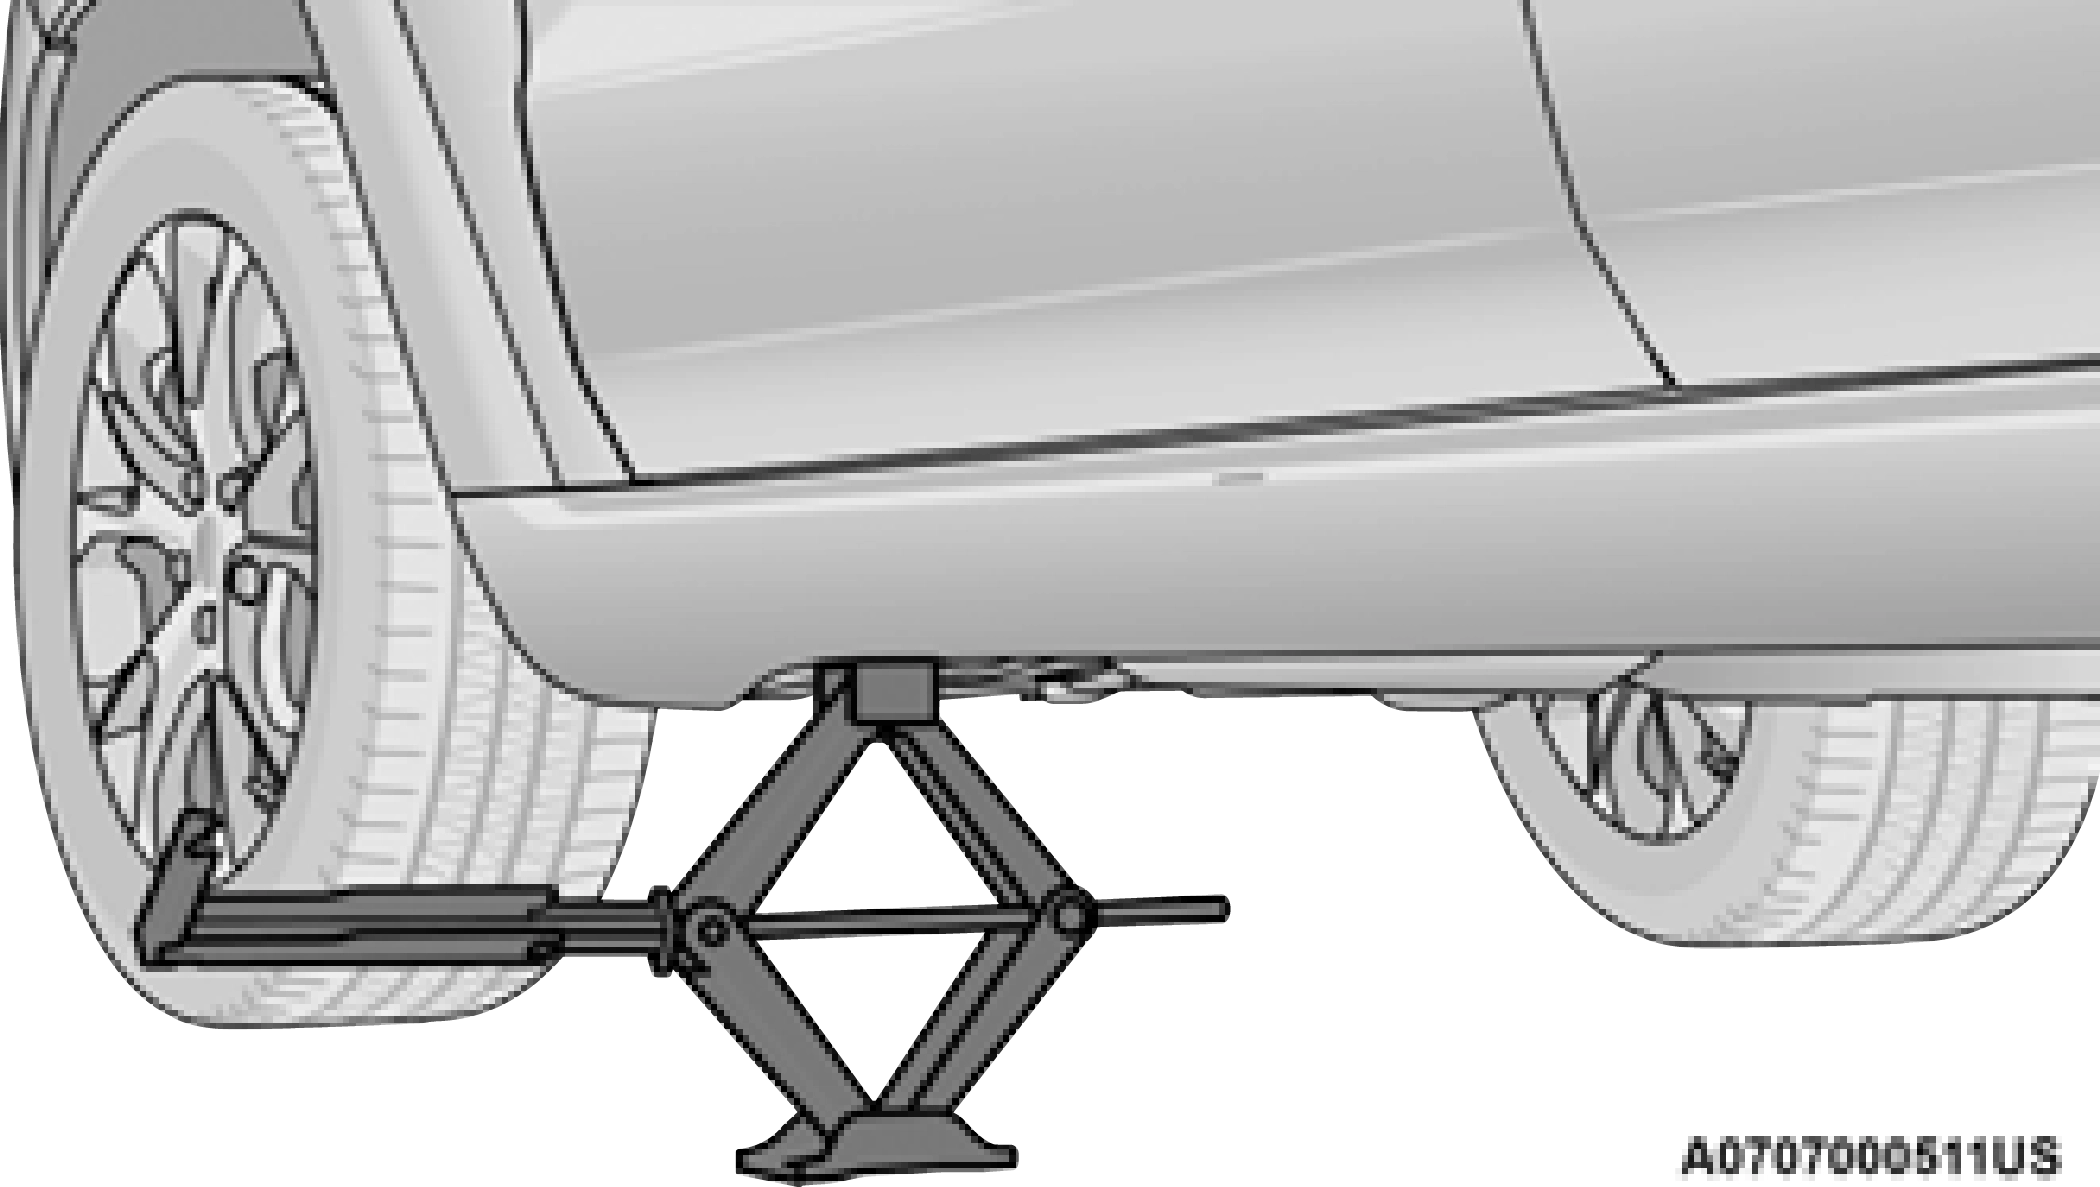
The rear lifting point location is the same for all trim levels.
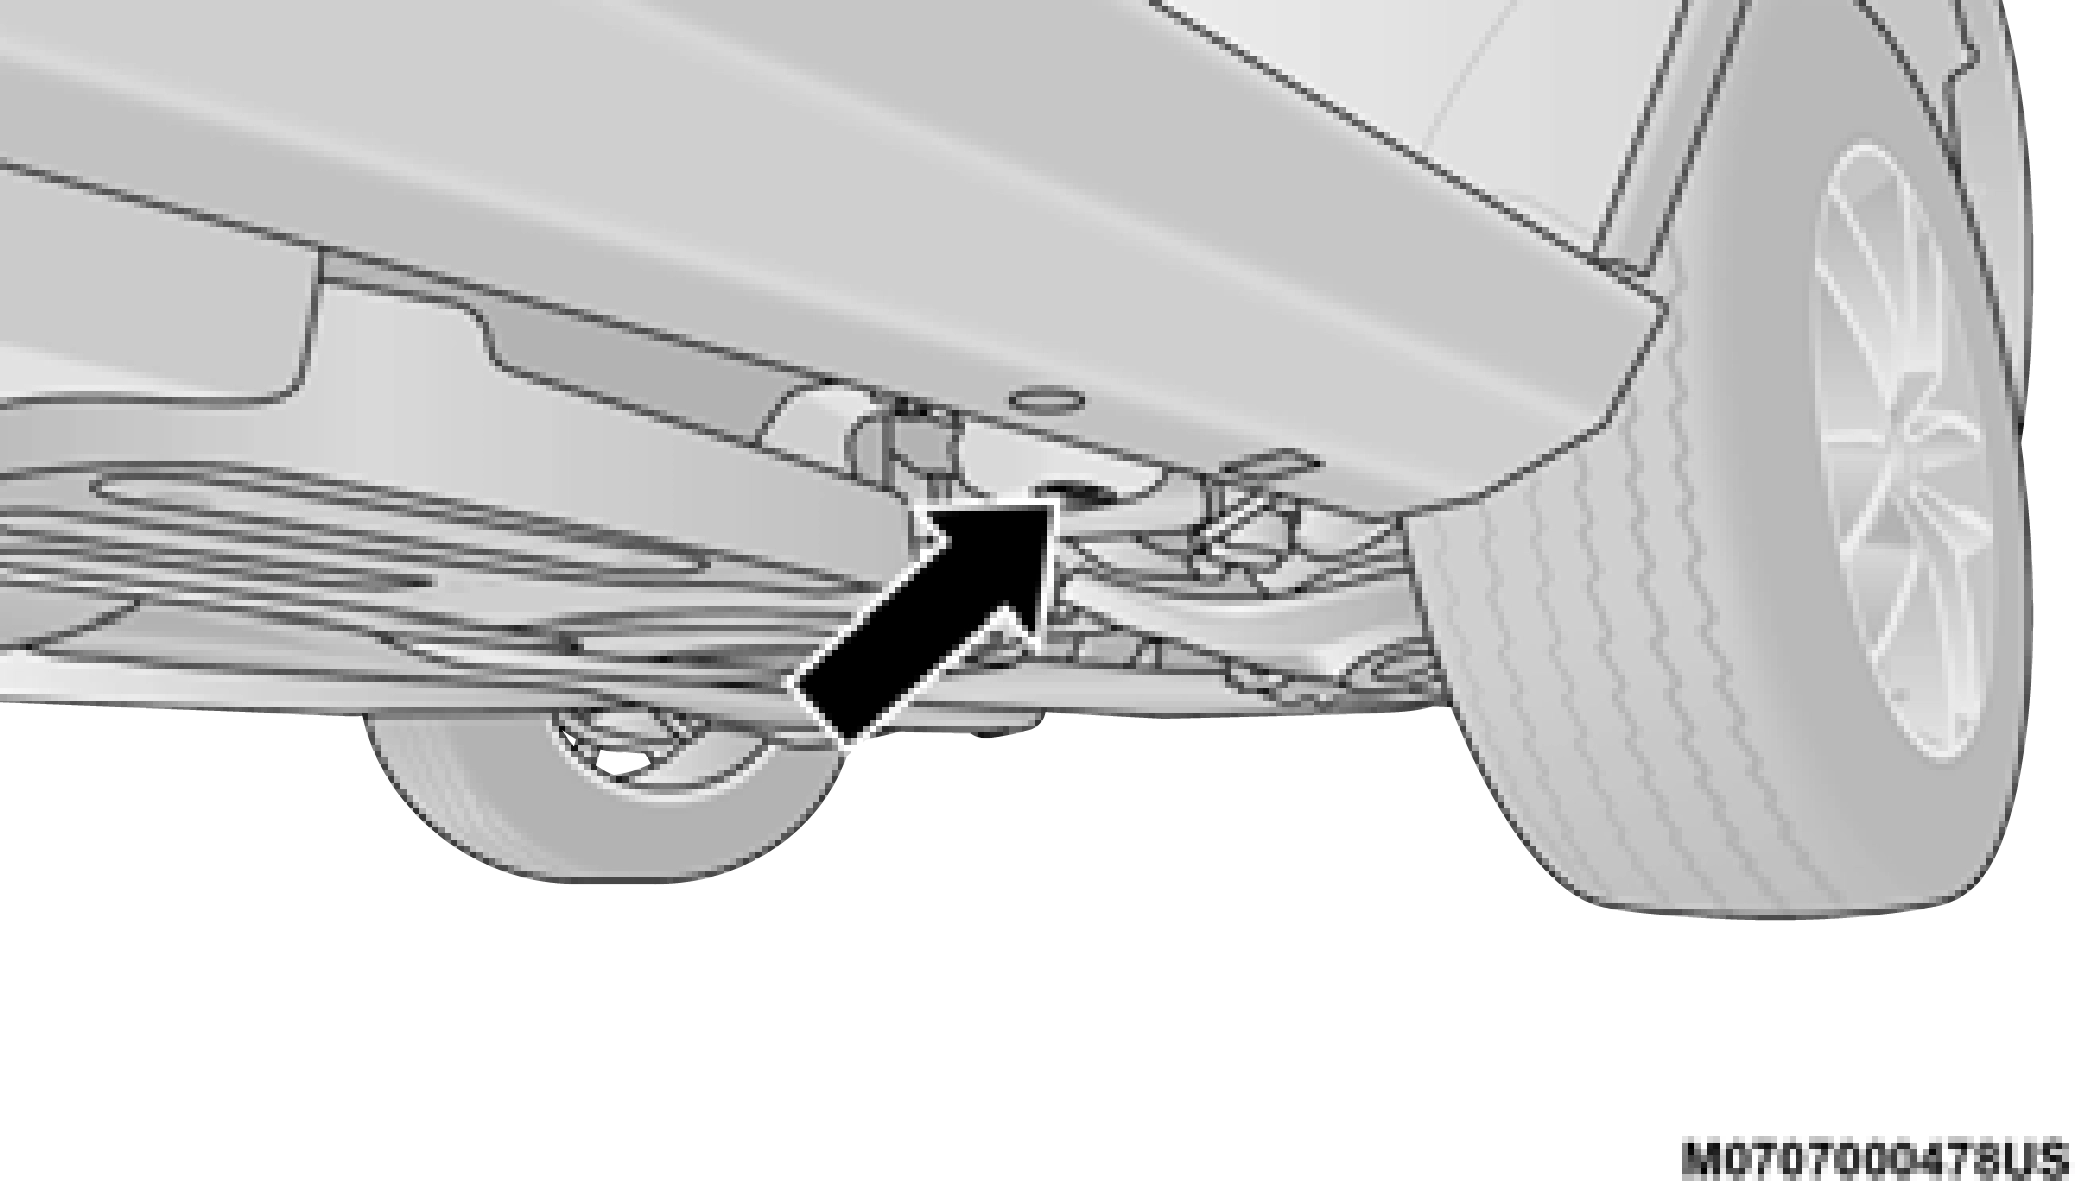
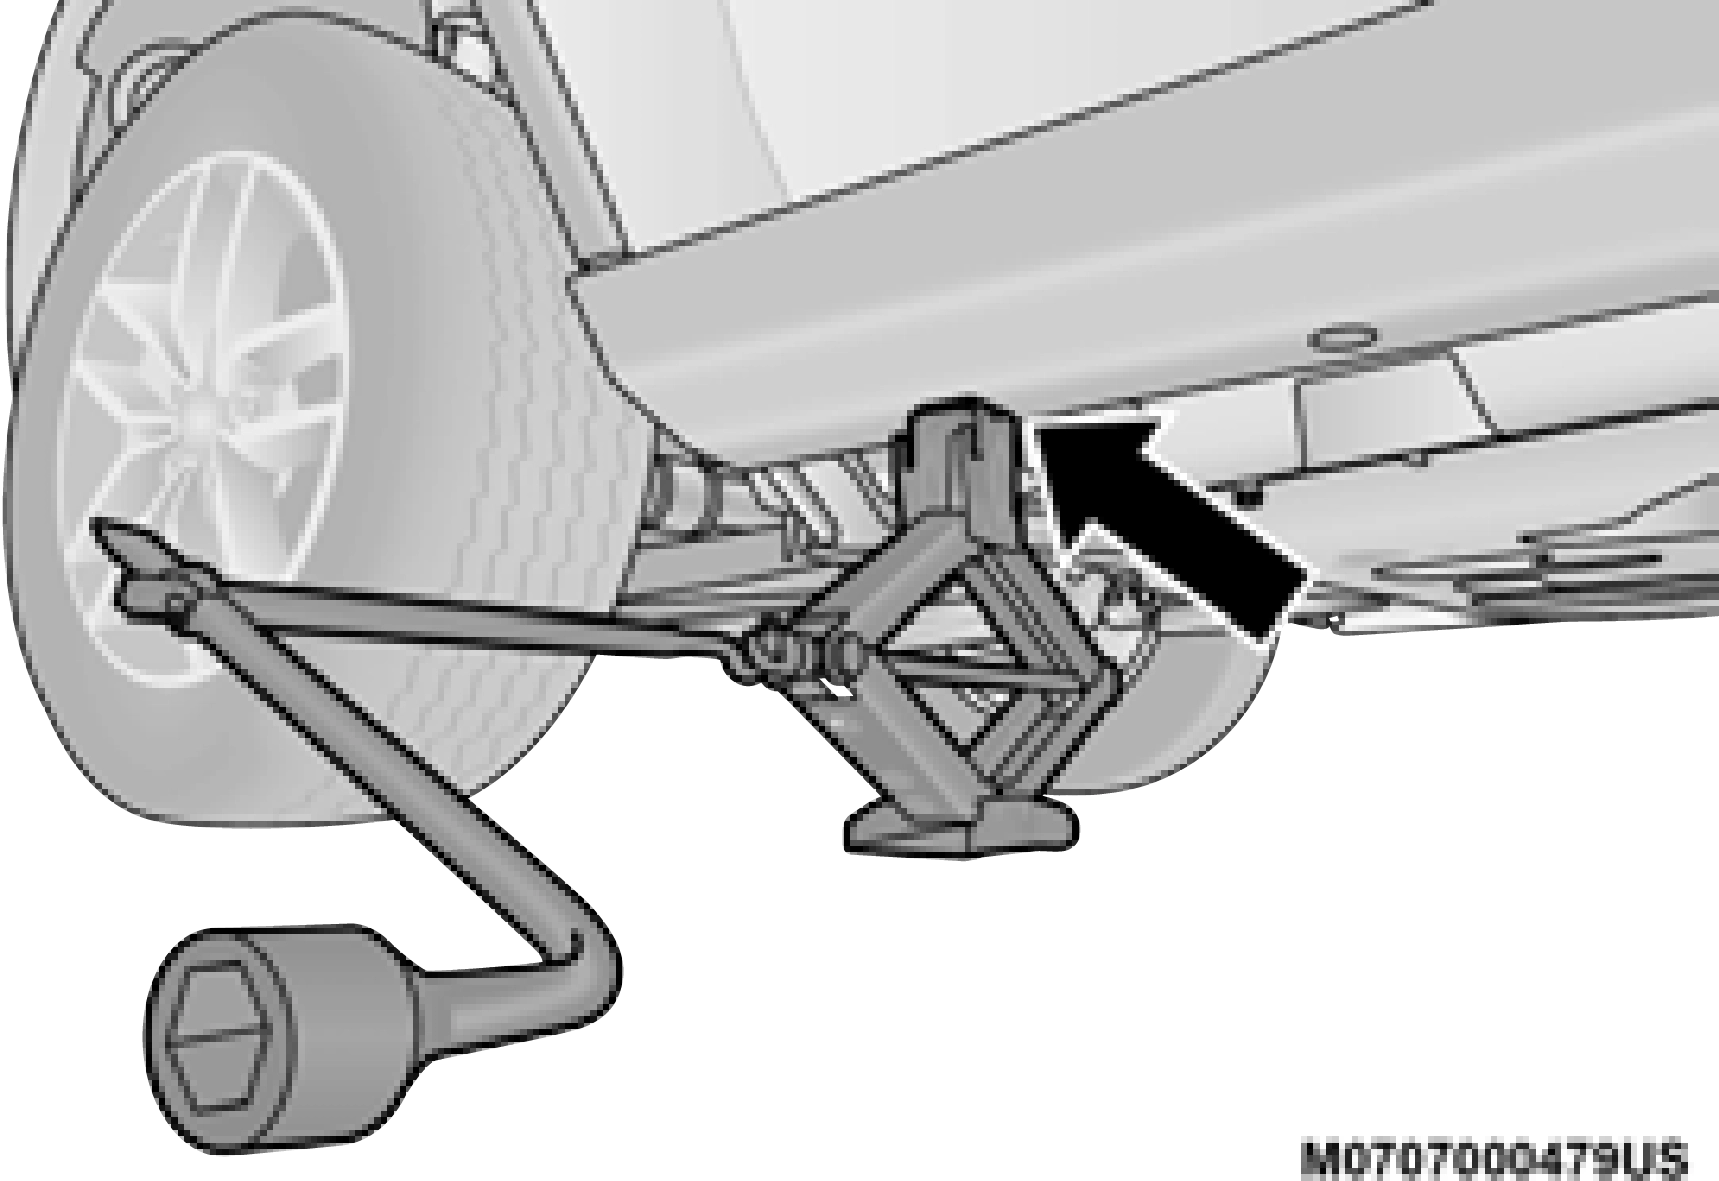
Rear Lifting Point - Rock Rail
Rear Jacking Location
Rear Jacking Location - Rock Rail
cone-shaped end toward the wheel. Lightly tighten the nuts.
 7
7
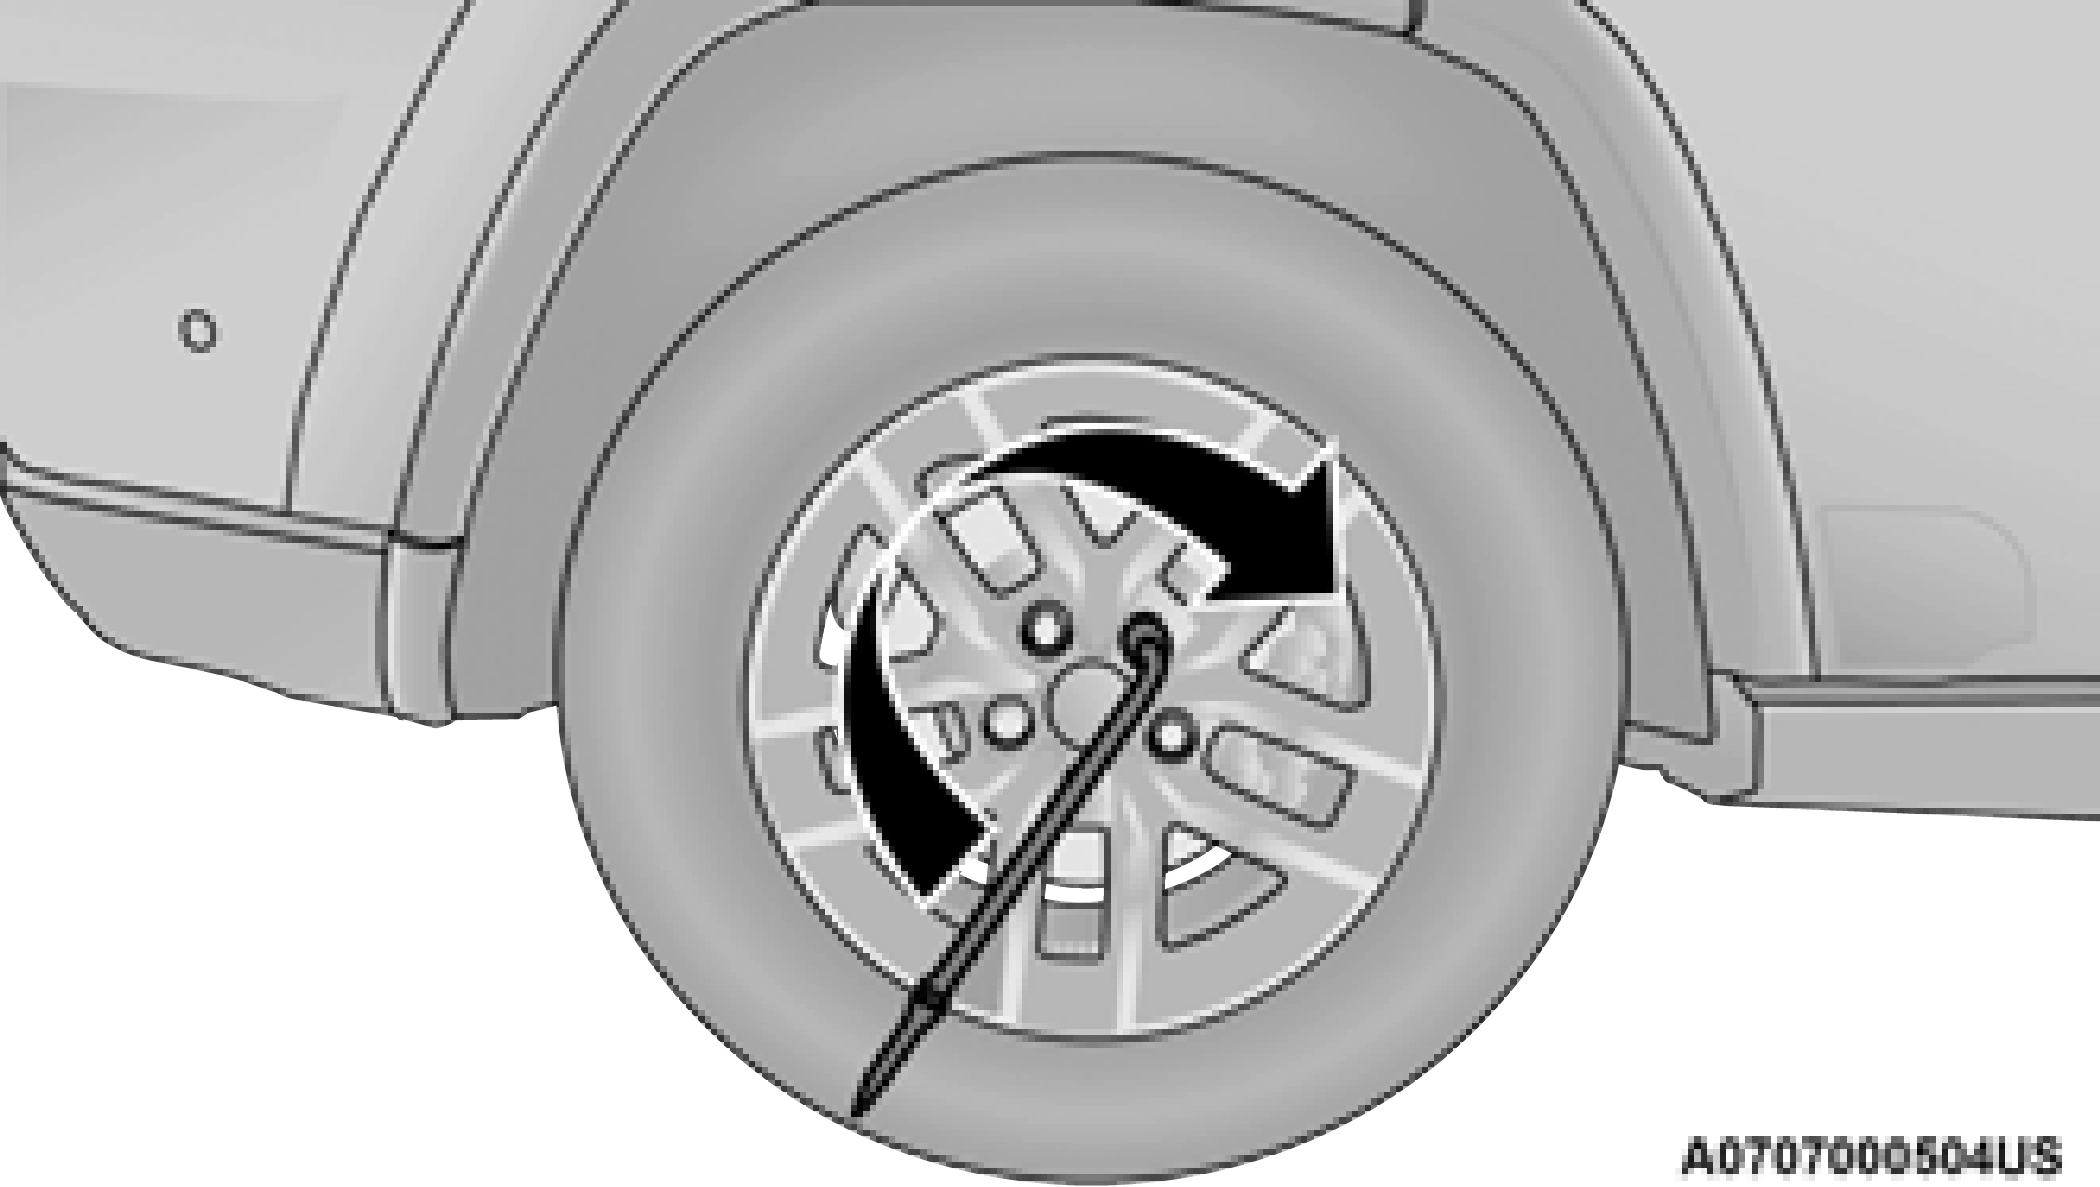
 Remove the small center cap and securely store the road wheel in the cargo area. Turn the wing nut clockwise until secured.
Do not drive with the spare tire installed for more than 50 miles (80 km) at a max speed of 50 mph (80 km/h).
Download Manual