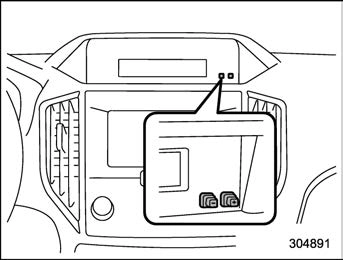
Clock
For models with a SUBARU genuine navigation and/or audio system, the clock can be adjusted using either auto mode or manual mode.

 button.
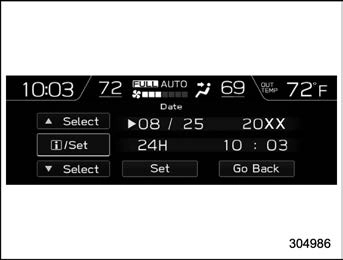
The clock can be set to 12-hour or 24-hour display. Perform the following procedure to switch the display format.
press and hold the “+” button for approxi- mately 2 seconds. The clock format will then change.
NOTE
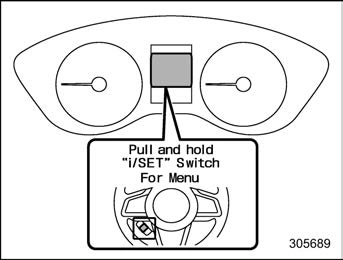
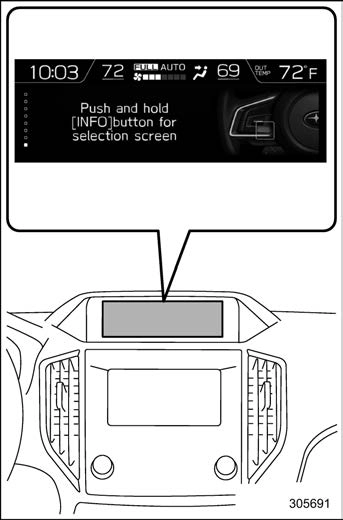
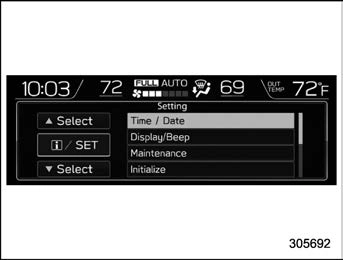
When the combination meter display (color LCD) is displaying the menu screen entering screen, the system will not move to the selection screen even if the “INFO” button is pressed and held. Before adjusting the clock, be sure to change the combination meter display
(color LCD) to a screen other than the menu screen entering screen.

 button.
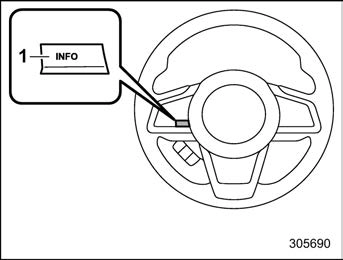
1) “INFO” button
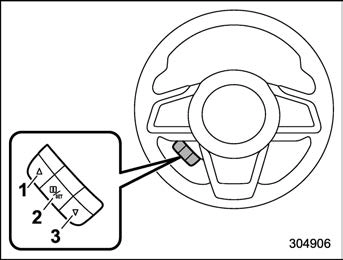
 ” or “
 ” switch to select the item.
 /SET switch.
 /SET switch.
 ”, “
”, “  ” switches to scroll through to the items you can set.
 / SET switch to choose the item you would like to change.
 ”, “
”, “  ” switches to adjust the items.
 /SET switch to complete the clock setting.
Select “Go Back” to return to the previous screen without saving settings.
& Setting the clock automati- cally

 button.
 button again to complete the setting.
The clock will be set automatically where a GPS signal is available.
The clock will be set and adjusted auto- matically when a smartphone is connected via Bluetooth® for transferring phonebook data.
For details, check the instructions on connecting smartphones.

The Bluetooth® word mark and logos are registered trademarks owned by Bluetooth SIG, Inc.
Download Manual