Internal equipment
The glove compartment is located on the passenger side of the instrument panel and features both an upper and lower storage area.
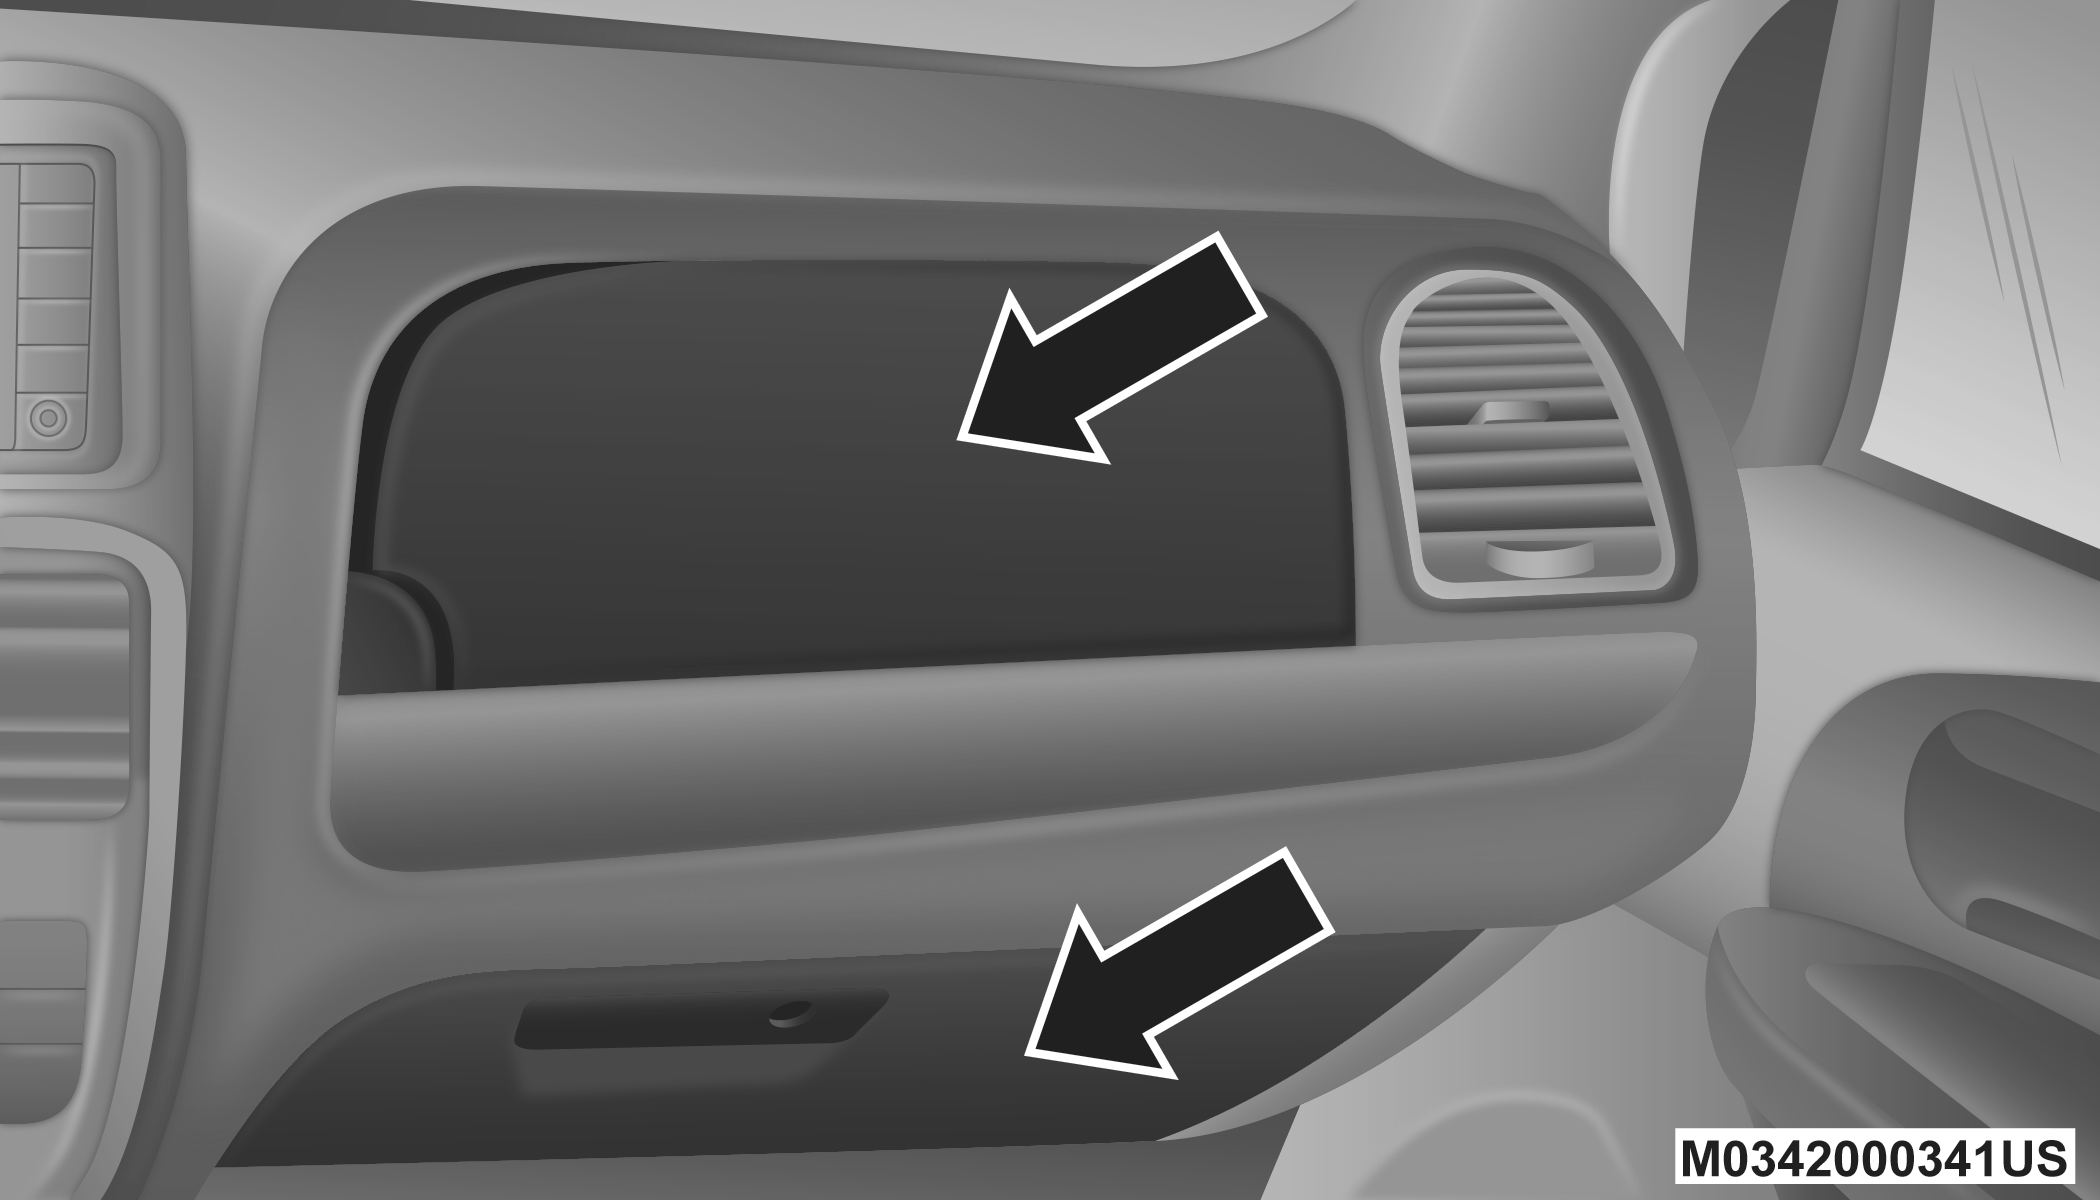
Upper And Lower Glove Compartments
To open the upper compartment, push in the release button located on the left side of the upper door. The door will automatically open.
Upper Compartment Release Button
To close the compartment door, push downward on the door's surface to latch the door closed.
To open the lower compartment, pull the release handle.
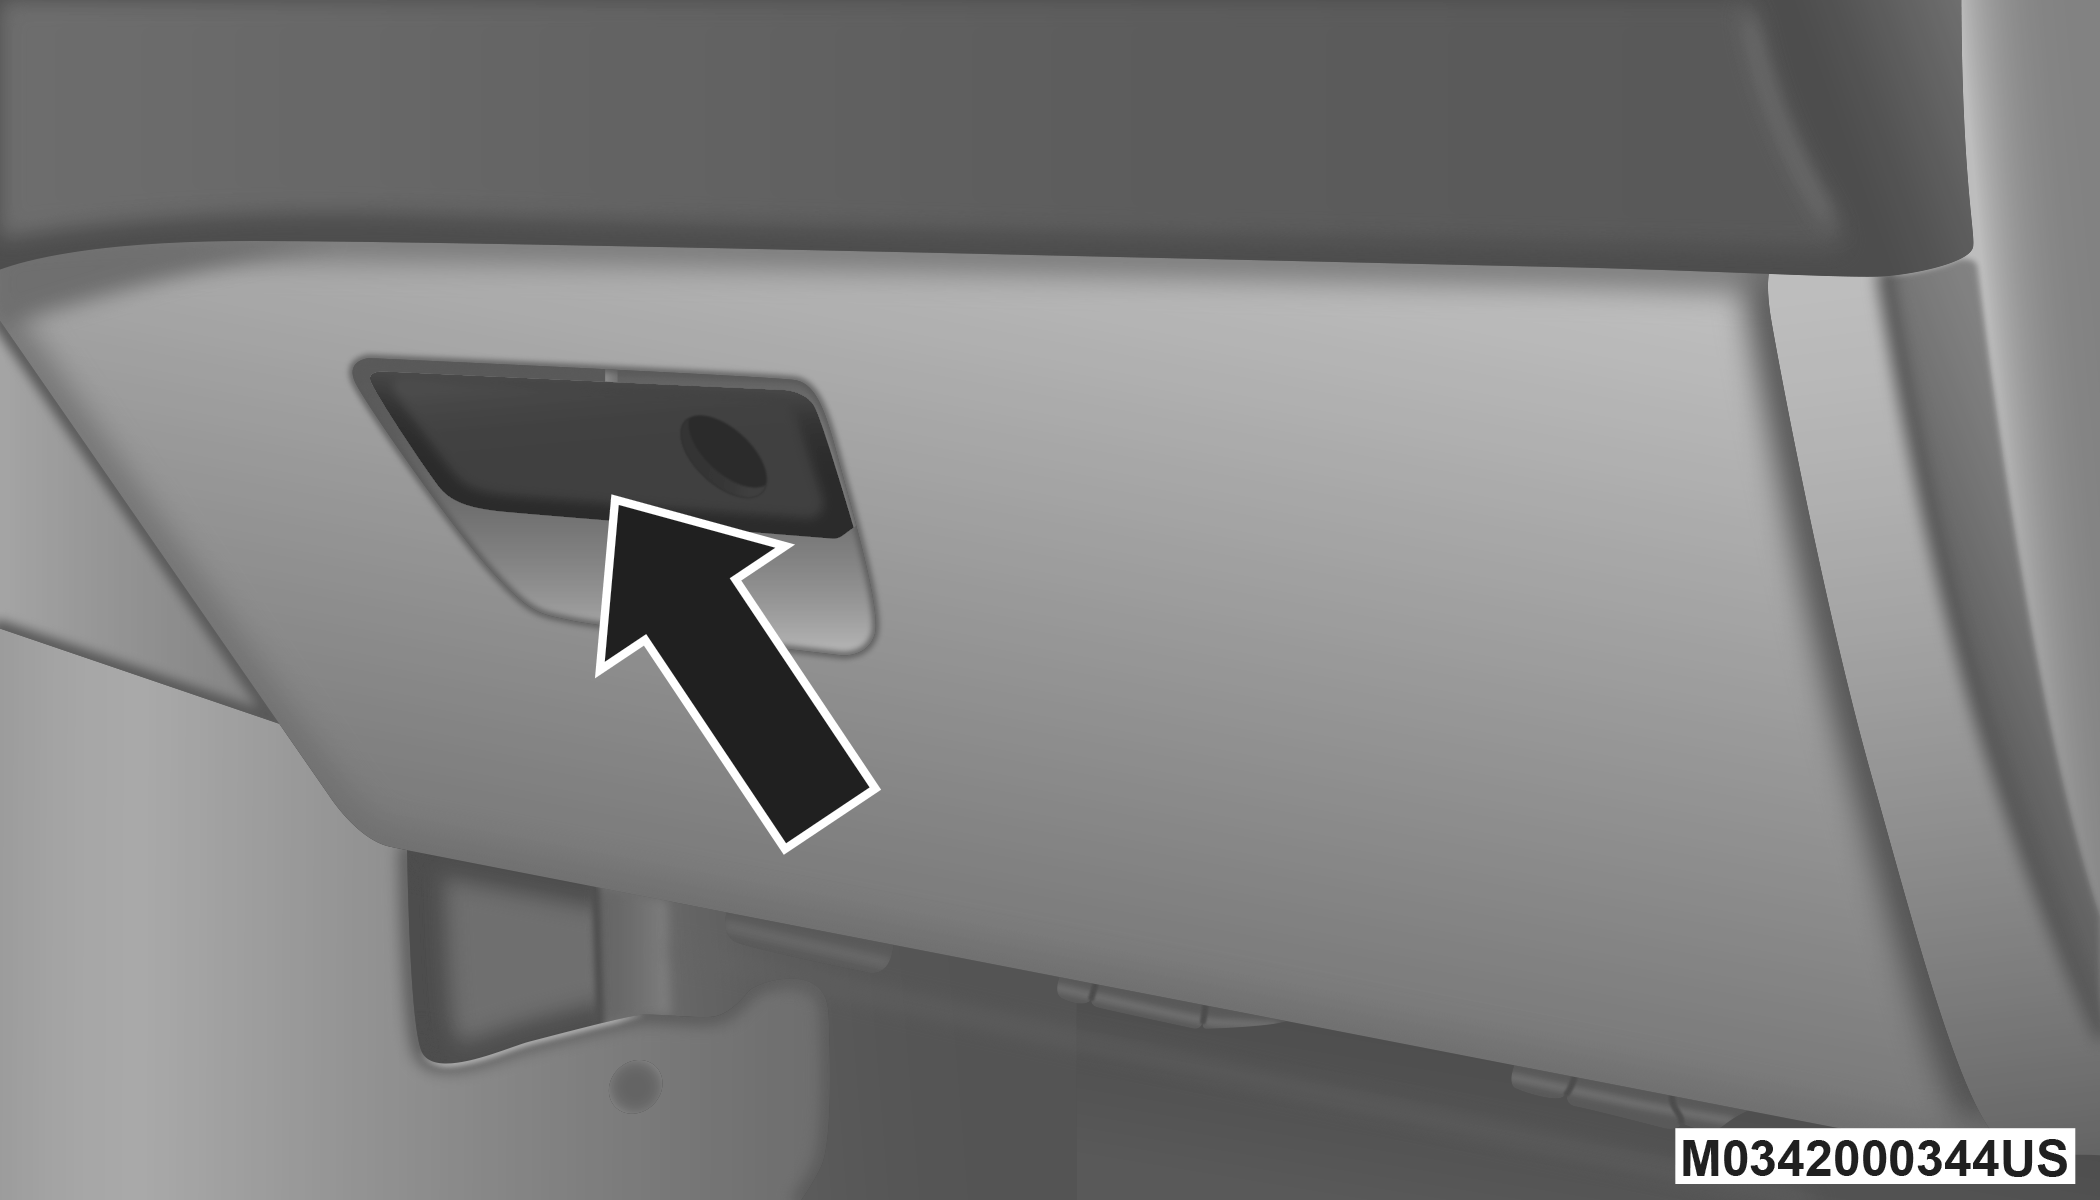
Lower Compartment Release Handle
Note:
The lower compartment is equipped with a lock that is a part of the compartment handle.
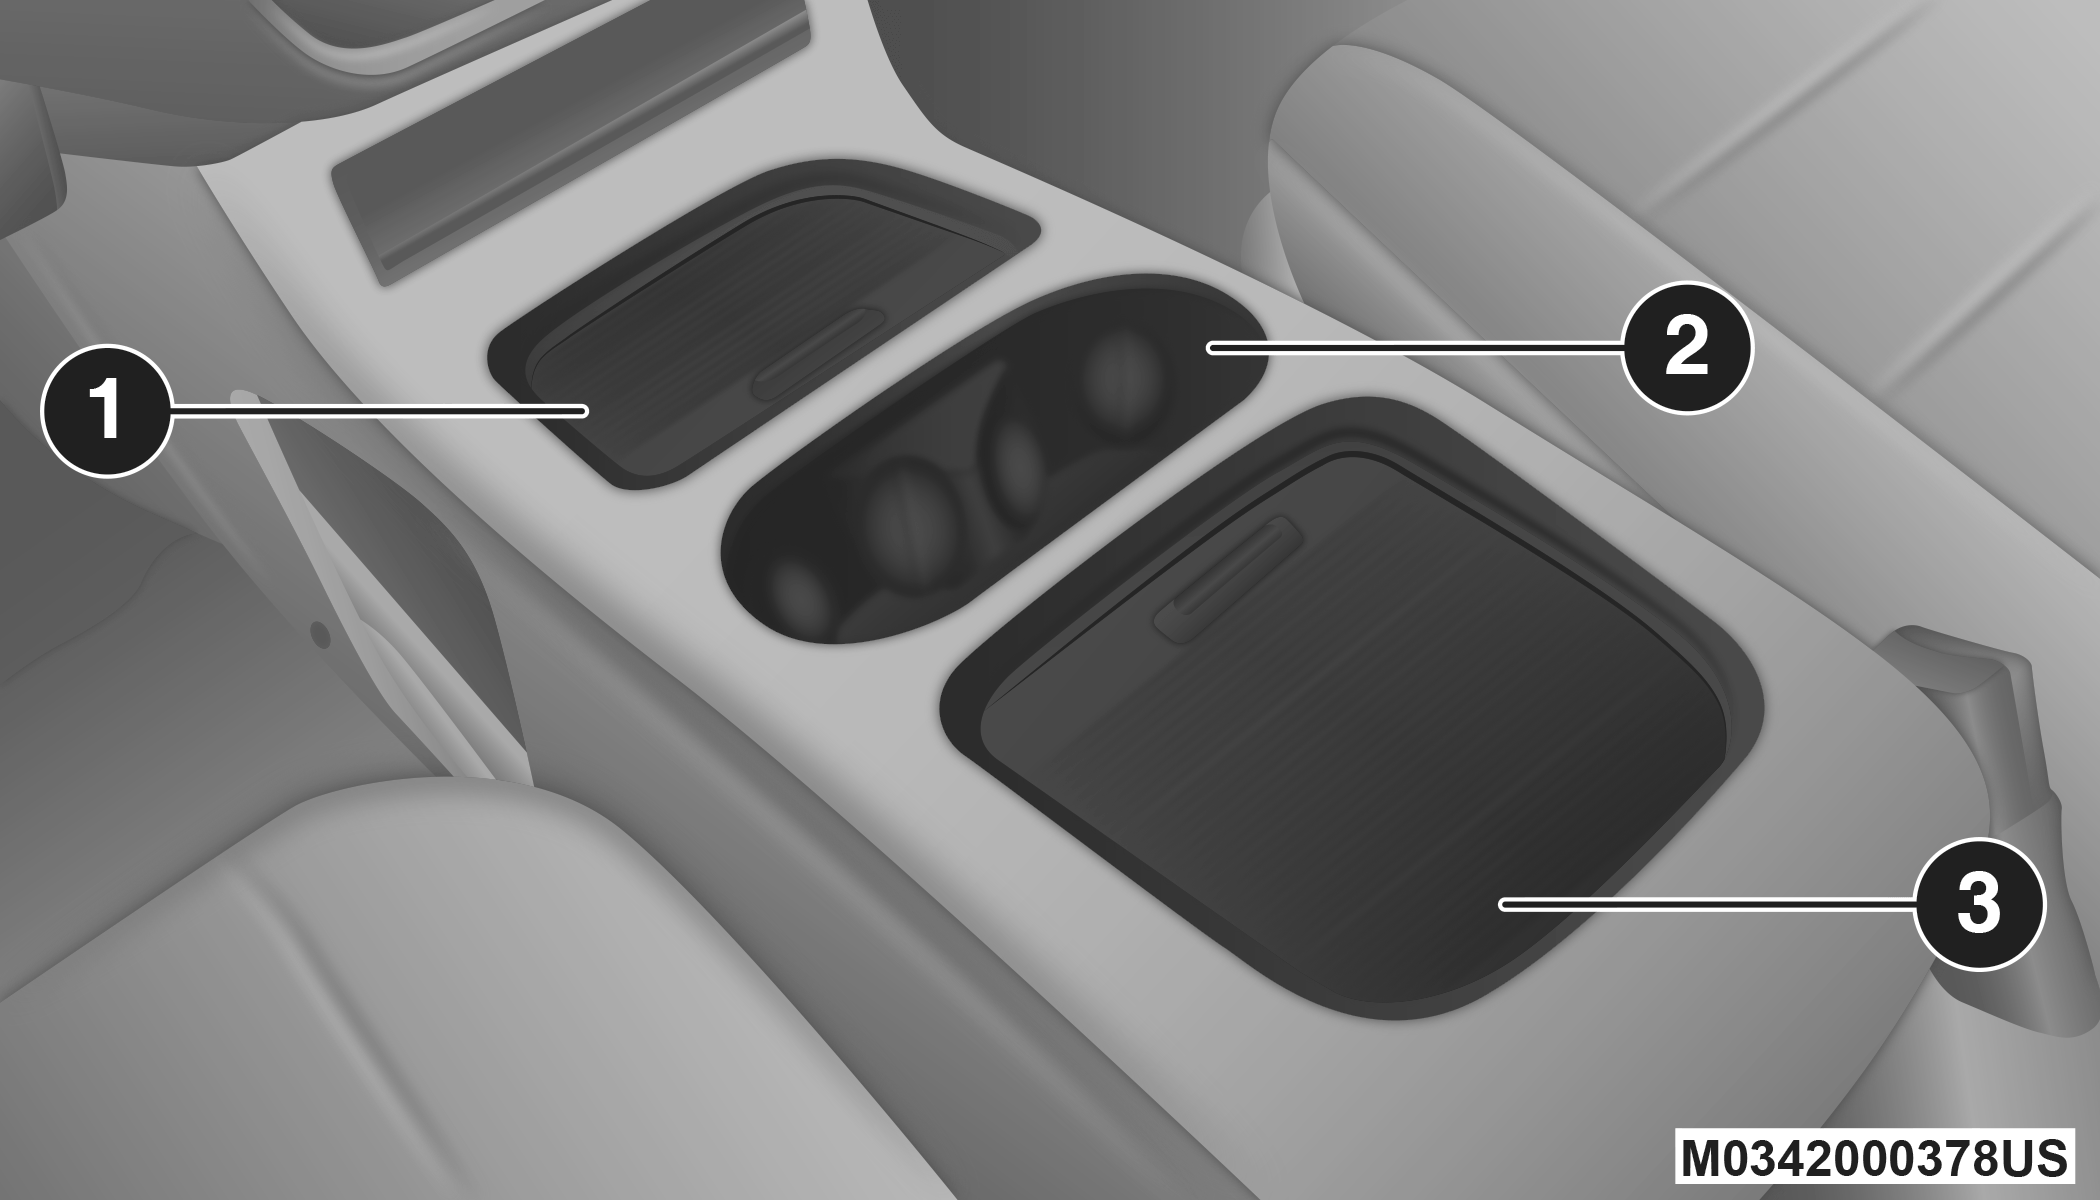
CENTER CONSOLE FEATURES
There are two consoles available: Basic and Super.
WARNING:
Do not operate this vehicle with a console compartment lid in the open position. Driving with the console compartment lid open may result in injury in a collision.
Basic Console
The Basic Console consists of the following features:
-
The Basic Console profile allows vehicle occupants to easily pass through the first row to the second.
-
Four cupholders accept up to extra large size beverage cups or 20 oz (0.6 L) plastic bottles. Cupholders are dishwasher safe for cleaning.
-
The cupholders are removable to access a large storage bin.
-
The Basic Console is removable from the vehicle for additional floor space by removing the anchor cup plug and clip at the console base, sliding the console base forward while lifting slightly to clear the rear load floor hook.
To reinstall the Basic Console:
-
Position the console at a slight angle (front slightly higher than the rear).
-
Slide the console rearward into the floor bracket/hook.
-
Align the console until the front anchor cup plug hole is centered on the winch hole.
-
Reinstall the clip first and then while pushing downward on the console with slight pressure, reinstall the cover plug.
-
Pull up on the console to be sure it is firmly latched.
WARNING:
In an accident, serious injury could result if the removable floor console is not properly installed. Always be sure the removable floor console is fully latched.
Super Console — If Equipped
The Super Console contains multiple storage areas: a front lower pass through, top forward bin, top rearward bin and rear pull out drawer.
The Super Console contains a pass through storage area accessible for both the driver and front passenger.

Super Console Pass Through
The Super Console tambour doors are opened by pushing down on the finger tabs and sliding the door. The front tambour door slides forward, the rear tambour door slides rearward.
Super Console
|
1 — Front Sliding Tambour Door |
|
2 — Cupholder Light Ring |
|
3 — Rear Sliding Tambour Door |
Note:
The front cupholder light ring and pass through lighting is controlled by a dimming switch located on the instrument panel, refer to “Interior Lights” in this chapter for further information.
Located in the back of the Super Console is a storage drawer and cupholders for the rear passengers.
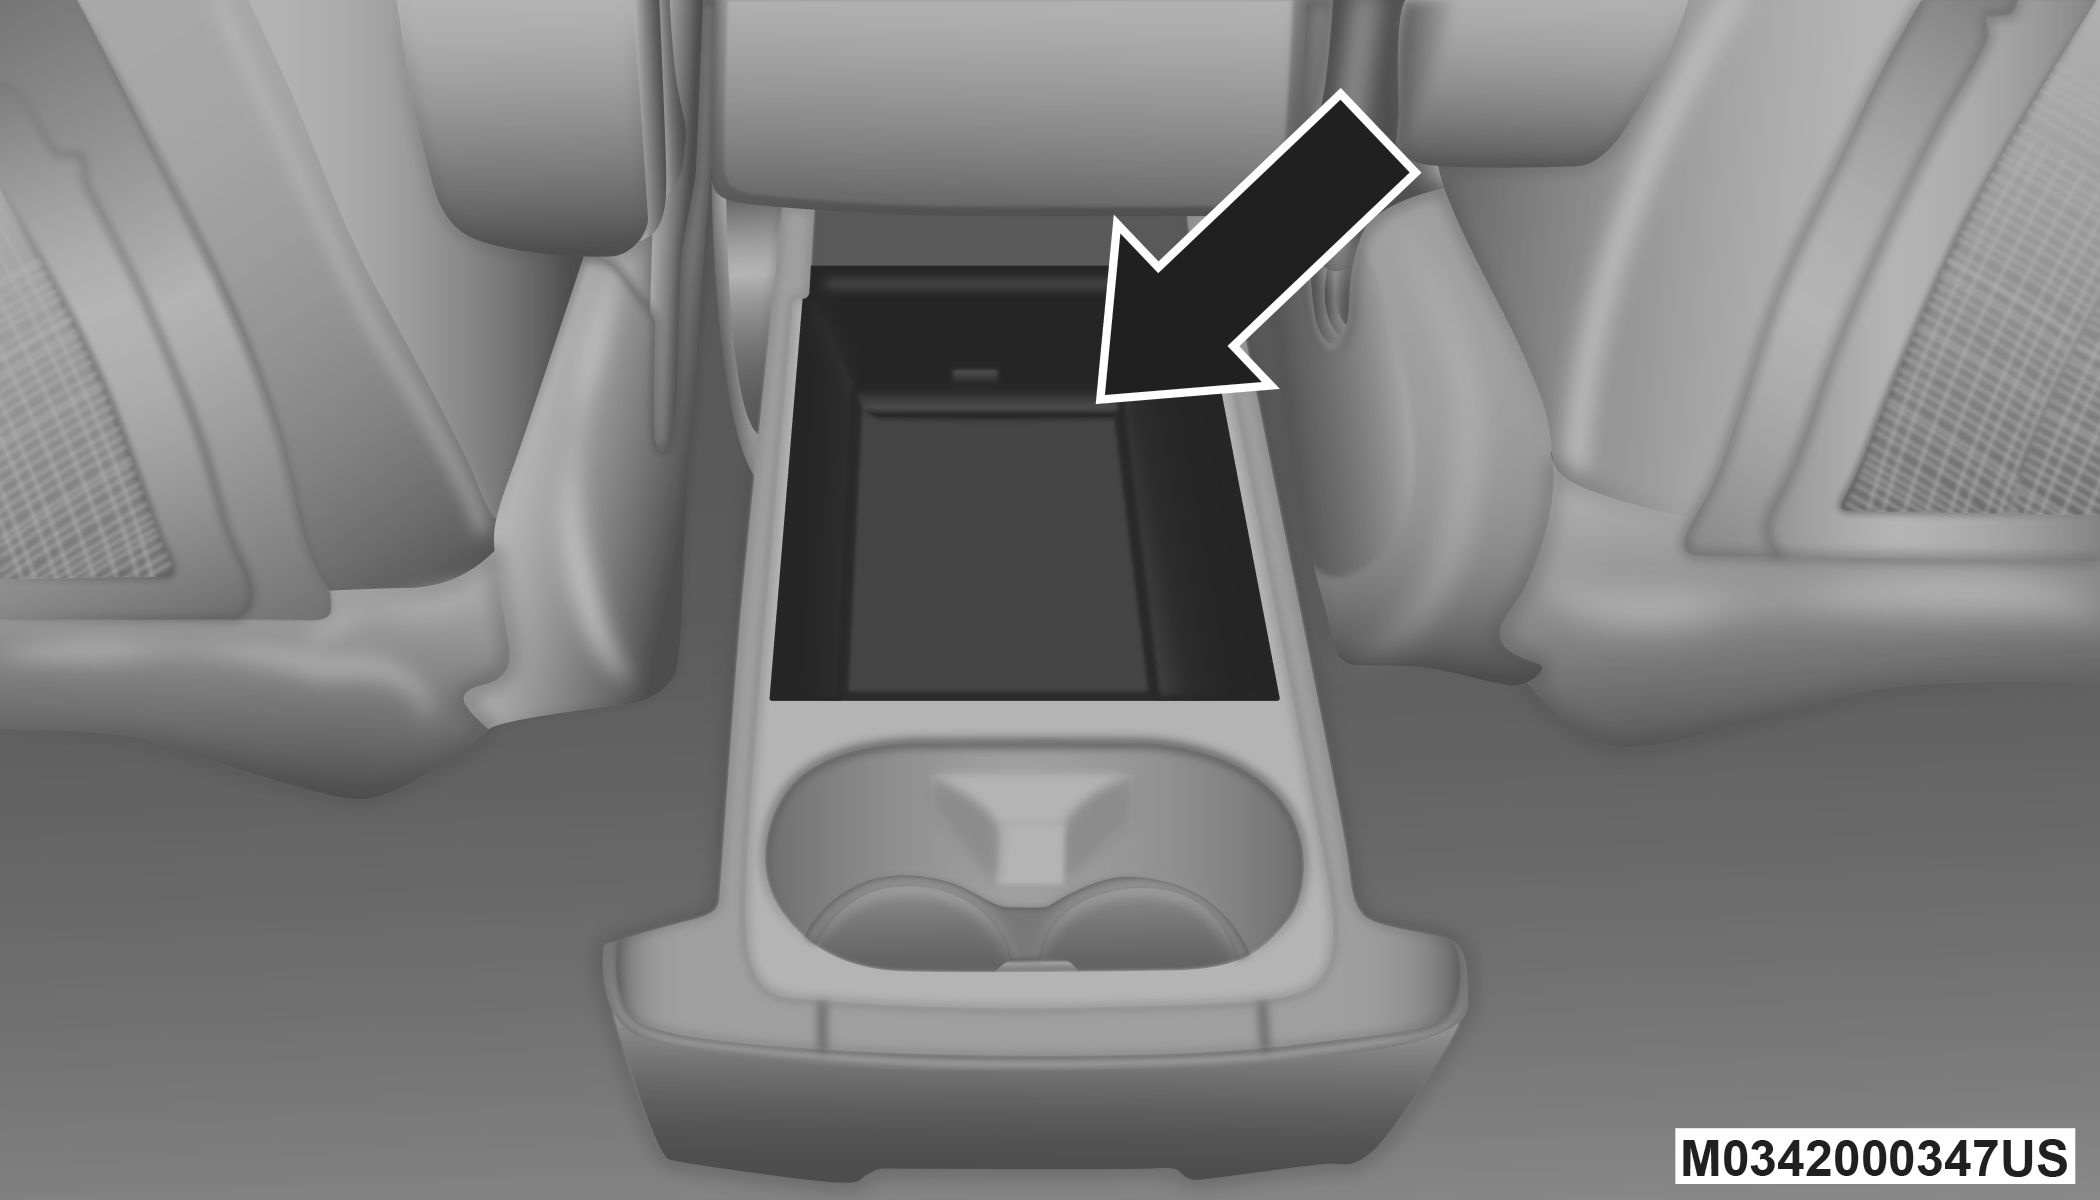
Rear Drawer Storage
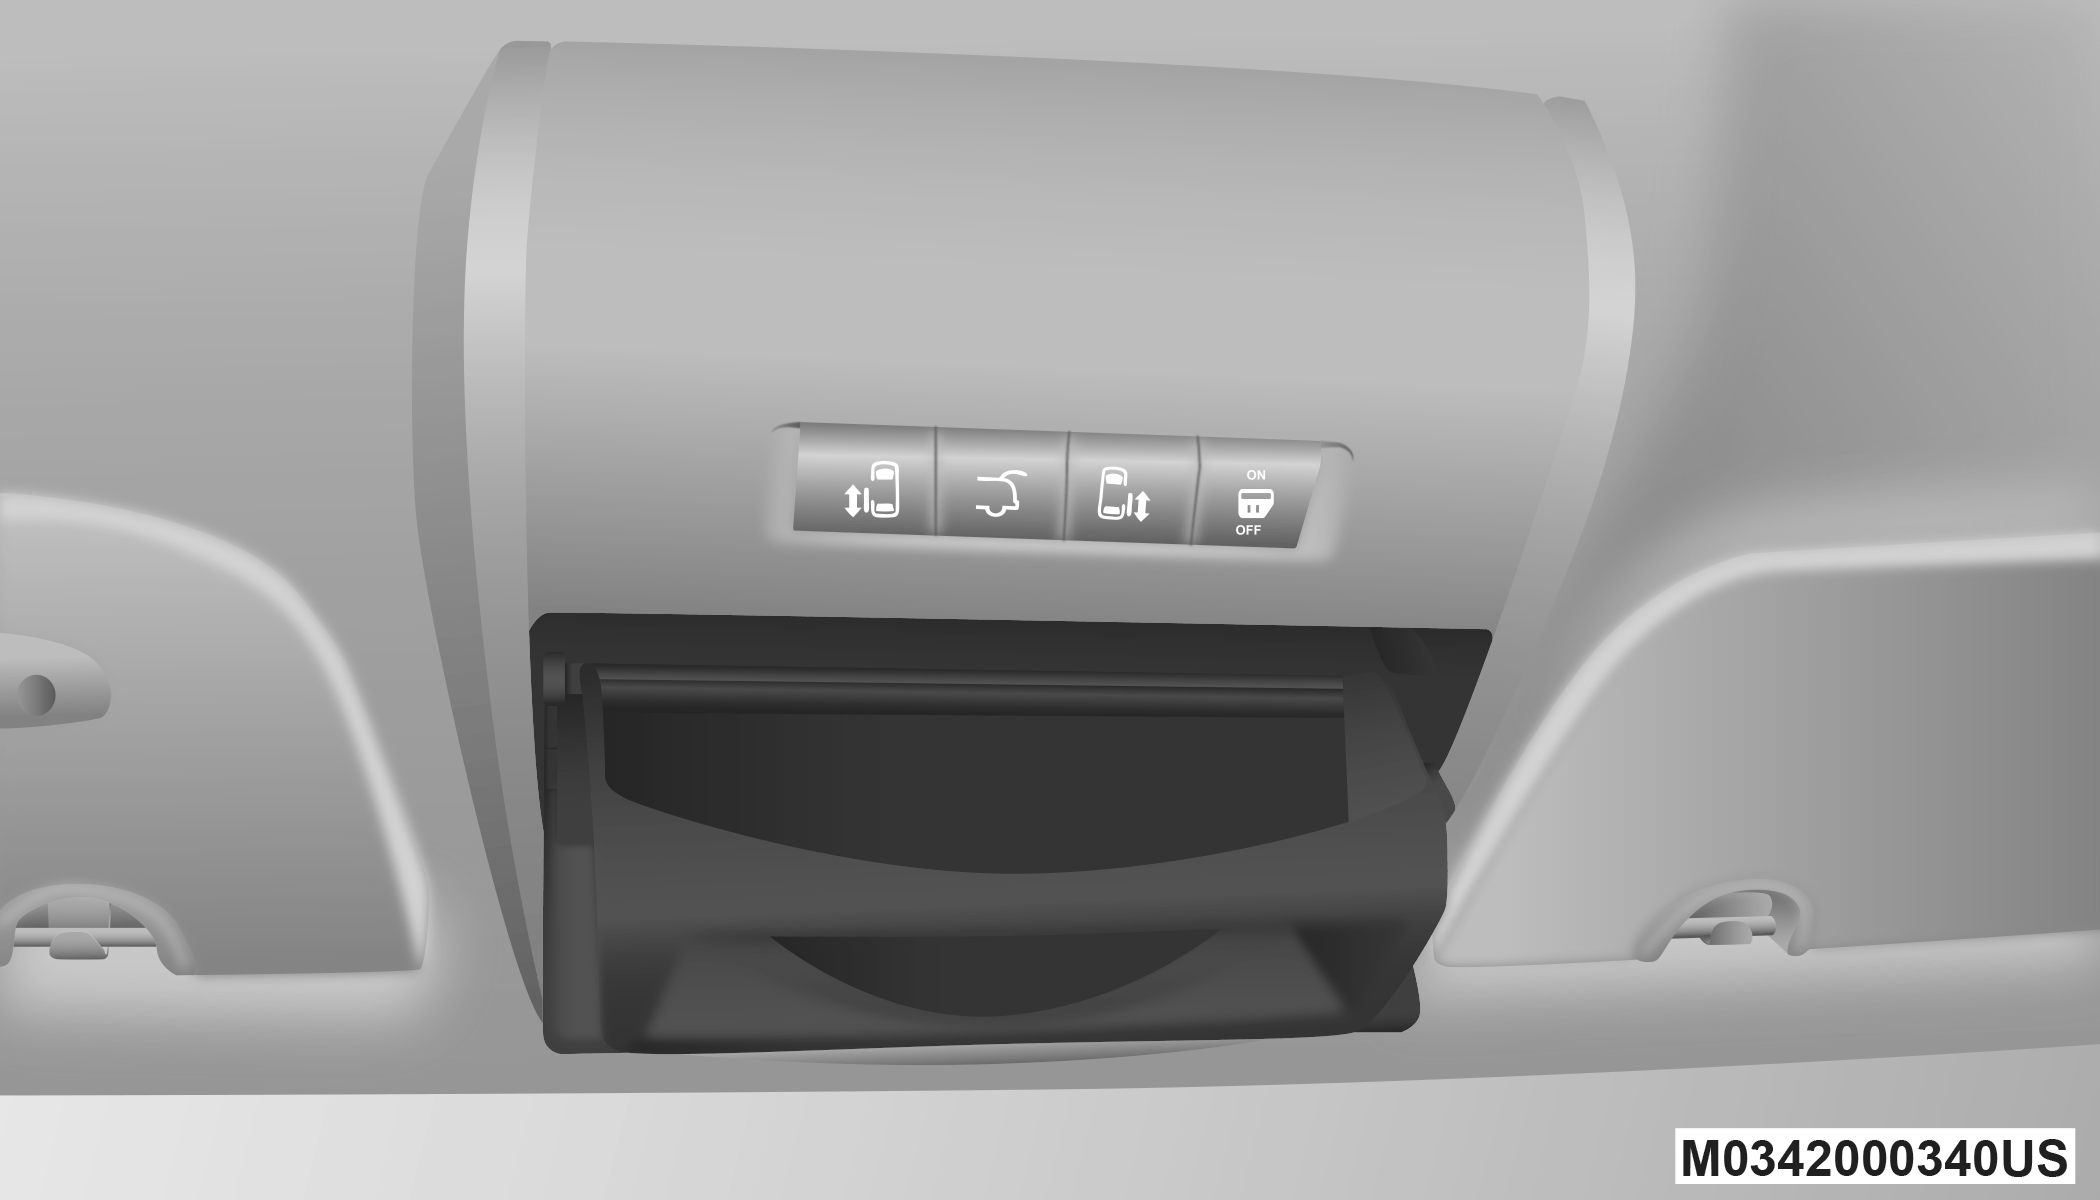
FRONT AND REAR OVERHEAD CONSOLES
Front Overhead Console
Two versions of the overhead console are available. The base front overhead console features fixed incandescent courtesy/reading lights, flip-down sunglass storage and conversation mirror. The premium front overhead console features an LED focused light that illuminates the instrument panel cupholders, two swiveling LED lights, flip-down sunglass storage, conversation mirror, optional power sliding door switches, and an optional power liftgate switch.
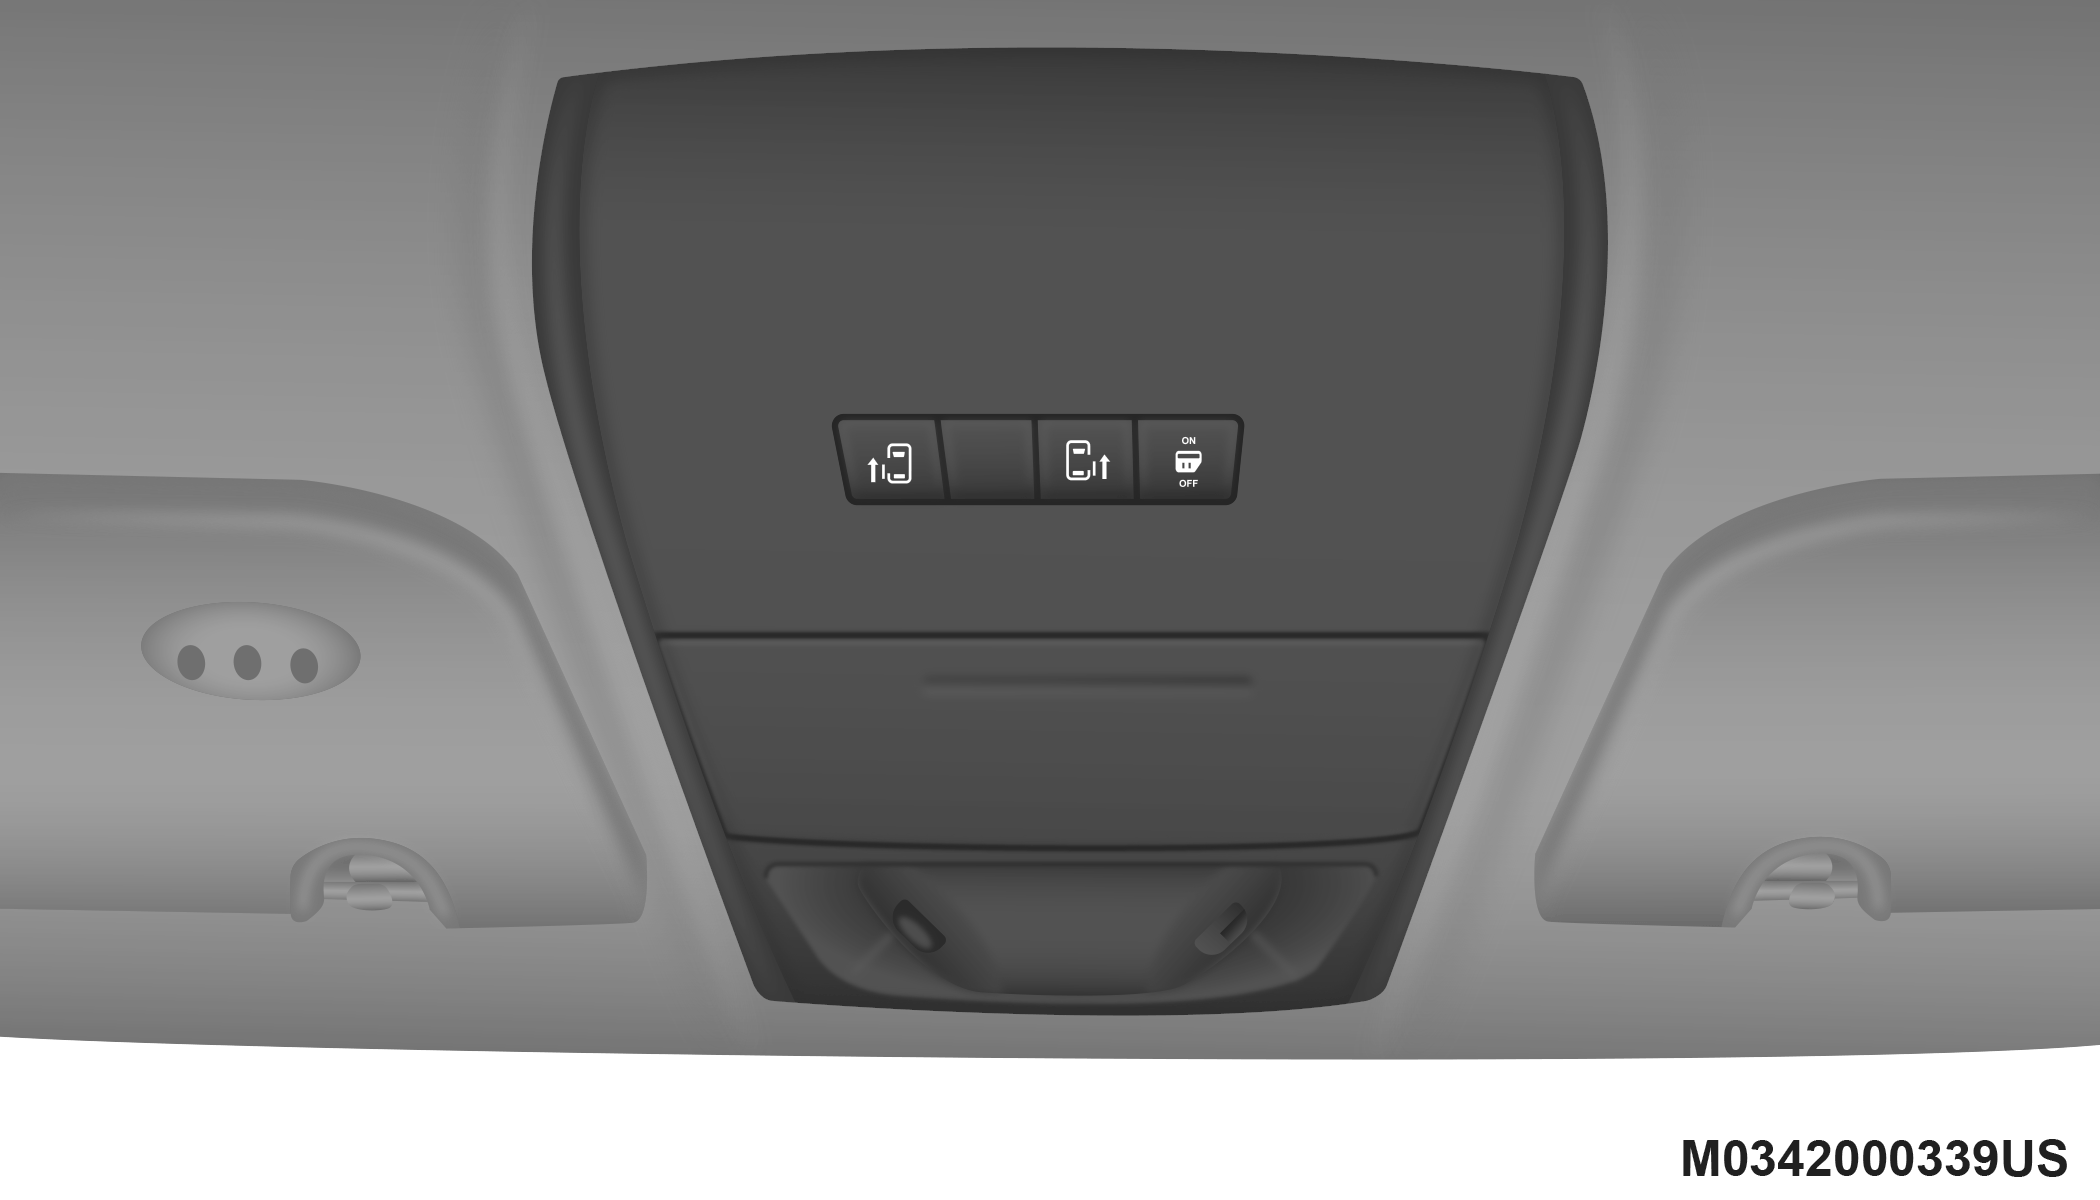
Front Overhead Console
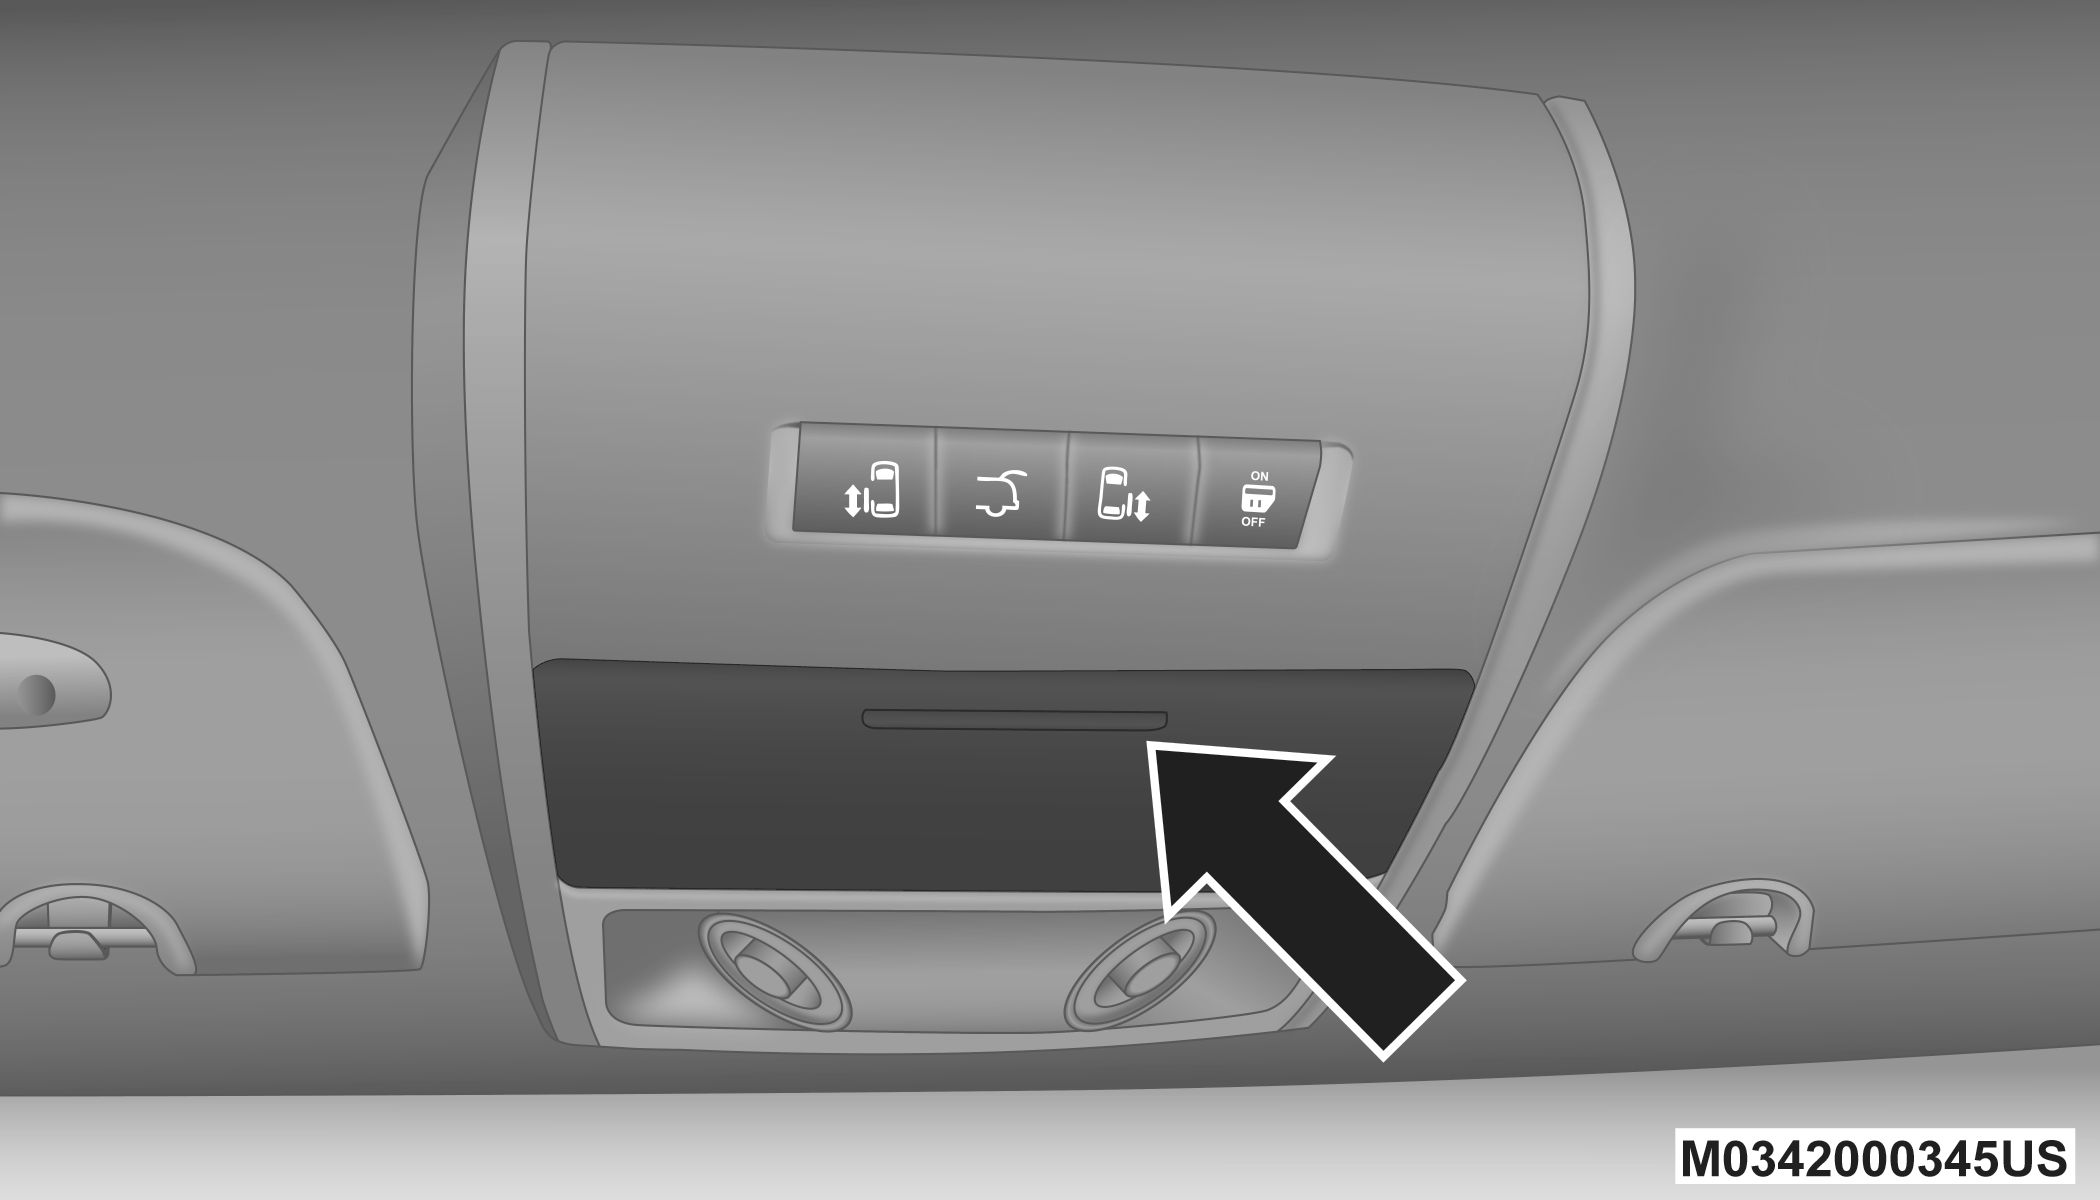
Rear Overhead Console — If Equipped
The rear overhead storage system is available. There is an LED at the front of the rear console that shines down on the front foot-well area while in courtesy mode, for added convenience.
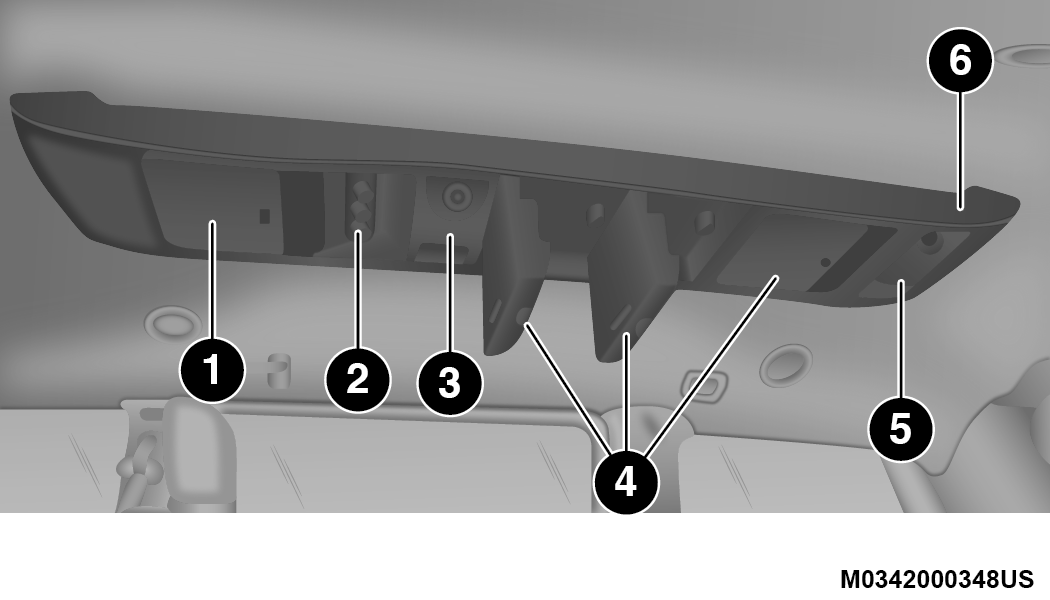
Rear Overhead Console Features
|
1 — LCD Screen |
|
2 — Rear HVAC |
|
3 — Interior Lights |
|
4 — Storage |
|
5 — Interior Lights |
|
6 — Halo Lighting |
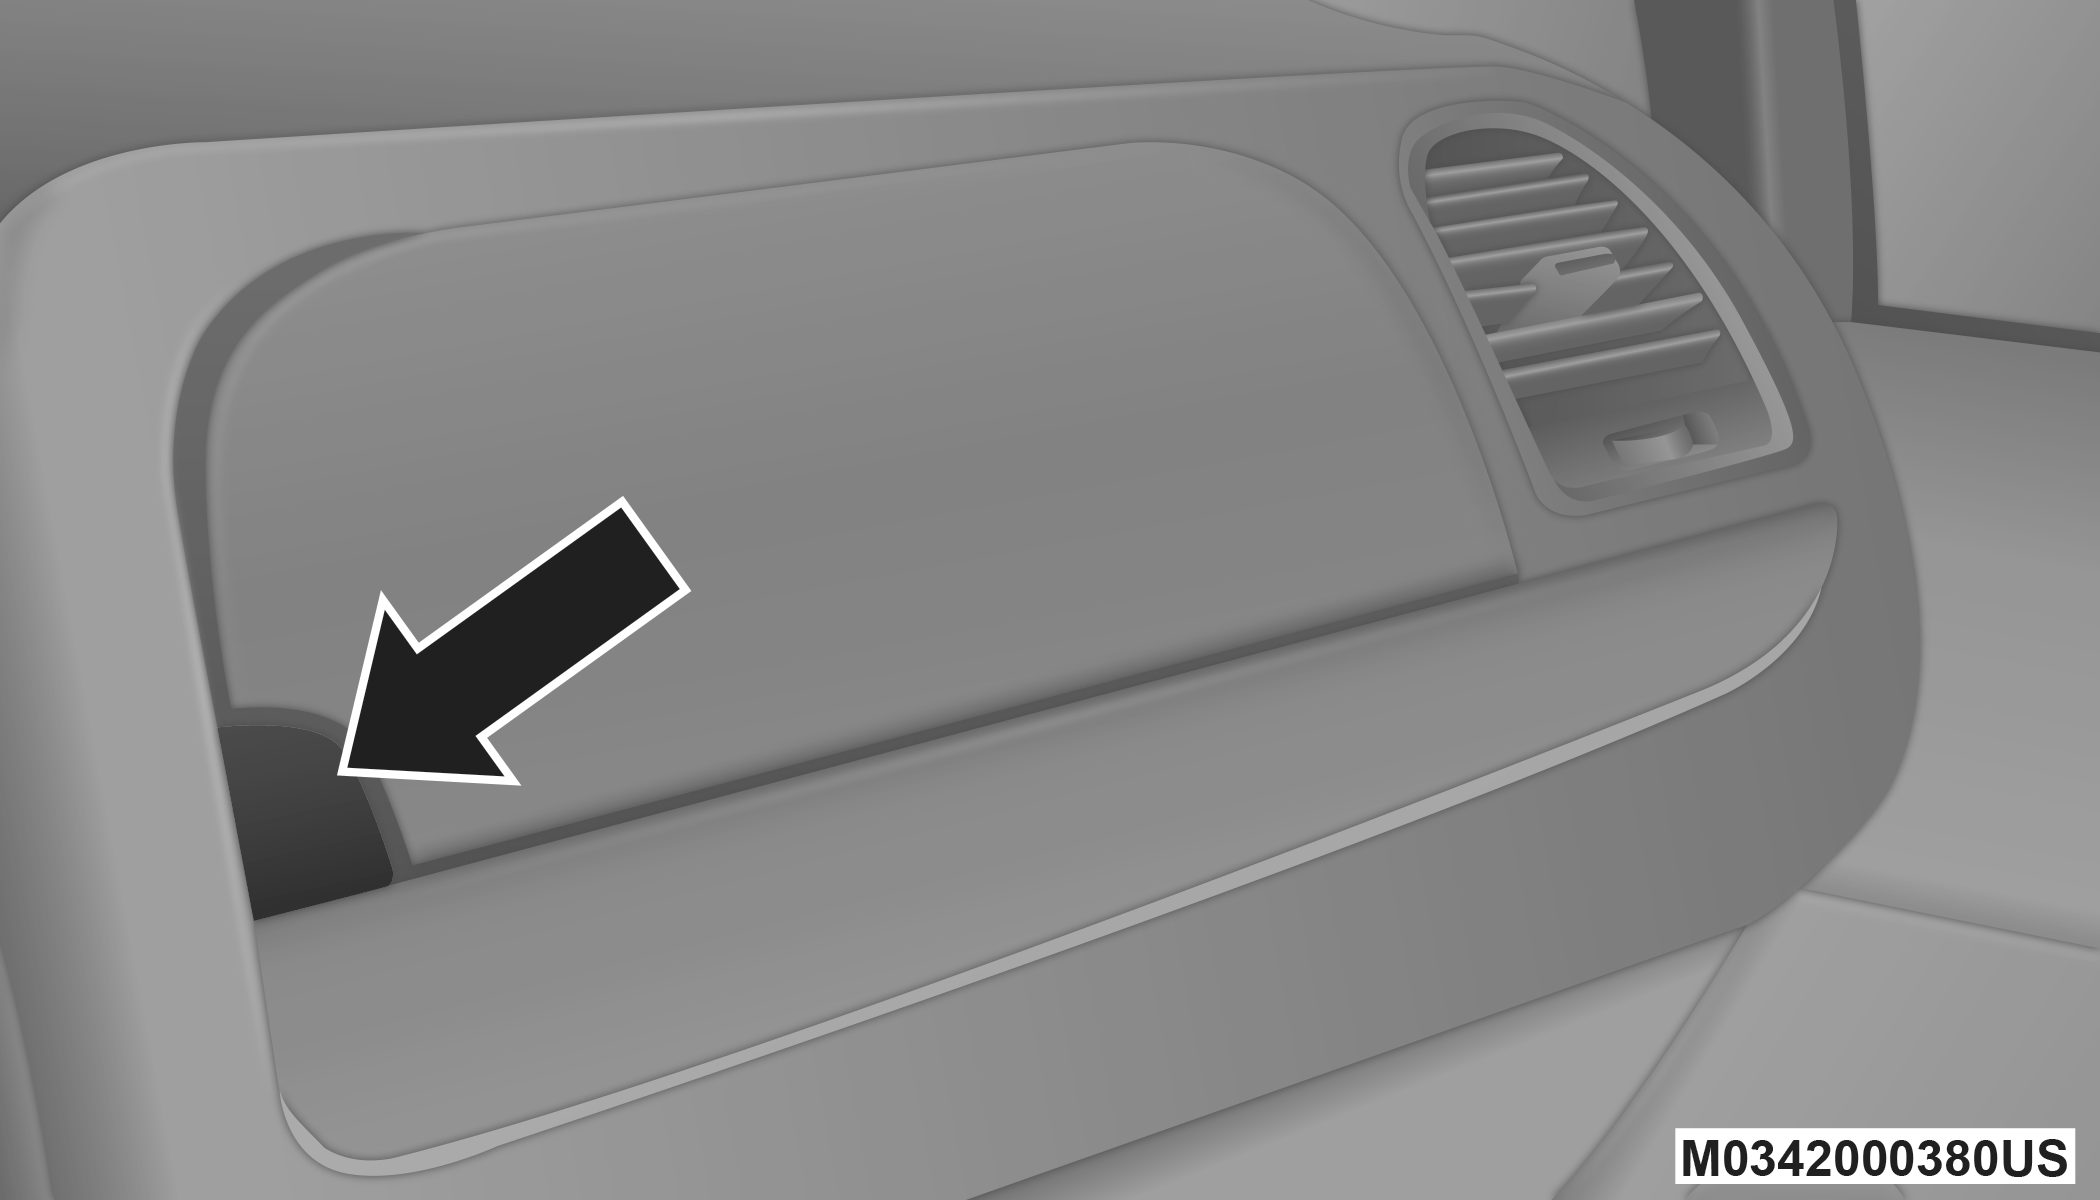
FRONT DOOR STORAGE
Both interior front door panels have multiple pockets for storage.
WARNING:
If containers of hot liquid are placed in the bottle holder, they can spill when the door is closed, burning the occupants. Be careful when closing the doors to avoid injury.
DRIVER SEATBACK STORAGE — IF EQUIPPED
The driver's seatback has a primary storage pocket on all models and an optional secondary mesh pocket.
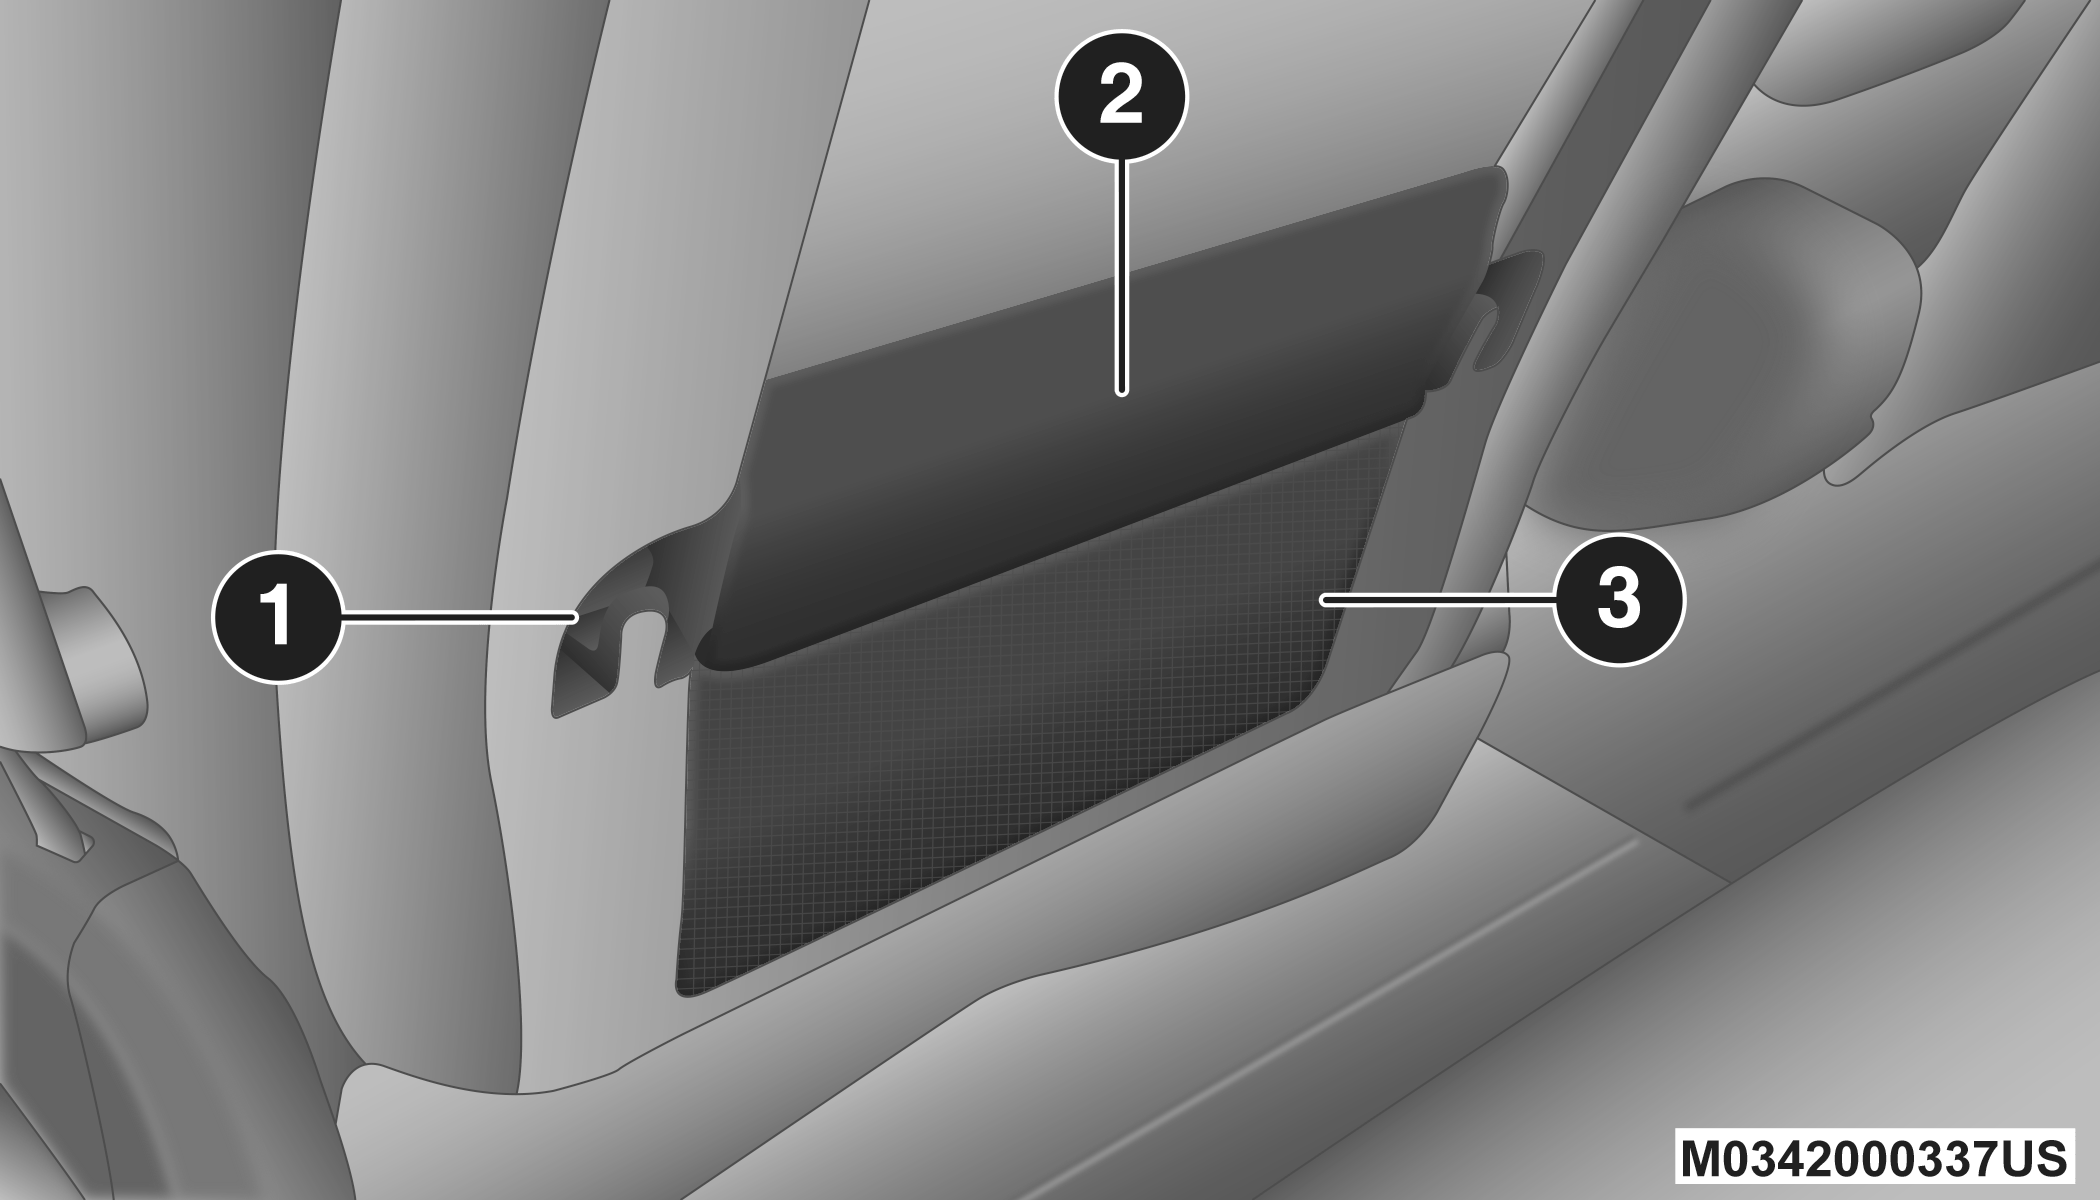
Driver’s Seatback Storage
|
1 — Bag Holder |
|
2 — Standard Pocket |
|
3 — Mesh Pocket |
UMBRELLA HOLDER
An umbrella holder has been conveniently molded into the left front door entry scuff molding.
Umbrella Holder
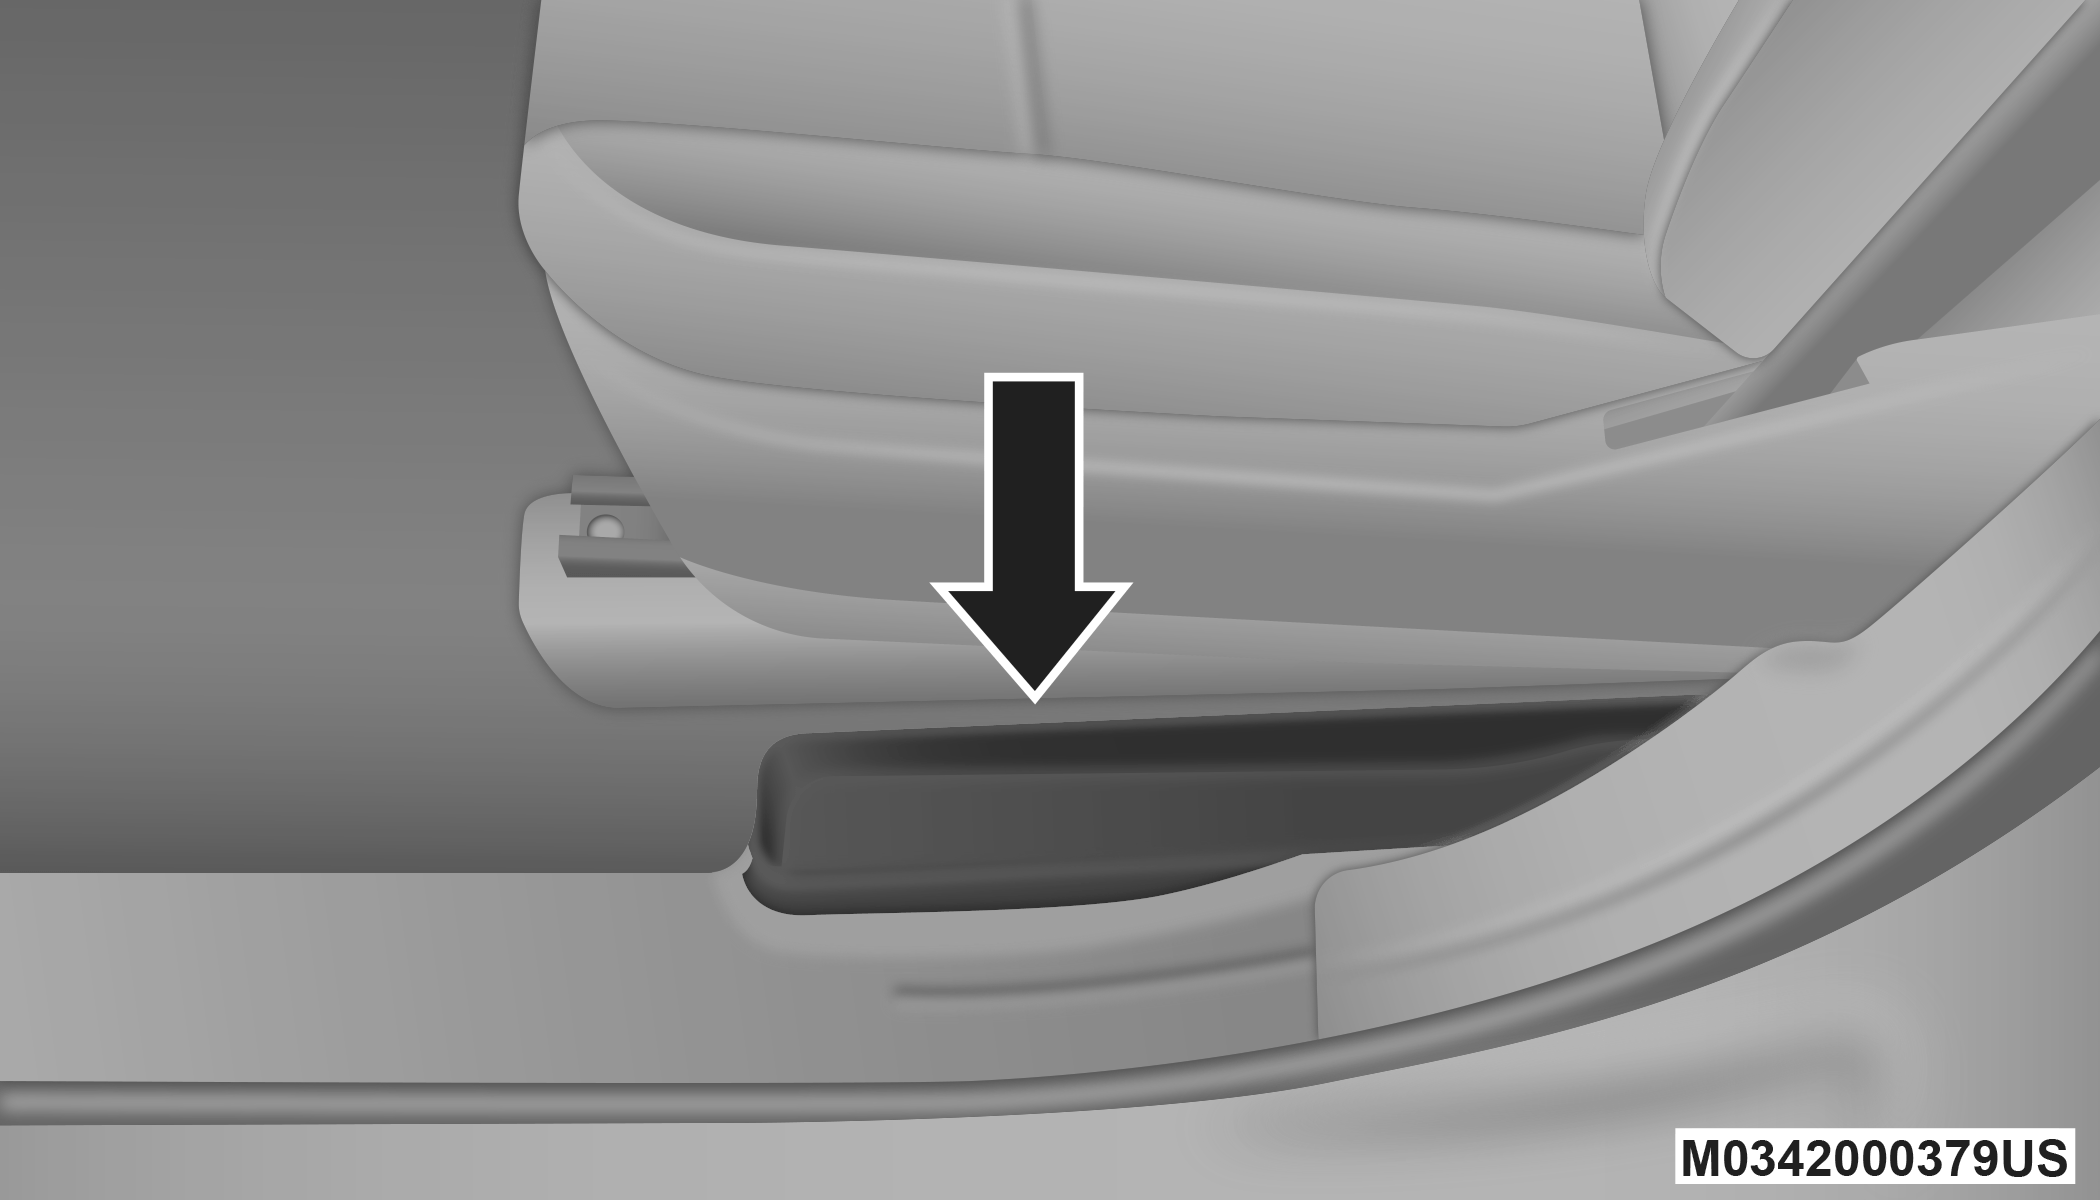
SECOND ROW SEAT STORAGE BINS — IF EQUIPPED
The seat storage bins are located on the floor in front of the second row seats. The area below the covers can be used for storage when the second row seat is in the upright position.
Pull up on the storage bin latch to open the cover. Slide the storage bin locking mechanism to the "lock" position to allow greater access to the storage bin.
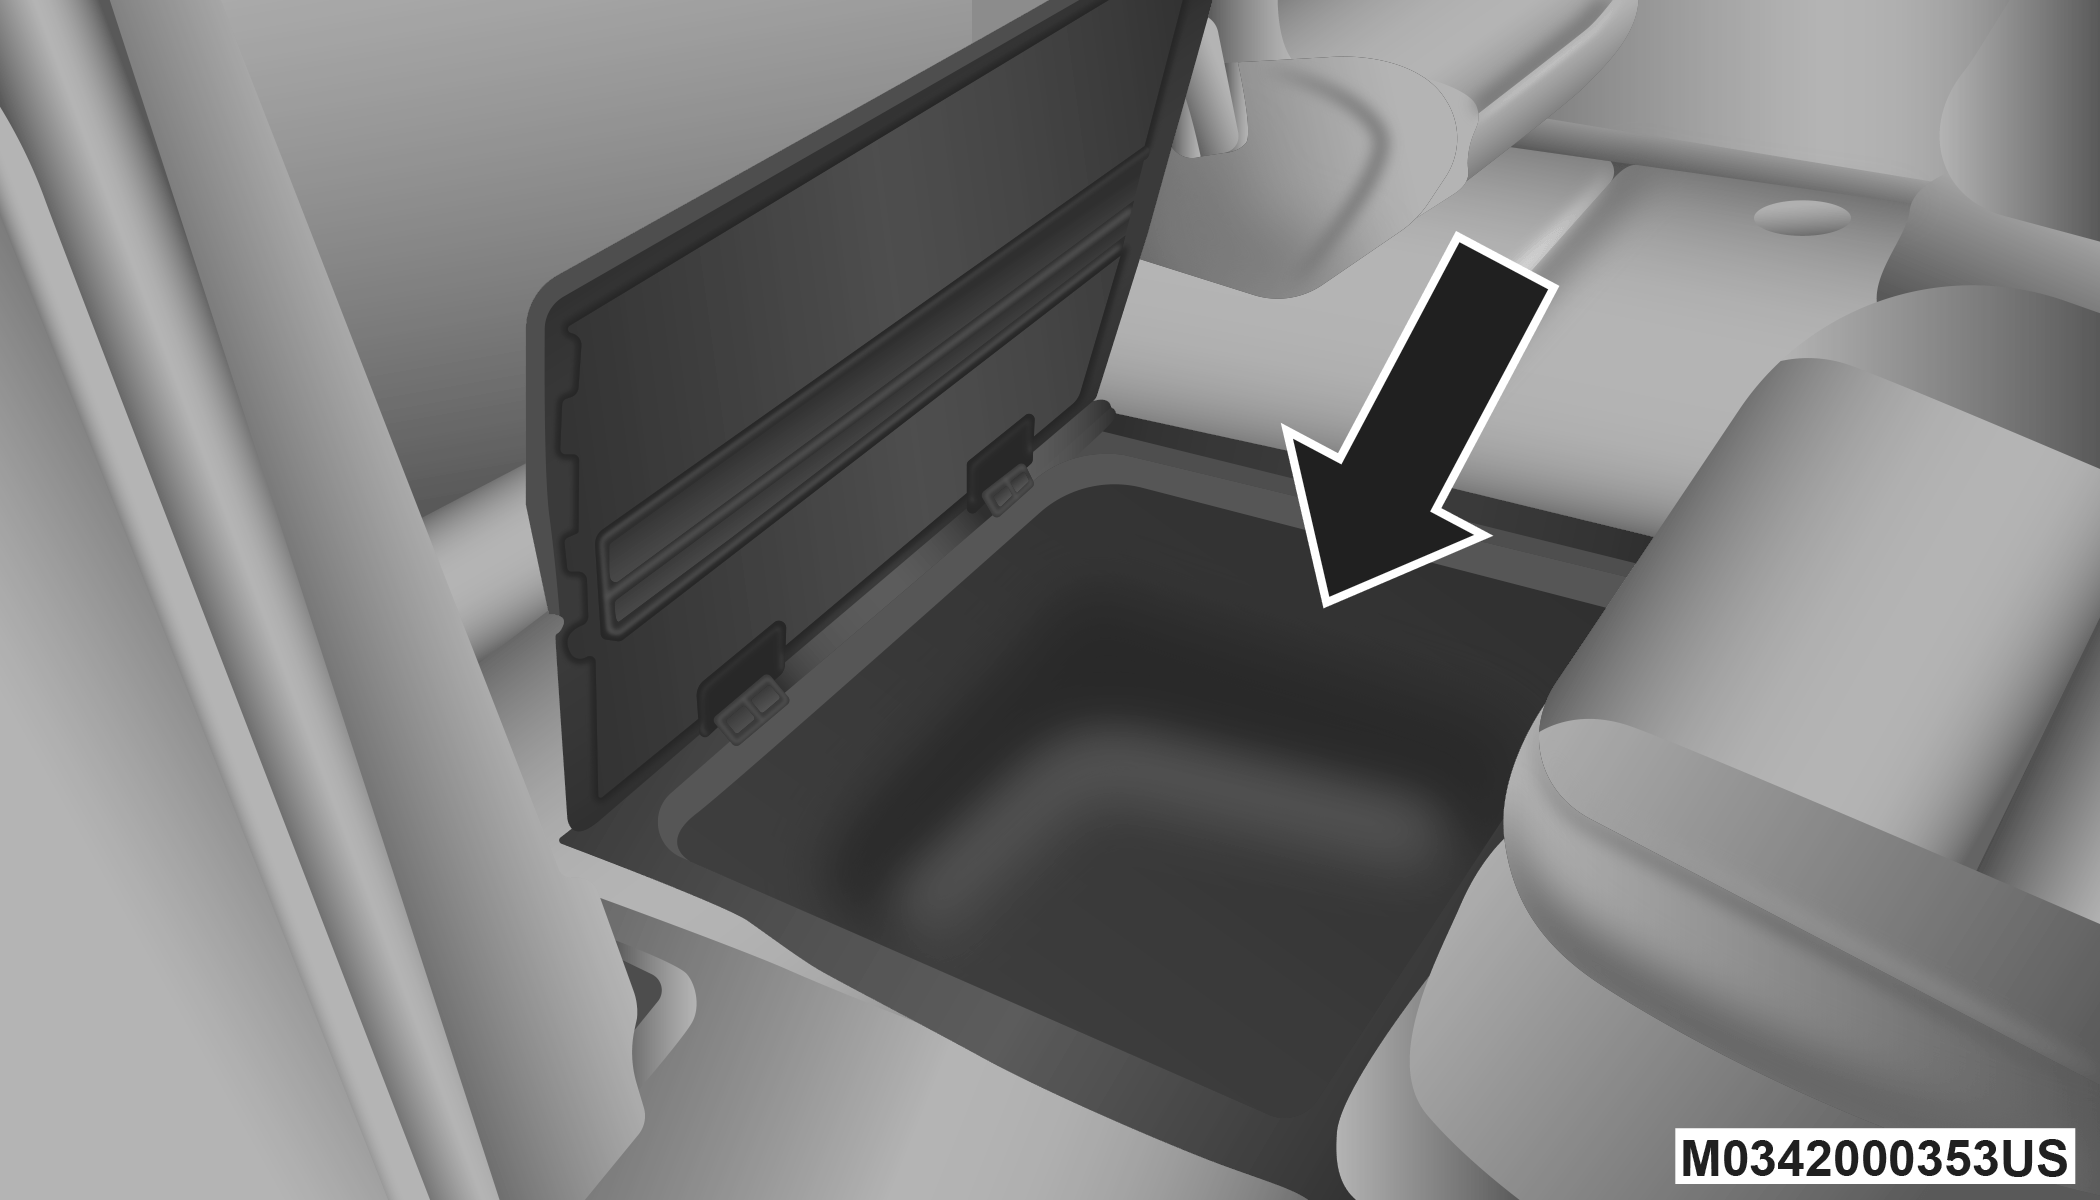
Storage Bin
WARNING:
In a collision, serious injury could result if the seat storage bin covers are not properly latched.
-
Do not drive the vehicle with the storage bin covers open.
-
Keep the storage bin covers closed and latched while the vehicle is in motion.
-
Do not operate the storage bin covers while the vehicle is in motion.
-
Do not use a storage bin latch as a tie down.
CAUTION:
The storage bin cover must lay flat and be locked to avoid damage from contact with the front seat tracks, which have minimal clearance to the cover. If the storage bin cover is left in the open position, front seat adjustment may damage the cover.
STORAGE BIN SAFETY WARNING
Carefully follow these warnings to help prevent personal injury or damage to your vehicle:
WARNING:
-
Always close the storage bin covers when your vehicle is unattended.
-
Do not allow children to have access to the second row seat storage bins. Once in the storage bin, young children may not be able to escape. If trapped in the storage bin, children can die from suffocation or heat stroke.
-
In a collision, serious injury could result if the seat storage bin covers are not properly latched.
-
Do not drive the vehicle with the storage bin covers open. Keep the storage bin covers closed and latched while the vehicle is in motion.
-
Do not operate the storage bin covers while the vehicle is in motion.
-
Do not use a storage bin latch as a tie down.
CAUTION:
The storage bin cover must lay flat and be locked to avoid damage from contact with the front seat tracks, which have minimal clearance to the cover. If the storage bin cover is left in the open position, front seat adjustment may damage the cover.
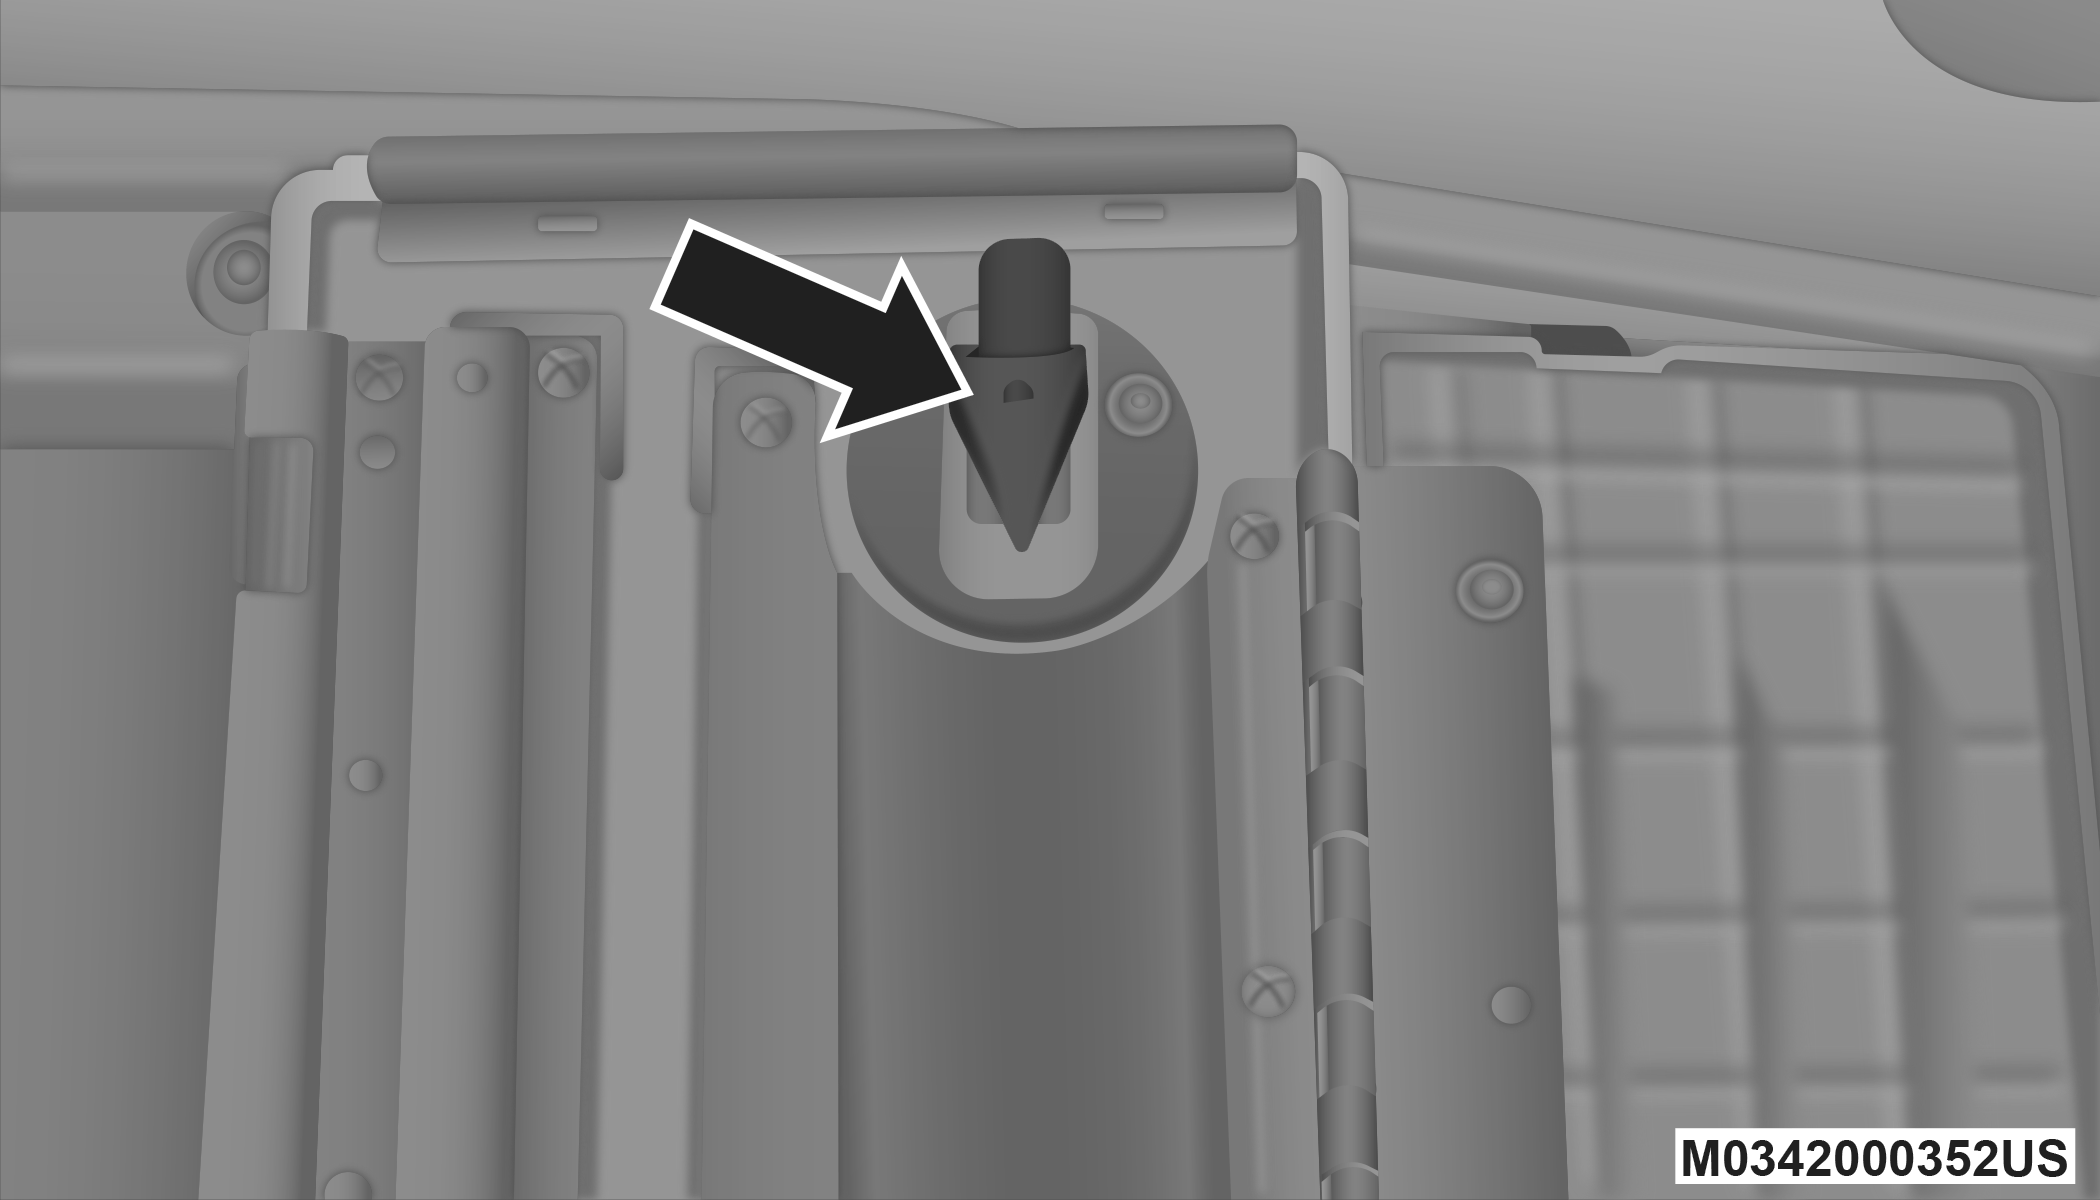
SEAT STORAGE BIN COVER EMERGENCY RELEASE LEVER
As a security measure, the Seat Storage Bin Cover has an Emergency Release Lever built into the latching mechanism.
Storage Bin Cover Emergency Release Lever
Note:
In the event of an individual being locked inside the storage bin, the storage bin cover can be opened from inside of the bin by pushing on the glow-in-the-dark lever attached to the storage bin cover latching mechanism.
COAT HOOKS
Coat hooks are located along the headliner for the second and third row seating positions. The coat hook load limit is 10 lb (4.5 kg). Exceeding the recommended load limit can cause the coat hooks to break or disengage from the vehicle.
CUPHOLDERS
INSTRUMENT PANEL CUPHOLDERS
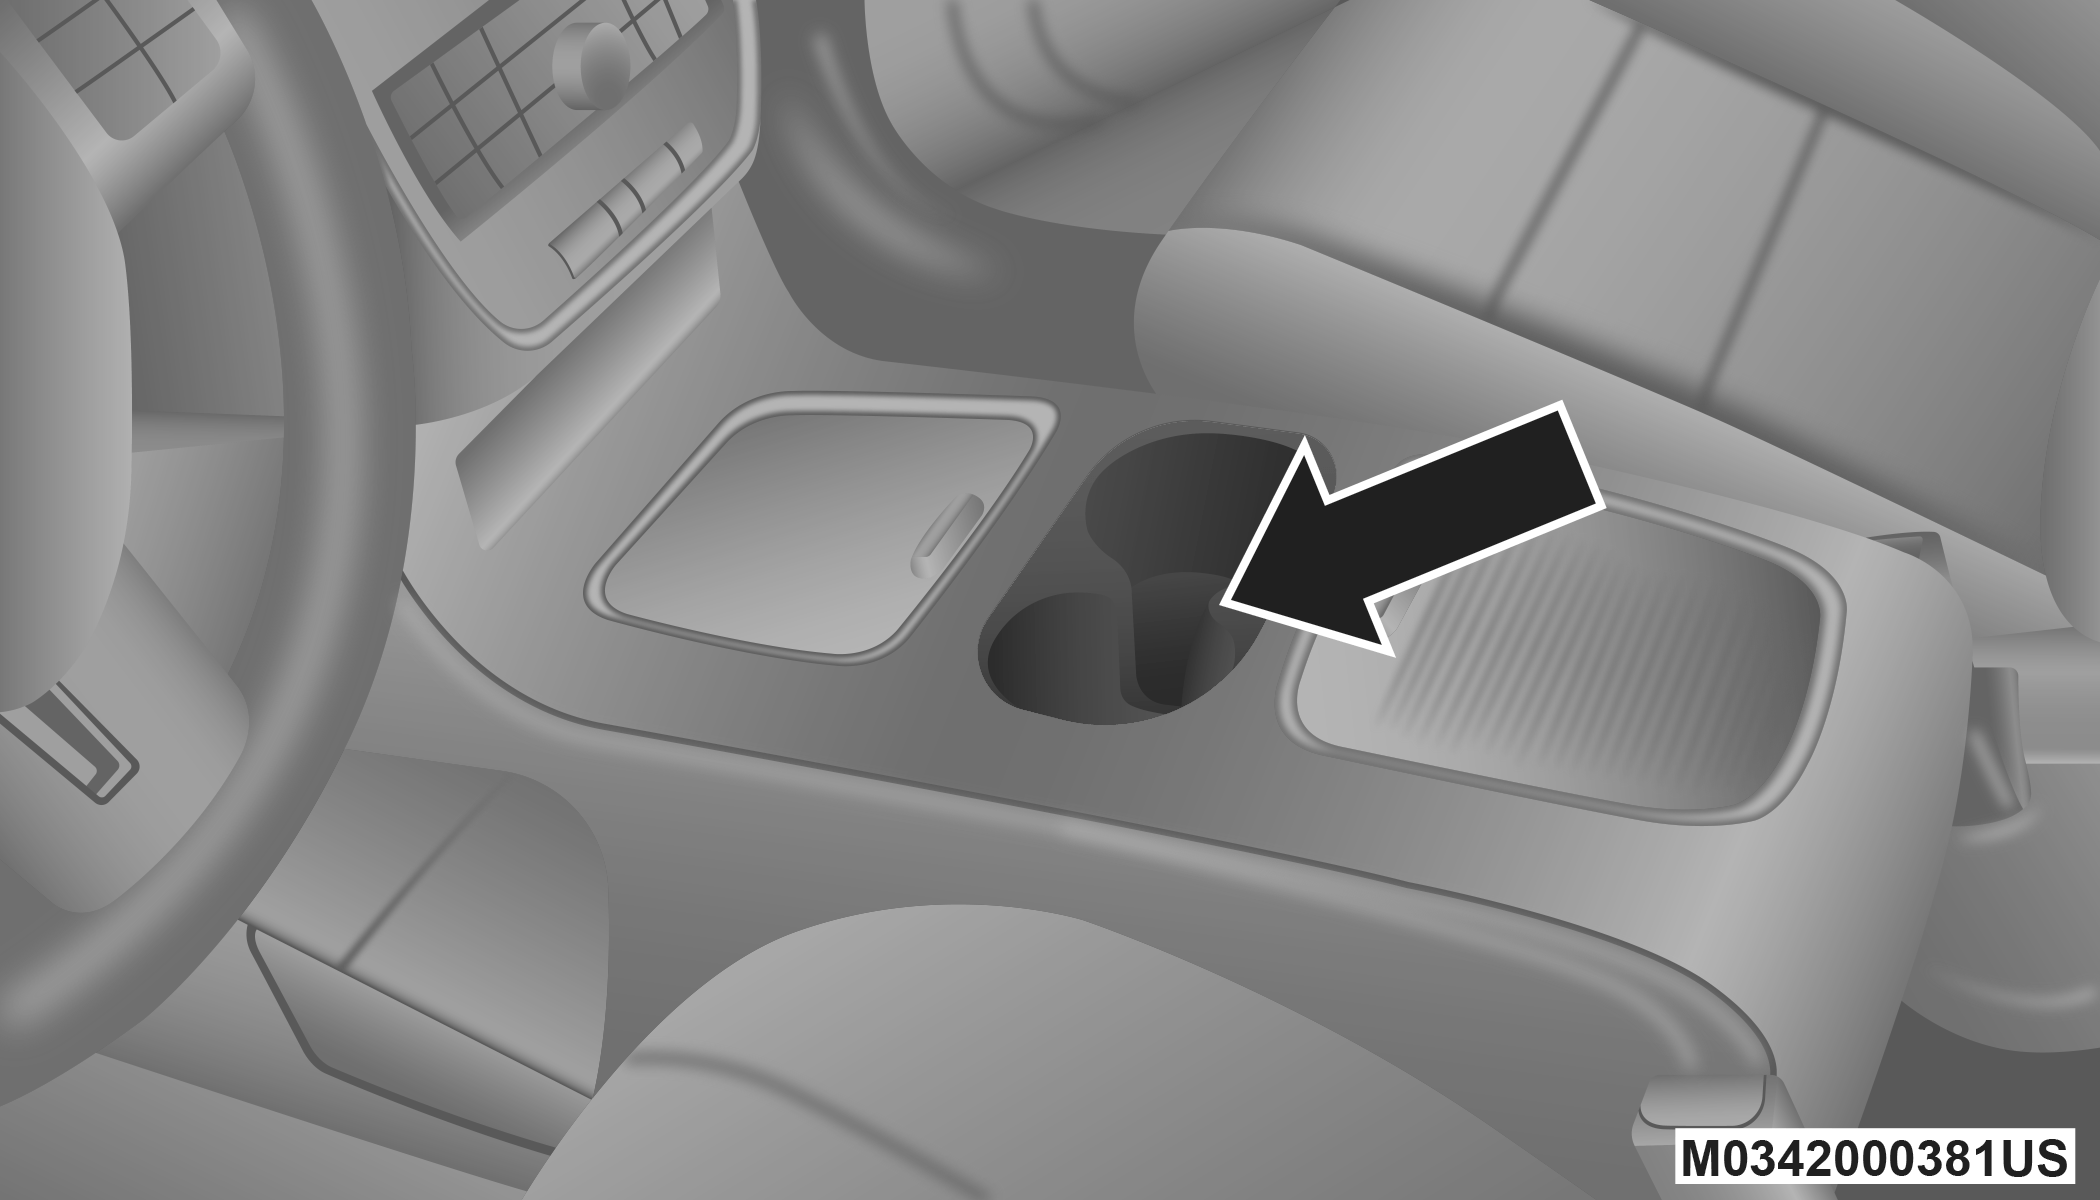
The instrument panel cupholders are located in a pull-out drawer just above the lower storage bin.
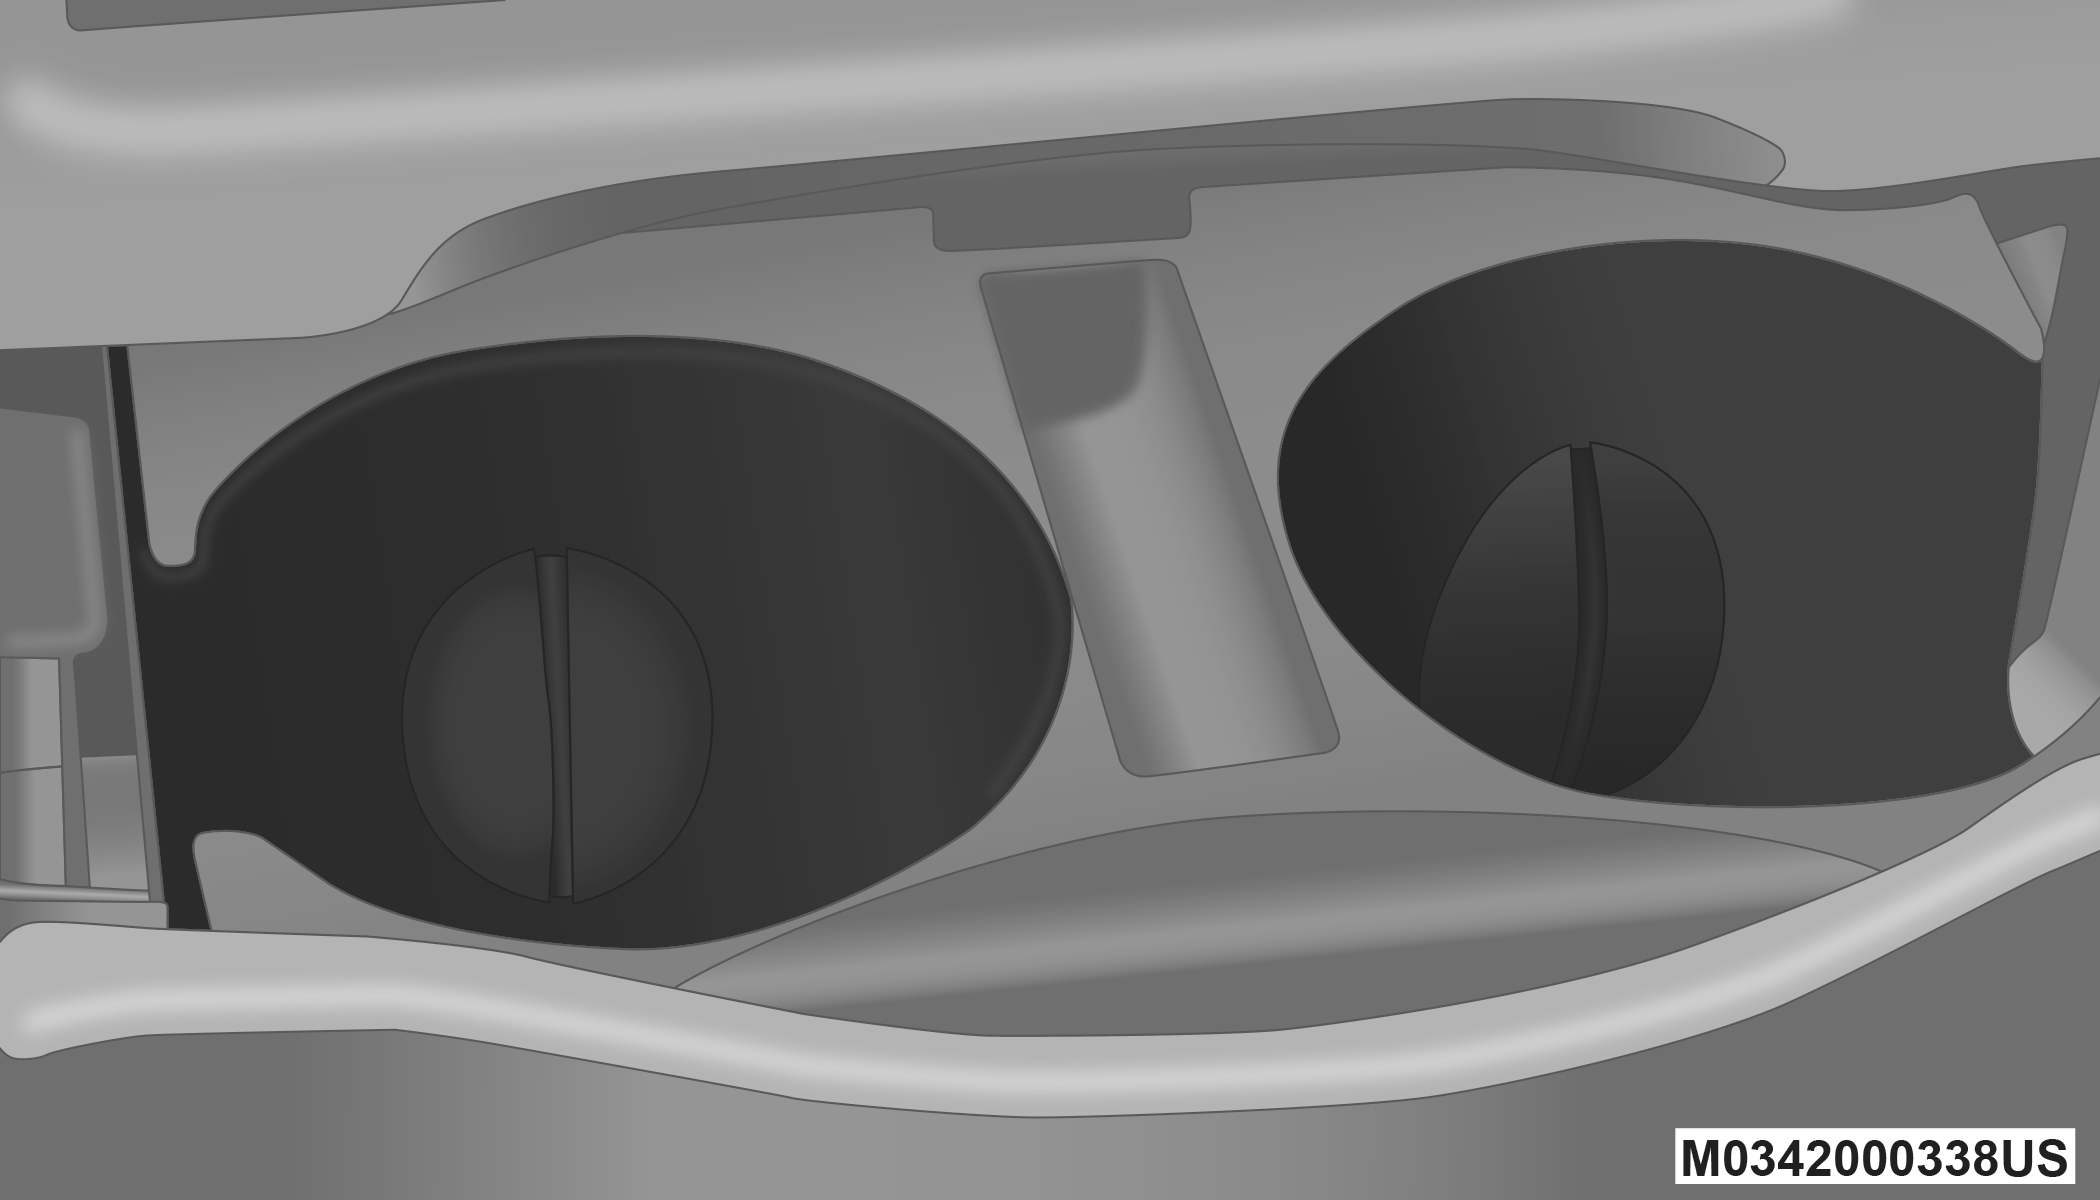
Front Cupholders
Pull the drawer out firmly until it stops, and place the container to be held in either one of the cupholder wells. The cupholders are designed to accommodate a wide variety of container types and sizes. Push down on the container to engage the cupholder retention features.
SUPER CONSOLE — IF EQUIPPED
On models equipped with the Super Console, there are two cupholders located in the center of the console.
Super Console Cupholders
For rear passengers two cupholders are located in the pull-out drawer, located in the back of the Super Console. Pull the drawer out to the first position to use the cupholders.
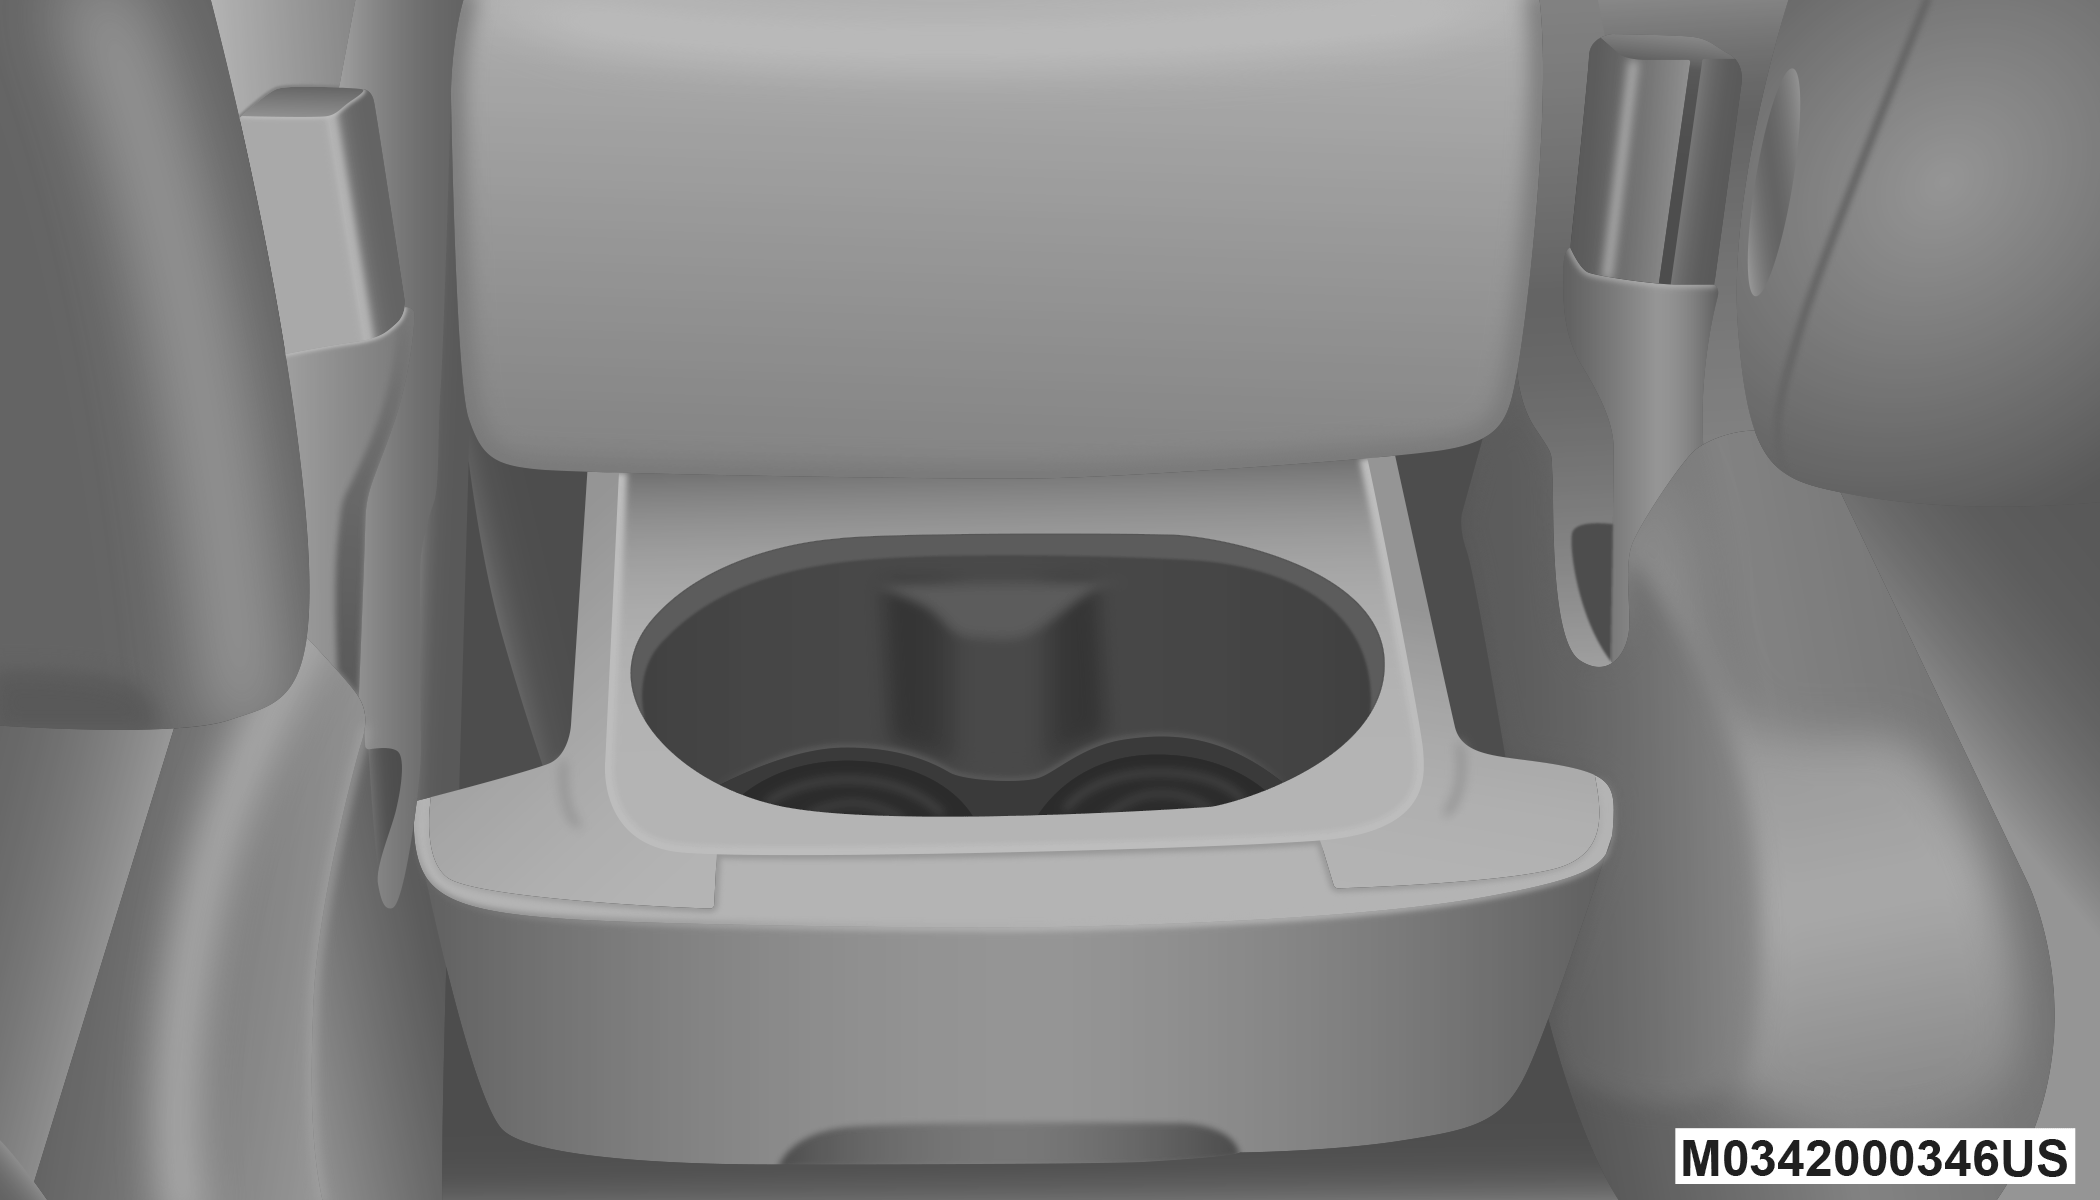
Rear Cupholders
INTERIOR BOTTLE HOLDERS
There are four bottle holders located in the interior. One bottle holder is molded into each front interior door trim panels, and one bottle holder is molded into each side sliding interior door trim panel. Each holder accommodates up to a 20 oz (0.6 L) plastic bottle.
WARNING:
If containers of hot liquid are placed in the bottle holder, they can spill when the door is closed, burning the occupants. Be careful when closing the doors to avoid injury.

Interior Bottle Holder
Two outboard mesh pockets are on intermediate seating. The mesh pockets are flexible enough to hold juice boxes, toys, games or MP3 players, etc.
SUN SCREENS — IF EQUIPPED
Sun screens are available for second row seating windows. The screens store in the sill trim panels, and the tops of the windows are equipped with hooks that the sun screens attach to when pulled out.

Sun Screen Retracted
Gently pull up on the tab to raise the sun screen. Continue pulling the sun screen until the tab is near the top of the window.
Once the screen is completely to the top of the window, extend the top bar of the sun screen over the two hooks attached to the top of the window.

Sun Screen Extended
To lower the sun screen, gently lift the tab upward to disengage the hooks, and feed the screen back into the base sill.
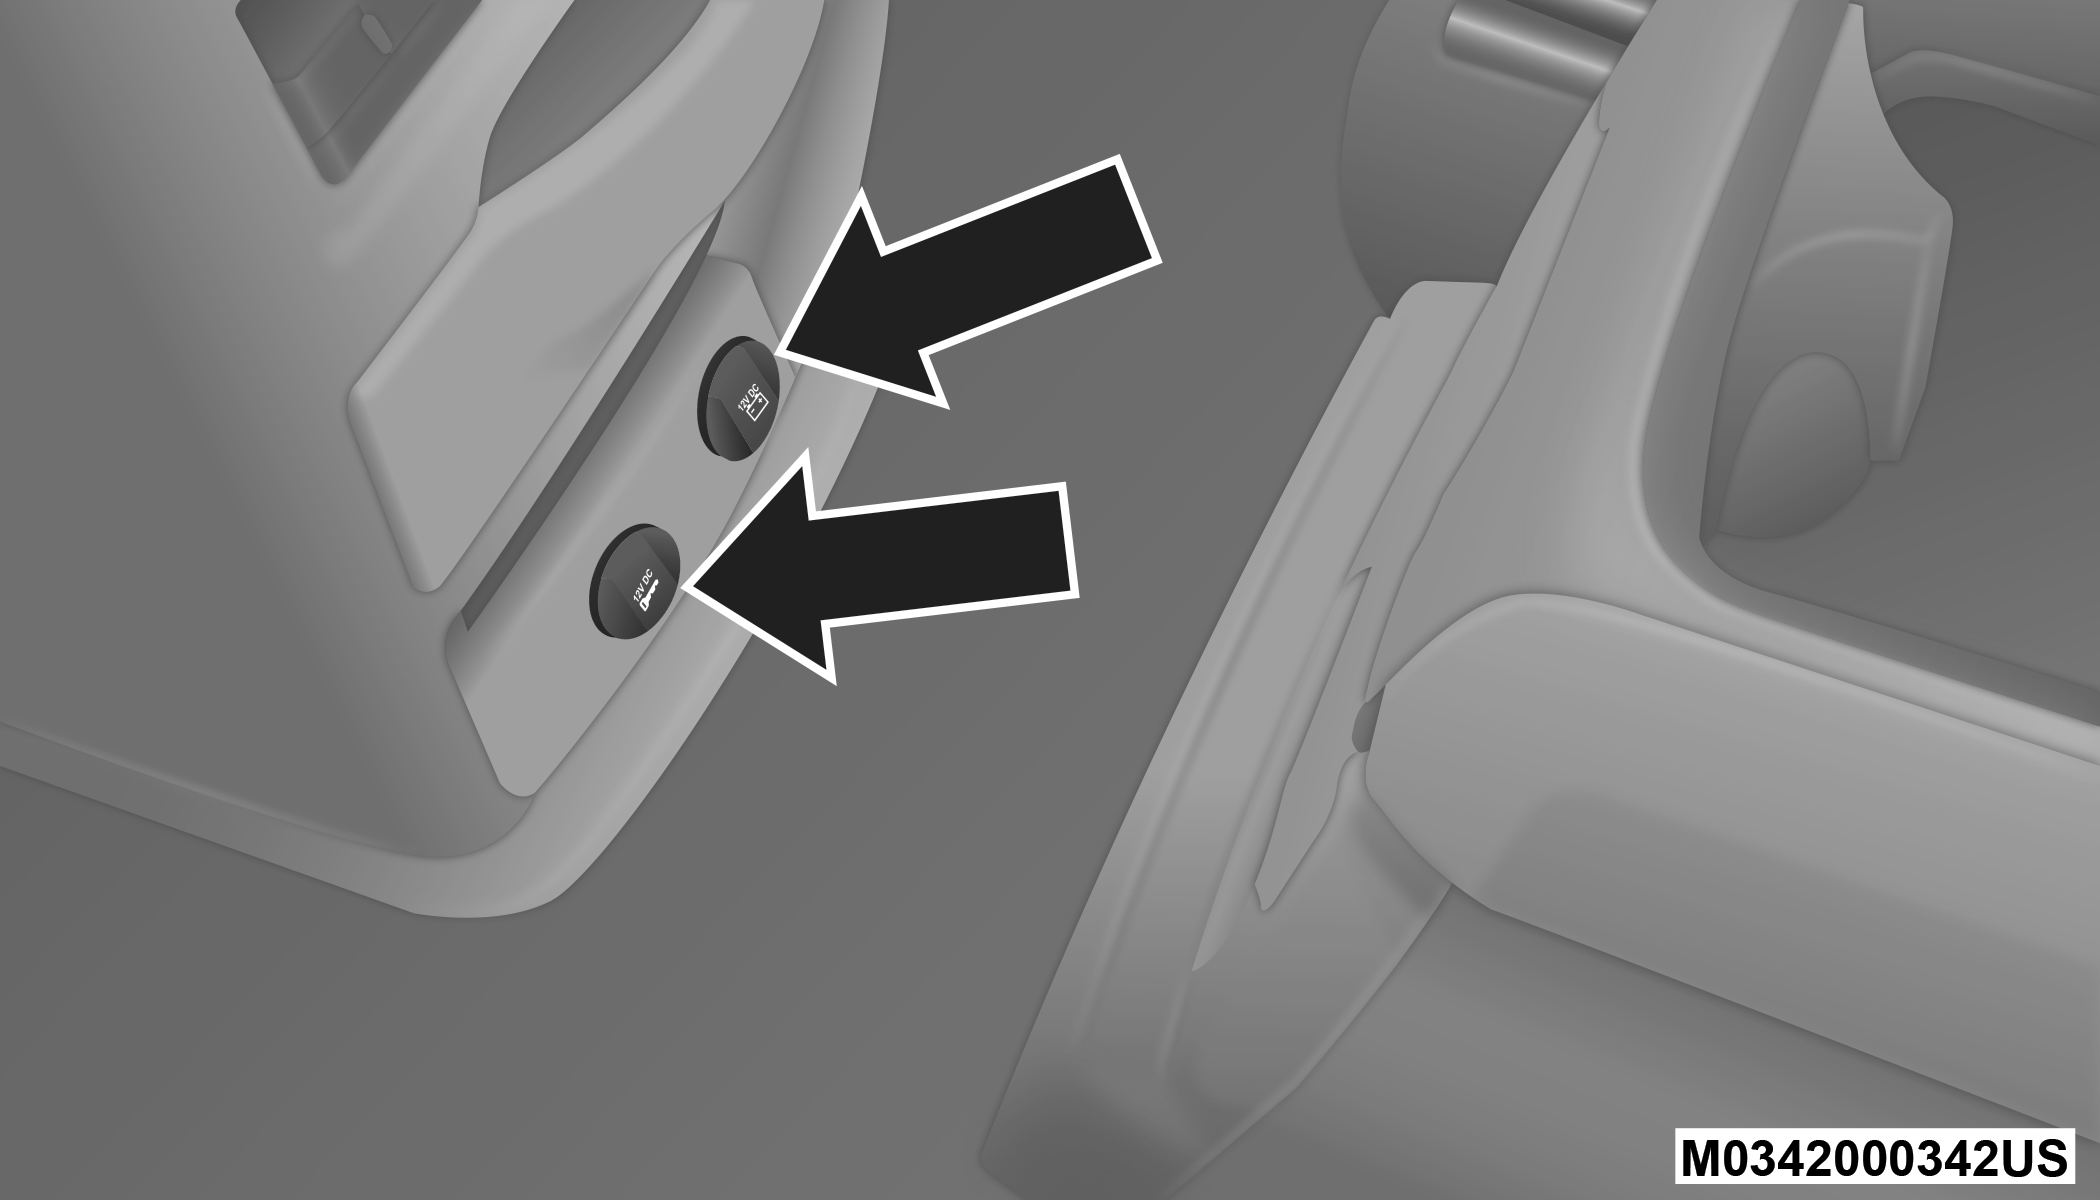
ELECTRICAL POWER OUTLETS — IF EQUIPPED
Two 12 Volt (13 Amp) power outlets are located on the lower instrument panel, below the open storage bin. The driver-side power outlet is controlled by the ignition switch and the passenger-side power outlet is connected directly to the battery. The driver-side power outlet will also operate a conventional cigar lighter unit (if equipped with an optional Smoker's Package).
Instrument Panel Power Outlets
CAUTION:
-
Do not exceed the maximum power of 160 Watts (13 Amps) at 12 Volts. If the 160 Watt (13 Amp) power rating is exceeded the fuse protecting the system will need to be replaced.
-
Power outlets are designed for accessory plugs only. Do not insert any other object in the power outlets as this will damage the outlet and blow the fuse. Improper use of the power outlet can cause damage not covered by your New Vehicle Limited Warranty.
One outlet in the removable floor console (if equipped) shares a fuse with the lower outlet in the instrument panel and is also connected to the battery. Do not exceed a maximum power of 160 Watts (13 Amps) shared between the lower panel outlet and the removable floor console outlet.

Removable Console Power Outlet
On vehicles equipped, center console power outlets are located under the retractable cover. To access the power outlets push down on the cover and slide it toward the instrument panel.

Center Console Power Outlets
There is an additional 12 Volt power outlet located on the left rear trim panel immediately behind the second row left passenger seat.
Rear Panel Power Outlet
The outlet in the rear quarter panel near the liftgate and the upper outlet in the instrument panel are both controlled by the ignition switch. Each of these outlets can support 160 Watts (13 Amps). Do not exceed 160 Watts (13 Amps) for each of these outlets.
The power outlets include tethered caps, labeled with a key or battery symbol indicating the power source. The power outlet, located on the lower instrument panel, is powered directly from the battery. Items plugged into this power outlet may discharge the battery and/or prevent the engine from starting.
WARNING:
To avoid serious injury or death:
-
Only devices designed for use in this type of outlet should be inserted into any 12 Volt outlet.
-
Do not touch with wet hands.
-
Close the lid when not in use and while driving the vehicle.
-
If this outlet is mishandled, it may cause an electric shock and failure.
CAUTION:
Many accessories that can be plugged in draw power from the vehicle's battery, even when not in use (i.e., cellular phones, etc.). Eventually, if plugged in long enough, the vehicle's battery will discharge sufficiently to degrade battery life and/or prevent the engine from starting.
Accessories that draw higher power (i.e., coolers, vacuum cleaners, lights, etc.), will degrade the battery even more quickly. Only use these intermittently and with greater caution.
After the use of high power draw accessories, or long periods of the vehicle not being started (with accessories still plugged in), the vehicle must be driven a sufficient length of time to allow the alternator to recharge the vehicle's battery.
Power outlets are designed for accessory plugs only. Do not hang any type of accessory or accessory bracket from the plug. Improper use of the power outlet can cause damage.
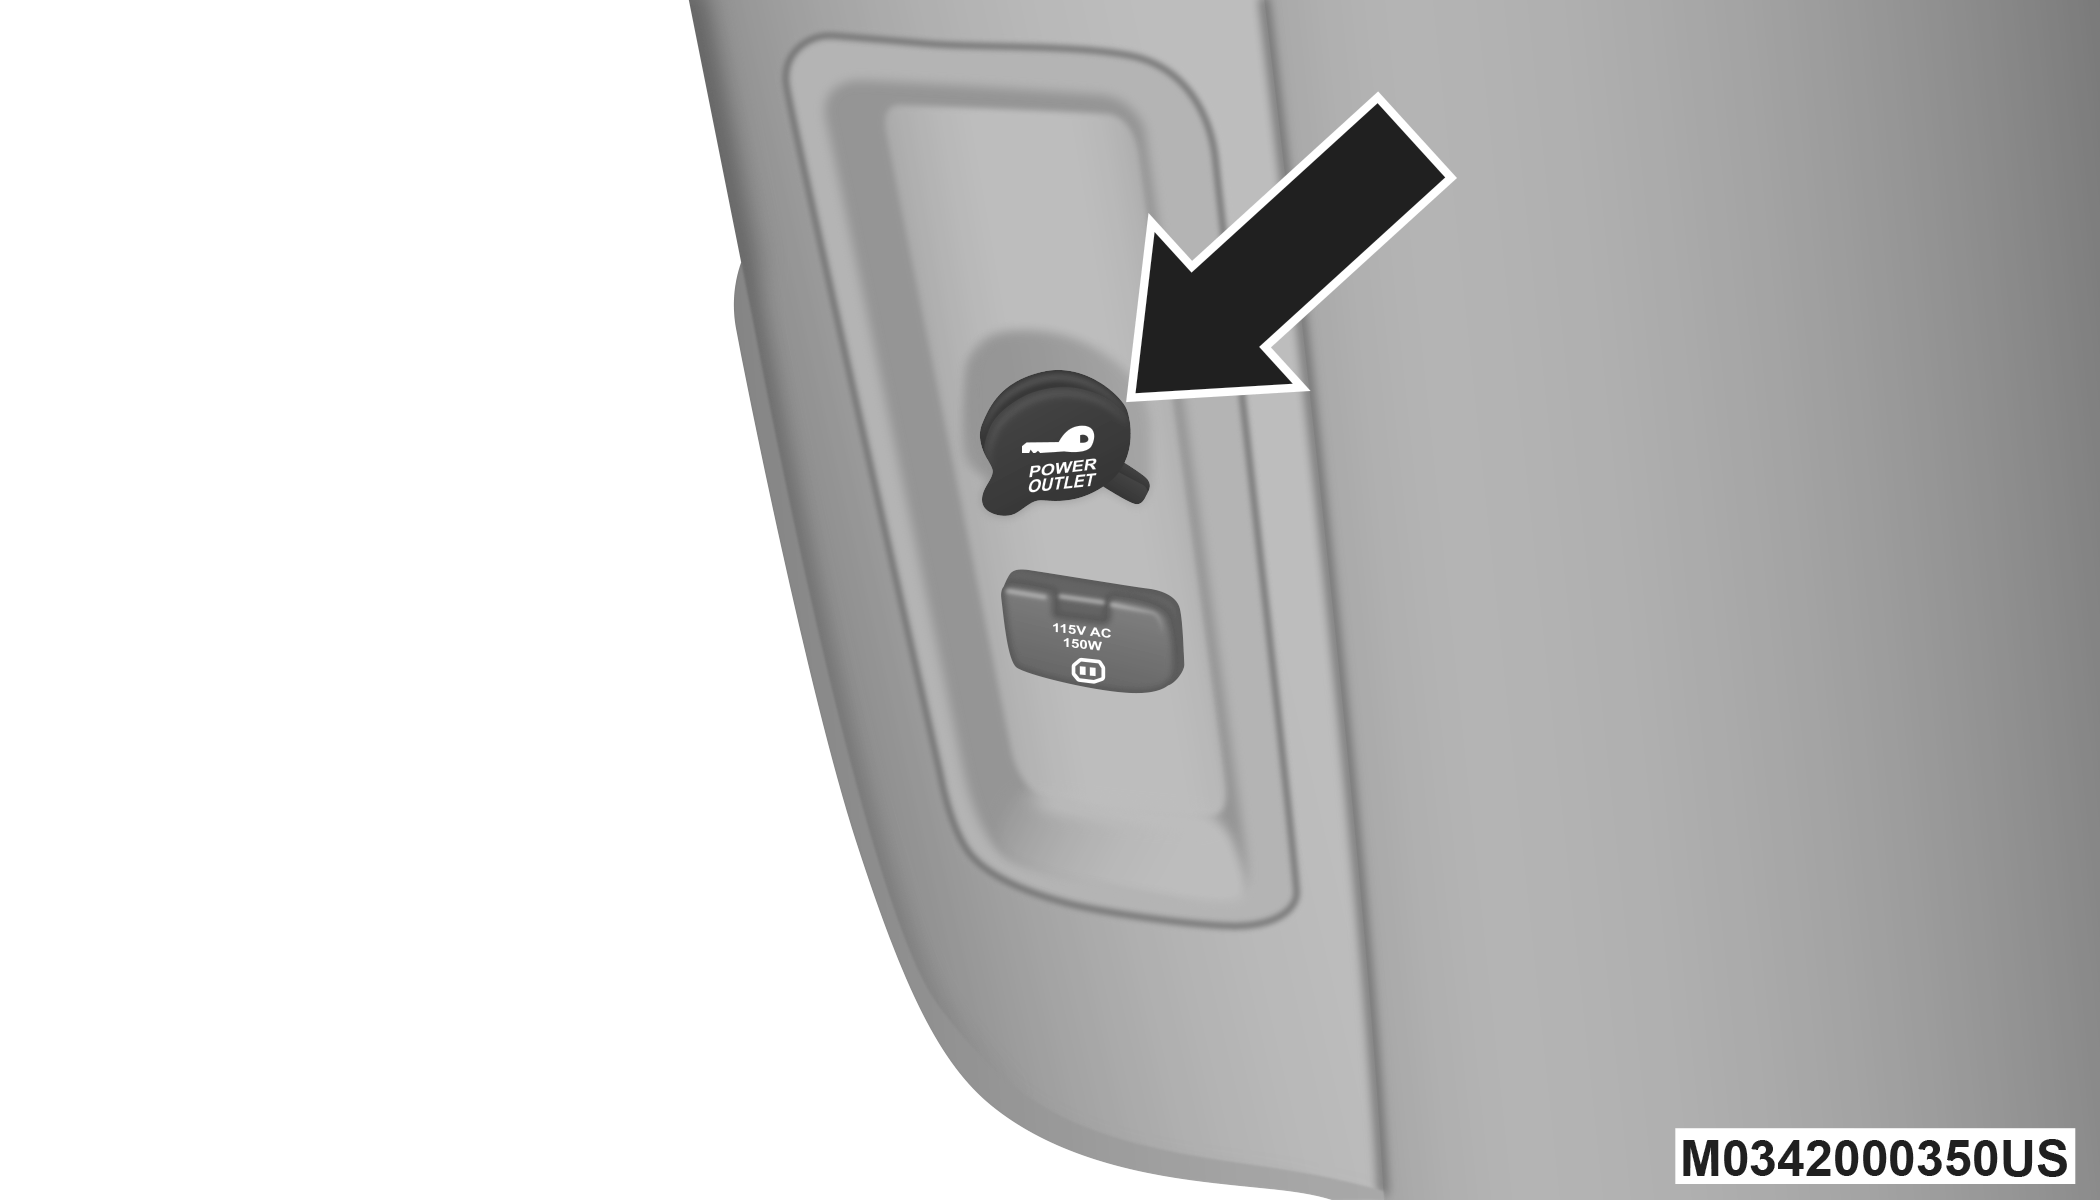
POWER INVERTER — IF EQUIPPED
A 115 Volt, 150 Watt inverter outlet converts DC current to AC current, and is located on the left rear trim panel immediately behind the second row left passenger seat.
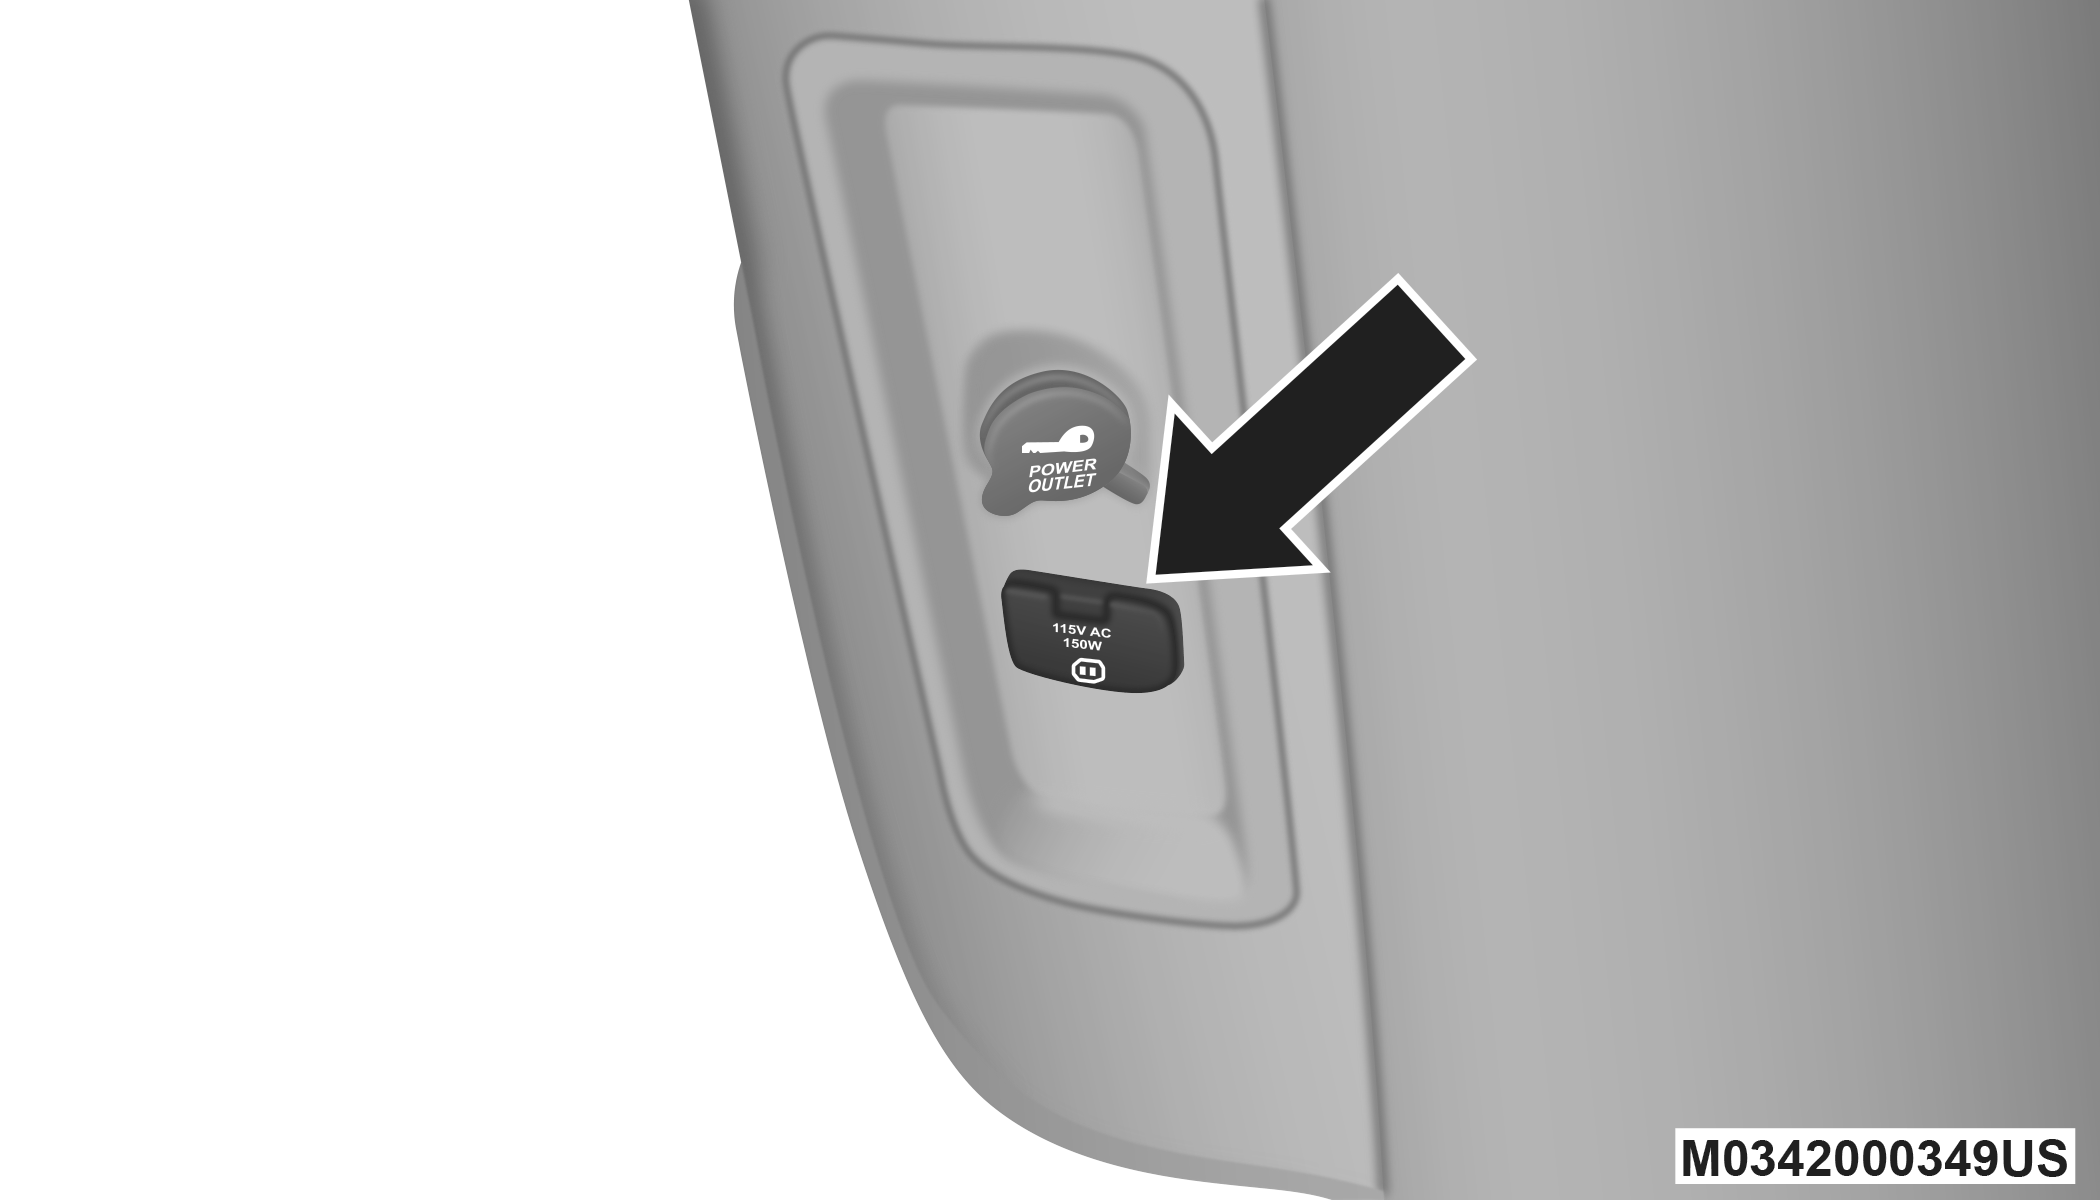
Power Inverter Outlet
The power inverter switch is located on the instrument panel below the climate controls.
To turn on the power outlet, push the switch once. Push the switch a second time to turn the power outlet off.
This outlet can power cellular phones, electronics and other low power devices requiring power up to 150 Watts. Certain high-end video game consoles exceed this power limit, as will most power tools.
The power inverter is designed with built-in overload protection. If the power rating of 150 Watts is exceeded, the power inverter shuts down. Once the electrical device has been removed from the outlet, the inverter should automatically reset. If the power rating exceeds approximately 170 Watts, the power inverter may have to be reset manually. To reset the inverter manually push the power inverter button off and on. To avoid overloading the circuit, check the power ratings on electrical devices prior to using the inverter.
WARNING:
To avoid serious injury or death:
-
Do not insert any objects into the receptacles.
-
Do not touch with wet hands.
-
Close the lid when not in use.
-
If this outlet is mishandled, it may cause an electric shock and failure.
SMOKER'S PACKAGE KIT — IF EQUIPPED
With the optional authorized dealer installed Smoker's Package Kit, a removable ash receiver is inserted into one of the two cupholders in the center front instrument panel. To install the ash receiver, align the receiver so the thumb grip on the lid is facing rearward. Push the ash receiver into either of the cup wells to secure. Pull upward on the ash receiver to remove for cleaning and/or storage.
The left rear trim panel cupholder is designed to accommodate a second ash receiver, if desired.
SUNGLASS STORAGE BIN — IF EQUIPPED
At the front of the overhead console, a compartment is provided for the storage of two pairs of sunglasses.
From the closed position, push the door latch to open the compartment.
Over Door Latch
The door will slowly rotate to the full open position.
Full Open Position
From this position, the door can be fully closed or, by rotating upward about 3/4 of the way and releasing, positioned for conversation mirror use.
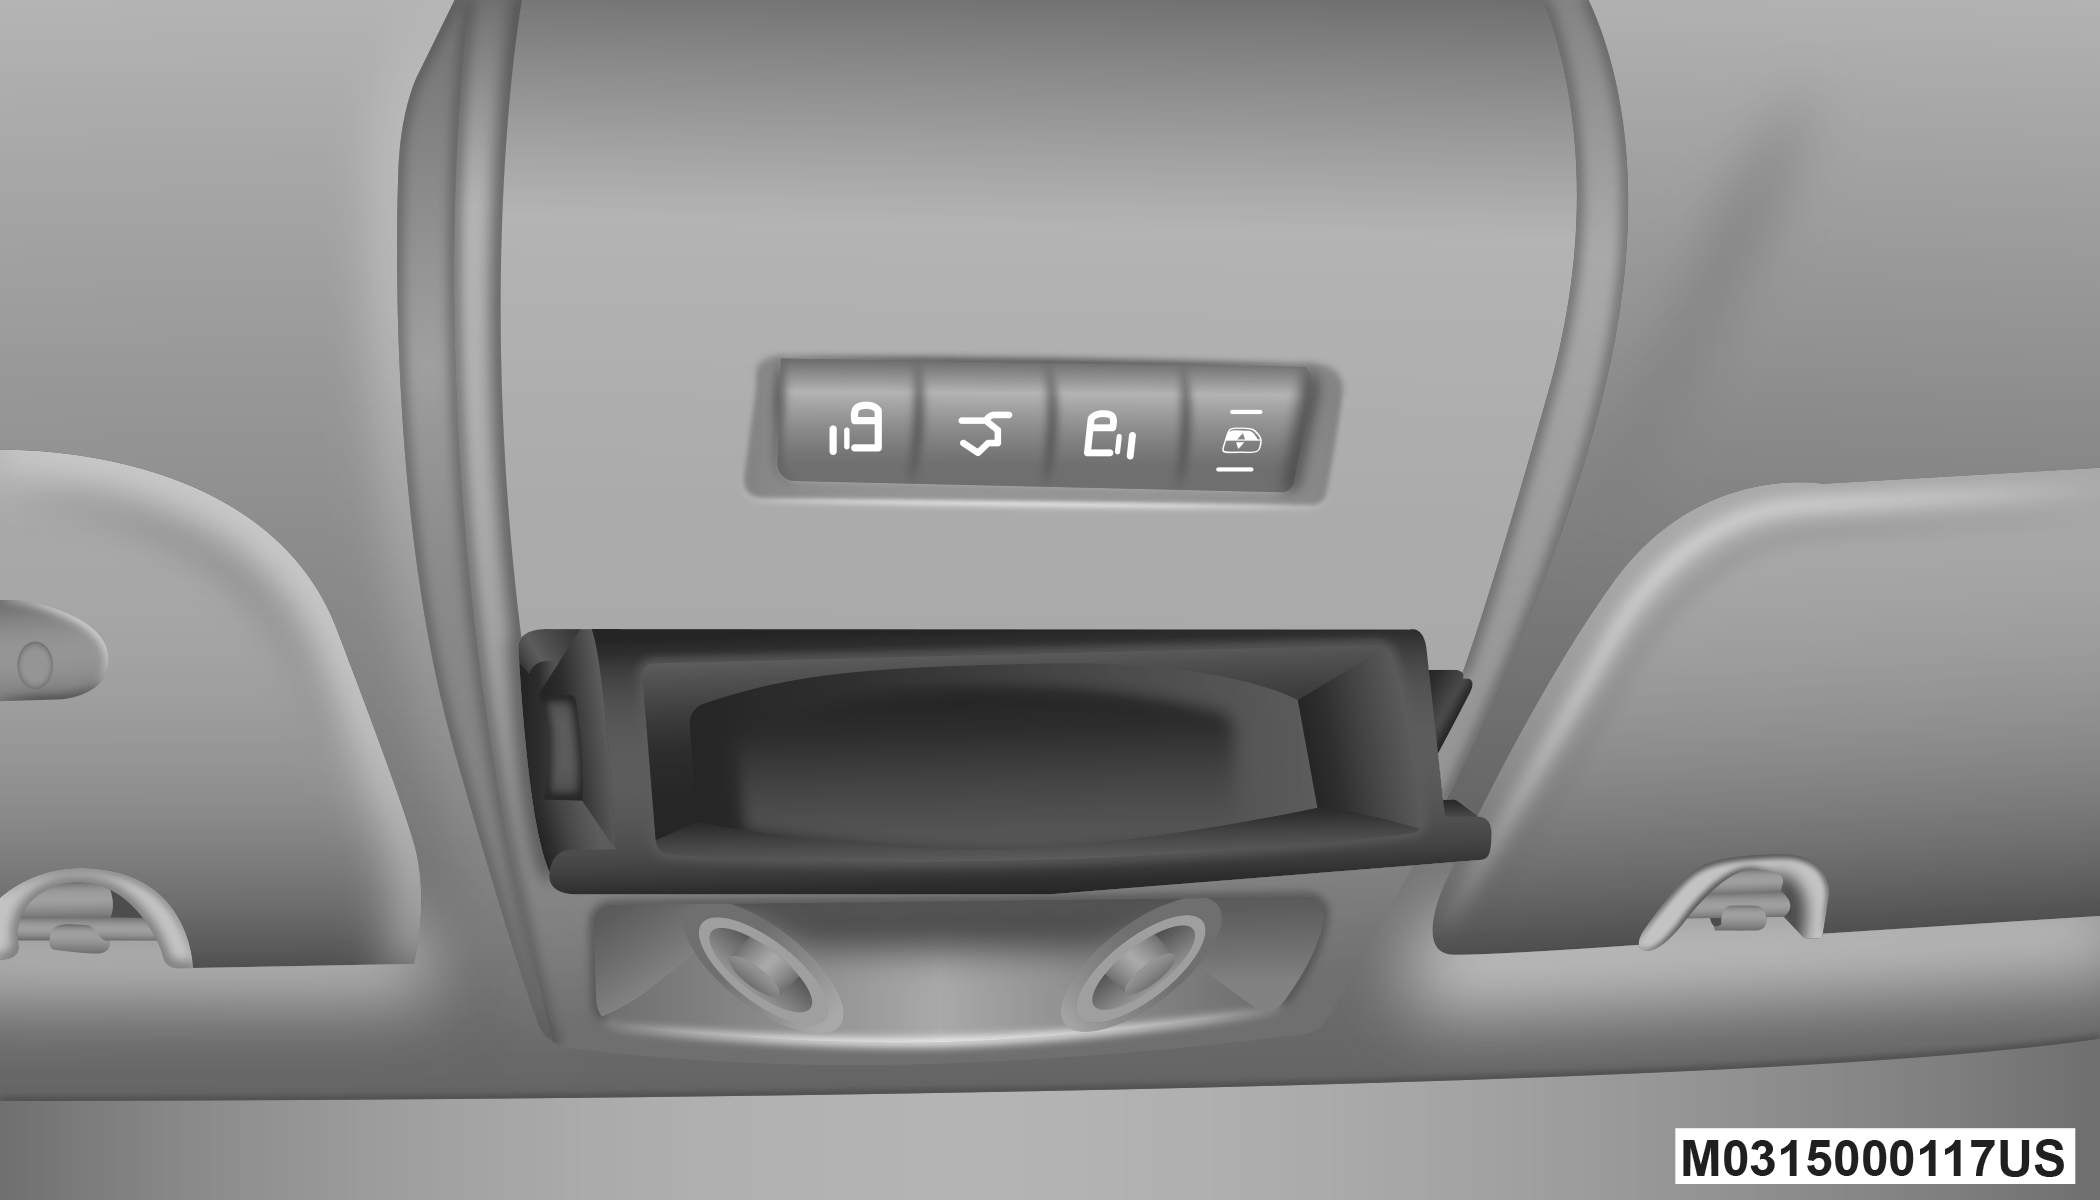
Conversation Mirror Position
Note:
From the “conversation mirror” position, the door can only be closed.
To return to the full open position, the door must first be closed and then opened by pushing the latch again to release.
Download Manual