Bulb replacement
|
Interior Bulbs |
|
|
Bulb Name |
Bulb Number |
|
Center & Rear Dome Lamp |
578 |
|
Center & Rear Reading Lamps |
578 |
|
Front Door Courtesy Lamp |
578 |
|
Front Header Reading Lamps – If Equipped |
578 |
|
Instrument Cluster Lamps |
PC74 |
|
Liftgate Lamp(s) |
578 |
|
Overhead Console Reading Lamps |
PC579 |
|
Removable Console Lamp – If Equipped |
194 |
|
Visor Vanity Lamps |
6501966 |
Note:
For lighted switches, see an authorized dealer for replacement instructions.
|
Exterior Bulbs |
|
|
Bulb Name |
Bulb Number |
|
Headlamp |
H11LL |
|
Fog Lamp – If Equipped |
PSX24W |
|
Front Side Marker, Park/Turn Signal |
3757A or PY27/7W |
|
Rear Tail, Stop, Turn Signal Lamp |
LED (Serviced at an Authorized Dealer) |
|
Center High Mounted Stop Lamp |
LED (Serviced at an Authorized Dealer) |
|
Backup Lamp |
3157 |
|
License |
168 |
Note:
All of the interior bulbs are glass wedge base or glass cartridge types. Aluminum base bulbs are not approved and should not be used for replacement.
REPLACING EXTERIOR BULBS
HEADLAMPS
-
Raise the hood to access the rear of the headlamp housing.
-
Slide the red lock tab rearward on the connector, then depress the tab and remove the connector from the bulb.
-
Twist the headlamp bulb and pull the bulb from the headlamp housing.
-
Install the new headlamp bulb and twist until locked into the headlamp housing.
CAUTION:
Do not touch the new bulb with your fingers. Oil contamination will severely shorten bulb life. If the bulb comes in contact with an oily surface, clean the bulb with rubbing alcohol.
-
Connect the wiring connector to bulb and slide red lock tab forward.
FRONT PARK/TURN SIGNAL LAMPS
-
Raise the hood to access the rear of the headlamp housing.
-
Twist the turn signal socket and remove from the headlamp housing, then pull the bulb out.
-
Push the new bulb into the socket and reinstall the socket by twisting until locked into the headlamp housing.
FOG LAMPS
Note:
Access to the fog lamp bulb is from the rear of the fascia. On the left rear side of the fascia, remove the push pin and lower the hinged access door on the air dam.
-
From behind the bumper fascia, or the access panel on the air dam, squeeze the two tabs on the side of the bulb socket and pull straight out from the fog lamp.
CAUTION:
Do not touch the new bulb with your fingers. Oil contamination will severely shorten bulb life. If the bulb comes in contact with an oily surface, clean the bulb with rubbing alcohol.
-
Disconnect the wire harness from the bulb.
-
Reconnect the wiring harness to the new bulb and reinstall by inserting the new bulb straight into the fog lamp until it locks into place.
REAR TAIL, STOP, TURN SIGNAL, SIDE MARKER AND BACKUP LAMPS
-
Raise the liftgate.
-
Remove the tail lamp assembly by removing the two screws from the inboard side. Use a fiber stick or similar tool to gently pry the light on the outboard side to disengage the two ball studs.
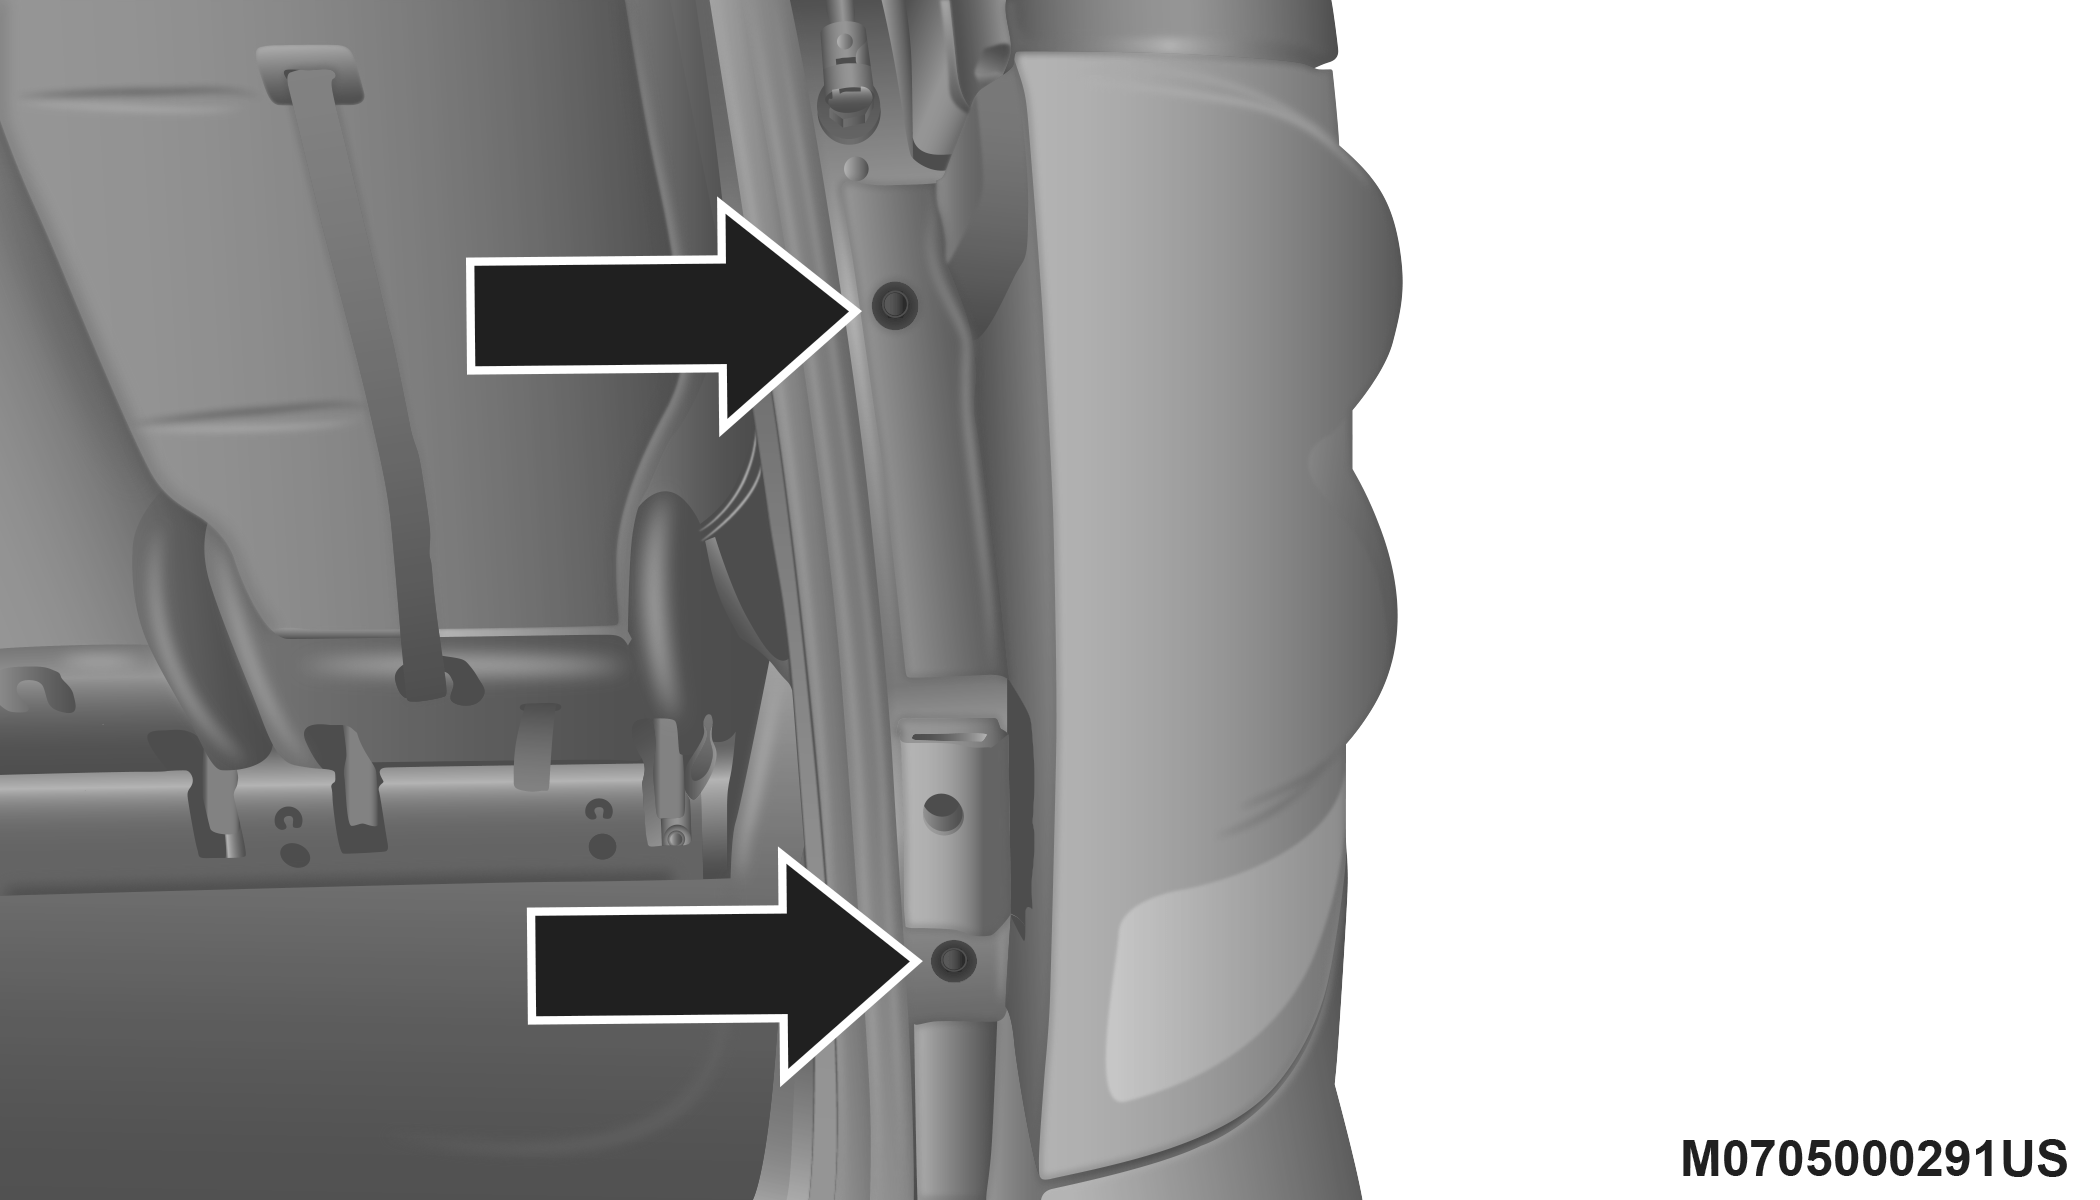
Tail Lamp Assembly Screws
Note:
-
If a screwdriver is used, make sure a soft material is placed between the vehicle body and tool so not to scratch the paint.
-
The PRY location is best closest to the studs while dislodging them separately.
-
-
Twist the socket and remove from the lamp assembly.
-
Pull the bulb to remove it from the socket.
-
Replace the bulb, reinstall the socket, and reattach the lamp assembly.
CENTER HIGH MOUNTED STOP LAMP (CHMSL)
The CHMSL uses LED lamps that are not serviceable separately. The CHMSL must be replaced as an assembly. See an authorized dealer.
LICENSE LAMP
The license plate lamp is located under the tailgate light bar and above the license plate.
-
Using a small screwdriver, press inward the locking tab on the outboard side of the lamp assembly and pull down on the lamp assembly for removal.
-
Twist and remove the socket from the lamp assembly and pull the bulb out to remove.
-
Push the bulb into the socket, twist the socket into the lamp assembly and reinstall the lamp assembly into place ensuring the locking tab is secure.
Download Manual