Head restraints
Head restraints are designed to reduce the risk of injury by restricting head movement in the event of a rear impact. Head restraints should be adjusted so that the top of the head restraint is located above the top of your ear.
WARNING:
-
All occupants, including the driver, should not operate a vehicle or sit in a vehicle’s seat until the head restraints are placed in their proper positions in order to minimize the risk of neck injury in the event of a crash.
-
Head restraints should never be adjusted while the vehicle is in motion. Driving a vehicle with the head restraints improperly adjusted or removed could cause serious injury or death in the event of a collision.
SUPPLEMENTAL ACTIVE HEAD RESTRAINTS — FRONT SEATS
Active Head Restraints are passive, deployable components, and vehicles with this equipment cannot be readily identified by any markings, only through visual inspection of the head restraint. The Active Head Restraints (AHR) will be split in two halves, with the front half being soft foam and trim, the back half being decorative plastic.
When AHRs deploy during a rear impact, the front half of the head restraint extends forward to reduce the gap between the back of the occupant’s head and the AHR. This system is design to reduce the risk of injury to the driver or front passenger in certain types of rear impacts. Refer to “Occupant Restraints” in “Safety” for further information.
To raise the head restraint, pull upward on the head restraint. To lower the head restraint, push the adjustment button, located at the base of the head restraint, and push downward on the head restraint.
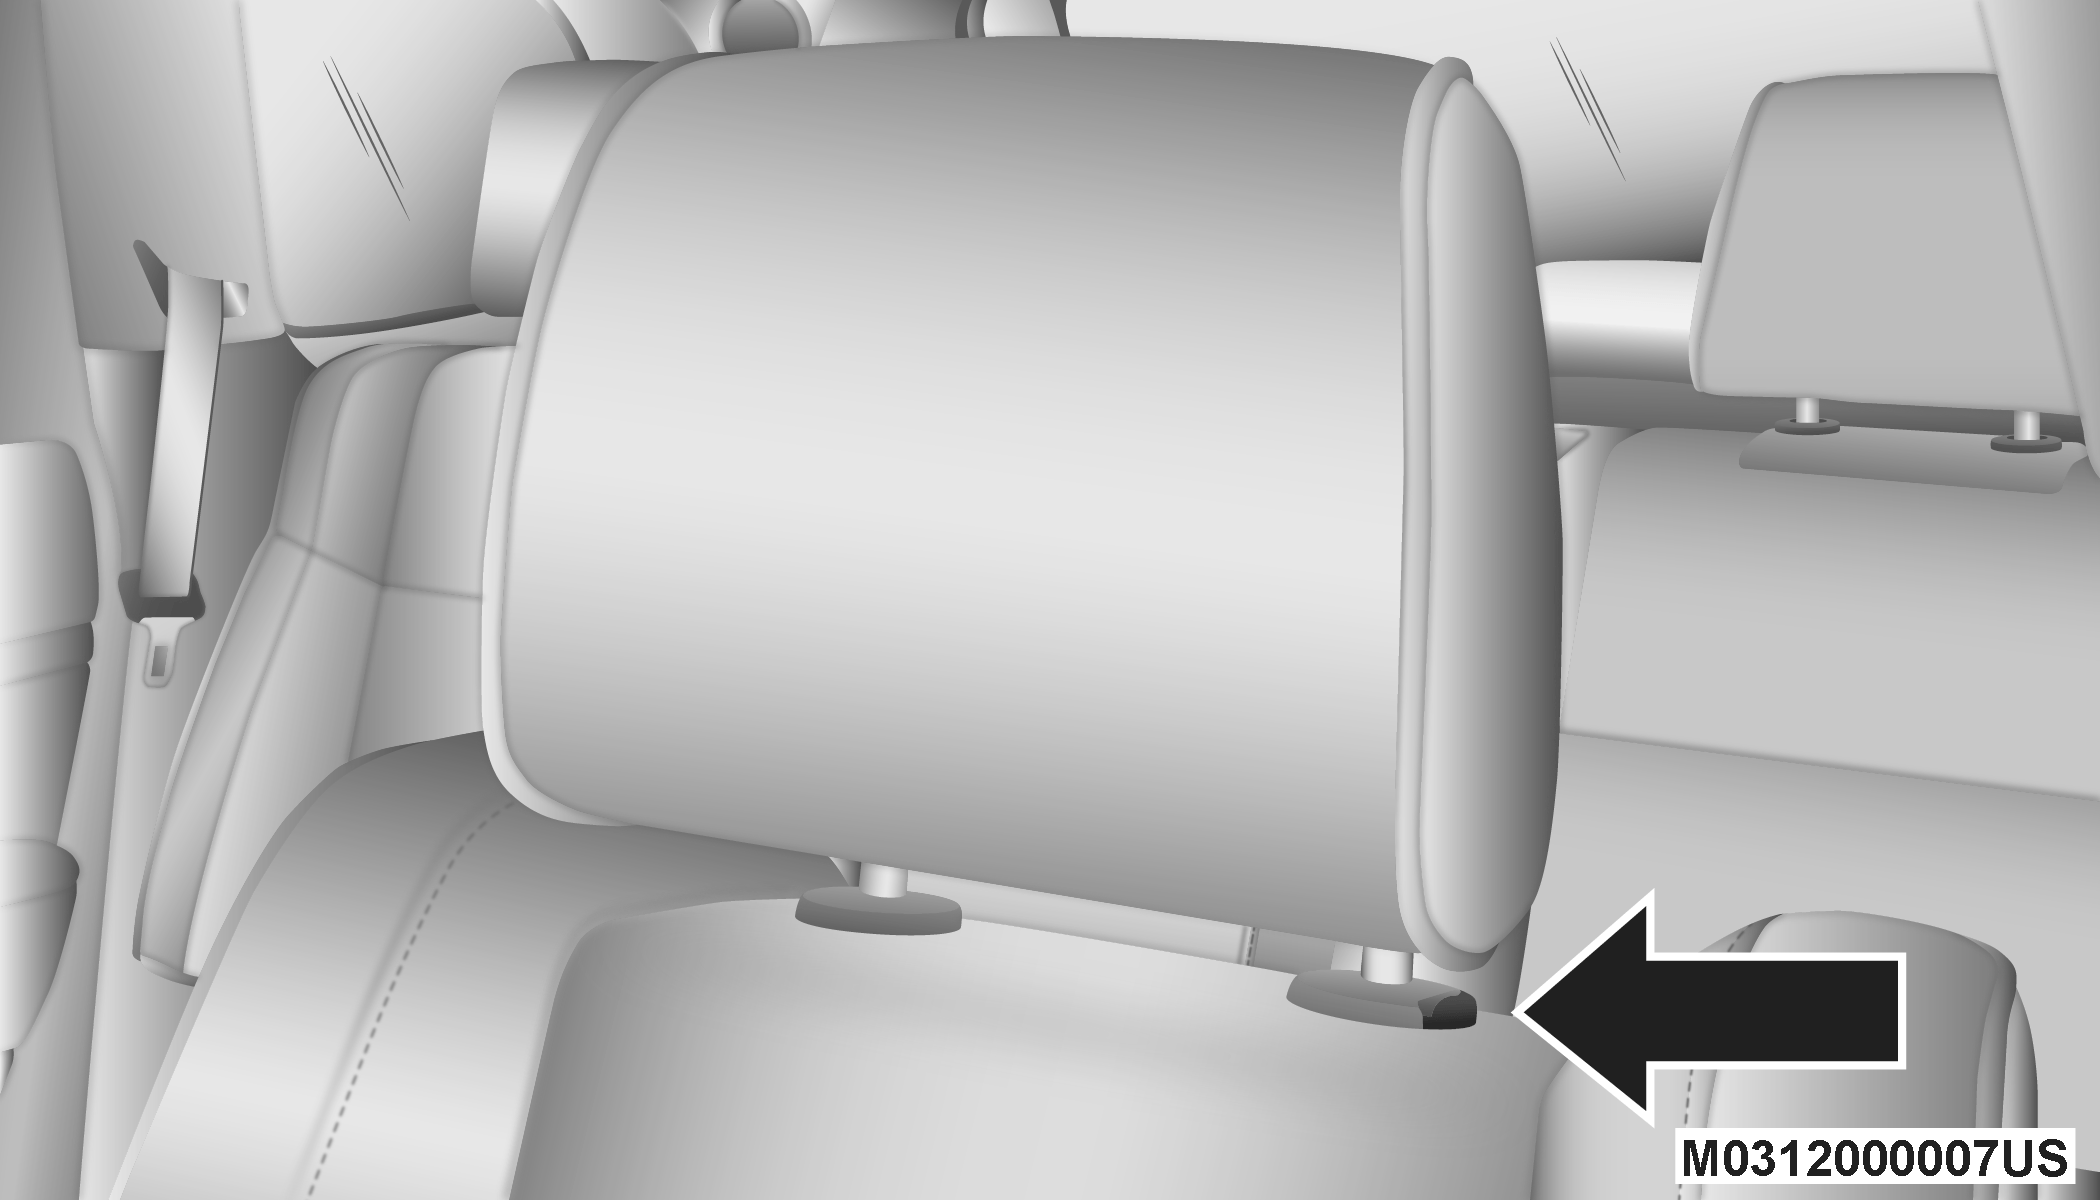
Adjustment Button
For comfort, the Active Head Restraints can be tilted forward and rearward. To tilt the head restraint closer to the back of your head, pull forward on the bottom of the head restraint. Push rearward on the bottom of the head restraint to move the head restraint away from your head.
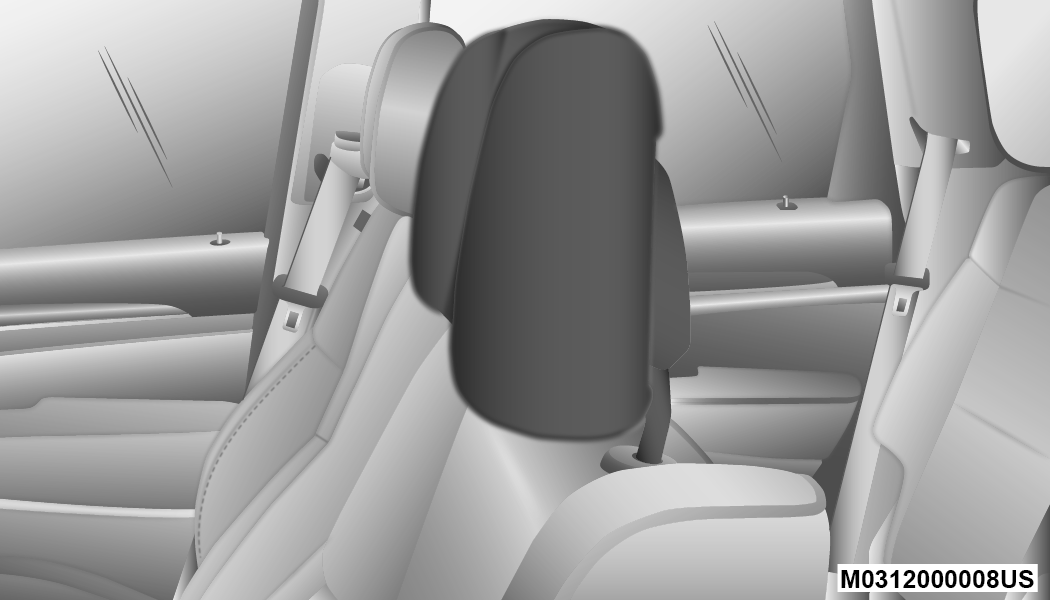
Active Head Restraint (Normal Position)
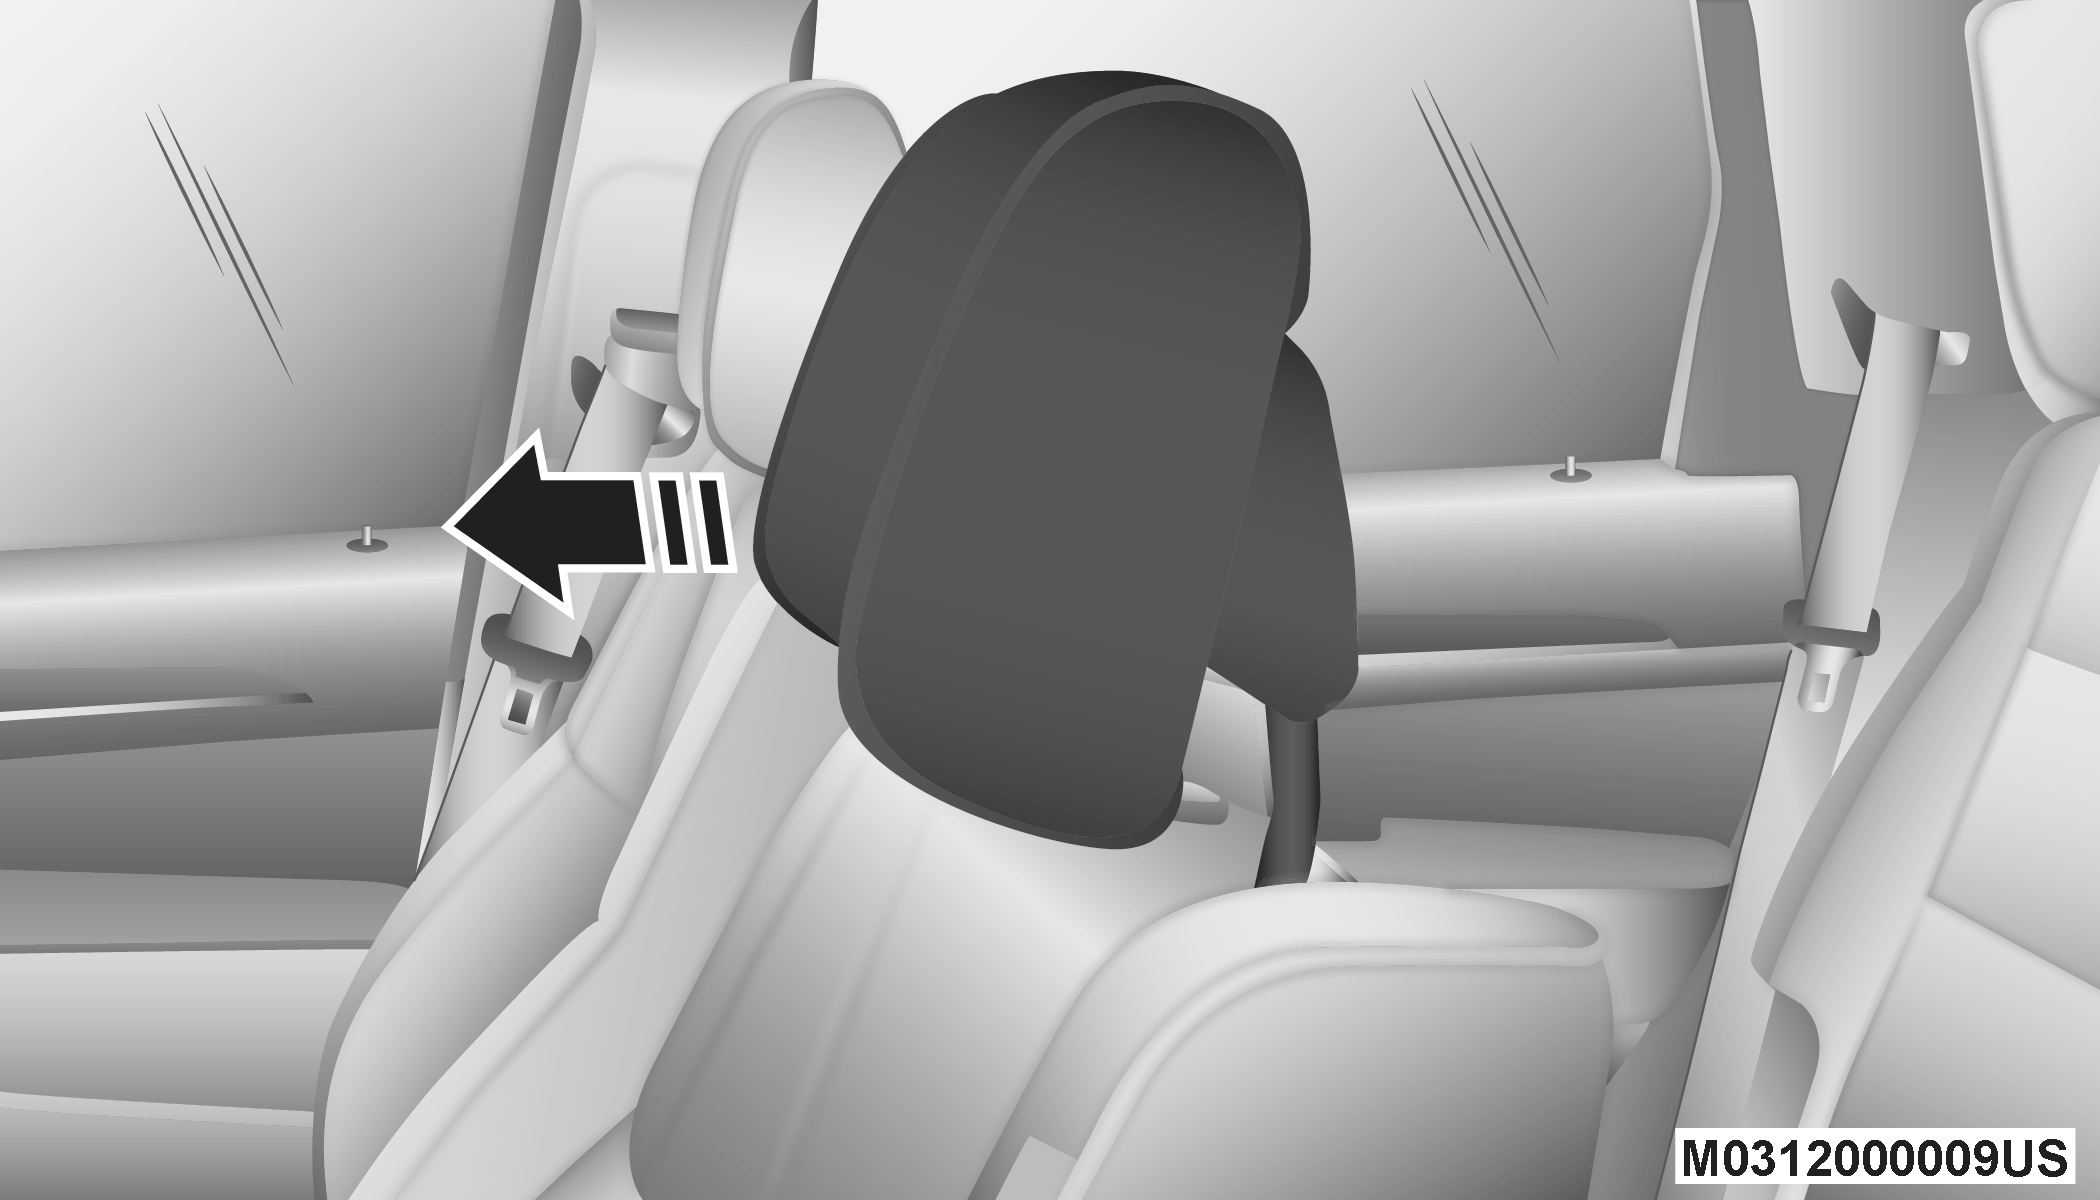
Active Head Restraint (Tilted)
Note:
-
The head restraints should only be removed by qualified technicians, for service purposes only. If either of the head restraints require removal, see an authorized dealer.
-
In the event of deployment of an Active Head Restraint, refer to “Occupant Restraints/Resetting Active Head Restraints (AHR)” in “Safety” for further information.
WARNING:
-
ALL the head restraints MUST be reinstalled in the vehicle to properly protect the occupants.
-
All occupants, including the driver, should not operate a vehicle or sit in a vehicle’s seat until the head restraints are placed in their proper positions in order to minimize the risk of neck injury in the event of a collision.
-
Do not place items over the top of the Active Head Restraint, such as coats, seat covers or portable DVD players. These items may interfere with the operation of the Active Head Restraint in the event of a collision and could result in serious injury or death.
-
Active Head Restraints may be deployed if they are struck by an object such as a hand, foot or loose cargo. To avoid accidental deployment of the Active Head Restraint ensure that all cargo is secured, as loose cargo could contact the Active Head Restraint during sudden stops. Failure to follow this warning could cause personal injury if the Active Head Restraint is deployed.
HEAD RESTRAINTS — SECOND ROW QUAD SEATS
The head restraints on the second row quad seats are non-adjustable and non-removable. The head restraint will automatically fold forward when the seat release lever is pulled during the Stow n’ Go procedure. Refer to “Seats” in this chapter for further information.
HEAD RESTRAINTS — SECOND ROW BENCH
The second row bench seat is equipped with adjustable head restraints.
To raise the head restraint, pull upward on the head restraint. To lower the head restraint, push the adjustment button, located at the base of the head restraint, and push downward.
Adjustment Button
|
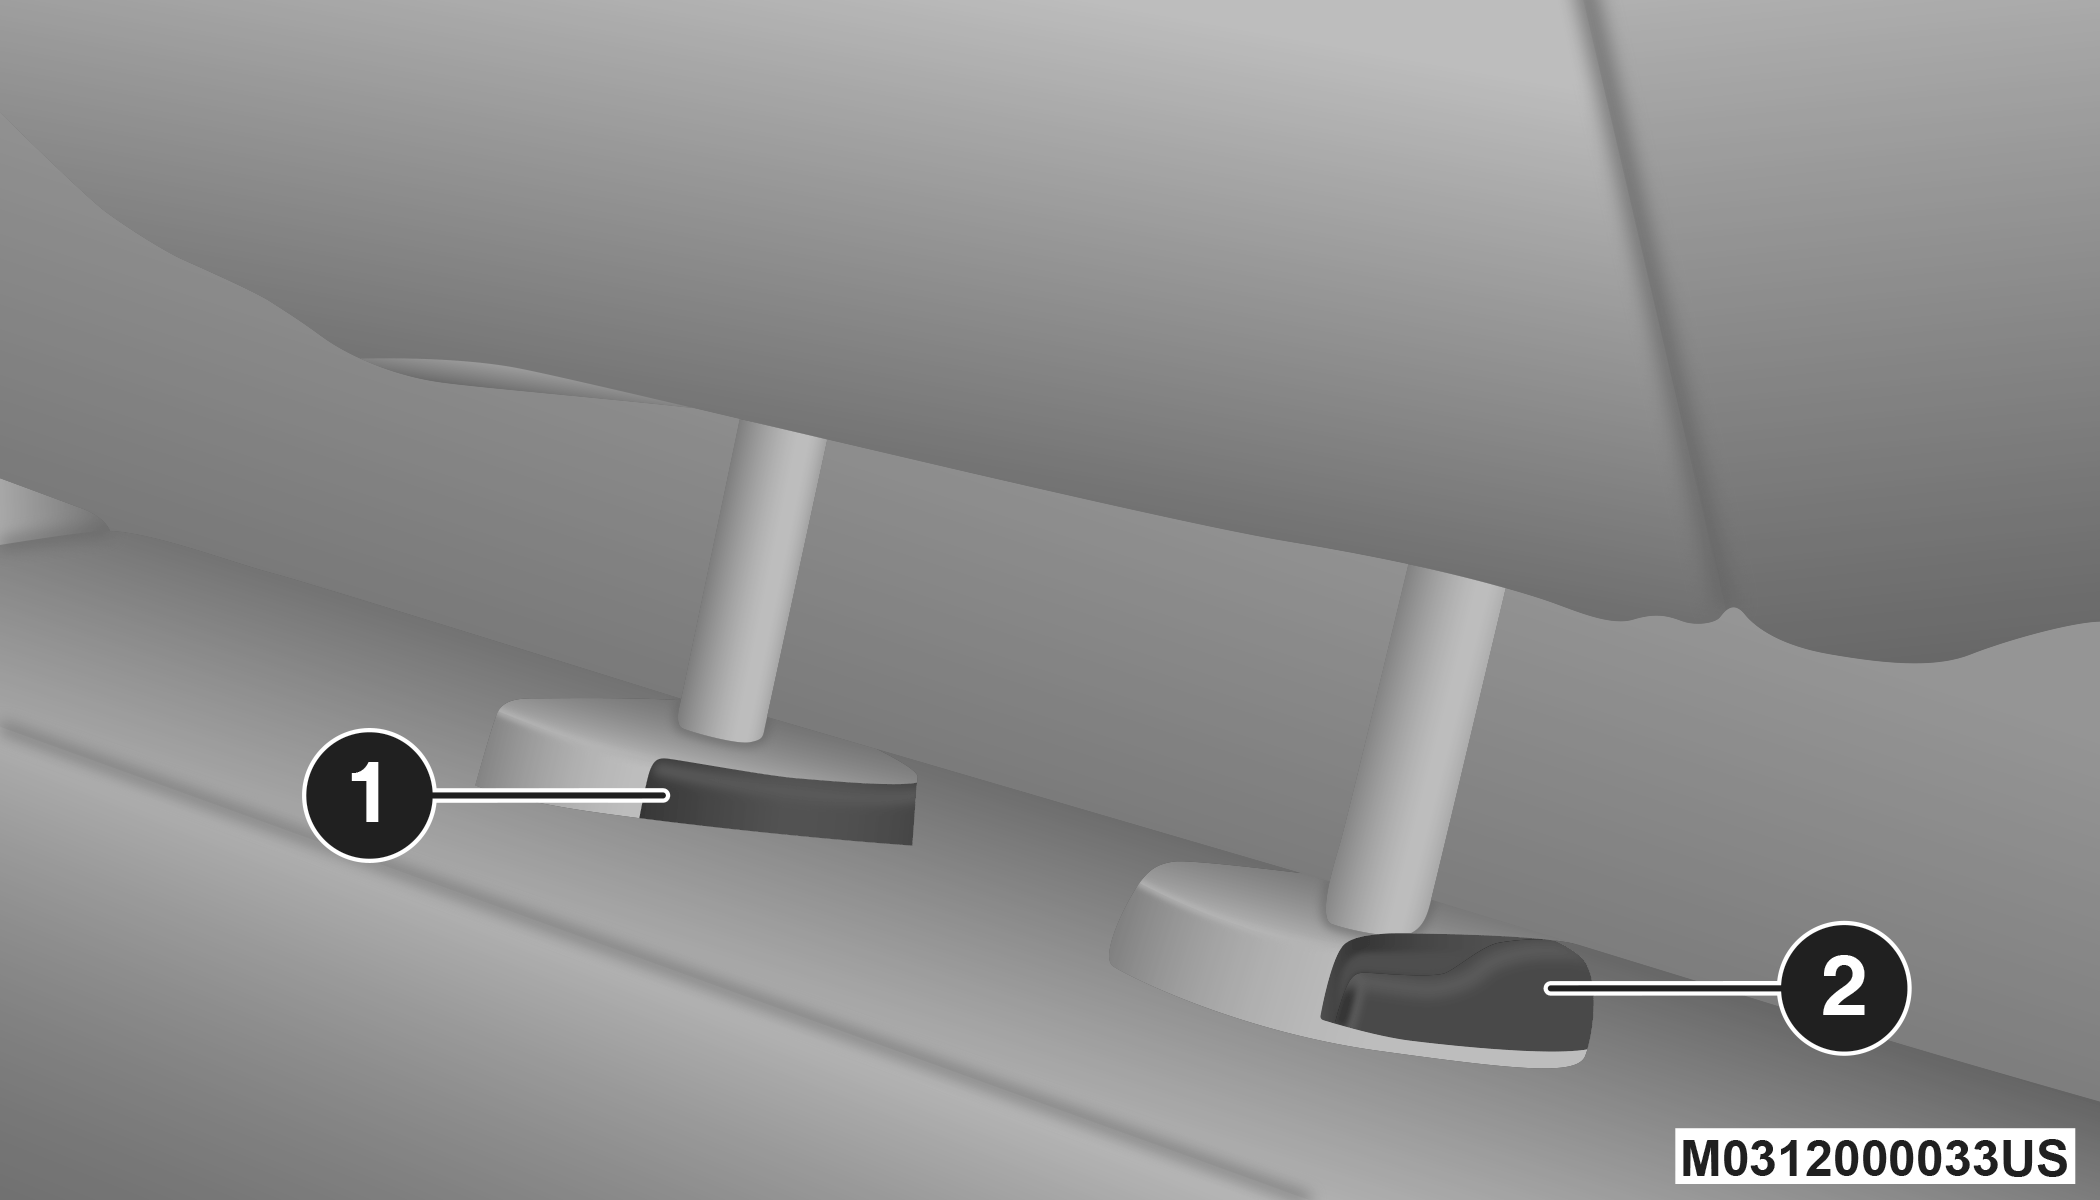
1 — Release Button |
|
2 — Adjustment Button |
To remove the head restraint, raise it as far as it can go. Then, push the release button and the adjustment button at the base of each post while pulling the head restraint up. Seatback angle may need to be adjusted to fully remove the head restraint. To reinstall the head restraint, put the head restraint posts into the holes and push downward. Then, adjust the head restraint to the appropriate height.
WARNING:
-
A loose head restraint thrown forward in a collision or hard stop could cause serious injury or death to occupants of the vehicle. Always securely stow removed head restraints in a location outside the occupant compartment.
-
ALL the head restraints MUST be reinstalled in the vehicle to properly protect the occupants. Follow the re-installation instructions above prior to operating the vehicle or occupying a seat.
Note:
For child restraint tethering, refer to “Occupant Restraint Systems” in “Safety” for further information.
HEAD RESTRAINTS — THIRD ROW
The outboard head restraints can be manually folded forward for improved rearward visibility. They are non-removable. Pull the release strap to fold them forward.
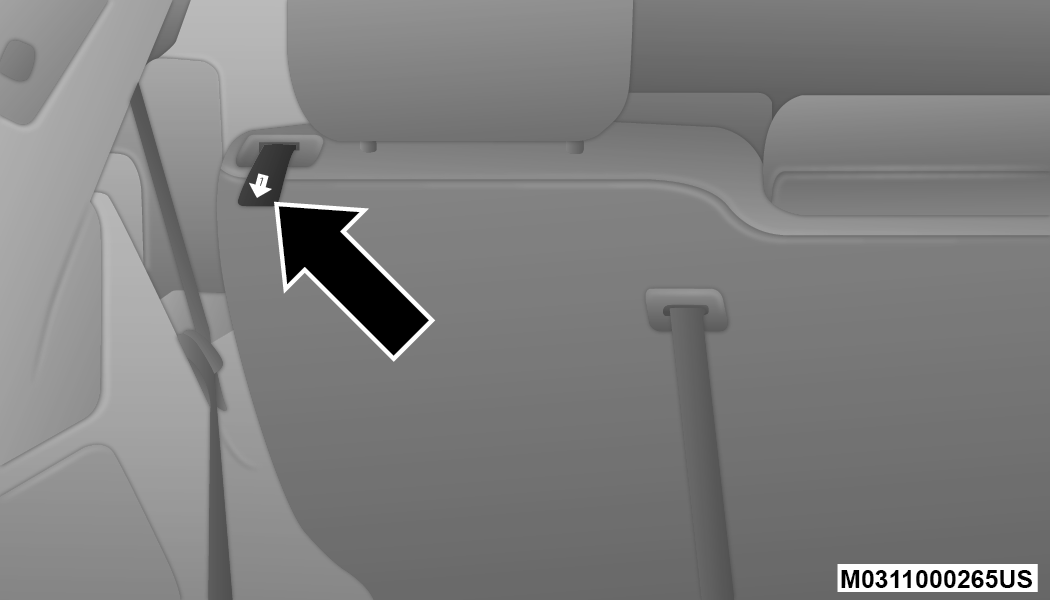
Head Restraint Release Strap “1”
Note:
-
The head restraints must be raised manually when occupying the third row.
-
Do not fold if there are passengers seated in the third row seats.
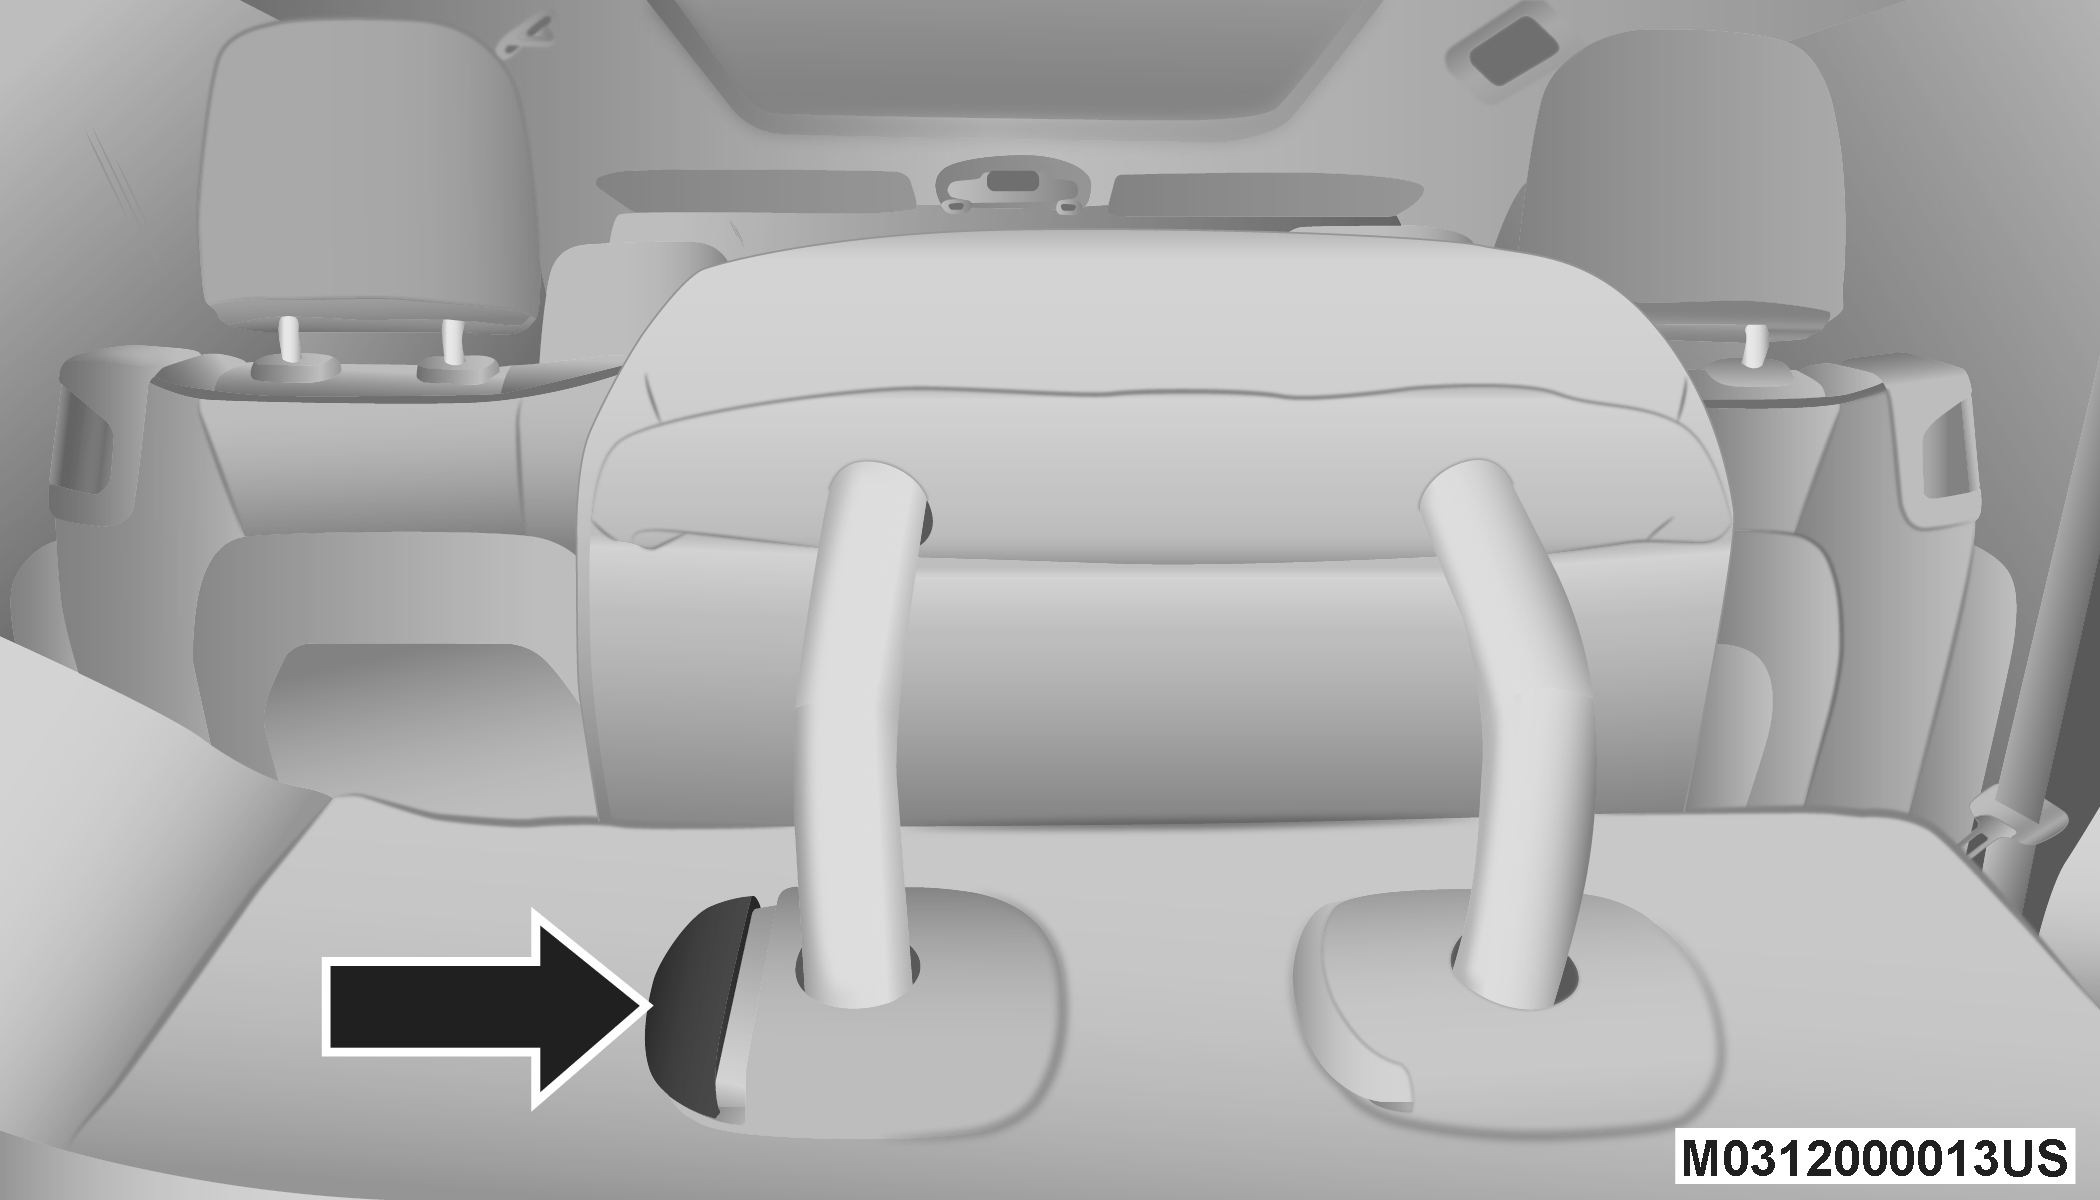
The head restraint in the center position can be raised and lowered for tether routing or height adjustment. Refer to “Occupant Restraint Systems” in “Safety” for further information.
Note:
To remove the center head restraint, raise it as far as it can go. Then, push both the release button and the adjustment button at the base of each post while pulling the head restraint up. To reinstall the head restraint, put the head restraint posts into the holes and push downward. Then, using the adjustment button, adjust the head restraint to the appropriate height.
Adjustment Button
Refer to “Occupant Restraints” in “Safety” for further information.
Download Manual