JACKING AND TIRE CHANGING
JACK LOCATION/SPARE TIRE STOWAGE
The jack and spare tire are both stowed under an access cover in the trunk. Follow these steps to access the jack and spare tire.
NOTE:
The spare tire must be removed in order to access the jack.
- Open the trunk.
- Lift the access cover using the pull strap.
- Rotate the fastener securing the spare tire counterclockwise to remove it.
- Remove the spare tire.
- Rotate the fastener securing the jack counterclockwise to remove it.
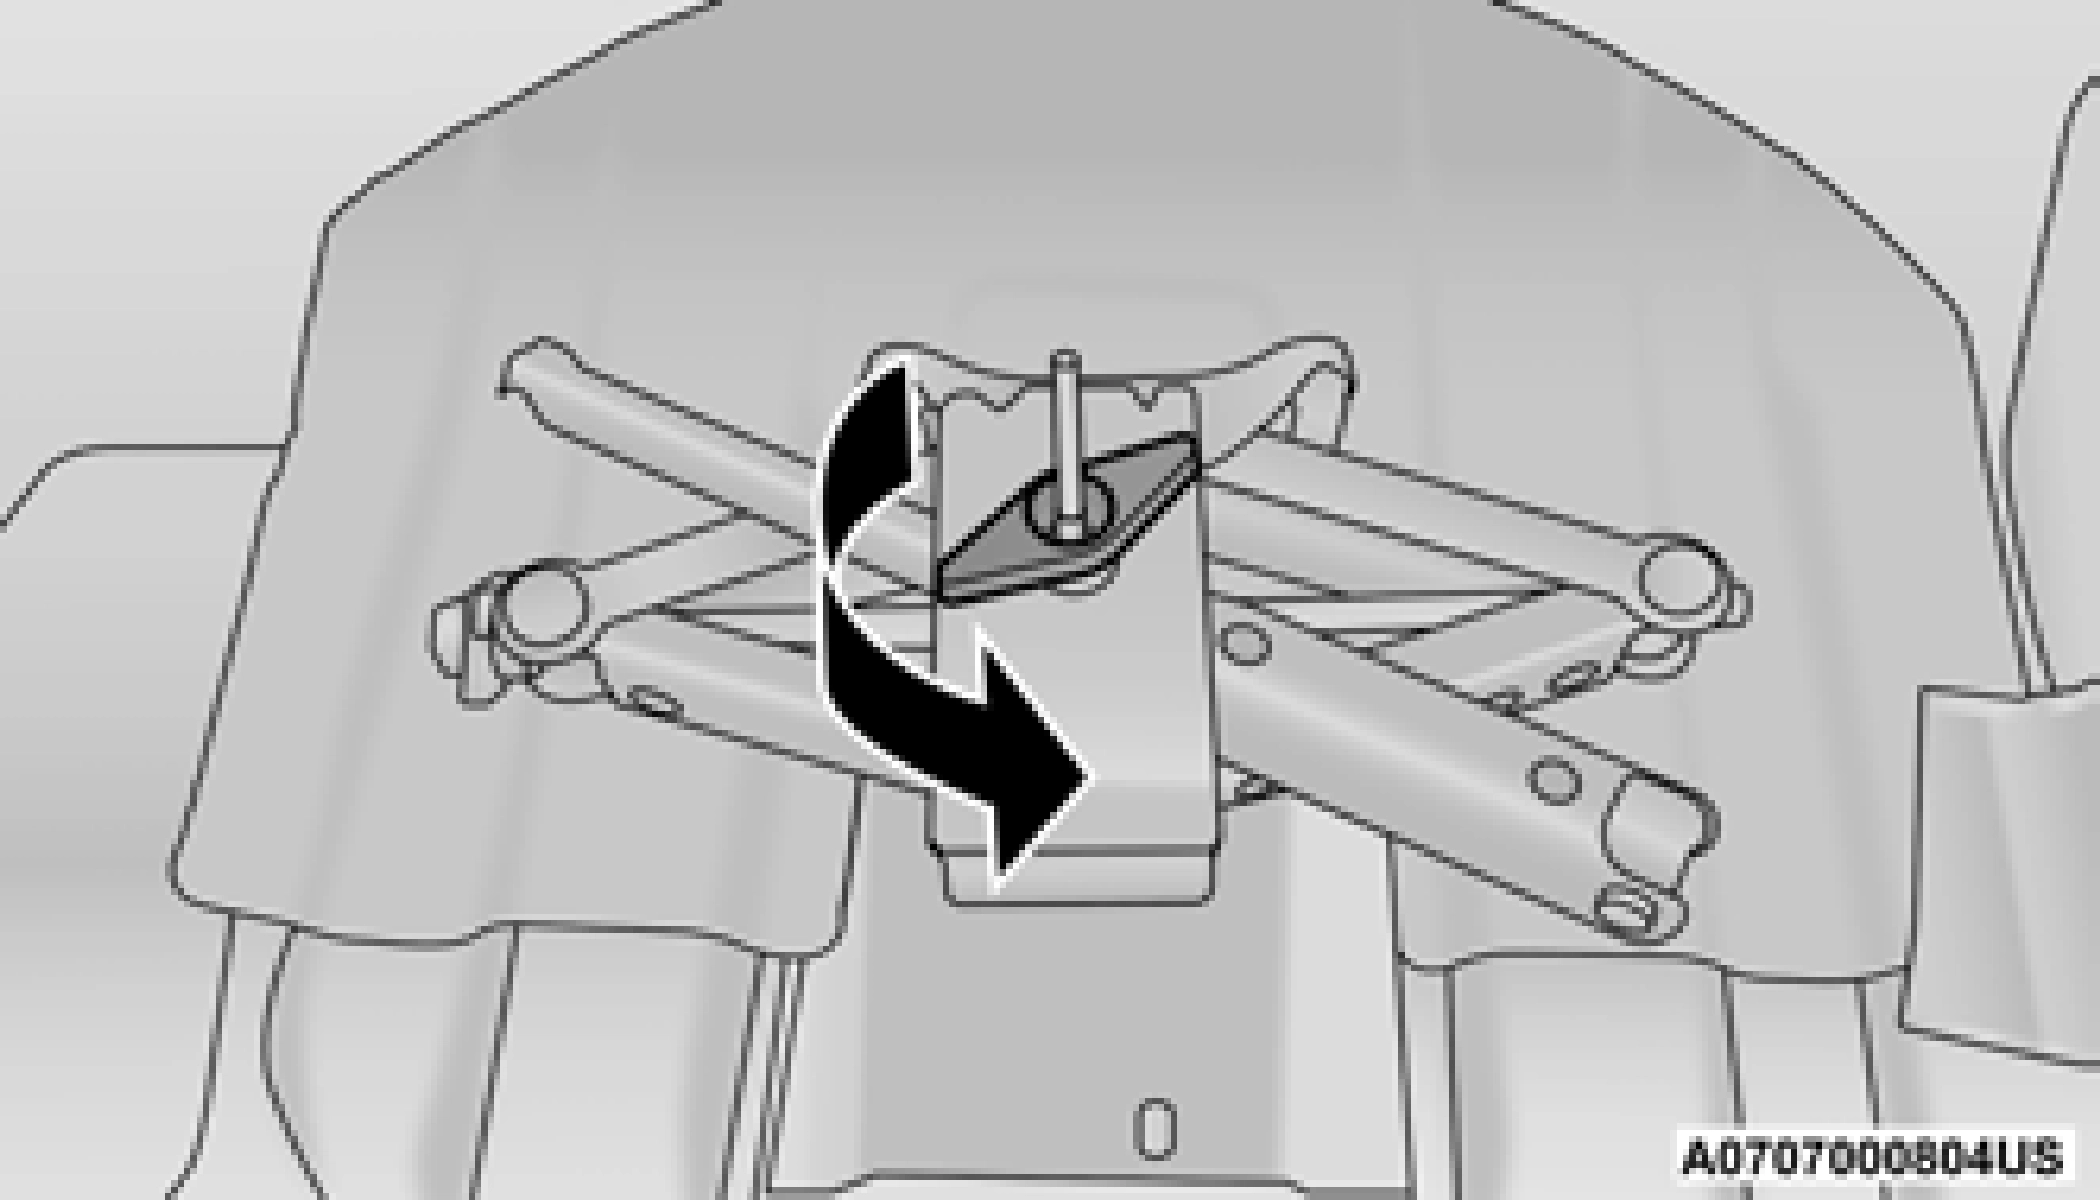
- Remove the wheel chocks, jack and lug wrench assembly from under the spare tire. Turn the jack screw to the left to loosen the lug wrench, and remove the wrench from the jack assembly.
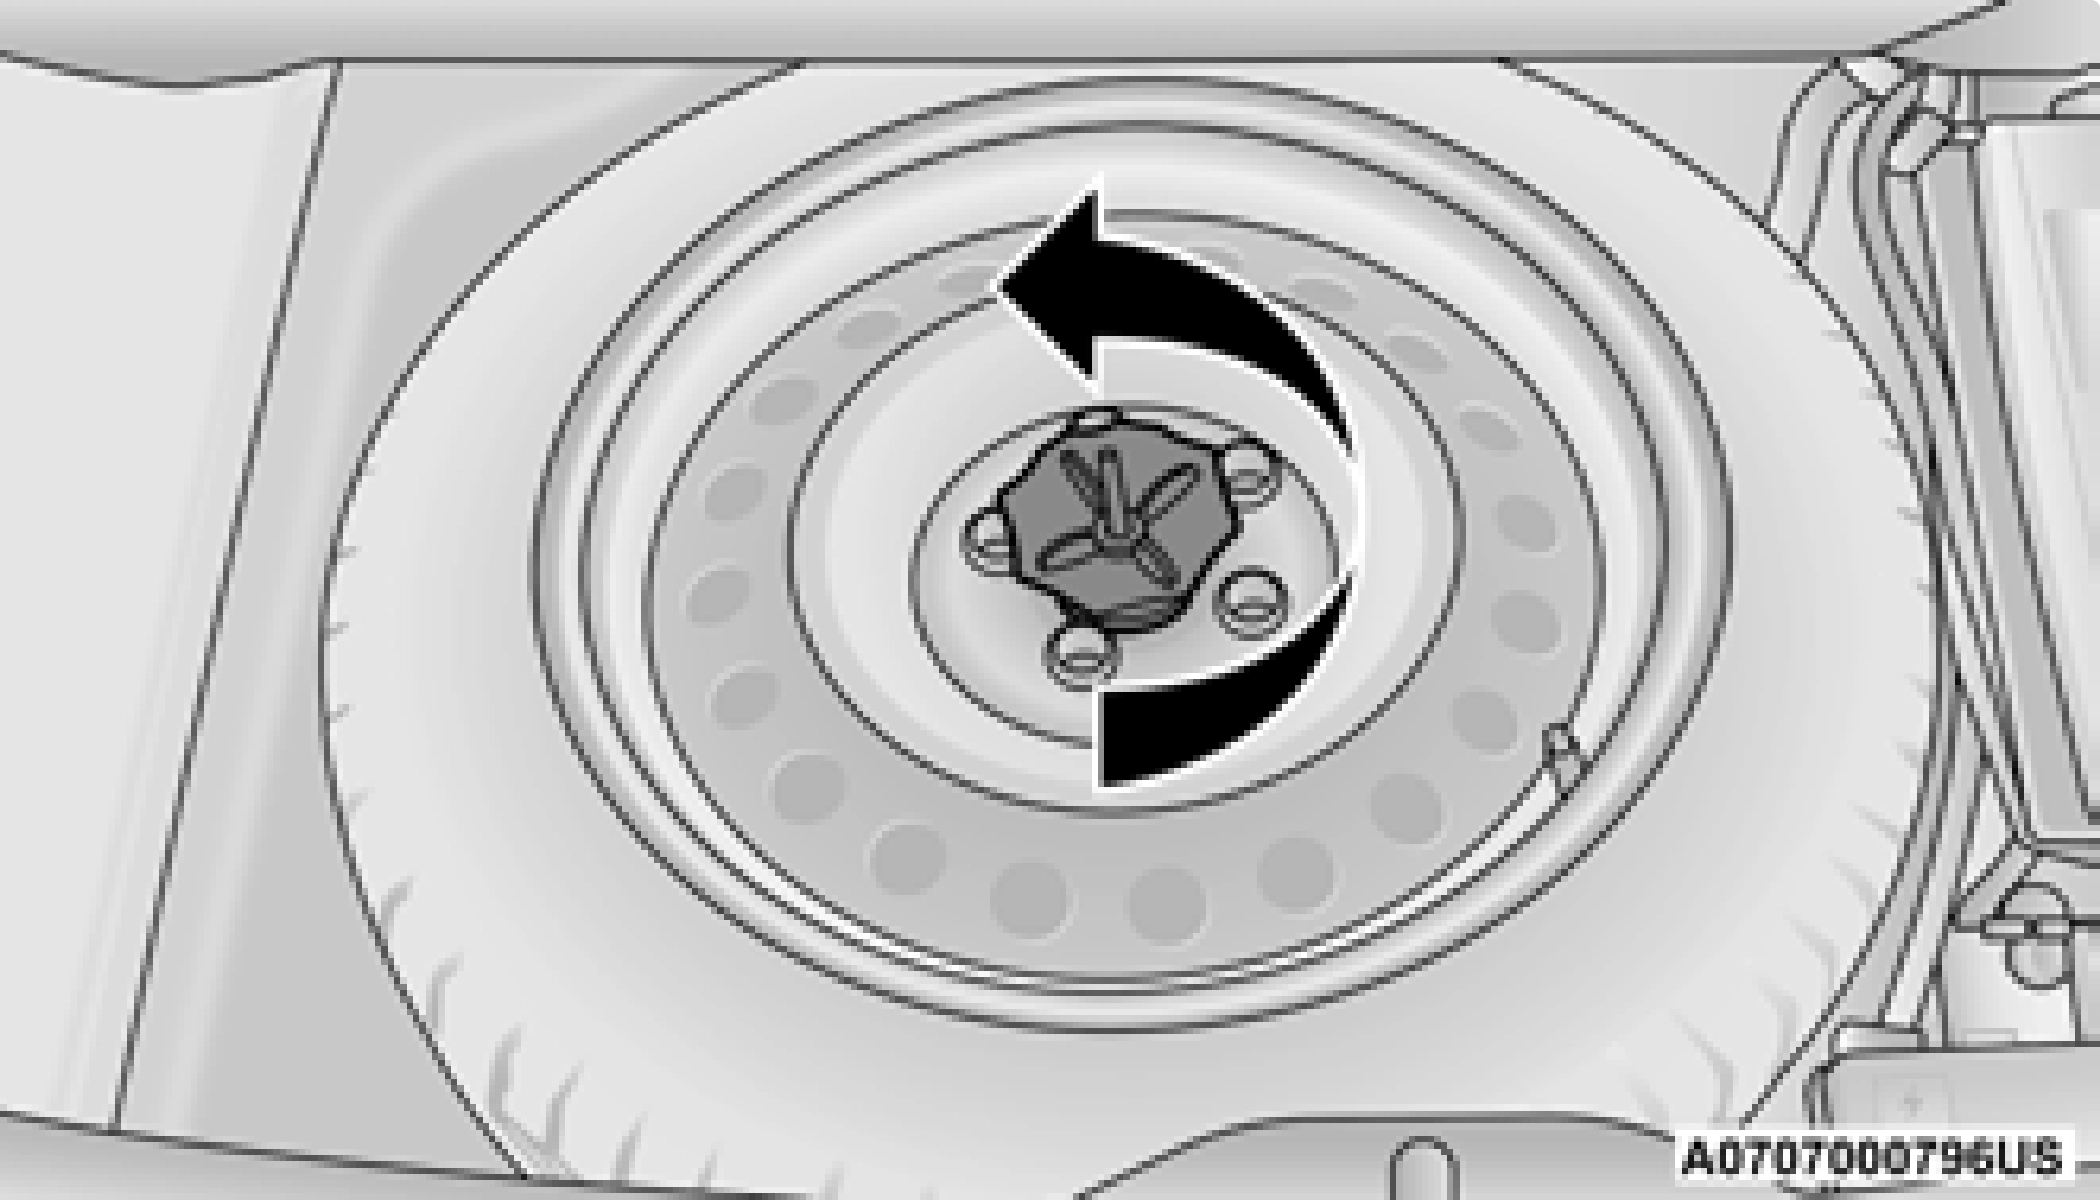
Spare Tire Fastener
Jack Fastener
PREPARATIONS FOR JACKING
- Park the vehicle on a firm, level surface as far from the edge of the roadway as possible. Avoid icy or slippery areas.
- Turn on the Hazard Warning Flashers.
- Apply the parking brake.
- Place the gear selector into PARK (P).
- Turn off the ignition.
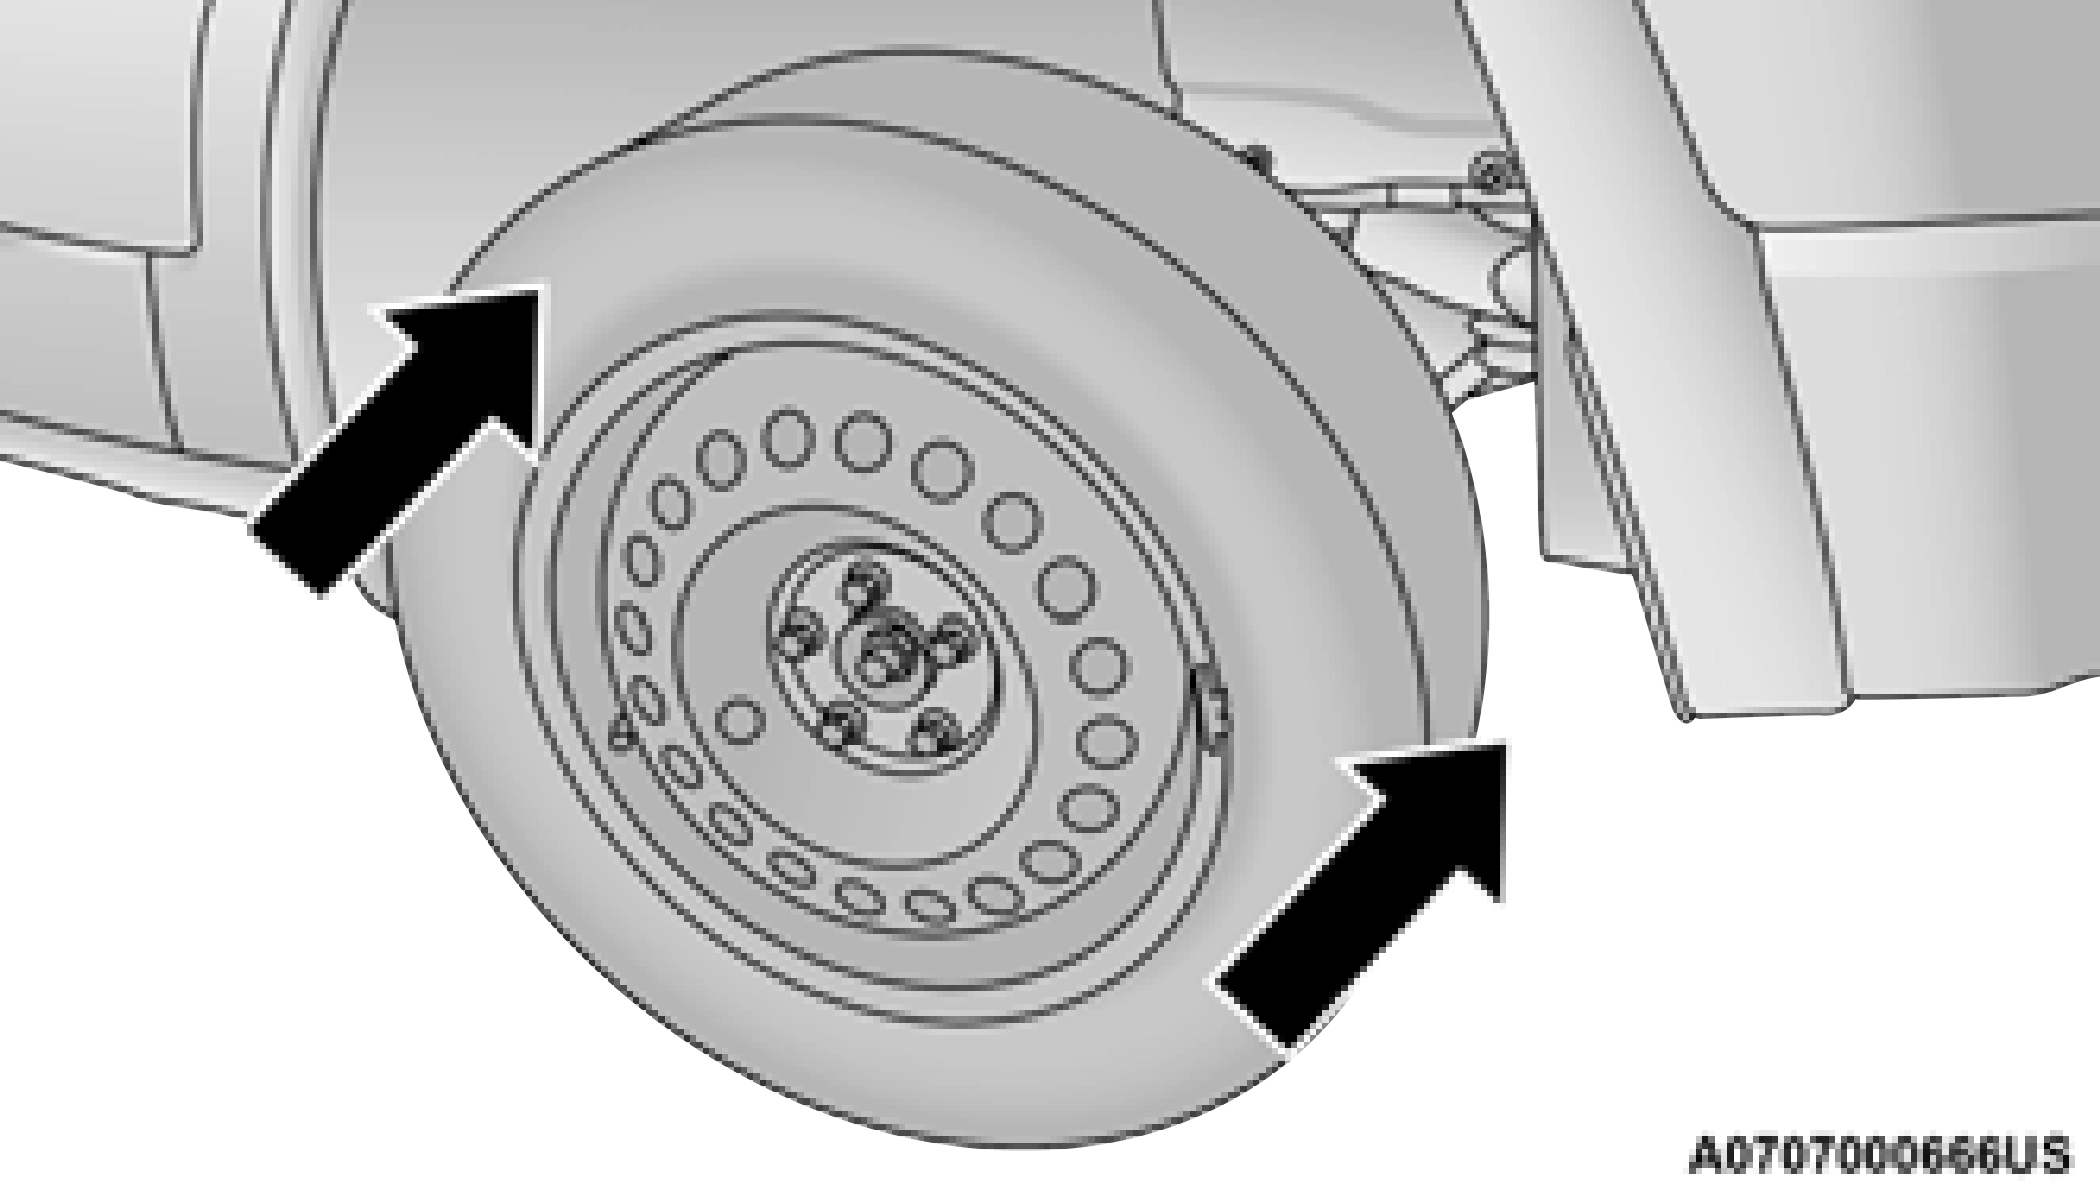
- Block both the front and rear of the wheel diagonally opposite of the jacking position using the provided wheel chocks. For example, if changing the driver’s front tire, chock the passenger’s rear wheel. Place both chocks under the tire.
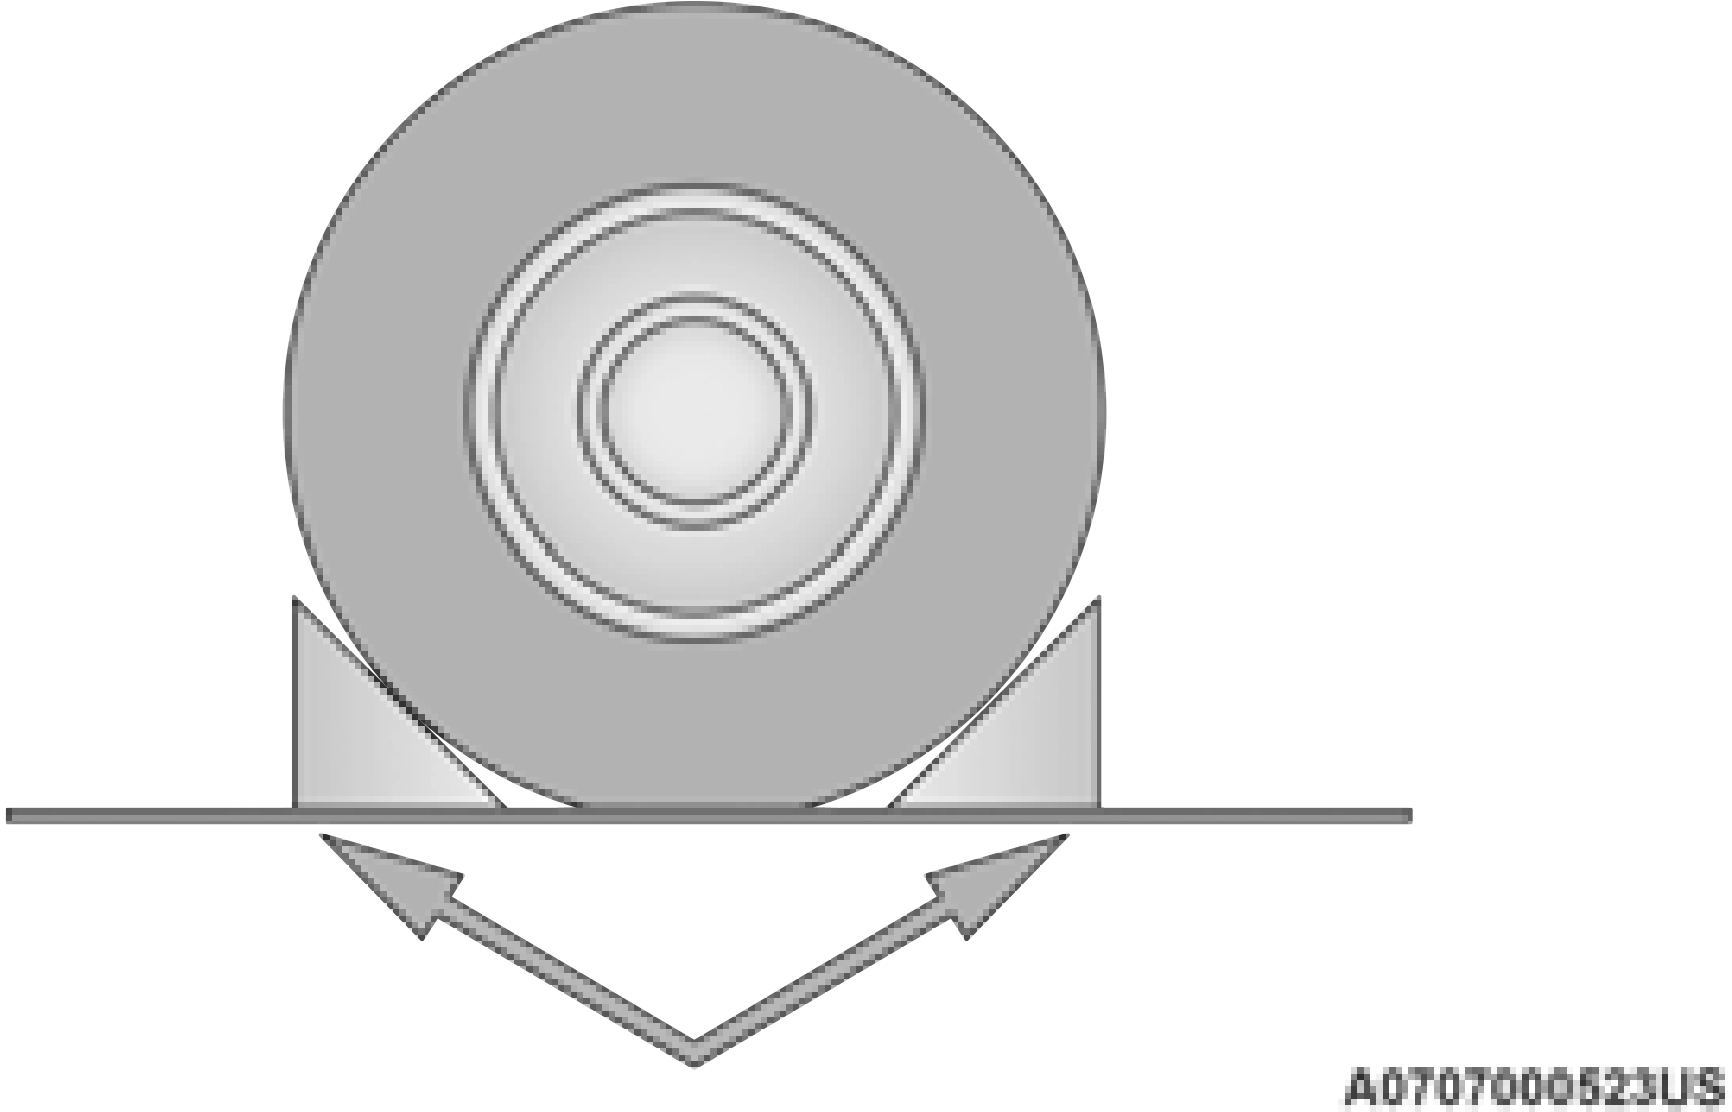
Wheel Chocks
NOTE:
Passengers should not remain in the vehiclewhen the vehicle is being lifted or raised.
JACKING AND CHANGING A TIRE
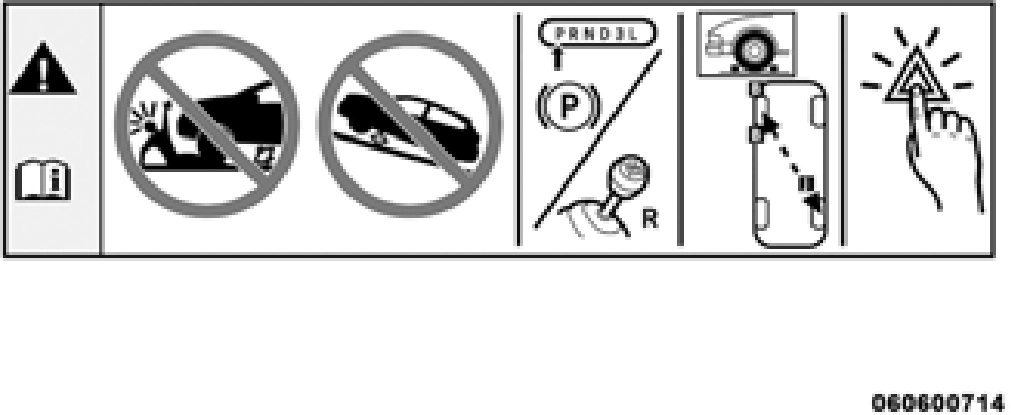
Jack Warning Label
- Remove the spare tire, jack, wheel chocks, and lug wrench.
- If equipped with aluminum wheels where the center cap covers the lug nuts, use the lug wrench to pry the center cap off carefully before raising the vehicle.
- Before raising the vehicle, use the lug wrench to loosen, but not remove, the lug nuts on the wheel with the flat tire. Turn the lug nuts counterclockwise one turn while the wheel is still on the ground.
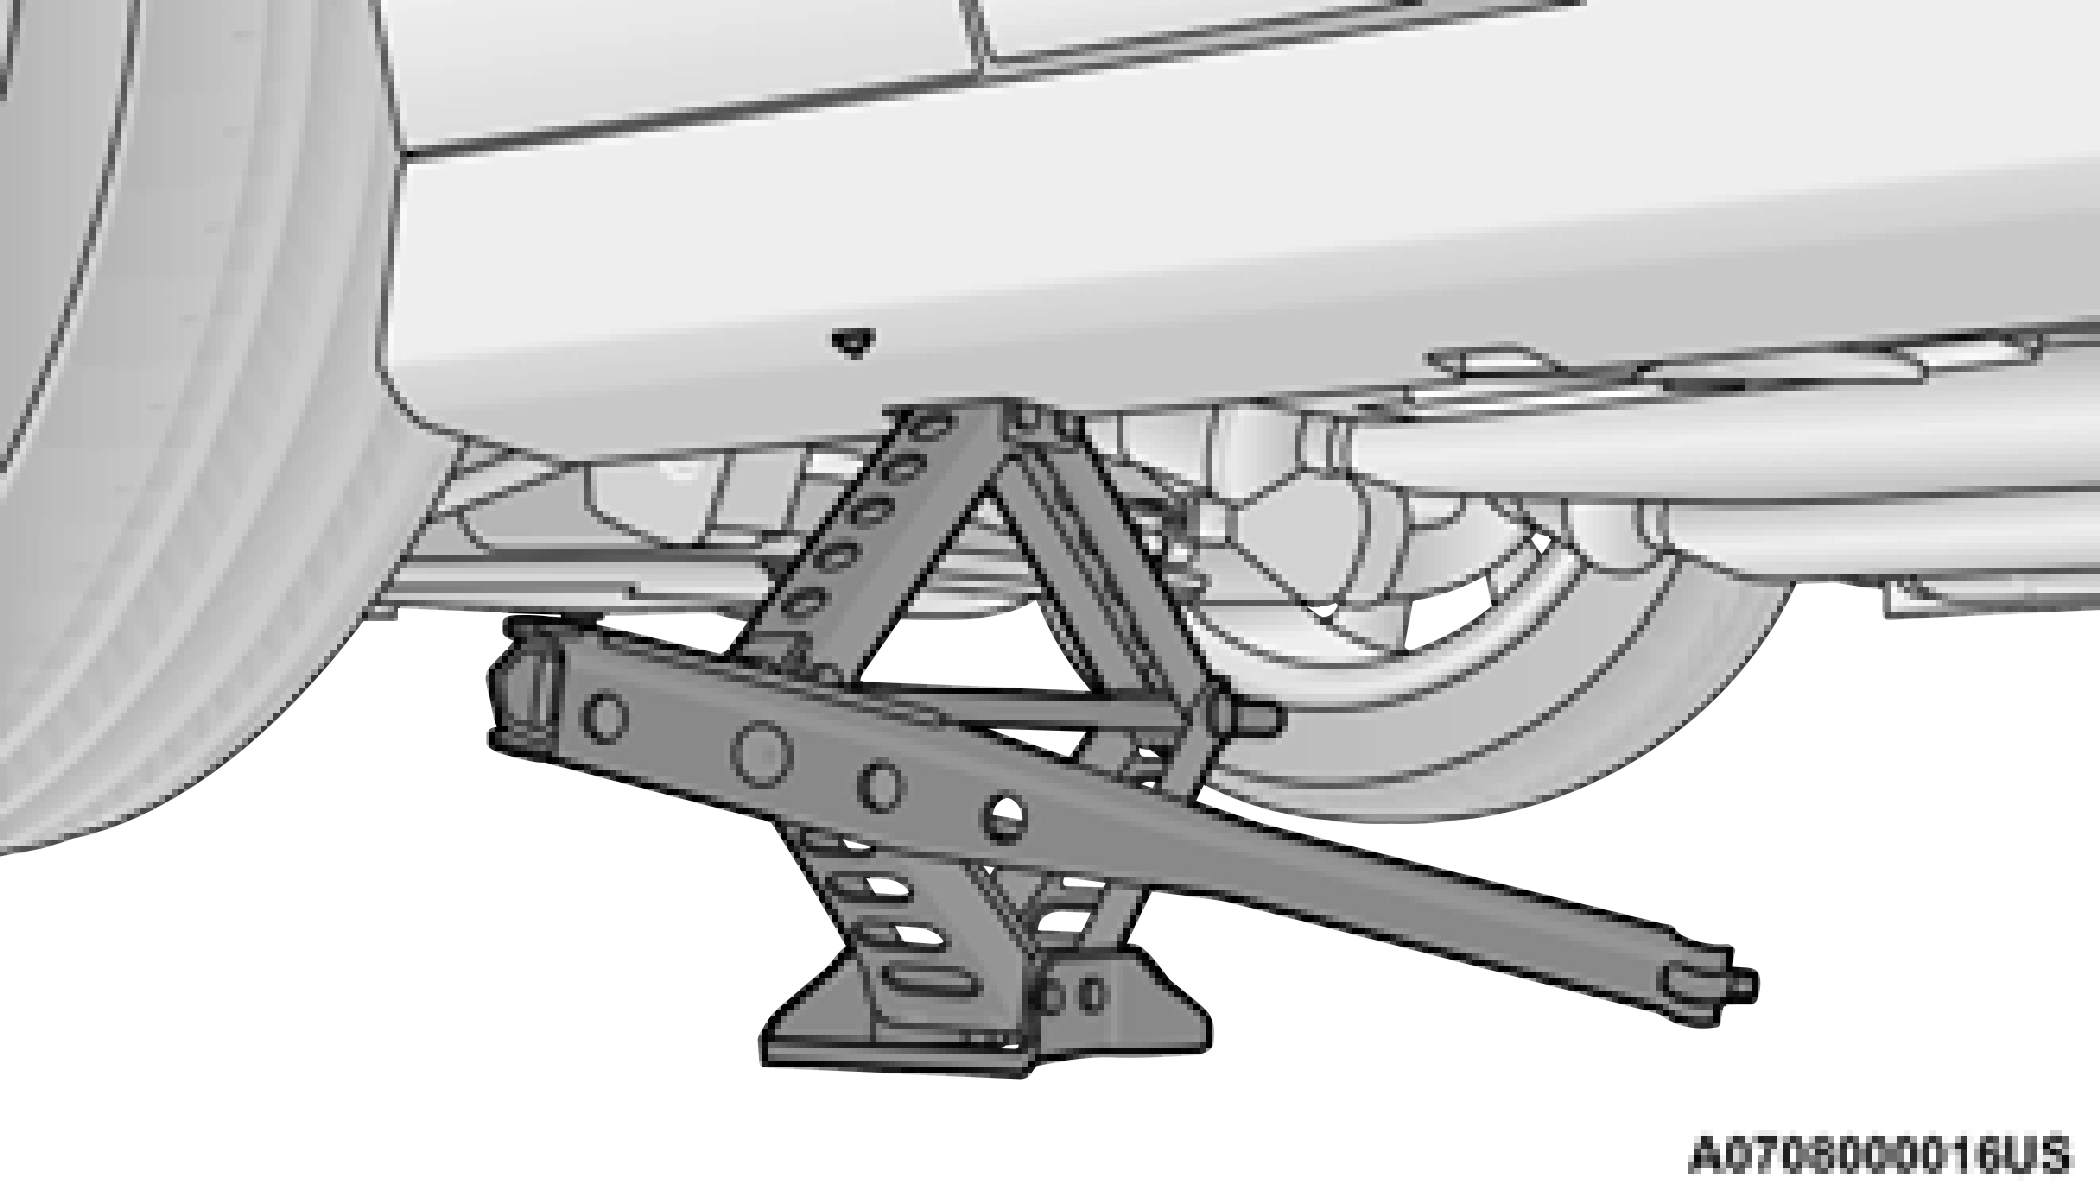
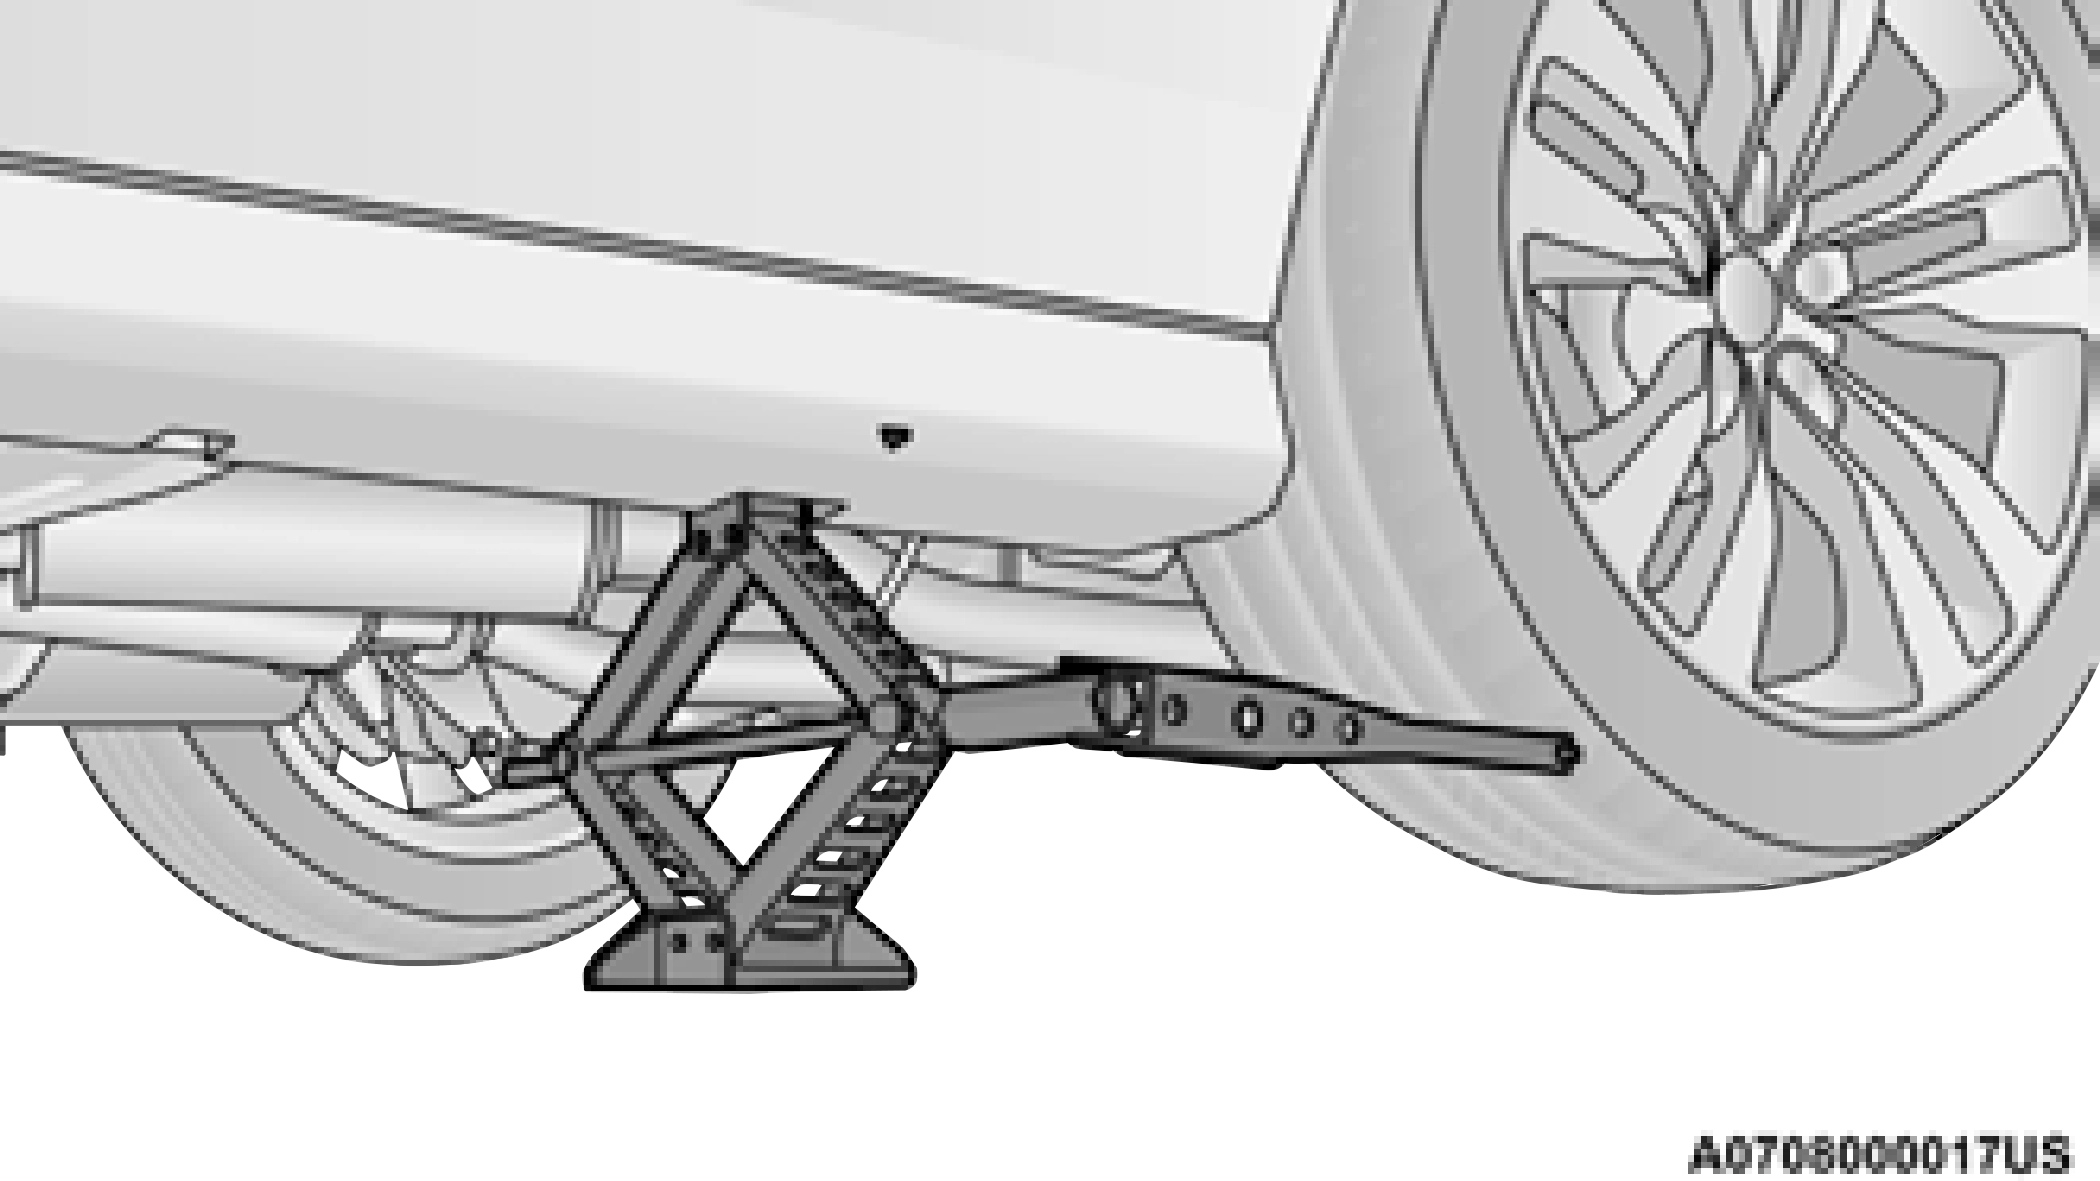
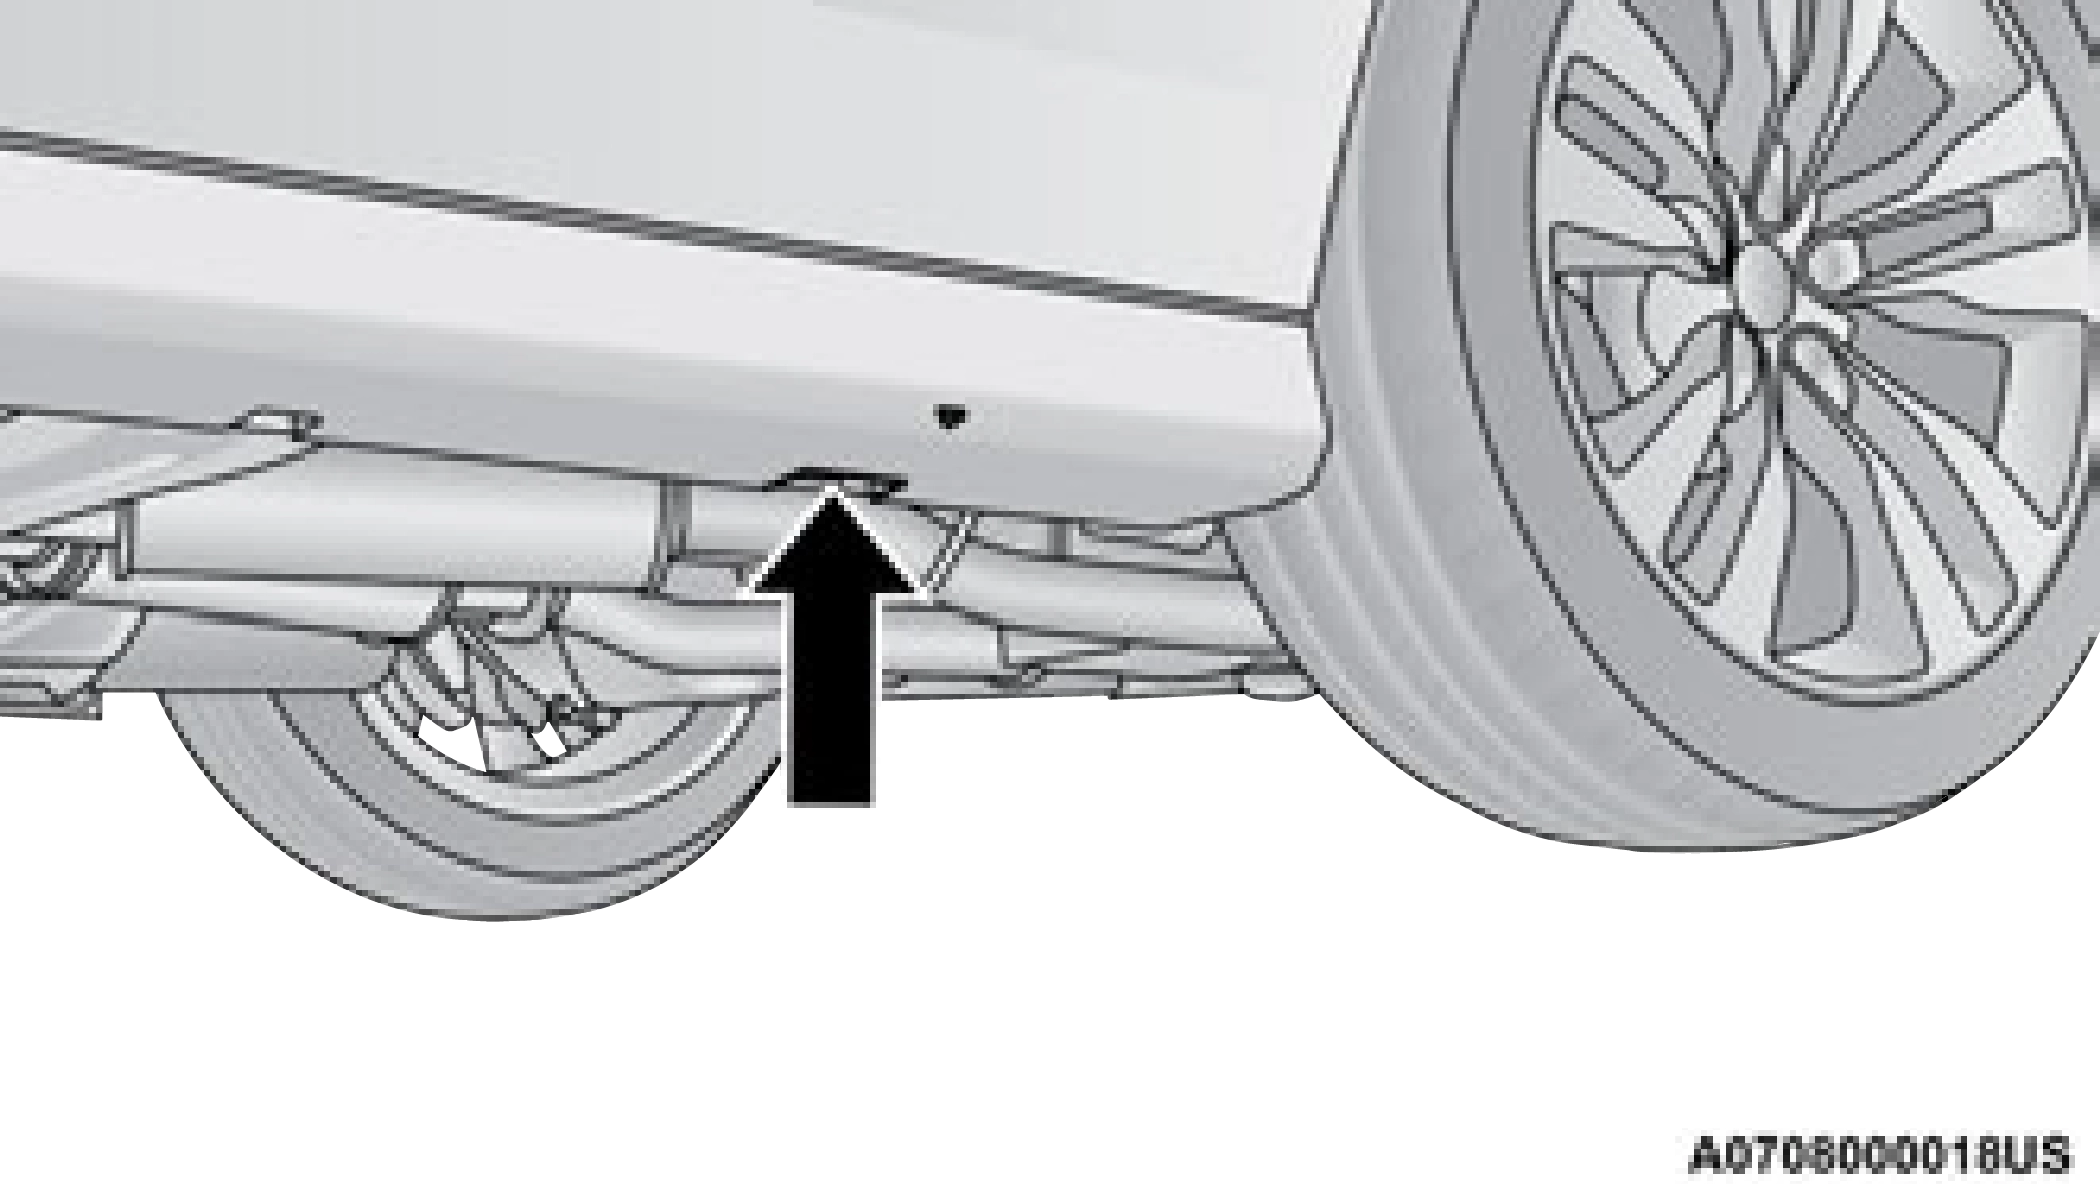
- Place the jack underneath the lift area that is closest to the flat tire. Turn the jack screw clockwise to firmly engage the jack saddle with the lift area of the sill flange.
- Raise the vehicle just enough to remove the flat tire and install the spare tire.
- Remove the lug nuts and tire.
- Mount the spare tire.
- Install the remaining lug nuts with the cone shaped end of the nut toward the wheel. Lightly tighten the lug nuts.
- Lower the vehicle to the ground by turning the jack handle counterclockwise.
- Finish tightening the lug nuts. Push down on the wrench while at the end of the handle for increased average. Tighten the lug nuts in a star pattern until each nut has been tightened twice. Refer to “Wheel And Tire Torque Specifications” in “Technical Specifications” for proper lug nut torque.
- Stow the wheel chocks, jack, tools and flat tire. Make sure the base of the jack faces the front of the vehicle before tightening down the fastener.
NOTE:
When the following label is present, the spare tire must be used for the rear wheel(s) only. For a flat front tire, you must first install the spare on one of the rear tires. Then, follow the jacking instructions for front tire replacement and replace the front road wheel with the wheel removed from the rear of the vehicle.
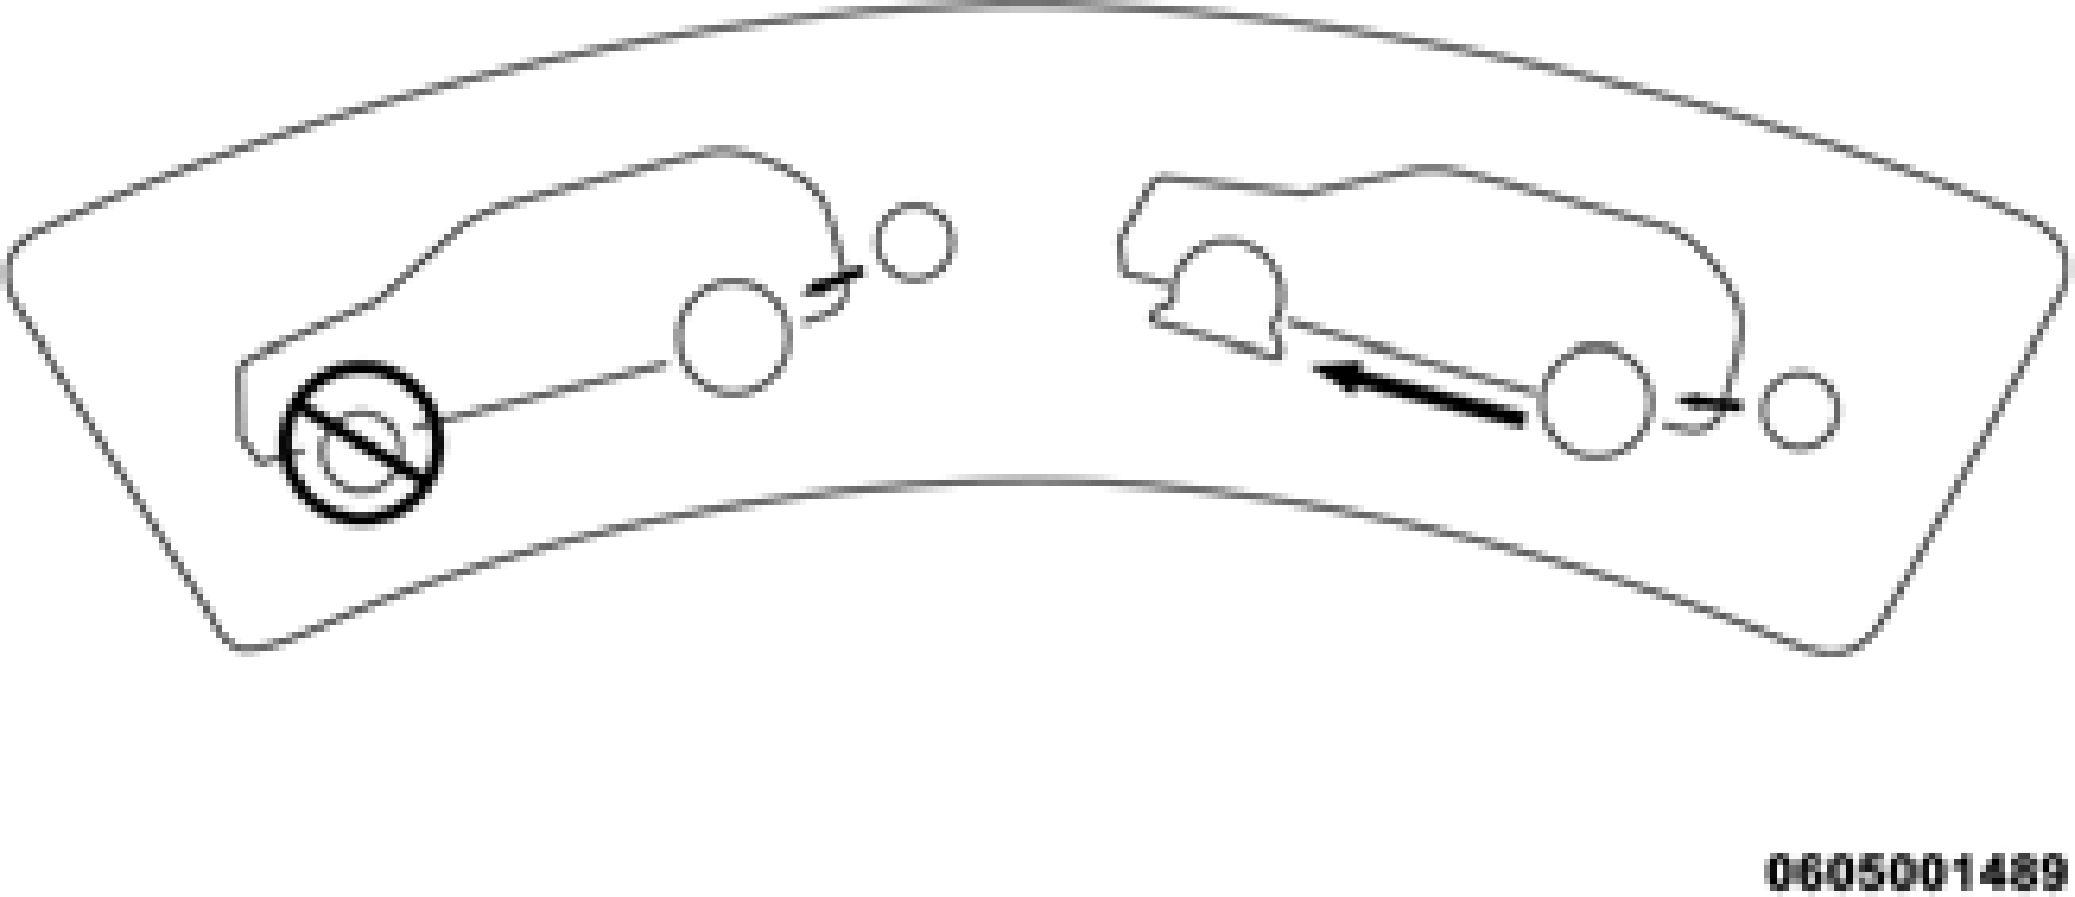
Spare Tire Label
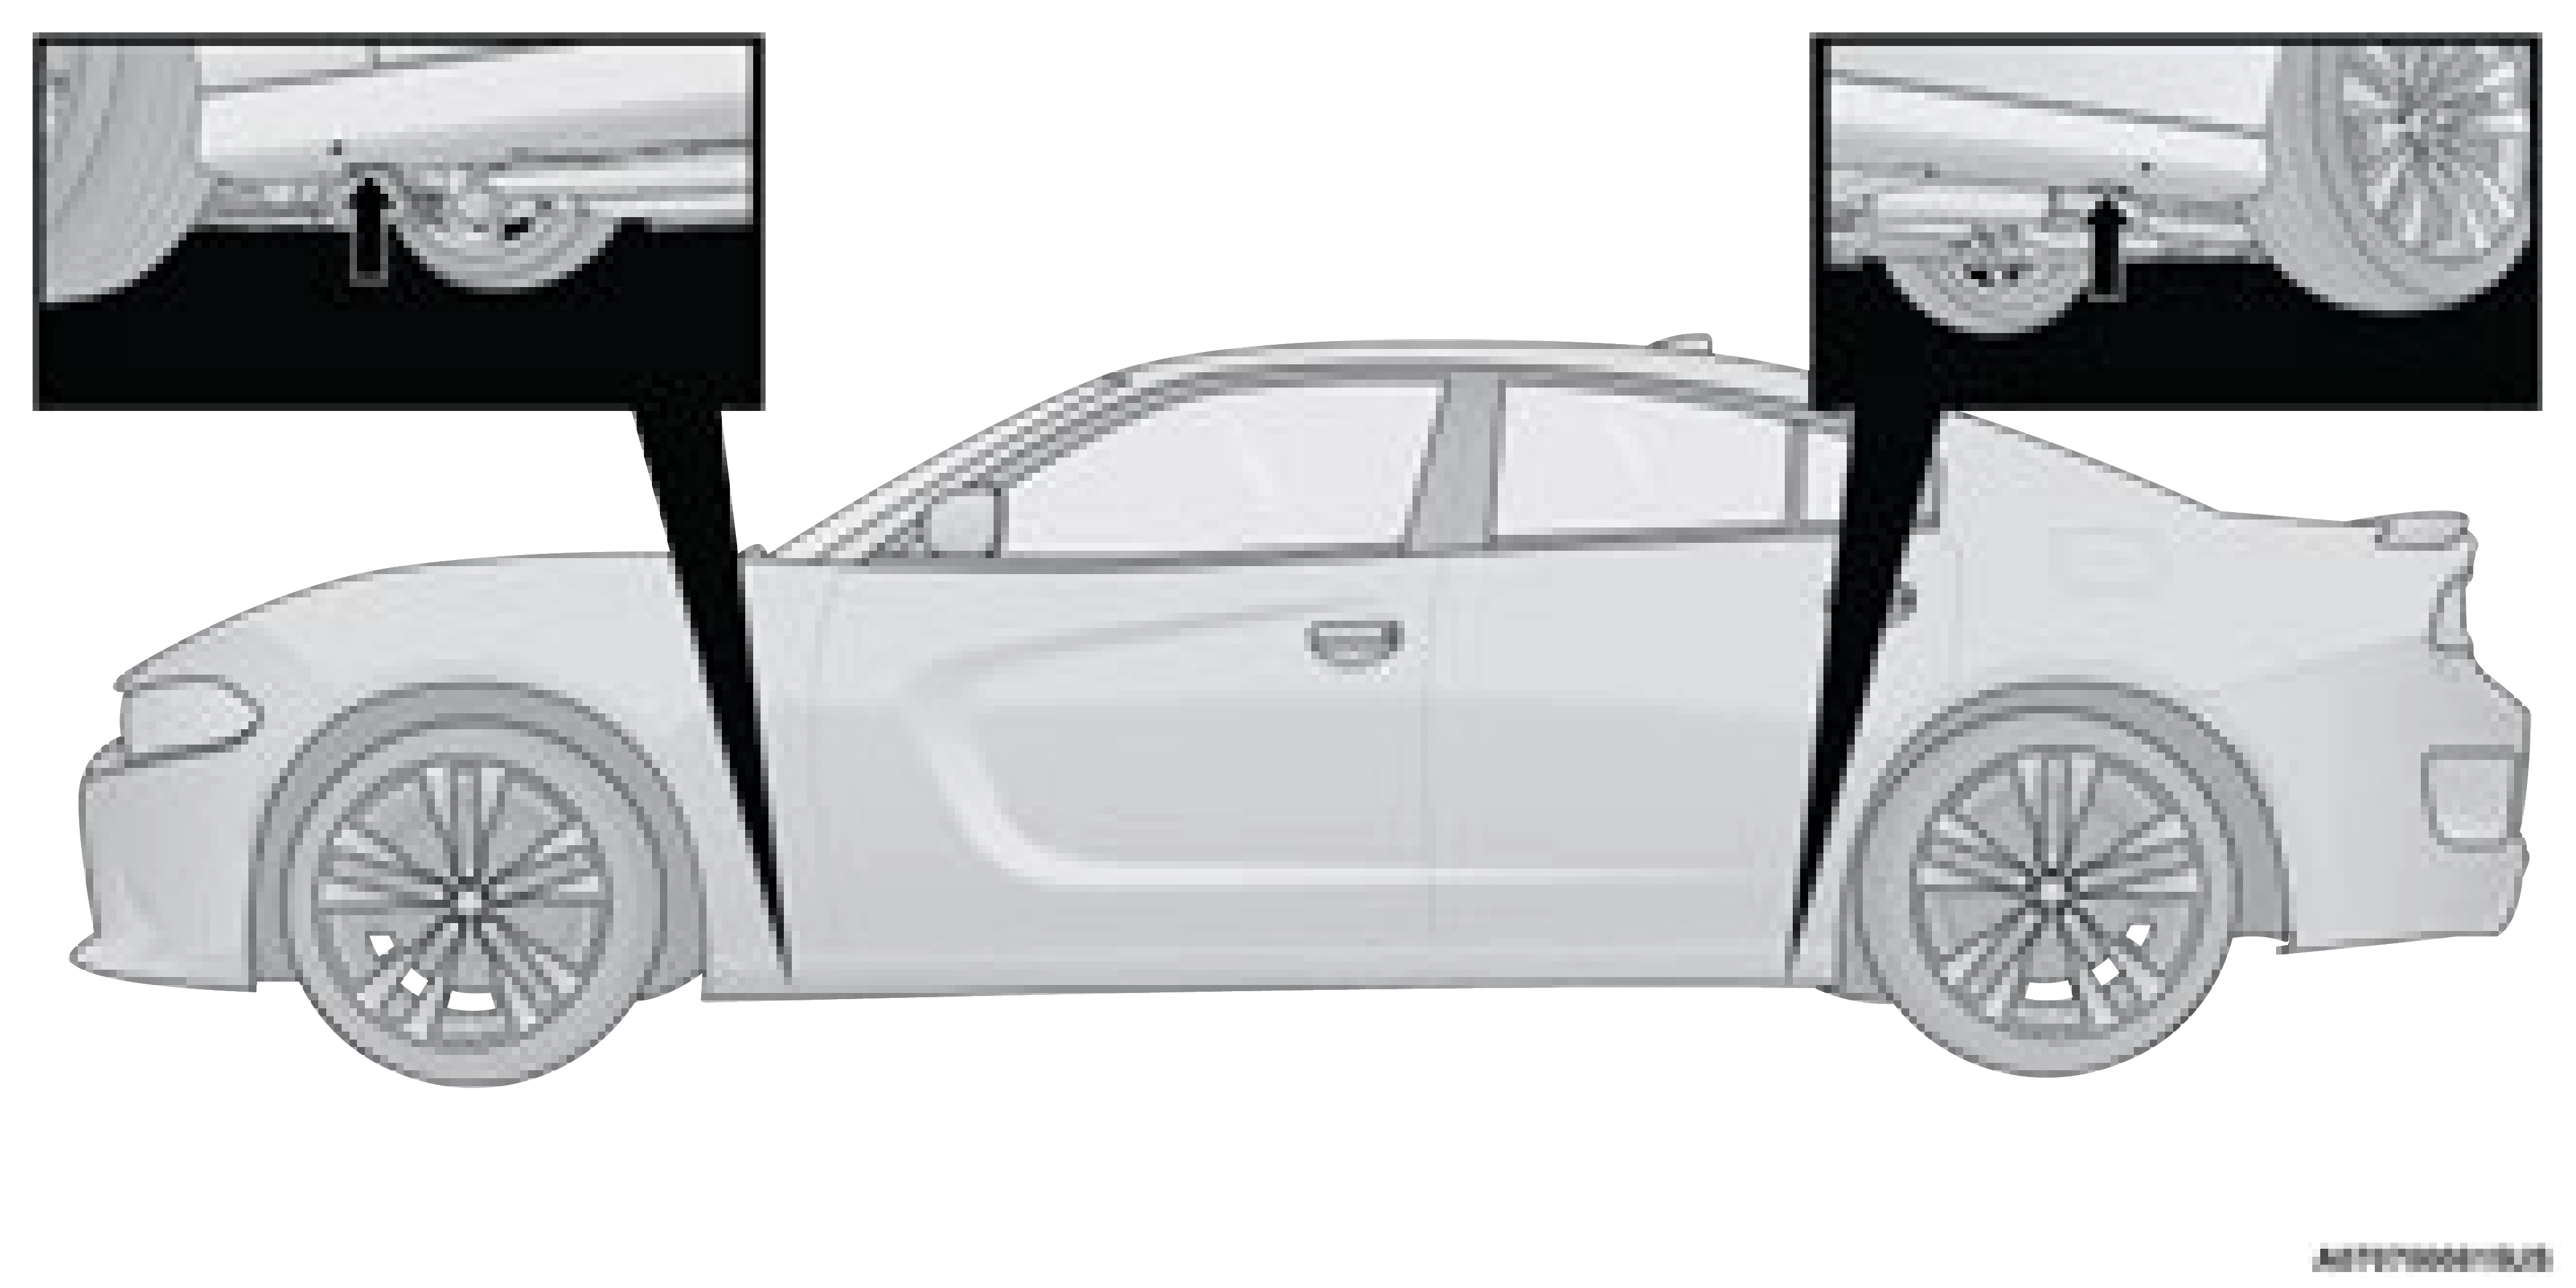
Jacking Locations
NOTE:
If the vehicle is too low for jack placement, slide the jack on its side and rotate it up into position.
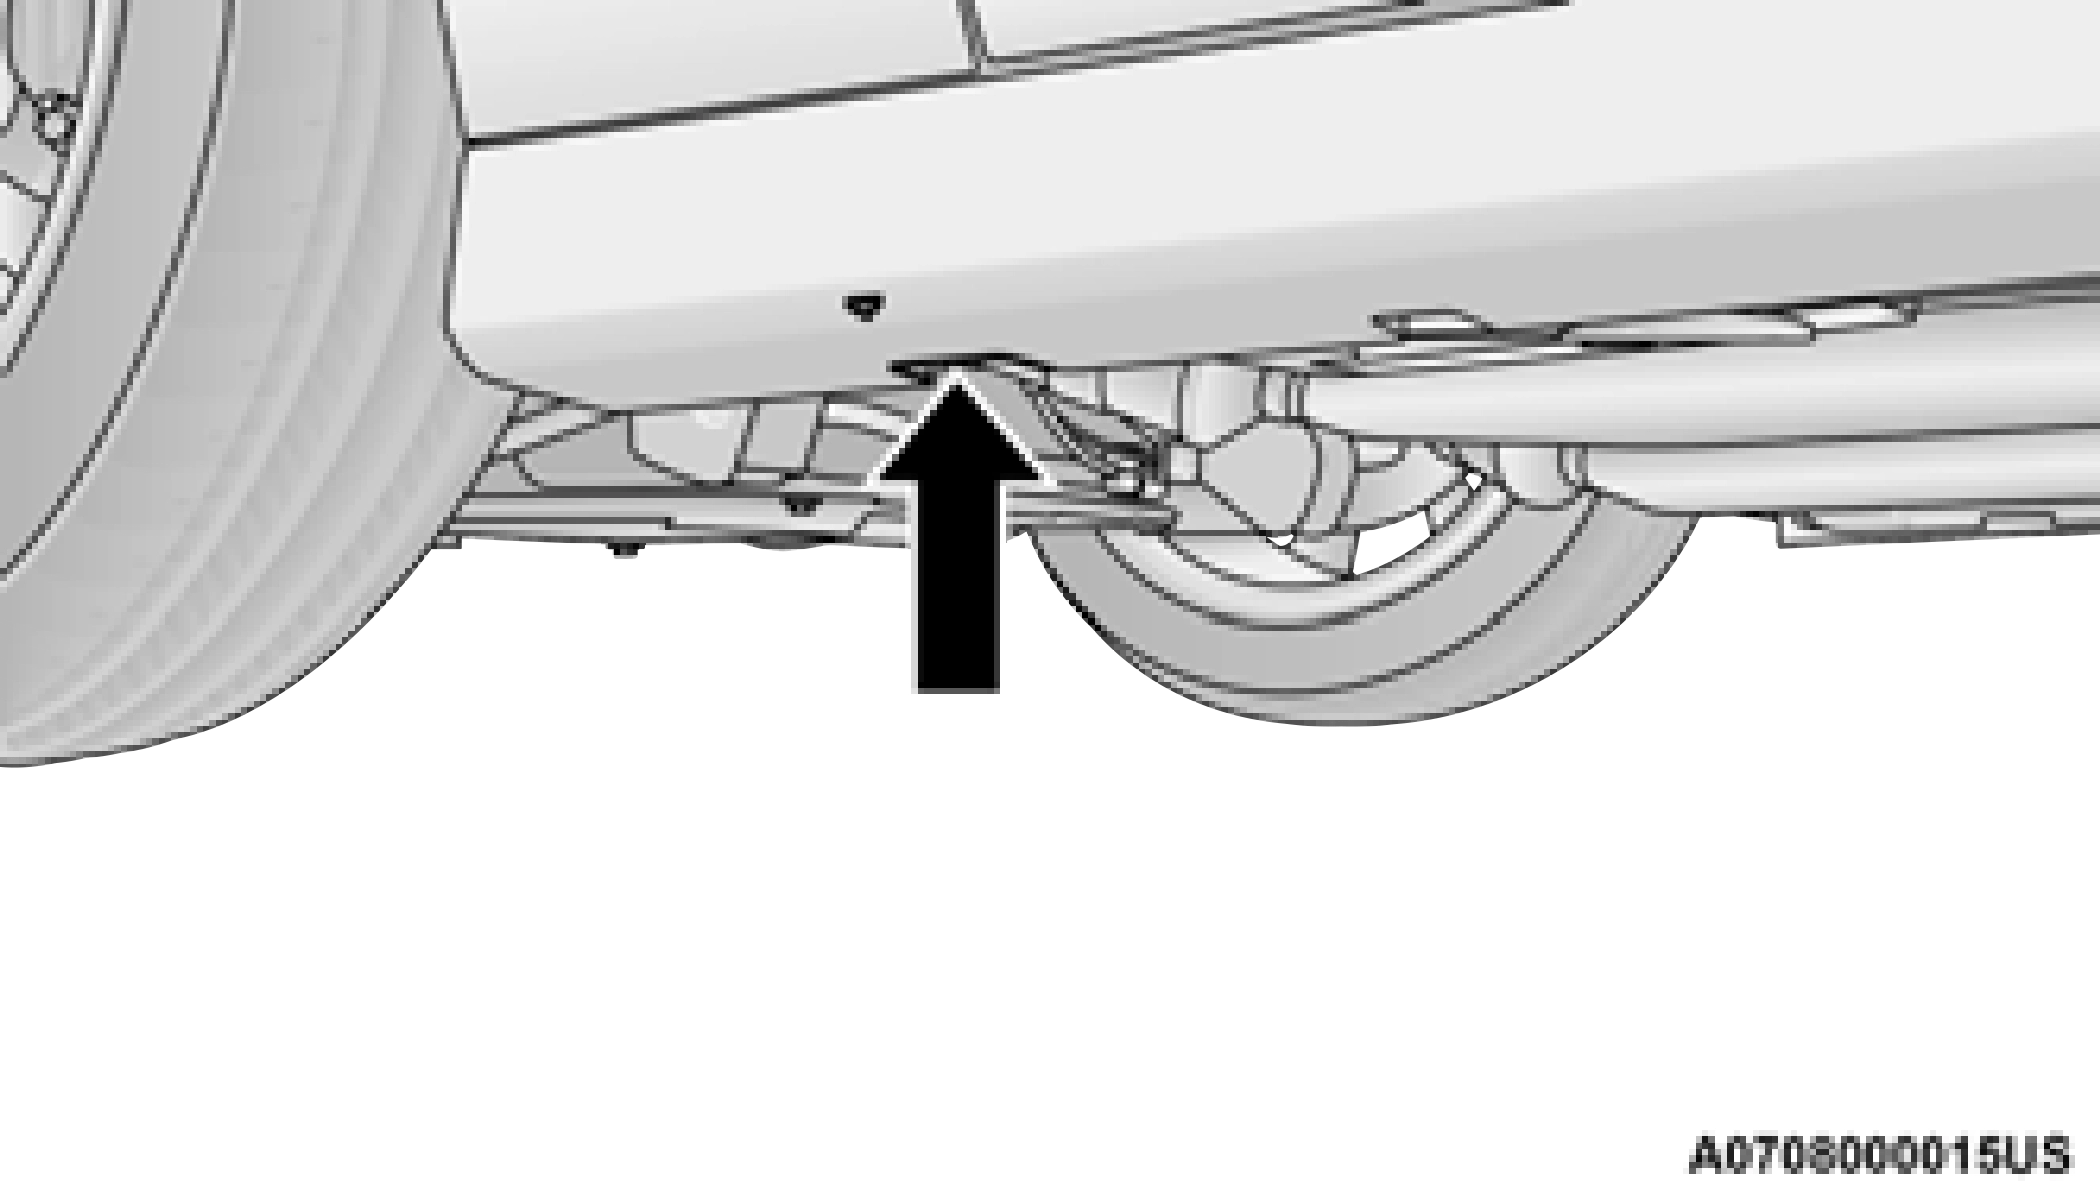
Front Lifting Point
Front Jacking Location
Rear Lifting Point
Rear Jacking Location
Install the lug nuts with the cone shaped end of the lug nut toward the wheel. Lightly tighten the lug nuts.
Mounting Spare Tire
NOTE:
For vehicles that are equipped, do not attempt to install a center cap or wheel cover on the compact spare.
Refer to“Tires” in“Servicing And Mainte- nance” for additional warnings, cautions, and information about the spare tire, its use, and operation.
ROAD TIRE INSTALLATION
- Mount the road tire on the axle.
- Install the remaining lug nuts with the cone shaped end of the nut toward the wheel. Lightly tighten the lug nuts.
- Lower the vehicle to the ground by turning the jack handle counterclockwise.
- Refer to“Wheel And Tire Torque Specifications” in“Technical Specifications” for proper lug nut torque.
- After 25 miles (40 km), check the lug nut torque with a torque wrench to ensure that all lug nuts are properly seated against the wheel.
Download Manual