Engine oil
Checking engine oil level
Checking engine oil level
- Park the vehicle on a level surface and apply the parking brake.
- Start the engine and let it idle until it reaches operating temperature.
- Turn off the engine. Wait more than 10 minutes for the oil to drain back into the oil pan.
- Remove the dipstick and wipe it clean. Reinsert it all the way.
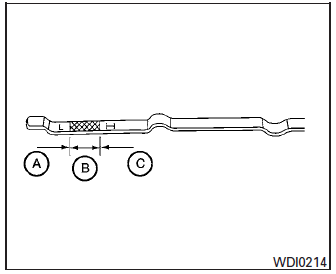
- Remove the dipstick again and check the oil level. It should be between the H (High) and L (Low) marks B . This is the normal operating oil level range. If the oil level is below the L (Low) mark A , remove the oil filler cap and pour recommended oil through the opening. Do not overfill C .
- Recheck oil level with the dipstick.
It is normal to add some oil between oil maintenance intervals or during the break-in period, depending on the severity of operating conditions.
| CAUTION
Oil level should be checked regularly. Operating the engine with an insufficient amount of oil can damage the engine, and such damage is not covered by warranty. |
Changing engine oil
Changing engine oil
- Park the vehicle on a level surface and apply the parking brake.
- Start the engine and let it idle until it reaches operating temperature, then turn it off.
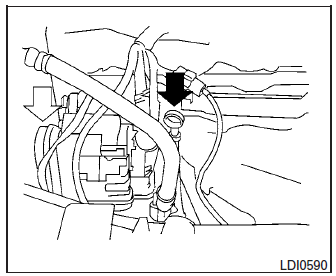
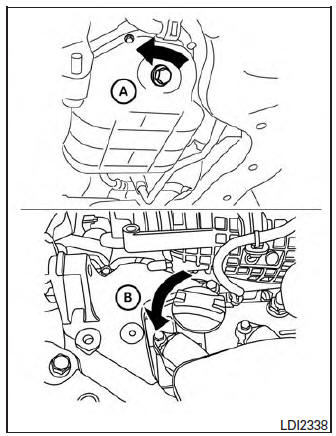
- Remove the oil filler cap B by turning it counterclockwise.
- Place a large drain pan under the drain plug A .
- Remove the drain plug A with a wrench by turning it counterclockwise and completely drain the oil.
If the oil filter is to be changed, remove and replace it at this time. See “Changing engine oil filter” in this section.
- Waste oil must be disposed of properly.
- Check your local regulations.
WARNING
|
| CAUTION
Be careful not to burn yourself. The engine oil may be hot. |
- Clean and reinstall the drain plug and a new washer. Securely tighten the drain plug with a wrench. Do not use excessive force.
Drain plug tightening torque: 22 - 29 ft-lb (29 - 39 N·m)
- Refill engine with recommended oil through the oil filler opening, then install the oil filler cap securely.
For additional information, refer to “Recommended fluids/lubricants and capacities” in the “Technical and consumer information” section of this manual for drain and refill capacity.
The drain and refill capacity depends on the oil temperature and drain time. Use these specifications for reference only. Always use the dipstick to determine when the proper amount of oil is in the engine.
- Start the engine. Check for leakage around the drain plug and oil filter. Correct as required.
- Turn the engine off and wait more than 10 minutes. Check the oil level with the dipstick. Add engine oil if necessary.
Changing engine oil filter
 > Changing engine oil filter
- Park the vehicle on a level surface and apply the parking brake.
- Turn the engine off.
- Place a large drain pan under the oil filter B .
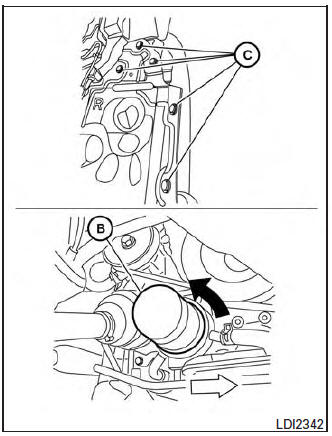
- Remove pins C from the right engine protector located inside right wheel well, remove protector. Remove oil filter B with an oil filter wrench by turning it counterclockwise.
Then remove the oil filter by turning it by hand.
| CAUTION
Be careful not to burn yourself. The engine oil may be hot. |
- Wipe the engine oil filter sealing surface with a clean rag.
CAUTION
|
- Coat the gasket on the new filter with clean engine oil.
- Screw on the oil filter until a slight resistance is felt, then tighten an additional 2/3 turn.
- Start the engine and check for leakage around the oil filter. Correct as required.
- Turn the engine off and wait more than 10 minutes. Check the oil level. Add engine oil if necessary.
Continuously Variable Transmission (CVT) fluid
CAUTION
|
When checking or replacement of CVT fluid is required, we recommend your NISSAN dealer for servicing.
Brake fluid
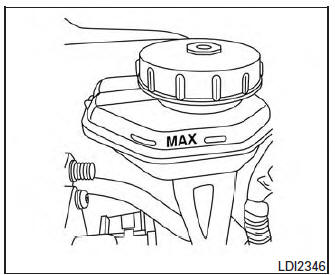
Brake fluid
Check the brake fluid level in the reservoir. If the brake warning light comes on, add Genuine NISSAN Super Heavy Duty Brake Fluid or equivalent DOT 3 fluid up to the MAX line. If fluid must be added frequently, the system should be checked by a NISSAN dealer.
Download Manual