Basic Audio
Operation
Connect audio devices and operate buttons and displays for the audio system.
USB Port
Connect a USB flash drive or other audio device, such as an iPod or iPhone®. Install the flash drive or cable connector to the USB port in the center console.
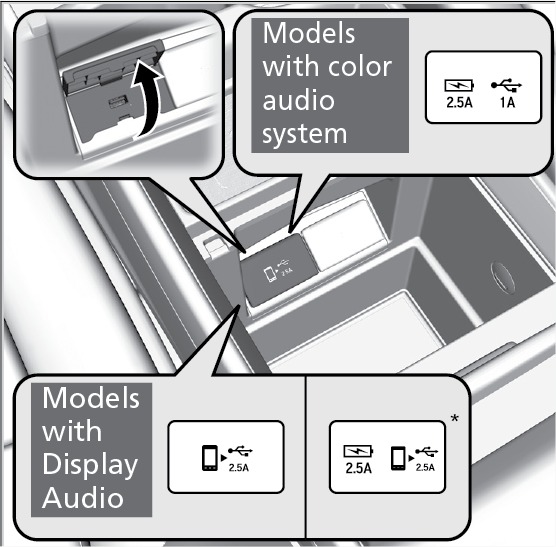
Models with color audio system
The right-side port (1.0A) is for playing audio, connecting a phone, and device charging.
The left-side port (2.5A)* is for device charging only.
Models with Display Audio
The USB port (2.5A) is for playing audio, charging devices, and connecting to Apple CarPlay (see "Apple Car Play") or Android Auto (see "Android Auto").
The left-side port* (2.5A) is for device charging only.
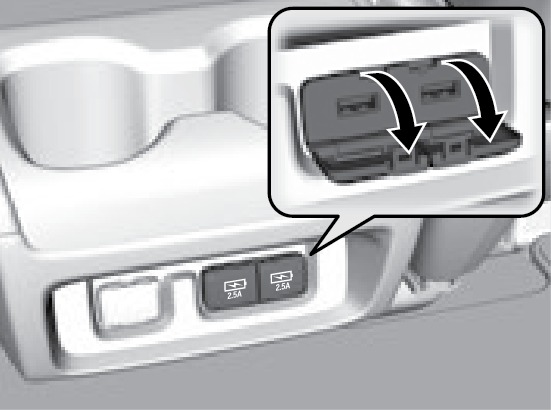
Additional charging-only ports are on the back of the center console.
iPod and iPhone are trademarks of Apple, Inc.
Your vehicle comes equipped with software, which is governed by the End User License Agreement in this vehicle's Owner's Manual, and which contains a binding arbitration clause. Please refer to the End User License Agreement for the terms and conditions governing your use of the installed software, as well as the applications, services, functions, and content provided through the software. Your use of the installed software will serve as your consent to the terms and conditions of the End User License Agreement.
You may opt out of the arbitration provisions within 30 days of your initial use of the Software by sending a signed, written notice to HONDA at American Honda Motor Co., Inc. Honda Automobile Customer Services Mail Stop 100-5E-8A, 1919 Torrance Blvd. Torrance, CA 90501-2746
*if equipped
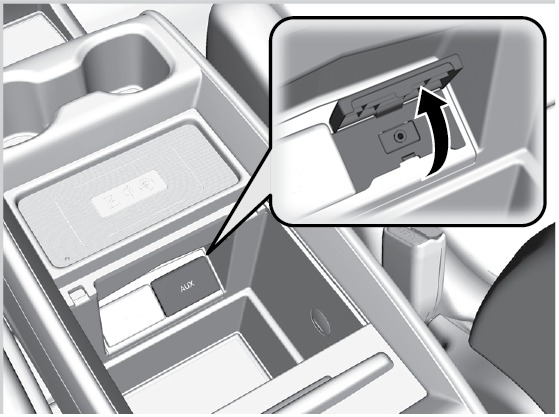
Auxiliary Input Jack
Connect standard audio devices with a 1/8-inch (3.5 mm) stereo miniplug.
- Open the AUX cover.
- Insert the miniplug attached to the audio device into the jack.
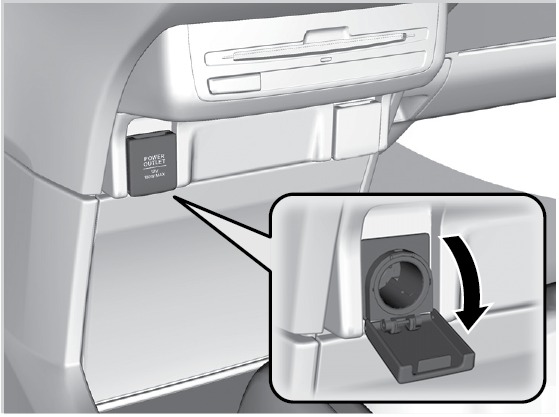
AC Power Outlet*
The outlet can supply power for appliances up to 115 volts that are rated 150 watts or less when the engine is running.
- Open the socket cover.
- Slightly plug in the appliance, turn it 90 degrees clockwise, then push it in all the way.
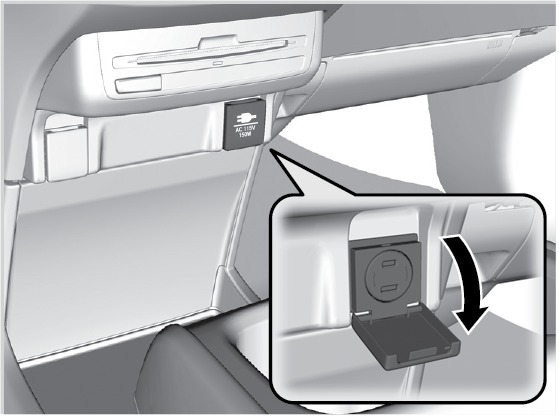
Do not use the AC power outlet for electric devices requiring high initial peak wattage or extremely stable power regulation. This includes medical equipment.
*if equipped
Accessory Power Sockets
Open the socket cover to use power when the vehicle is on.
Power sockets are located in the front console and the driver's side rear cargo area and the third-row seat*.
Do not insert an automotive type cigarette lighter element. This can overheat the power socket.
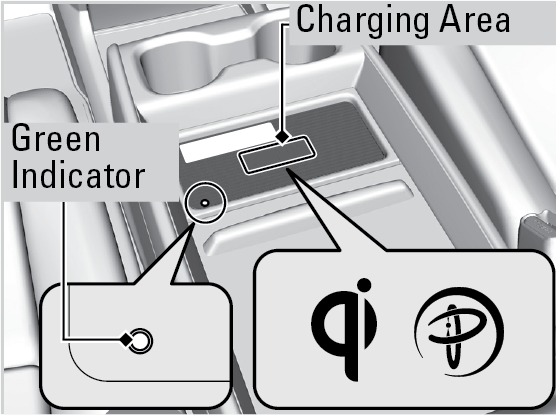
Wireless Charger*
Charge your Qi®-compatible device when the vehicle is in ACCESSORY mode or ON.
- Place the chargeable side of the device on the charge area. The system begins charging the device and the green indicator appears.
- The green indicator turns off when charging is complete. On some devices, the green indicator may blink when charging is complete.
Notes:
- This system consumes a lot of power. It is best to charge your device when the engine is running.
- If the indicator light is blinking, there may be an object between the device and charging area, the device may have moved, or the charger is malfunctioning.
- The device may not charge if you are near strong electromagnetic waves, such as at a gas station.
- The device and charging area may get warm during charging. This is normal.
- Metal objects between the charger and the device to be charged will get hot and can burn you.
- Remove foreign objects from the charger before charging the device.
- Do not attach a metal object to the charger.
- Do not charge if the charger is covered with a towel, layer of dust, etc.
- Do not allow the charger to get wet.
- Do not wipe the charger with oils, alcohol, benzine, thinners, etc. or expose it to aerosols.
- Do not use the charger if it is malfunctioning. In the unlikely event the charger emits smoke, abnormal odors or unusual sounds, stop use immediately.
- Do not place any magnetic devices, such as credit cards or watches within the charge area while charging. The data on credit cards can be lost and watches may stop working.
Qi® is a registered trademark of the Wireless Power Consortium.
*if equipped
Adjusting the Sound
Adjust various sound settings.
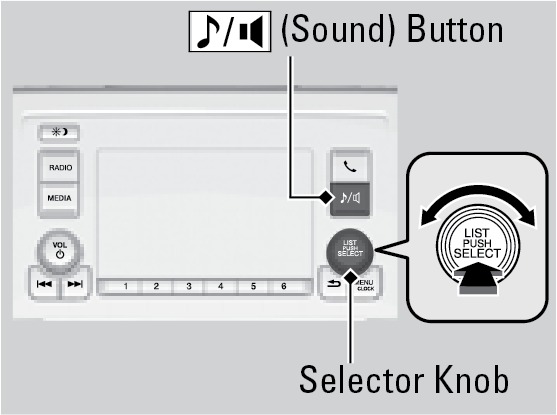
Models with color audio system
Use the selector knob to make and enter selections.
- Press the Sound button.
- Select a sound mode to change, and adjust it using the selector knob.
- Press the Back button to exit the menu.
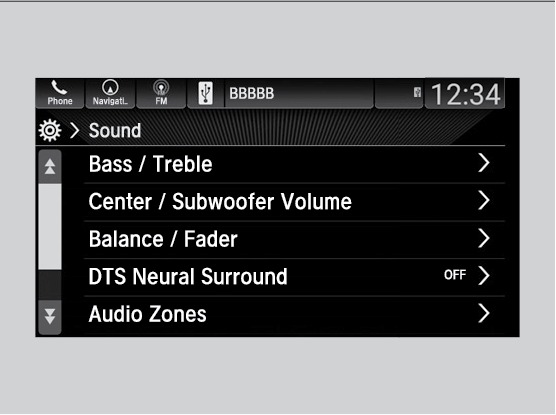
Models with Display Audio
Make and enter selections using the touchscreen.
- From the Home scren, select an audio source (FM, USB, etc.).
- Select Sound.
- Select the category you wish to change and adjust the setting.
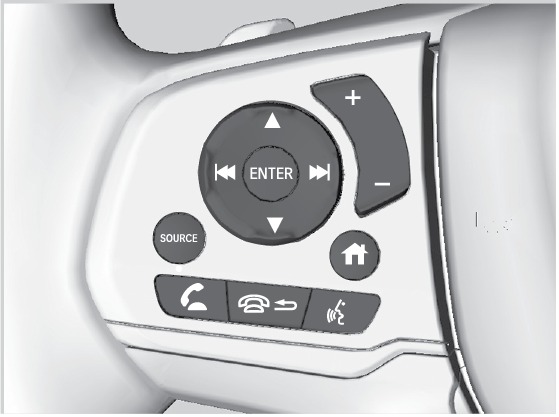
Audio Remote Controls
You can operate certain functions of the audio system using the steering wheel controls.
Models with color audio
SOURCE button: Cycle through available audio modes.
+ / - (volume) bar: Adjust audio volume.
 : buttons: Change presets, tracks, albums, or folders.
FM/AM Radio
Press: for the next or previous preset station.
iPod/USB/Bluetooth Audio
Press: for the next or previous track.
Models with Display Audio
![]() : Press to cycle through the audio modes.
: Press to cycle through the audio modes.
+ / - bar: Press the ends of the bar to adjust audio volume.
Press: buttons: Change presets, tracks, albums, or folders.
ENTER button: Make audio selections in the Driver Information Interface.

FM/AM/SiriusXM Radio*
Press : for the next or previous preset station.
iPod/USB/Bluetooth Audio
Press : for the next or previous track.
- Android Auto
- USB Flash Drive
- Apple CarPlay
- Setting the Clock
- Wi-Fi Connection*
- SiriusXM Radio*
- Basic Navigation Operation
- Color Audio Operation*
- Steering Wheel and Nearby Controls
- iPod
Download Manual