Garage door opener — if equipped
HomeLink® replaces up to three remote controls (hand-held transmitters) that operate devices such as garage door openers, motorized gates, lighting or home security systems. The HomeLink® unit operates off your vehicle’s battery.
The HomeLink® buttons, located on either the overhead console, headliner or sunvisor, designate the three different HomeLink® channels. The HomeLink® indicator is located above the center button.
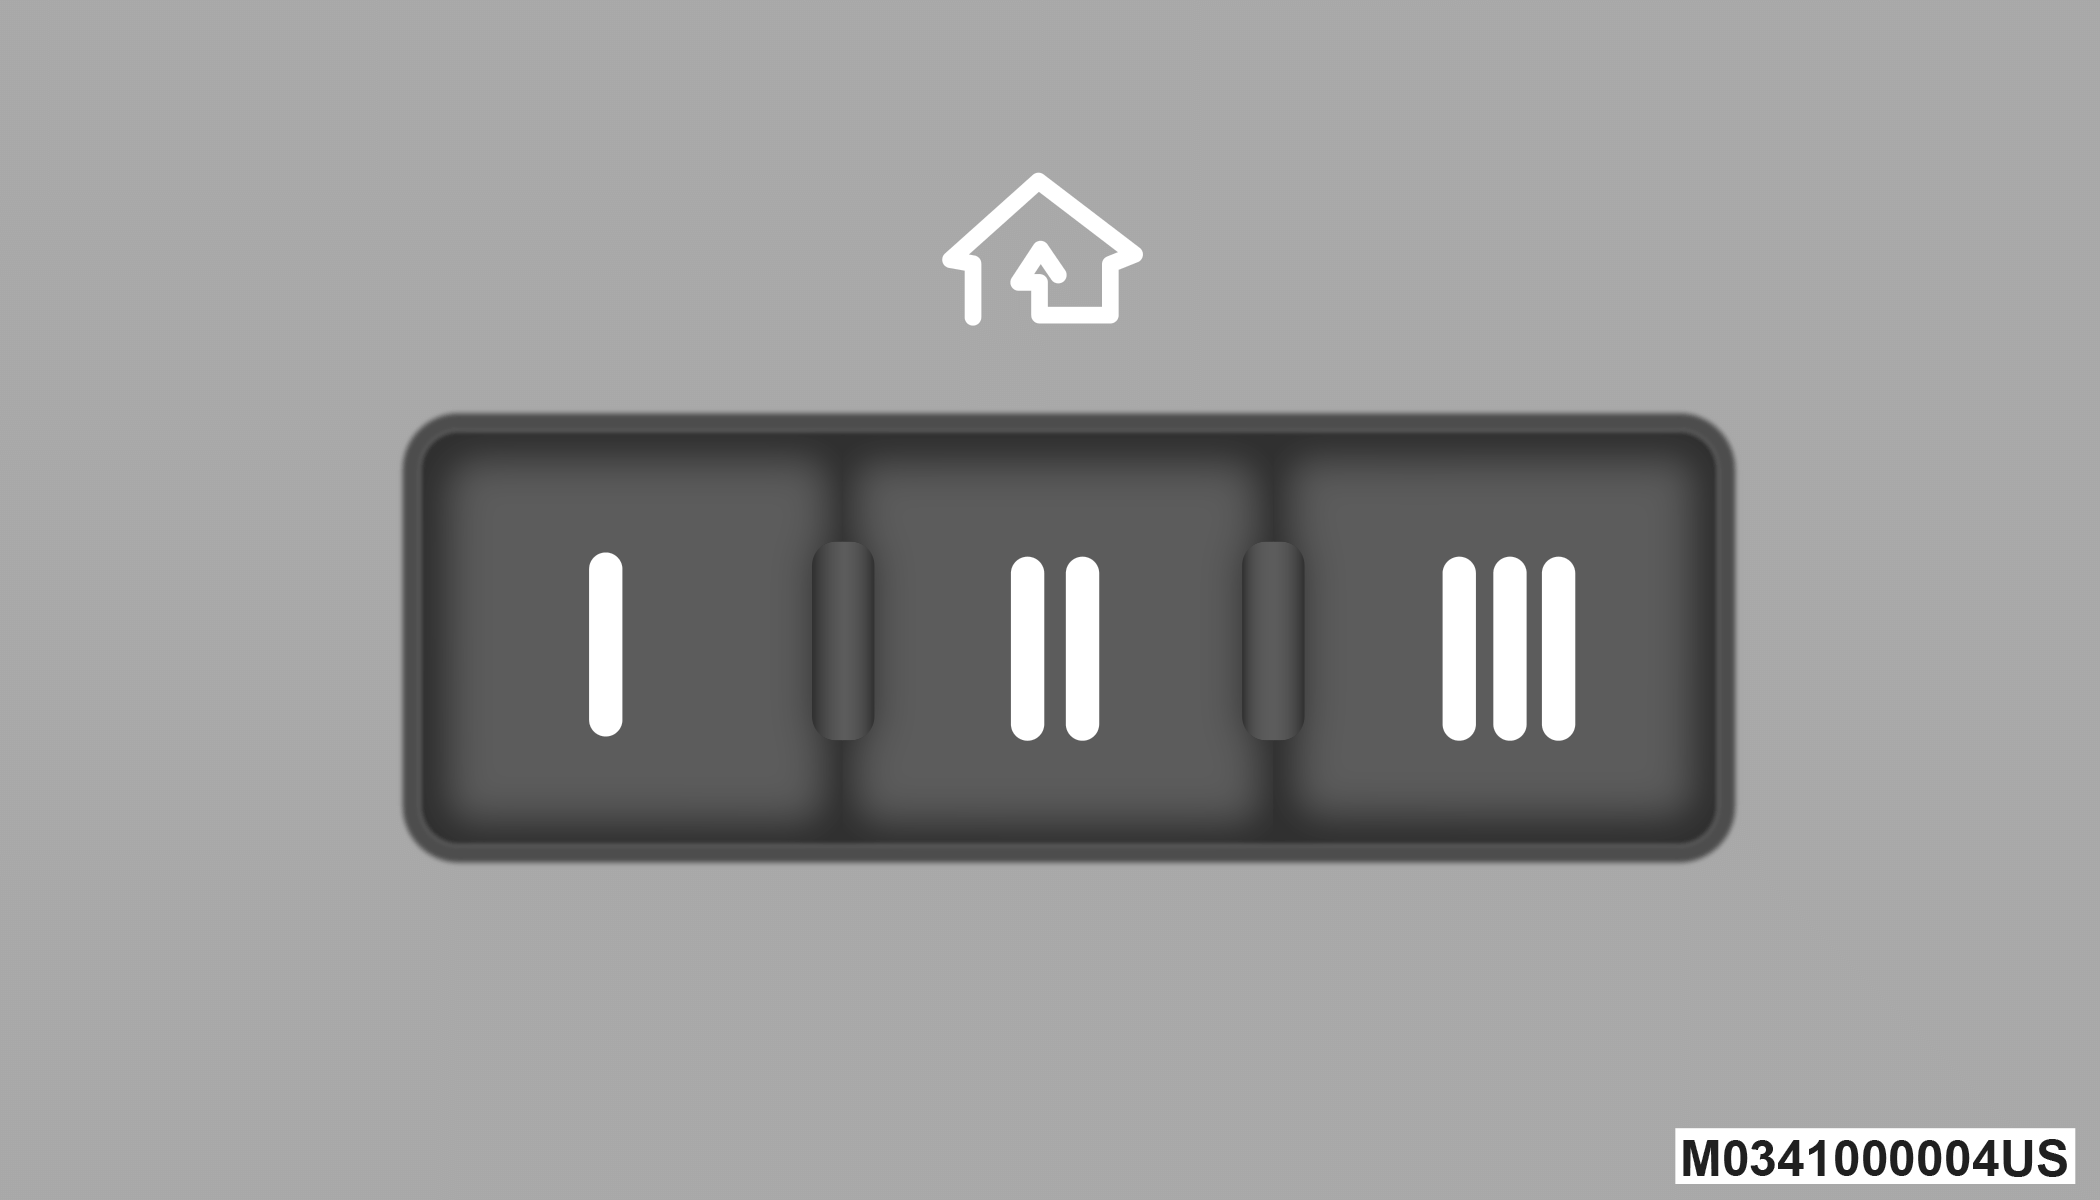
HomeLink® Buttons/Overhead Consoles
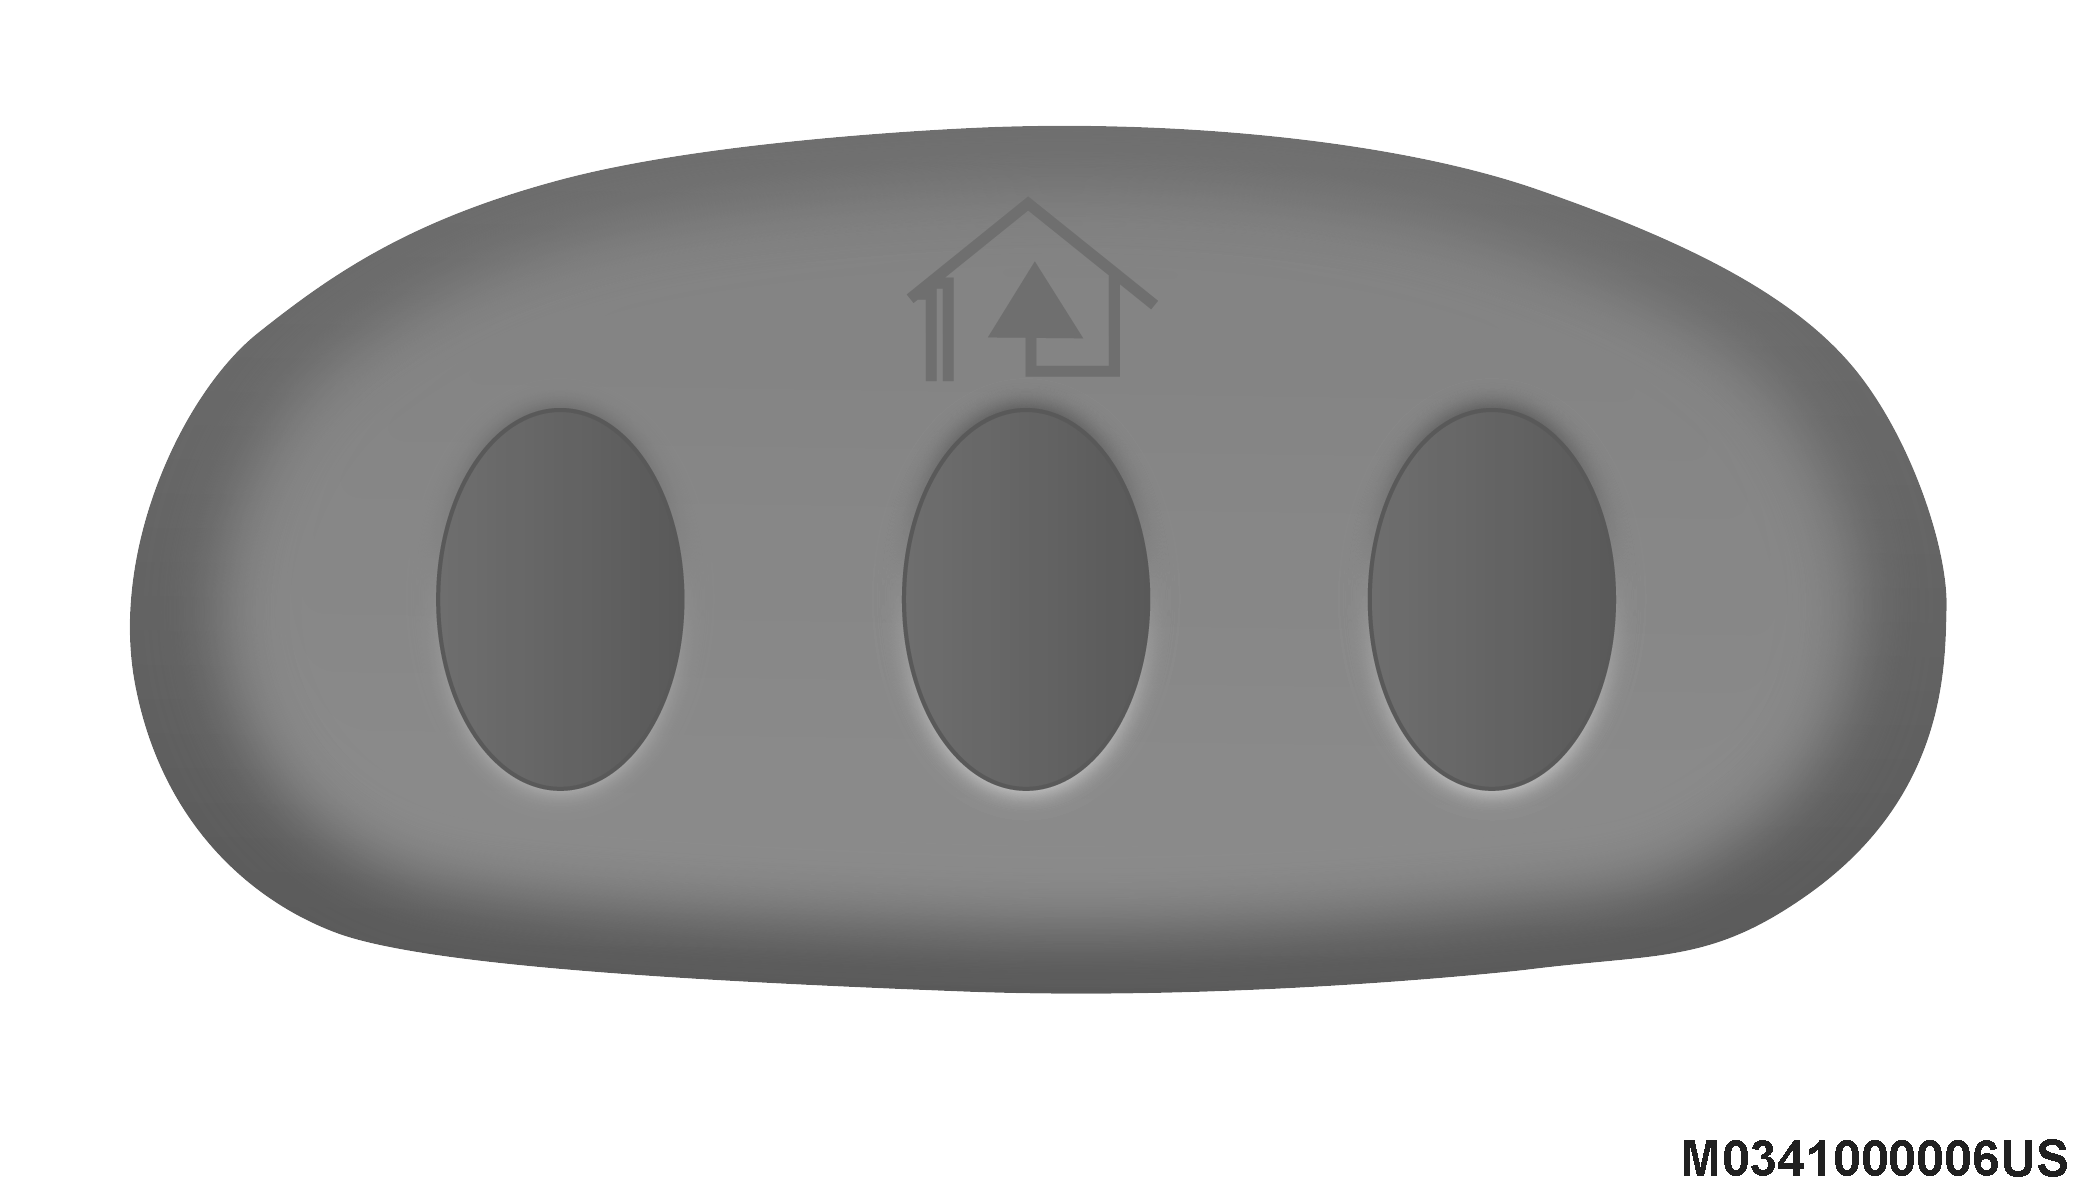
HomeLink® Buttons/Sunvisor/Headliner
Note:
HomeLink® is disabled when the vehicle security alarm is active.
BEFORE YOU BEGIN PROGRAMMING HOMELINK®
Be sure that your vehicle is parked outside of the garage before you begin programming.
For more efficient programming and accurate transmission of the Radio Frequency (RF) signal it is recommended that a new battery be placed in the hand-held transmitter of the device that is being programmed to the HomeLink® system.
To erase the channels, place the ignition in the ON/RUN position, and push and hold the two outside HomeLink® buttons (I and III) for up to 20 seconds or until the orange indicator flashes.
Note:
-
Erasing all channels should only be performed when programming HomeLink® for the first time. Do not erase channels when programming additional buttons.
-
If you have any problems, or require assistance, please call toll-free 1-800-355-3515 or, on the Internet at HomeLink.com for information or assistance.
PROGRAMMING A ROLLING CODE
For programming garage door openers that were manufactured after 1995:
These garage door openers can be identified by the “LEARN” or “TRAIN” button located where the hanging antenna is attached to the garage door opener. It is NOT the button that is normally used to open and close the door. The name and color of the button may vary by manufacturer.
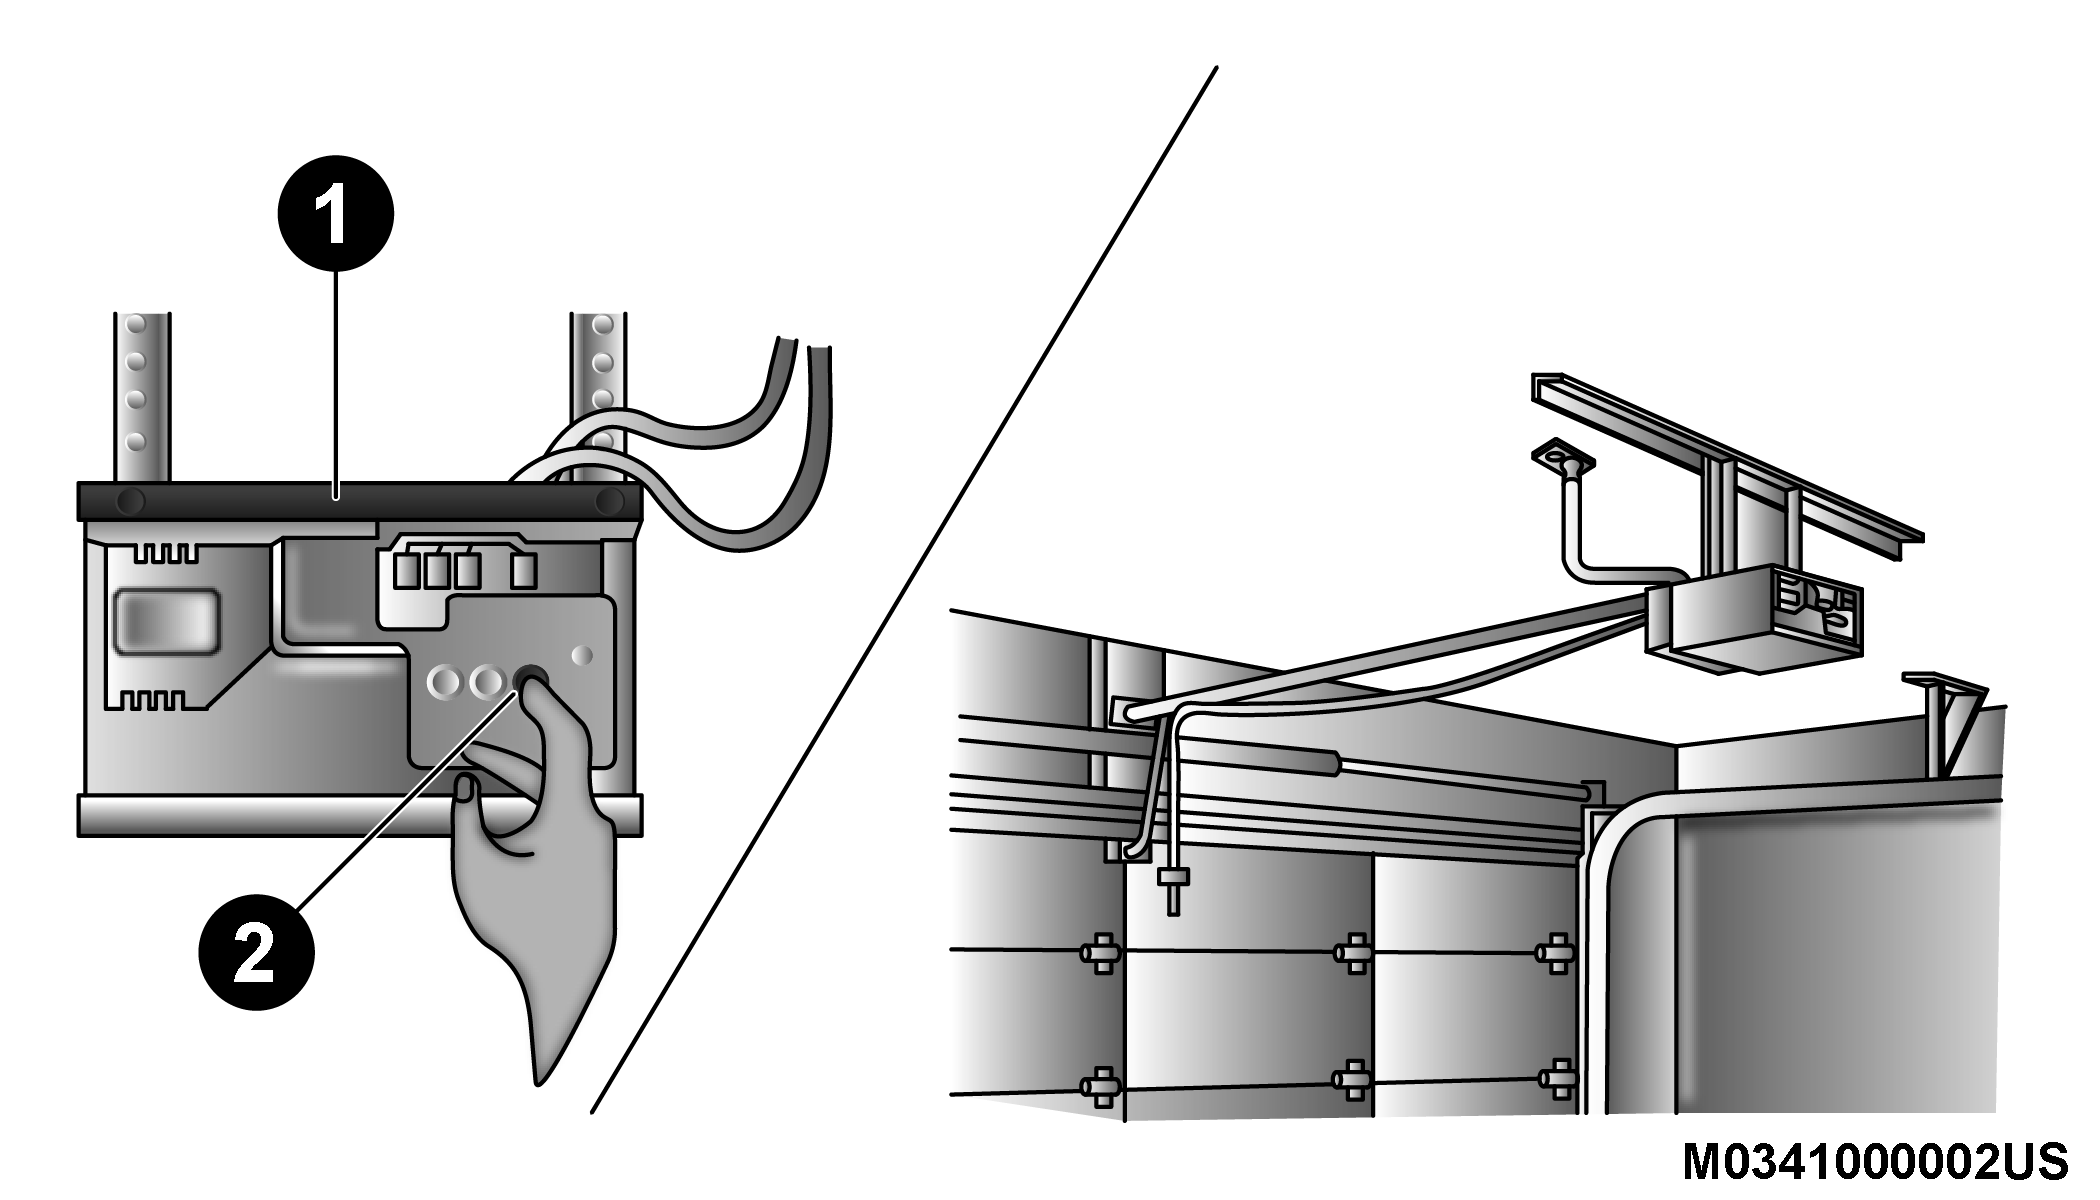
Training The Garage Door Opener
|
1 — Door Opener |
|
2 — Training Button |
-
Place the ignition in the ON/RUN position.
Note:
For vehicles equipped with Keyless Enter-N-Go, place the ignition in the RUN position with the engine ON. Make sure while programming HomeLink® with the engine ON that your vehicle is outside of your garage, or that the garage door remains open at all times.
-
Place the hand-held transmitter 1 to 3 inches (3 to 8 cm) away from the HomeLink® button you wish to program while keeping the HomeLink® indicator light in view.
-
Push and hold the HomeLink® button you want to program while you push and hold the hand-held transmitter button.
-
Continue to hold both buttons and observe the indicator light. The HomeLink® indicator will flash slowly and then rapidly after HomeLink® has received the frequency signal from the hand-held transmitter. Release both buttons after the indicator light changes from slow to rapid.
-
At the garage door opener (in the garage), locate the “LEARN” or “TRAINING” button. This can usually be found where the hanging antenna wire is attached to the garage door opener/device motor. Firmly push and release the “LEARN” or “TRAINING” button. On some garage door openers/devices there may be a light that blinks when the garage door opener/device is in the LEARN/TRAIN mode.
Note:
You have 30 seconds in which to initiate the next step after the LEARN button has been pushed.
-
Return to the vehicle and push the programmed HomeLink® button twice (holding the button for two seconds each time). If the garage door opener/device activates, programming is complete.
Note:
-
If the garage door opener/device does not activate, push the button a third time (for two seconds) to complete the training.
-
To program the remaining two HomeLink® buttons, repeat each step for each remaining button. DO NOT erase the channels.
-
PROGRAMMING A NON-ROLLING CODE
For programming garage door openers manufactured before 1995:
-
Place the ignition in the ON/RUN position.
Note:
For vehicles equipped with Keyless Enter-N-Go, place the ignition in the RUN position with the engine on. Make sure while programming HomeLink® with the engine on that your vehicle is outside of your garage, or that the garage door remains open at all times.
-
Place the hand-held transmitter 1 to 3 inches (3 to 8 cm) away from the HomeLink® button you wish to program while keeping the HomeLink® indicator light in view.
-
Push and hold the HomeLink® button you want to program while you push and hold the hand-held transmitter button.
-
Continue to hold both buttons and observe the indicator light. The HomeLink® indicator will flash slowly and then rapidly after HomeLink® has received the frequency signal from the hand-held transmitter. Release both buttons after the indicator light changes from slow to rapid.
-
Push and hold the programmed HomeLink® button and observe the indicator light.
Note:
-
If the indicator light stays on constantly, programming is complete and the garage door/device should activate when the HomeLink® button is pushed.
-
To program the two remaining HomeLink® buttons, repeat each step for each remaining button. DO NOT erase the channels.
-
CANADIAN/GATE OPERATOR PROGRAMMING
For programming transmitters in Canada/United States that require the transmitter signals to “time-out” after several seconds of transmission:
Canadian radio frequency laws require transmitter signals to time-out (or quit) after several seconds of transmission, which may not be long enough for HomeLink® to pick up the signal during programming. Similar to this Canadian law, some U.S. gate operators are designed to time-out in the same manner.
It may be helpful to unplug the device during the cycling process to prevent possible overheating of the garage door or gate motor.
-
Place the ignition in the ON/RUN position.
Note:
For vehicles equipped with Keyless Enter-N-Go, place the ignition in the ON/RUN position with the engine on. Make sure while programming HomeLink® with the engine on that your vehicle is outside of your garage, or that the garage door remains open at all times.
-
Place the hand-held transmitter 1 to 3 inches (3 to 8 cm) away from the HomeLink® button you wish to program while keeping the HomeLink® indicator light in view.
-
Continue to push and hold the HomeLink® button while you push and release (“cycle”) your hand-held transmitter every two seconds until HomeLink® has successfully accepted the frequency signal. The indicator light will flash slowly and then rapidly when fully trained.
-
Watch for the HomeLink® indicator to change flash rates. When it changes, it is programmed. It may take up to 30 seconds or longer in rare cases. The garage door may open and close while you are programming.
-
Push and hold the programmed HomeLink® button and observe the indicator light.
Note:
-
If the indicator light stays on constantly, programming is complete and the garage door/device should activate when the HomeLink® button is pushed.
-
To program the two remaining HomeLink® buttons, repeat each step for each remaining button. DO NOT erase the channels.
-
If you unplugged the garage door opener/device for programming, plug it back in at this time.
USING HOMELINK®
To operate, push and release the programmed HomeLink® button. Activation will now occur for the programmed device (i.e. garage door opener, gate operator, security system, entry door lock, home/office lighting, etc.) The hand-held transmitter of the device may also be used at any time.
SECURITY
It is advised to erase all channels before you sell or turn in your vehicle.
To do this, push and hold the two outside buttons for 20 seconds until the red indicator flashes.
Note:
All channels will be erased. Individual channels cannot be erased.
The HomeLink® Universal Transceiver is disabled when the vehicle security alarm is active.
TROUBLESHOOTING TIPS
If you are having trouble programming HomeLink®, here are some of the most common solutions:
-
Replace the battery in the garage door opener hand-held transmitter.
-
Push the LEARN button on the garage door opener to complete the training for a Rolling Code.
-
Did you unplug the device for programming and remember to plug it back in?
If you have any problems, or require assistance, please call toll-free 1-800-355-3515 or, on the Internet at HomeLink.com for information or assistance.
WARNING:
-
Vehicle exhaust contains carbon monoxide, a dangerous gas. Do not run your vehicle in the garage while programming the transceiver. Exhaust gas can cause serious injury or death.
-
Your motorized door or gate will open and close while you are programming the universal transceiver. Do not program the transceiver if people, pets or other objects are in the path of the door or gate. Only use this transceiver with a garage door opener that has a “stop and reverse” feature as required by Federal safety standards. This includes most garage door opener models manufactured after 1982. Do not use a garage door opener without these safety features.
GENERAL INFORMATION
The following regulatory statement applies to all Radio Frequency (RF) devices equipped in this vehicle:
This device complies with Part 15 of the FCC Rules and with Innovation, Science and Economic Development Canada license-exempt RSS standard(s). Operation is subject to the following two conditions:
-
This device may not cause harmful interference, and
-
This device must accept any interference received, including interference that may cause undesired operation.
Le présent appareil est conforme aux CNR d`Innovation, Science and Economic Development applicables aux appareils radio exempts de licence. L'exploitation est autorisée aux deux conditions suivantes:
-
l'appareil ne doit pas produire de brouillage, et
-
l'utilisateur de l'appareil doit accepter tout brouillage radioélectrique subi, même si le brouillage est susceptible d'en compromettre le fonctionnement.
La operación de este equipo está sujeta a las siguientes dos condiciones:
-
es posible que este equipo o dispositivo no cause interferencia perjudicial y
-
este equipo o dispositivo debe aceptar cualquier interferencia, incluyendo la que pueda causar su operación no deseada.
Note:
Changes or modifications not expressly approved by the party responsible for compliance could void the user’s authority to operate the equipment.
Download Manual