Bulb replacement
|
Interior Bulbs |
|
|
Bulb Name |
Bulb Number |
|
Courtesy/Reading Lamps (Incandescent) |
578 |
|
Courtesy/Reading Lamps (Optional LED) |
LED (Serviced at an Authorized Dealer) |
|
Glove Compartment Lamp |
194 |
|
Cargo Lamp |
579 |
|
Optional Door Map Pocket/Cup holder |
LED (Serviced at an Authorized Dealer) |
|
Note: For lighted switches, see an authorized dealer for replacement instructions. |
|
|
Exterior Bulbs |
|
|
Bulb Name |
Bulb Number |
|
Low Beam Headlamp |
9006 |
|
High Beam Headlamp |
9005 |
|
Front Park/Turn Signal |
3757AK |
|
Side Marker Lamp |
168 |
|
Front Fog Lamp |
PSX24W or 2504 |
|
Center High Mounted Stop Lamp (CHMSL) |
LED (Serviced at an Authorized Dealer) |
|
License Lamp |
168 |
|
Exterior Bulbs — Rear (LED Version) |
|
|
Bulb Number |
Bulb Number |
|
Rear Tail/Stop Lamp |
LED (Serviced at an Authorized Dealer) |
|
Rear Tail (Liftgate) Lamp |
LED (Serviced at an Authorized Dealer) |
|
Rear Turn Signal Lamp |
WY21W or 7440A |
|
Backup Lamp |
W21W or 7440 |
|
Exterior Bulbs — Rear (Bulb Version) |
|
|
Bulb Name |
Bulb Number |
|
Rear Tail/Stop/Turn Signal Lamp |
P27/7W or 3157 |
|
Rear Tail (Liftgate) Lamp |
P27/7W or 3157 |
|
Backup Lamp |
P27/7W or 3157 |
REPLACING EXTERIOR BULBS
Note:
Lens fogging can occur under certain atmospheric conditions. This will usually clear as atmospheric conditions change to allow the condensation to change back into a vapor. Turning the lamps on will usually accelerate the clearing process.
FRONT LOW/HIGH BEAM HEADLAMP, TURN SIGNAL/PARK LAMP, AND SIDE MARKER LAMP
-
Open the hood.
Note:
It may be necessary to remove the air cleaner filter housing and position the Totally Integrated Power Module (TIPM) aside to replace certain lamps in the left headlamp housing.
-
Rotate the applicable bulb and connector assembly a quarter turn counterclockwise and remove the assembly from the headlamp housing.
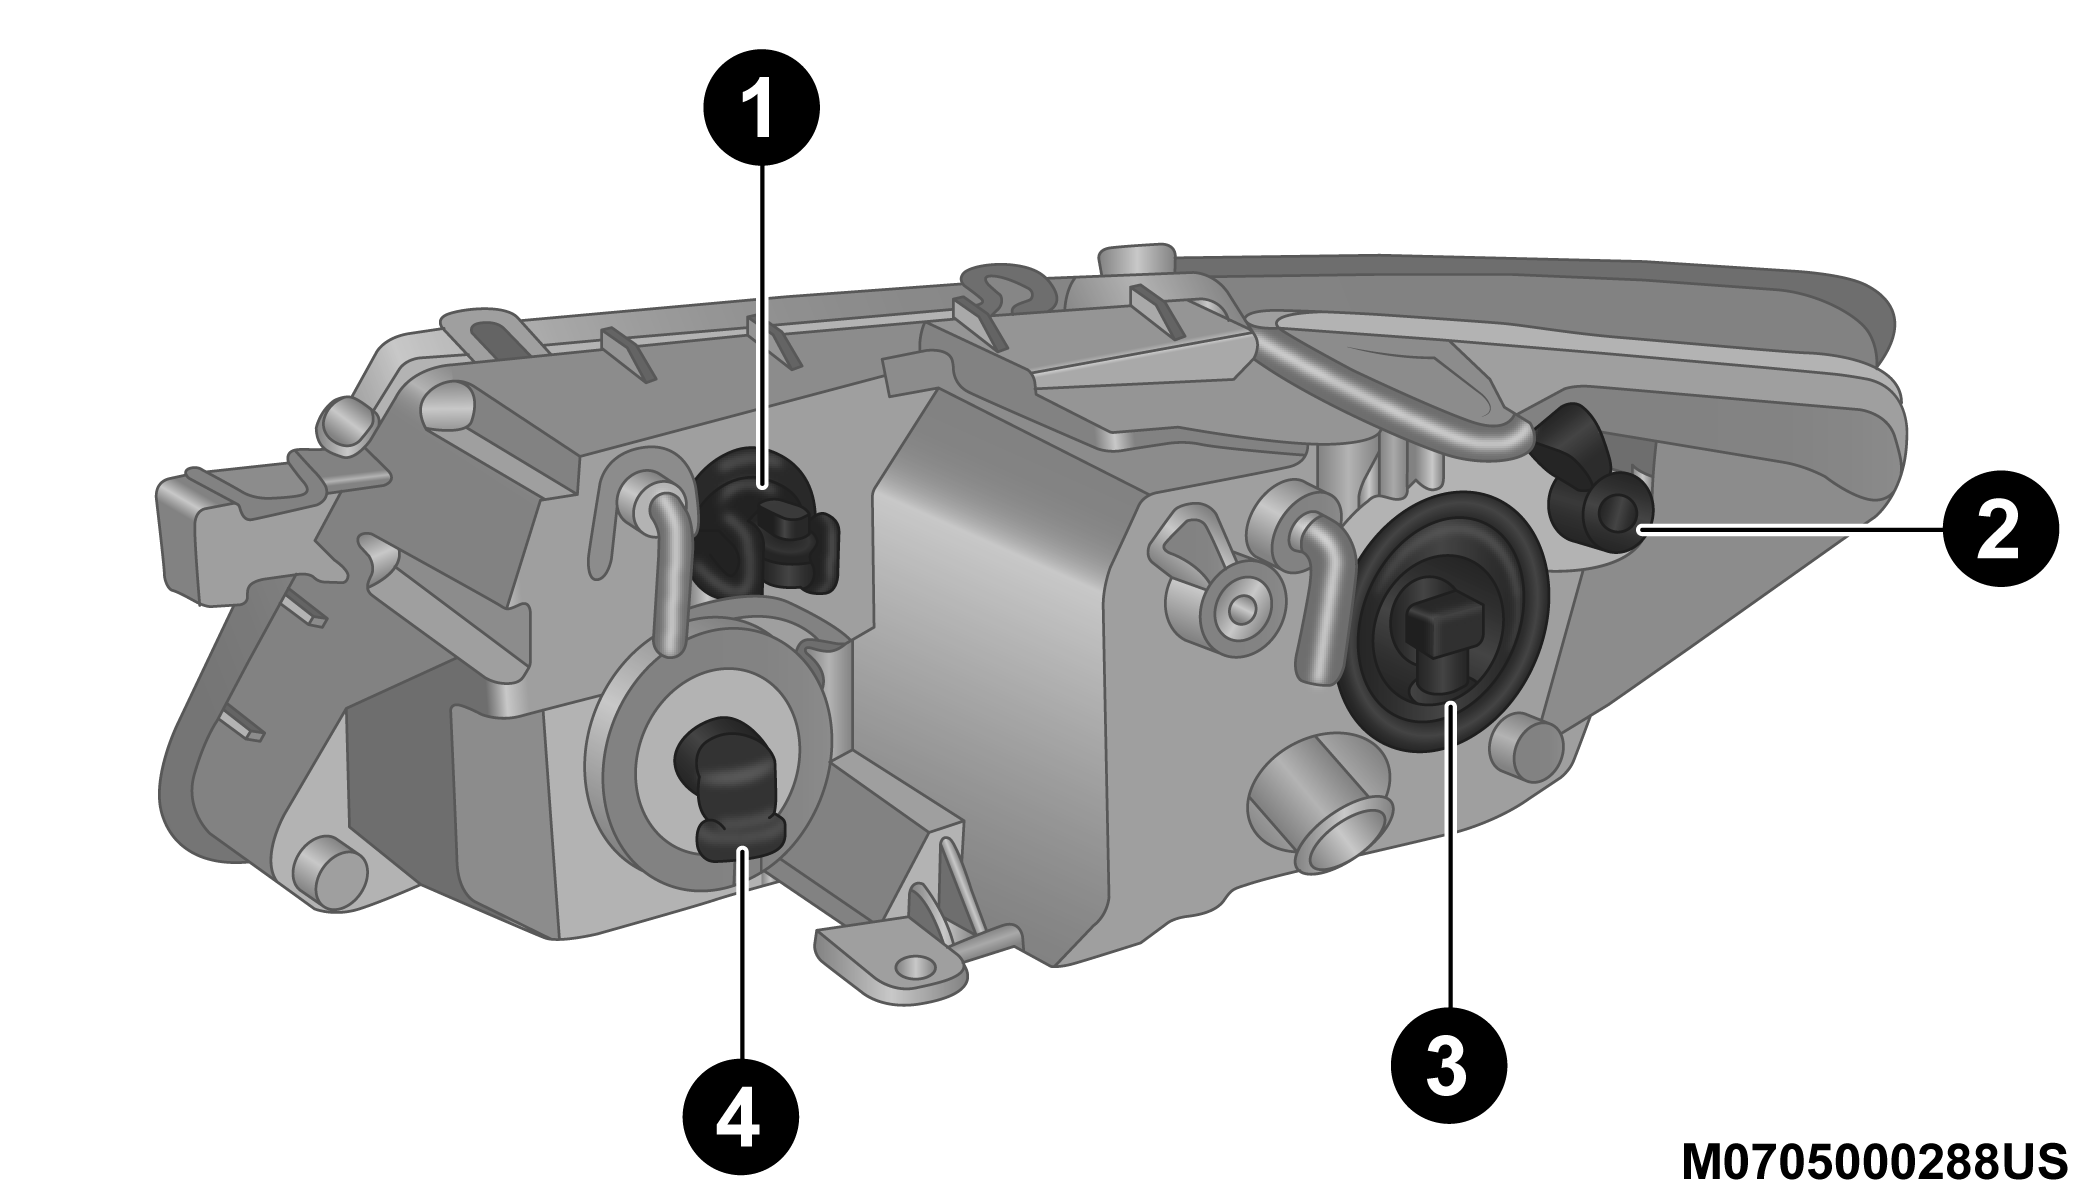
Headlamp Housing
1 — Front Turn Signal/Park Lamp Bulb
2 — Side Marker Lamp Bulb
3 — Low Beam Headlamp Bulb
4 — High Beam Headlamp Bulb
-
Disconnect the bulb from the harness connector and then connect the replacement bulb.
CAUTION:
Do not touch the new bulb with your fingers. Oil contamination will severely shorten bulb life. If the bulb comes in contact with any oily surface, clean the bulb with rubbing alcohol.
-
Install the bulb and connector assembly into the headlamp housing and rotate it a quarter turn clockwise to lock it in place.
FRONT FOG LAMP
Note:
Turn the steering wheel to the right if replacing the left front fog lamp or to the left if replacing the right front fog lamp to allow for easier access to the front of the wheel well.
-
Remove the fasteners retaining the front lower wheel well access panel and remove the access panel.
-
Remove the electrical connector from the fog lamp housing.
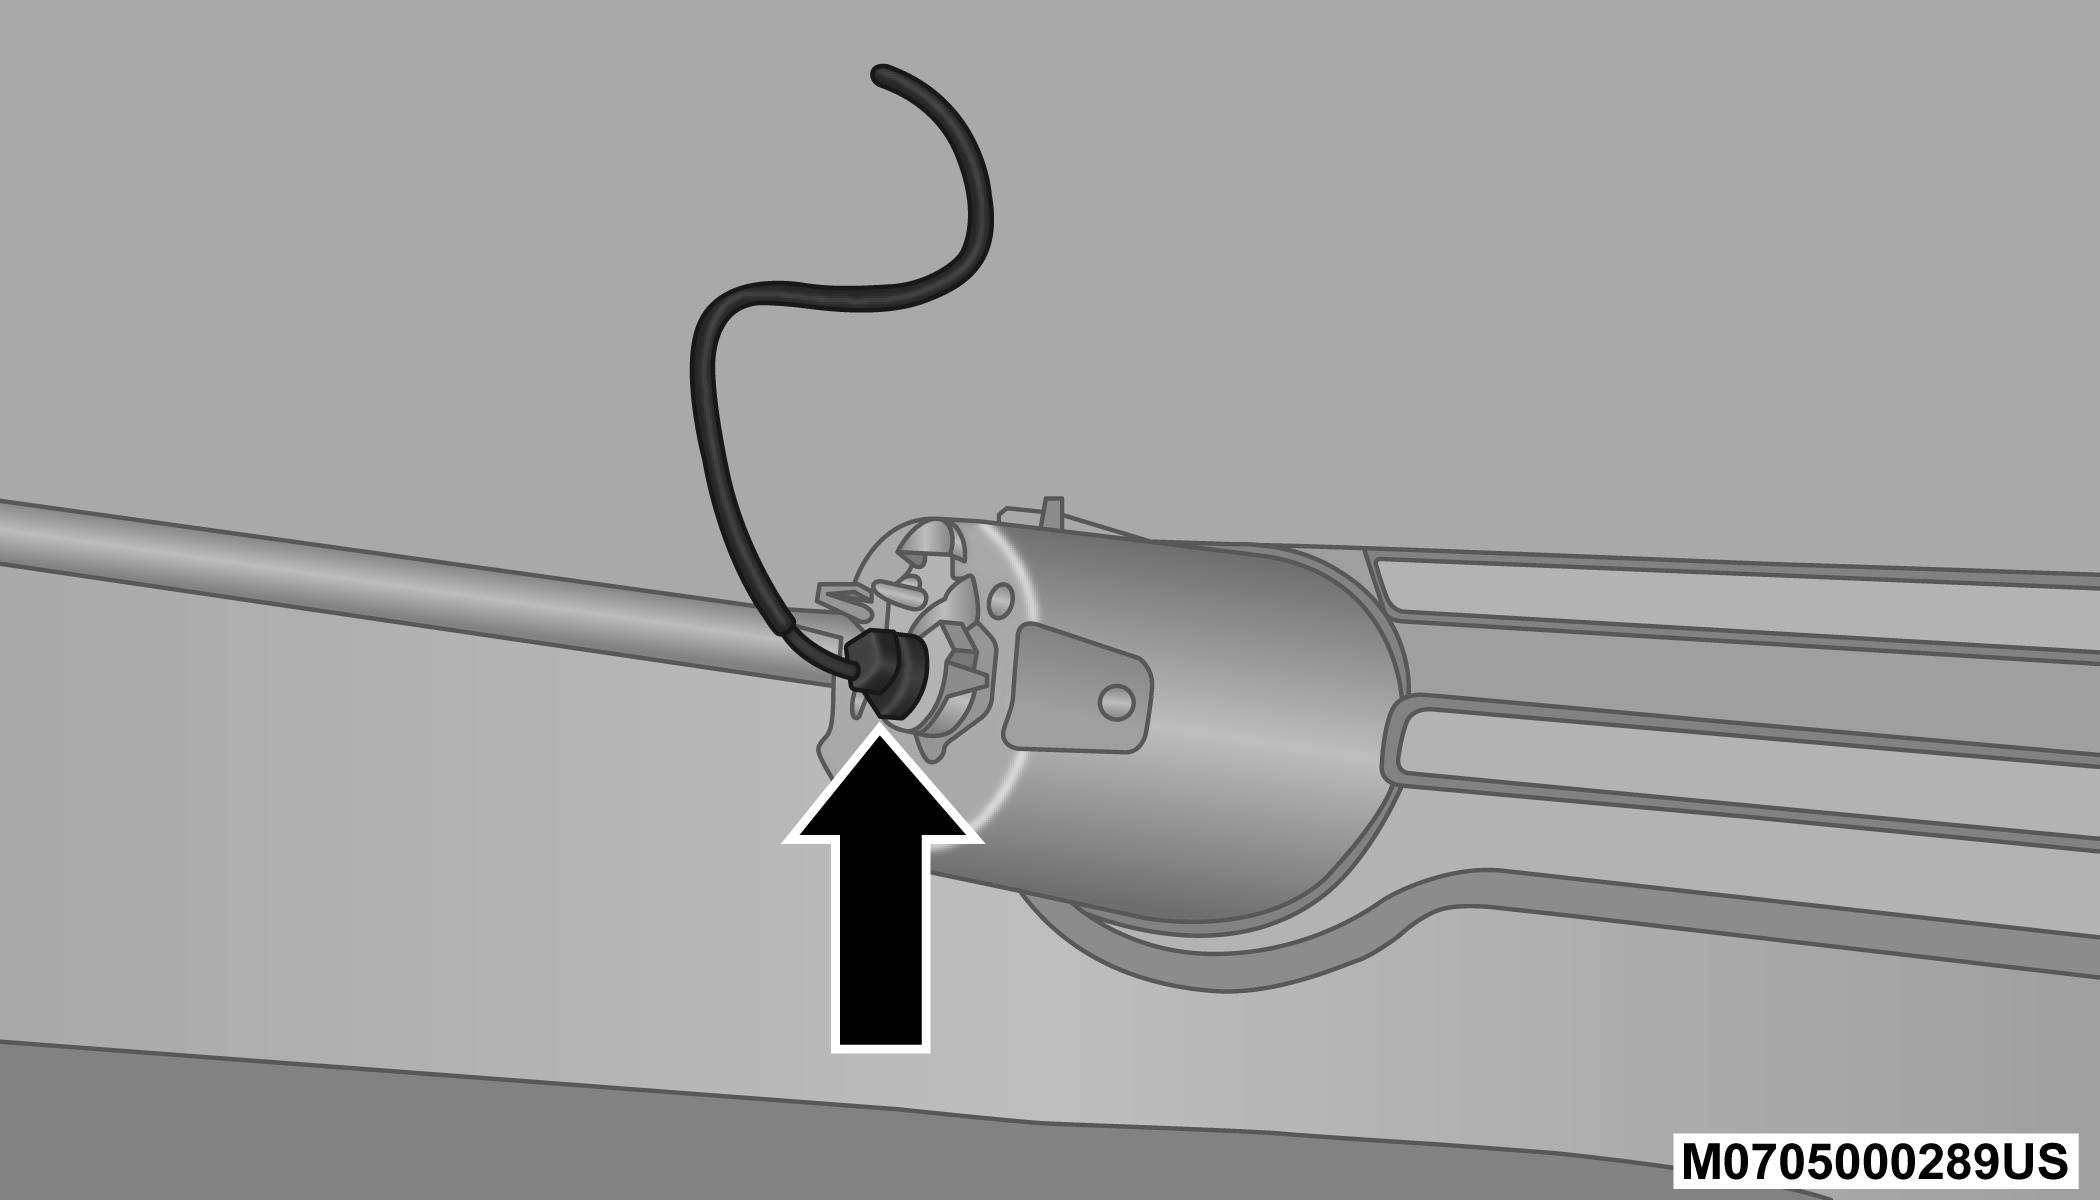
Front Fog Lamp Electrical Connector
-
Squeeze the two tabs on the side of the bulb socket and pull straight out from the fog lamp.
CAUTION:
Never introduce leaded fuel to the tank, even in small amounts in an emergency, as this would damage the catalytic converter beyond repair.
-
Install the replacement bulb and connector assembly straight into the fog lamp until it locks into place.
-
Reinstall the front lower wheel well access panel and fasteners.
REAR TURN SIGNAL AND BACKUP LAMP
The tail lamps are a two-piece design. The tail/stop/rear turn signal lamps are located in the rear corner body panels. The tail and backup lamps are located in the liftgate.
LICENSE PLATE LAMP
-
Push the small locking tab sticking out of the end of the lens toward the side of the vehicle and hold it in that position.
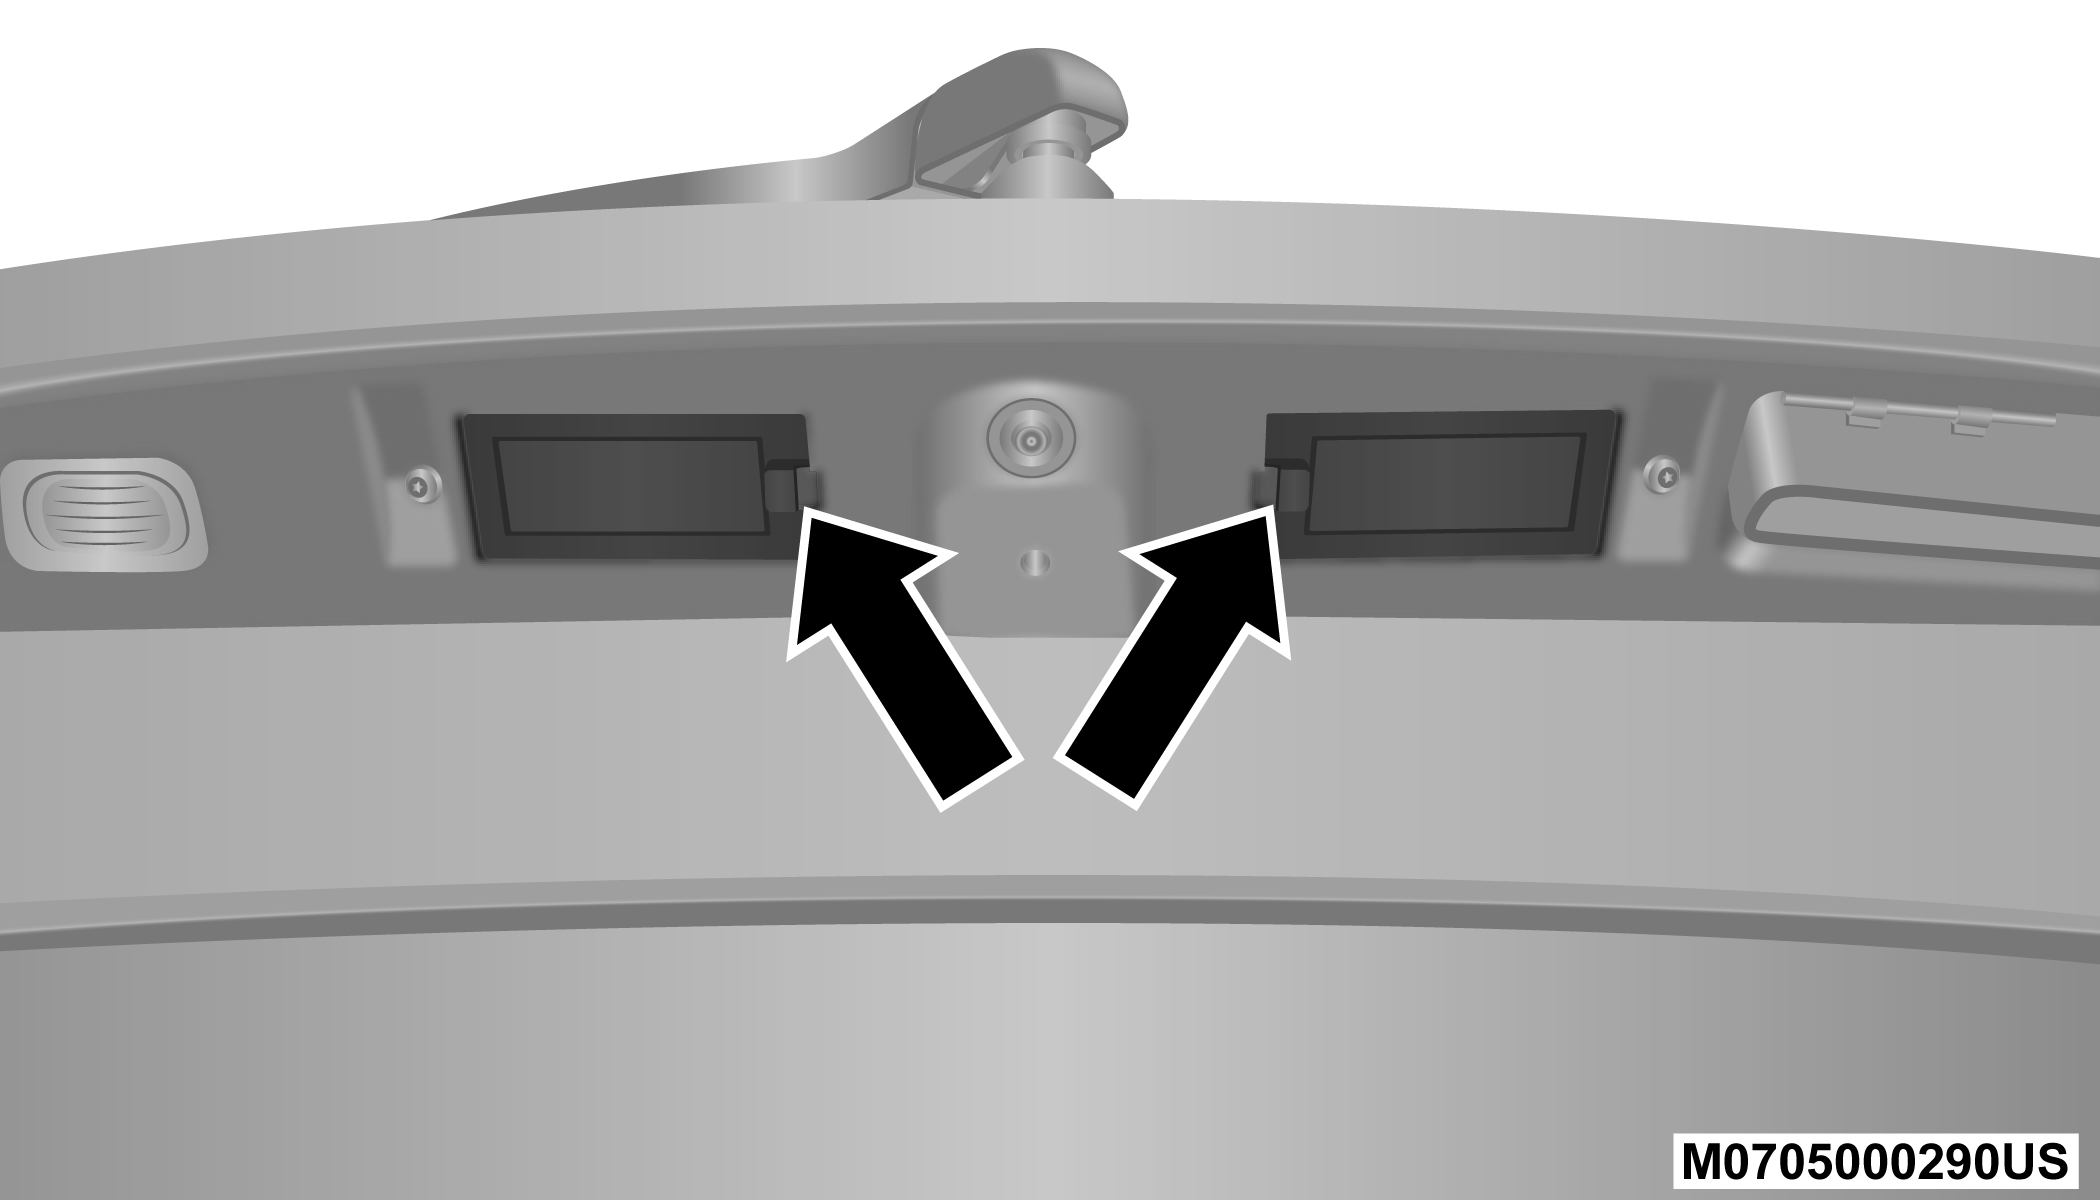
License Lamp
-
Insert a small flat-blade tool between the end of the lens with the locking tab and the surrounding housing and then pivot the tool to separate the lens from the housing.
-
Hold the lens with one hand and rotate the bulb's electrical connector a quarter turn counterclockwise, with the other hand separate the bulb and connector assembly from the lens.
-
Remove the bulb from the connector socket and install the replacement bulb.
-
Install the bulb and connector assembly into the lens and rotate the connector a quarter turn clockwise to lock it in place.
-
Insert the end of the lens without the locking tab into the housing on the liftgate and then push the opposite end of the lens into the housing, making sure it locks into the housing.
Download Manual