Combination meter dis- play (color LCD) (if equipped)
Various information will be shown on the combination meter display (color LCD). Also, a warning message will appear on the display if a malfunction is detected. In addition, several settings for the displayed content can be performed.
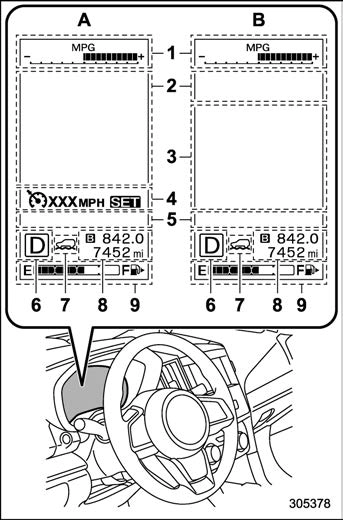
Combination meter display (color LCD)
P164.)
P193.)
P163.)/Double trip meter (Refer to “Double trip meter” P163.)
P164.)
A: Deactivating the Eyesight system or models without EyeSight system
B: Activating the Eyesight system
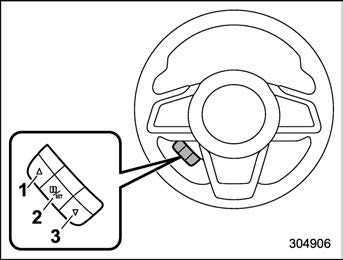
Control switch
By operating “  ” or “
  ” of the control switch, the screens and selection items can be switched. When the “
  /SET” switch is pulled toward you, the item can be selected and set.
If there are some useful messages, such as vehicle information, warning informa- tion, etc., they will interrupt the current screen, and appear on the display accom- panied by a beep. If such a screen is displayed, take proper action according to the message shown on the screen.
The warning screen will return to the
original screen after a few seconds. While the “ ” information reminder is shown on the display, it may be possible to display the warning screen again. To recall the message marked with “
  ” on the display, pull the “
  /SET” switch on the steering wheel toward you.
When the driver’s door is opened and closed after unlocking the door, the wel- come screen (opening animation) will appear on the combination meter display (color LCD) for approximately 20 seconds.
When the ignition switch is turned to the “LOCK”/“OFF” position, the combination meter display (color LCD) gradually turns off by showing Good-bye screen (ending animation).
Example of warning
If there is a warning message or a maintenance notification, it will appear on this screen. Take the appropriate actions based on the messages indicated.

When the corresponding situation occurs, the following telltales will be displayed on the telltale screen.
& Basic screens
By operating the “ ” or “
 ” switch on the steering wheel, you can change the screen that is always displayed.
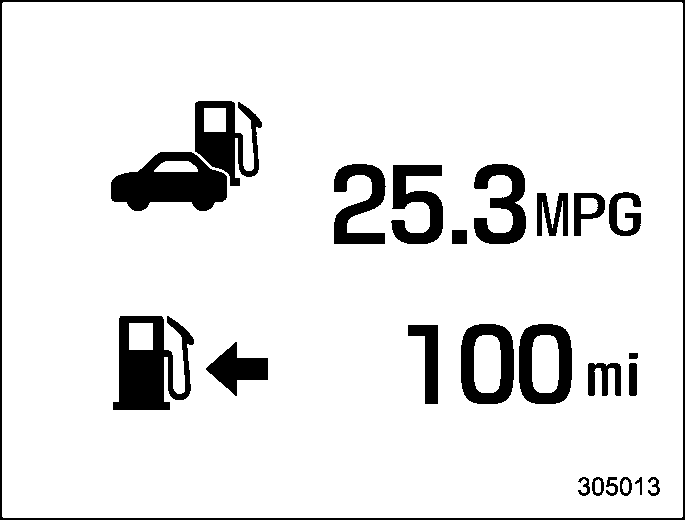
Average fuel consumption screen:
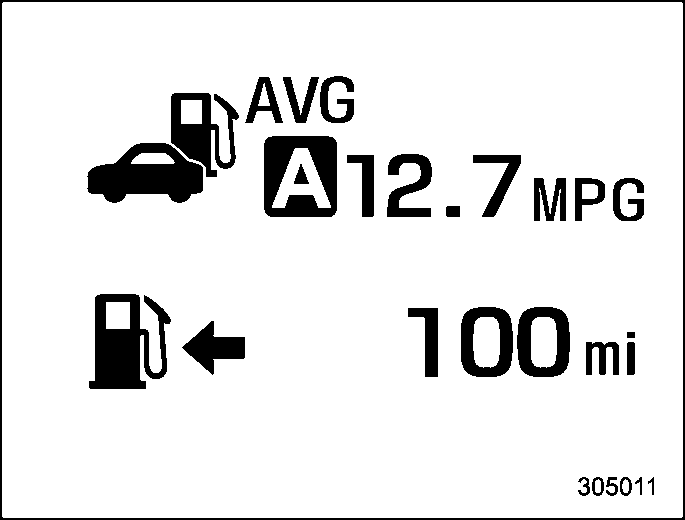
: Average fuel consumption
: Driving range on remaining fuel
This screen displays the average rate of fuel consumption since the trip meter was last reset.
Current fuel consumption screen:
: Current fuel consumption
: Driving range on remaining fuel
Driving information screen:
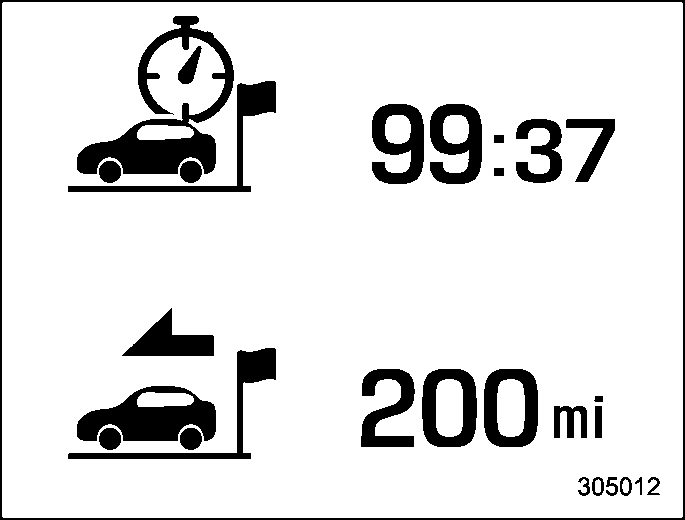
: Journey time
: Journey distance
This screen displays the journey time (the time that has elapsed since the ignition switch was turned to the “ON” position) and journey distance (the distance that has been driven since the ignition switch was turned to the “ON” position).
Digital speed screen:
This screen displays the current vehicle speed.
Auto Start Stop screen:
 : The total amount of time that the engine was stopped by means of the Auto Start Stop system
 : The total amount of fuel saved due to the engine being stopped by the Auto Start Stop system
The indicated values are calculated from the most recent reset of the currently displayed trip meter to the current time. The indication ranges are as follows.
TPMS screen (U.S.-spec. models):

This screen displays each tire pressure. When a tire is deflated, the deflated tire and the tire pressure will be displayed on the screen in yellow.
For information about the specified value of the air pressure, refer to “Tires” P501.
yellow until the system detects the normal tire pressure.
. Immediately adjust the tire pressure when the warning light illuminates. When the tire pressure monitoring system detects the adjusted tire pres- sure, the warning light will turn off and the tire pressure values will turn to white.
Menu screen entering screen:
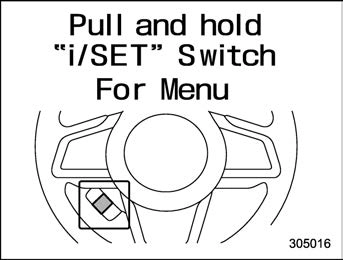
While this screen is selected, pull and hold the “  /SET” switch to enter the menu screen.
Pull and hold the “ /SET” switch to enter the menu screens when all of the following conditions are satisfied.
 ” information reminder is off.
By operating the “ ” or “
 ” switch on the steering wheel, you can select the menu. Pull the “
  /SET” switch to enter the selected menu.
! Screen Settings
After entering the “Screen Settings” menu, select one of the following menus.
The welcome screen can be activated or deactivated.
The good-bye screen can be activated or deactivated.
The movement of the meter needles and gauge needles that occurs when the ignition switch is turned to the “ON” position can be activated or deactivated.
! Units
Changes the units displayed in the combi- nation meter display (color LCD), the type A multi-function display (black and white) and the type B multi-function display (color LCD).
Changes the units displayed in the Tire Pressure Monitoring system.
Changes the language displayed in the combination meter display (color LCD) and the multi-function display (color LCD).
Sets the EyeSight warning volume, the BSD/RCTA warning volume and the RAB warning volume.
The rear seat reminder can be activated or deactivated.
NOTE
For details about how to use the EyeSight system, refer to the Owner’s Manual supplement for the EyeSight system.
! RAB (if equipped)
! Sonar Audible Alarm
When the Reverse Automatic Braking system is in operation, the warning sound to notify that an obstacle is detected in the rear can be activated or deactivated.
! Vehicle Setting
After entering the “Vehicle Setting” menu, select one of the following menus.
Sets the settings used when the keyless access function was operated.
Sets the electronic chirp that sounds when the door is locked or unlocked.
Sets the operation of the hazard warning flasher that blinks when the door is locked or unlocked.
Sets and customizes the operation of the defogger.
Sets and customizes the interior light off delay timer.
Setting conditions for Auto Door Lock and Unlock
Set the condition of the following items to lock the door automatically.
Set the conditions of the following items to unlock the door automatically.
Sets and customizes the sensitivity of the auto light sensor.
Sets the leaving time and approaching time.
Sets the illumination time of the headlights that illuminate when you approach the vehicle.
Sets the time until the headlights turn off when you have moved away from the vehicle.
Sets the one-touch lane changer on/off.
The reverse tilt-down feature can be activated or deactivated.
Select “Yes” to use the menu screen to restore customized settings to the factory default settings. Select “No” to return to the previous screen without restoring to the factory default settings.
Download Manual