JACKING AND TIRE CHANGING
If your vehicle is equipped with an air suspen- sion system, there is a feature which allows the automatic leveling to be disabled to assist with changing a tire. This feature can be activated through the Uconnect system page 249.
PREPARATIONS FOR JACKING
If your vehicle is equipped with Air Suspension, you will need to enable Tire Jack Mode in the Uconnect system page 165 before changing the tire.
(Continued)
REMOVAL OF JACK AND TOOLS
To access the jack and tools, you must remove the plastic access cover located on the side of the front passenger’s seat. To remove the cover, pull the front part of the cover (closest to the front of the seat) toward you to release a locking tab. Once the front of the cover is loose, slide the cover toward the front of the seat until it is free from the seat frame.
Release the tool bag straps from the jack and remove tools from bag.
NOTE:
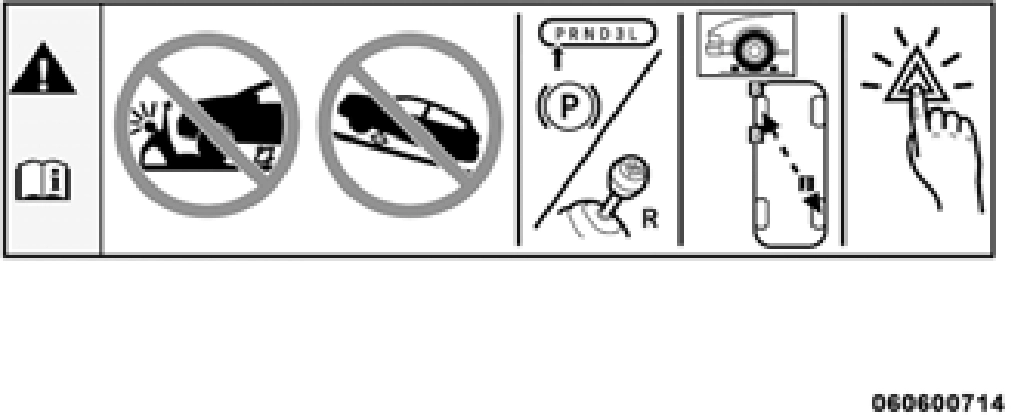
Passengers should not remain in the vehicle when the vehicle is being raised or lifted.
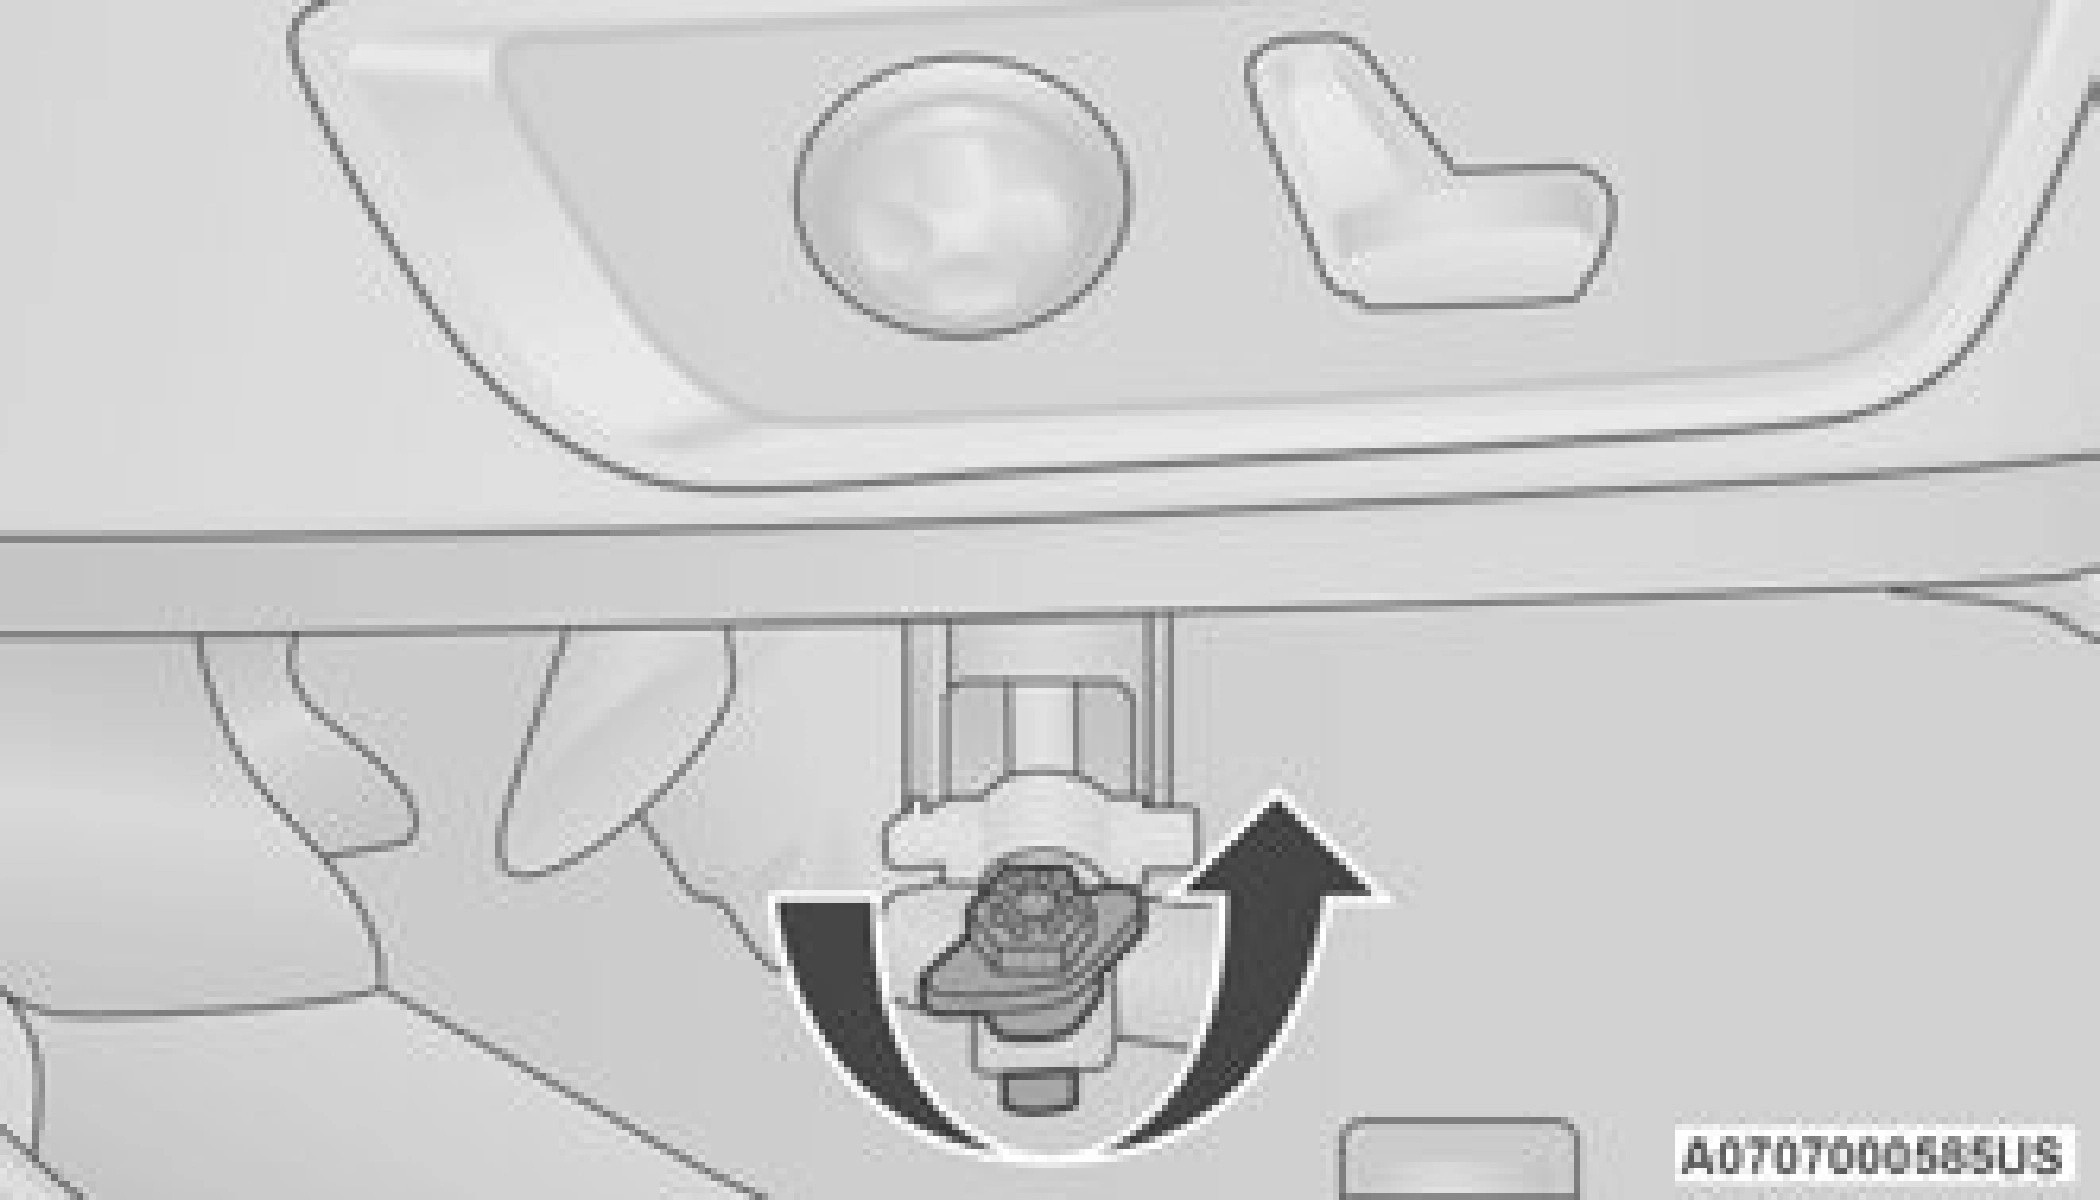
JACK LOCATION
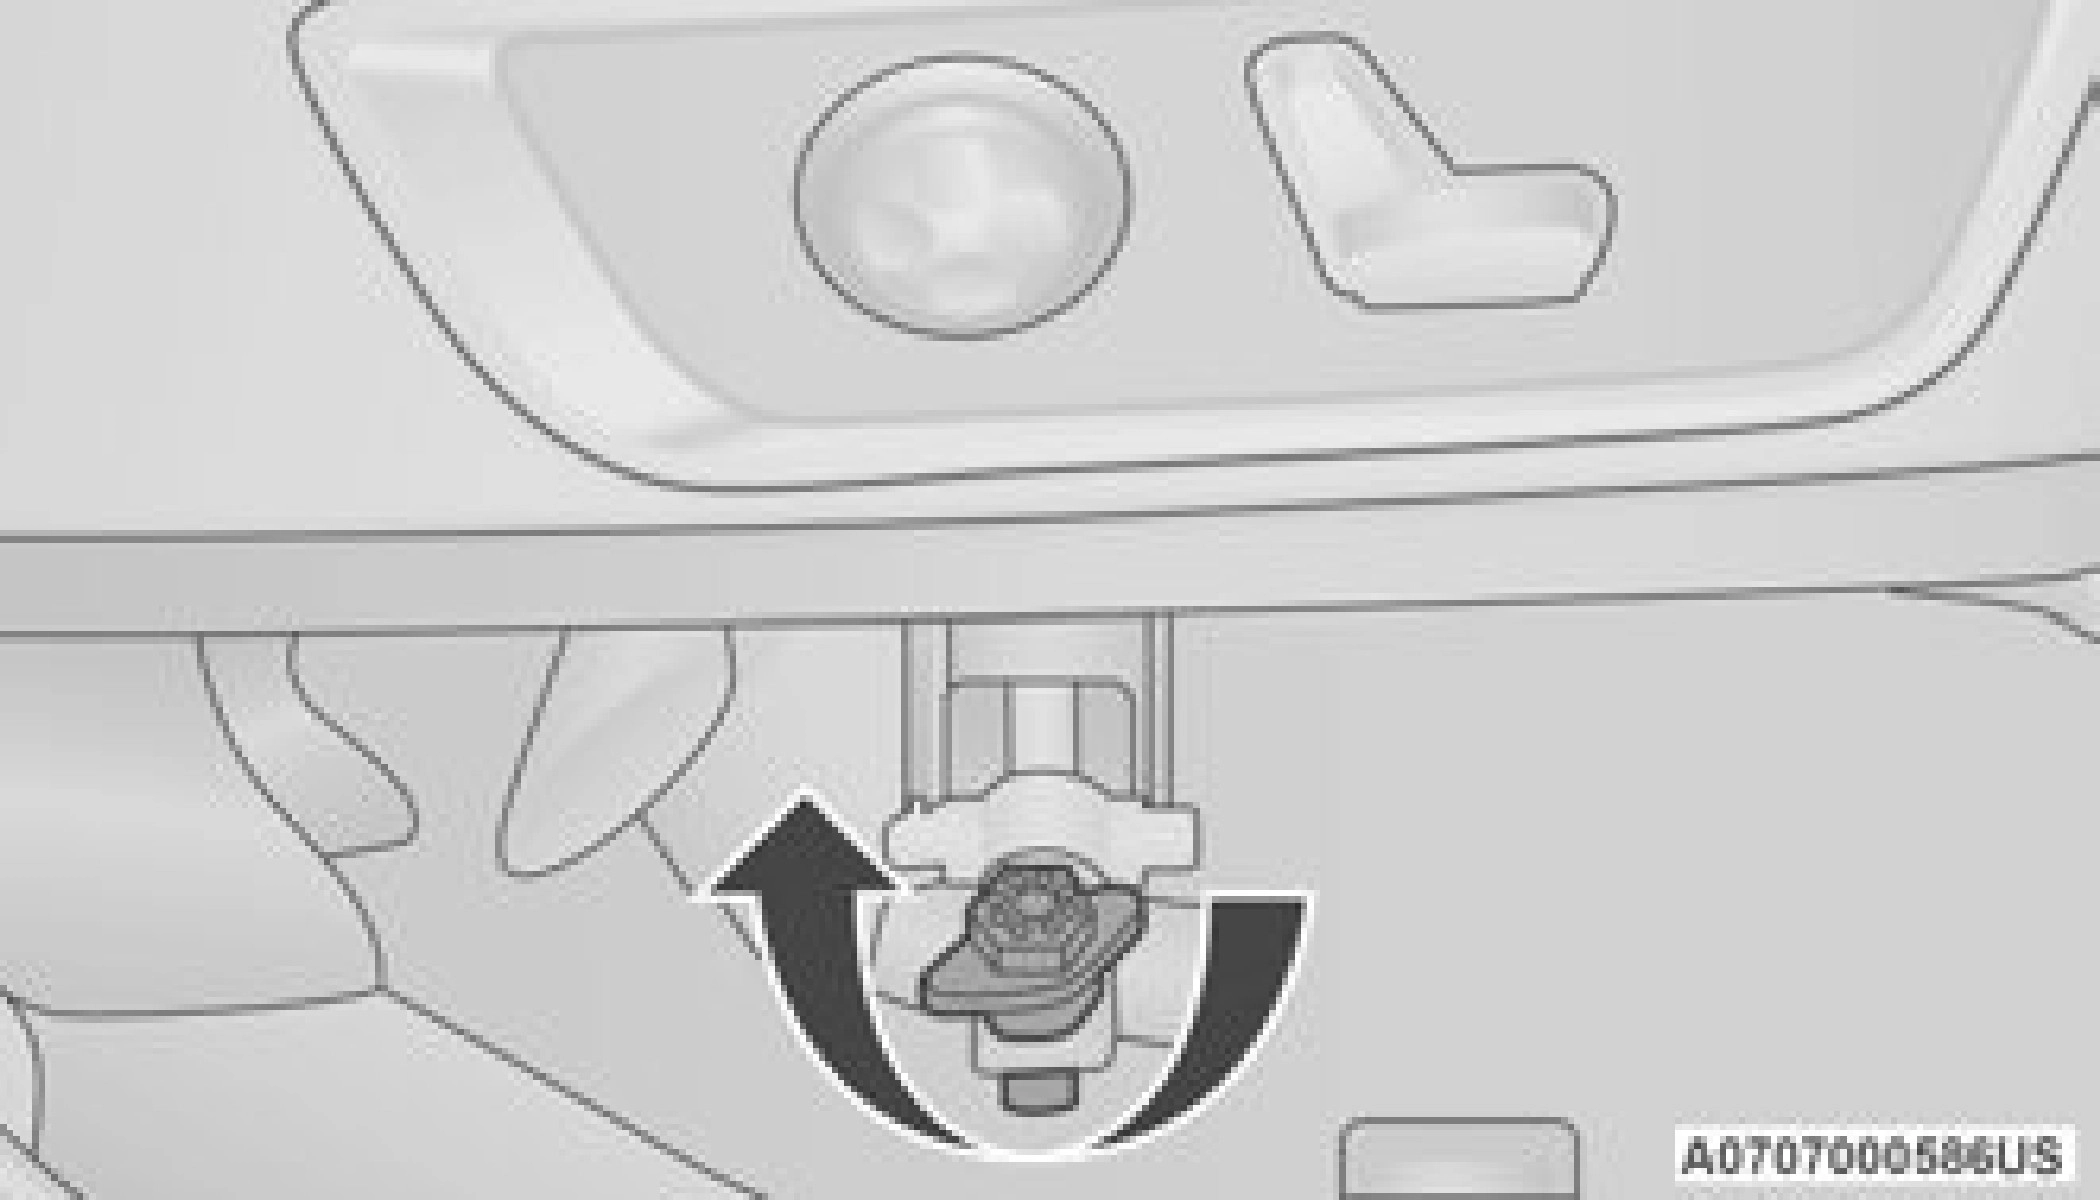
The jack and tools are stored under the front passenger seat.
Remove the jack and tools by turning the wing bolt counterclockwise, remove the wing bolt and then slide the assembly out from under the seat.
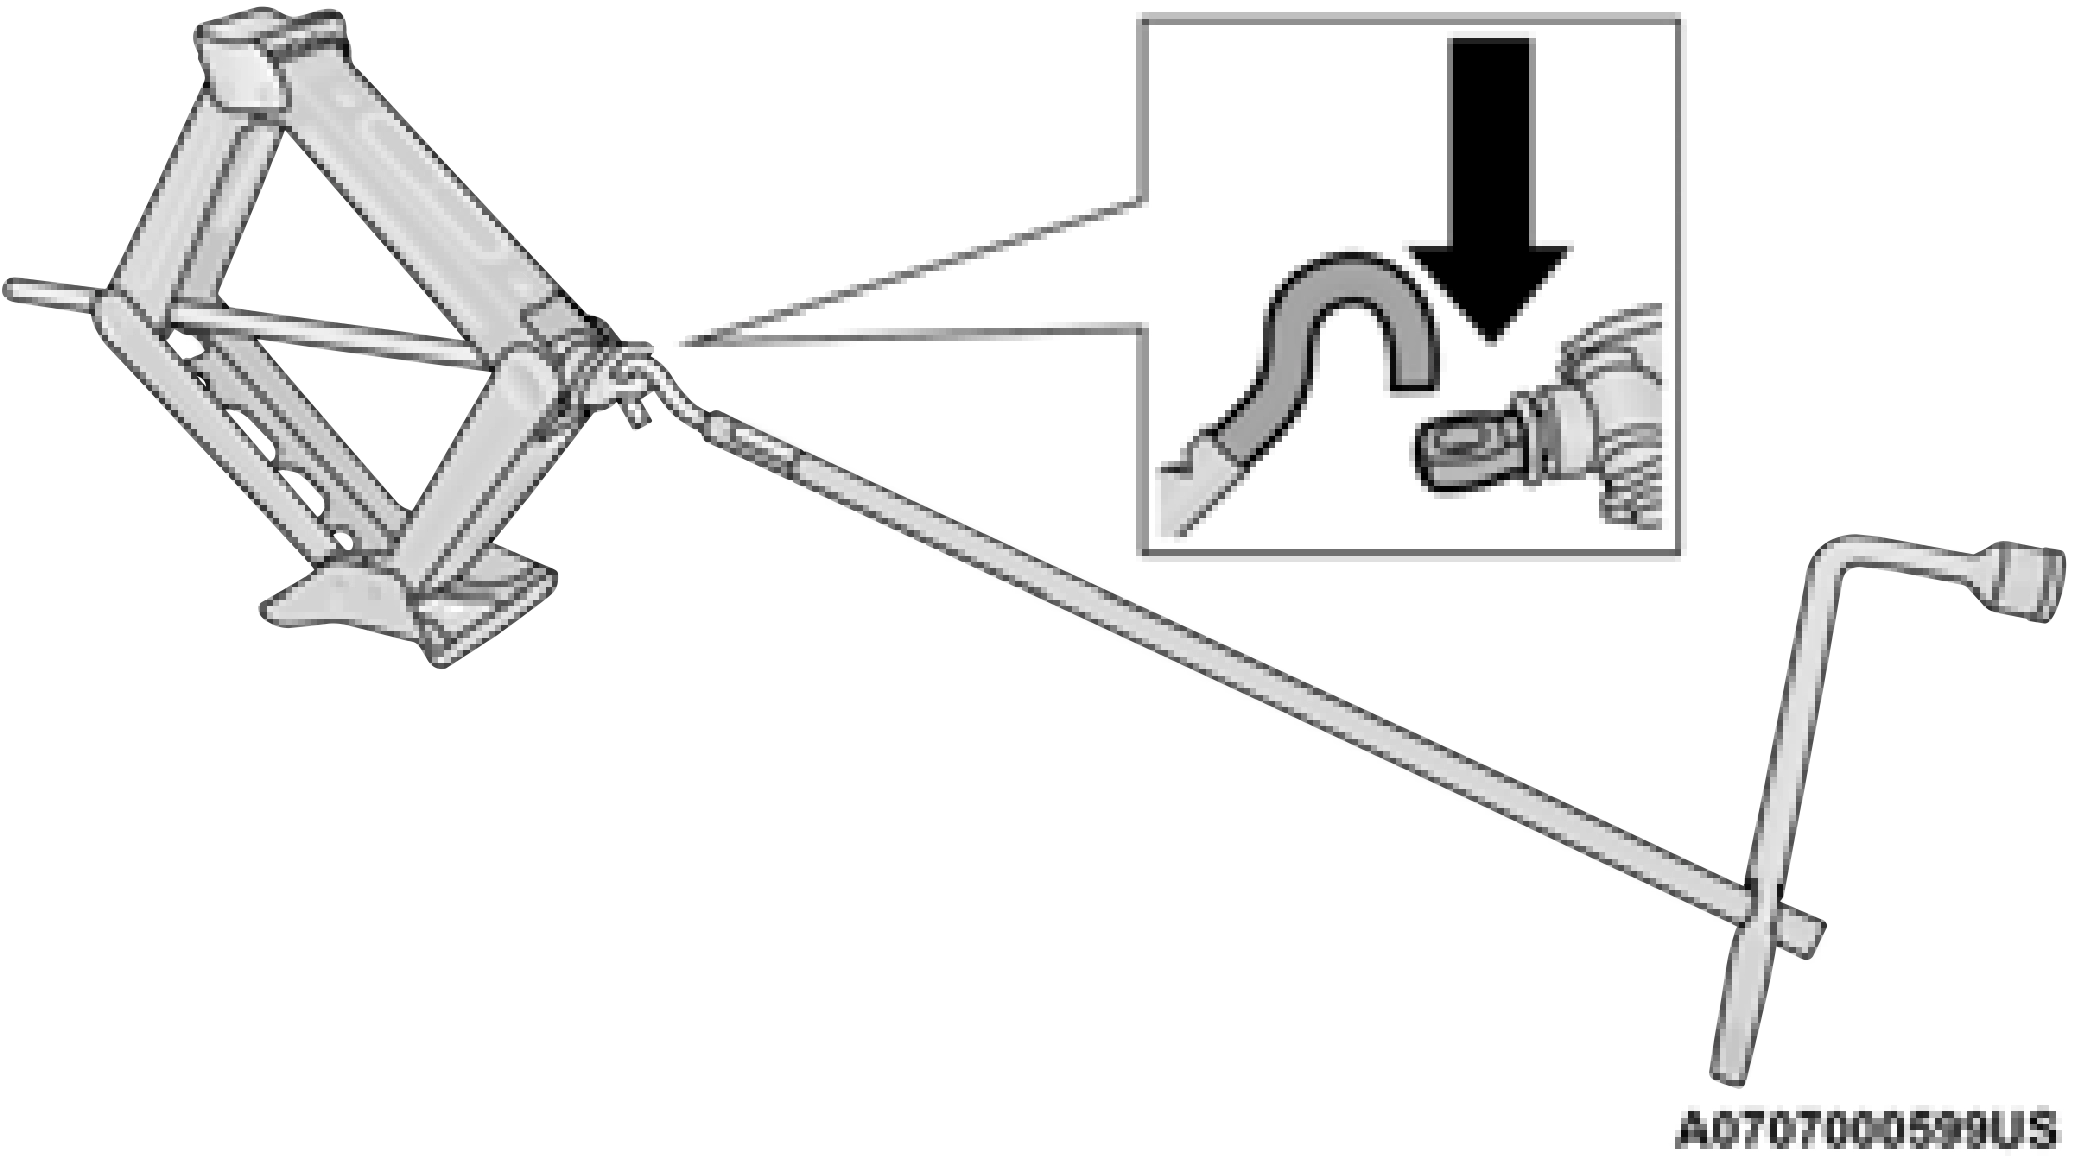
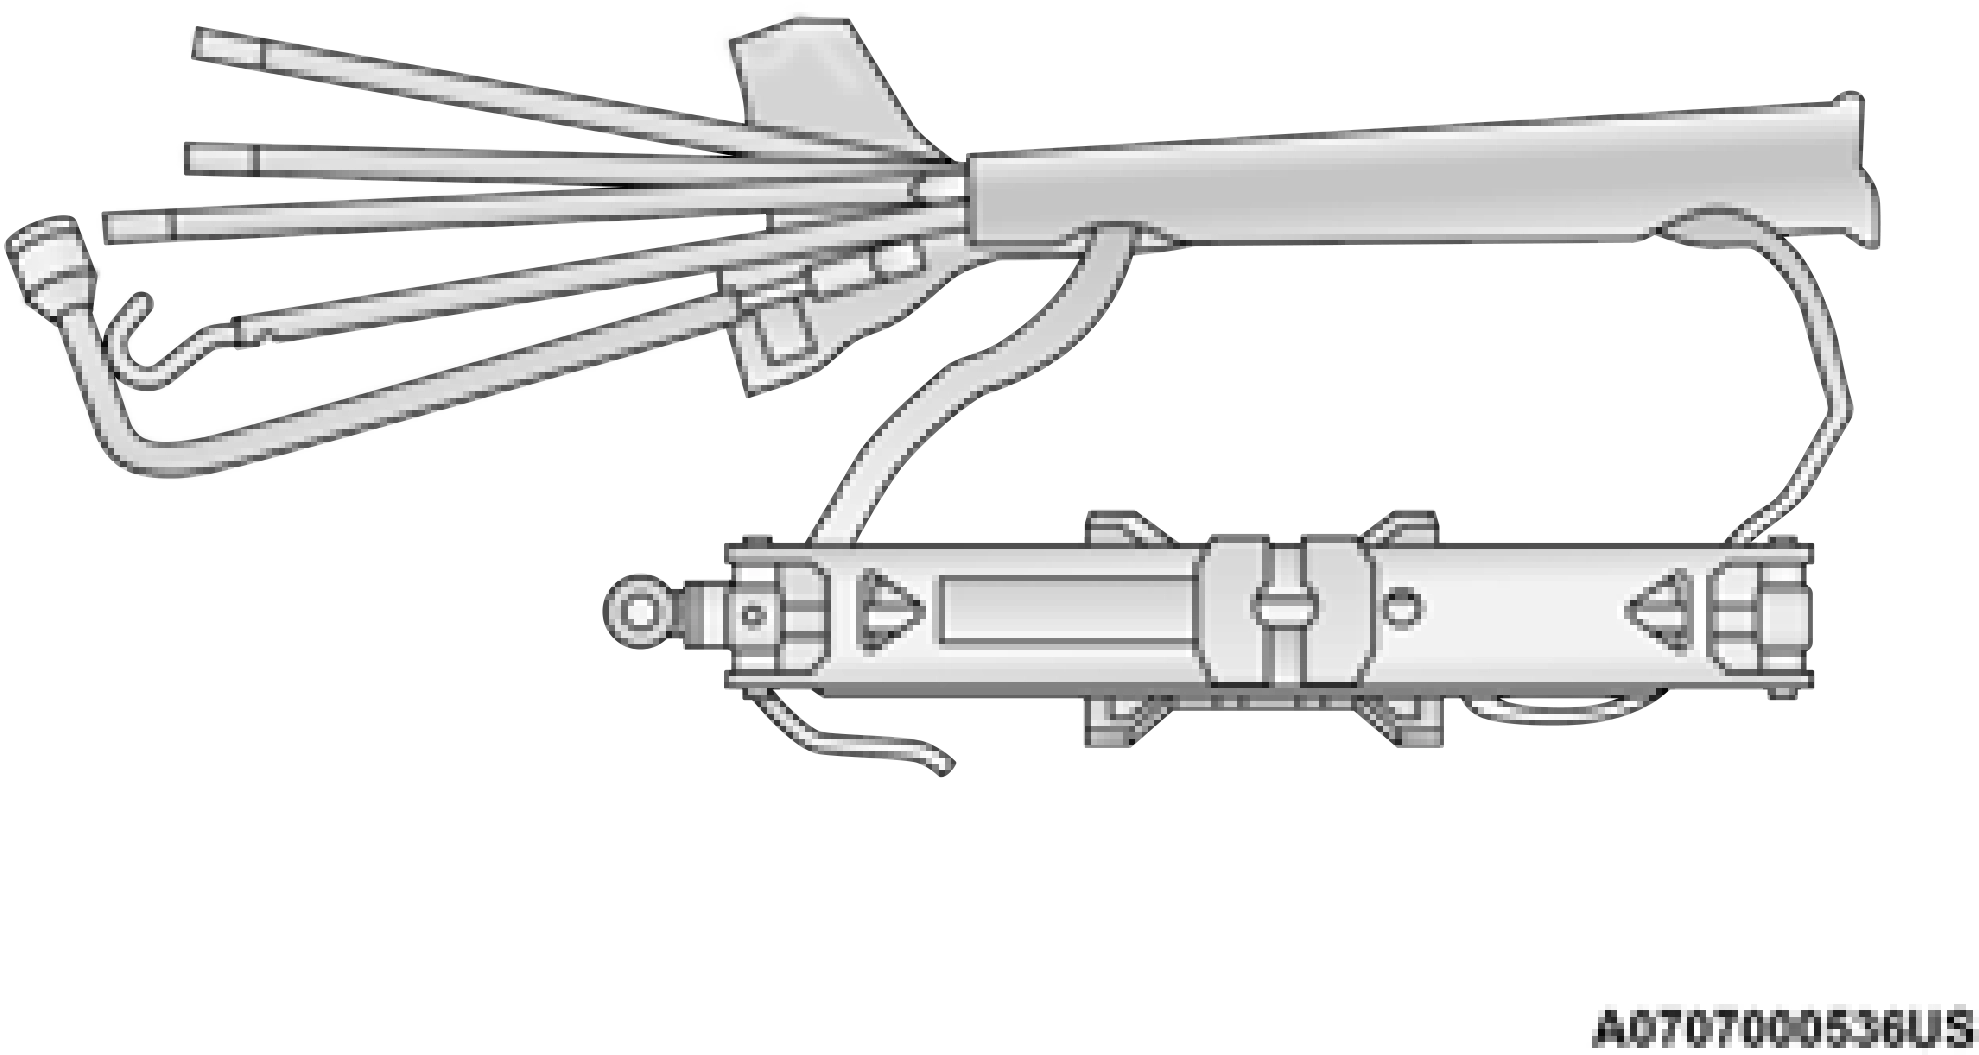
There are two ways to assemble the tools: Assembled For Spare Tire Lowering/Raising
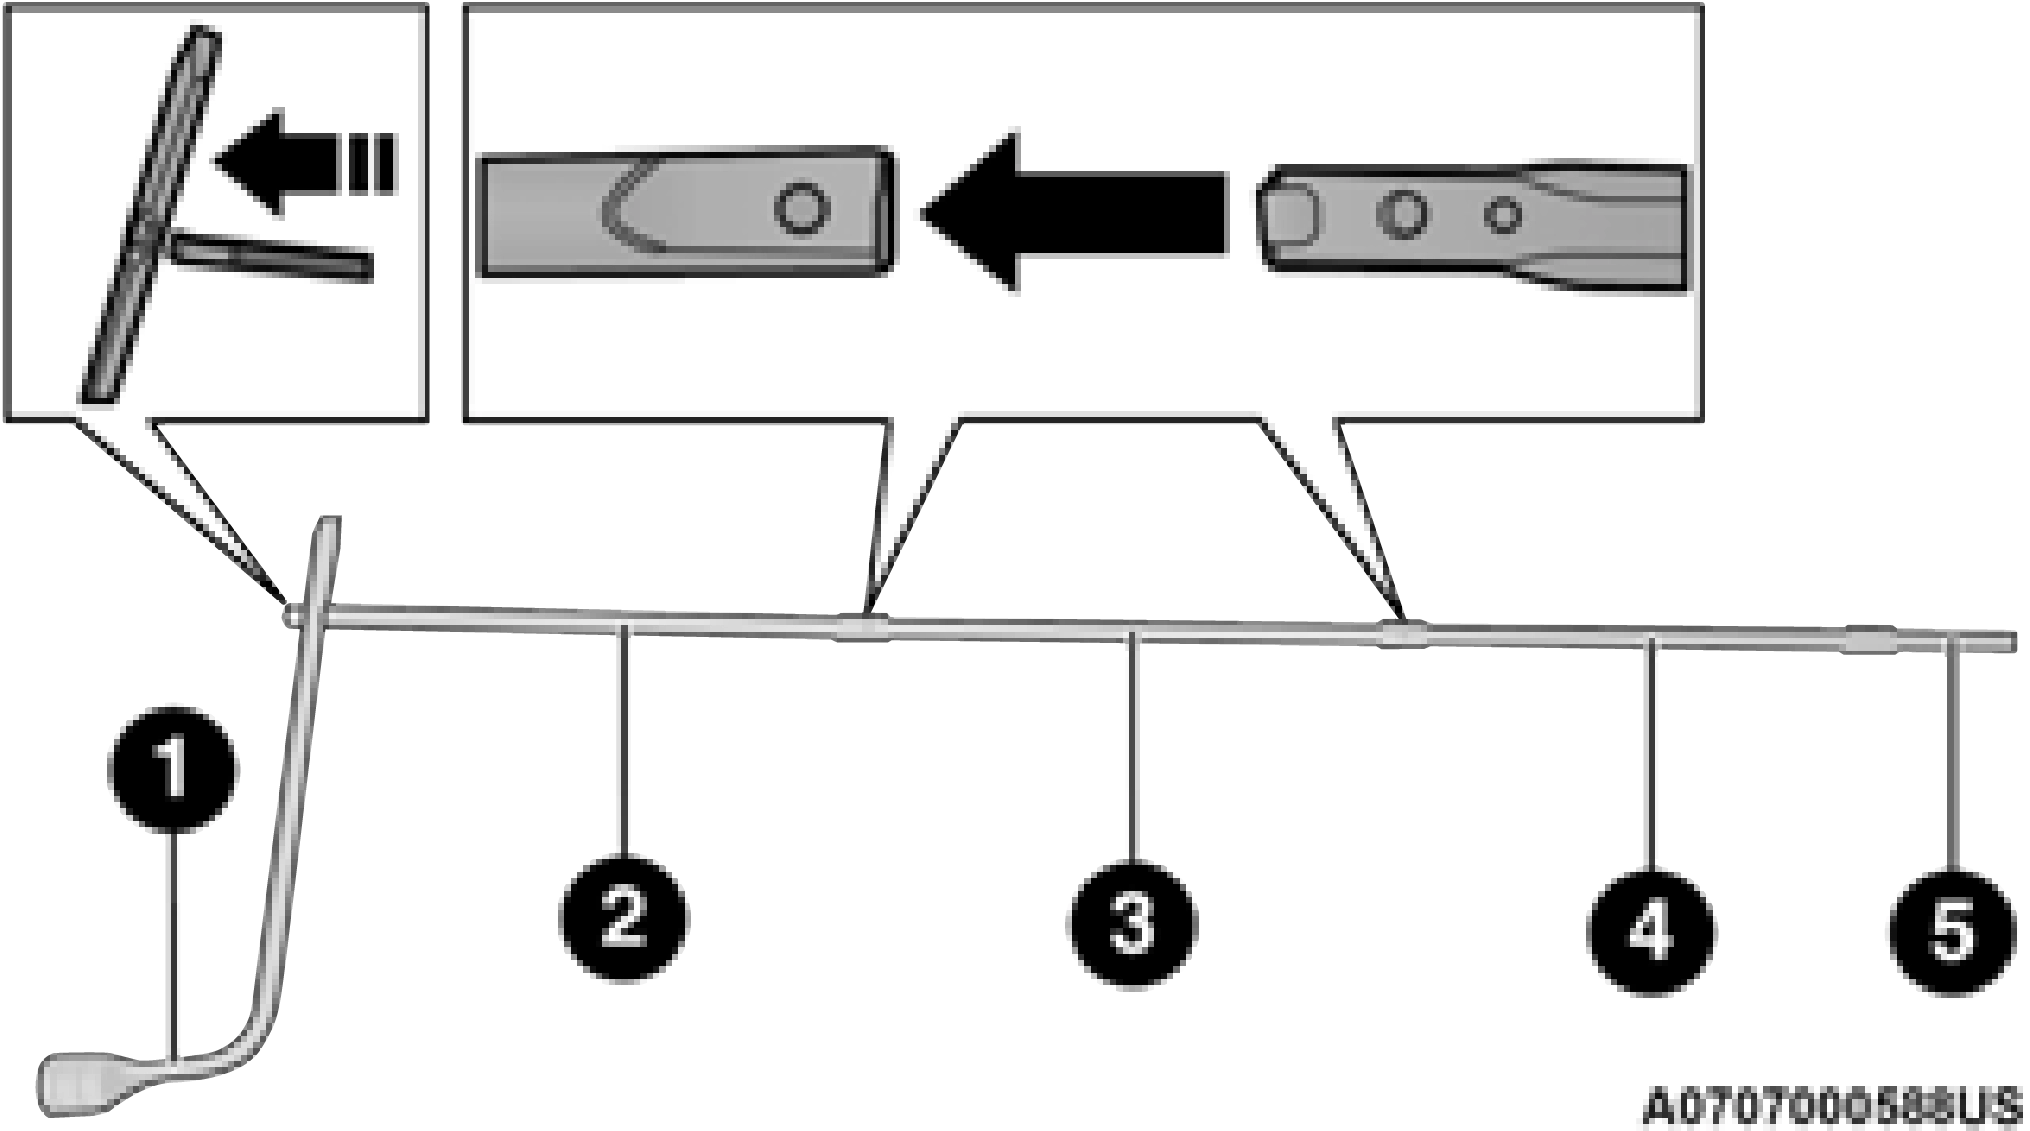
4 — Long Extension With Spring Clip 4 5 — Short Extension 5
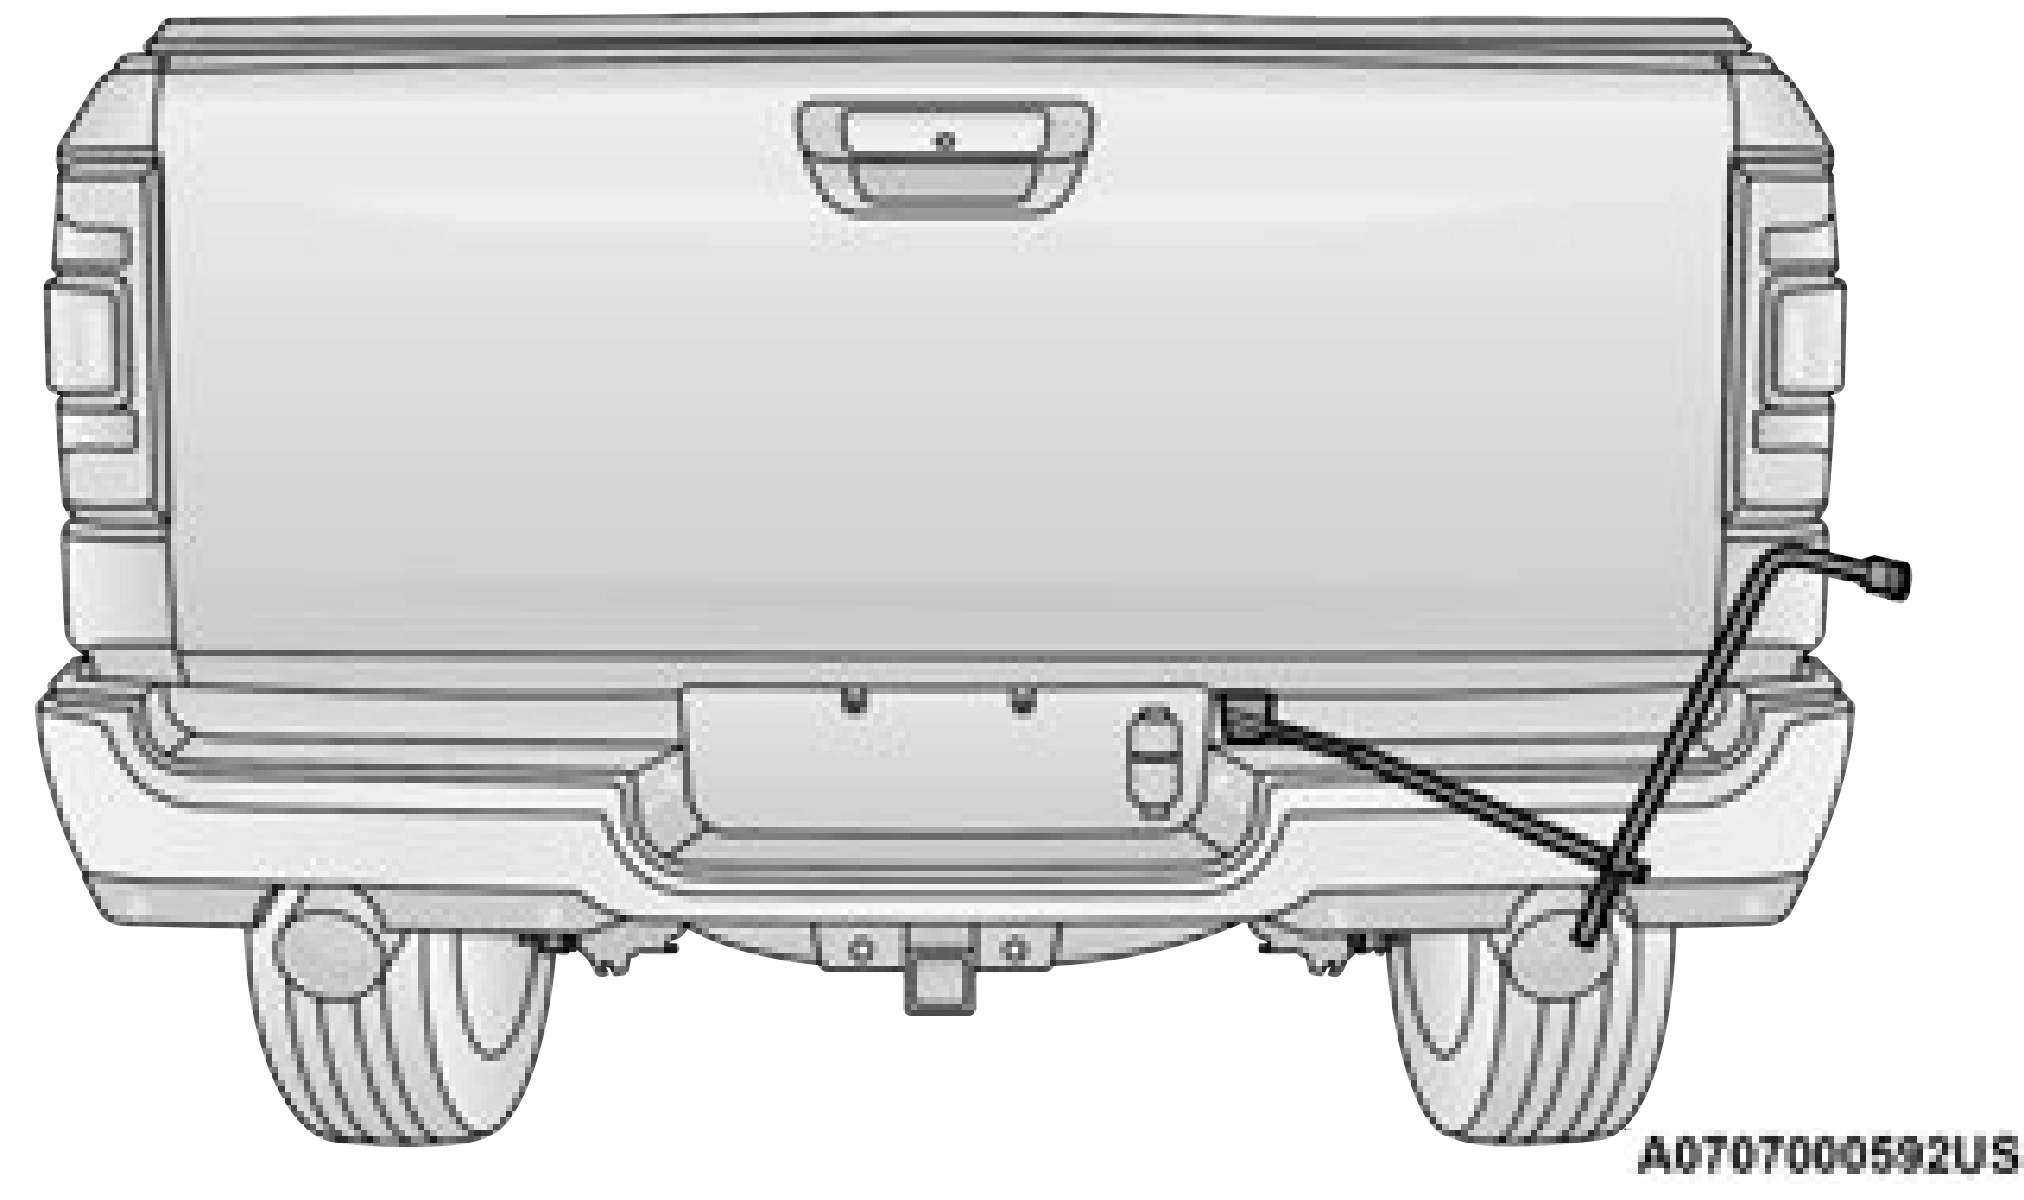
If the tailgate is lowered, adding the shorter extension 5 to jack extension 4 will enable lowering the spare tire without having to raise the tailgate.
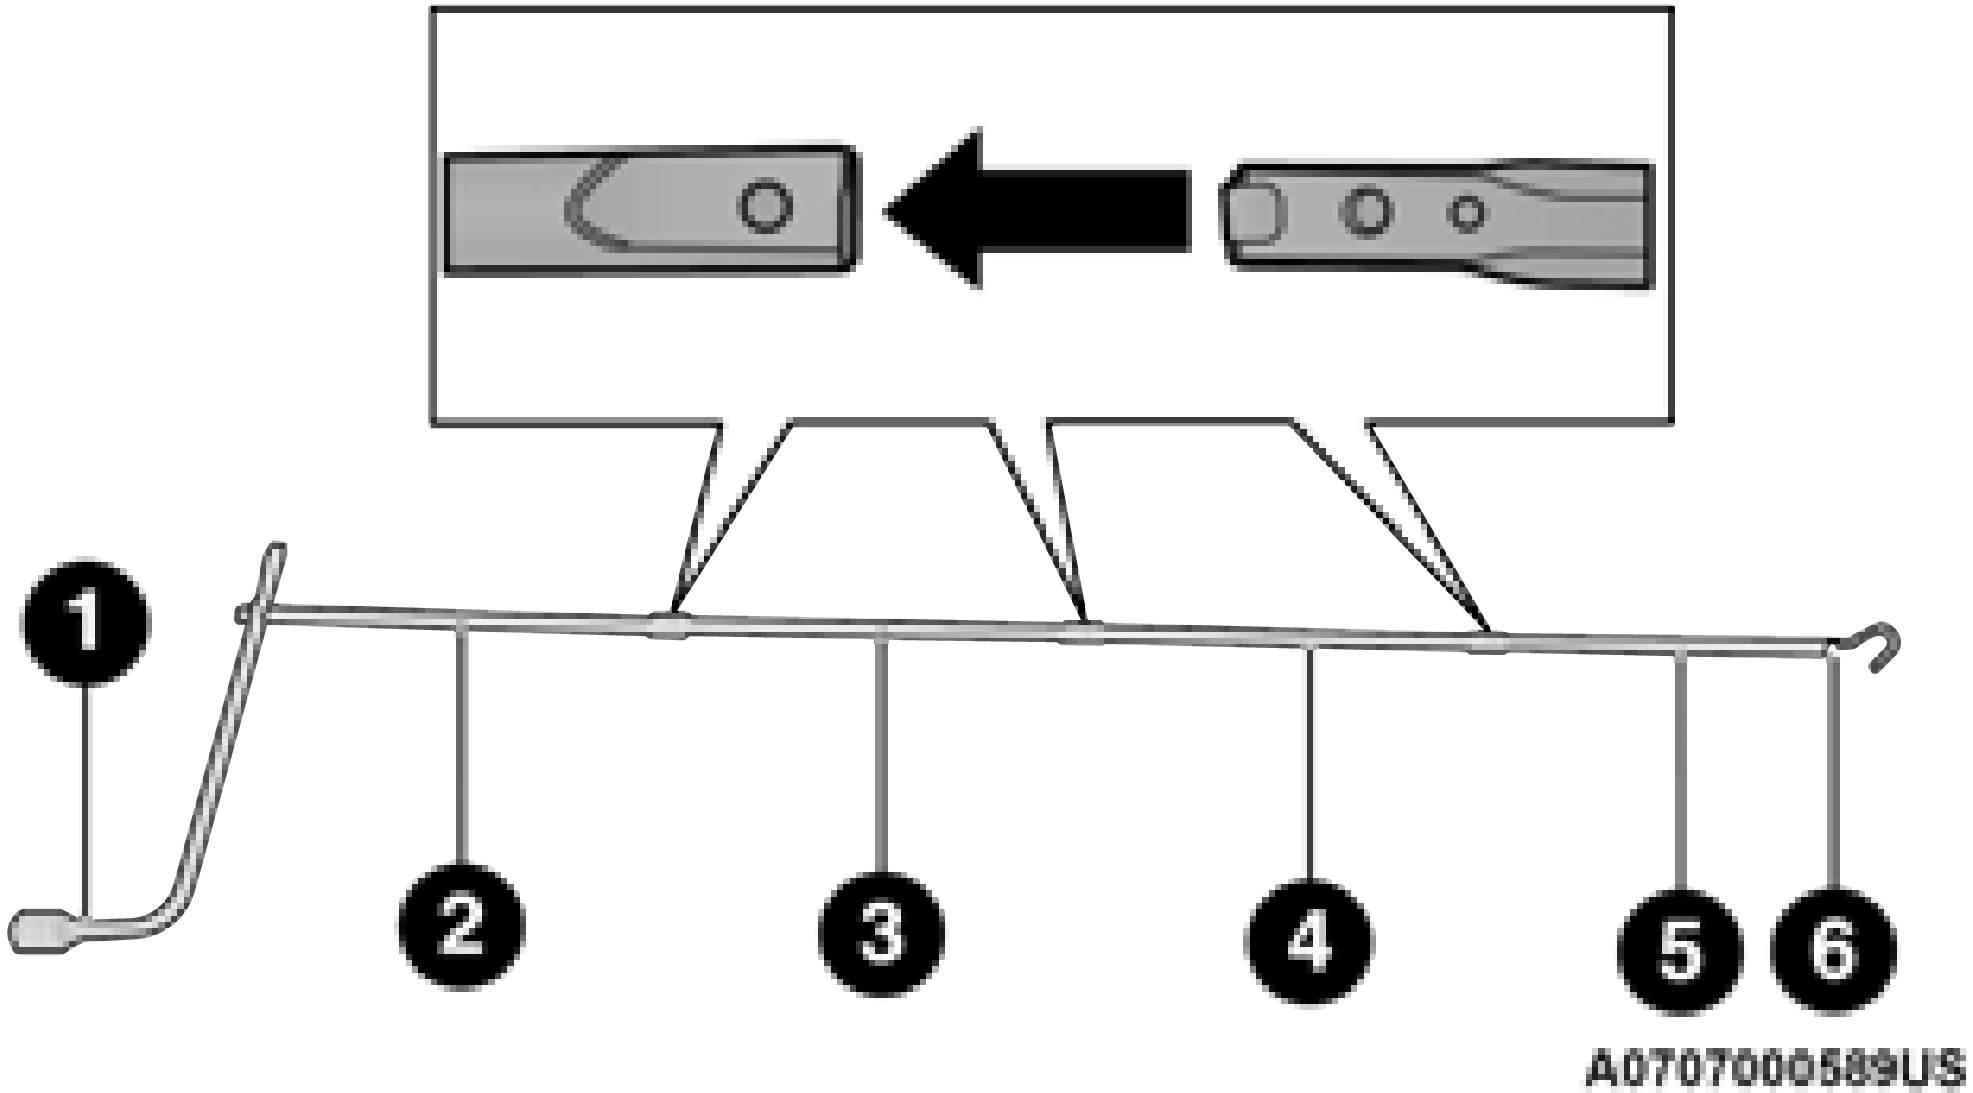
Assembled For Jack Operation
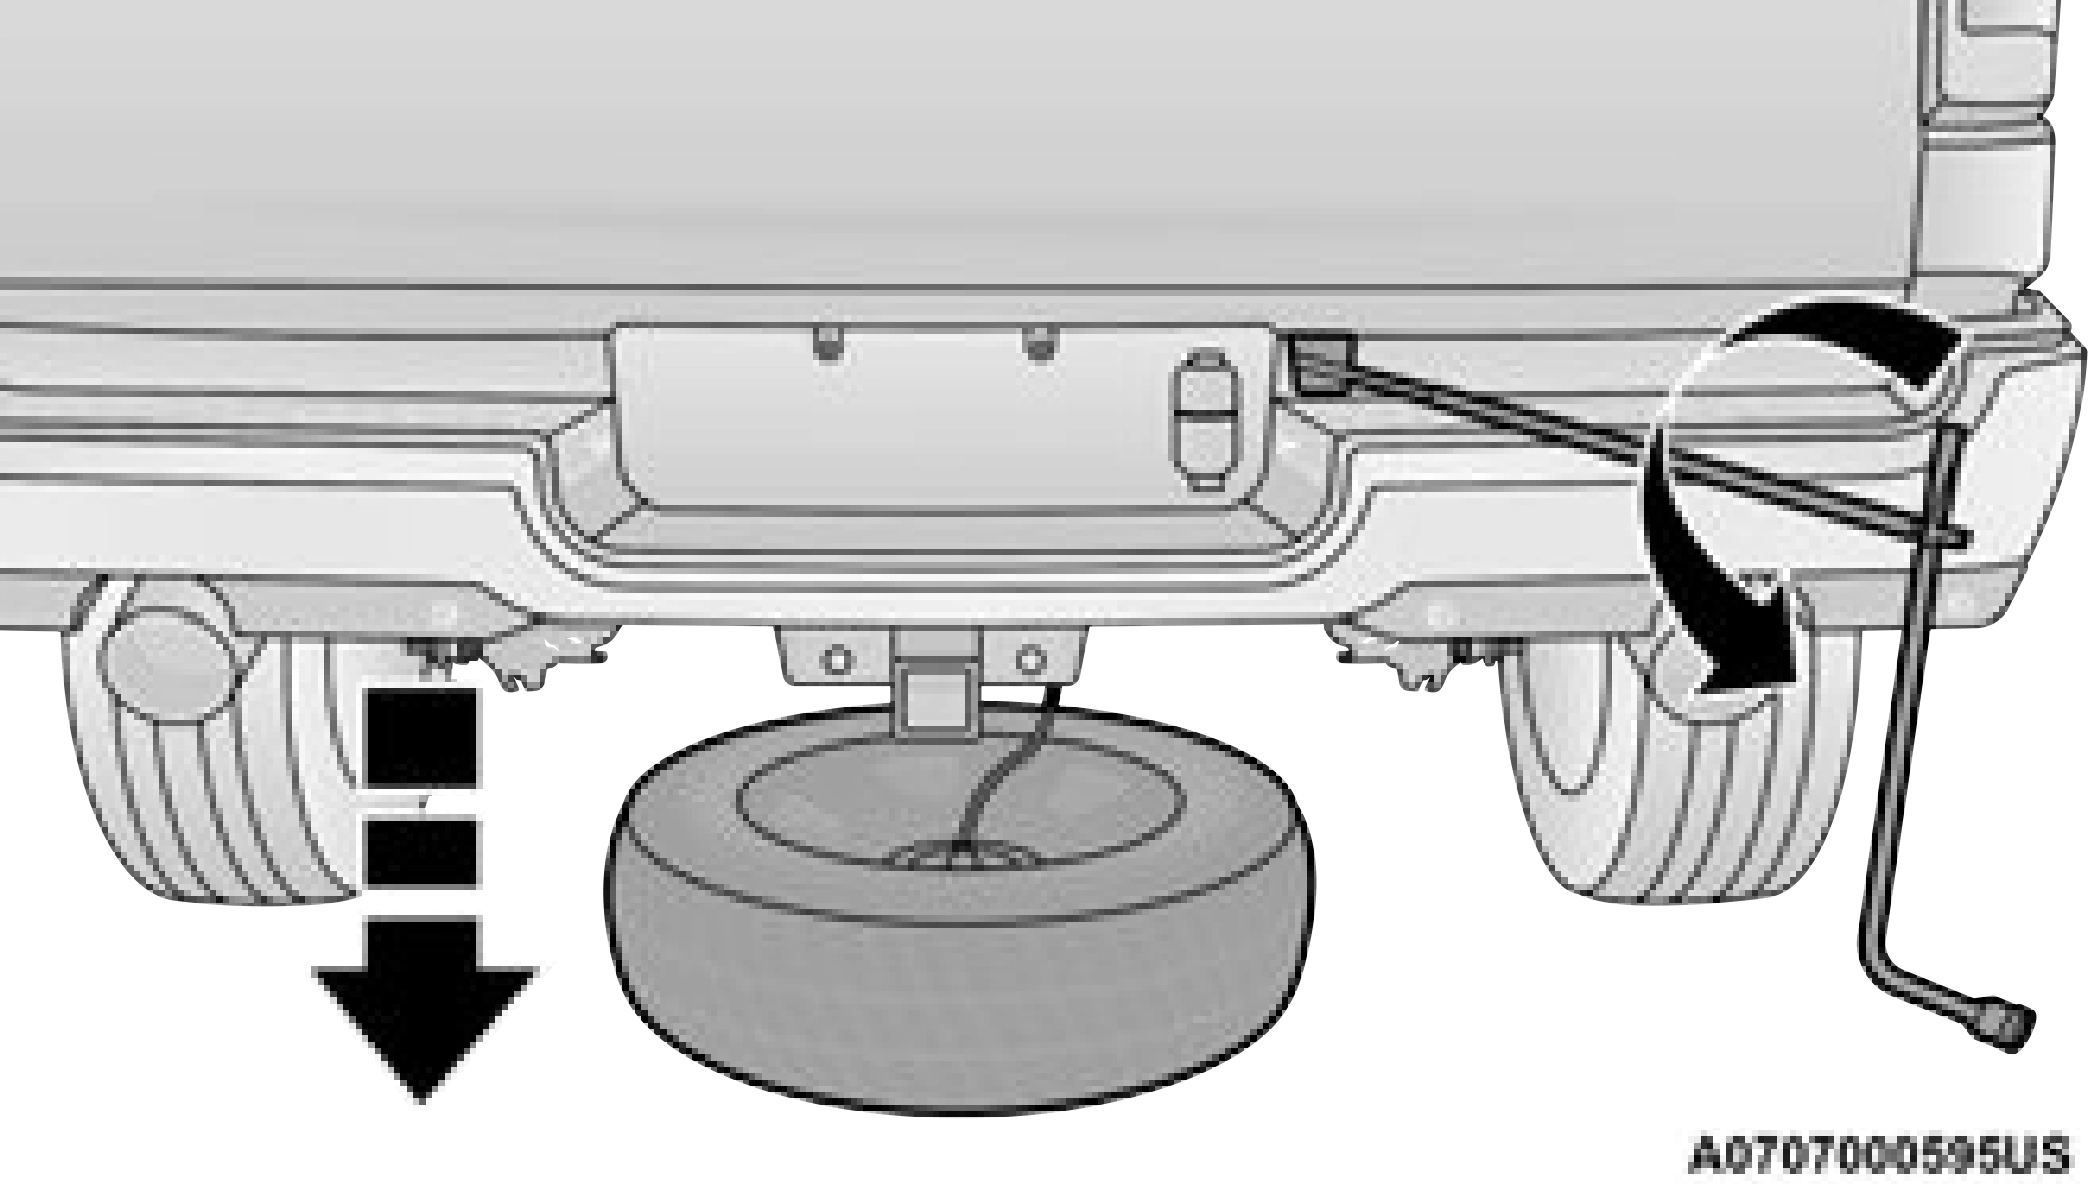
REMOVING THE SPARE TIRE
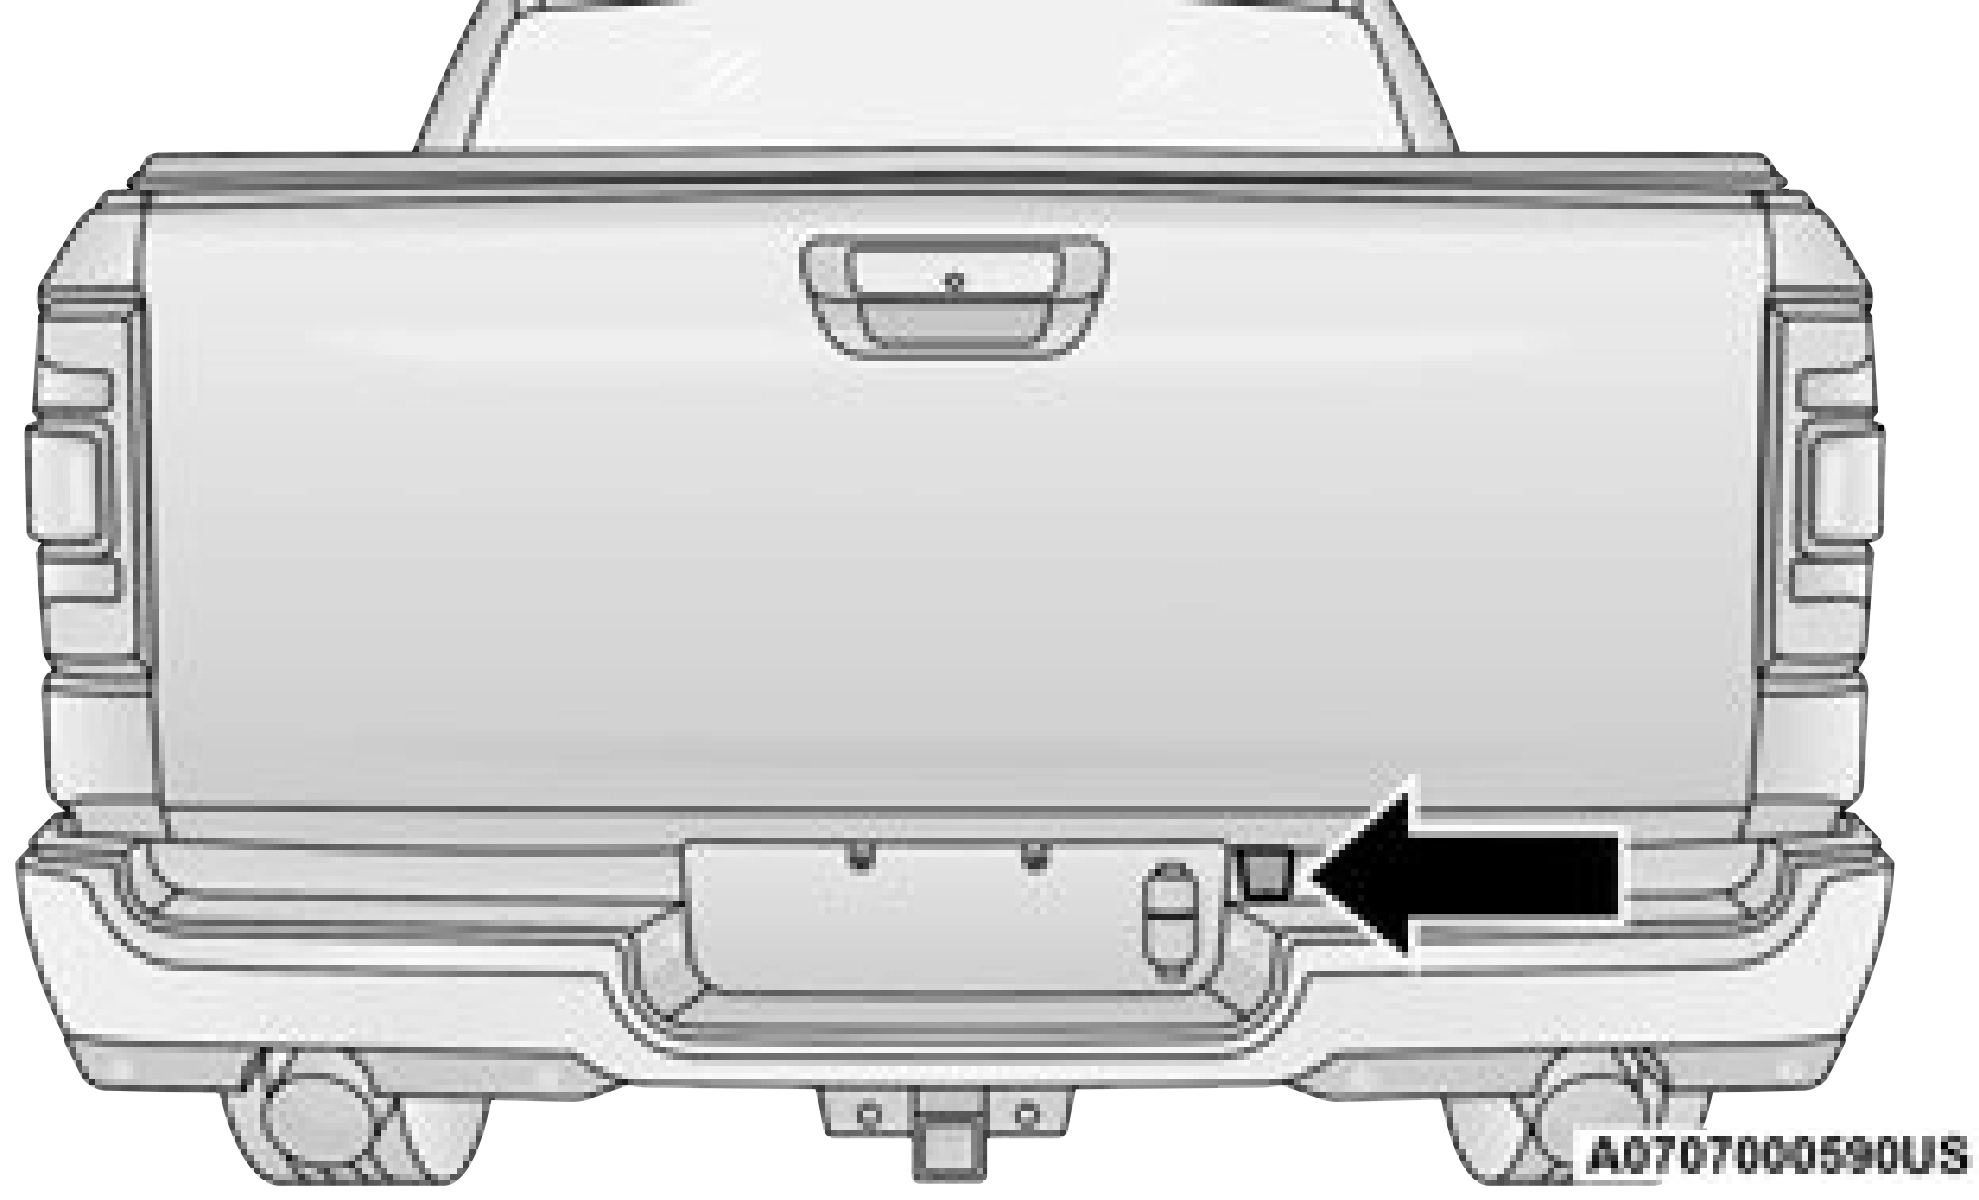
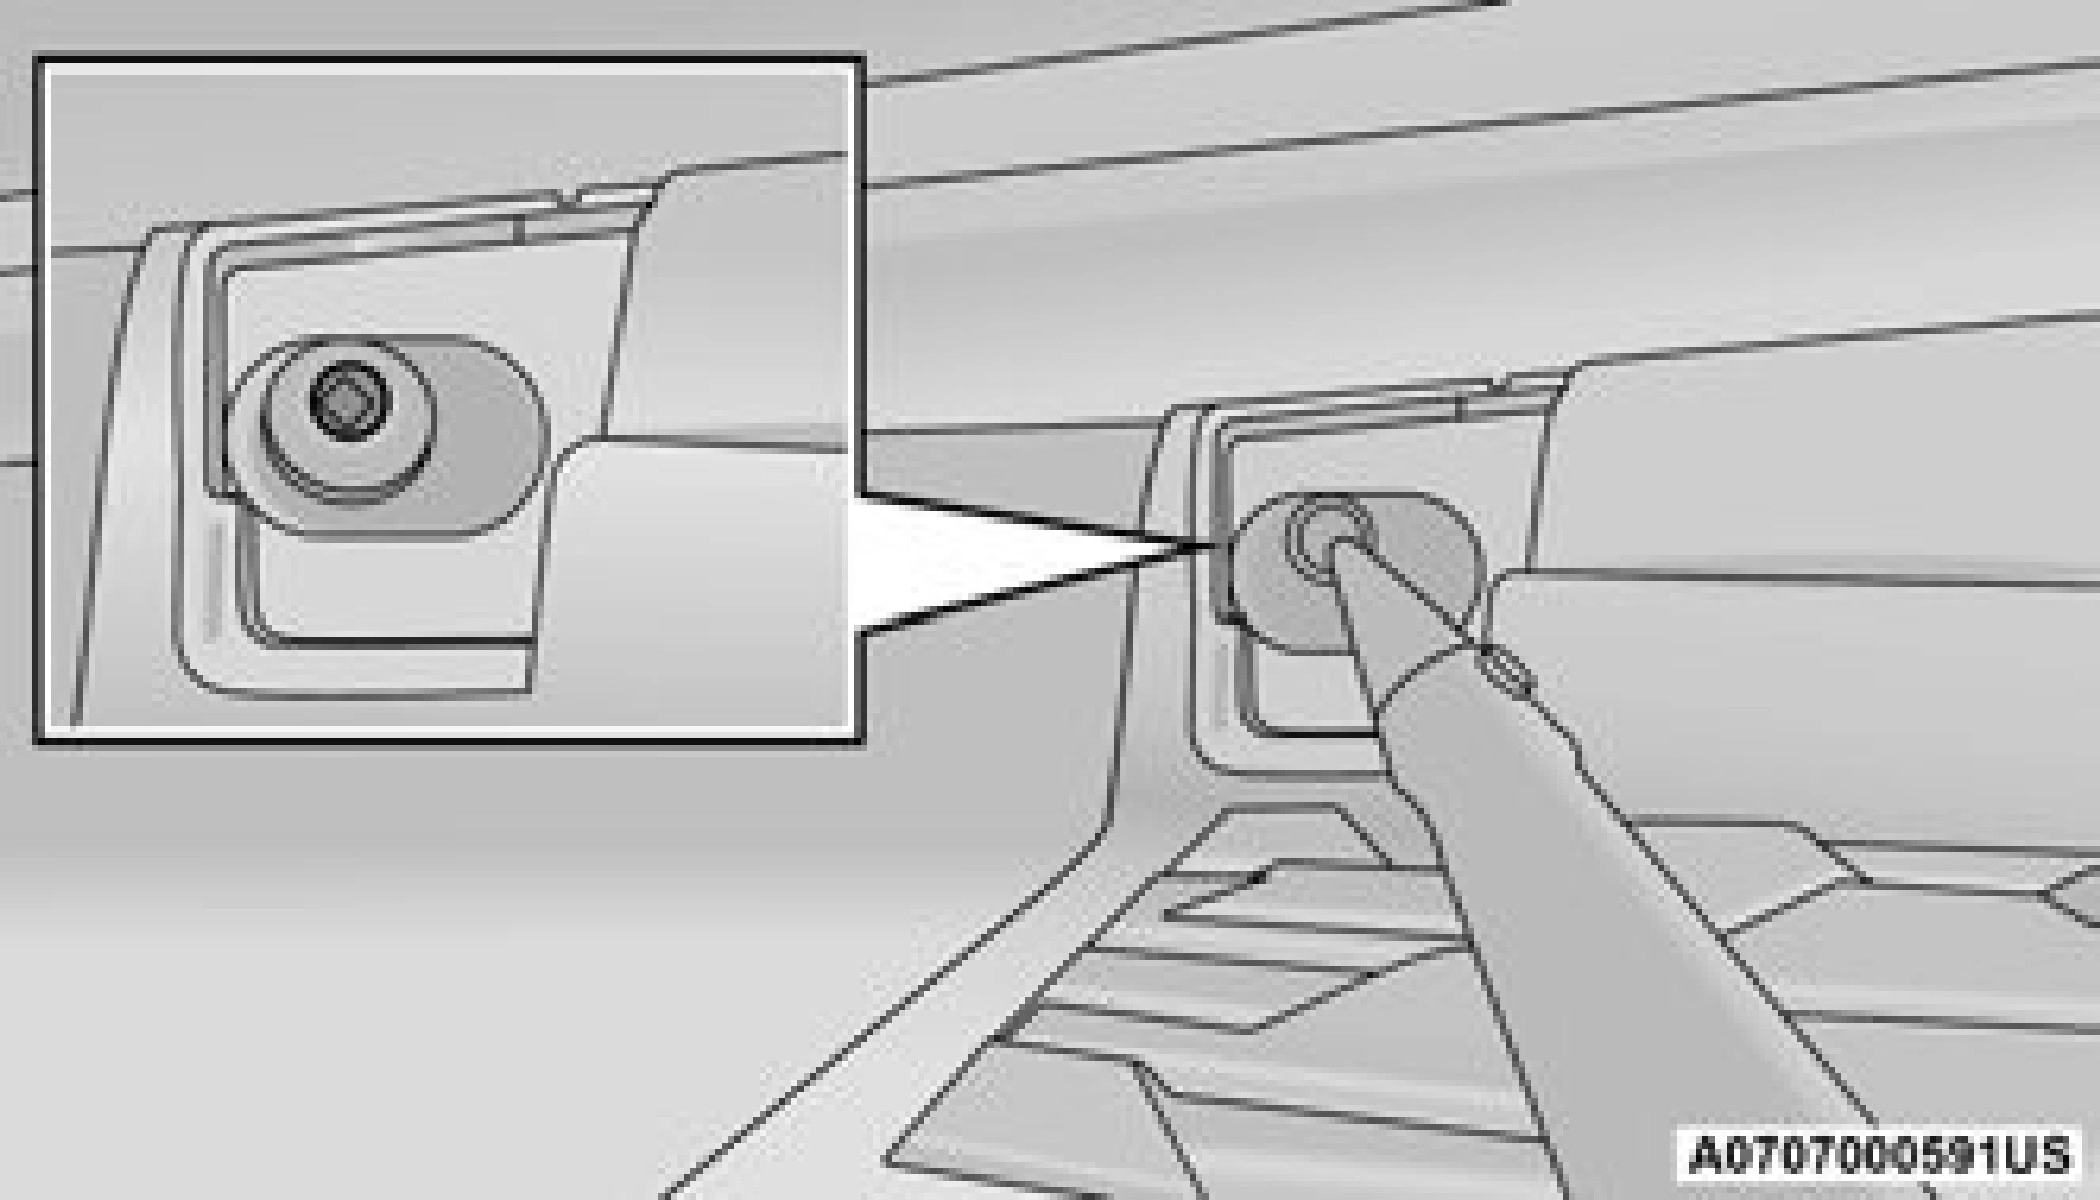
Inserting The Extension Tubes Into The Access Hole
NOTE:
The winch mechanism is designed for use with the extension tubes only. Use of an air wrench or other power tools is not recommended and can damage the winch.
JACKING INSTRUCTIONS
(Continued)
7
 4. Placement for the front and rear jacking locations are critical. See below images for proper jacking locations.
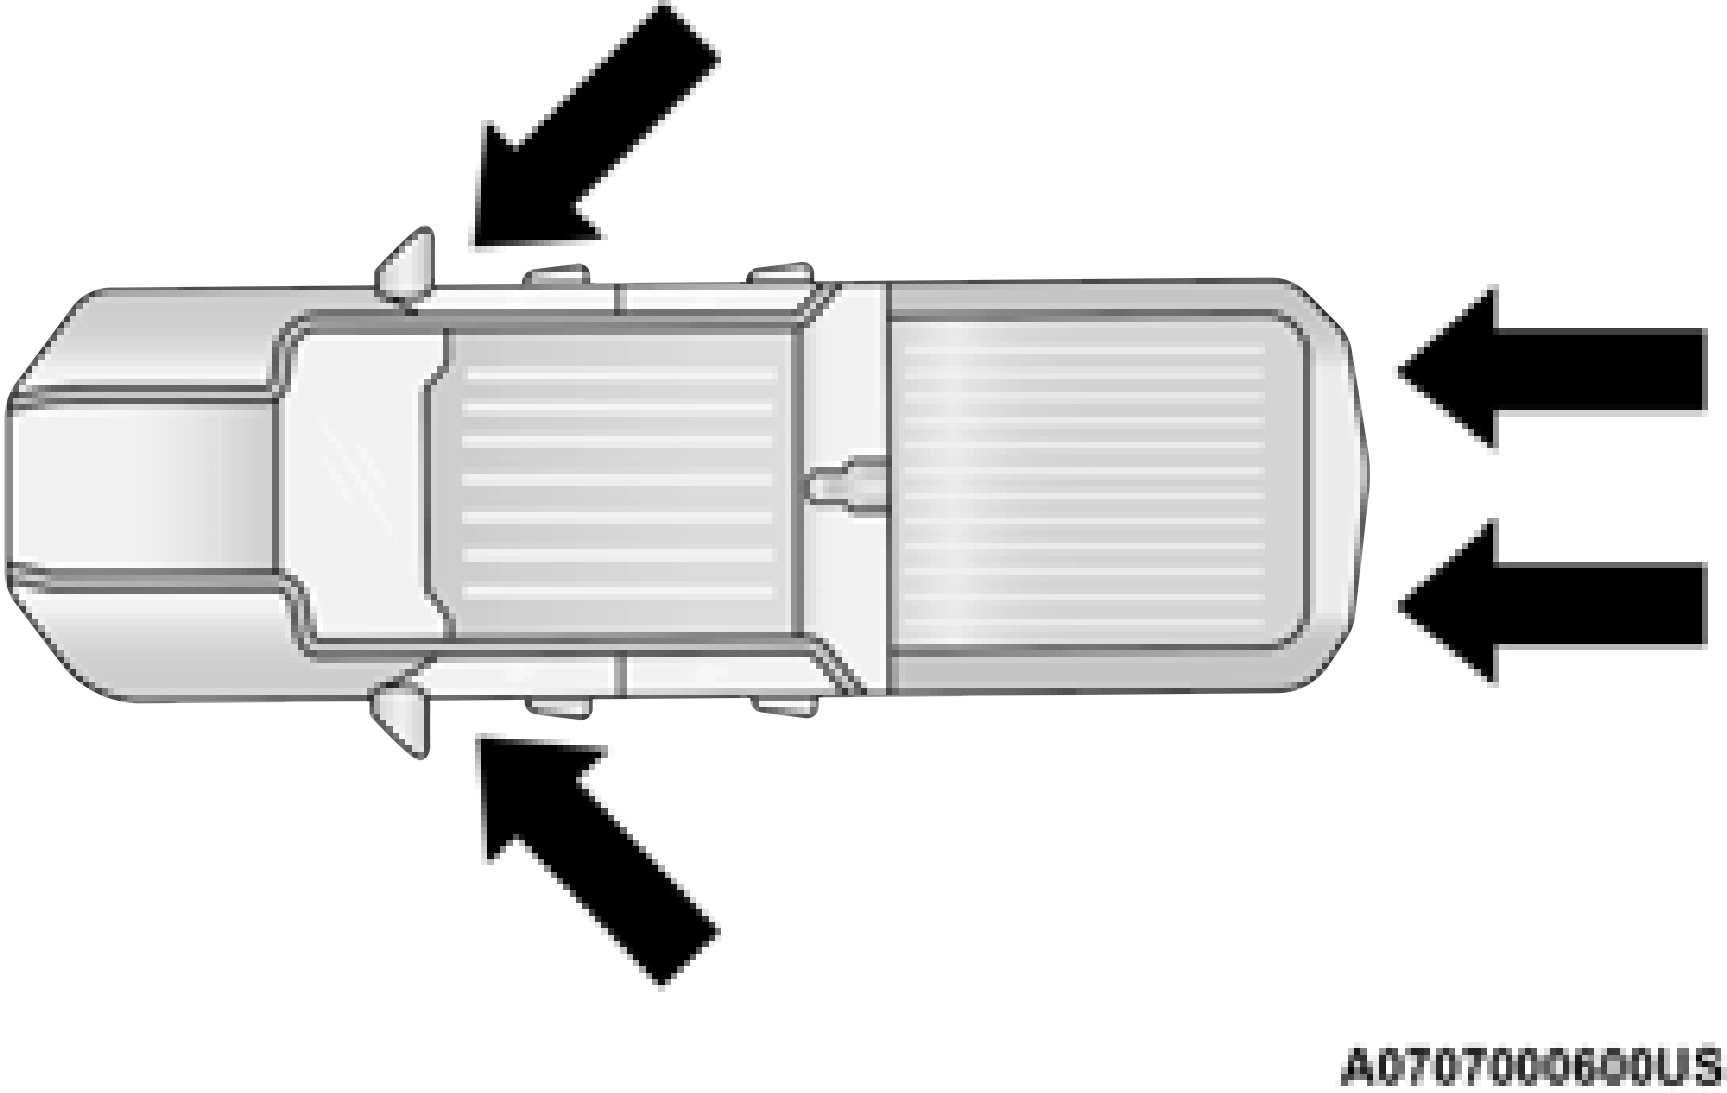 Jack / Extensions Placement
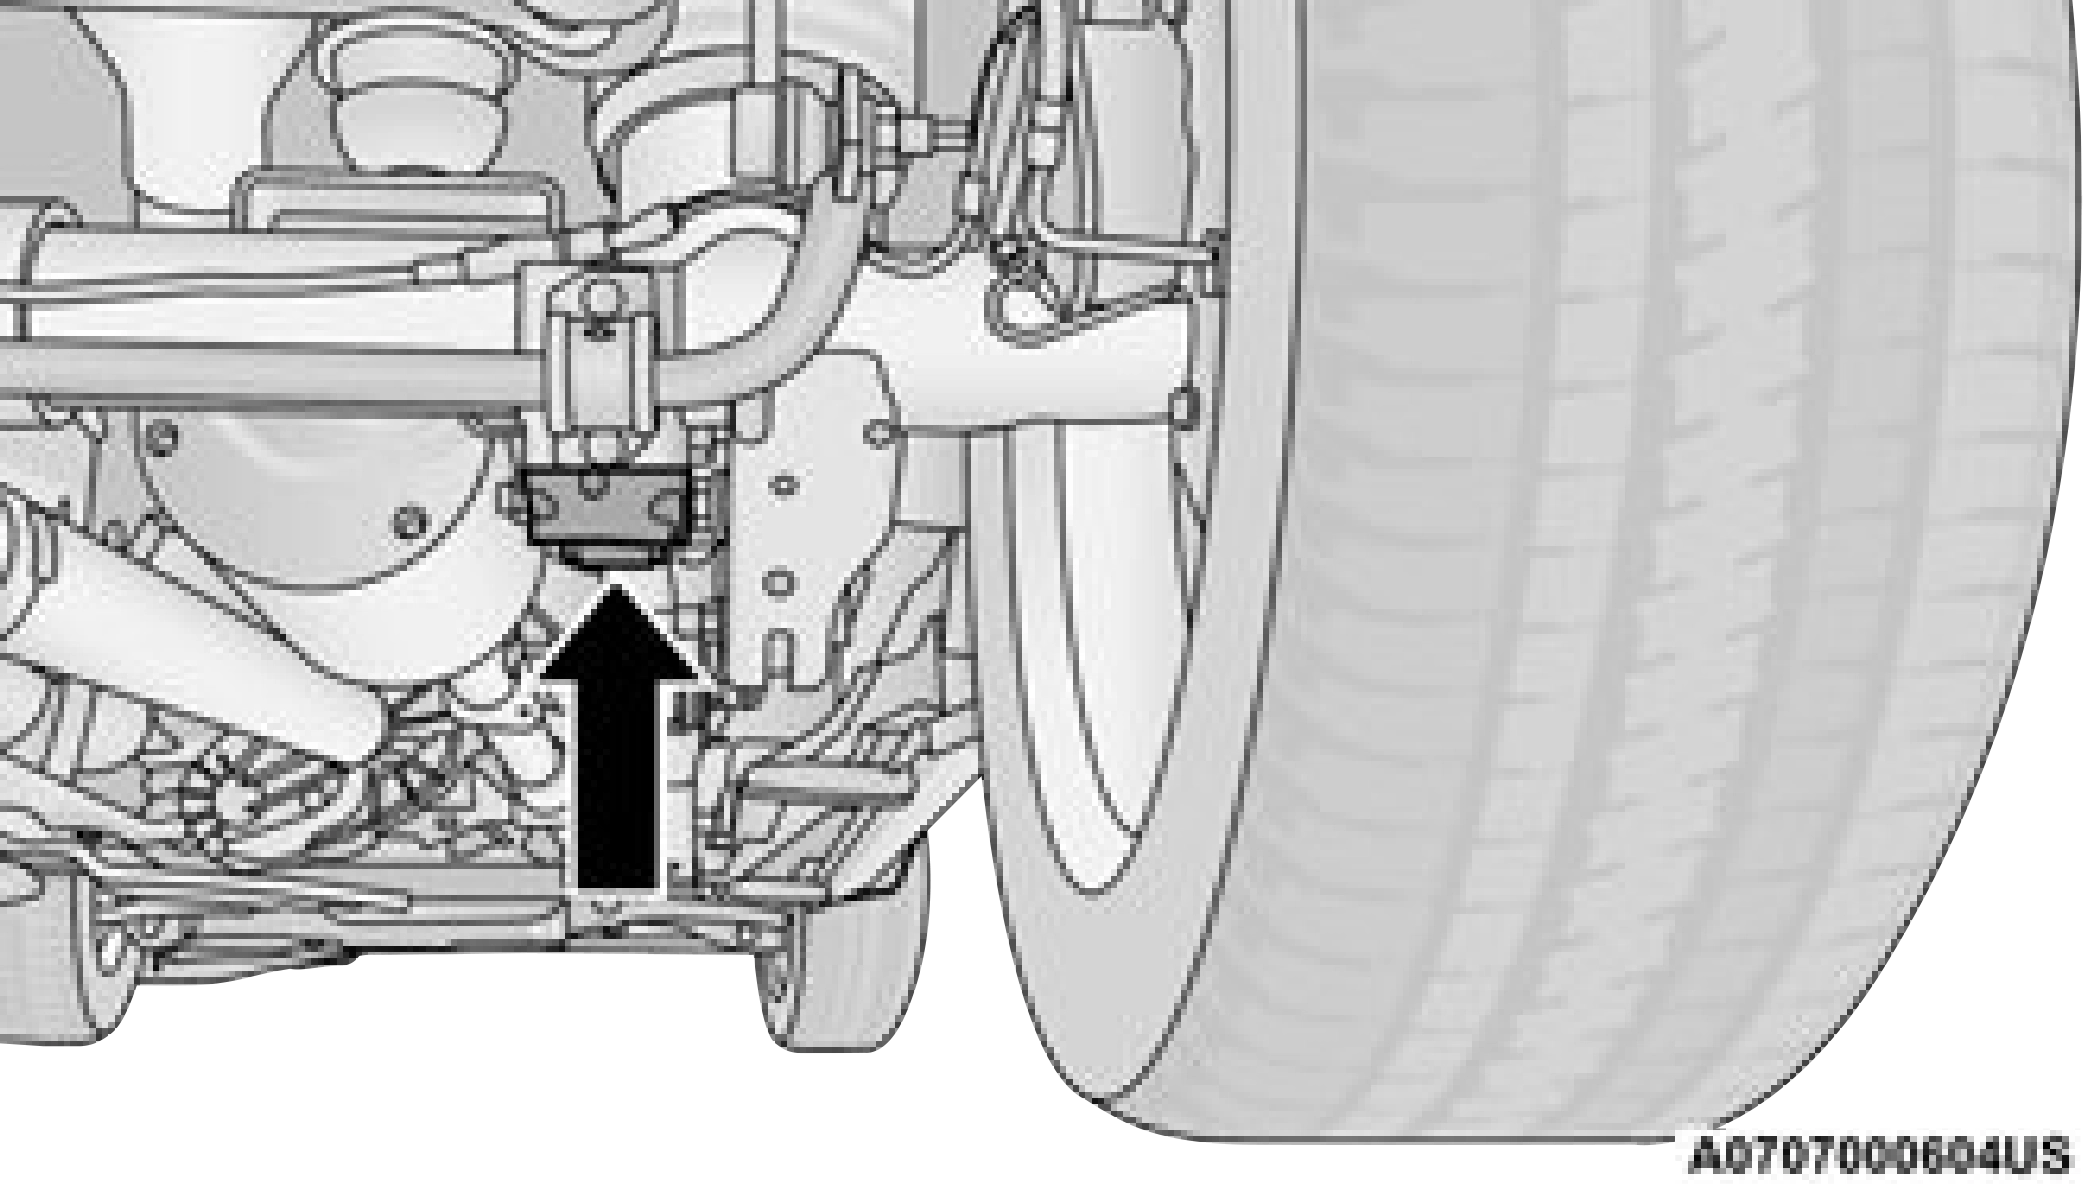
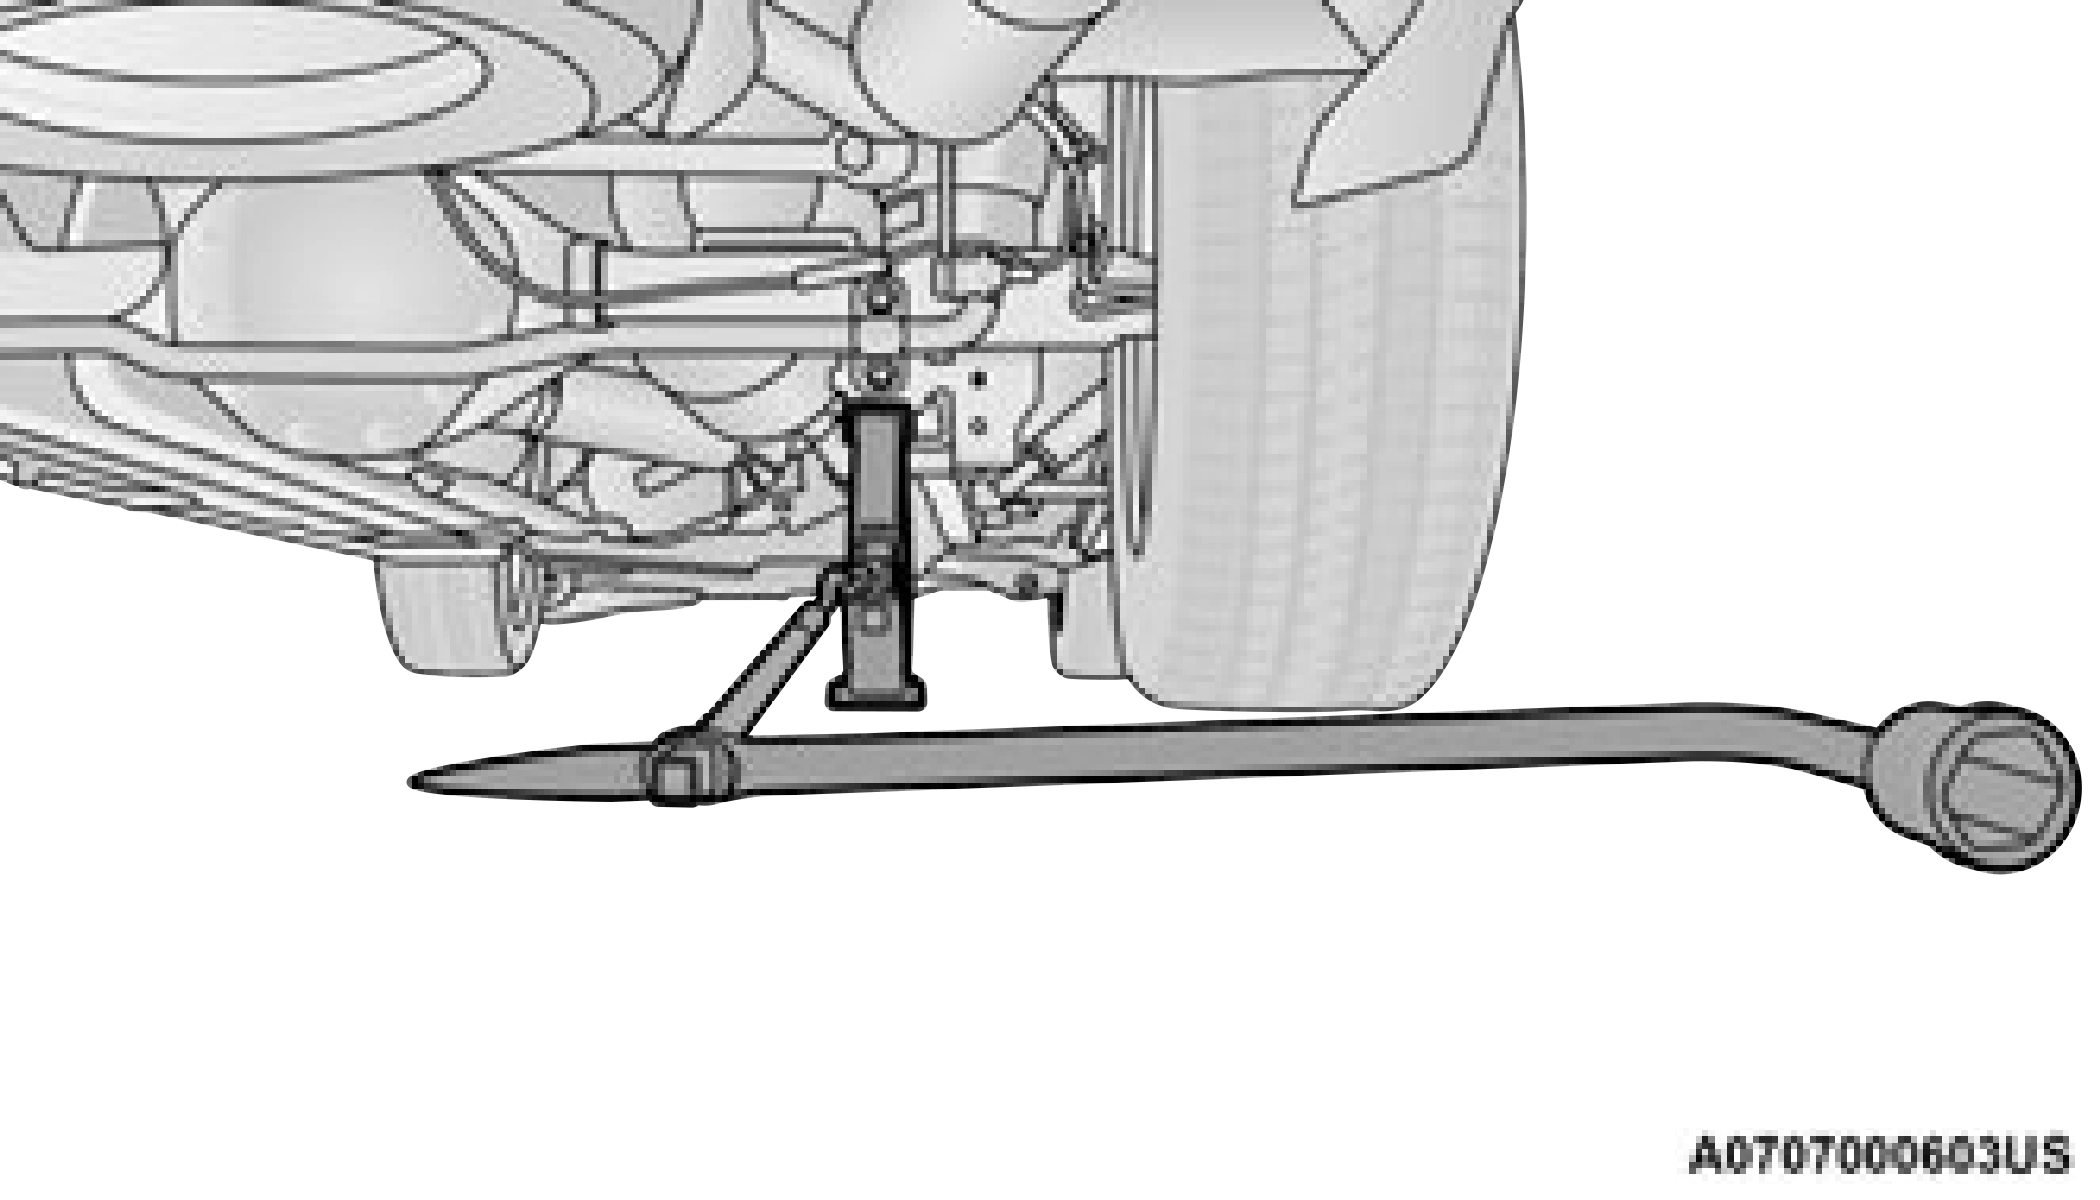
Front Jacking Location
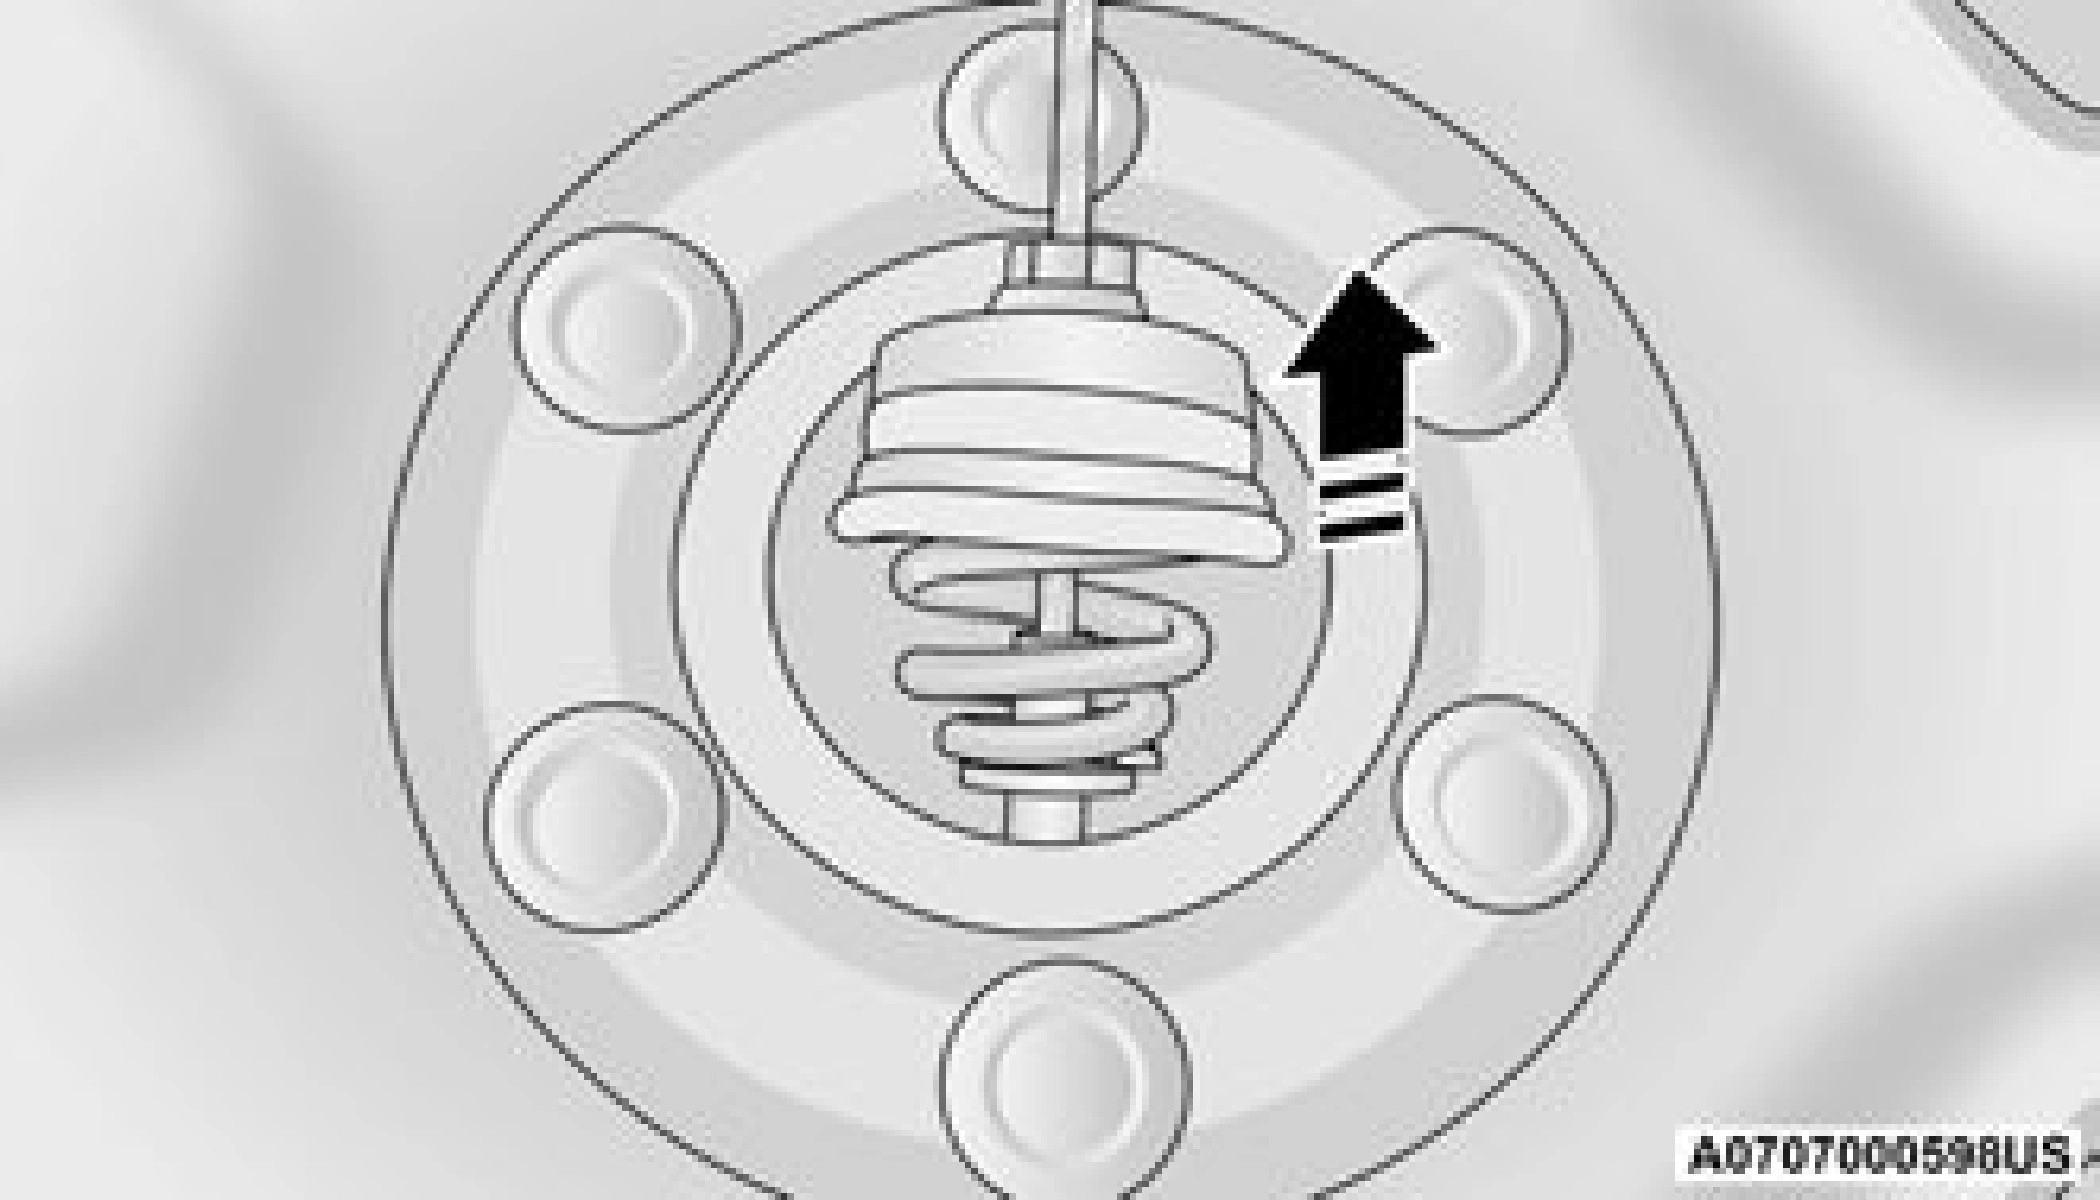
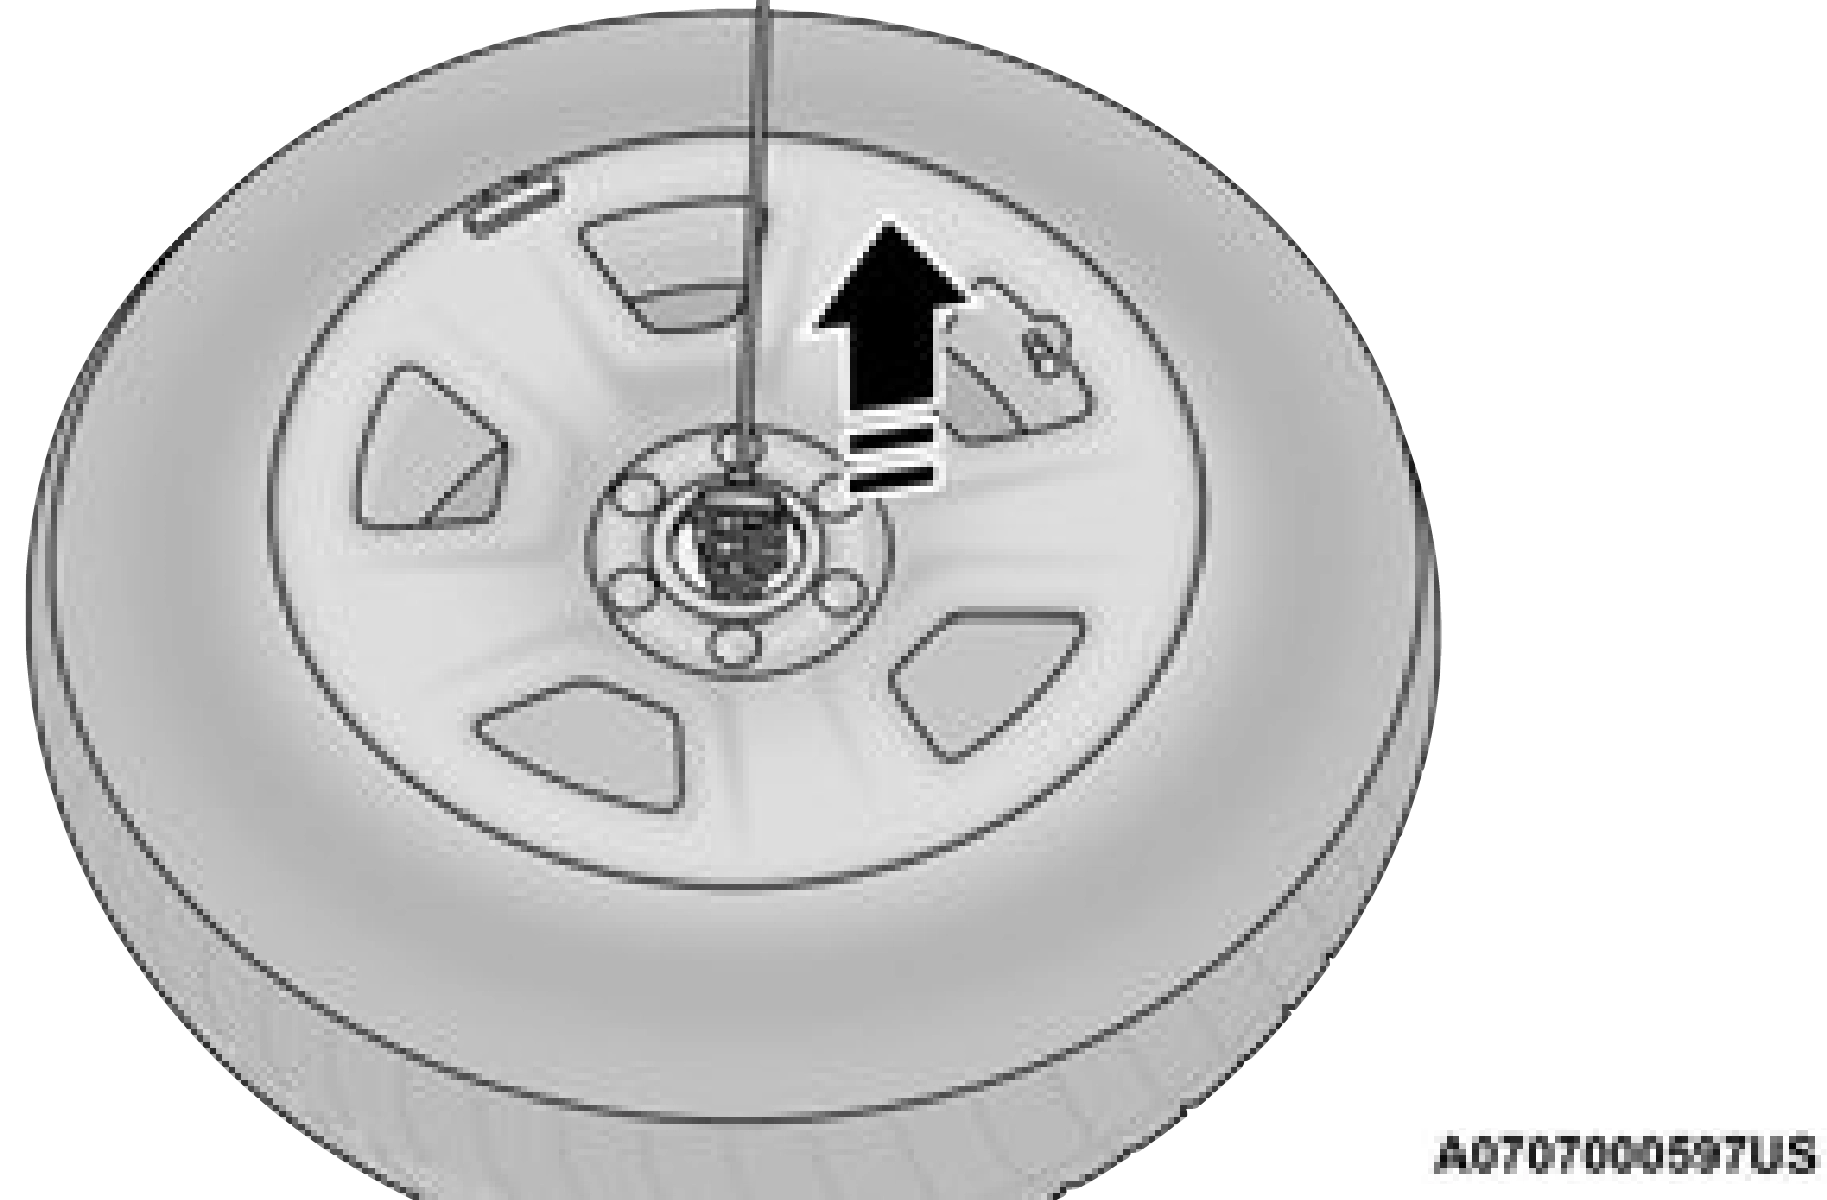
When changing a front wheel, place the scissor jack under the rear portion of the lower control arm as shown. Access the front jacking location from behind the front tire.
Front Jacking Location
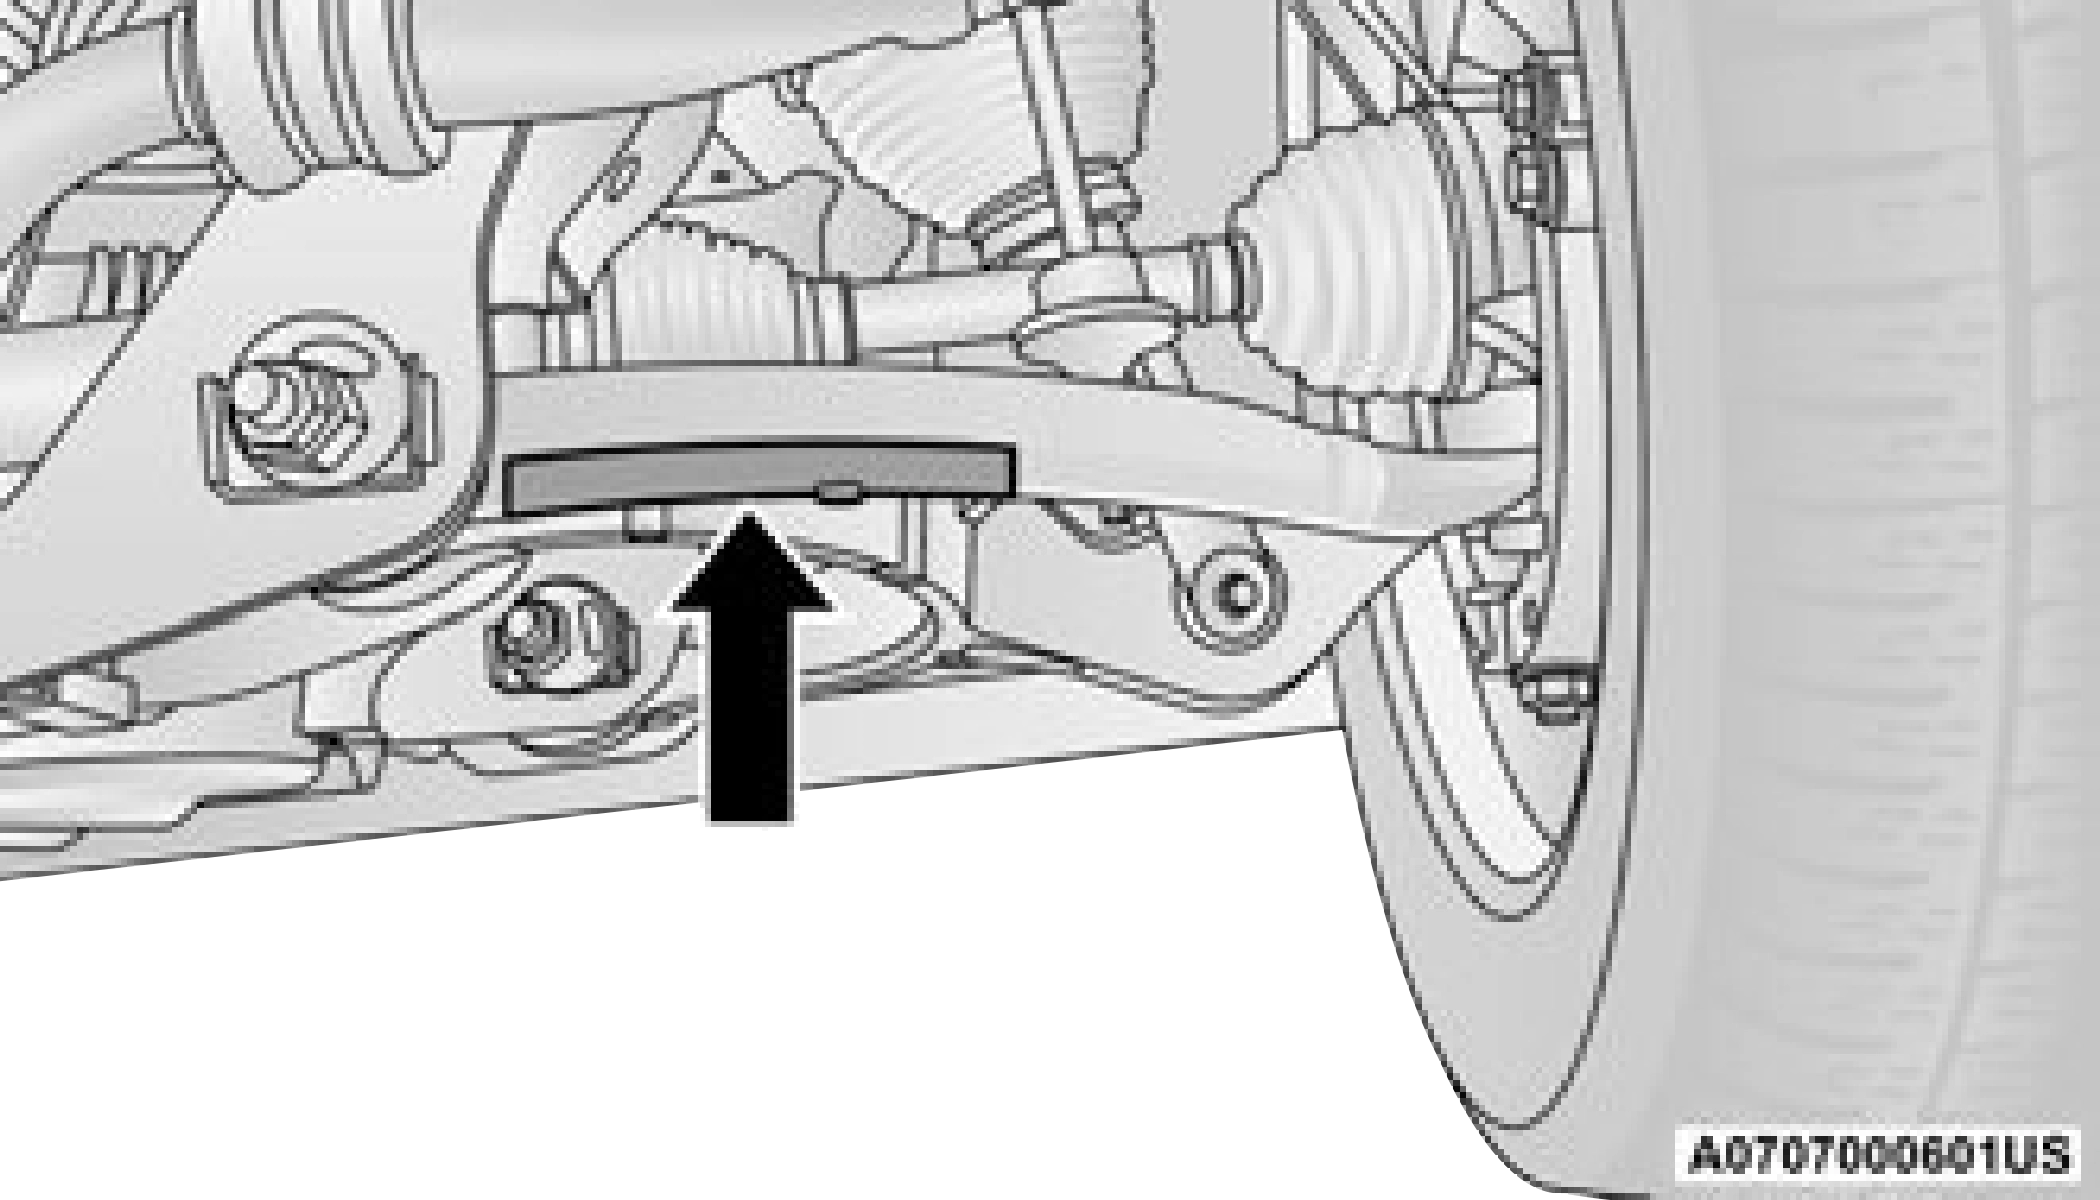
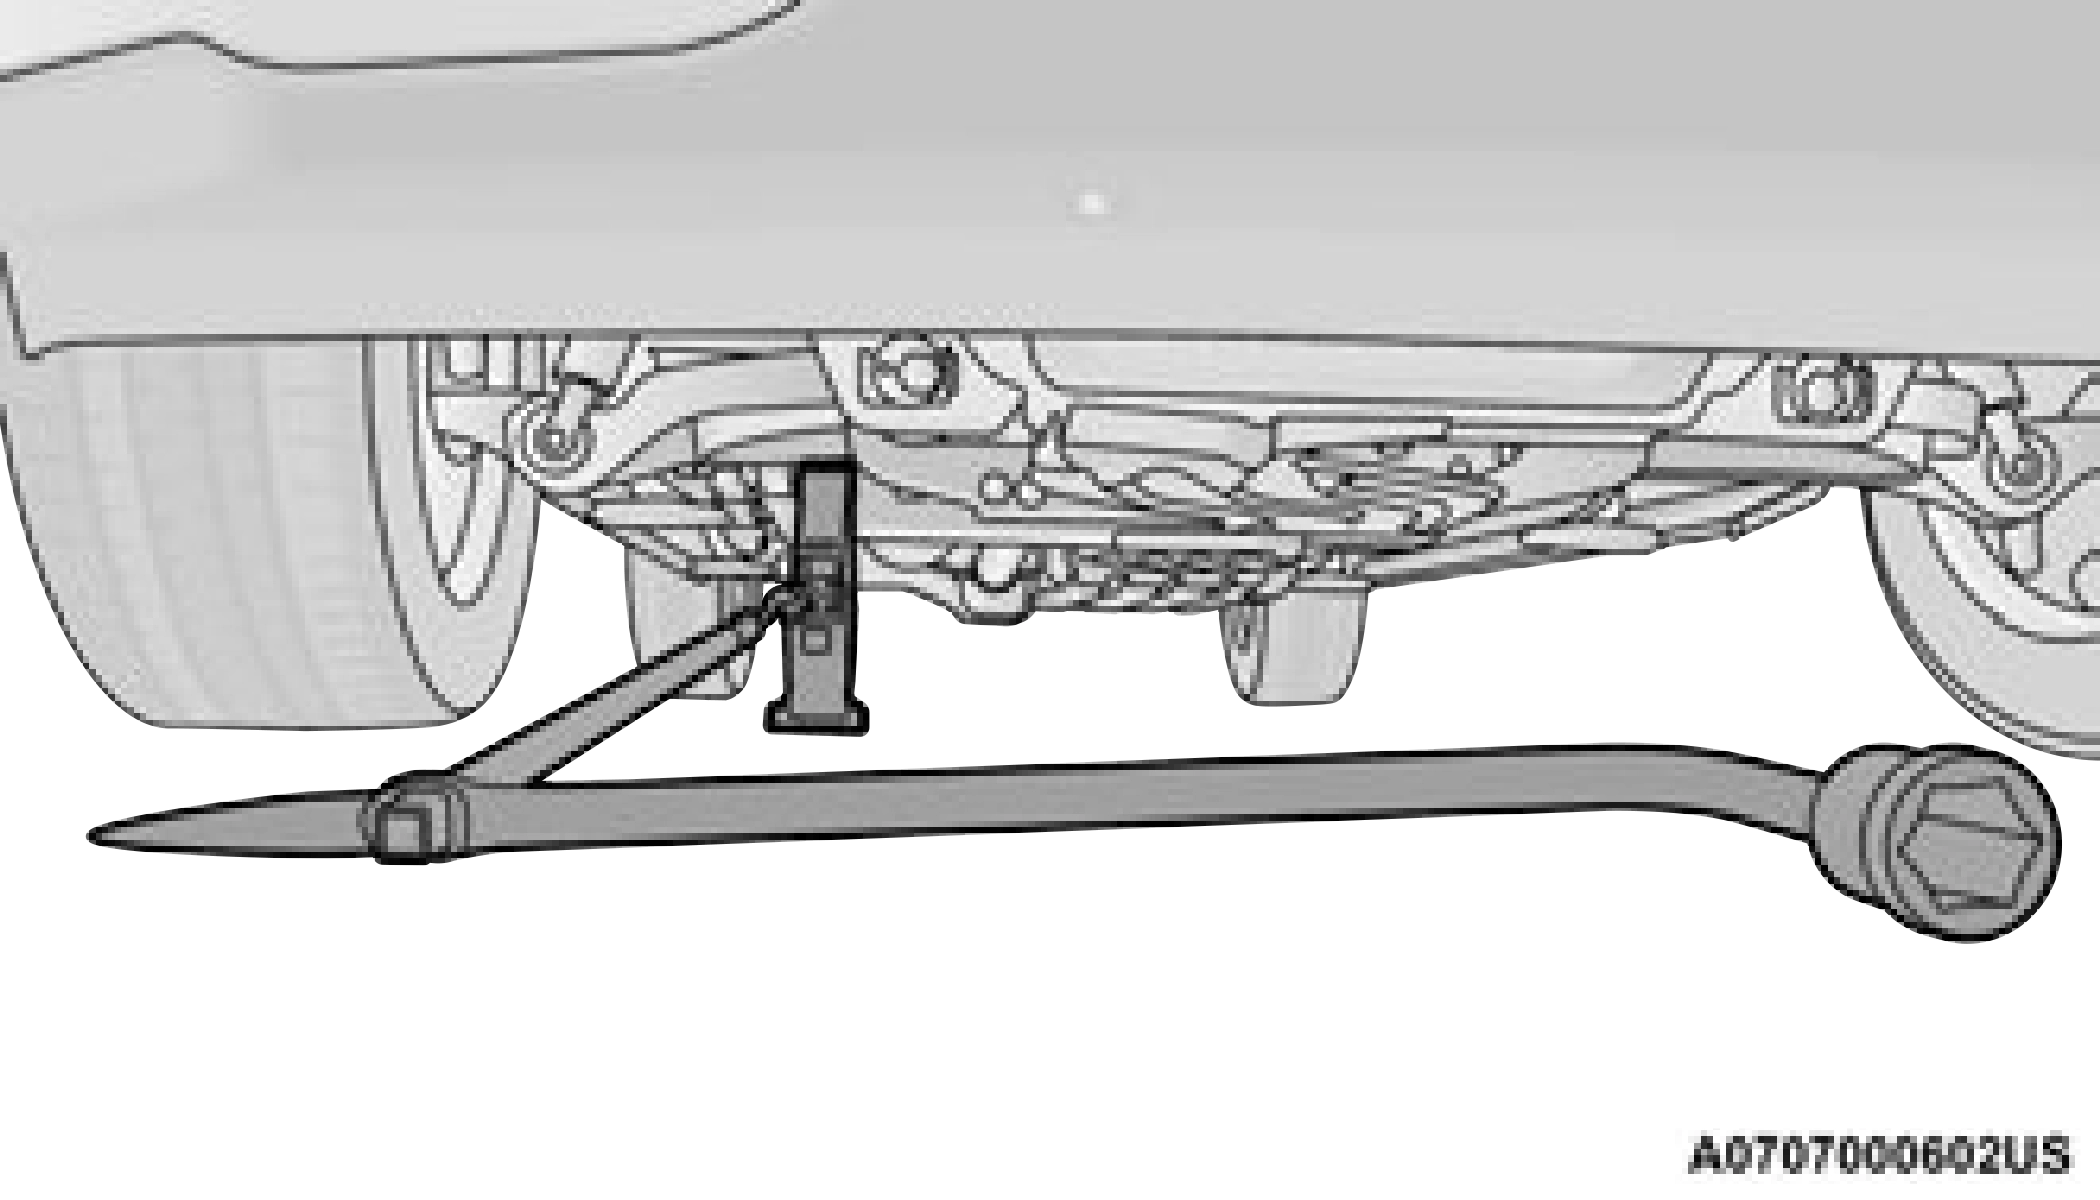
Rear Jacking Location
Operate the jack using the extension with jack hook and the lug wrench. The exten- sion tubes may be used but is not required.
When changing a rear wheel, assemble the extension with jack hook to the jack and connect the extension tubes. Access the rear jacking location from behind the rear tire. Place the jack under the Jack Lifting Point located on the rear axle lower control arm bracket. Then locate the slot in the jack lift plate onto the rear axle Jack Lifting Point. Attach the extension with jack hook extend- ing to the rear of the vehicle.
Rear Jacking Location
Connect the long extensions to the lug wrench.
page 467. If in doubt about the correct
tightness, have them checked with a torque wrench by an authorized dealer or at a service station.
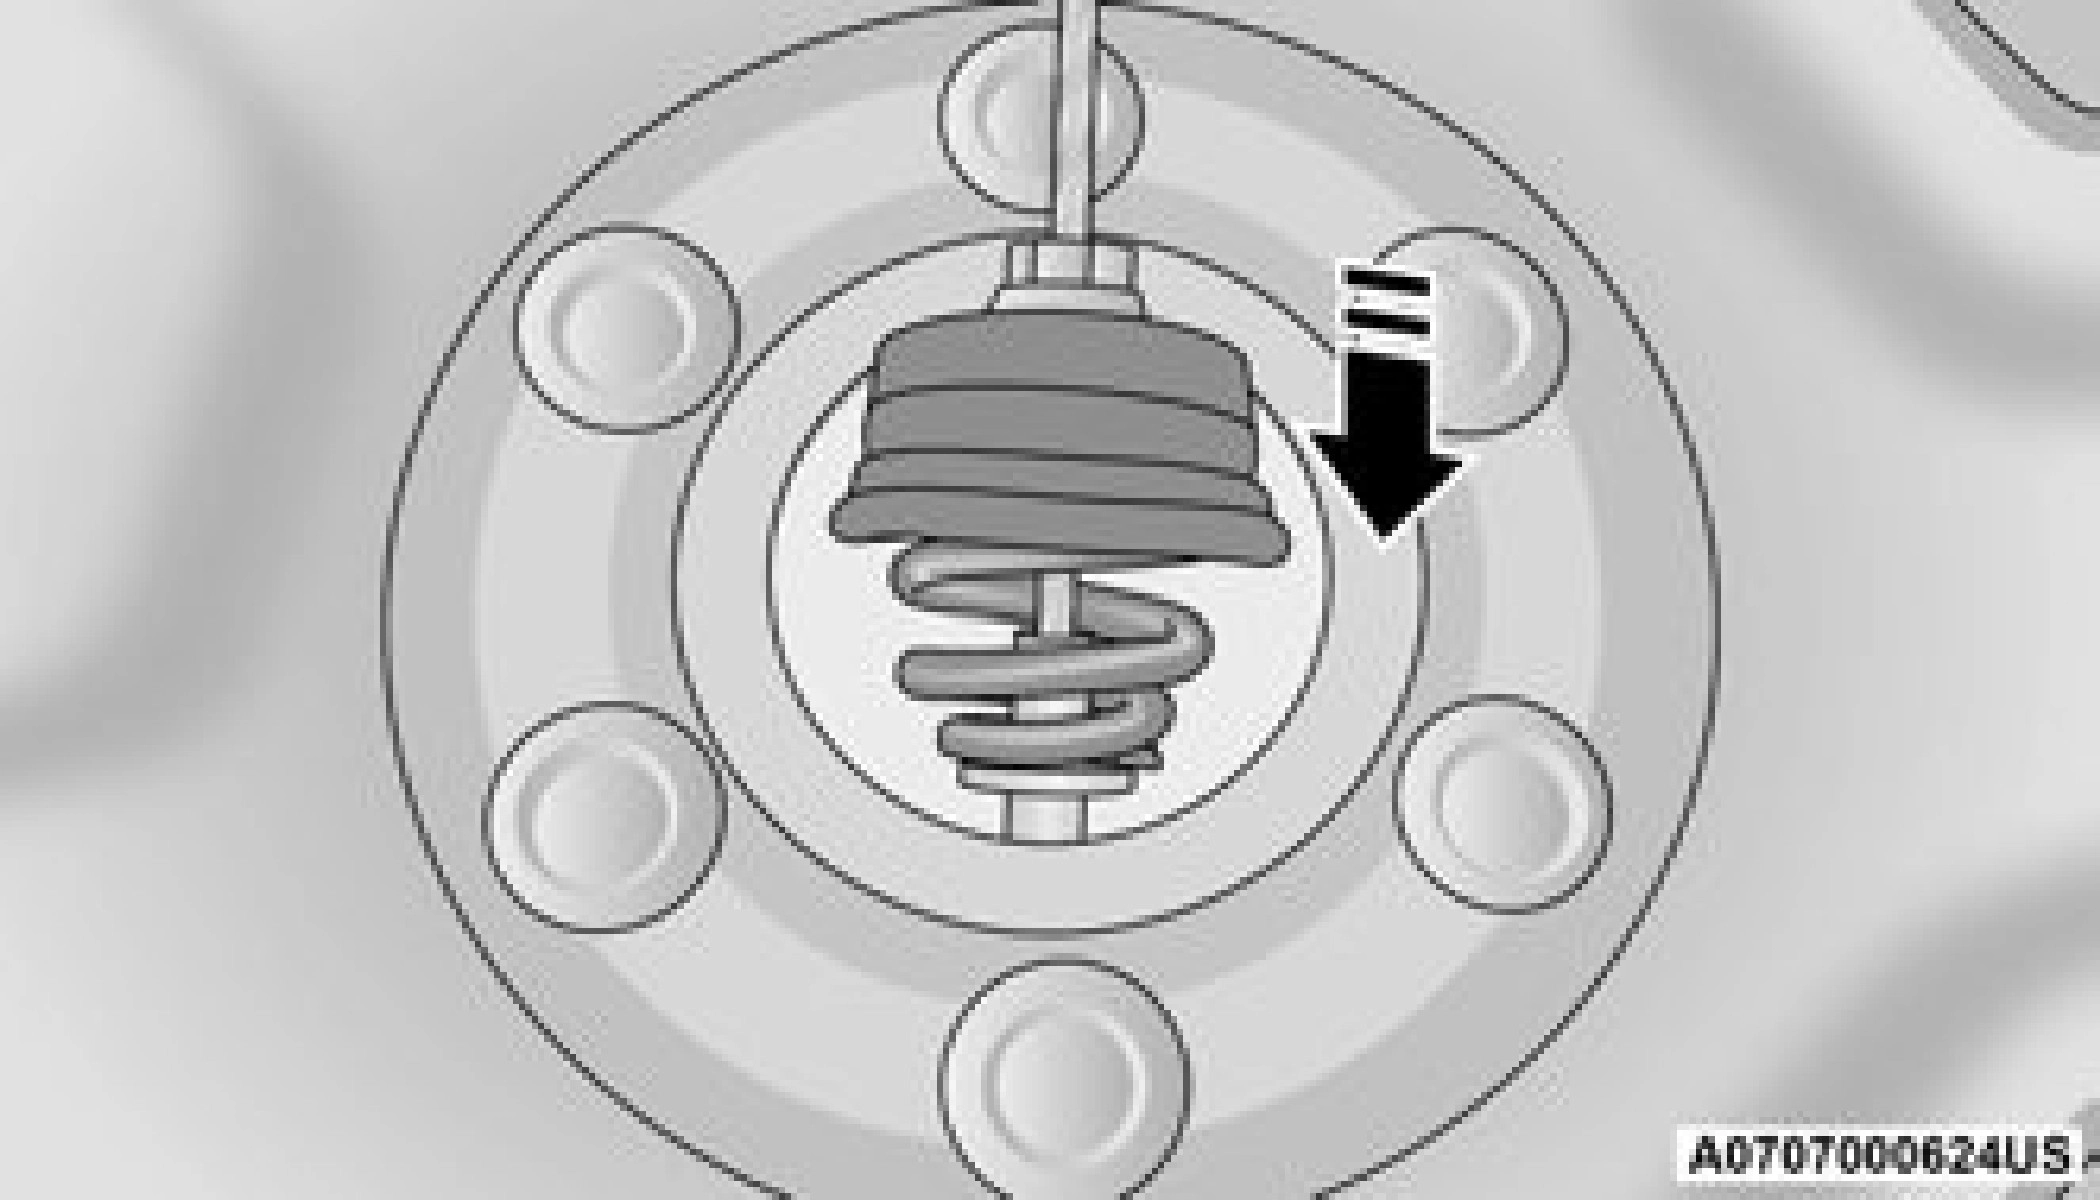
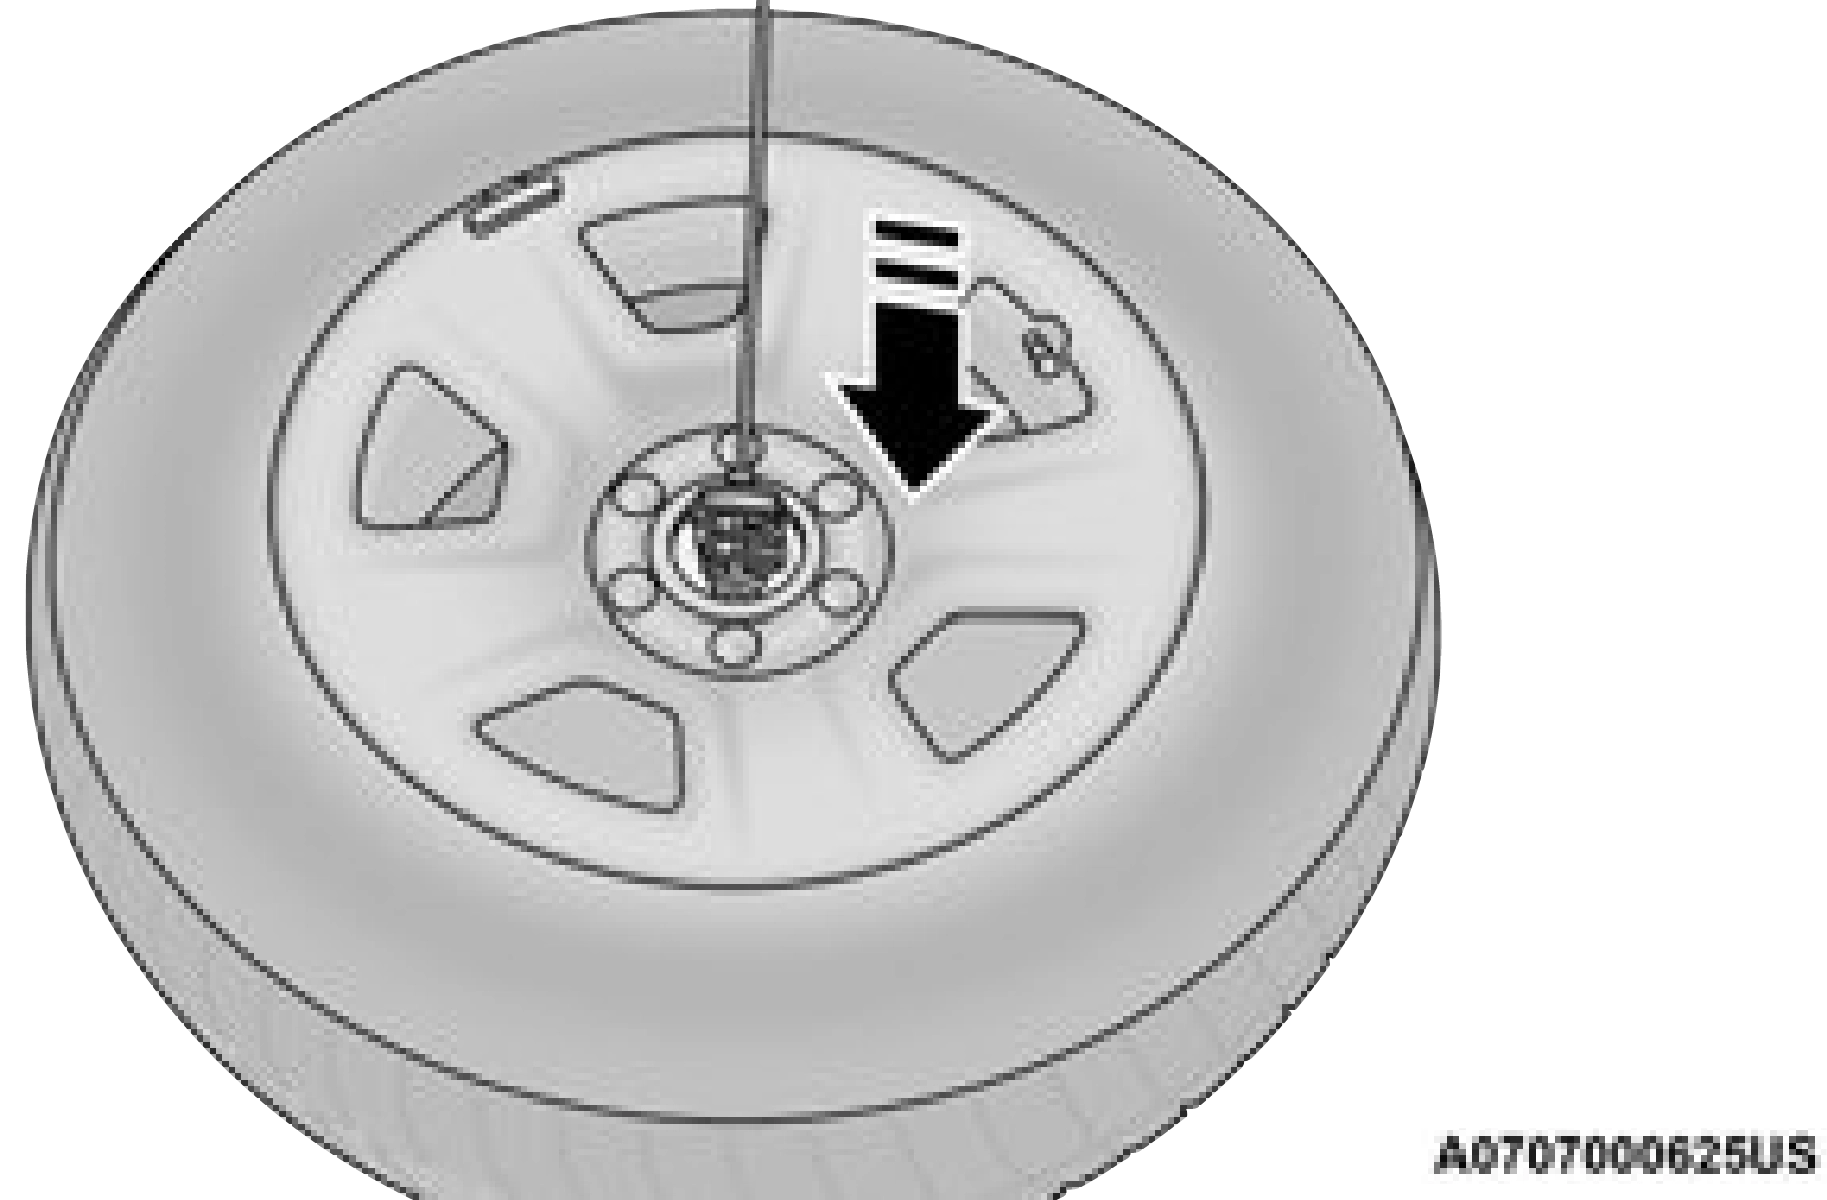
TO STOW THE FLAT OR SPARE
A loose tire or jack thrown forward in a collision or hard stop could endanger the occupants of the vehicle. Always stow the jack parts and the spare tire in the places provided. Have the deflated (flat) tire repaired or replaced immediately.
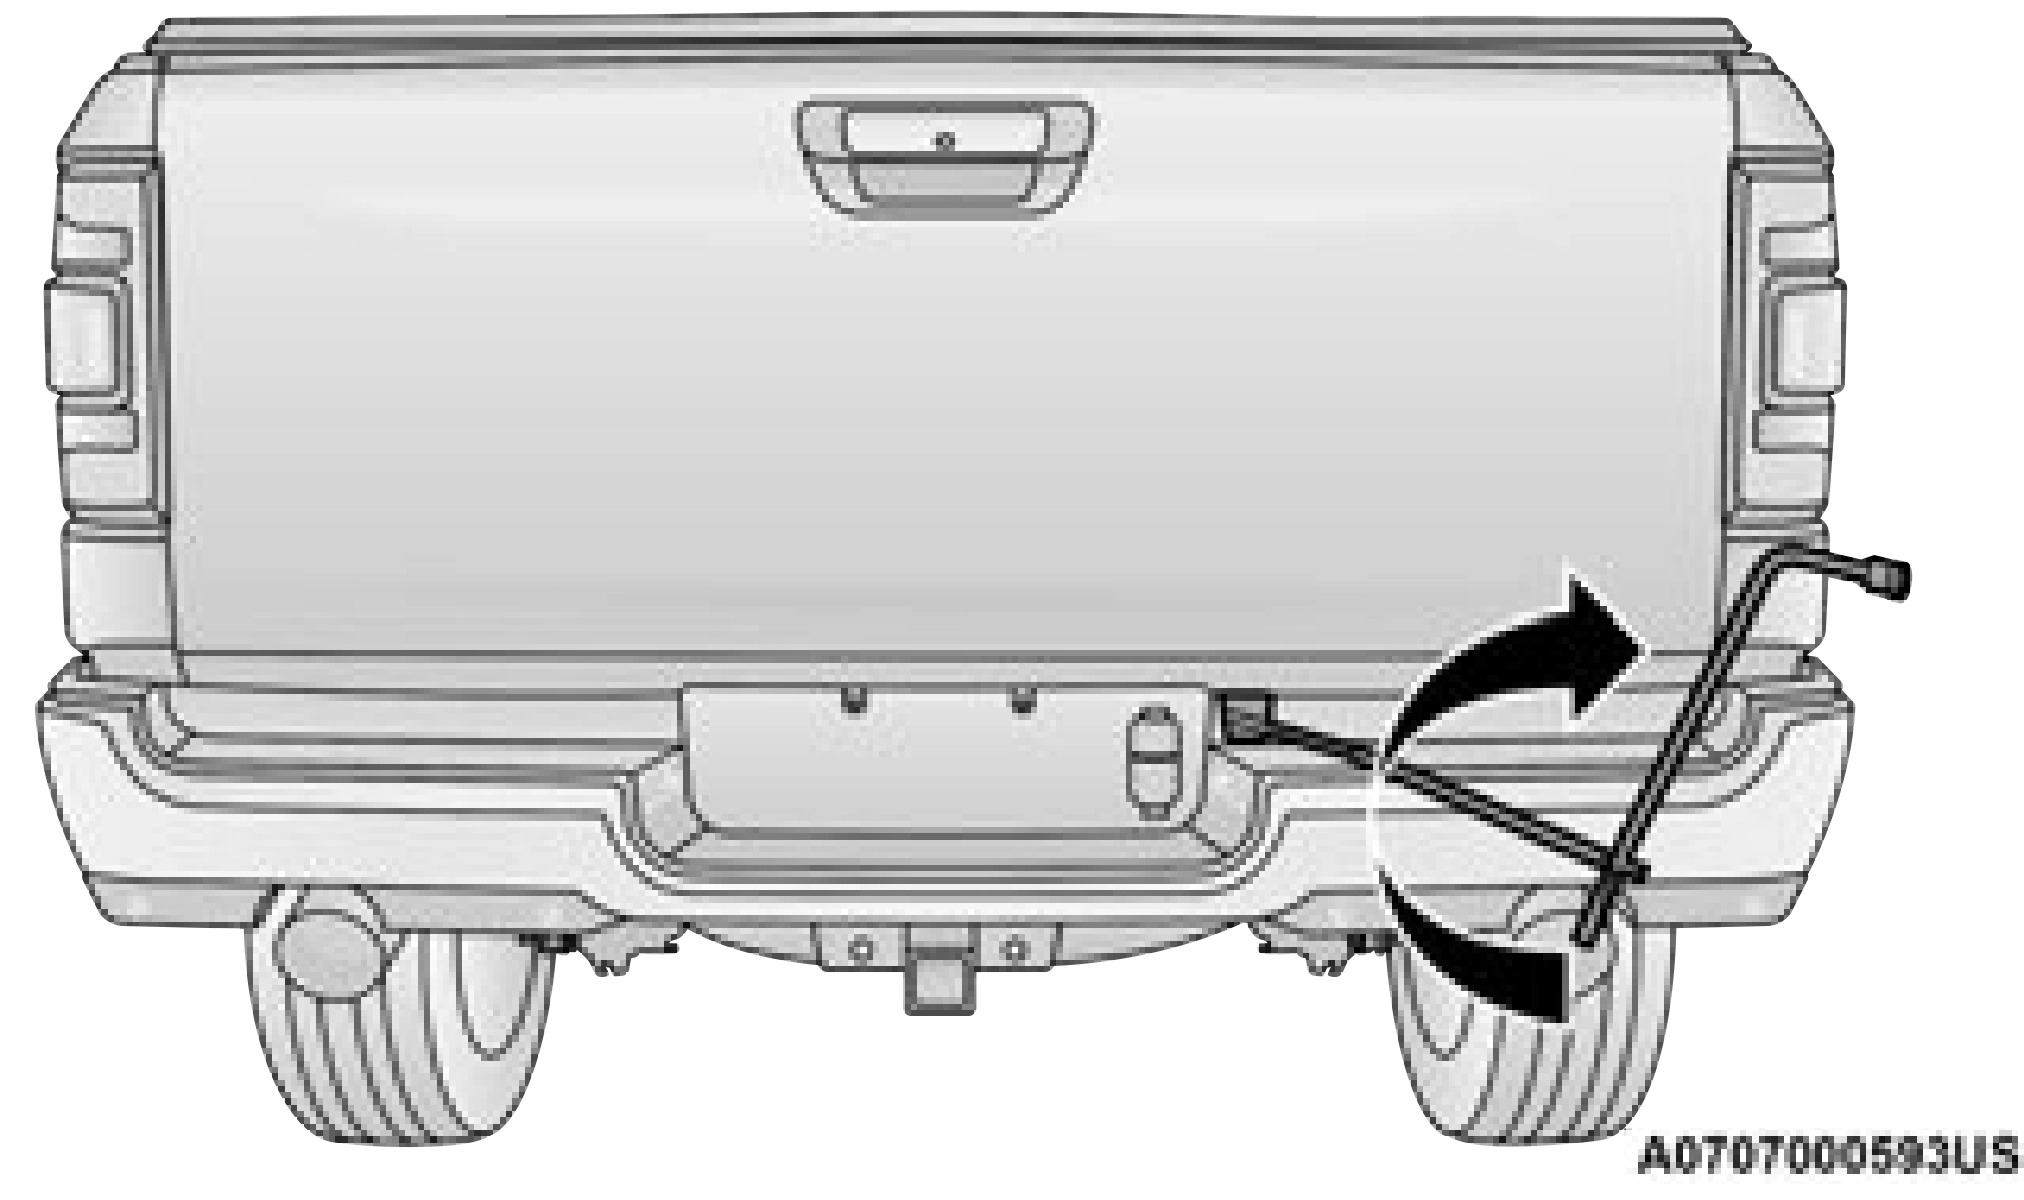
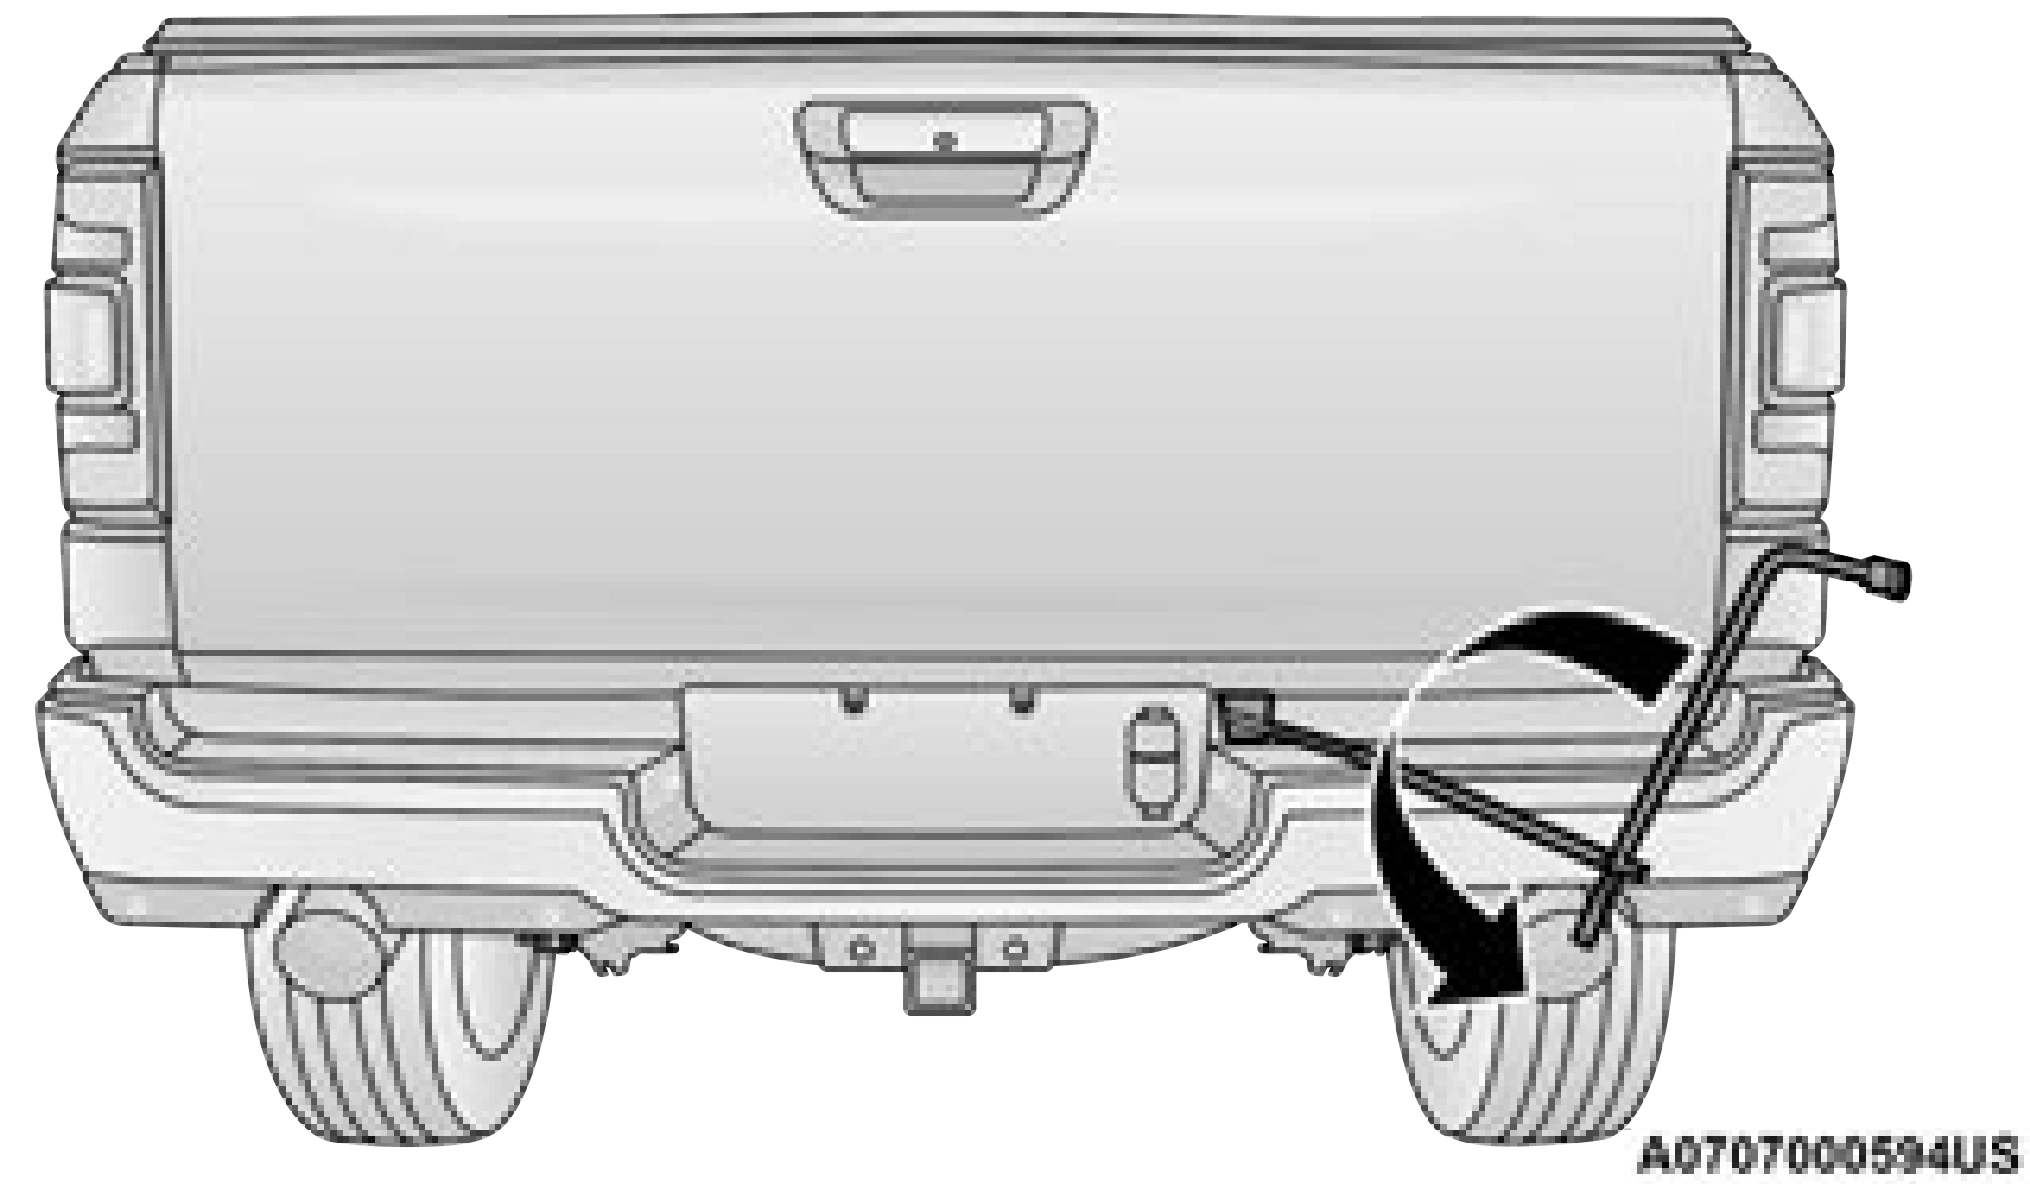
 Remove the extension with the hook and reattach the short extension 5. Attach the lug wrench to the extension tubes with the curved angle facing away from the vehicle page 378. Insert the extension tubes through the access hole between the lower tailgate and the top of the fascia/bumper and into the winch mechanism tube.
Rotating The Lug Wrench Handle
Jack And Tool Bag
The winch mechanism is designed for use with the extension tube only. Use of an air wrench or other power tools is not recommended and can damage the winch.
REINSTALLING THE JACK AND TOOLS
7
turn-screw, slip the jack and tools under the seat so that the bottom slot engages into the fastener on the floor.
Ensure that the jack slides into the front hold down location.
 Turn the wing bolt clockwise to secure to the floor pan. Reinstall the plastic cover.
Download Manual