INTERIOR STORAGE AND EQUIPMENT
STORAGE
The glove compartment is located on the passenger side of the instrument panel and features both an upper and lower storage area.
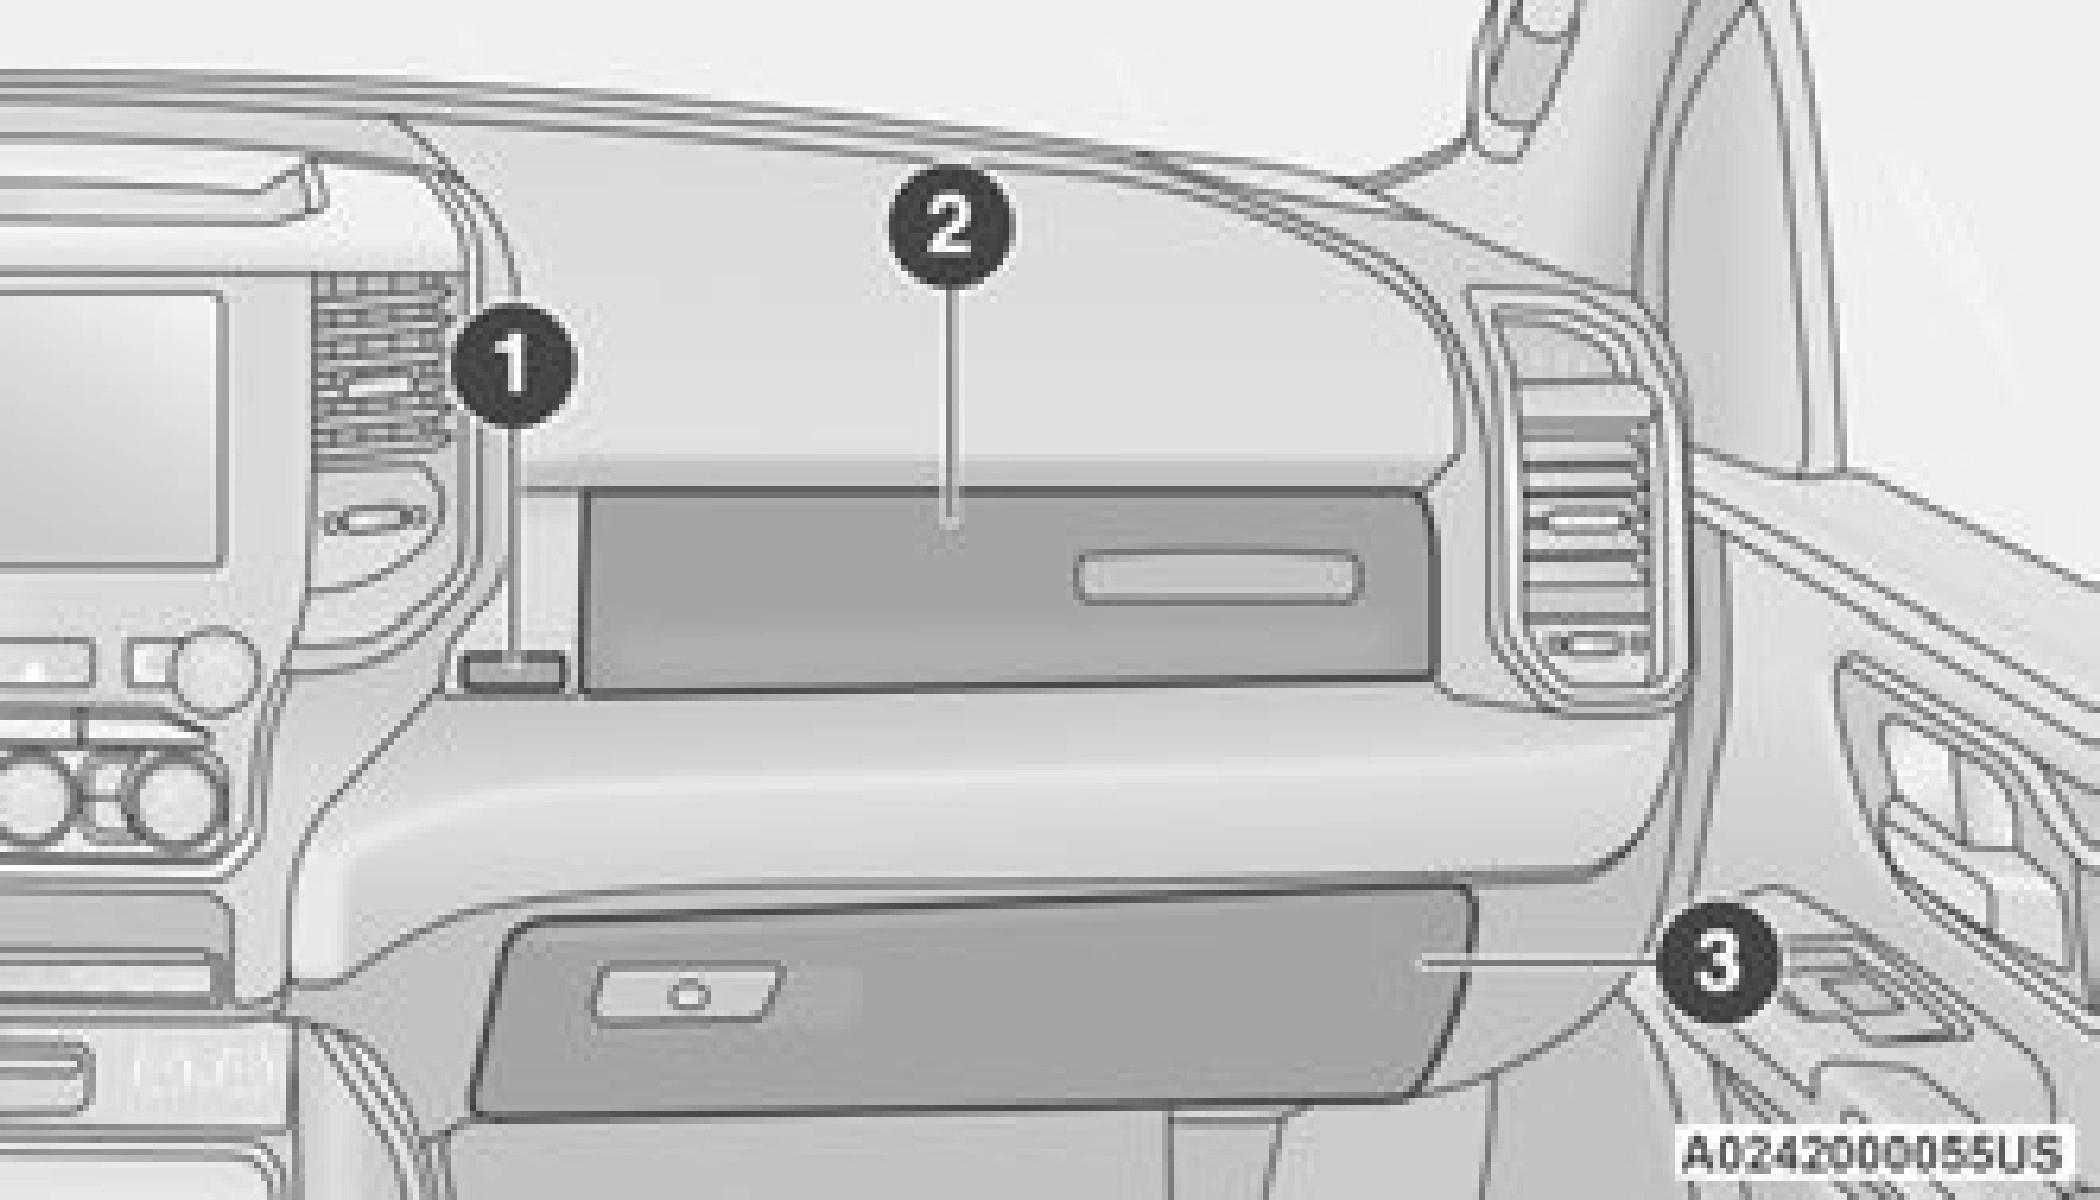
If equipped with a covered upper glove compartment, push the release button to open.
To open the lower glove compartment, pull the release handle.
Storage areas are located in the door trim panels.
Storage compartments are located in both the driver and passenger rear door trim panels.
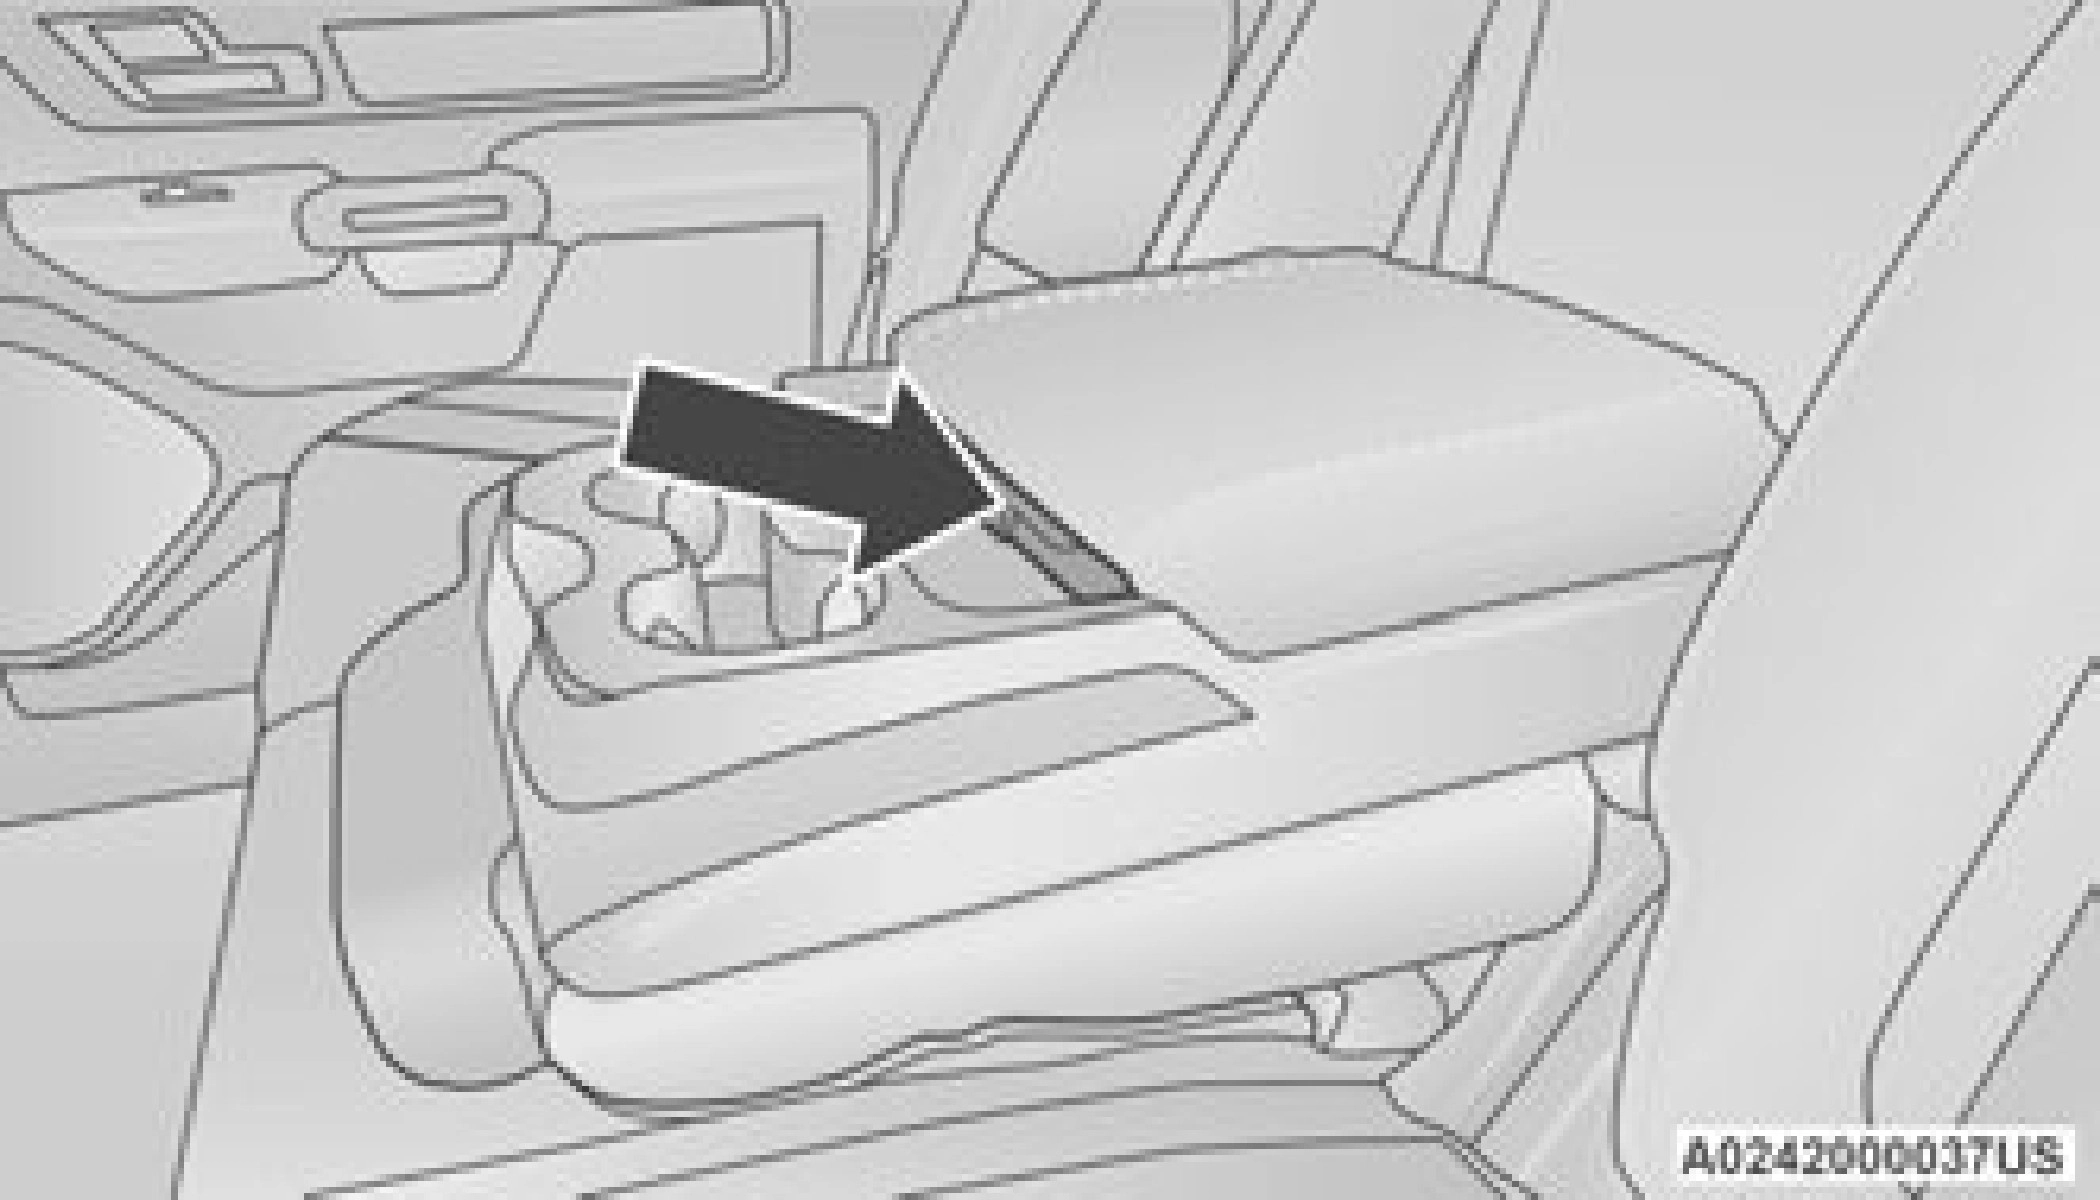
The center storage compartment is located between the driver and passenger seats. The storage compartment provides an armrest and contains both an upper and lower storage area.
Pull on the upper handle on the front of the armrest to raise the cover. The upper storage area contains a USB power outlet that can be used to power small electrical devices.
1 — Upper Console Handle 2 — Lower Console Handle
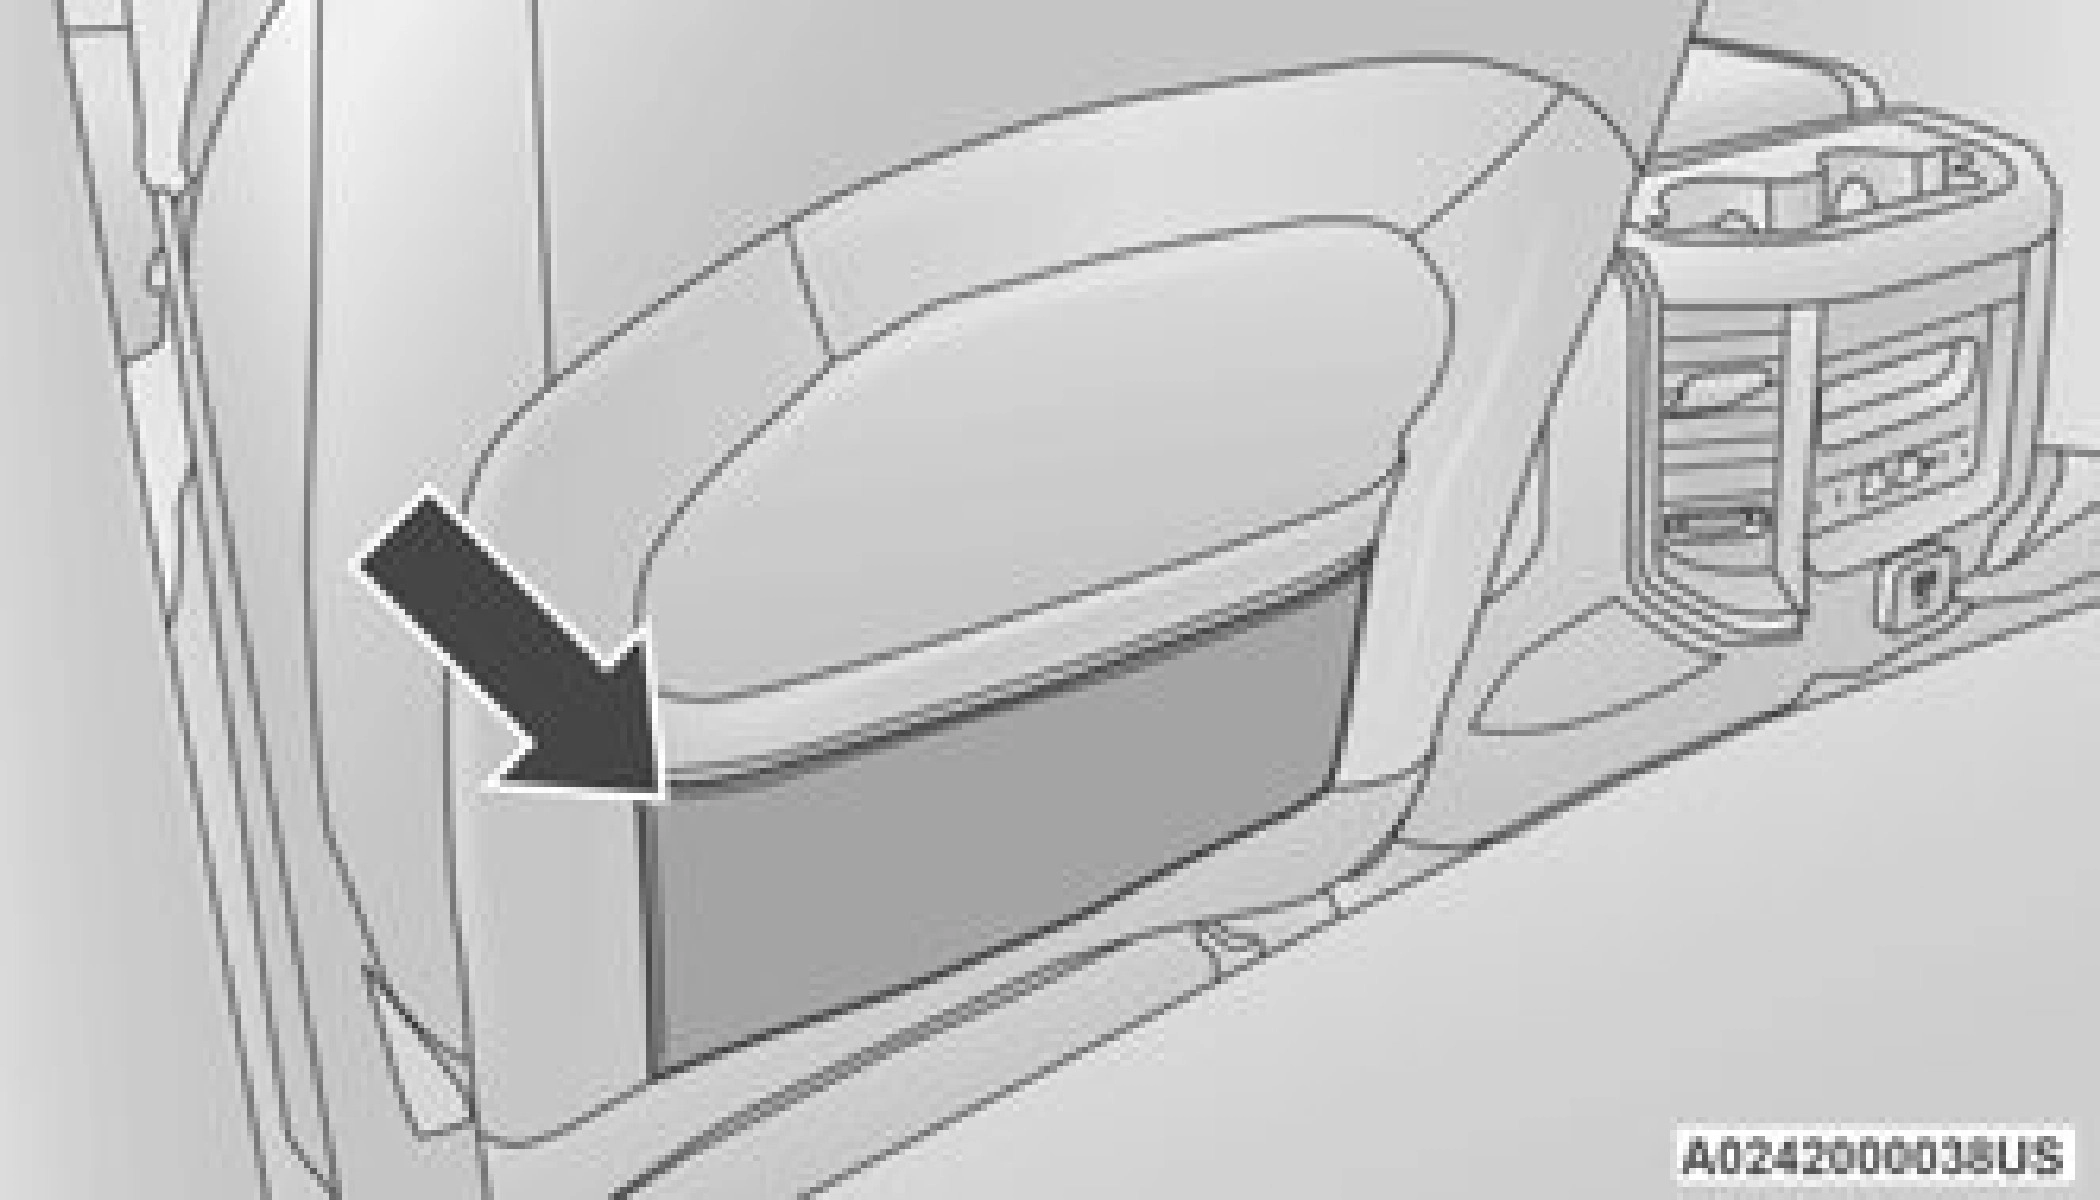
With the upper lid closed, pull on the lower handle to open the lower storage bin. The lower bin contains a power inverter. There is also a “fill line” located along the rear inside wall of the lower bin. Contents above the “fill line” may interfere with cupholder placement if equipped with a premium center console.
1 — Wireless Charging Pad 2 — Power Inverter
3 — Storage Area
The premium center console is equipped with two front storage bins located in front of the center storage compartment. These storage
bins may be equipped with tandem doors. Push 2
the front bin to access the cupholders, or push
the rear bin to access the coin holder/small storage bin.
1 — Push Front Bin Access 2 — Push Rear Bin Access
1 — Front Bin Open 2 — Rear Bin Open
Push the release button at the front of the cupholder bin to slide tray rearward to access the front lower storage bin, or forward to access the rear lower storage bin.
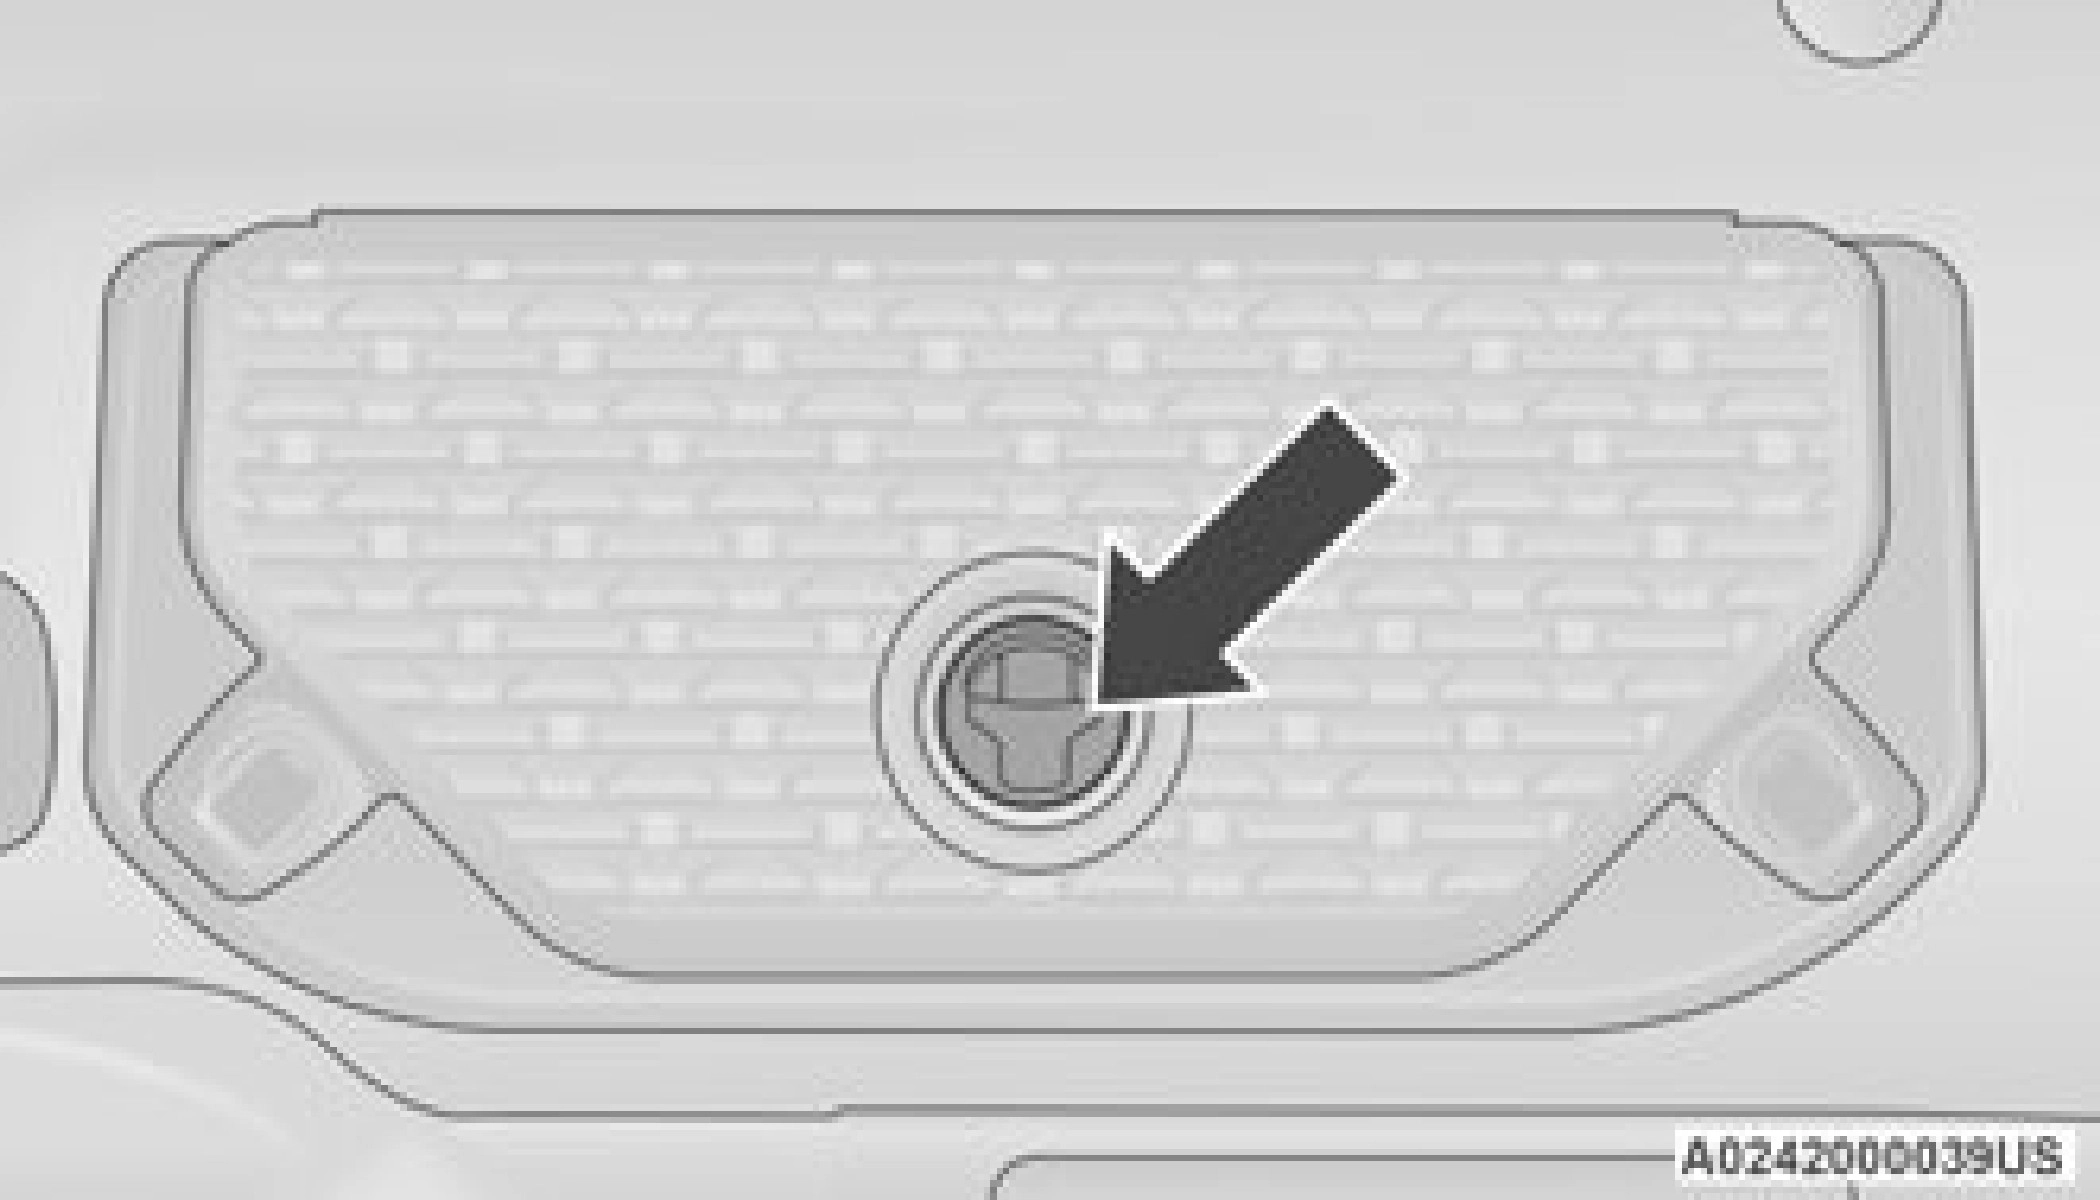
Overhead Sunglass Storage
At the front of the overhead console, a compartment is provided for the storage of one pair of sunglasses.
From the closed position, push the door latch to open the compartment.
Front Bench Seat Storage — If Equipped
If your vehicle is equipped with a front bench seat, storage can be found by folding down the center seat back. A console storage area and cupholders are available.
With the seatback in the upright position, lift the center seat bottom to access additional storage underneath the seat.
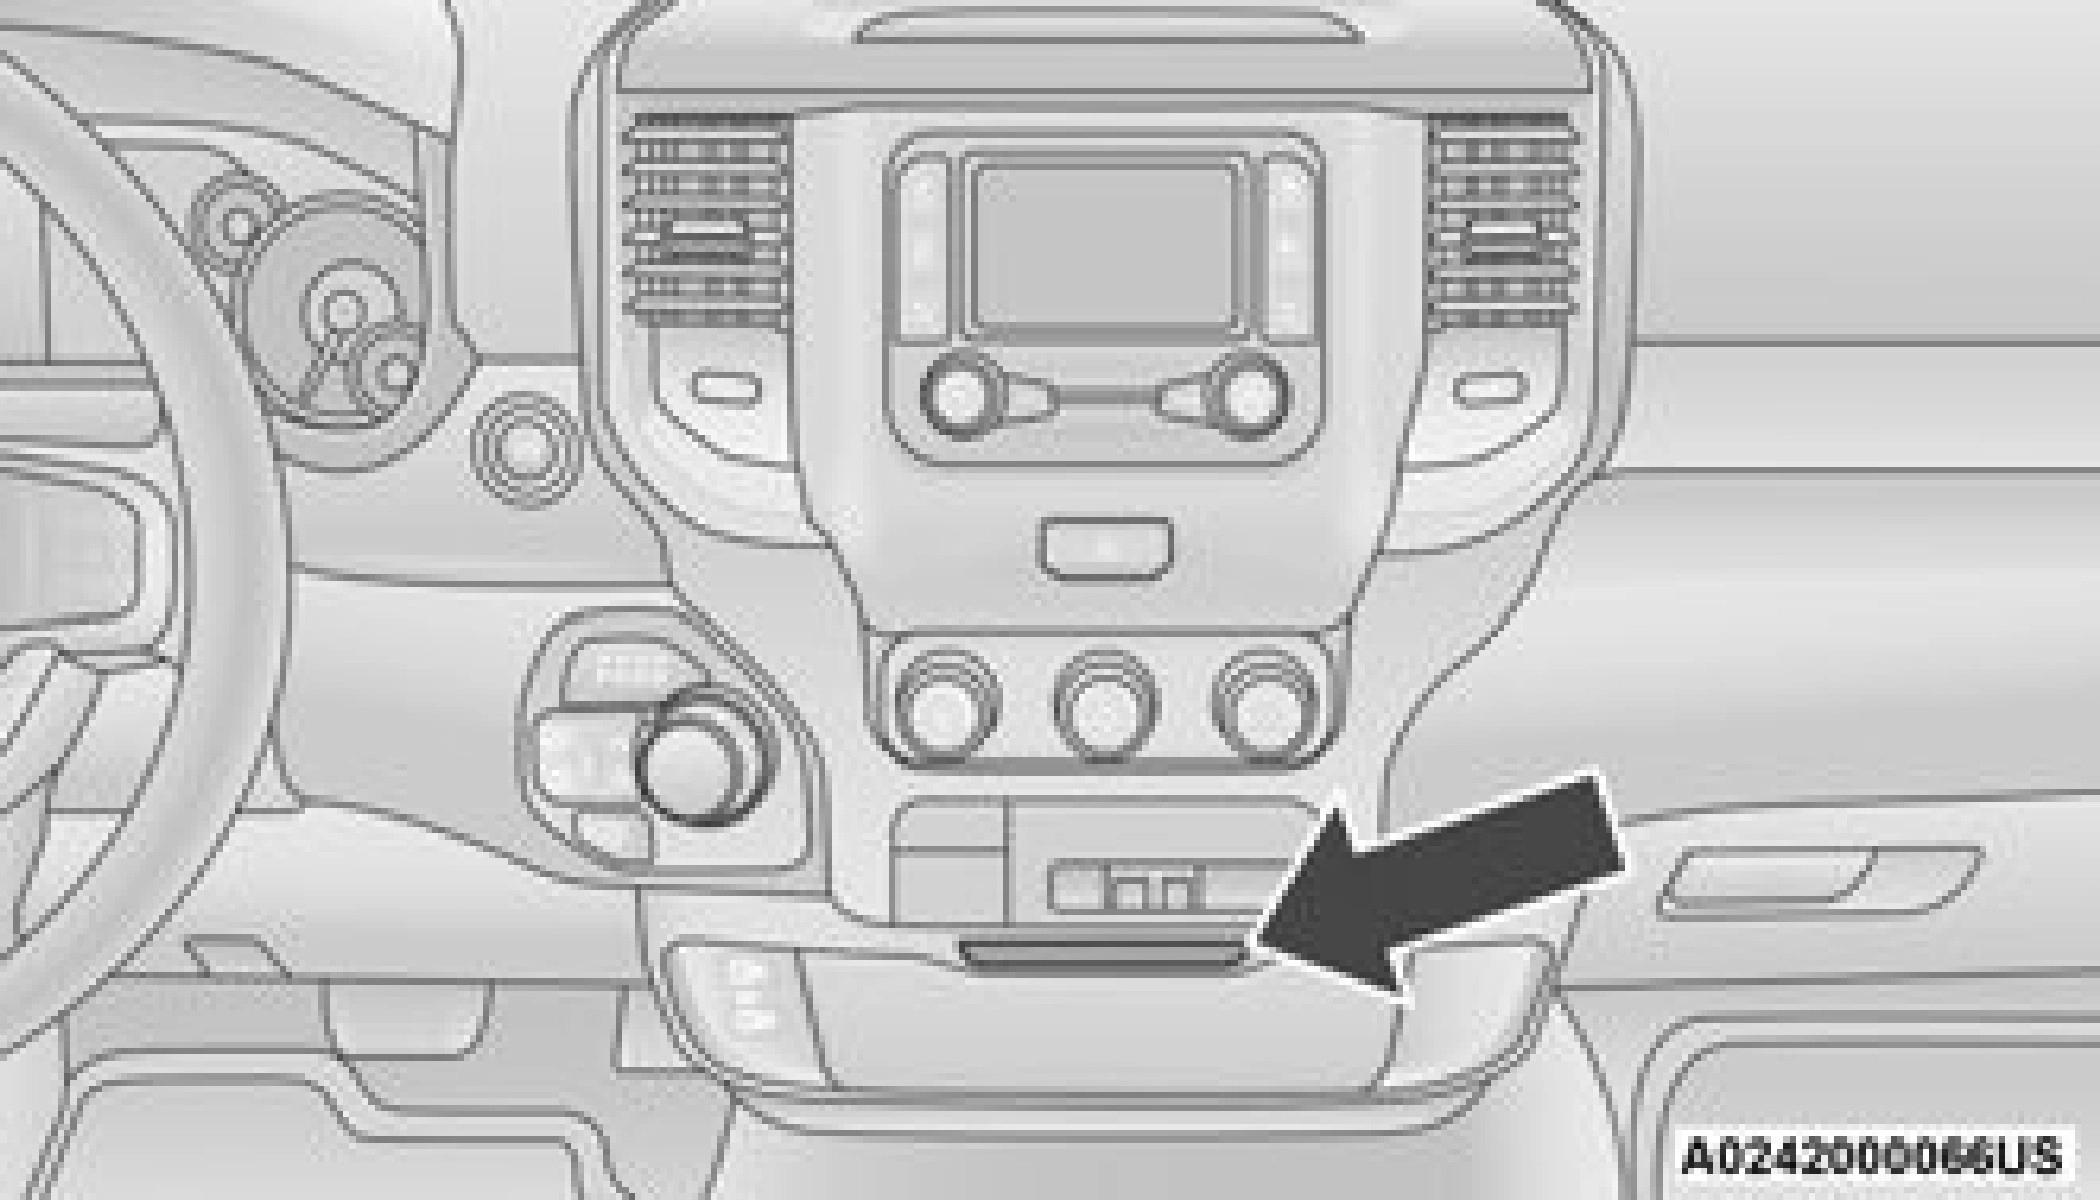
There is a storage drawer located in the lower center of the instrument panel. It can be released by pushing the access button above it. Pull drawer outward to the fully open position.
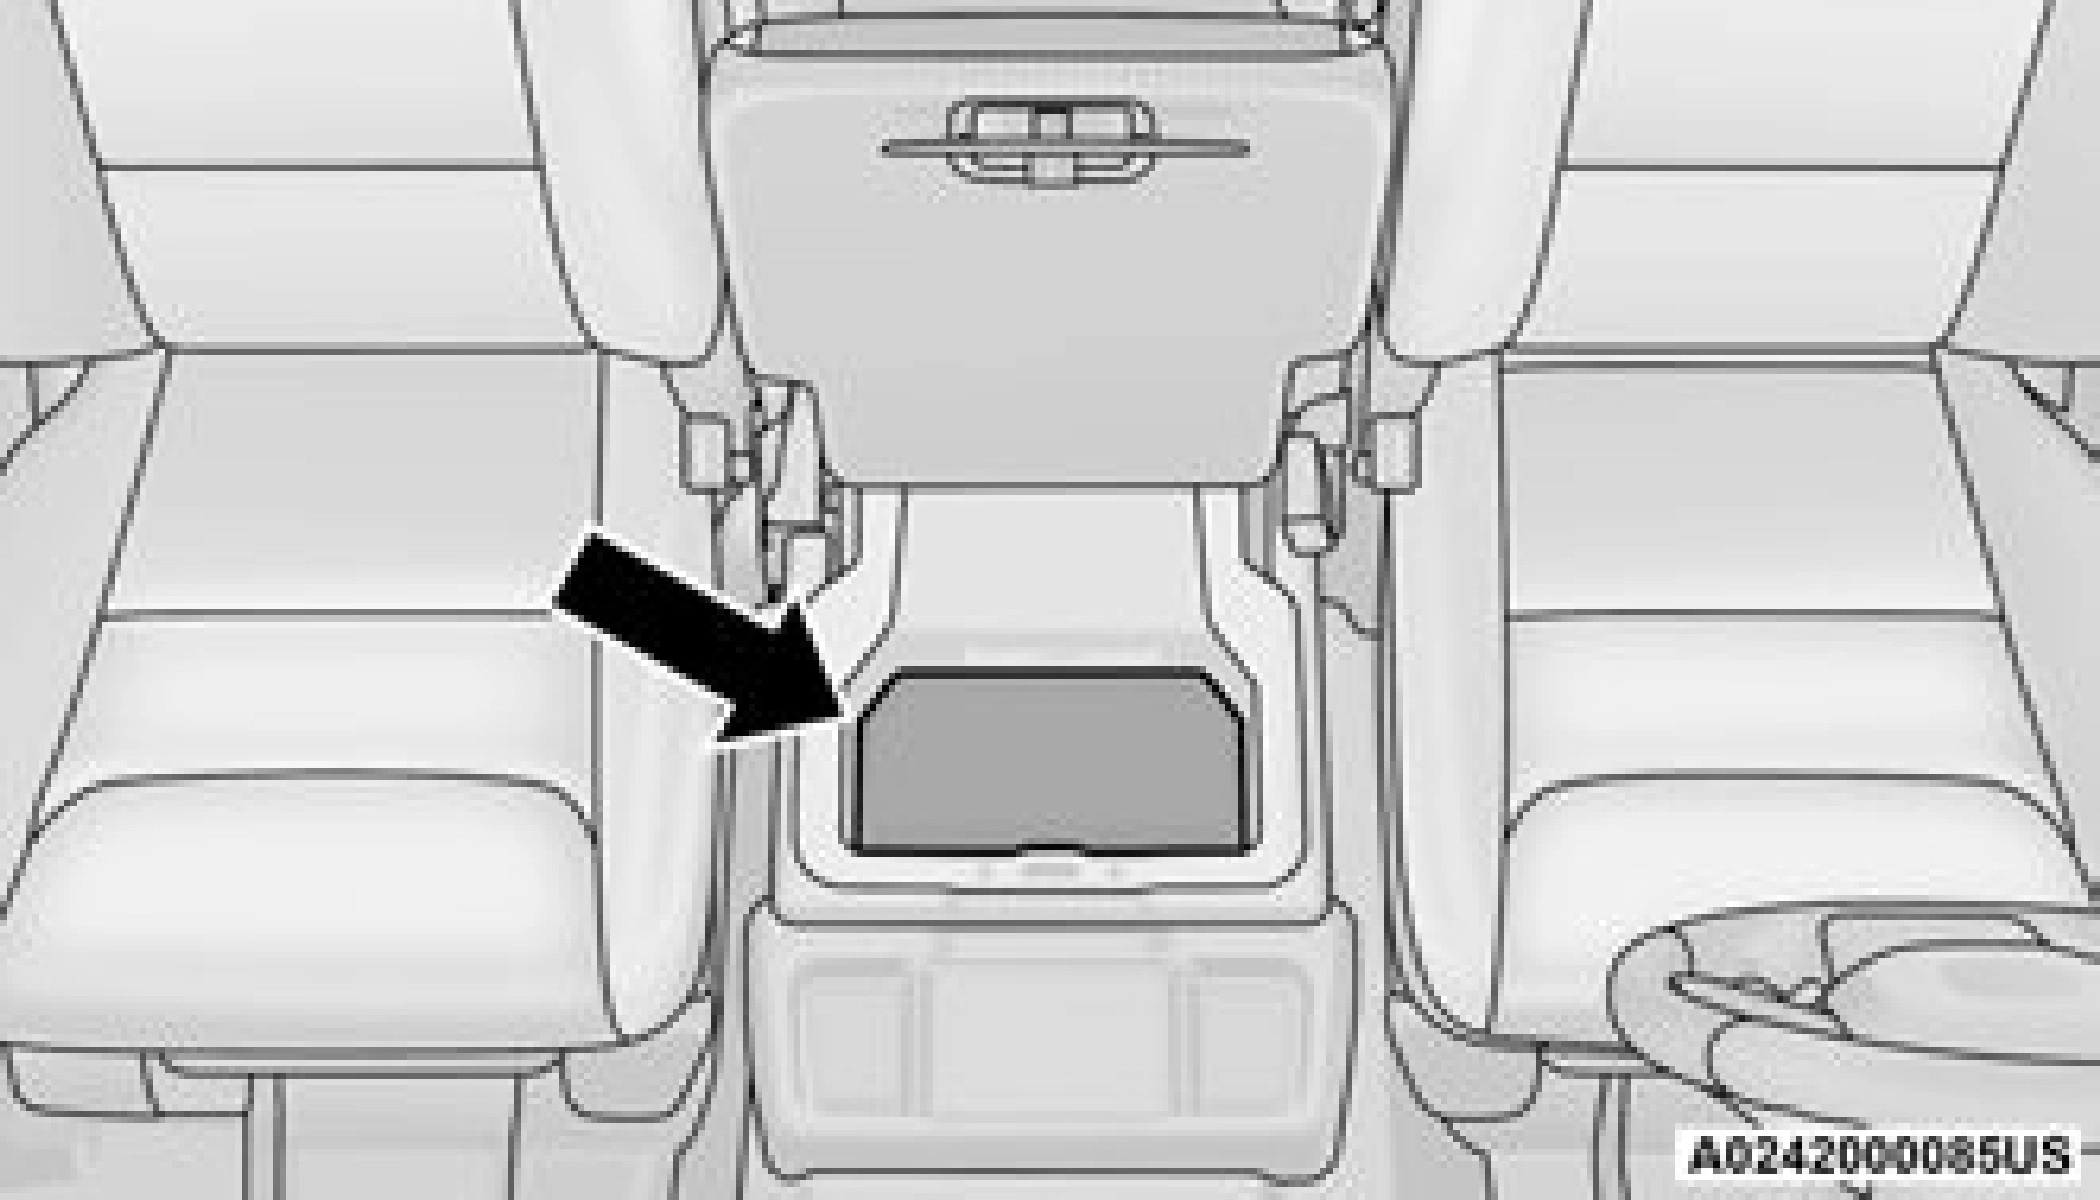
Rear Console Storage — If Equipped
The center portion of the 40/20/40 rear seat will fold forward for rear seat cupholders and a storage compartment. Lift up on the console latch to access the storage compartment.
Seatback Storage
Located in the back of both the driver and passenger front seats are pockets that can be used for storage.
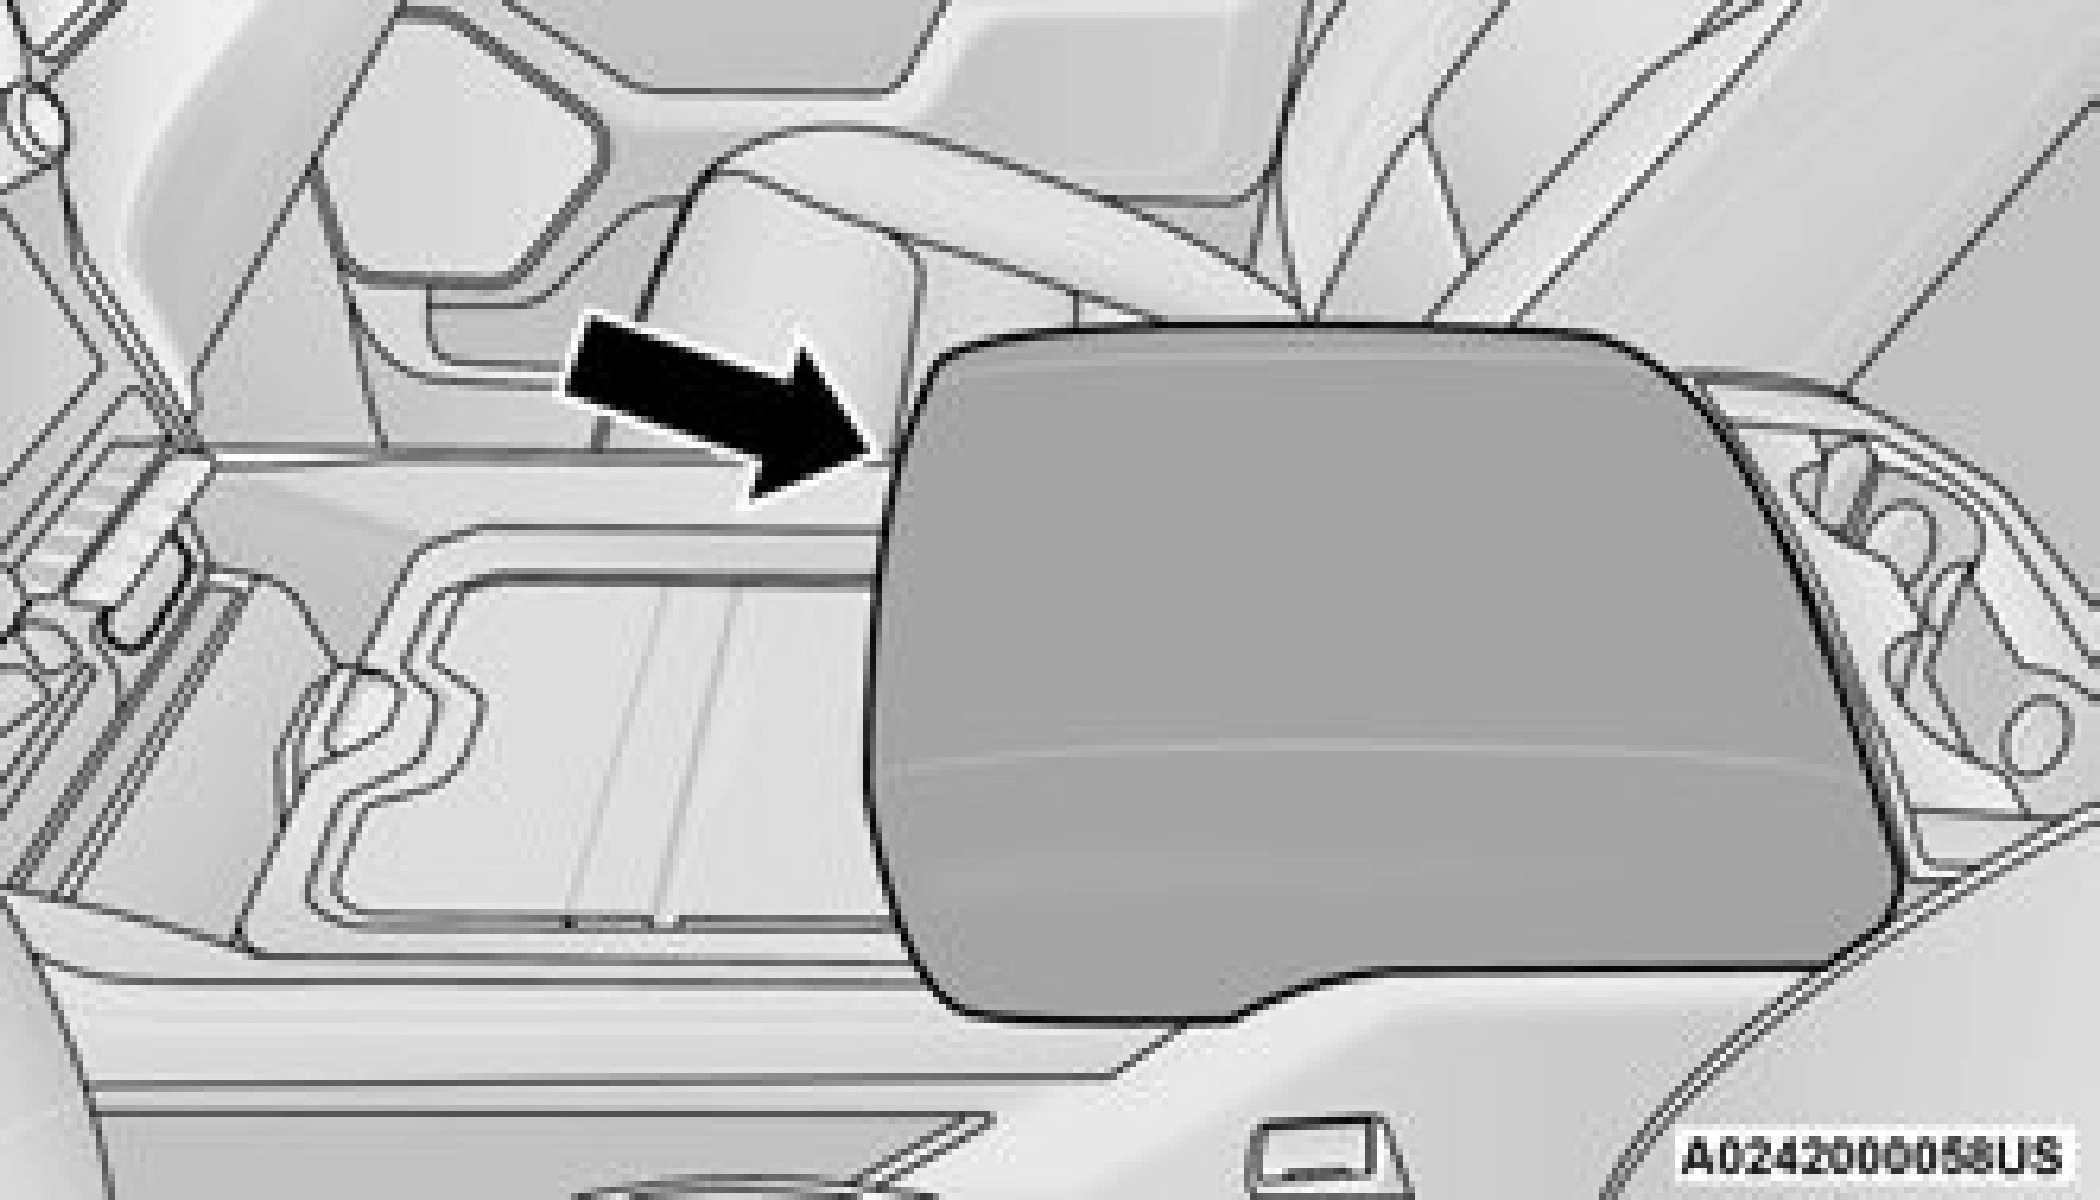
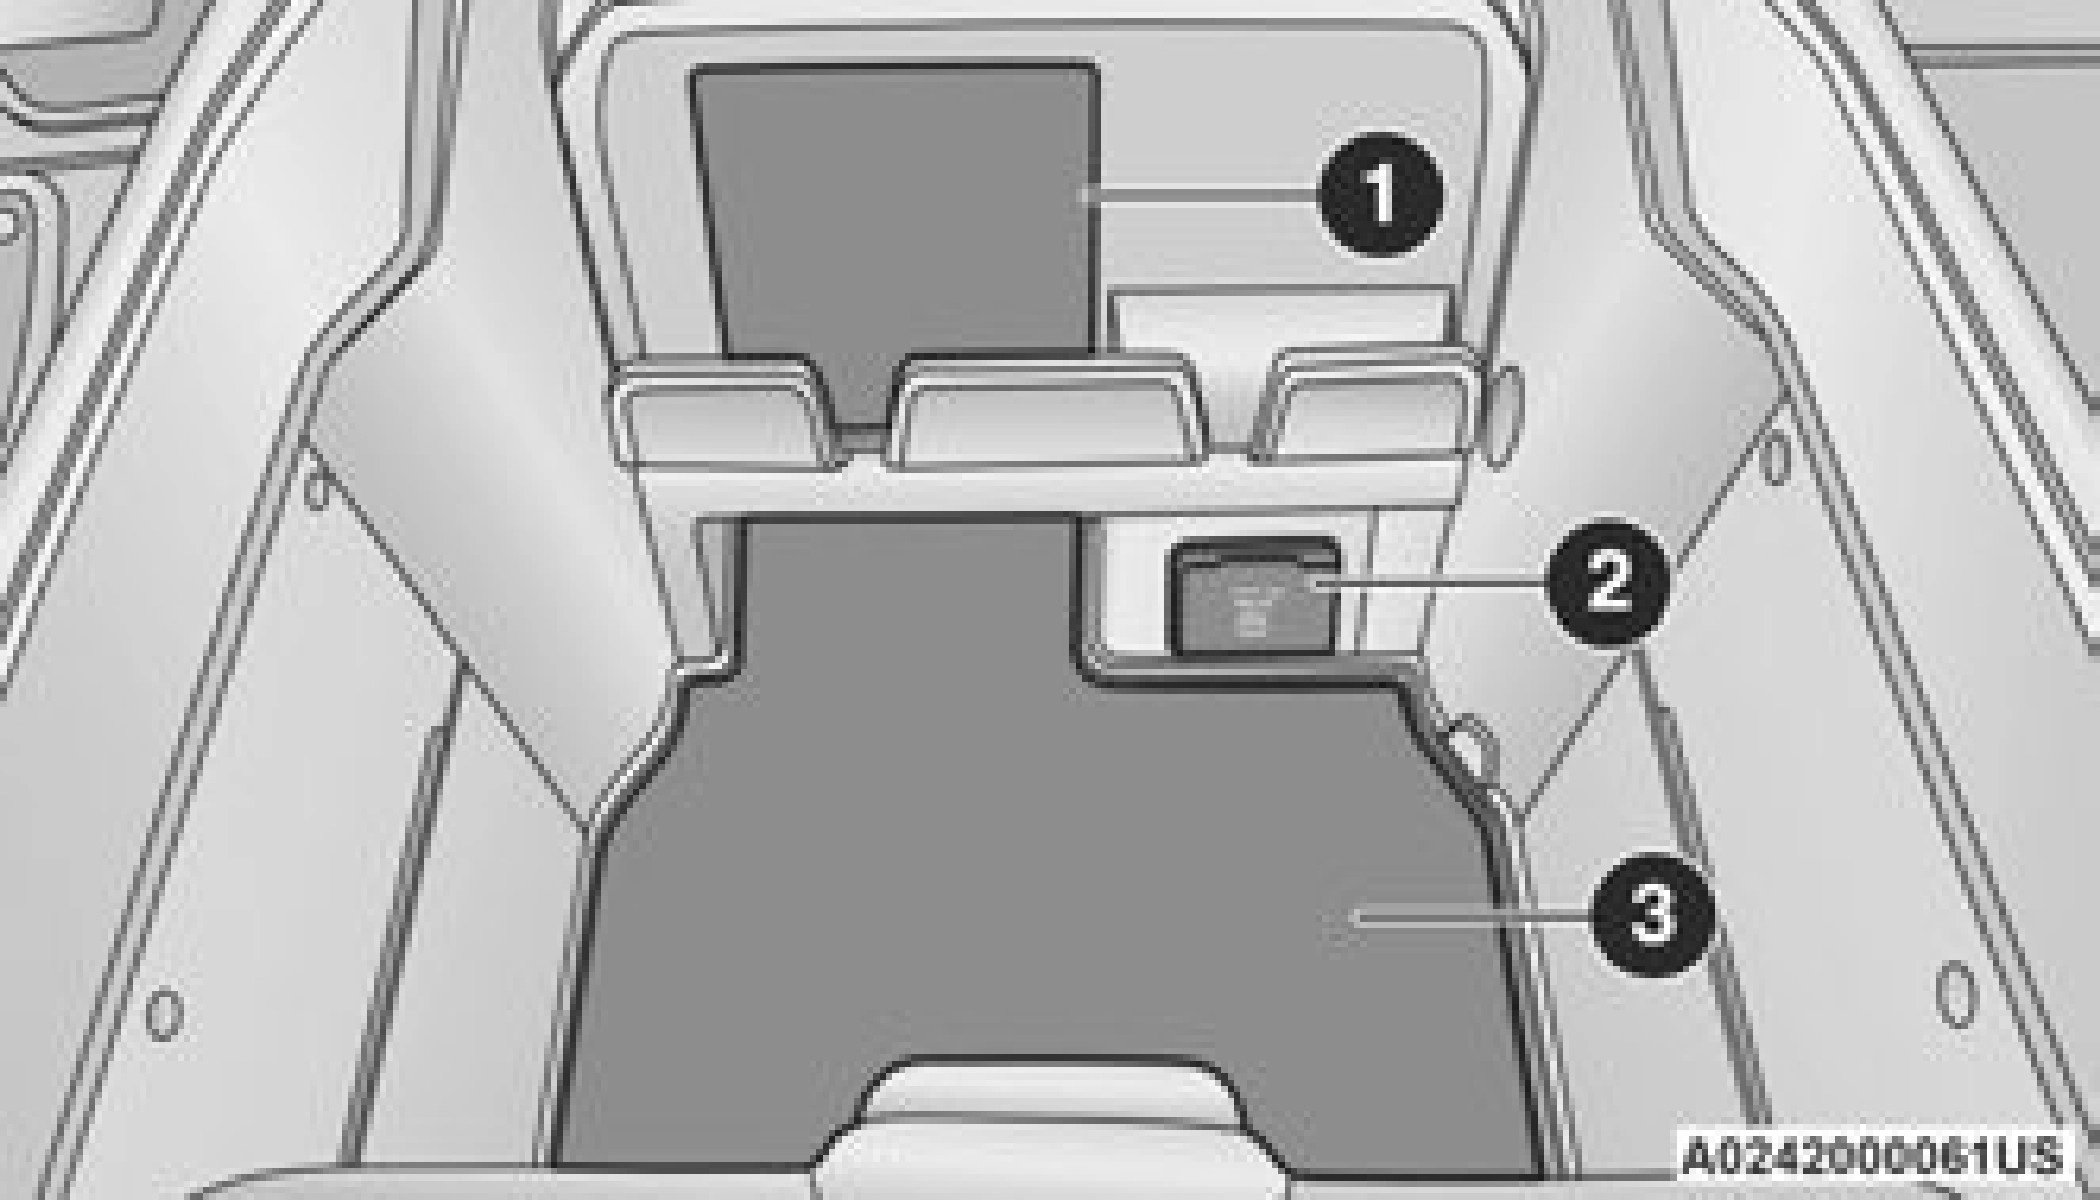
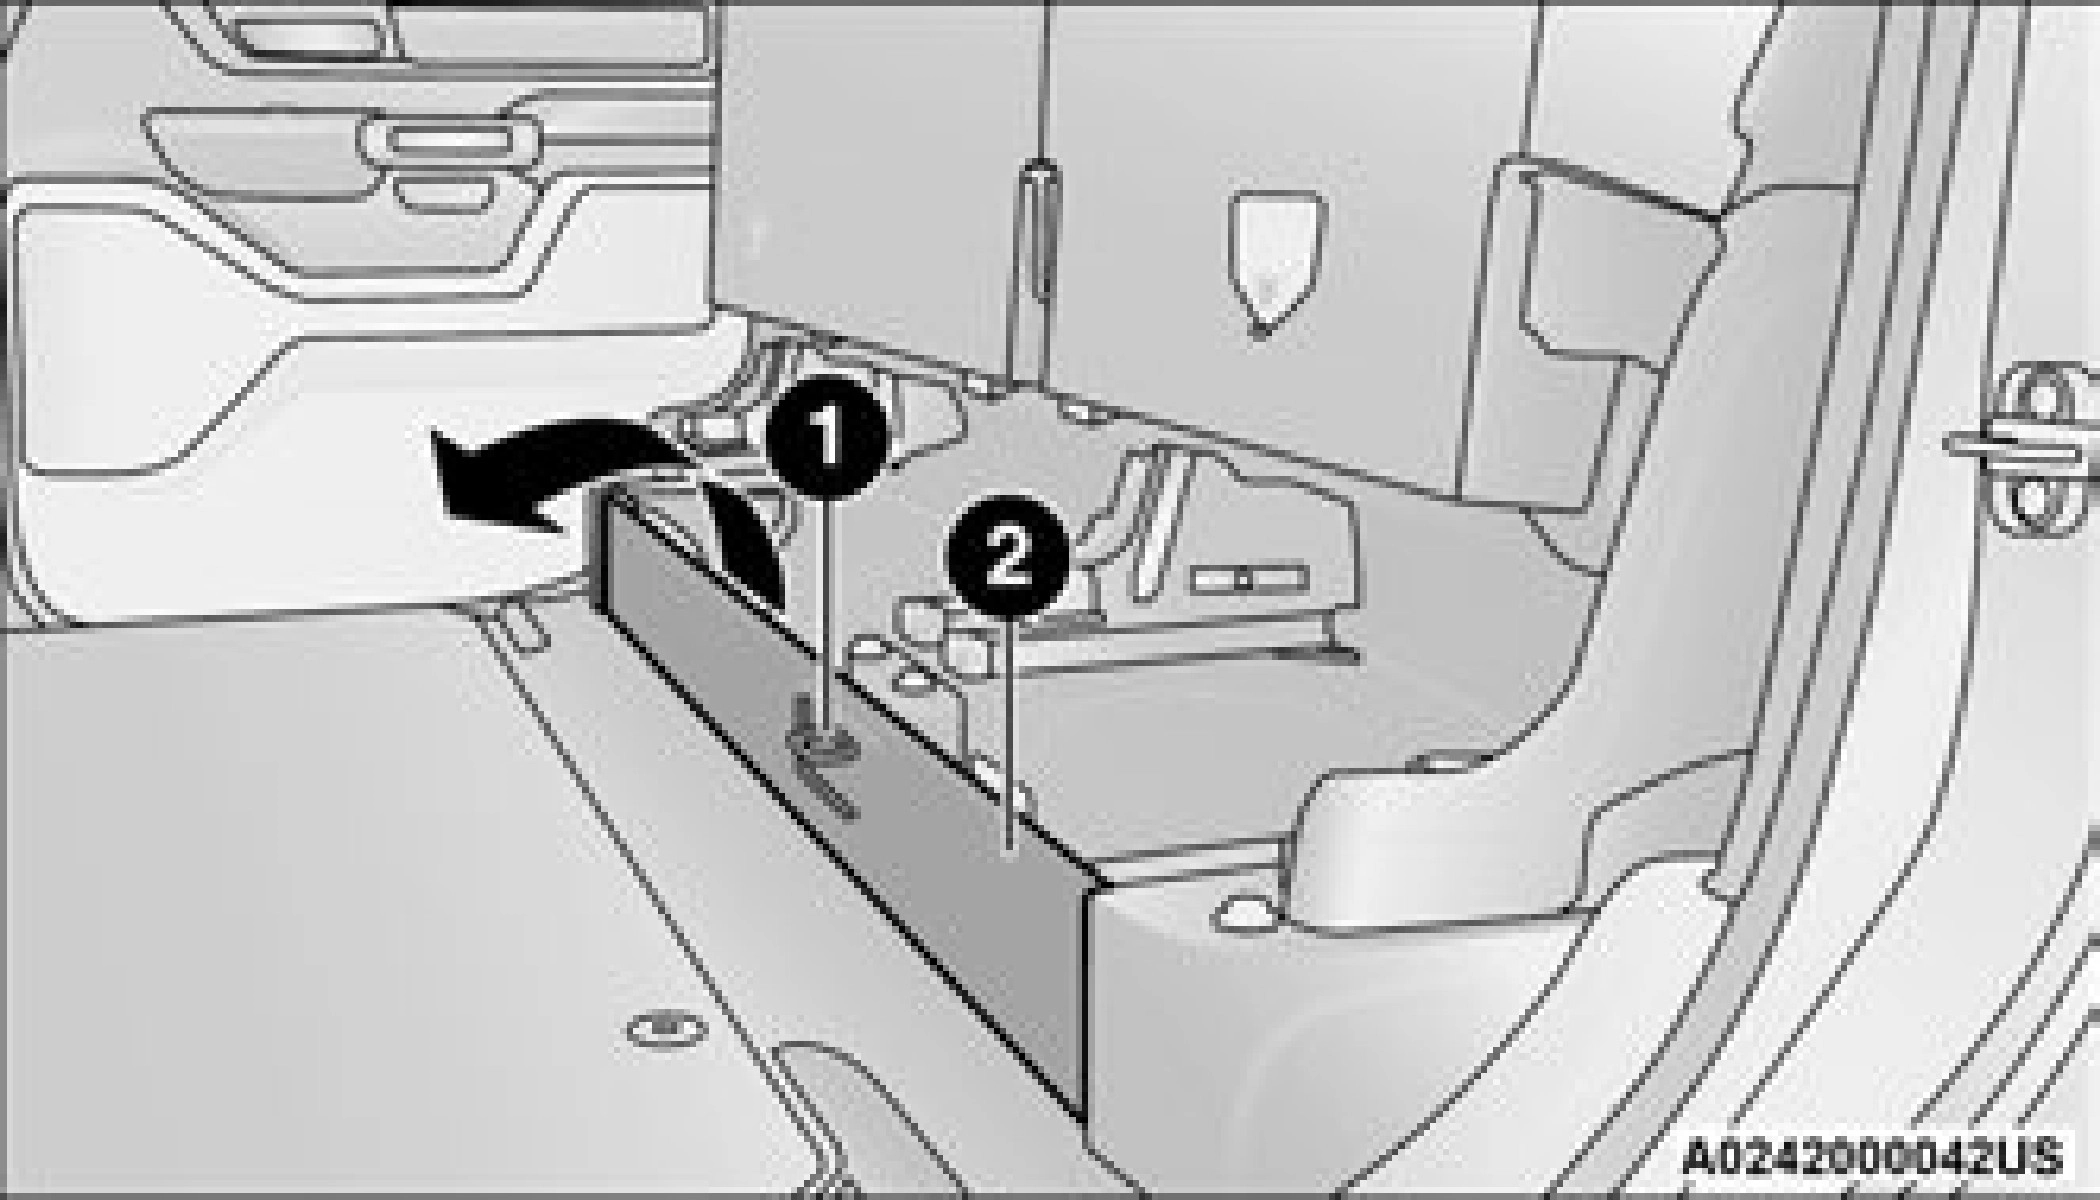
Second Row In-Floor Storage Bin — If Equipped
In-floor storage bins are located in front of the second row seats and can be used for extra
storage. The storage bins have removable liners 2
that can be easily removed for cleaning.
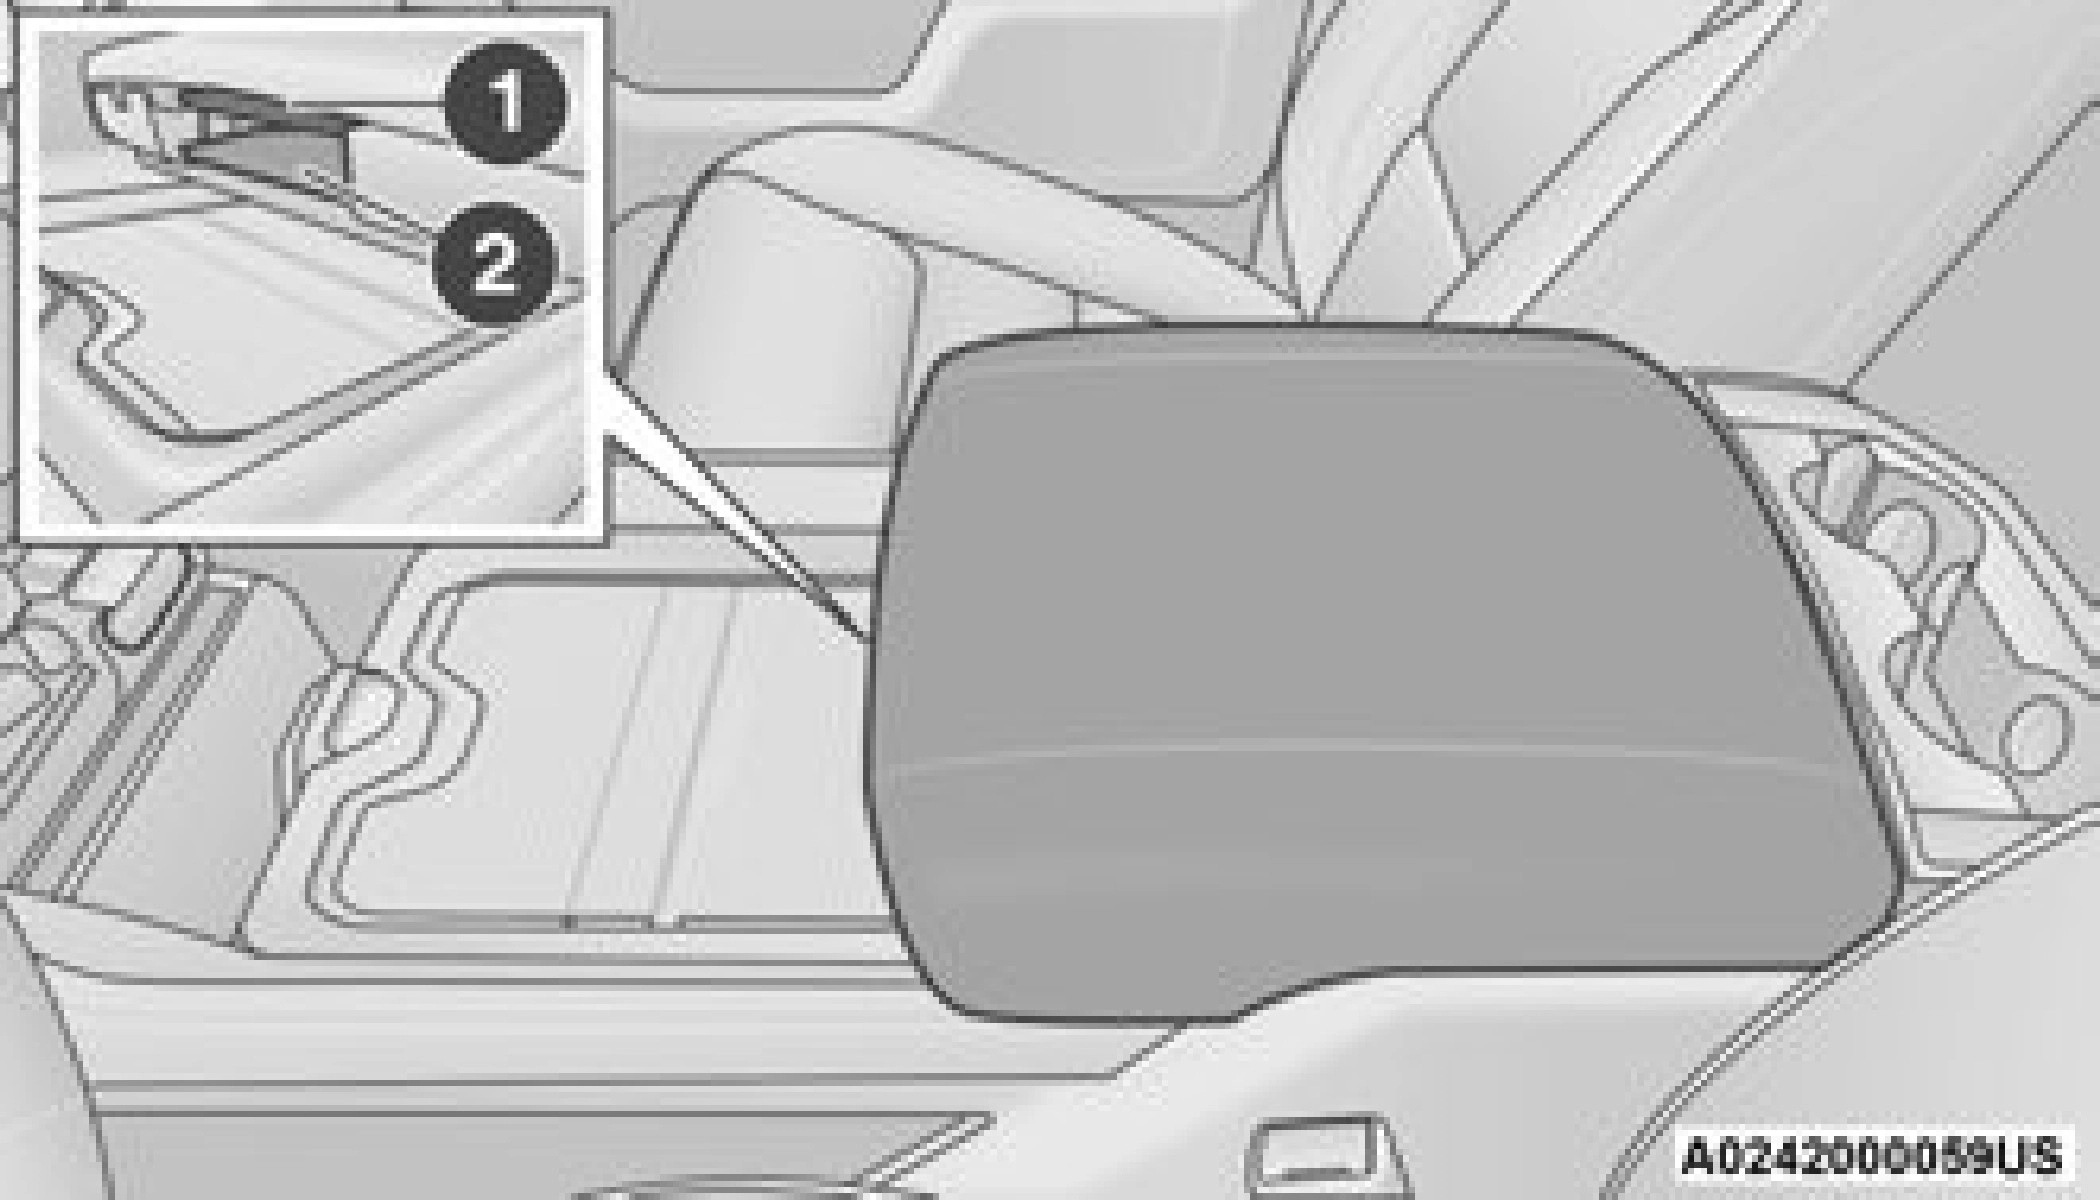
To open the in-floor storage bin, lift upward on the handle of the latch and open the lid.
NOTE:
 The front seat may have to be moved forward to fully open the lid.
The maximum load limit for each hook is 250 lbs (113 kg).
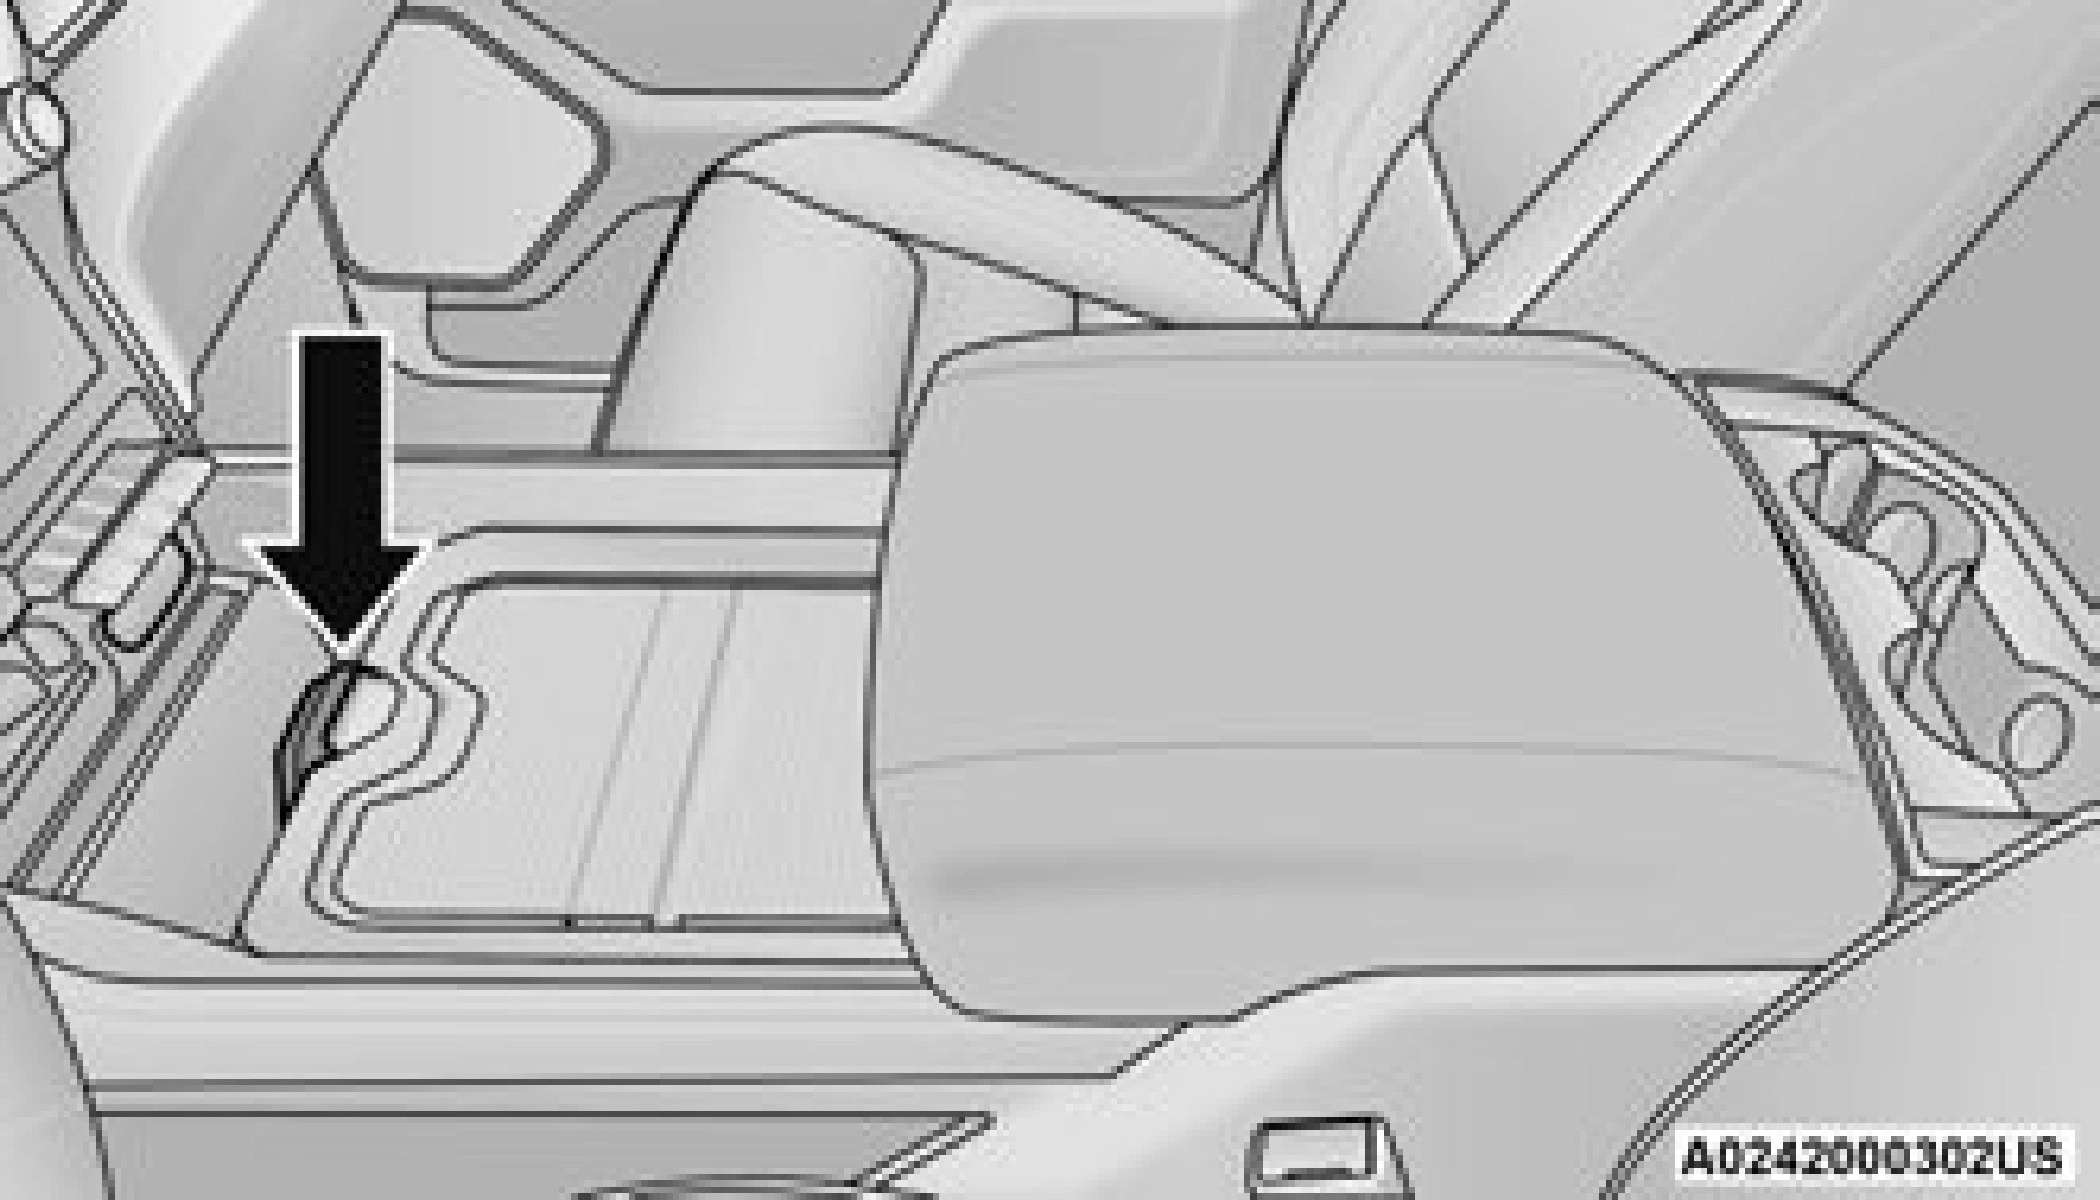
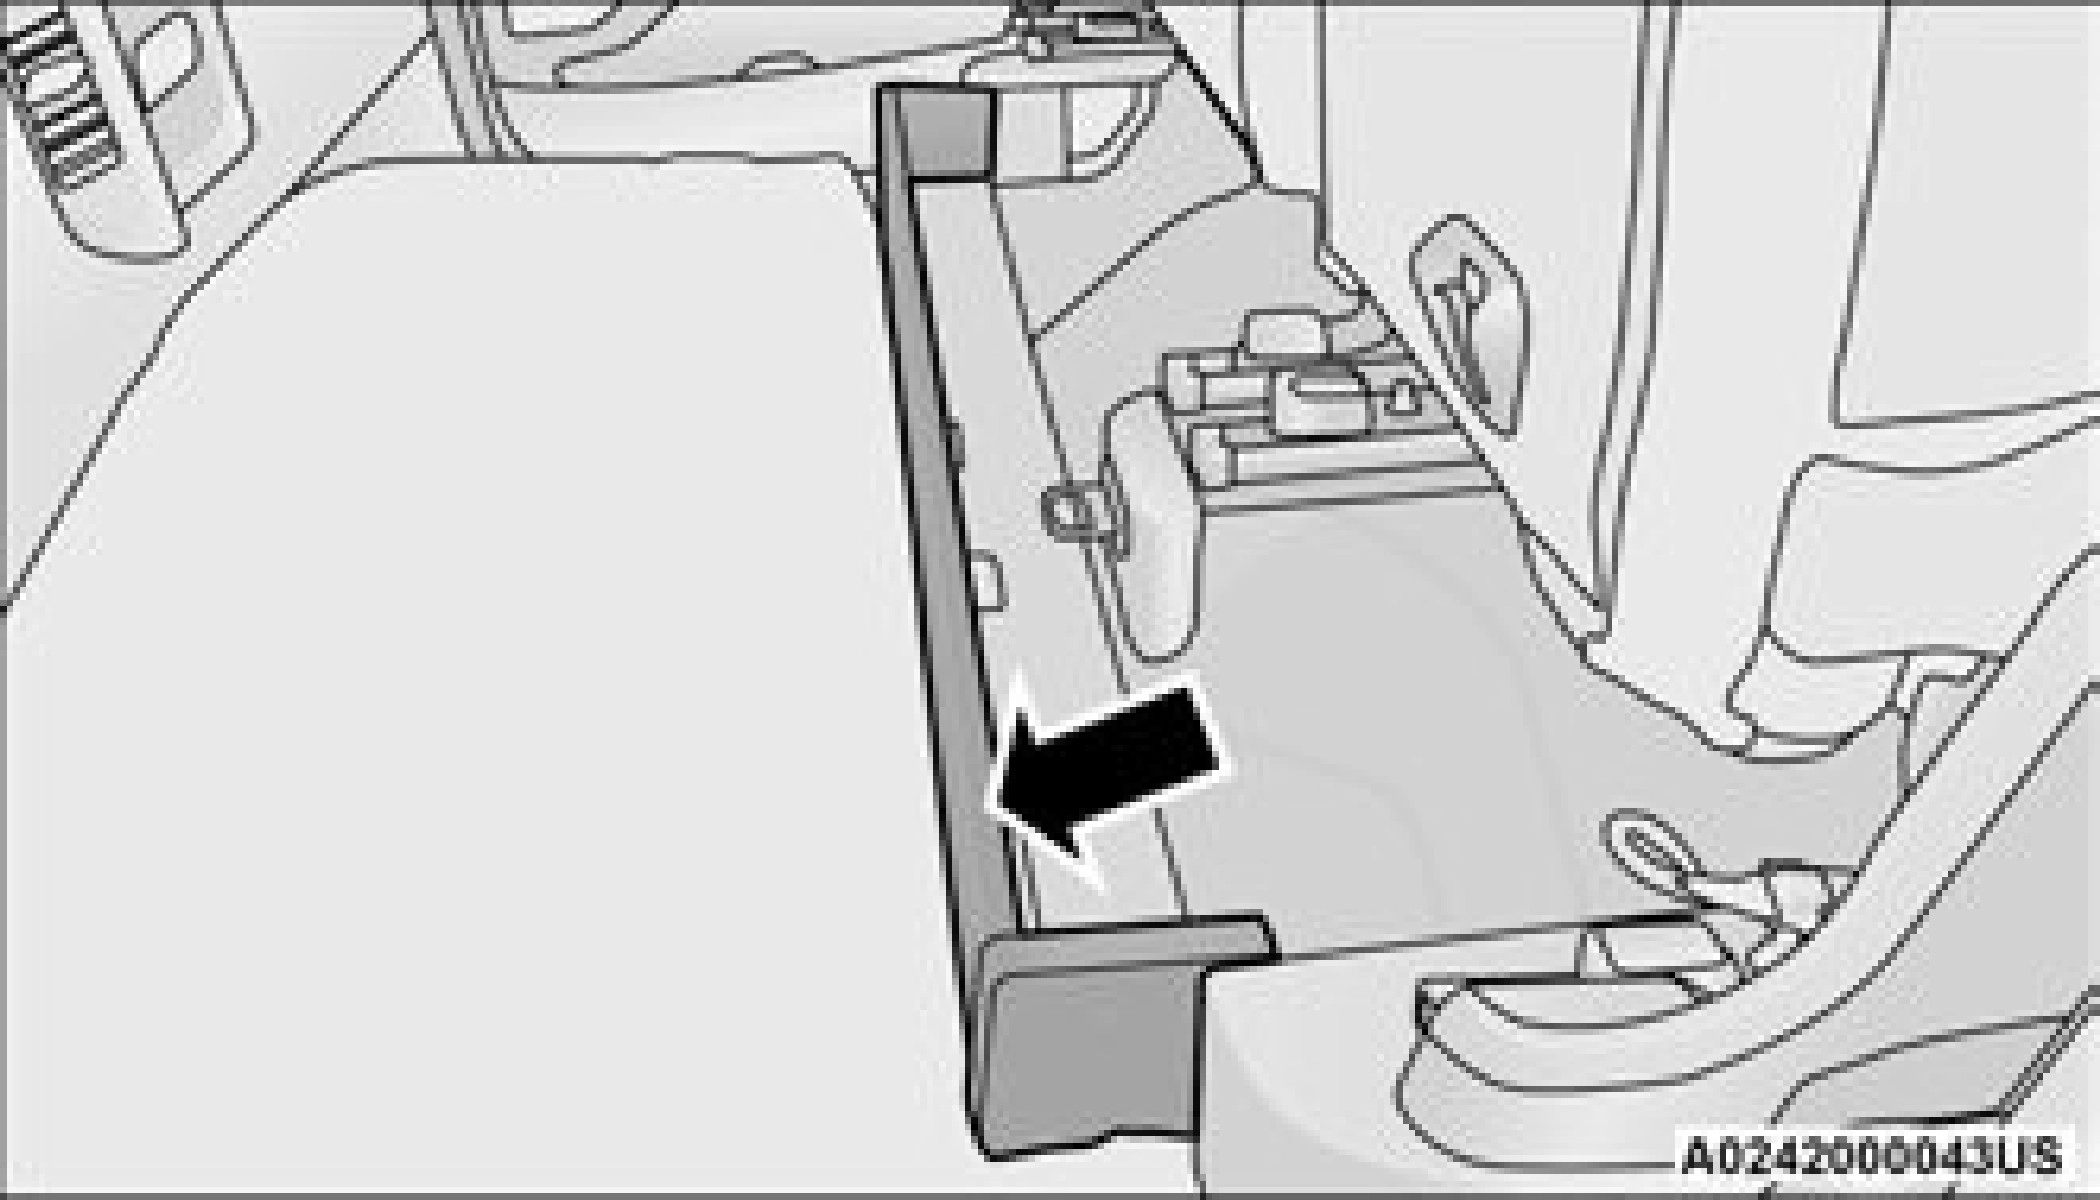
 To access the storage under the rear seats, unlatch the lock mechanism in the center of the seat base by rotating it to either side, and fold the front of the seat base forward.
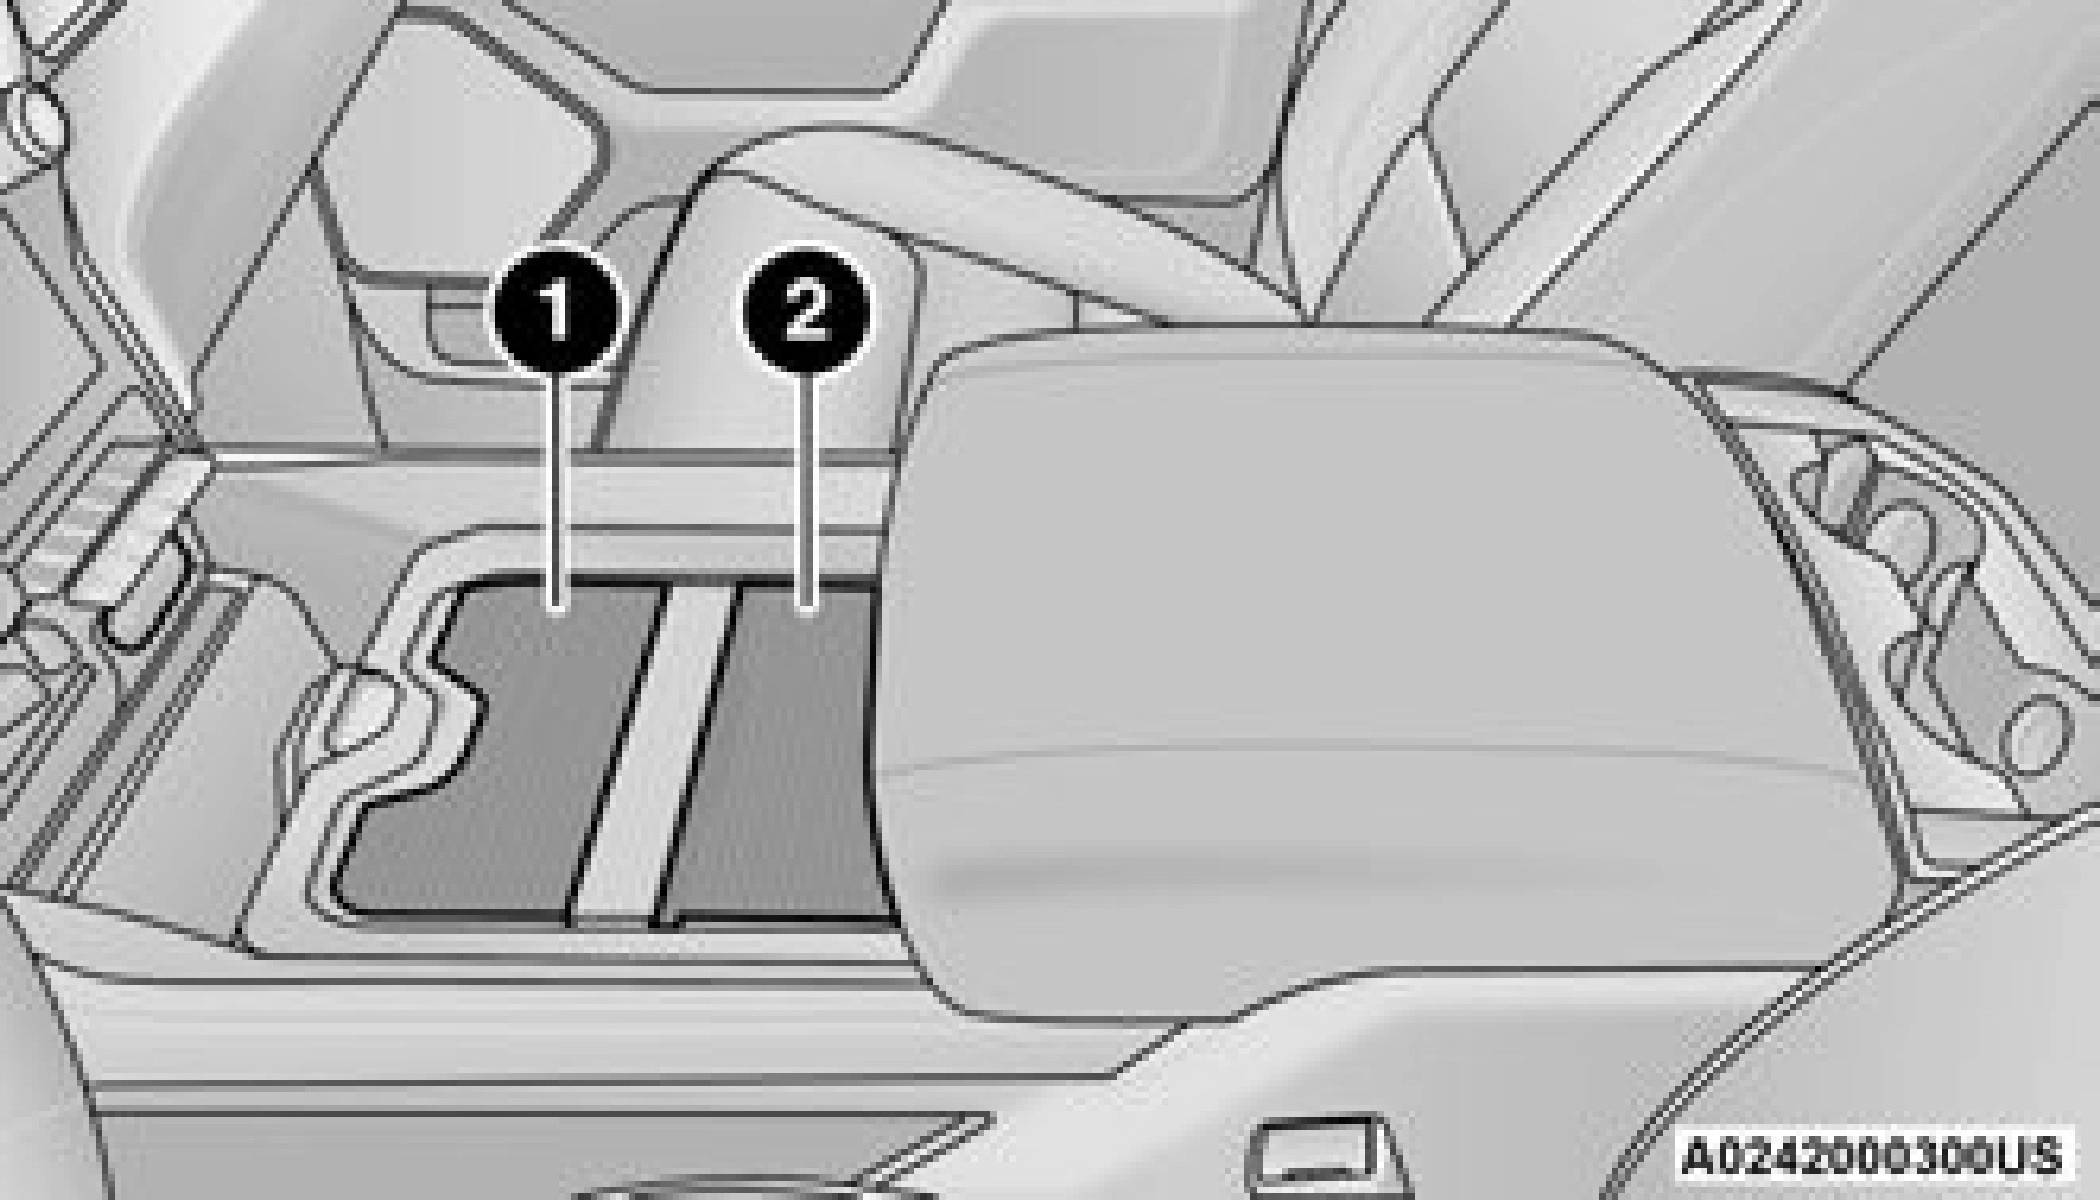
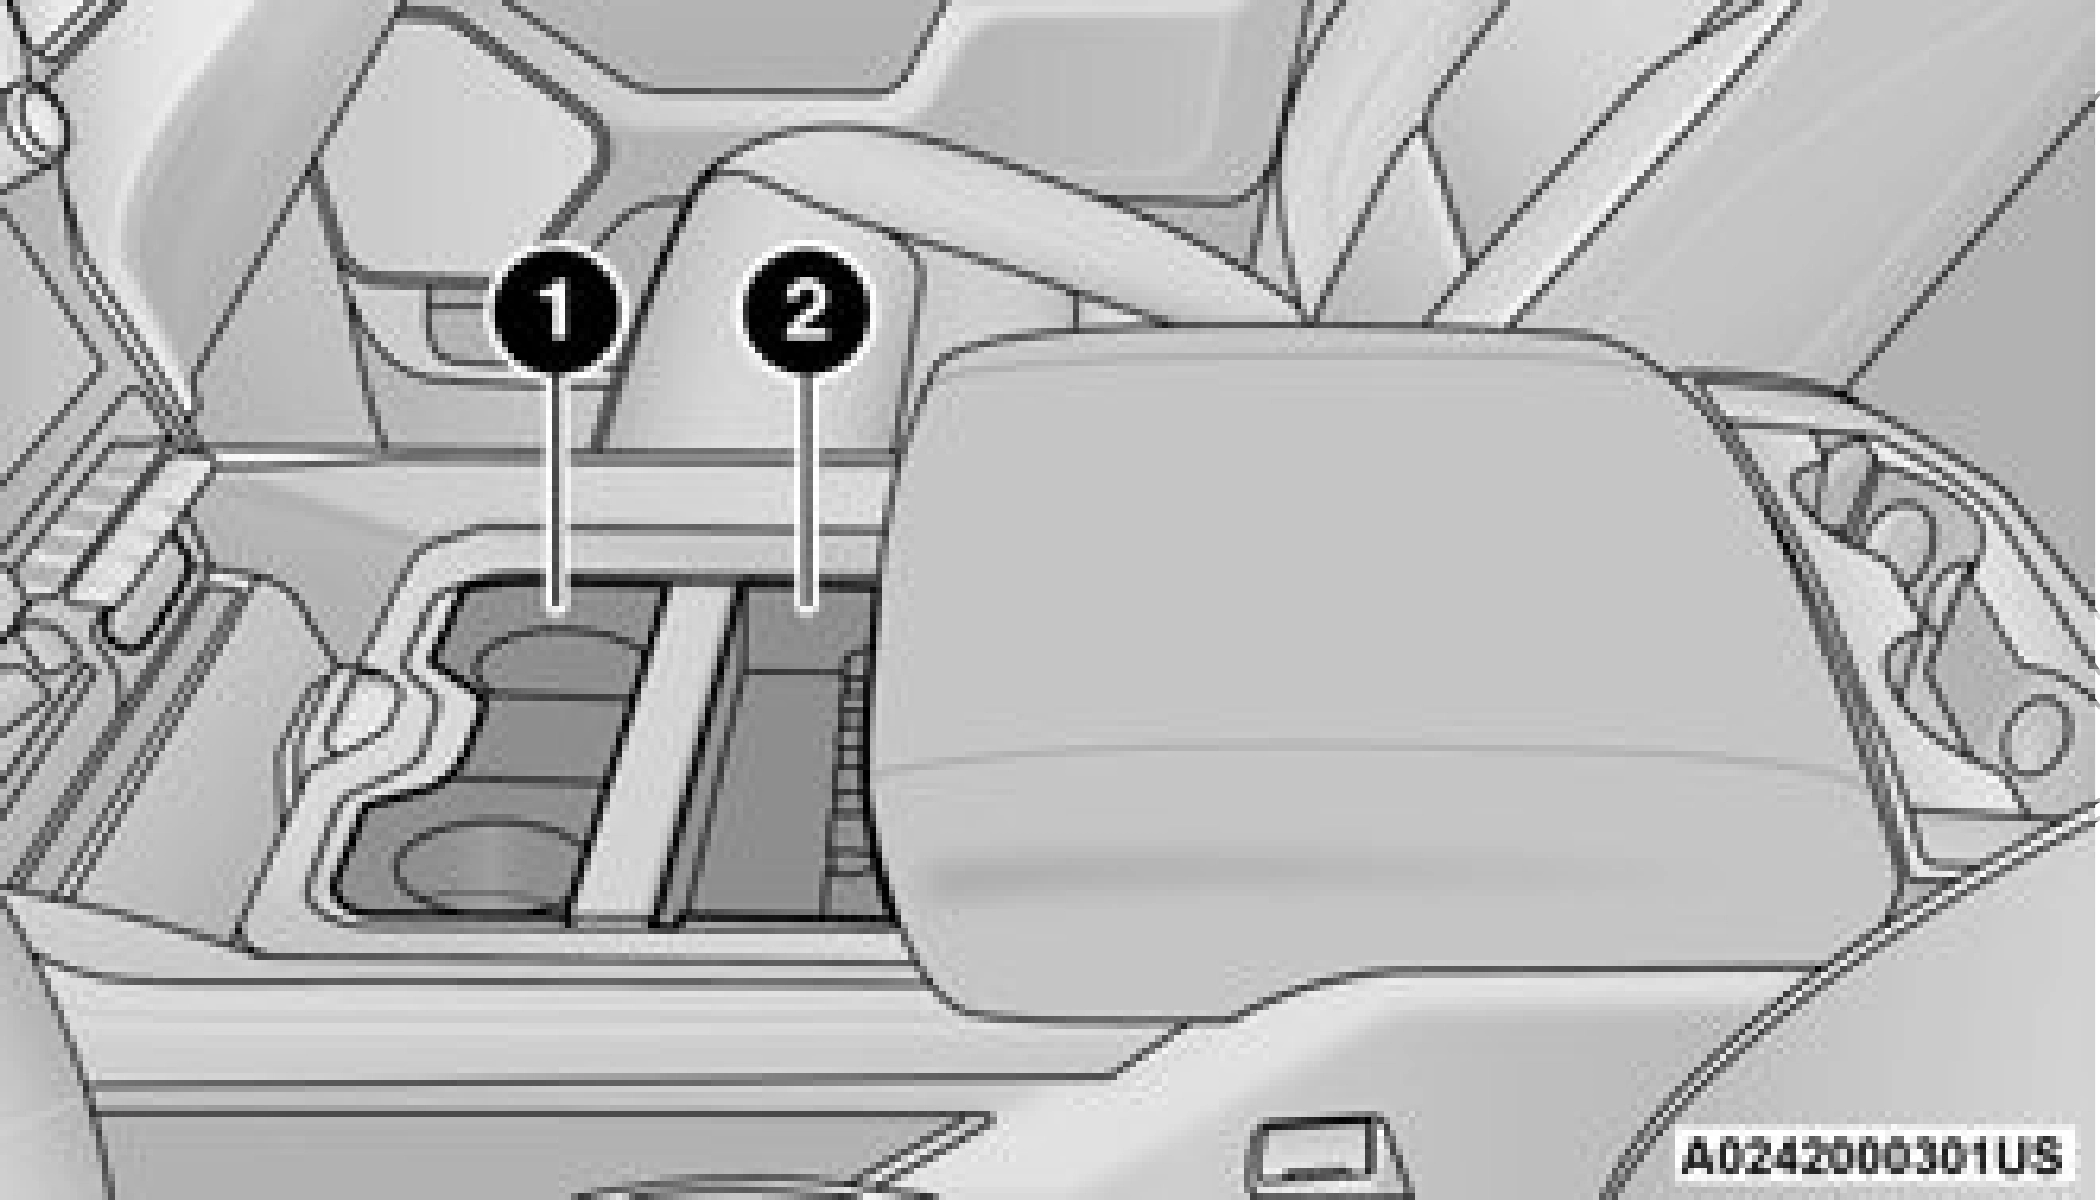
 Fully Extended Storage Area
Opened Storage Bin
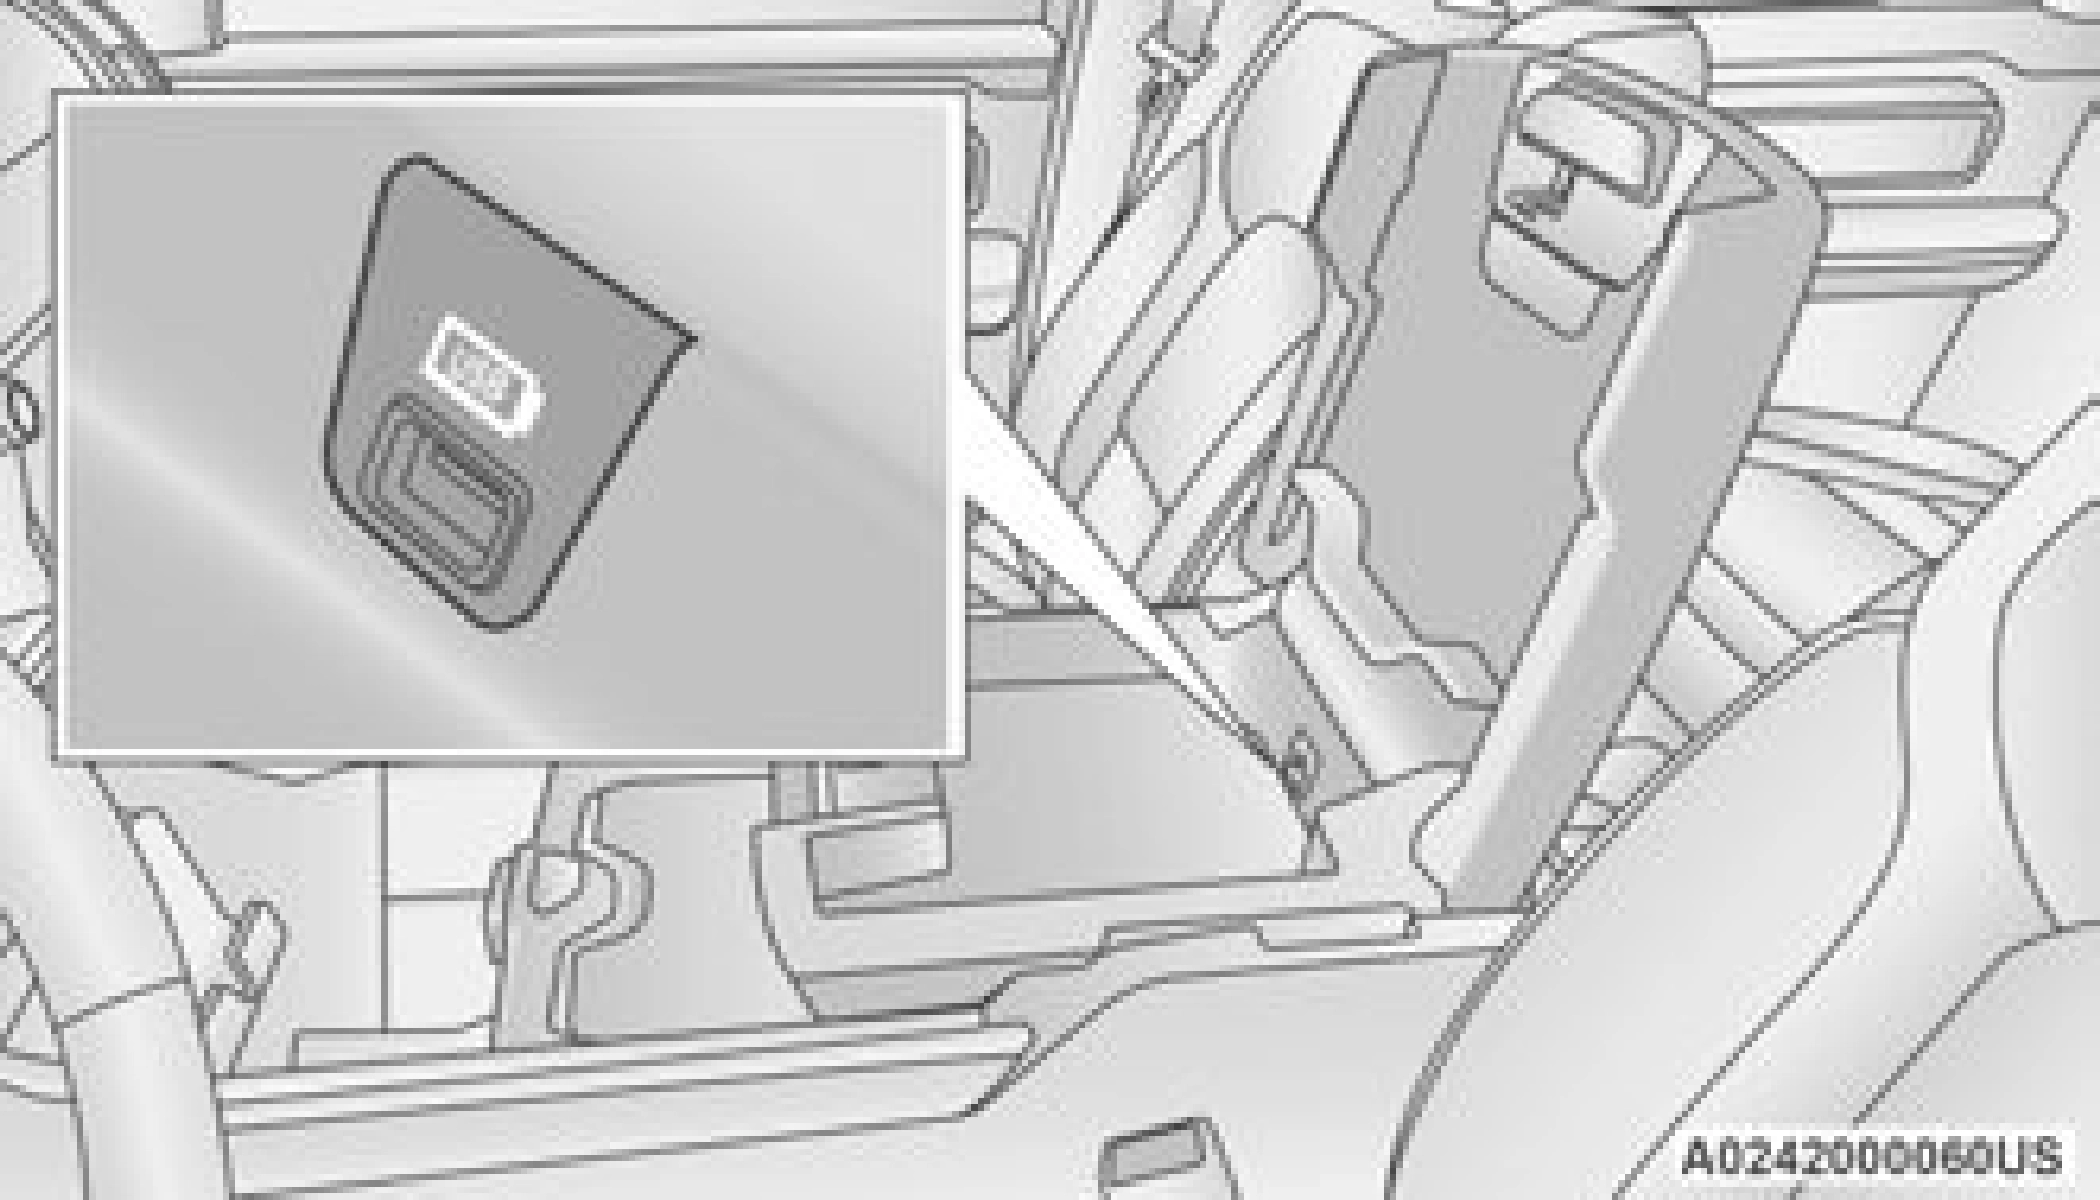
Each storage bin also contains two hooks for securing cargo. These hooks should be used to secure loads safely when the vehicle is moving.
Folding Down Front Of Seat Base
1 — Lock Mechanism 2 — Front Of Seat Base
Flip the inside of the base upward into the upright position, locking into place, creating and extended storage area.
The rear seats do not need to be folded up to access this feature.
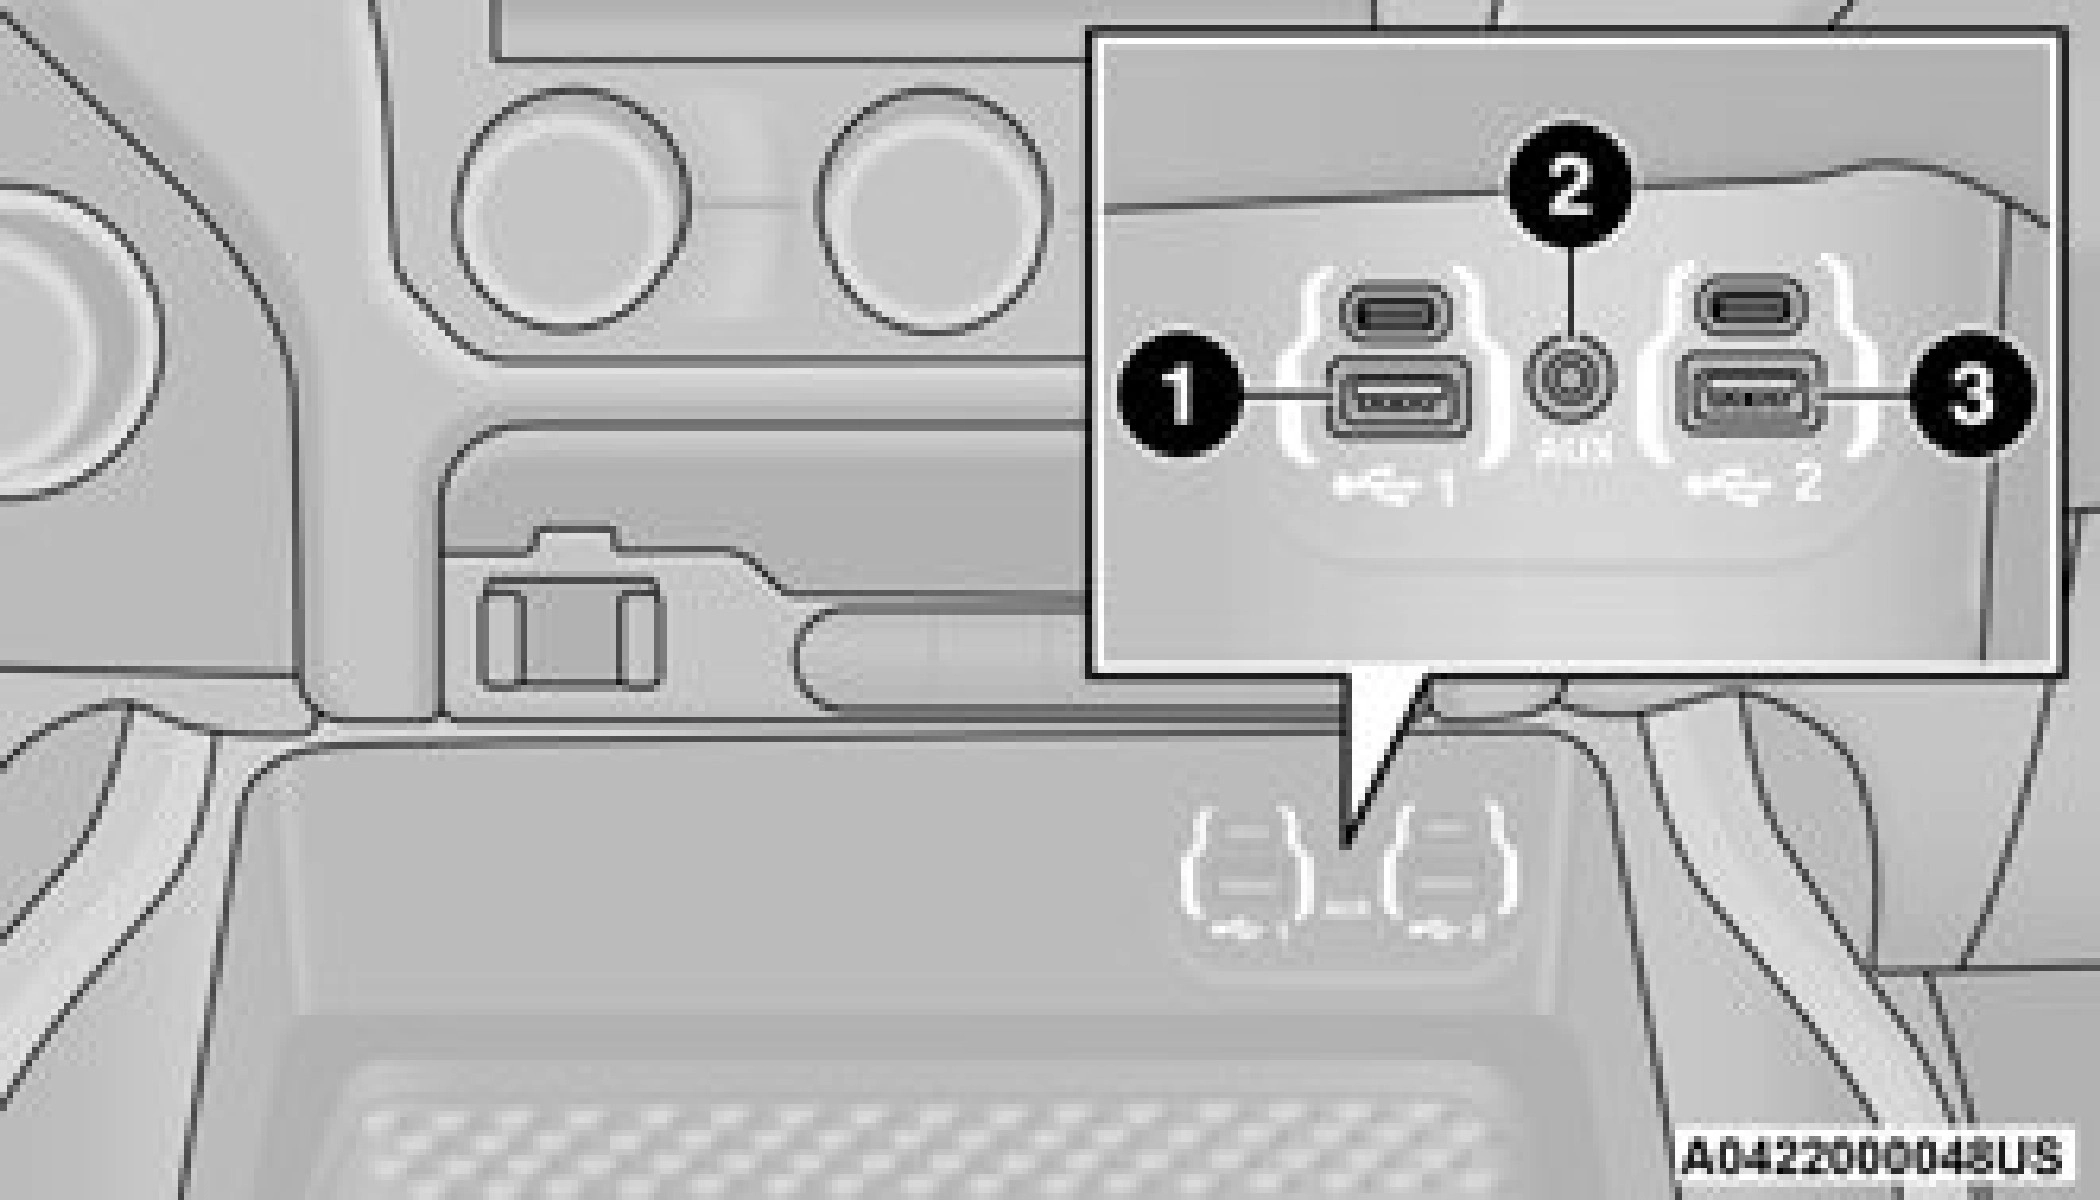
USB/AUX CONTROL
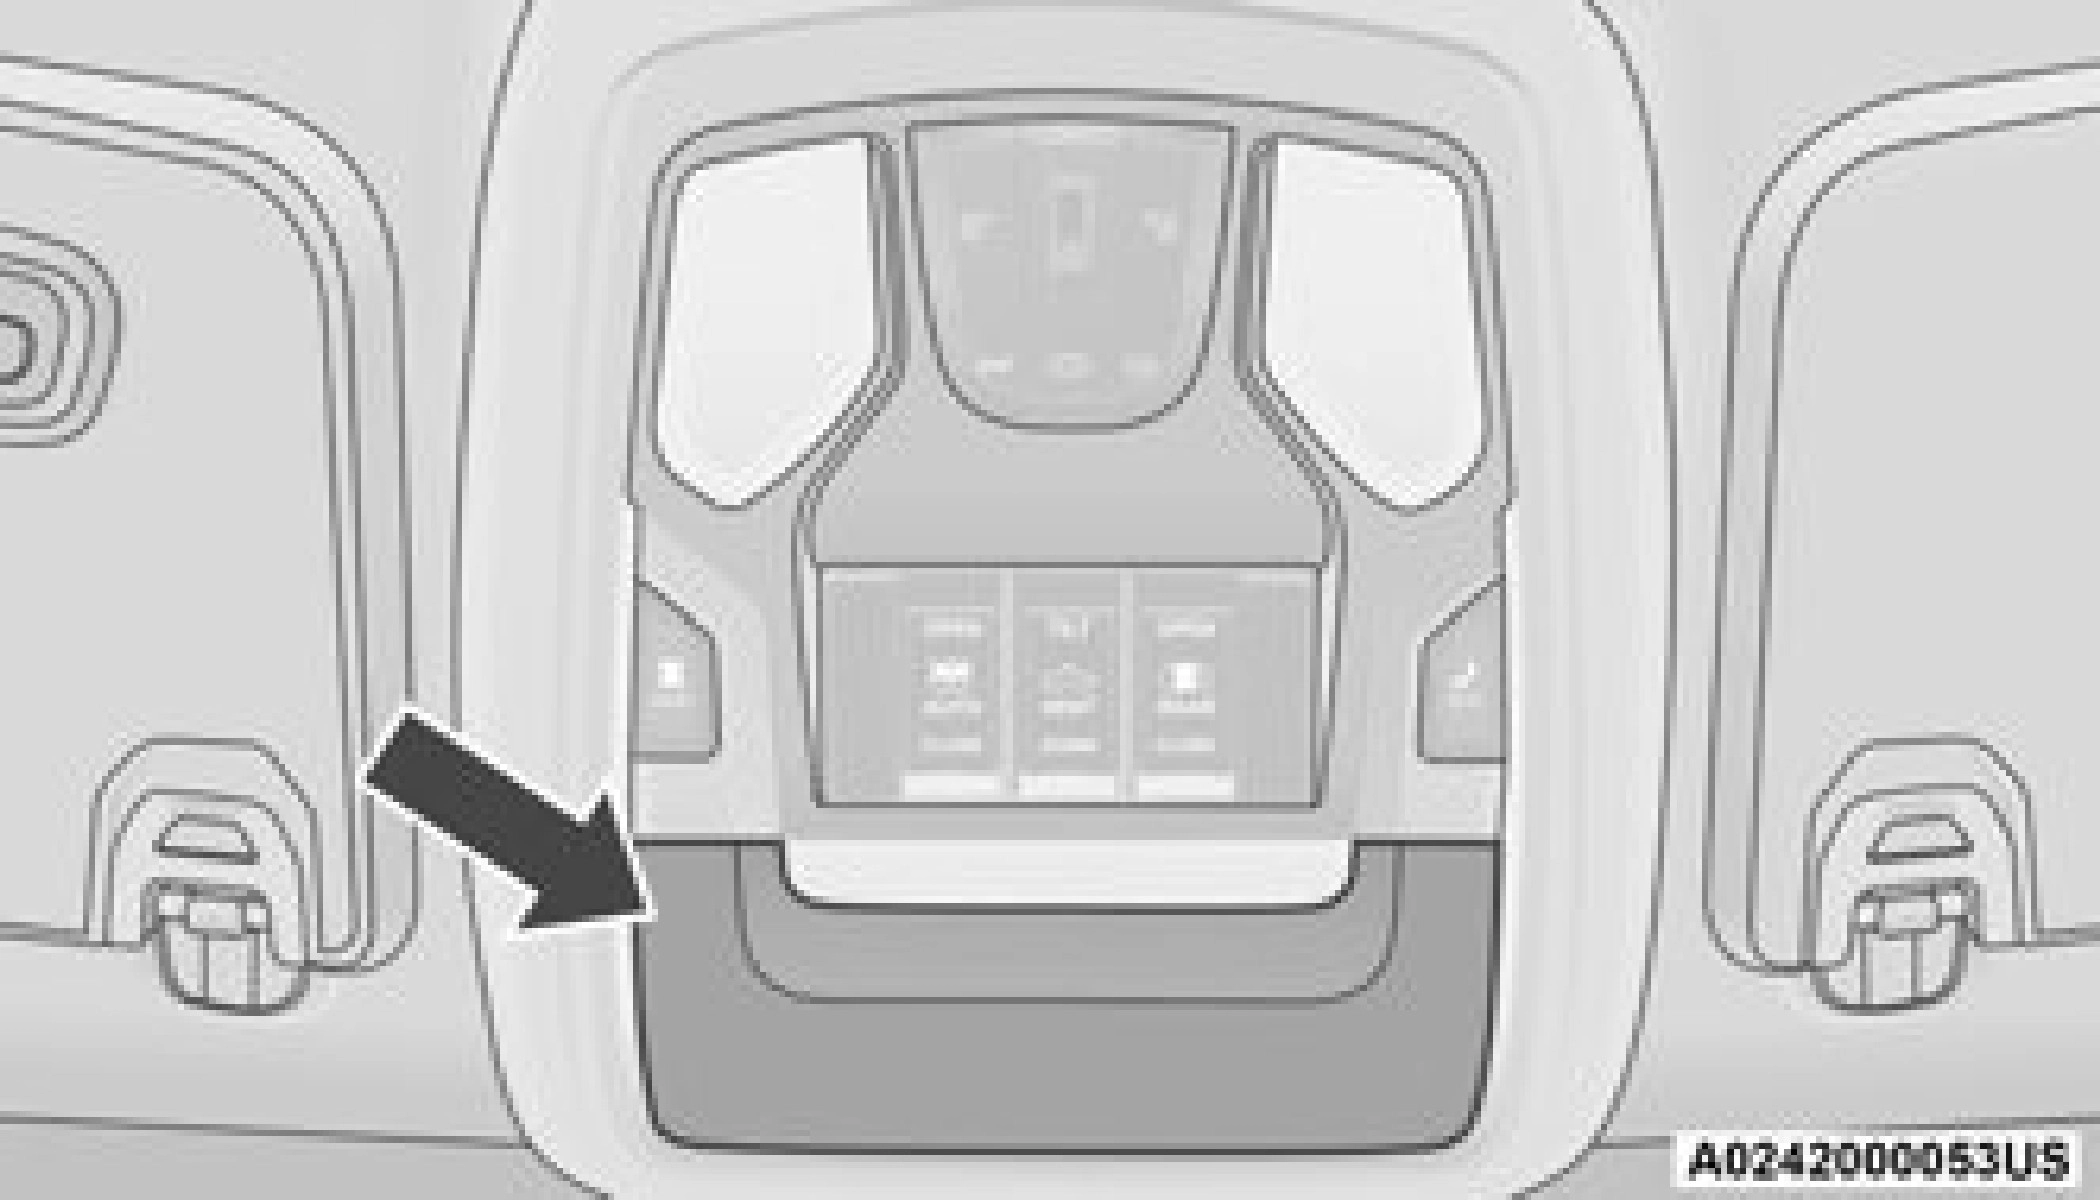
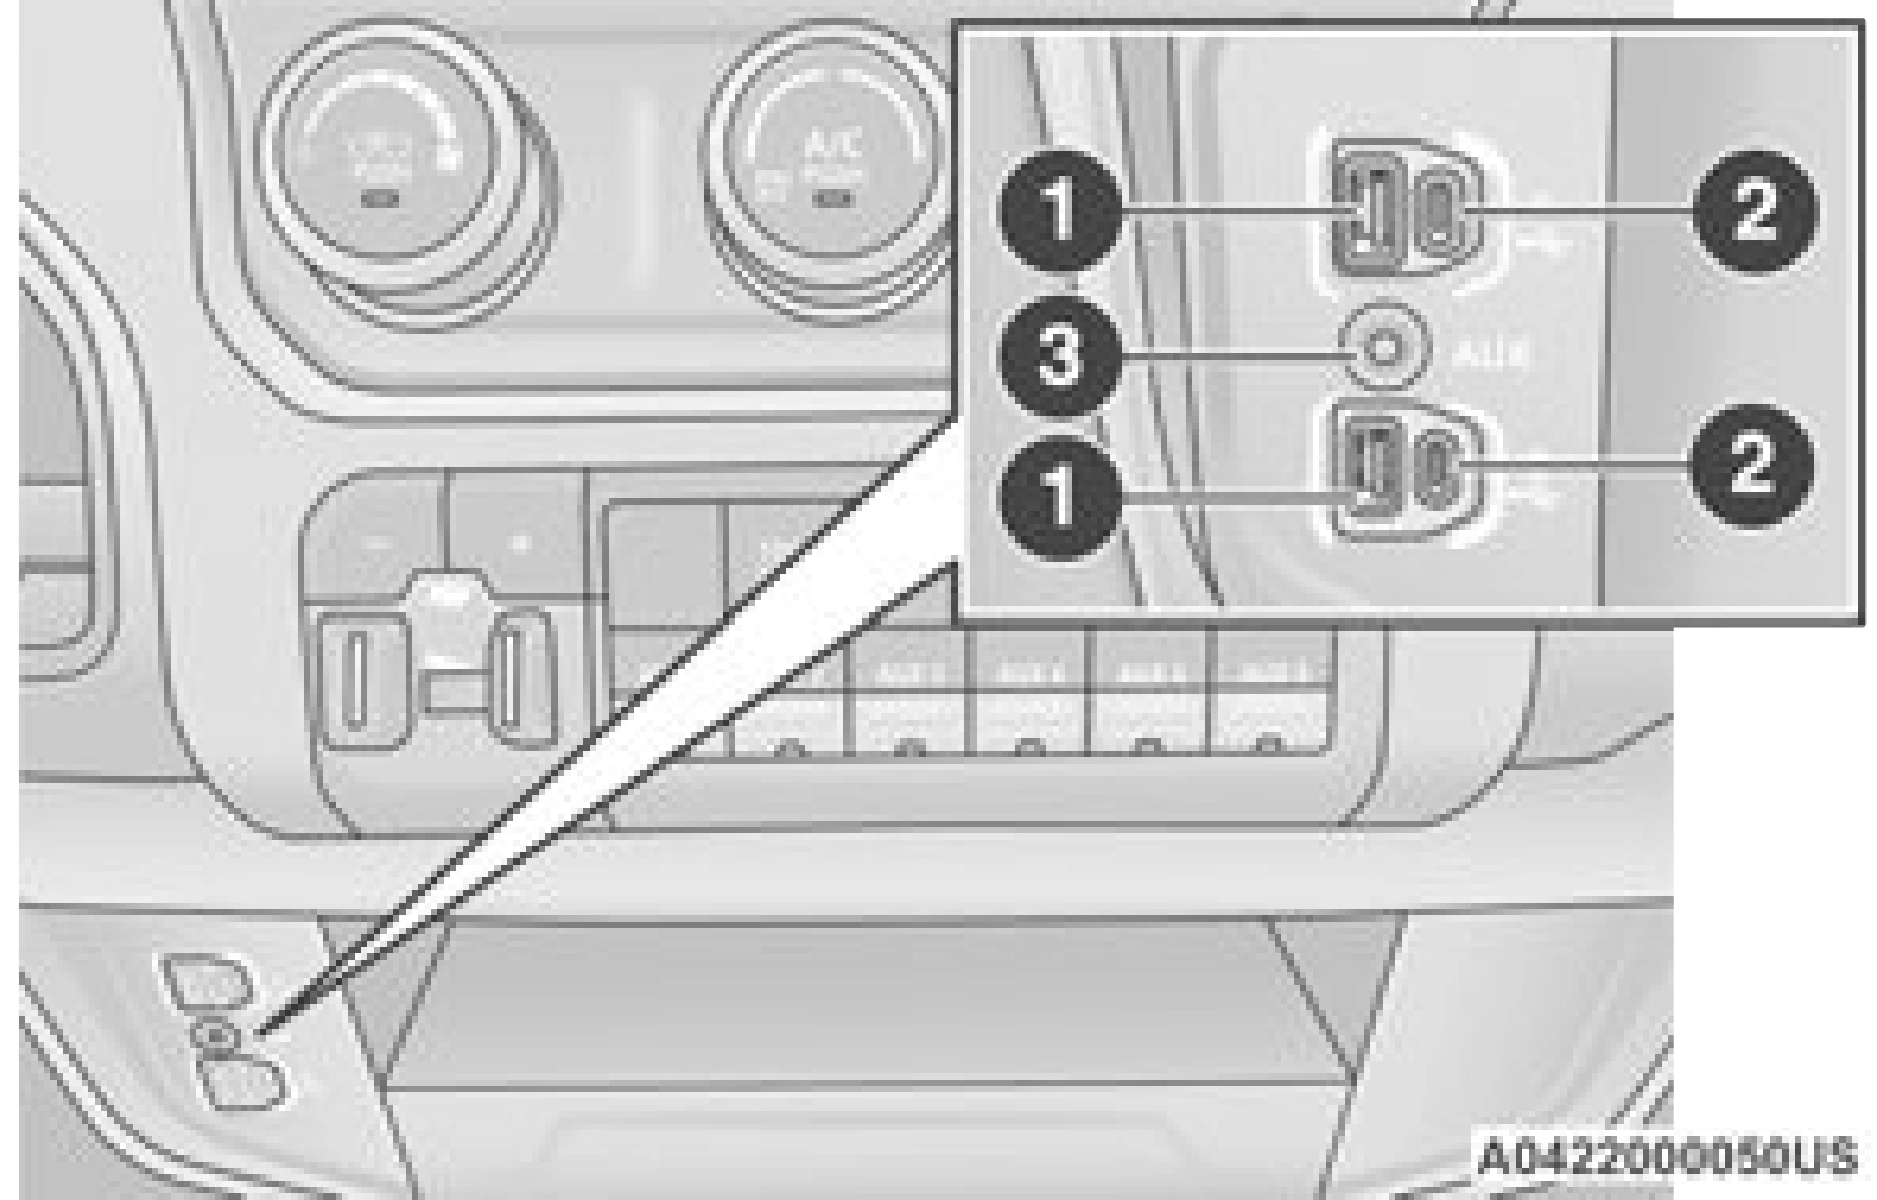
Located on the center stack, just below the instrument panel, is the main media hub. There are four total USB ports: Two Mini-USBs (Type C) and two Standard USBs (Type A). There is also an AUX port located in the middle of the USB Ports.
Plugging in a smartphone device to a USB Port may activate Android Auto™ or Apple CarPlay® features, if equipped. For further information, refer to “Android Auto™” or “Apple CarPlay®” in the Owner’s Manual Supplement.
Two devices can be plugged in at the same time, and both ports will provide charging capa- bilities. Only one port can transfer data to the system at a time. A pop-up will appear and allow you to select the device transferring data.
For example, if a device is plugged into the Type A USB port and another device is plugged into the Type C USB port, a message will appear and allow you to select which device to use.
The third and fourth USB ports are located behind the center console, above the power inverter. One of these USBs ports are charge only.
Applicable to only Uconnect 4C/4C NAV With 8.4-inch Display, and Uconnect 4C NAV With 12-inch Display radios, different scenarios are listed below when a non-phone device is plugged into the smaller and larger USB ports,
and when a phone device is plugged into the smaller and larger USB ports:
connection was lost”.
Plugging in a phone or another USB device may cause the connection to a previous device to be lost.
If equipped, your vehicle may also contain a USB port located on the top tray of the vehicles center console.
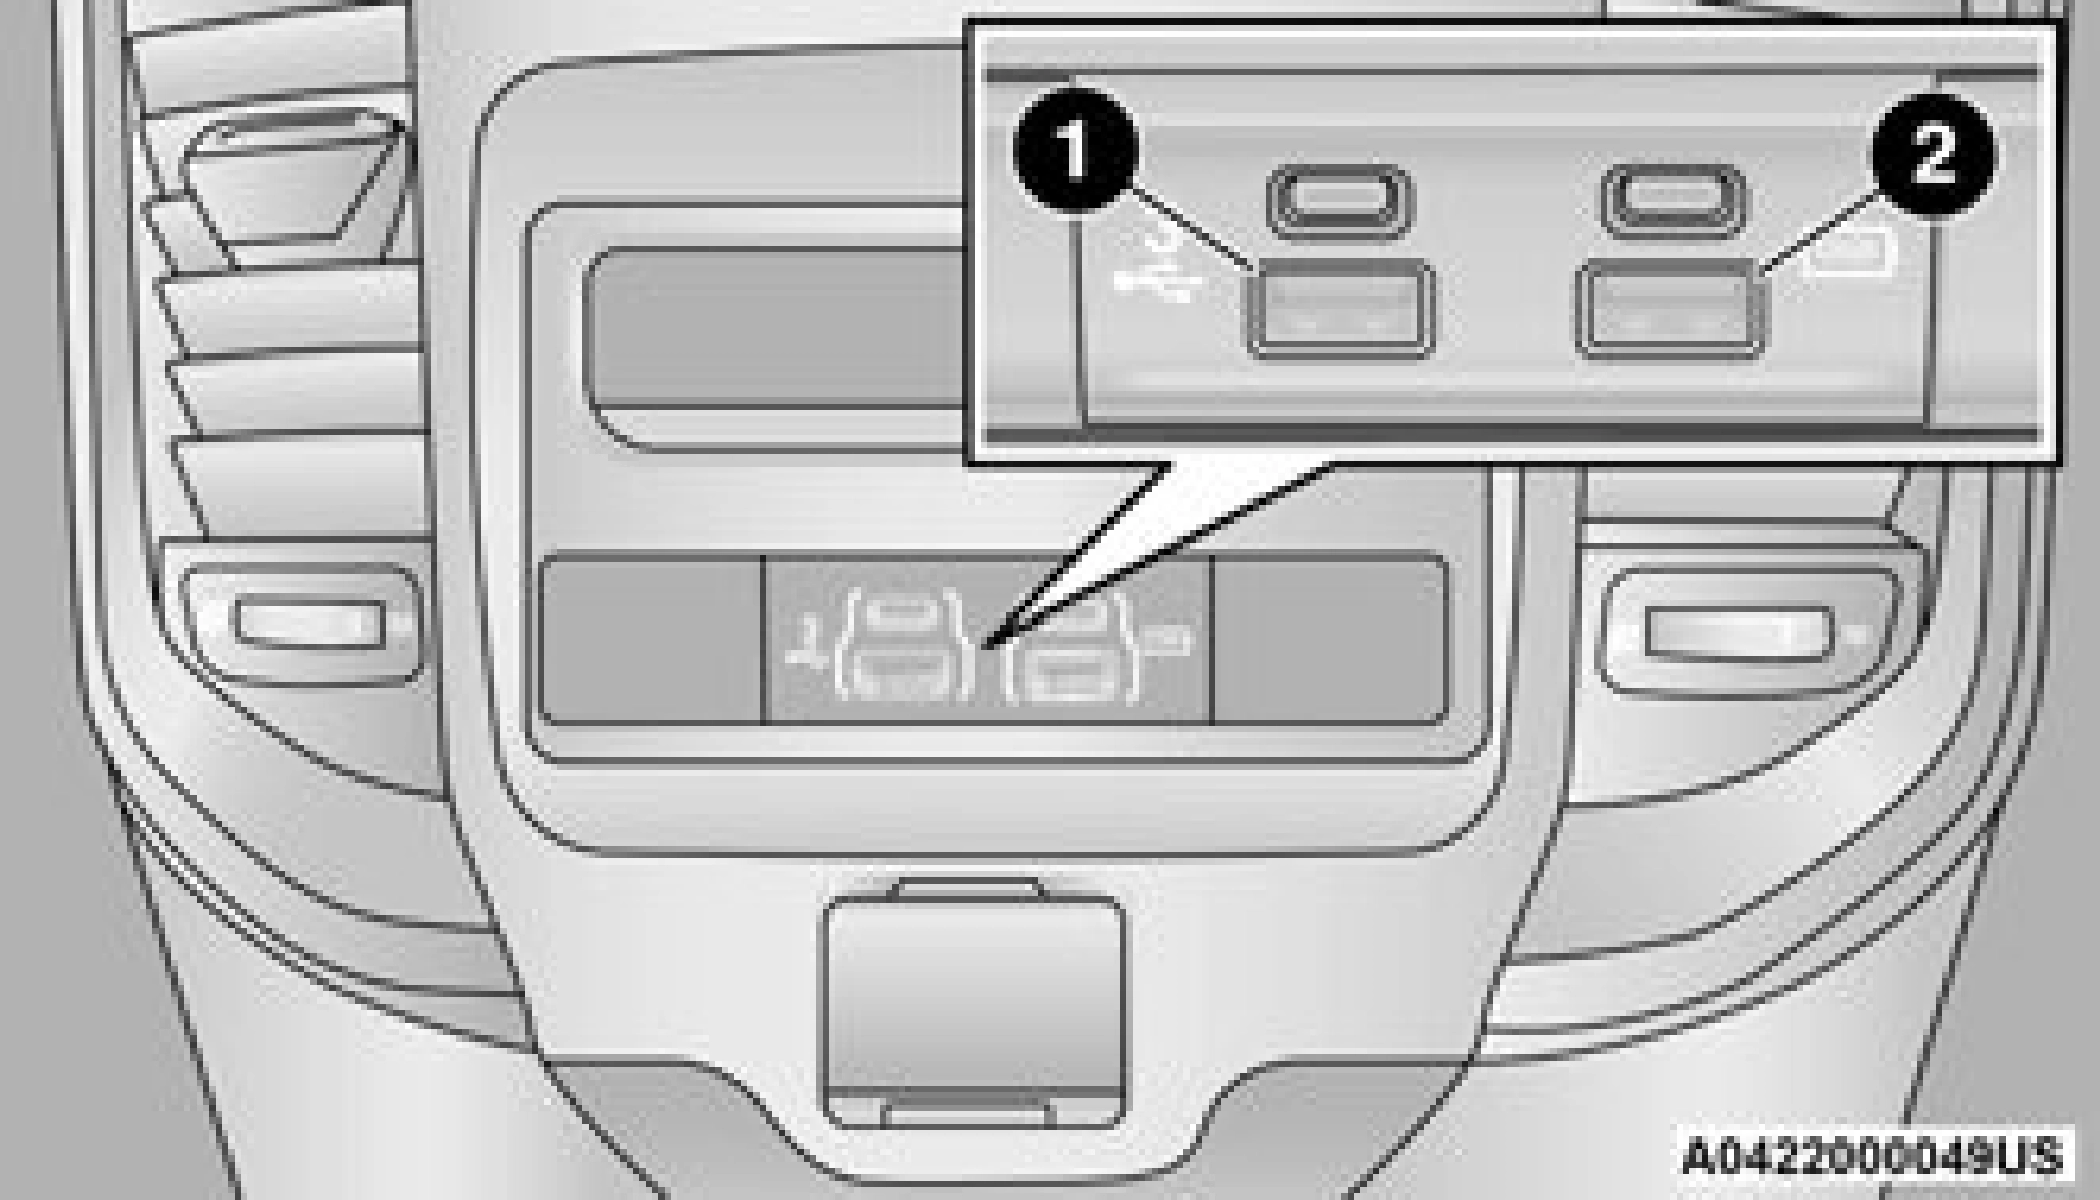
If equipped, two Mini-USB ports (Type C), two Standard USB ports (Type A), and one AUX port may be located to the left of the center stack, just below the climate controls.
1 — Standard USB Type A Ports 2 — Mini-USB Type C Ports
3 — AUX Port
Some USB ports support media and charging. You can use features, such as Apple CarPlay®, Android Auto™, Pandora®, and others while charging your phone.
Plugging in a phone or another USB device may cause the connection to a previous device to be lost.
For further information, refer to the Uconnect Owner’s Manual Supplement or visit UconnectPhone.com.
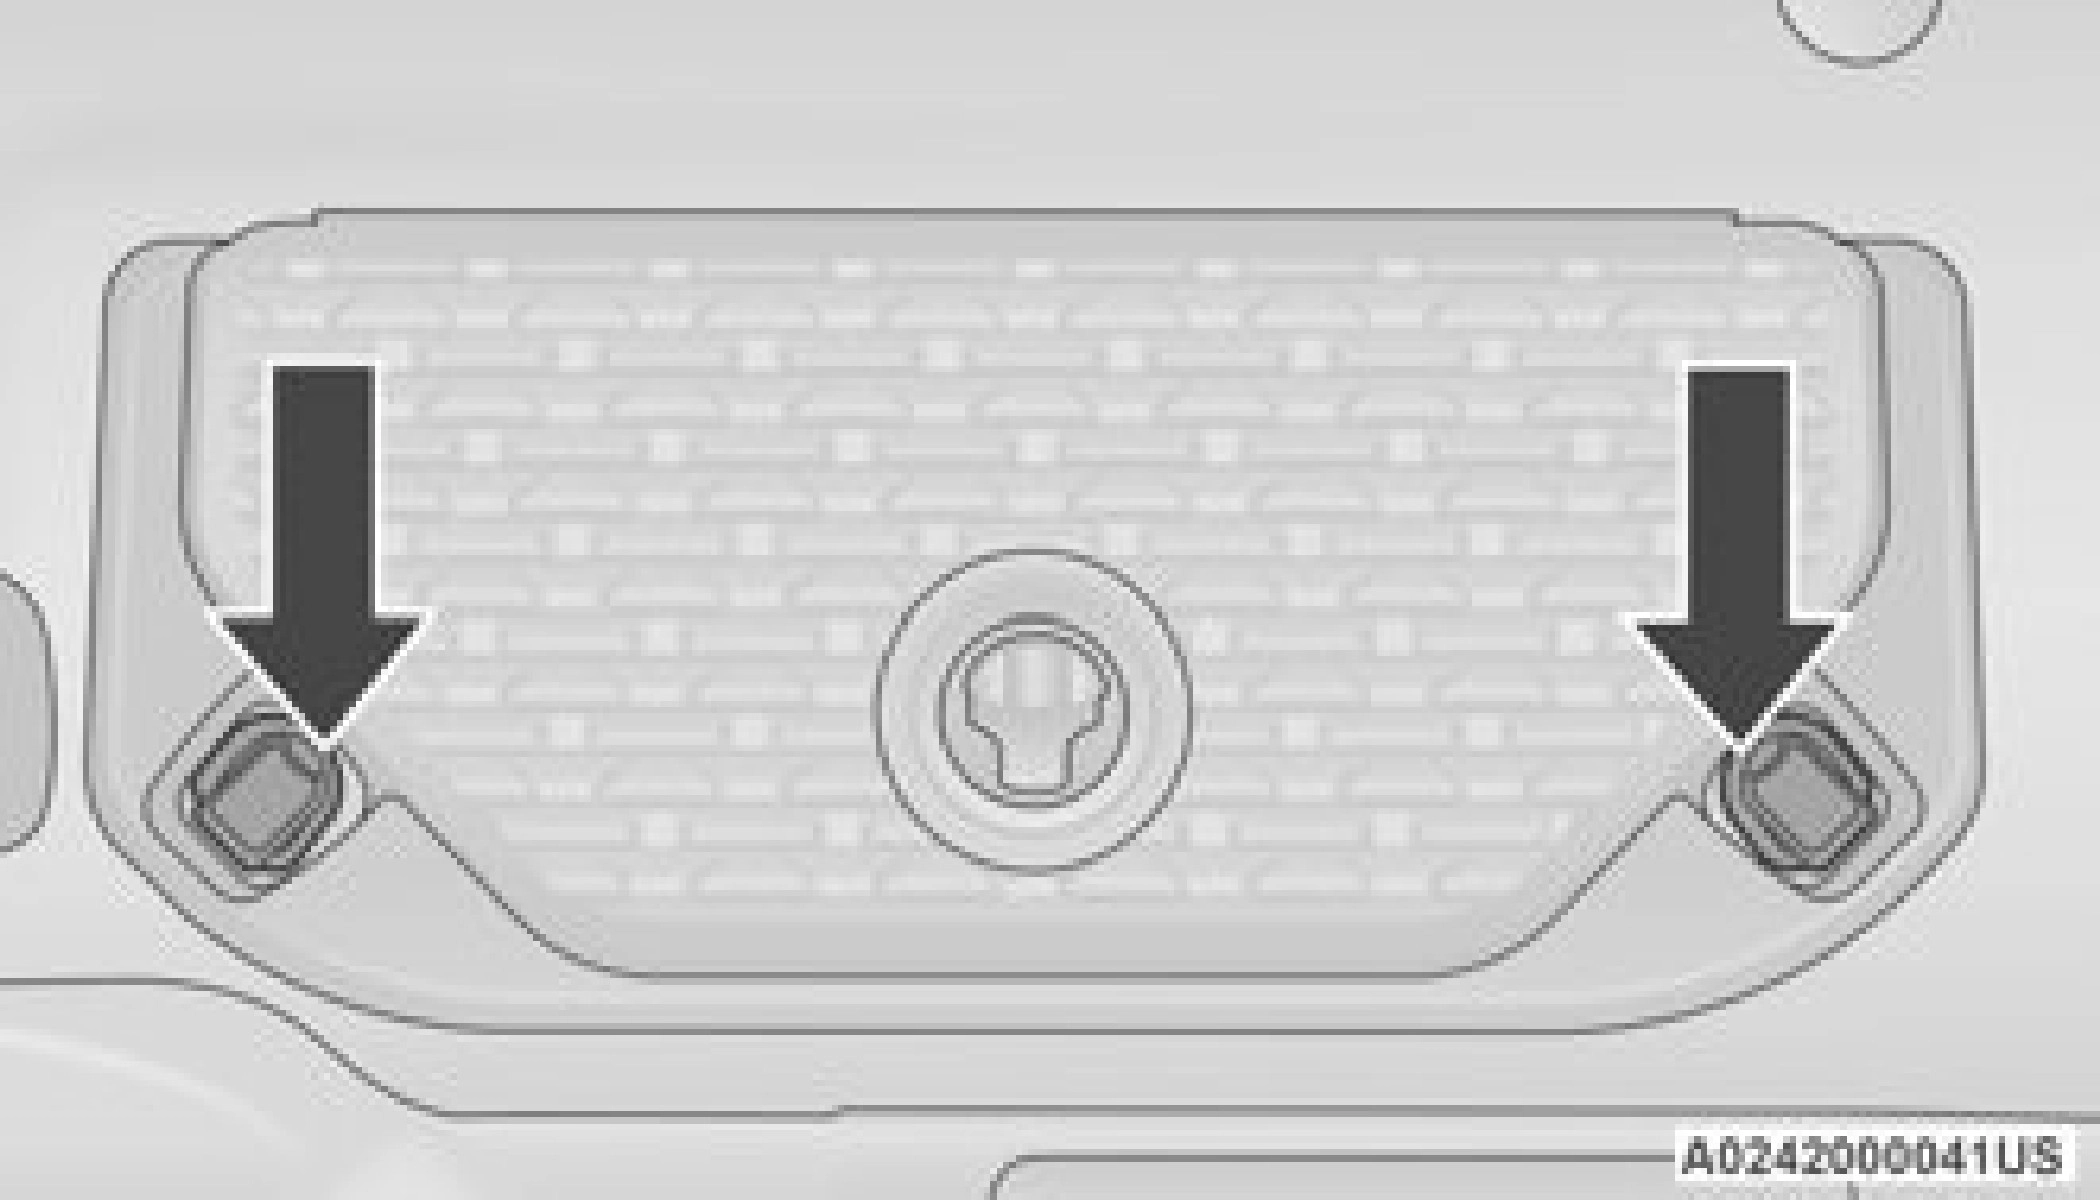
ELECTRICAL POWER OUTLETS
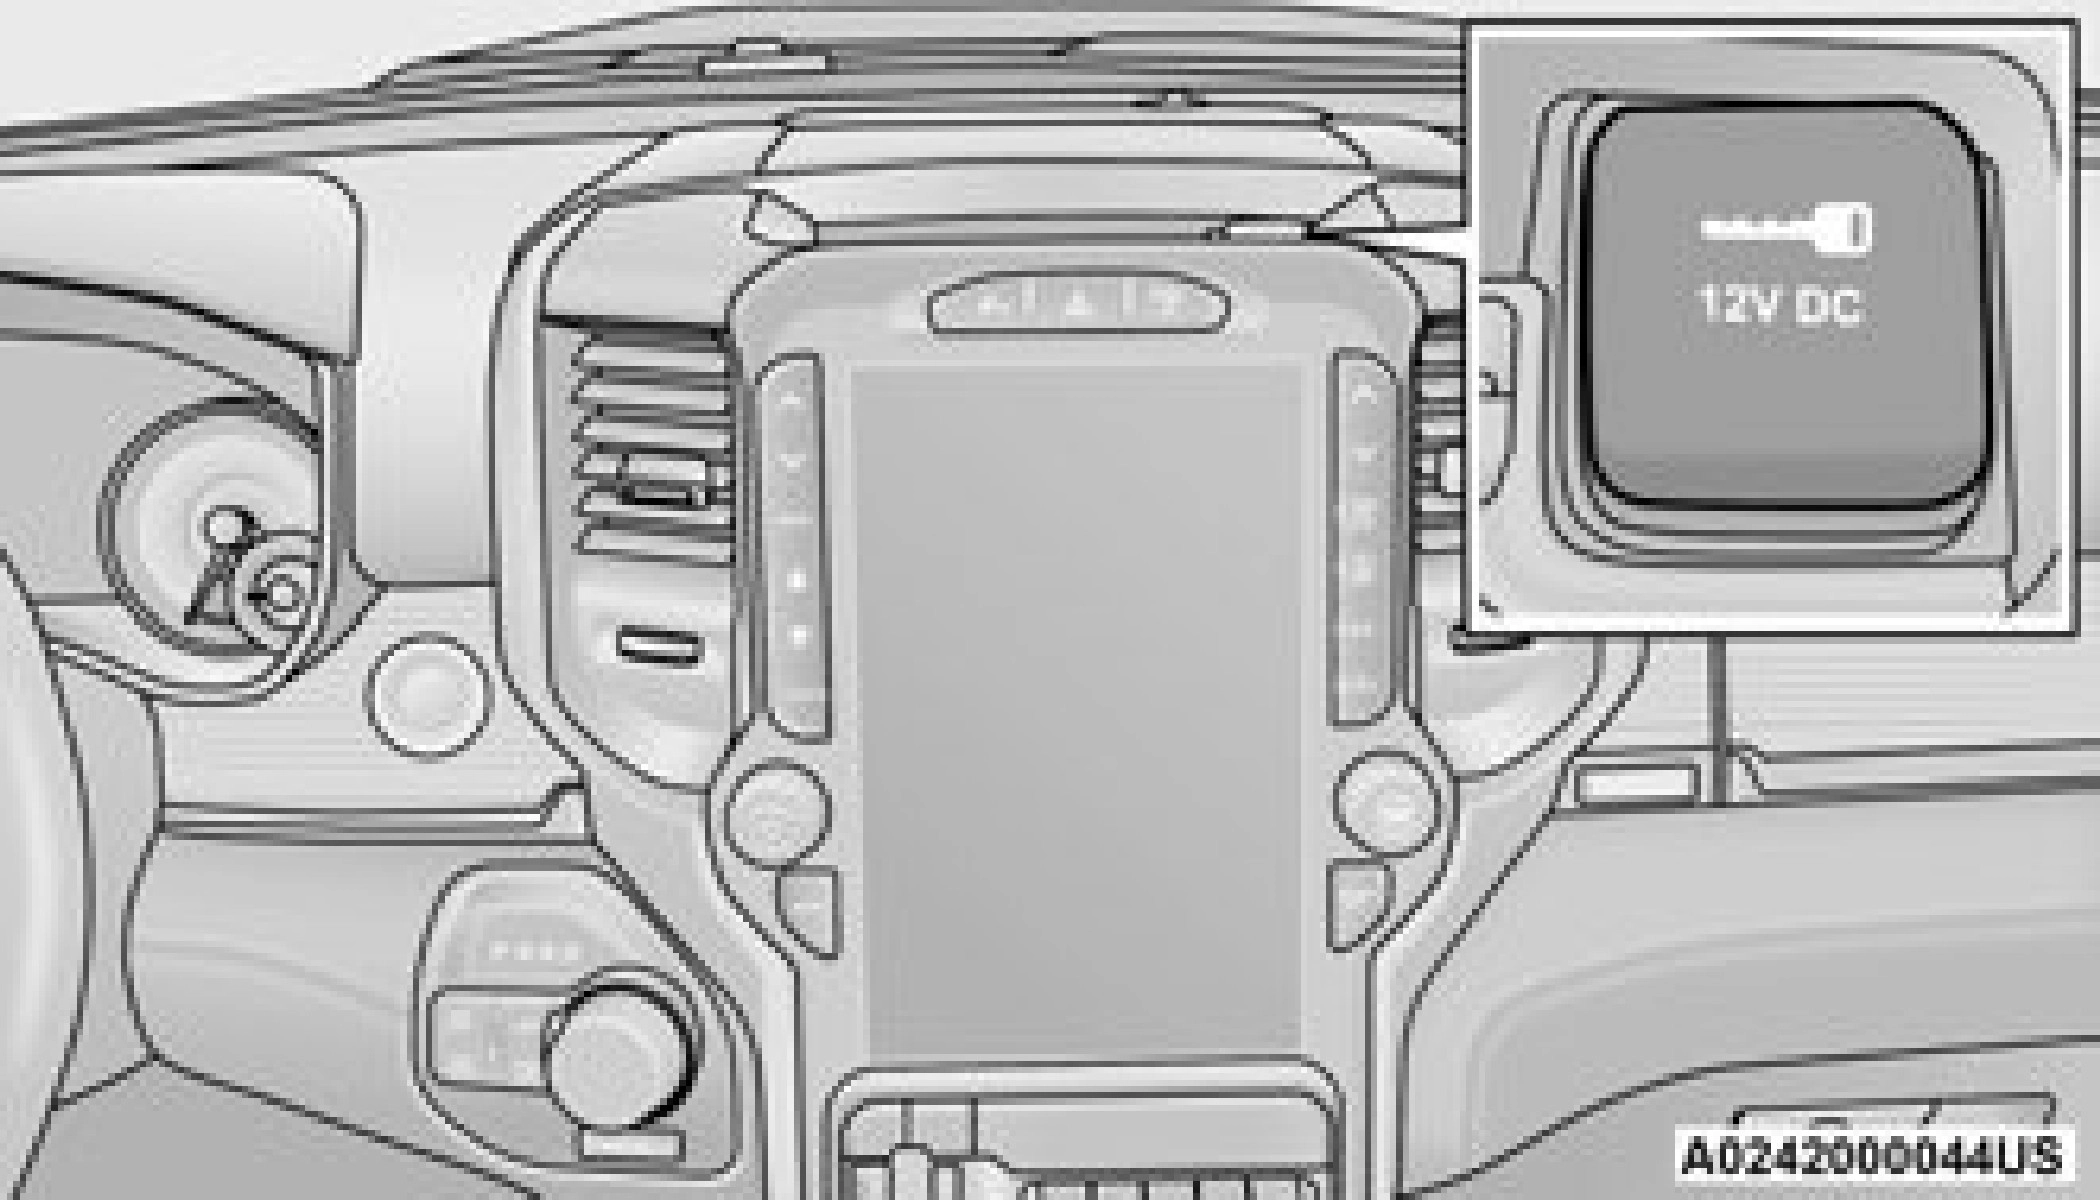
The auxiliary 12 Volt (13 Amp) power outlet can provide power for in-cab accessories designed for use with the standard “cigarette lighter” style plug. The 12 Volt power outlets and 5 Volt (2.5 Amp) USB Port (Charge Only) have a cap attached to the outlet indicating “12V DC”, together with either a key symbol, battery symbol, or USB symbol.
A key symbol indicates that the ignition must be in the ON/RUN or ACC positions for the outlet to provide power. The battery symbol indicates that the outlet is connected to the battery, and can provide power at all times.
(Continued)
An auxiliary power outlet can be found in the tray on top of the center stack. This power outlet only works when the ignition is in the ON/RUN or ACC position.
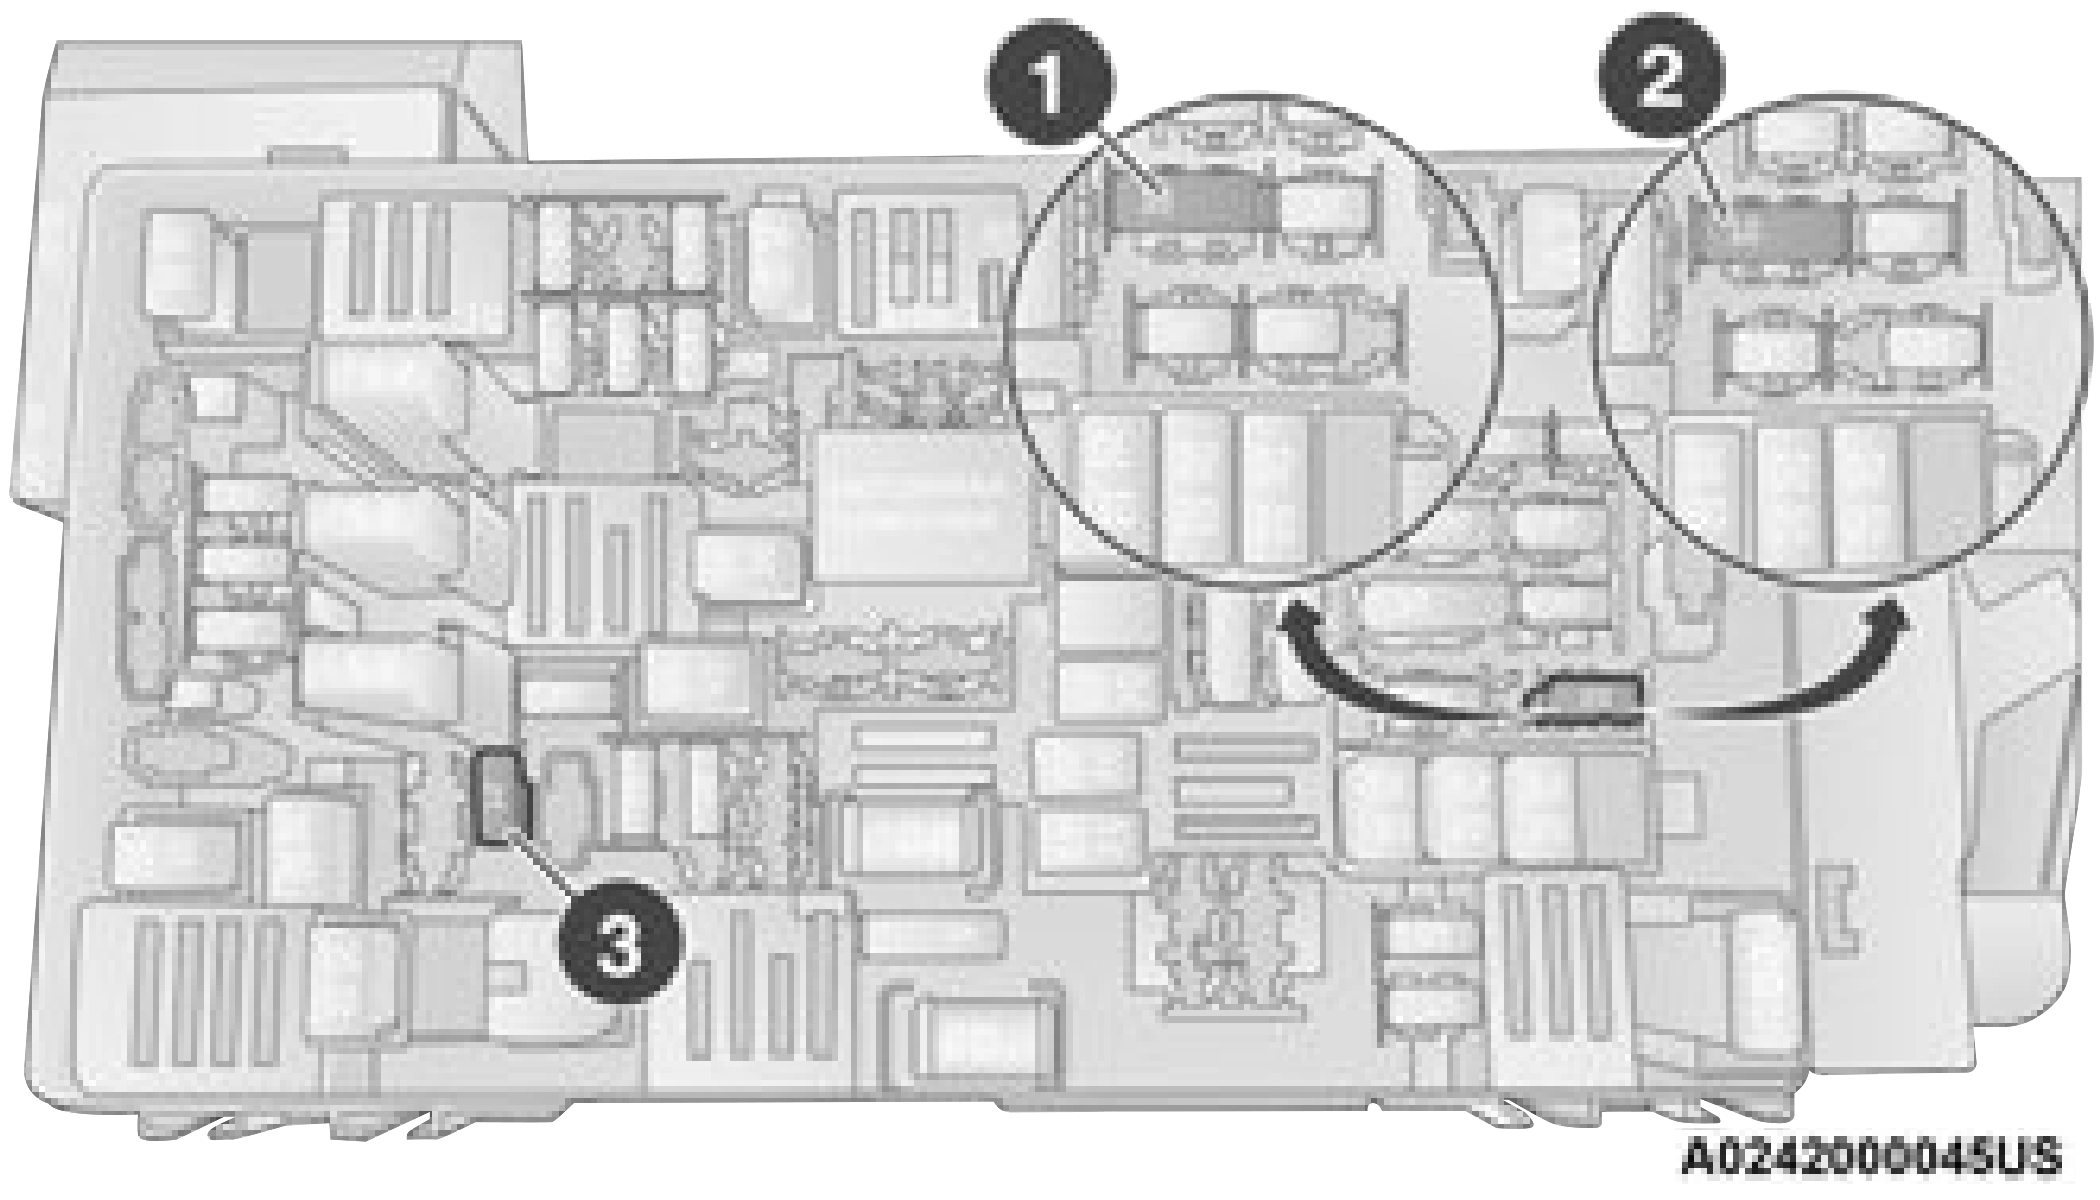 Power Outlet Fuse Locations
When the vehicle is turned off, be sure to unplug any equipment as to not drain the battery of the vehicle. All accessories connected to the outlet(s) should be removed or turned off when the vehicle is not in use to protect the battery against discharge.
(Continued)
2
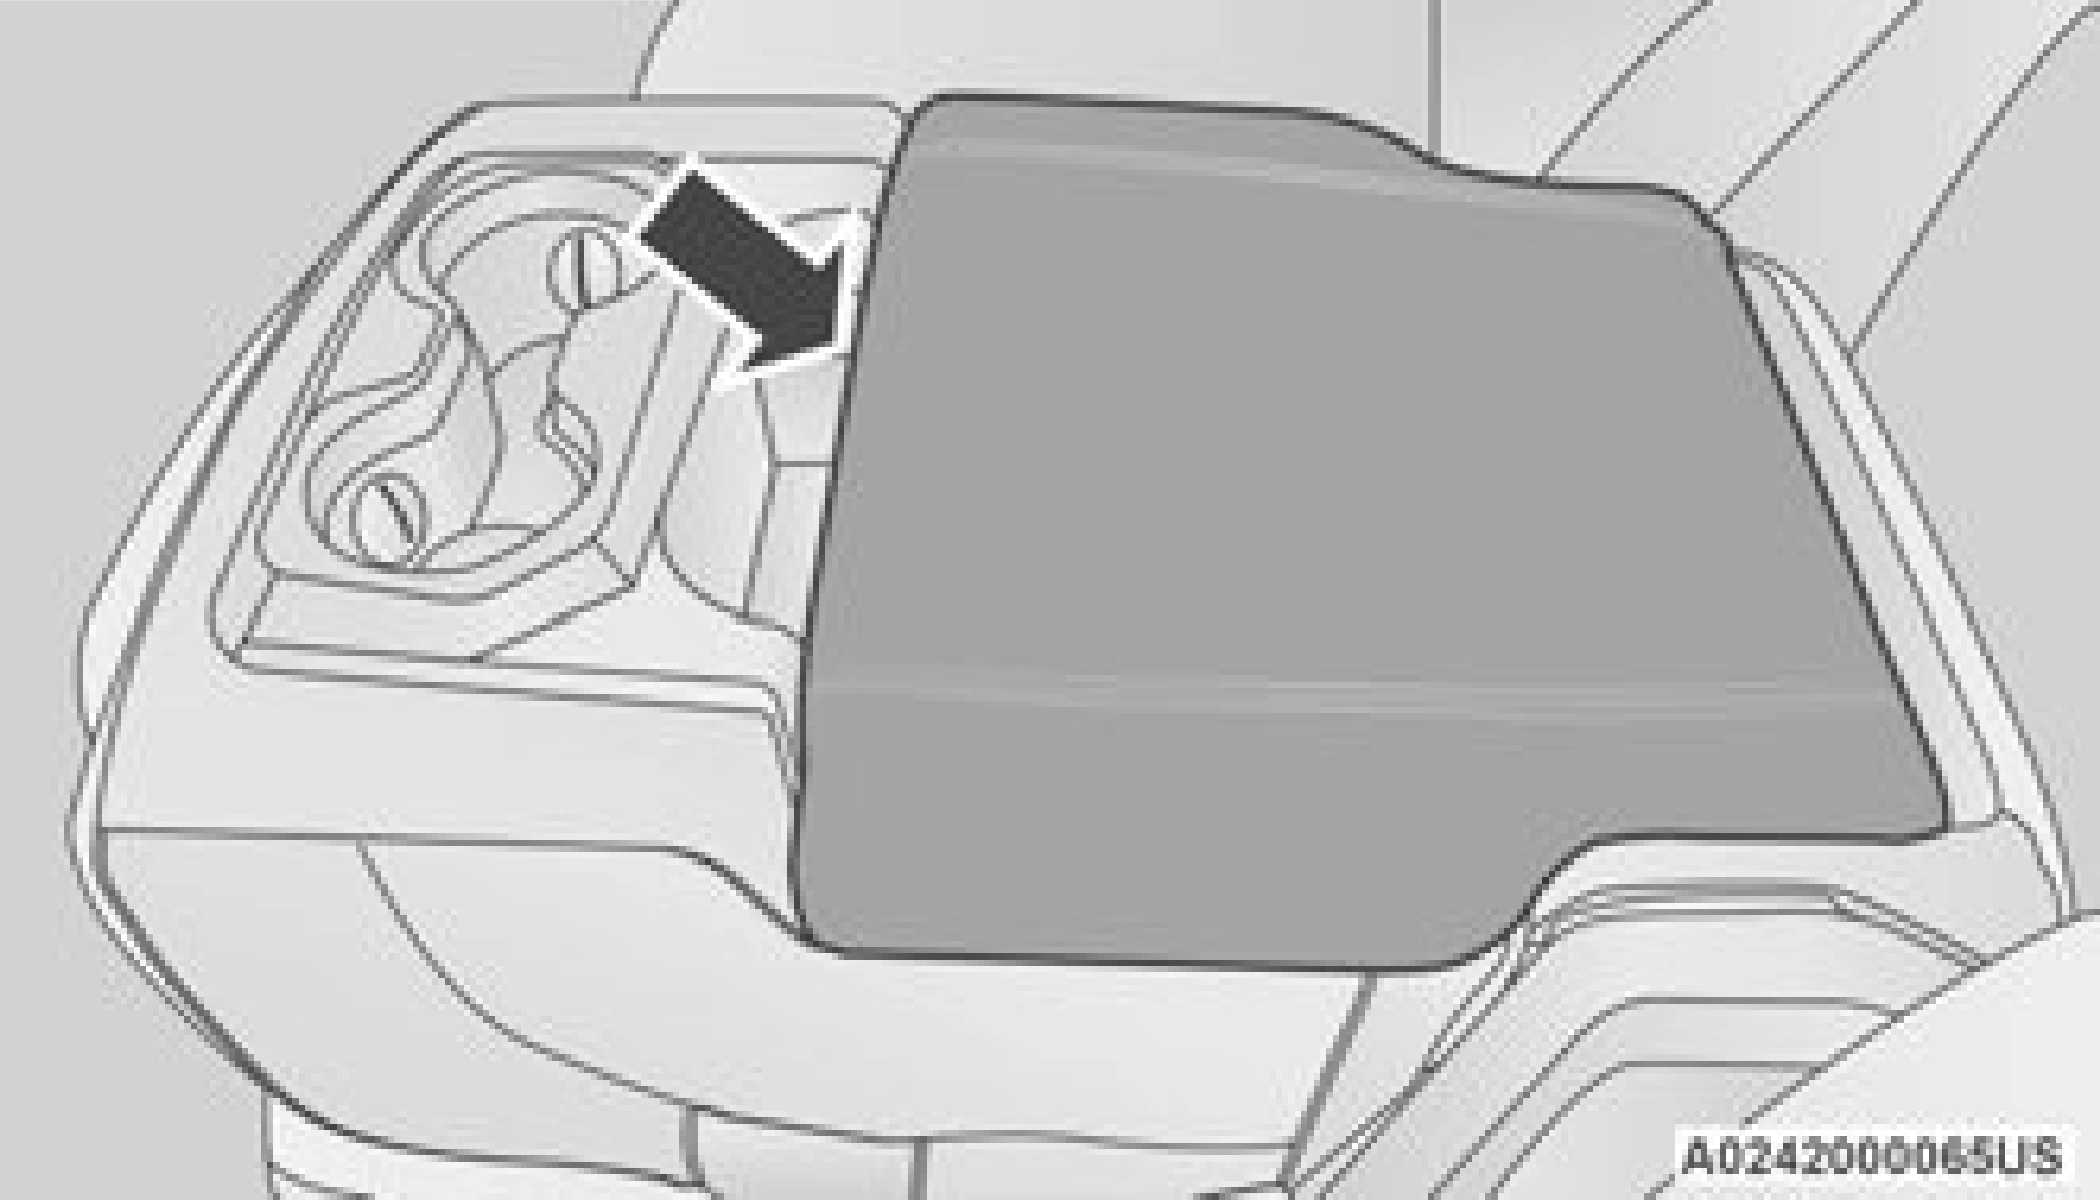
POWER INVERTER — IF EQUIPPED
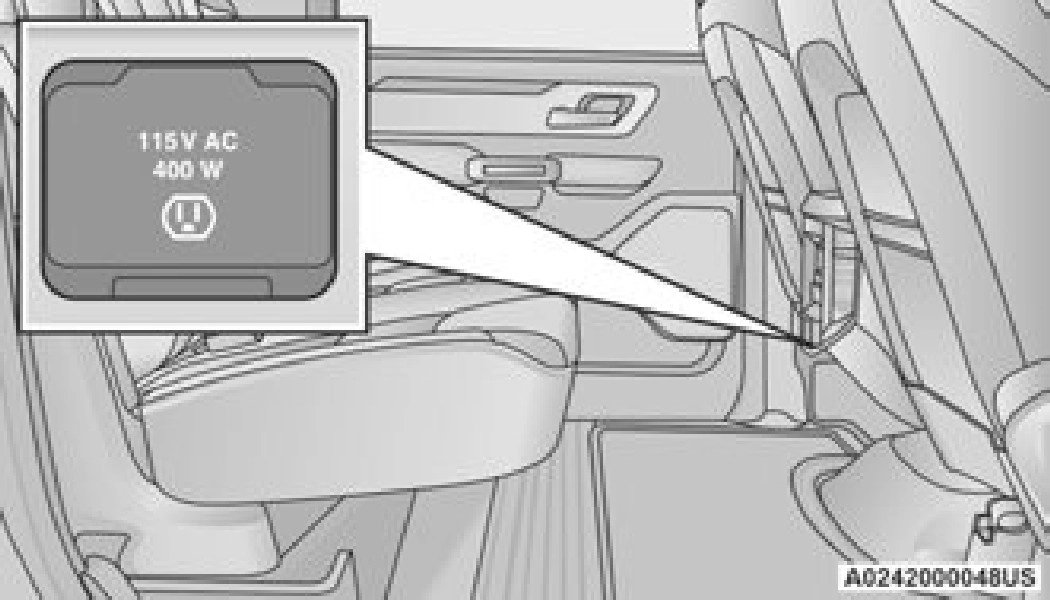
A 115 Volt (400 Watts Maximum) inverter may be located inside the center console towards the right hand side. This inverter can power cellular phones, electronics and other low power devices requiring power up to 400 Watts. Certain high-end video game consoles exceed this power limit, as will most power tools.
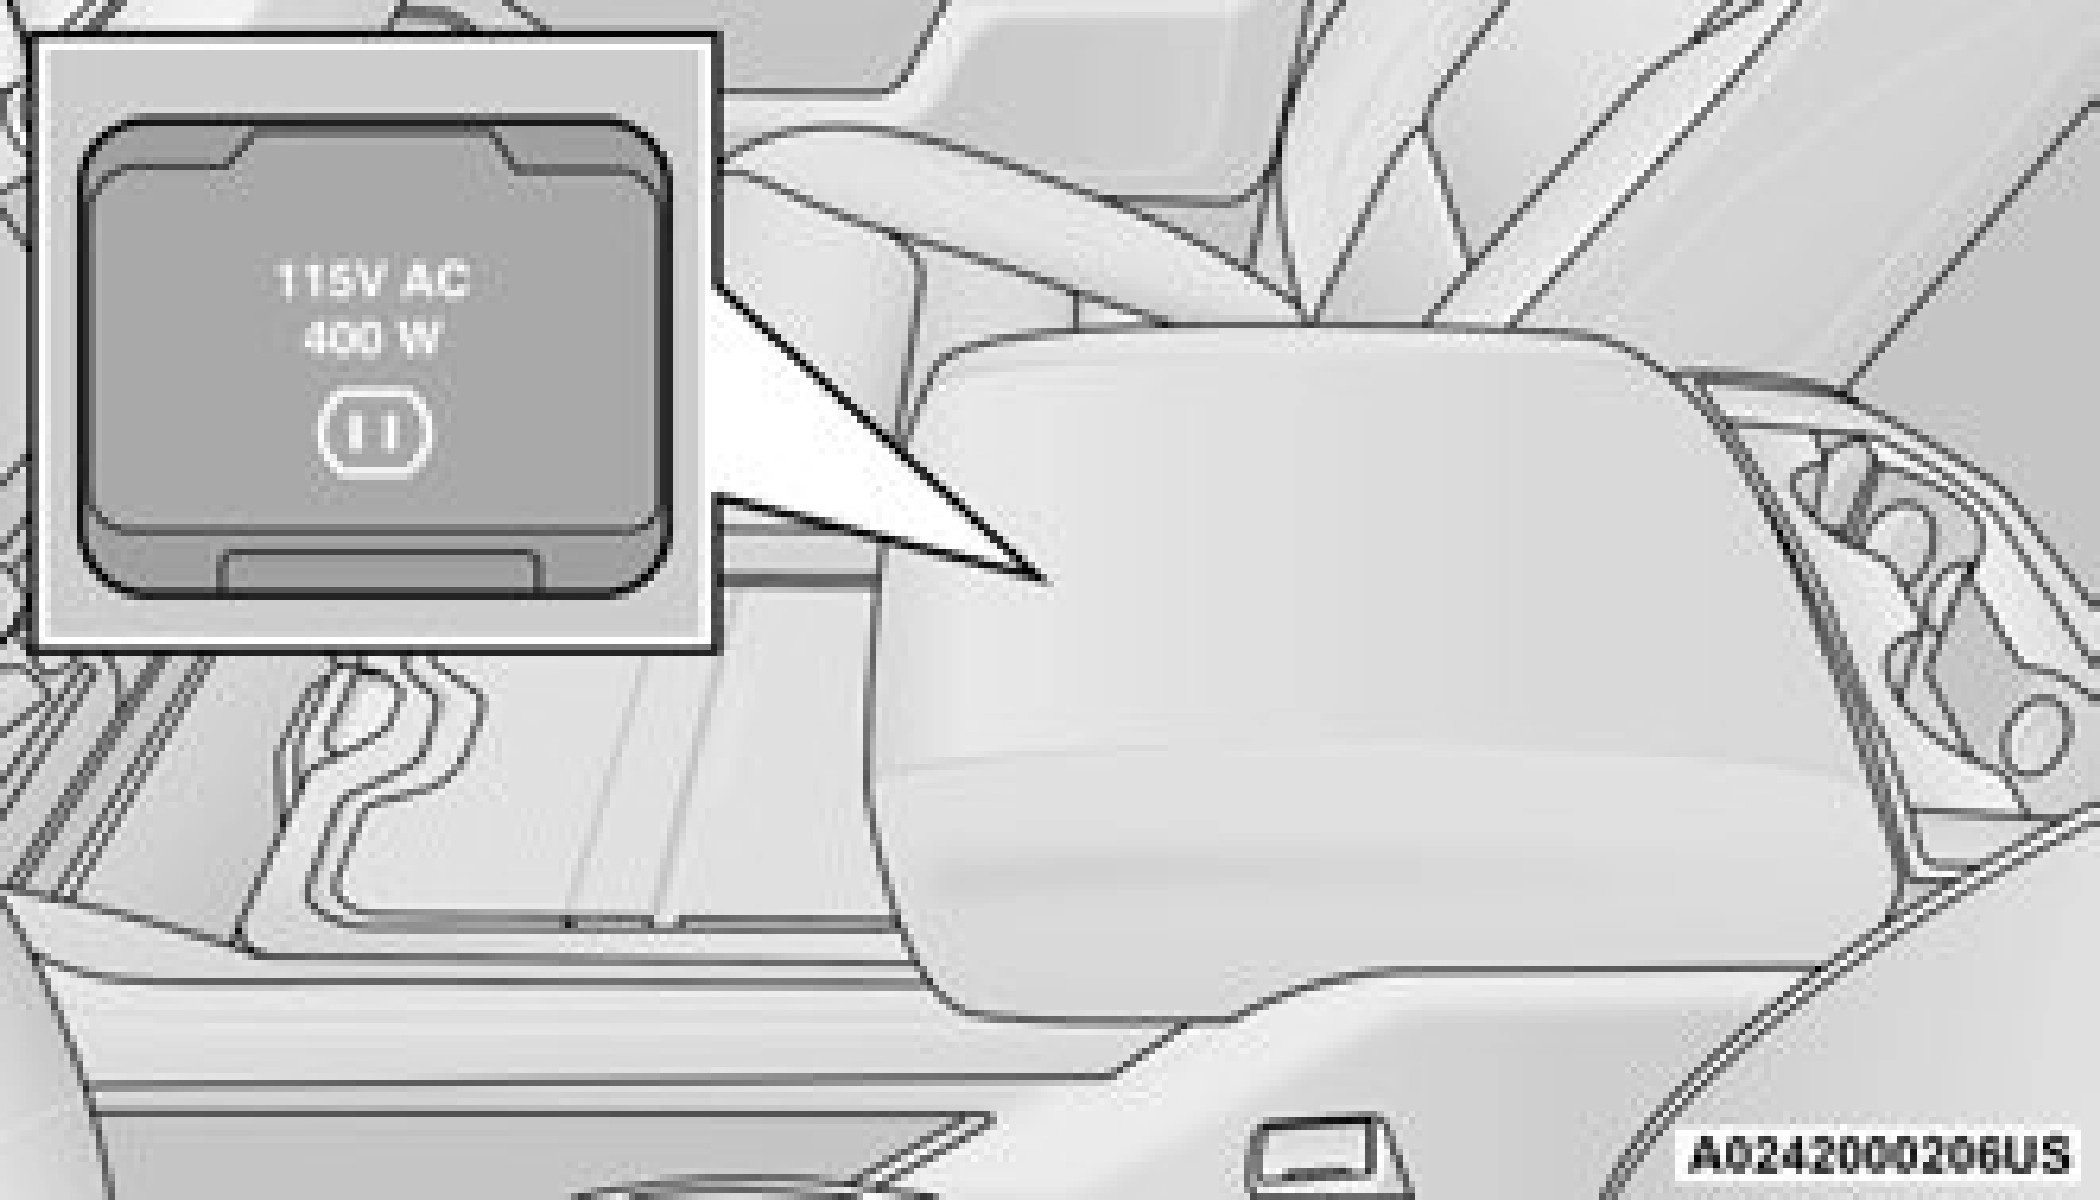
There is also a second 115 Volt (400 Watts Maximum) power inverter located on the rear of the center console. This inverter can power cellular phones, electronics and other low power devices requiring power up to 400 Watts. Certain high-end video game consoles exceed this power limit, as will most power tools.
All power inverters are designed with built-in overload protection. If the power rating of 400 Watts is exceeded, the power inverter shuts down. Once the electrical device has been removed from the outlet the inverter should reset.
NOTE:
400 Watts is the maximum for the inverter, not each outlet. If three outlets are in use, 400 Watts is shared amongst the devices plugged in.
If equipped with a front bench seat, there may be a 115 Volt (400 Watts Maximum) inverter located to the right of the center stack, just below the climate controls. This inverter can power cellular phones, electronics and other low power devices requiring power up to
400 Watts. Certain high-end video game consoles exceed this power limit, as will most power tools.
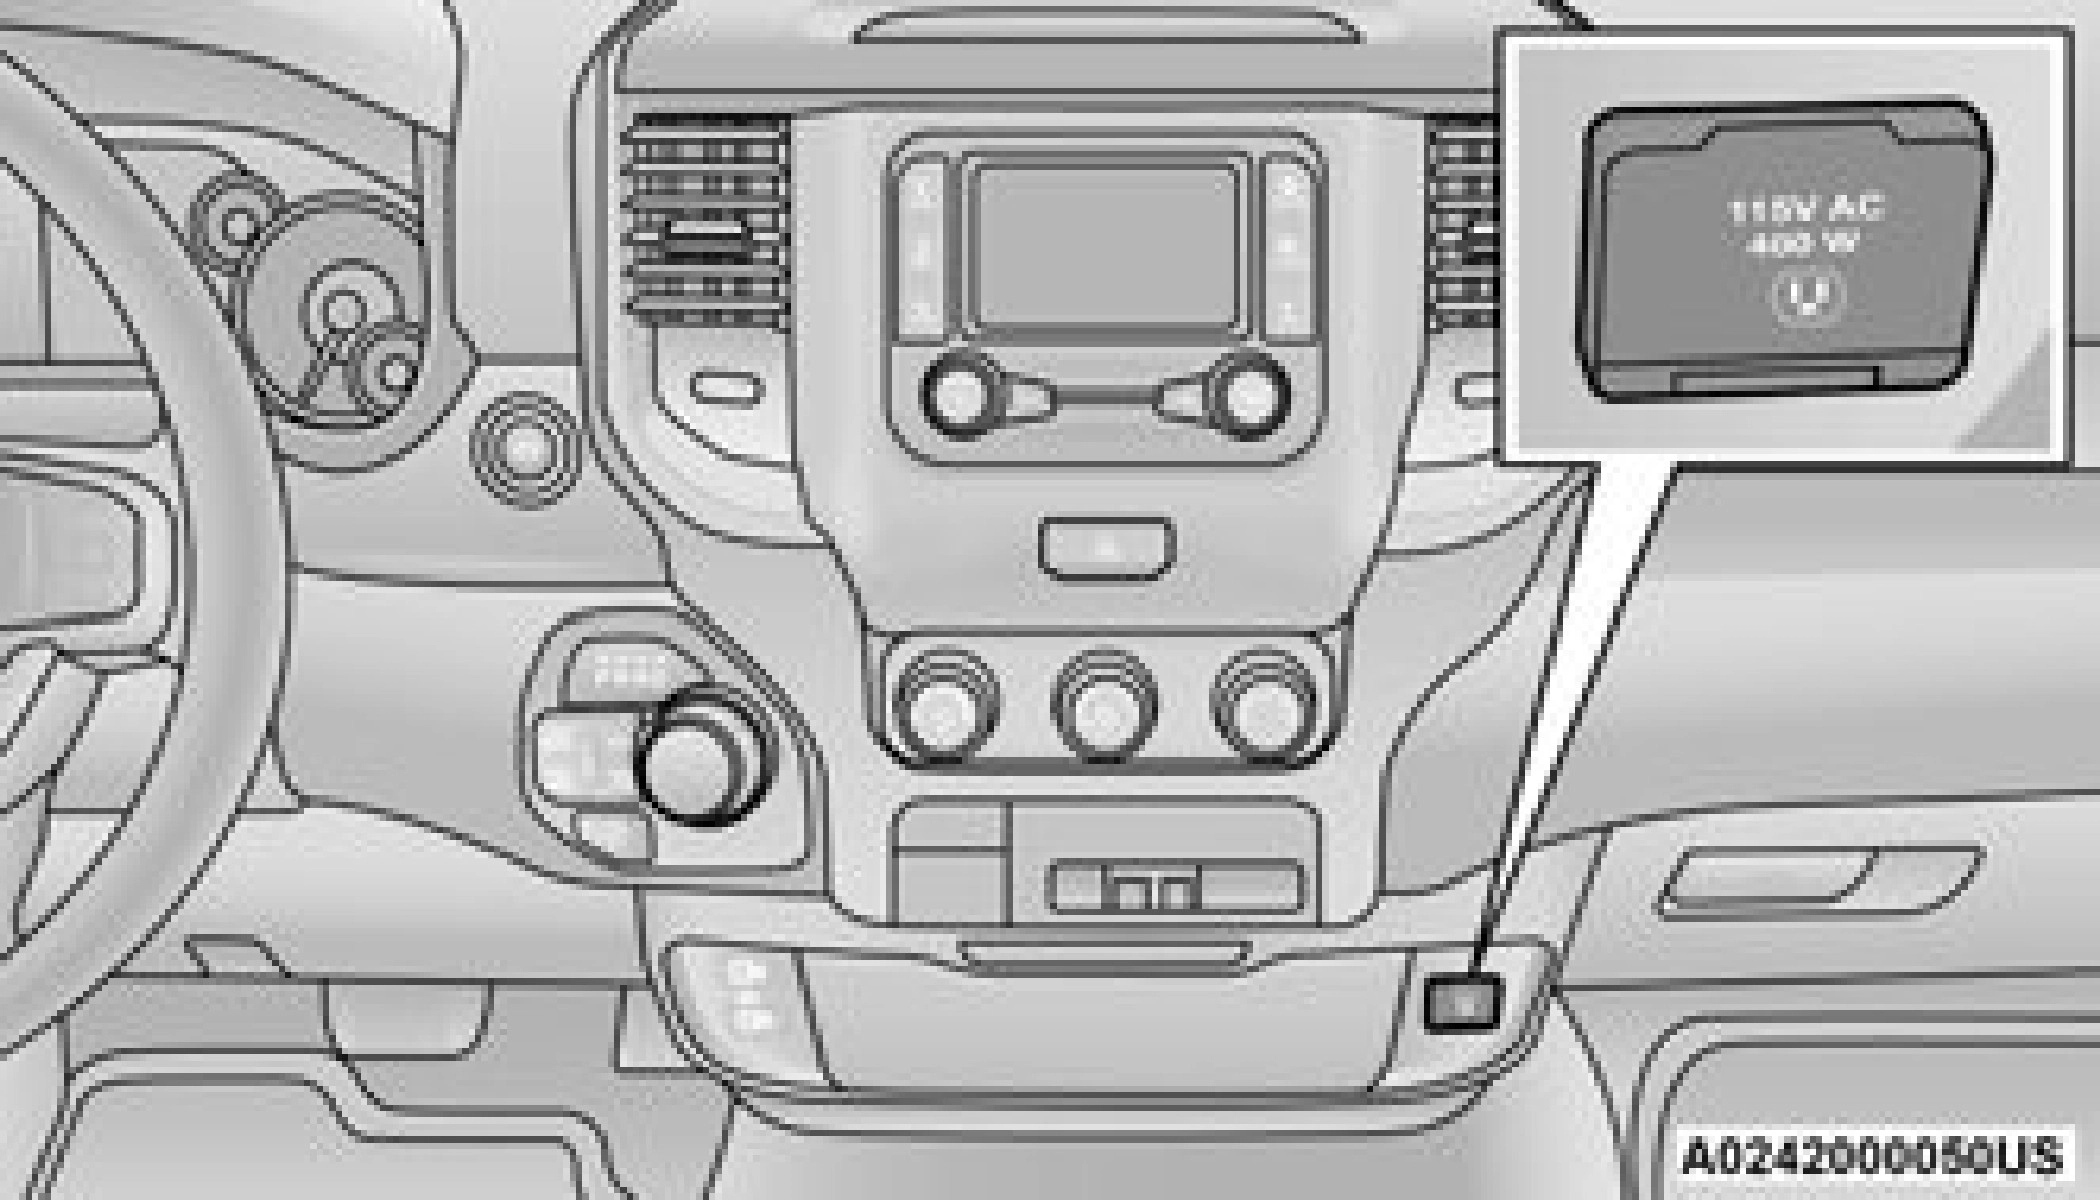
To turn on the power outlet, simply plug in the device. The outlet turns off when the device is unplugged.
WIRELESS CHARGING PAD — IF EQUIPPED
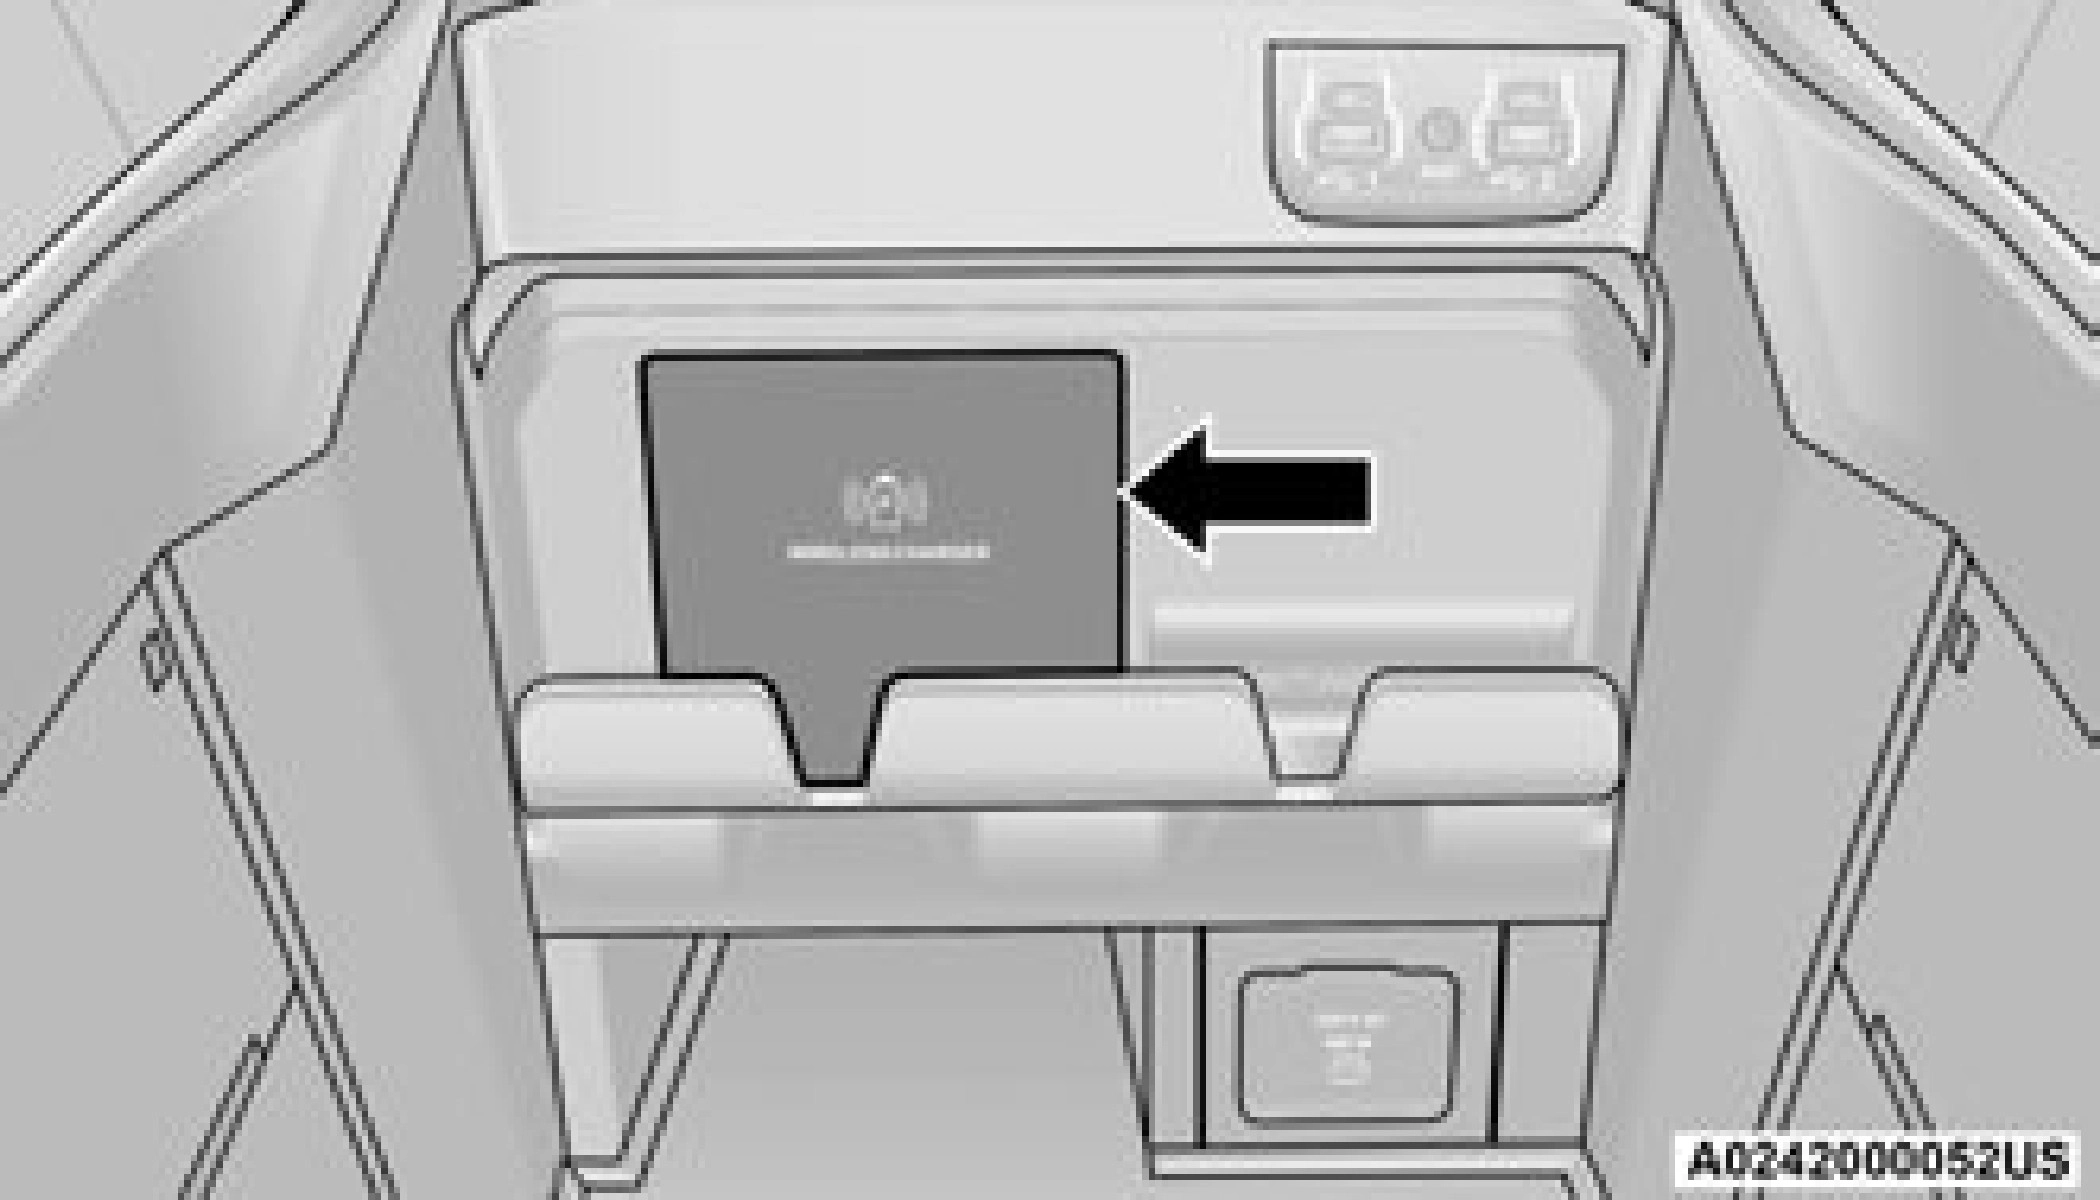
Your vehicle may be equipped with a 15W 3A Qi wireless charging pad located inside of the center console. This charging pad is designed to wirelessly charge your Qi enabled mobile phone. Qi is a standard that allows wireless charging of your mobile phone.
Your mobile phone must be designed for Qi wireless charging. If the phone is not equipped with Qi wireless charging functionality, an aftermarket sleeve or a specialized back plate can be purchased from your mobile phone provider or a local electronics retailer. Please see your phone’s owner’s manual for further information.
The wireless charging pad is equipped with an anti-slip mat, an adjustable cradle to hold your mobile phone in place, and an LED indicator light.
Using a phone case may interfere with wireless charging.
Download Manual