Seats
Seats are a part of the Occupant Restraint system of the vehicle.
WARNING:
It is dangerous to ride in a cargo area, inside or outside of a vehicle. In a collision, people riding in these areas are more likely to be seriously injured or killed.
Do not allow people to ride in any area of your vehicle that is not equipped with seats and seat belts. In a collision, people riding in these areas are more likely to be seriously injured or killed.
Be sure everyone in your vehicle is in a seat and using a seat belt properly.
MANUAL FRONT SEATS
WARNING:
Adjusting a seat while the vehicle is moving is dangerous. The sudden movement of the seat could cause you to lose control. The seat belt might not be adjusted properly and you could be injured. Adjust the seat only while the vehicle is parked.
Do not ride with the seatback reclined so that the shoulder belt is no longer resting against your chest. In a collision you could slide under the seat belt and be seriously or even fatally injured. Use the recliner only when the vehicle is parked.
MANUAL FRONT SEATS FORWARD/REARWARD ADJUSTMENT
On models equipped with manual seats, the adjusting bar is located at the front of the seats, near the floor.
Manual Seat Adjustment Levers
|
1 — Forward/Rearward Adjustment Bar |
|
2 — Seat Height Adjustment Lever (If Equipped) |
|
3 — Recline Lever |
While sitting in the seat, lift up on the bar and move the seat forward or rearward. Release the bar once you have reached the desired position. Then, using body pressure, move forward and rearward on the seat to be sure that the seat adjusters have latched.
HEIGHT ADJUSTMENT
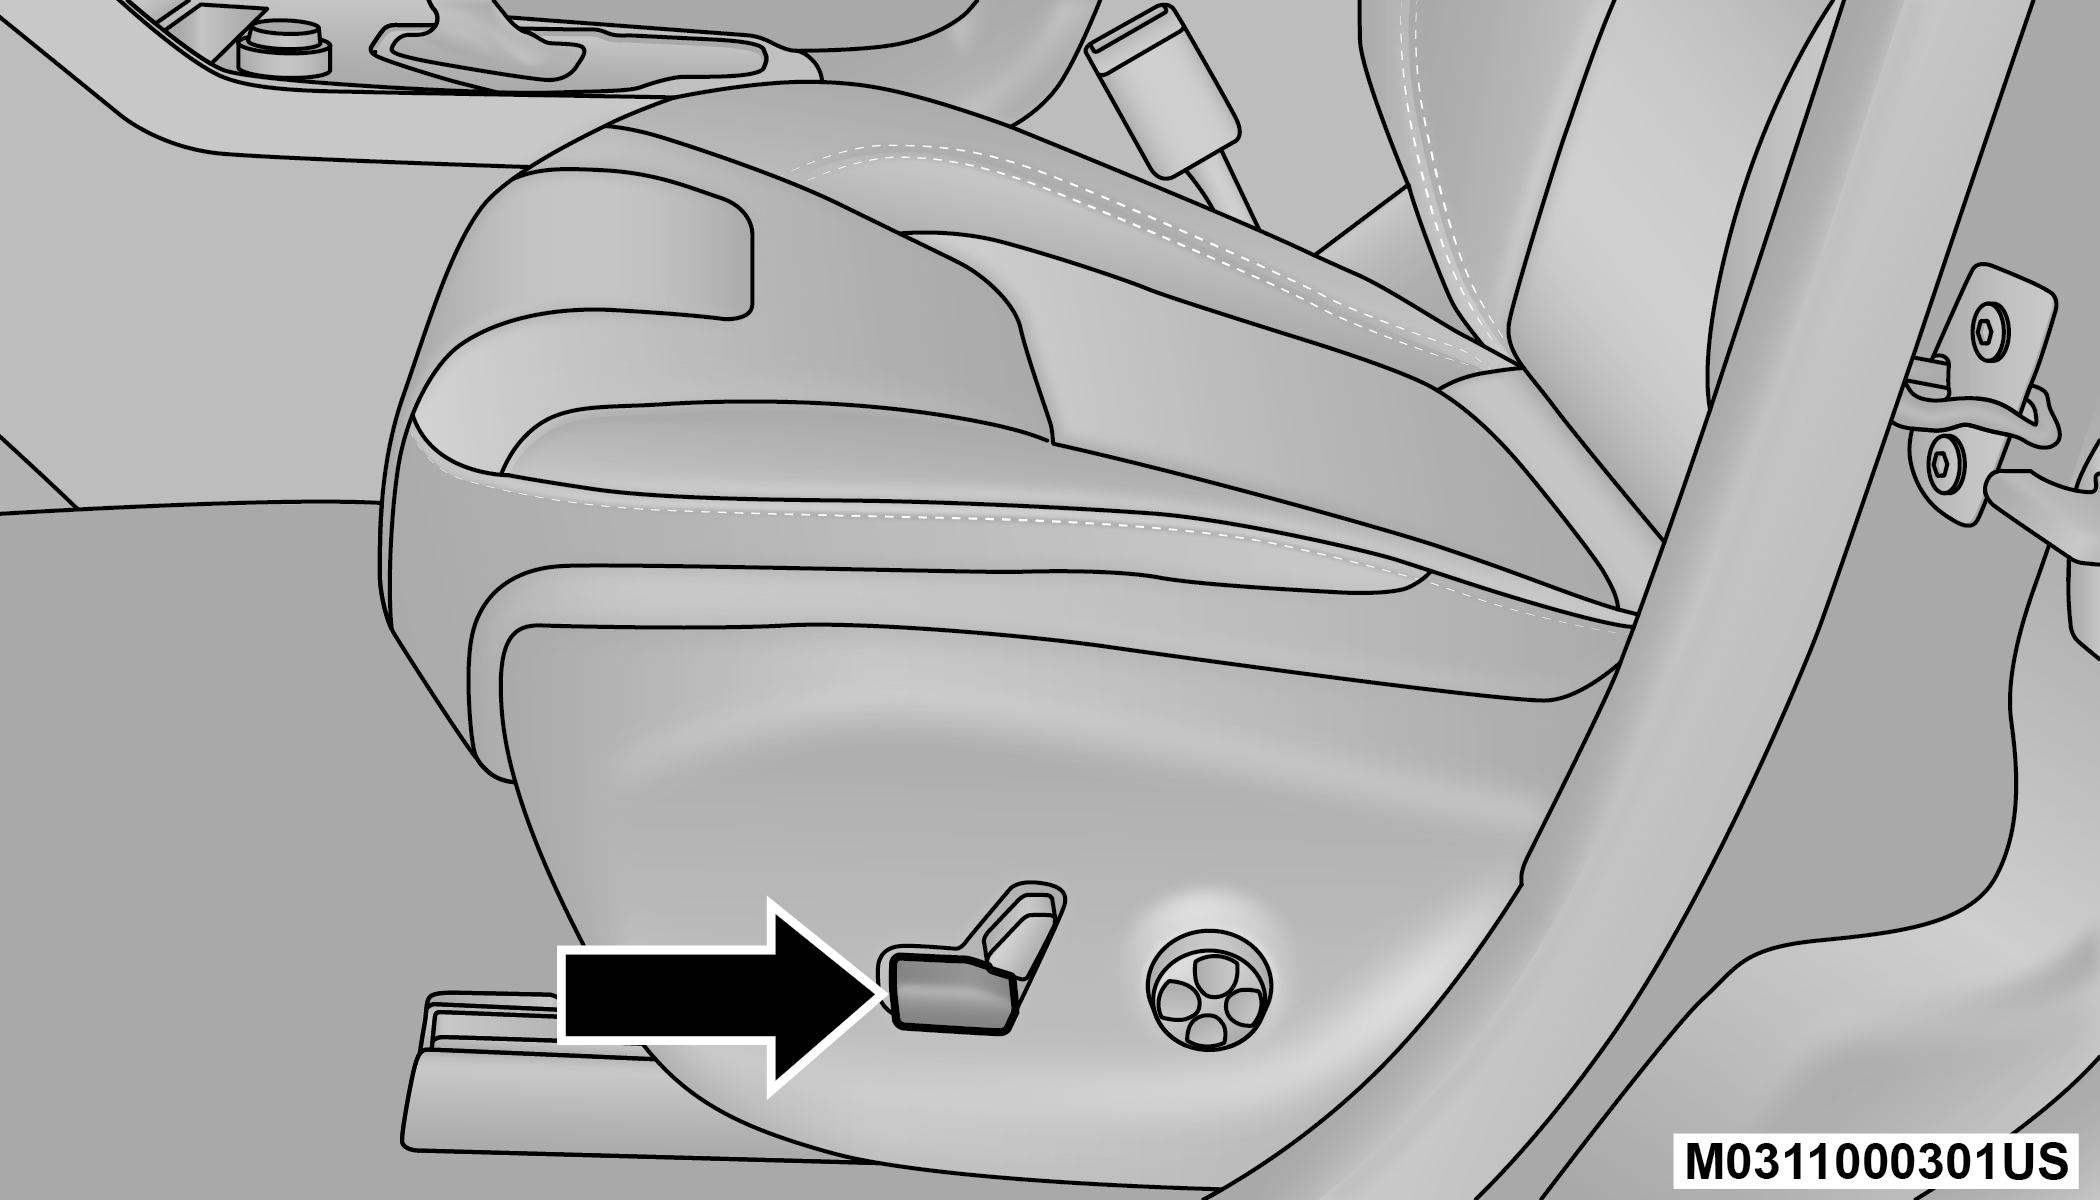
The driver’s seat height can be raised or lowered by using a lever, located on the outboard side of the seat. Pull upward on the lever to raise the seat height or push downward on the lever to lower the seat height.
MANUAL RECLINE ADJUSTMENT
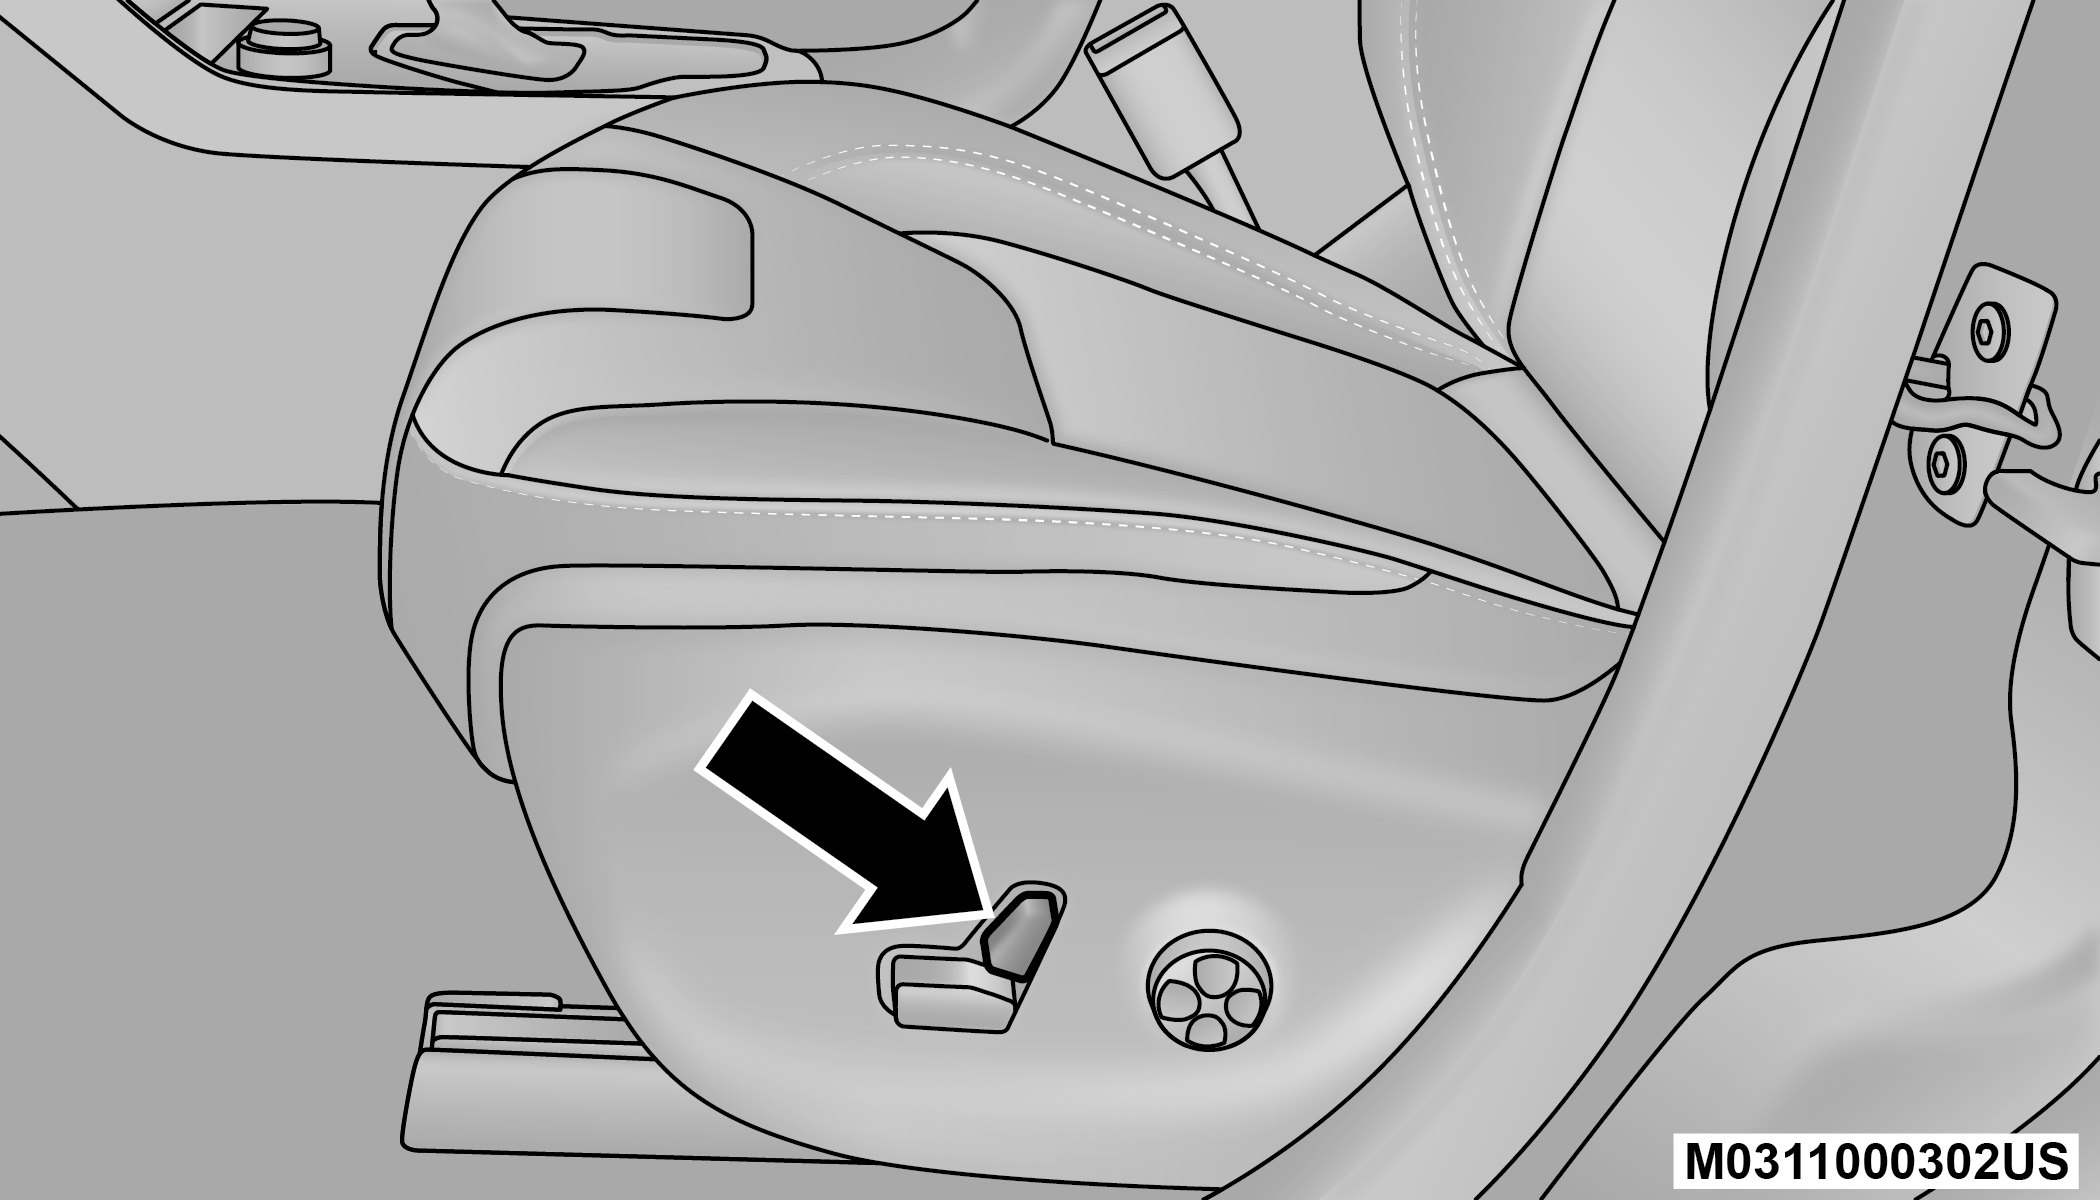
To adjust the seatback, lift the lever located on the outboard side of the seat, lean back to the desired position and release the lever. To return the seatback, lift the lever, lean forward and release the lever.
MANUAL REAR SEAT ADJUSTMENT
WARNING:
Do not pile luggage or cargo higher than the top of the seatback. This could impair visibility or become a dangerous projectile in a sudden stop or collision.
SPLIT REAR SEATS
The split rear seat has the ability to fold flat which increases the storage of the rear cargo area.
Note:
Prior to folding the rear seat down, it may be necessary to position the front seat to its mid-track position. Be sure that the front seats are fully upright and positioned forward, this will allow the rear seat to fold down easily.
Prior to folding the rear seat, you must secure the rear armrest in the upright position.
You may experience deformation in the seat cushion from the seat belt buckles if the seats are left folded for an extended period of time. This is normal and by simply unfolding the seats to the open position, over time the seat cushion will return to its normal shape.
WARNING:
It is extremely dangerous to ride in a cargo area, inside or outside of a vehicle. In a collision, people riding in these areas are more likely to be seriously injured or killed.
Do not allow people to ride in any area of your vehicle that is not equipped with seats and seat belts.
Be sure everyone in your vehicle is in a seat and using a seat belt properly.
CARGO AREA ENLARGEMENT
Folding both sides of the rear seat provides additional storage in the rear cargo area.
Proceed as follows:
-
Fully lower the rear seat head restraints.
-
Move the seat belts to the outboard side of the seat.
-
Pull the seatback release lever to fold both sides of the rear seatbacks completely forward.
PARTIAL ENLARGEMENT OF THE CARGO AREA
Enlargement of the left side of the cargo area allows you to carry a single passenger on the right side of the rear seat, while the enlargement of the right side allows you to carry two passengers.
Proceed as follows:
-
Remove the rear shelf (if equipped) .
-
Fully lower the rear seat head restraints.
-
Move the seat belts to the outboard side of the seat and rest them on the seat belt guide.
-
Pull the seatback release lever to fold the left or right rear seatback completely forward.
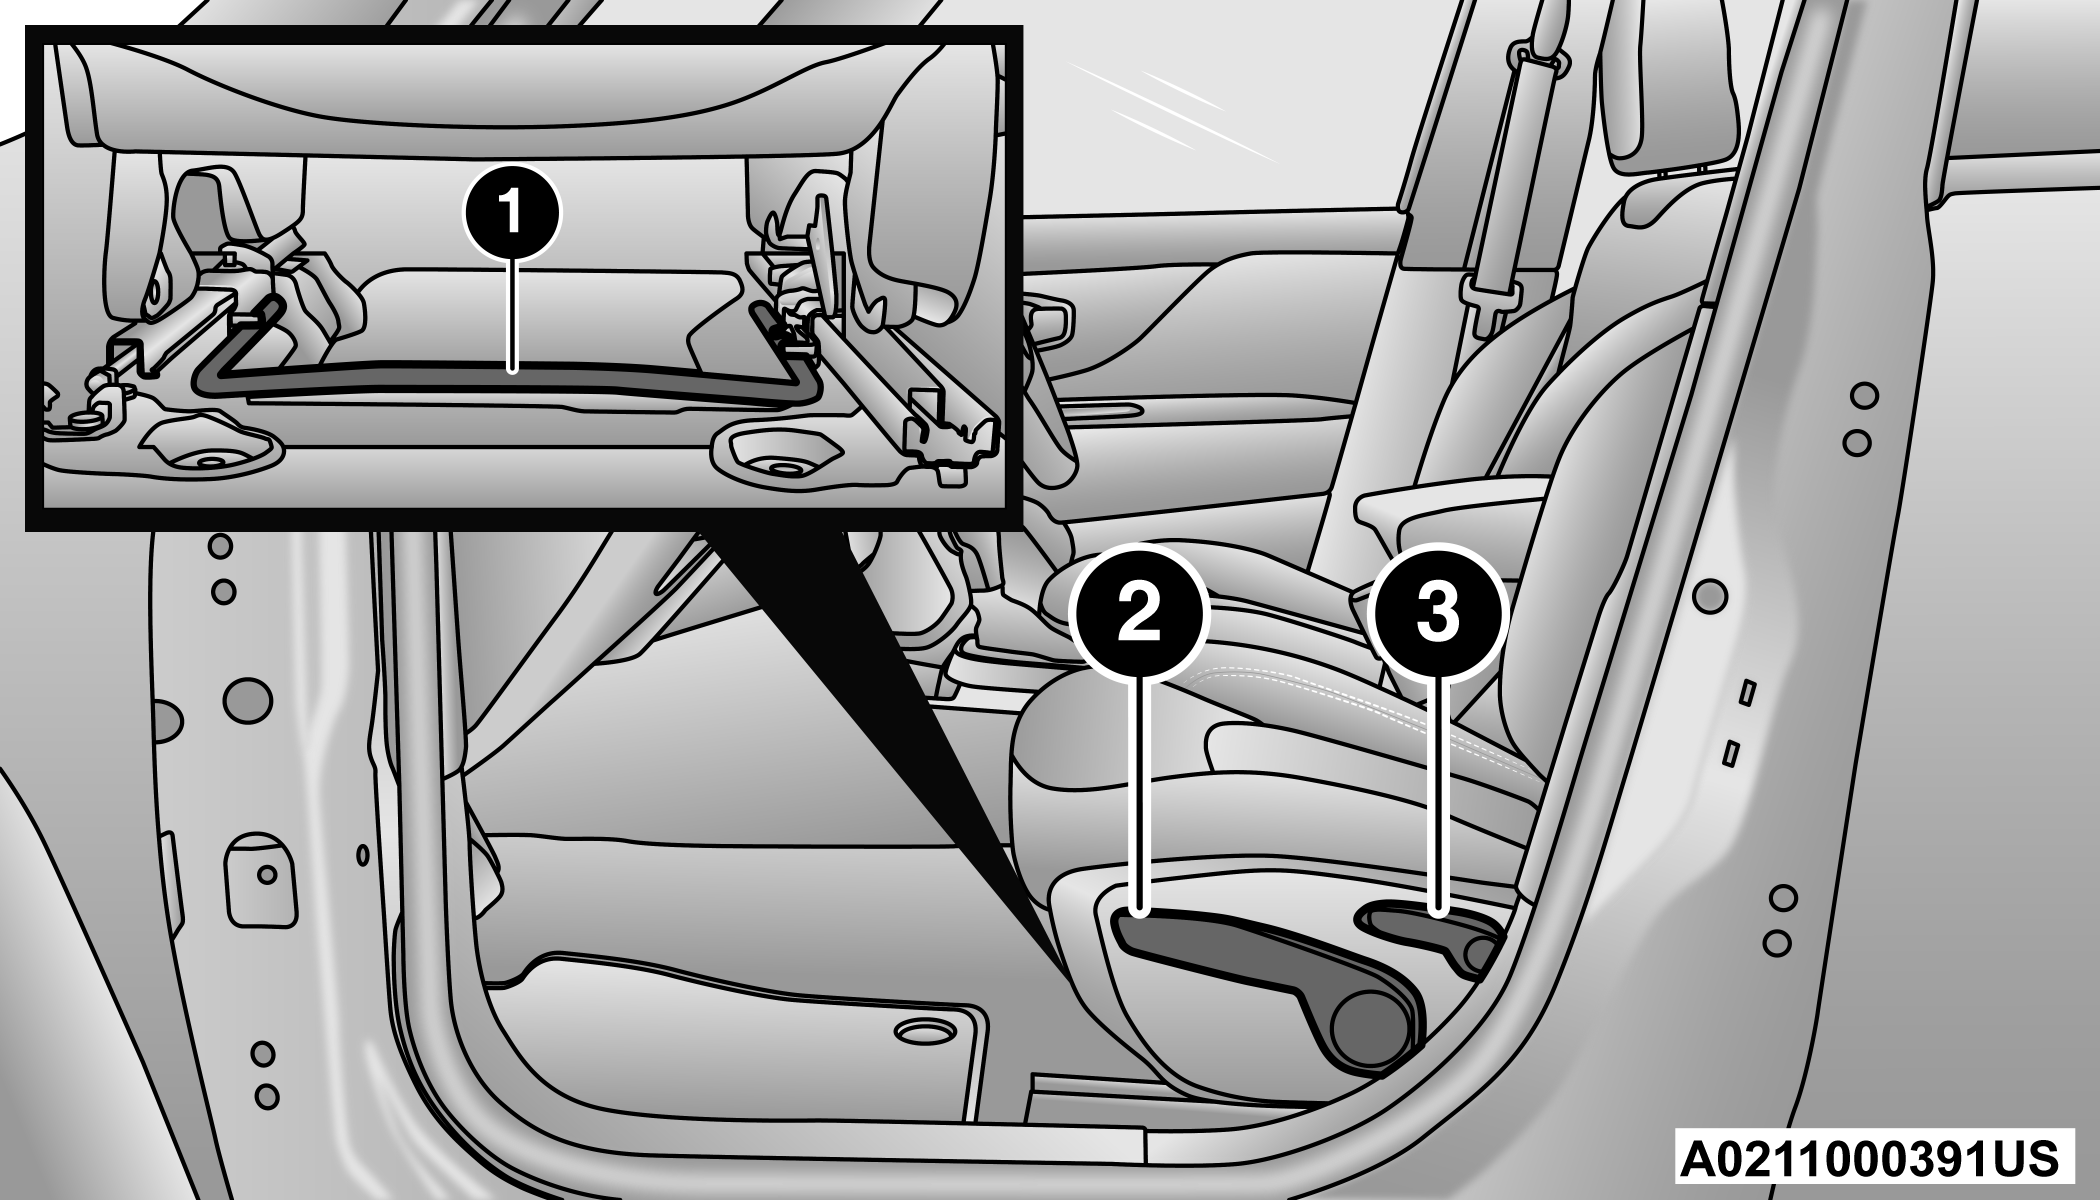
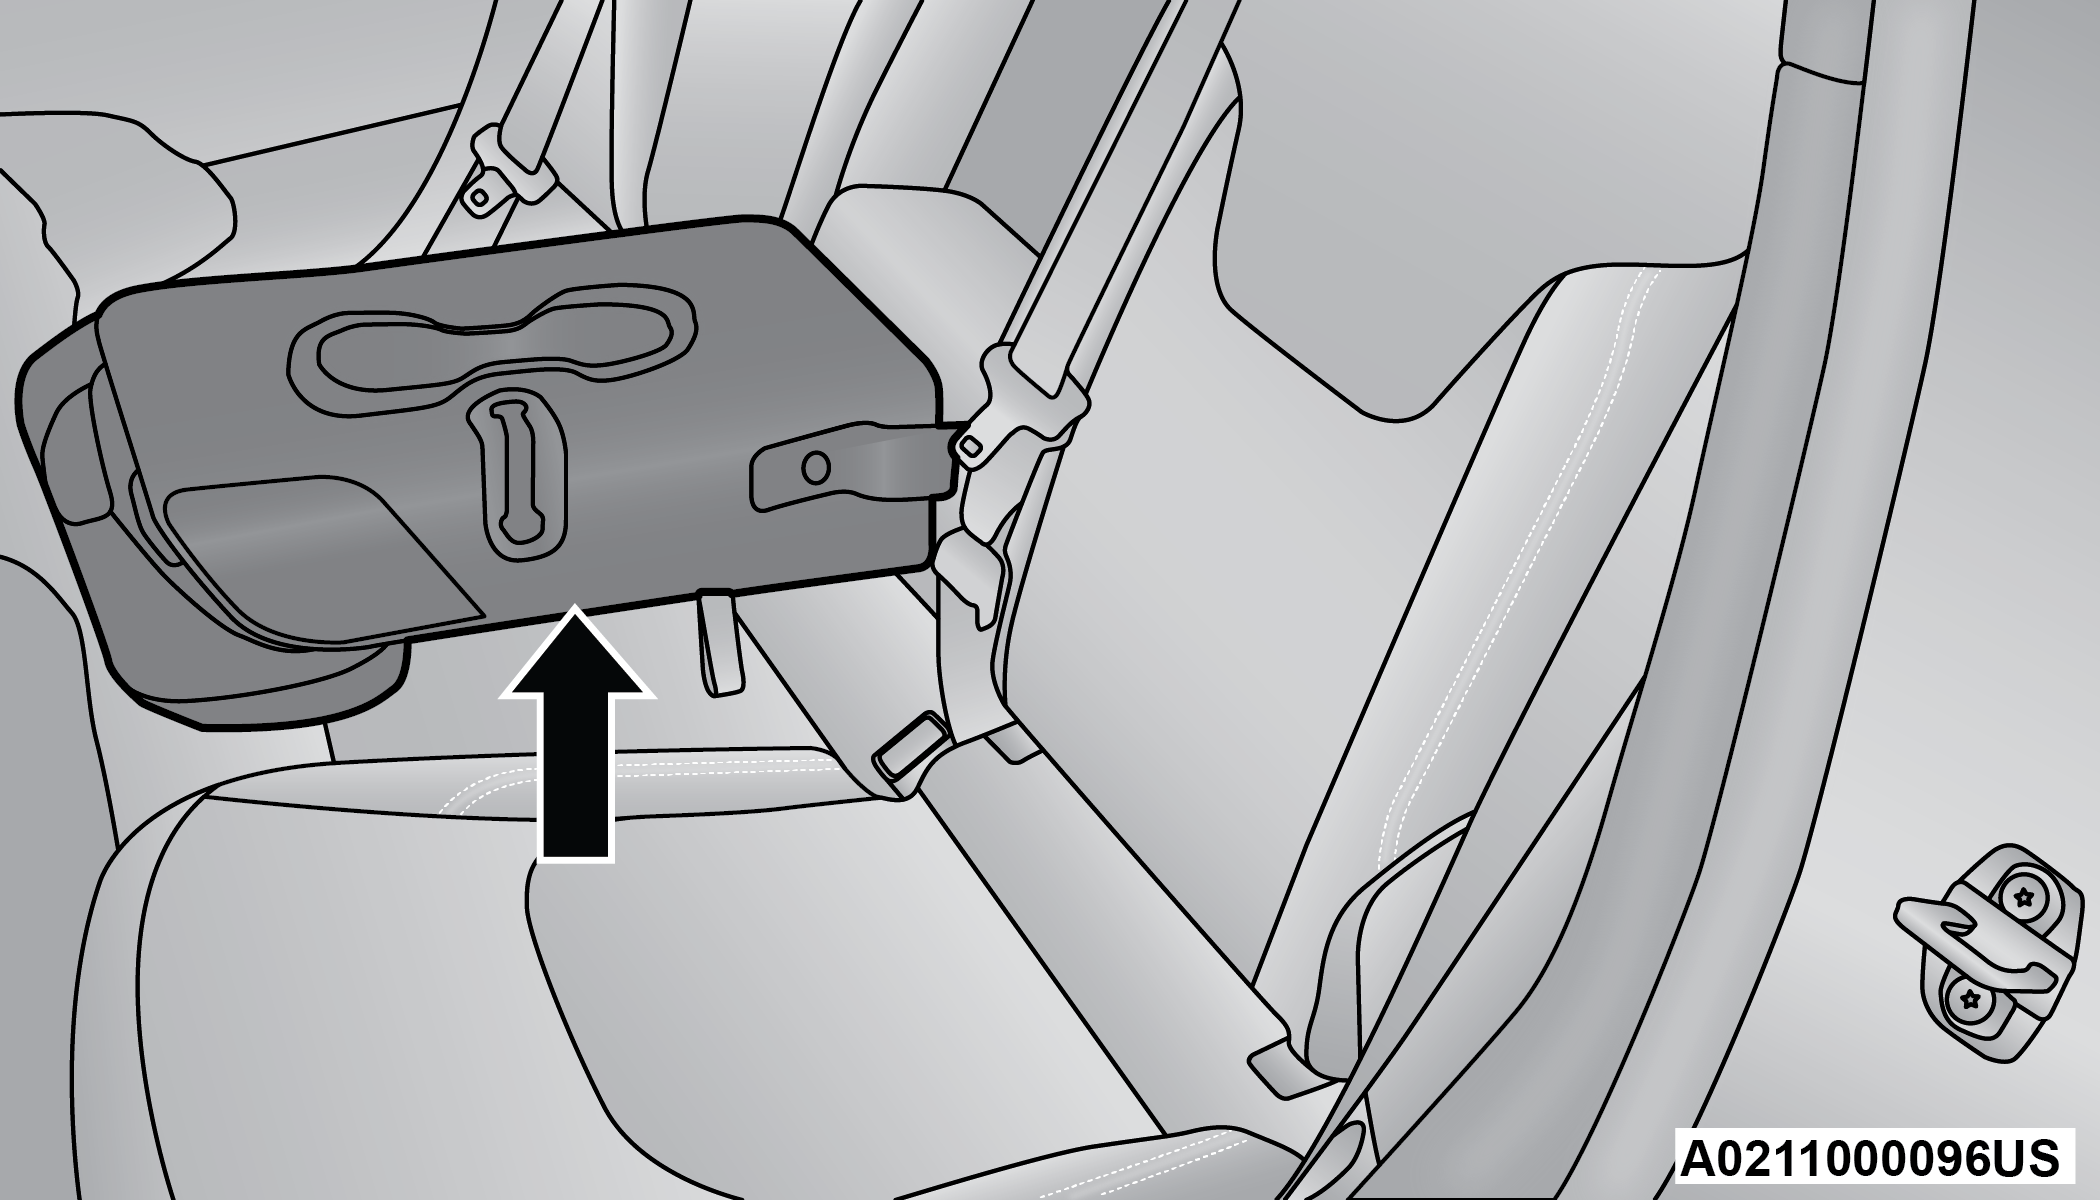
Rear Seat Release
1 — Seat Belt Guide 2 — Seatback Release Lever
SEATBACK REPOSITIONING
Note:
If interference from the cargo area prevents the seatback from fully locking, you will have difficulty returning the seat to its proper position.
-
Move the seat belts to the seat belt guides on the top edge of the seat to ensure the seatbacks properly latch.
-
Lift the seatbacks, pushing them back until they lock on both the latches. Verify the red notches are no longer visible on the release lever. If the red notches are visible, the seatback is not secure.
POWER ADJUSTMENT (FRONT) — IF EQUIPPED
Power Seat Switch
Some models may be equipped with a power driver's seat and/or power passenger seat. The power seat switch and power seat recliner switch are located on the outboard side of the seat near the floor. Use the power seat switch to adjust seat height, angle, or forward/rearward position. Use the power seat recline switch to adjust the angle of the seatback.
Forward Or Rearward Adjustment
The seat can be adjusted both forward and rearward. Push the seat switch forward or rearward, the seat will move in the direction of the switch. Release the switch when the desired position has been reached.
Height Adjustment
The height of the seats can be adjusted up or down. Pull upward or push downward on the seat switch, the seat will move in the direction of the switch. Release the switch when the desired position is reached.
Tilt Adjustment
The angle of the seat cushion can be adjusted up or down. Pull upward or push downward on the front of the seat switch and the front of the seat cushion will move in the direction of the switch.
RECLINING THE SEATBACK
The seatback can be reclined both forward and rearward. Push the seat recliner switch forward or rearward. The seatback will move in the direction of the switch. Release the switch when the desired position has been reached.
Power Seat Recliner Switch
WARNING:
Adjusting a seat while driving may be dangerous. Moving a seat while driving could result in loss of control which could cause a collision and serious injury or death.
Seats should be adjusted before fastening the seat belts and while the vehicle is parked. Serious injury or death could result from a poorly adjusted seat belt.
Do not ride with the seatback reclined so that the shoulder belt is no longer resting against your chest. In a collision you could slide under the seat belt, which could result in serious injury or death.
CAUTION:
Do not place any article under a power seat or impede its ability to move as it may cause damage to the seat controls. Seat travel may become limited if movement is stopped by an obstruction in the seat’s path.
POWER LUMBAR ADJUSTMENT— IF EQUIPPED
Push the switch forward or rearward to increase or decrease the lumbar support. Push the switch upward or downward to raise or lower the lumbar support.
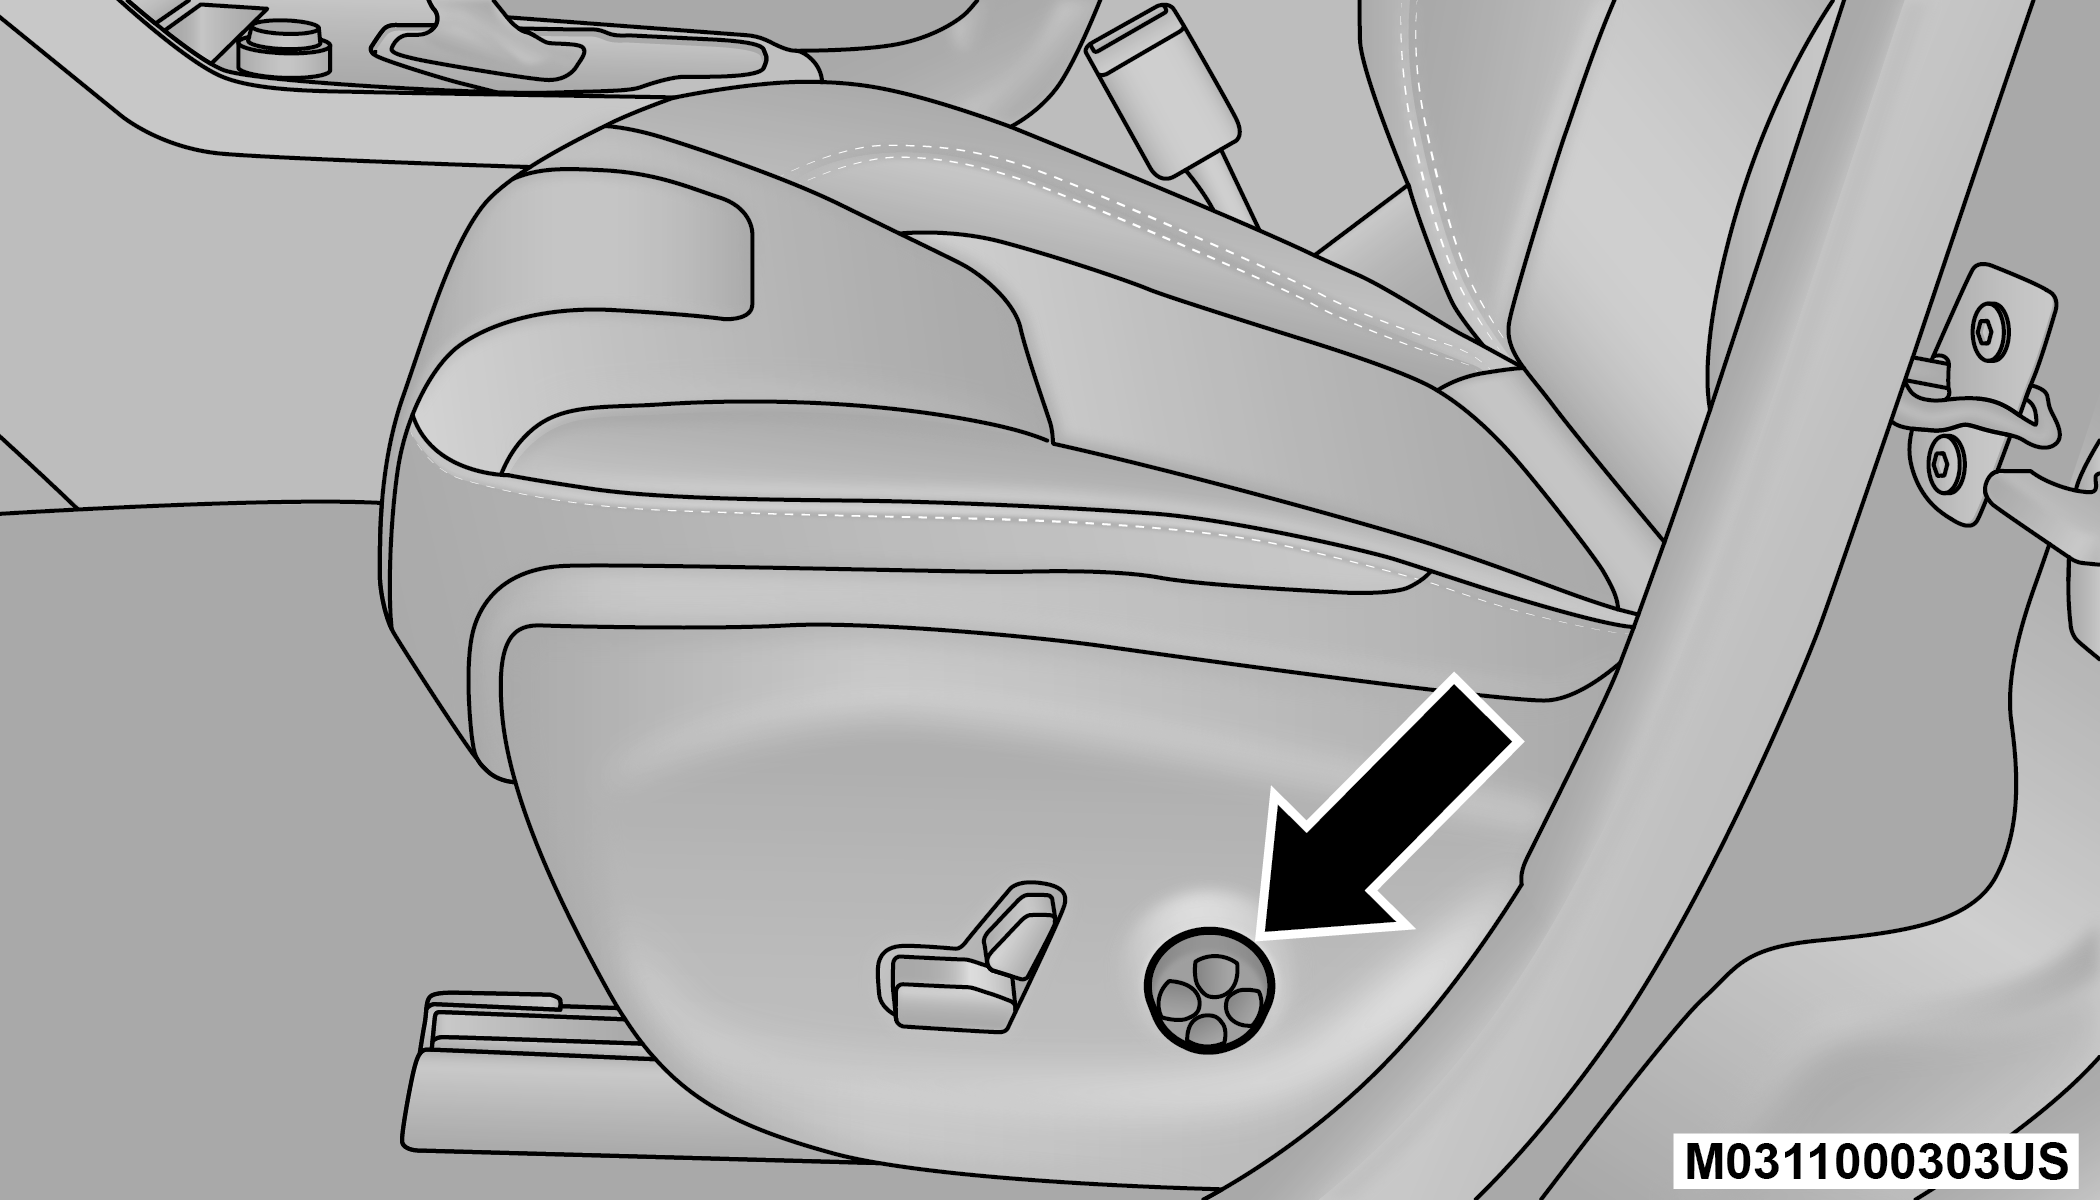
Power Lumbar Switch
Note:
Power seat adjustments are only allowed when the ignition is in the ON position, and for about 30 minutes after it is placed in the OFF position.
HEATED SEATS — IF EQUIPPED
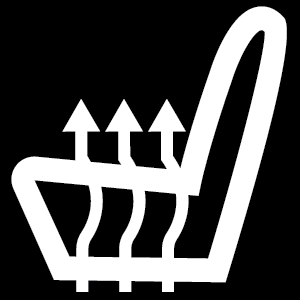 The heated seat buttons are located in your vehicle’s touchscreen or on the instrument panel.
You can choose between two heating levels:
Press the heated seat button once to turn the HI setting on.
Press the heated seat button a second time to turn the LO setting on.
Press the heated seat button a third time to turn the heating elements off.
If the operator presses the heated seat button a second time to turn on the LO setting, the display will change from HI to LO, and the LO level setting will turn off automatically after 45 minutes.
If the HI-level setting is selected, the system will automatically switch to LO-level after approximately 145 minutes of continuous operation. At that time, the display will change from HI to LO, indicating the change. The LO-level setting will turn off automatically after approximately 60 minutes.
Note:
The engine must be running for the heated seats to operate.
The timing values may vary the heated seat settings depending on the outside ambient temperature.
For information on use with the Remote Start system, see .
WARNING:
Persons who are unable to feel pain to the skin because of advanced age, chronic illness, diabetes, spinal cord injury, medication, alcohol use, exhaustion or other physical condition must exercise care when using the seat heater. It may cause burns even at low temperatures, especially if used for long periods of time.
Do not place anything on the seat or seatback that insulates against heat, such as a blanket or cushion. This may cause the seat heater to overheat. Sitting in a seat that has been overheated could cause serious burns due to the increased surface temperature of the seat.
UNFOLDING THE REAR ARMREST 40/20/40
Pull the rear armrest tab to release it from the seat and pull forward.
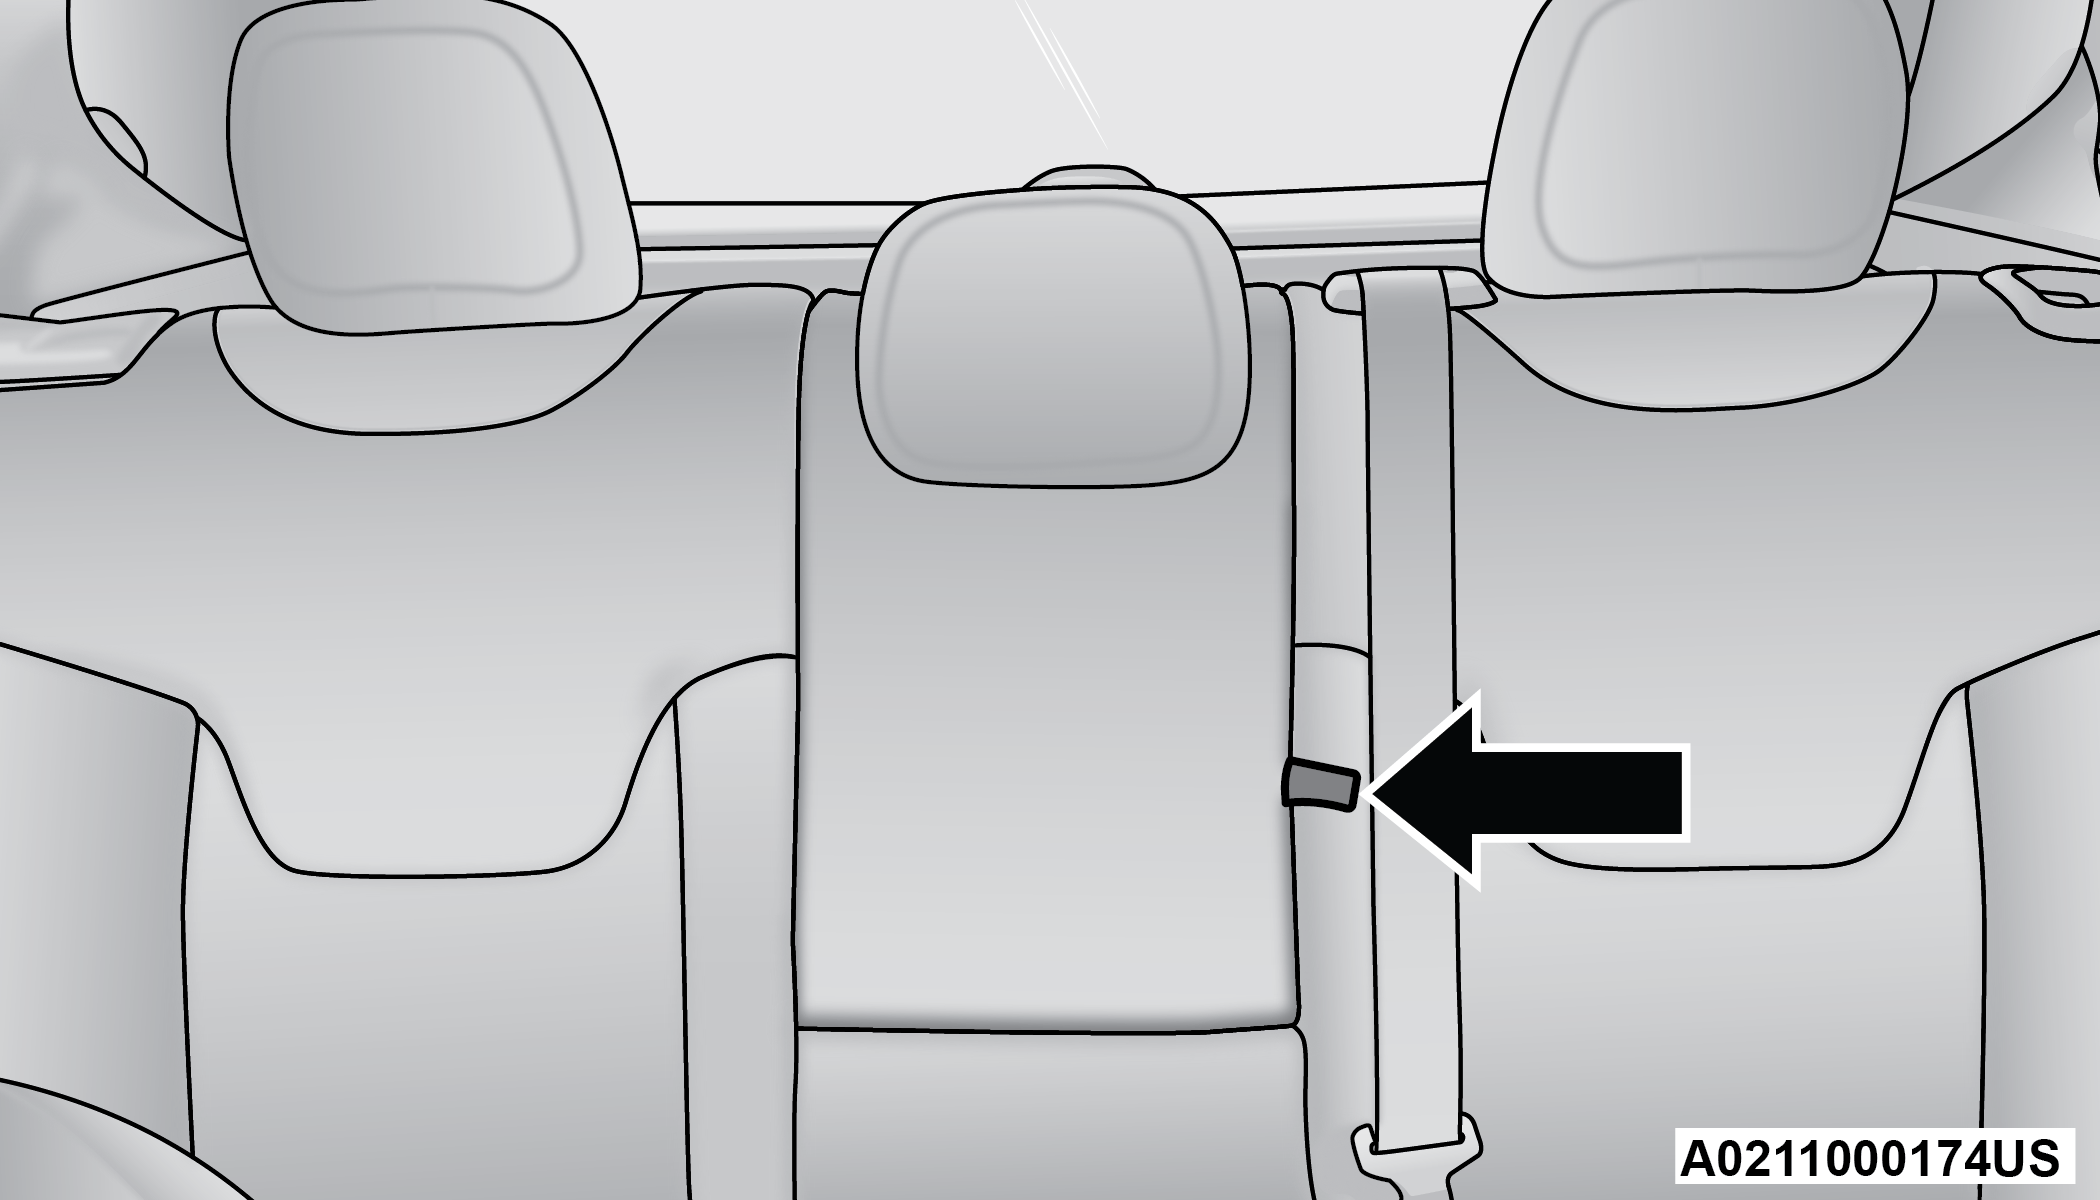
Armrest Tab Location
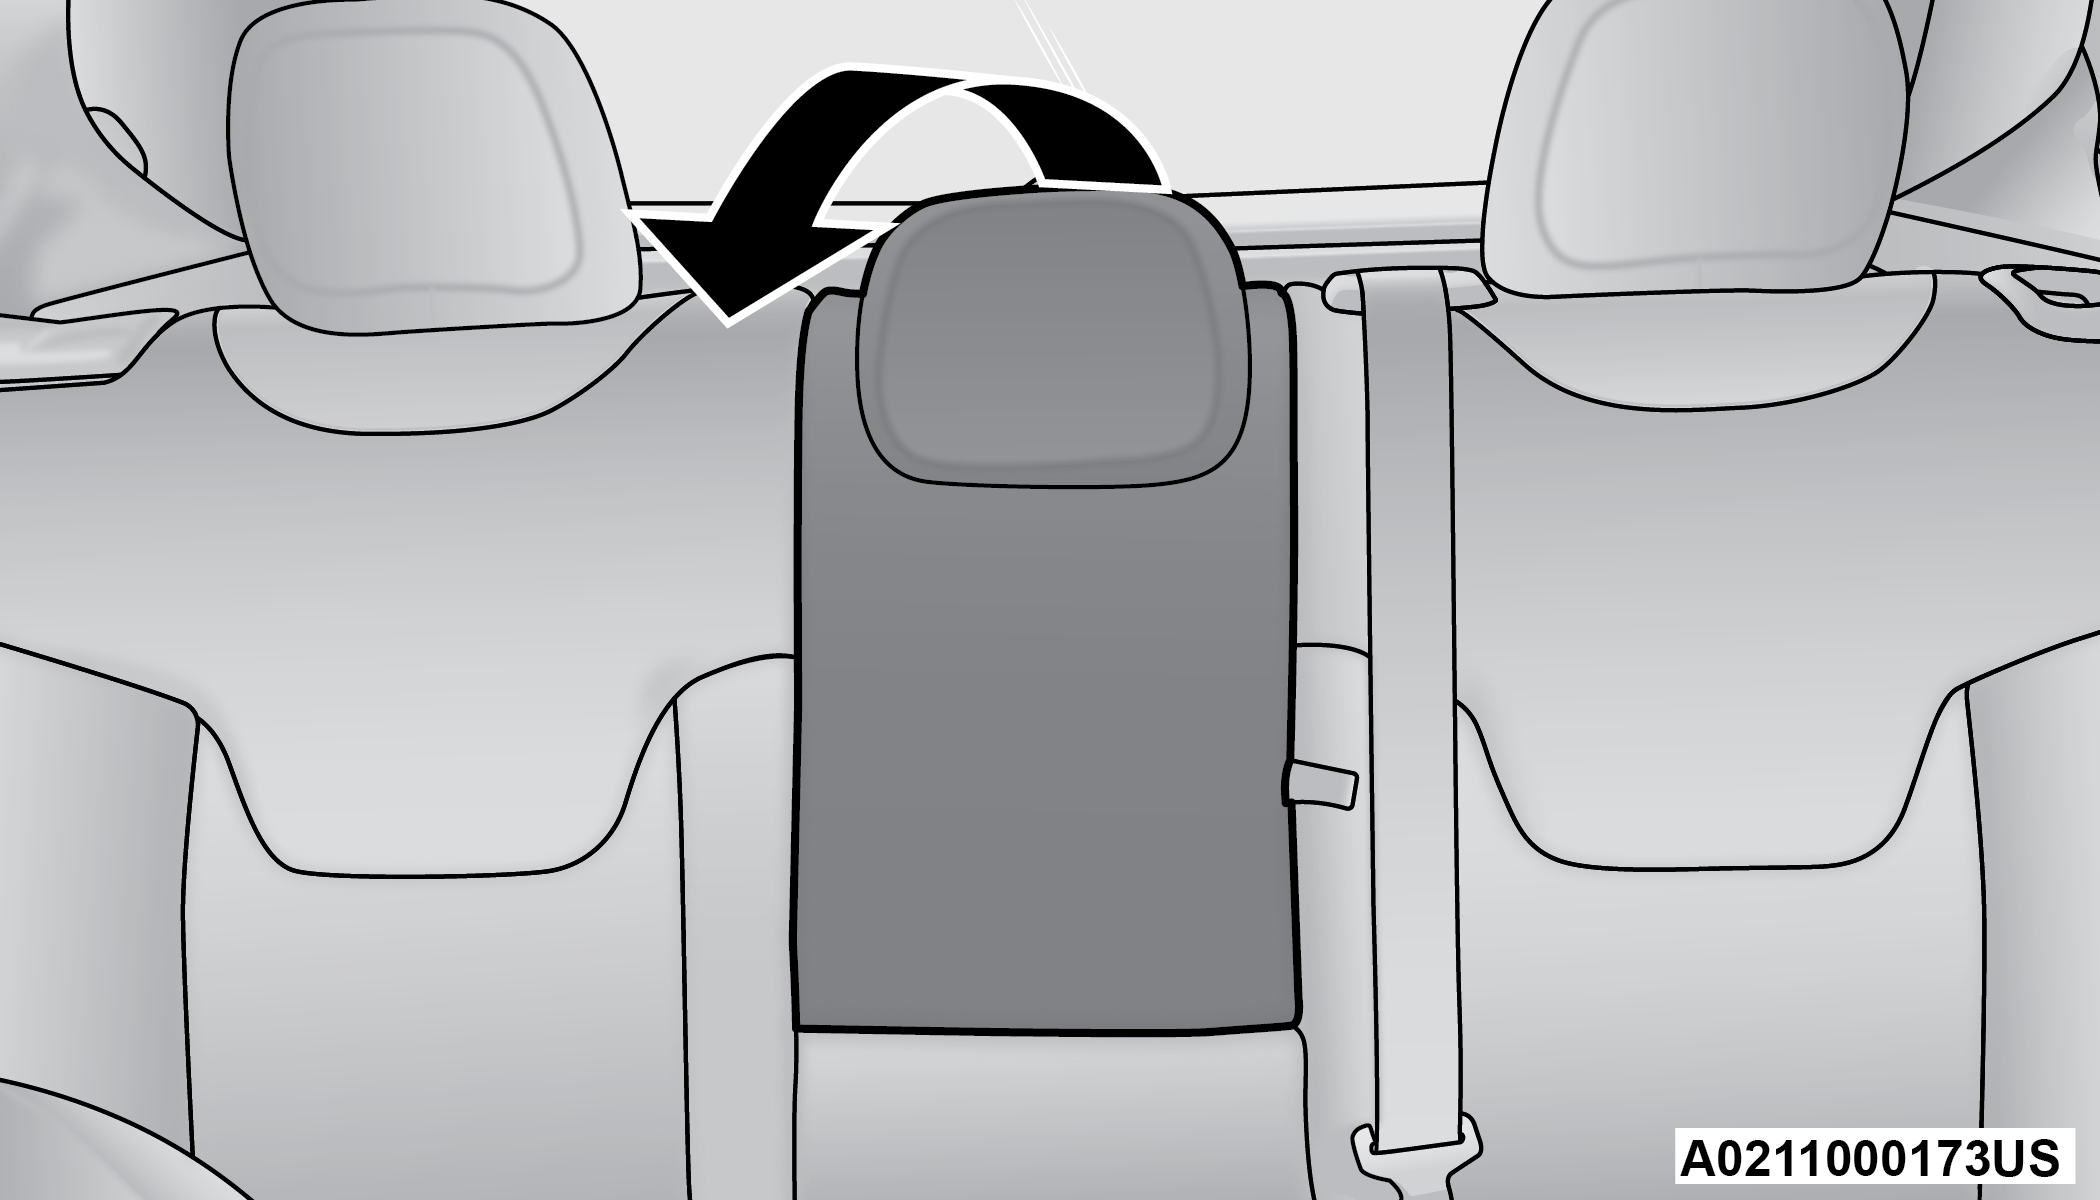
Fold Center Armrest Forward
The center part of the rear seat can also be used as a rear armrest with cupholders.
Rear Armrest With Cupholders
WARNING:
Be certain that the seatback is securely locked into position. If the seatback is not securely locked into position the seat will not provide the proper stability for child seats and/or passengers. An improperly latched seat could cause serious injury.
HEAD RESTRAINTS
Head restraints are designed to reduce the risk of injury by restricting head movement in the event of a rear impact. Head restraints should be adjusted so that the top of the head restraint is located above the top of your ear.
WARNING:
All occupants, including the driver, should not operate a vehicle or sit in a vehicle’s seat until the head restraints are placed in their proper positions in order to minimize the risk of neck injury in the event of a crash.
Head restraints should never be adjusted while the vehicle is in motion. Driving a vehicle with the head restraints improperly adjusted or removed could cause serious injury or death in the event of a collision.
FRONT HEAD RESTRAINTS
Your vehicle is equipped with front driver and passenger head restraints.
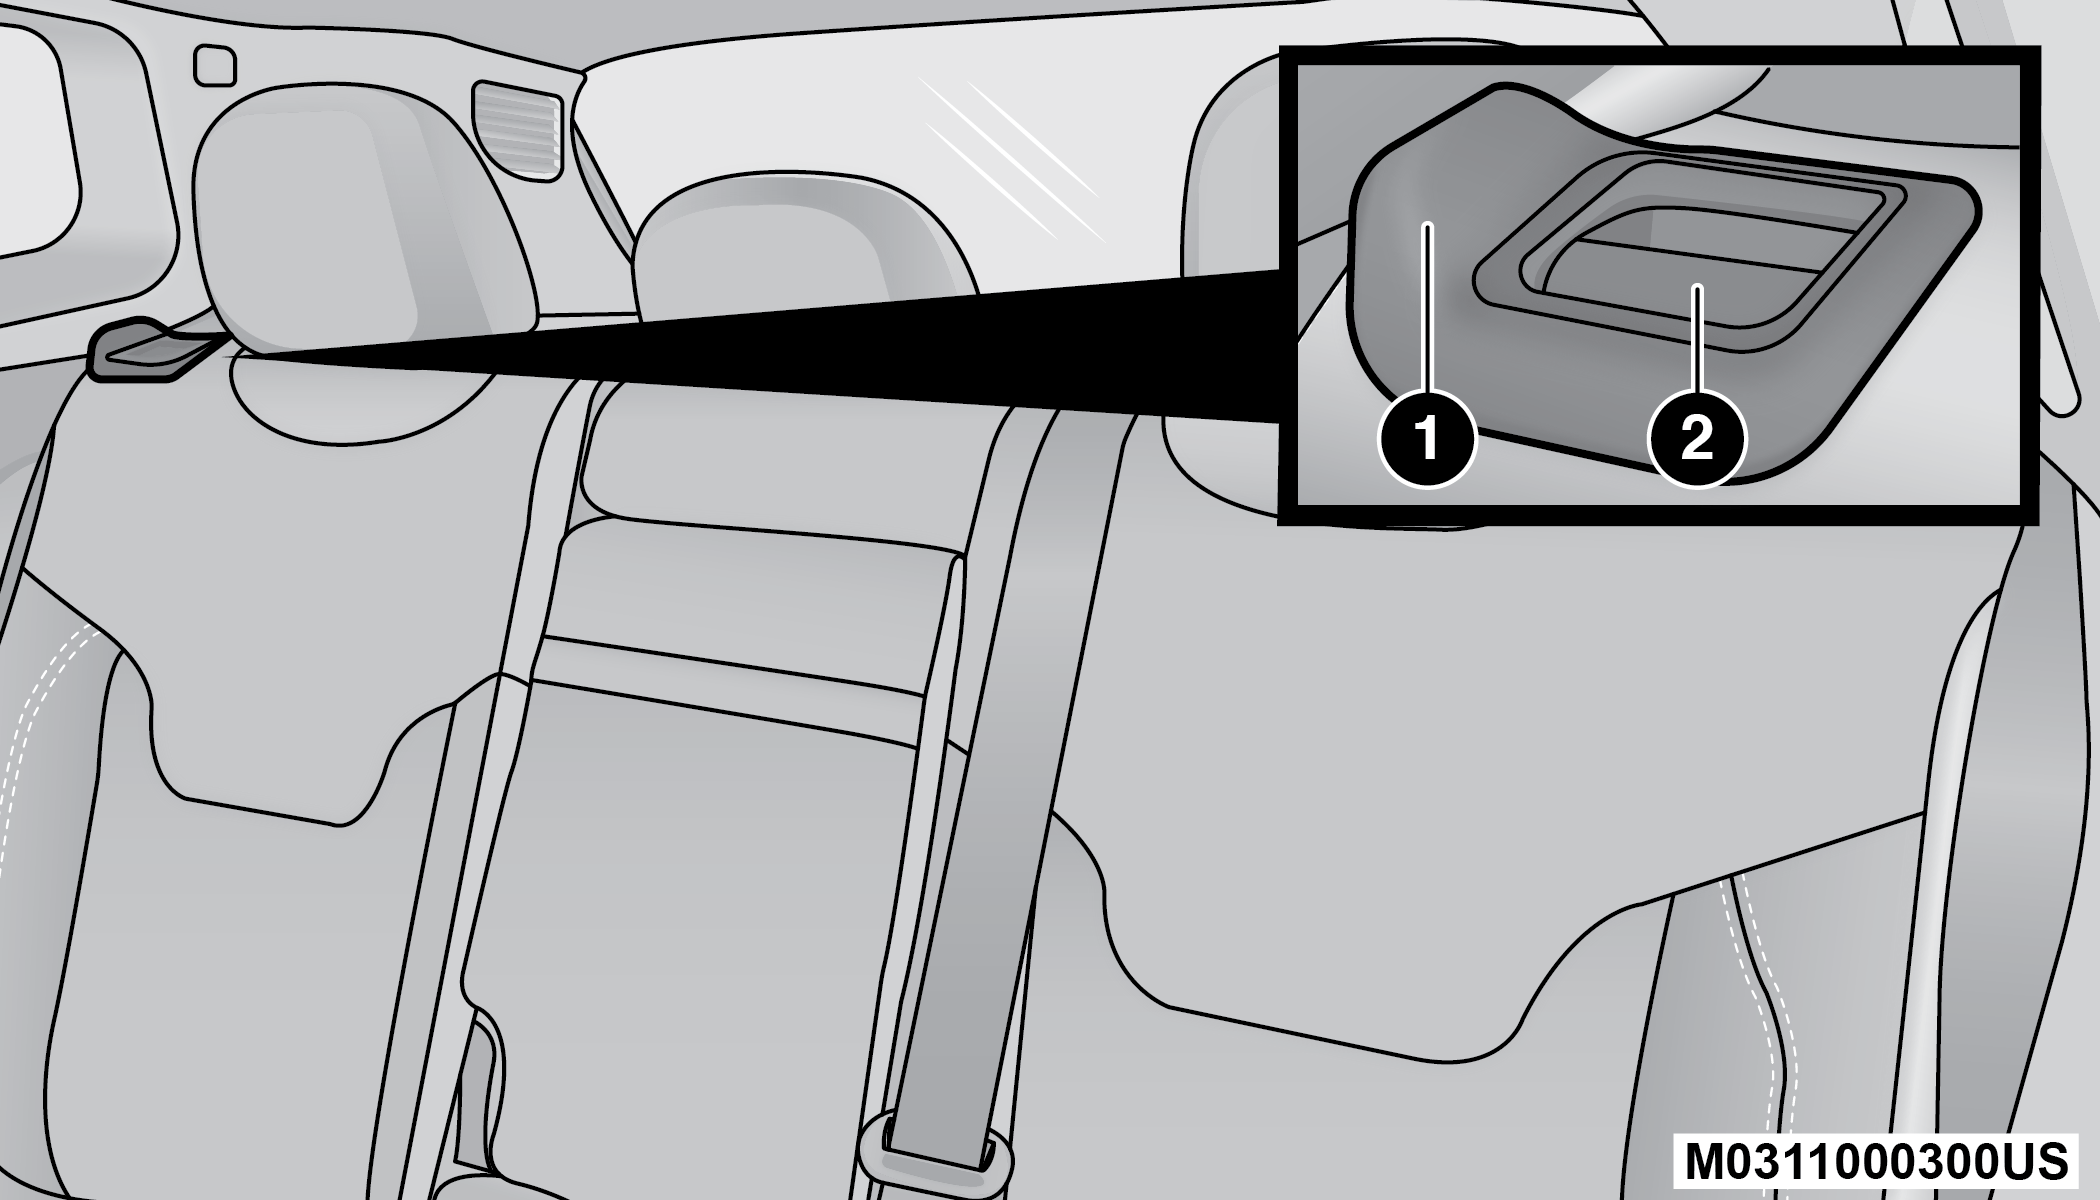
To raise the head restraint, pull upward on the head restraint. To lower the head restraint, push the adjustment button, located at the base of the head restraint, and push downward on the head restraint.
Head Restraint Adjustment Button
Note:
The head restraints should only be removed by qualified technicians, for service purposes only. If either of the head restraints require removal, see an authorized dealer.
WARNING:
All occupants, including the driver, should not operate a vehicle or sit in a vehicle’s seat until the head restraints are placed in their proper positions in order to minimize the risk of neck injury in the event of a crash.
Head restraints should never be adjusted while the vehicle is in motion. Driving a vehicle with the head restraints improperly adjusted or removed could cause serious injury or death in the event of a collision.
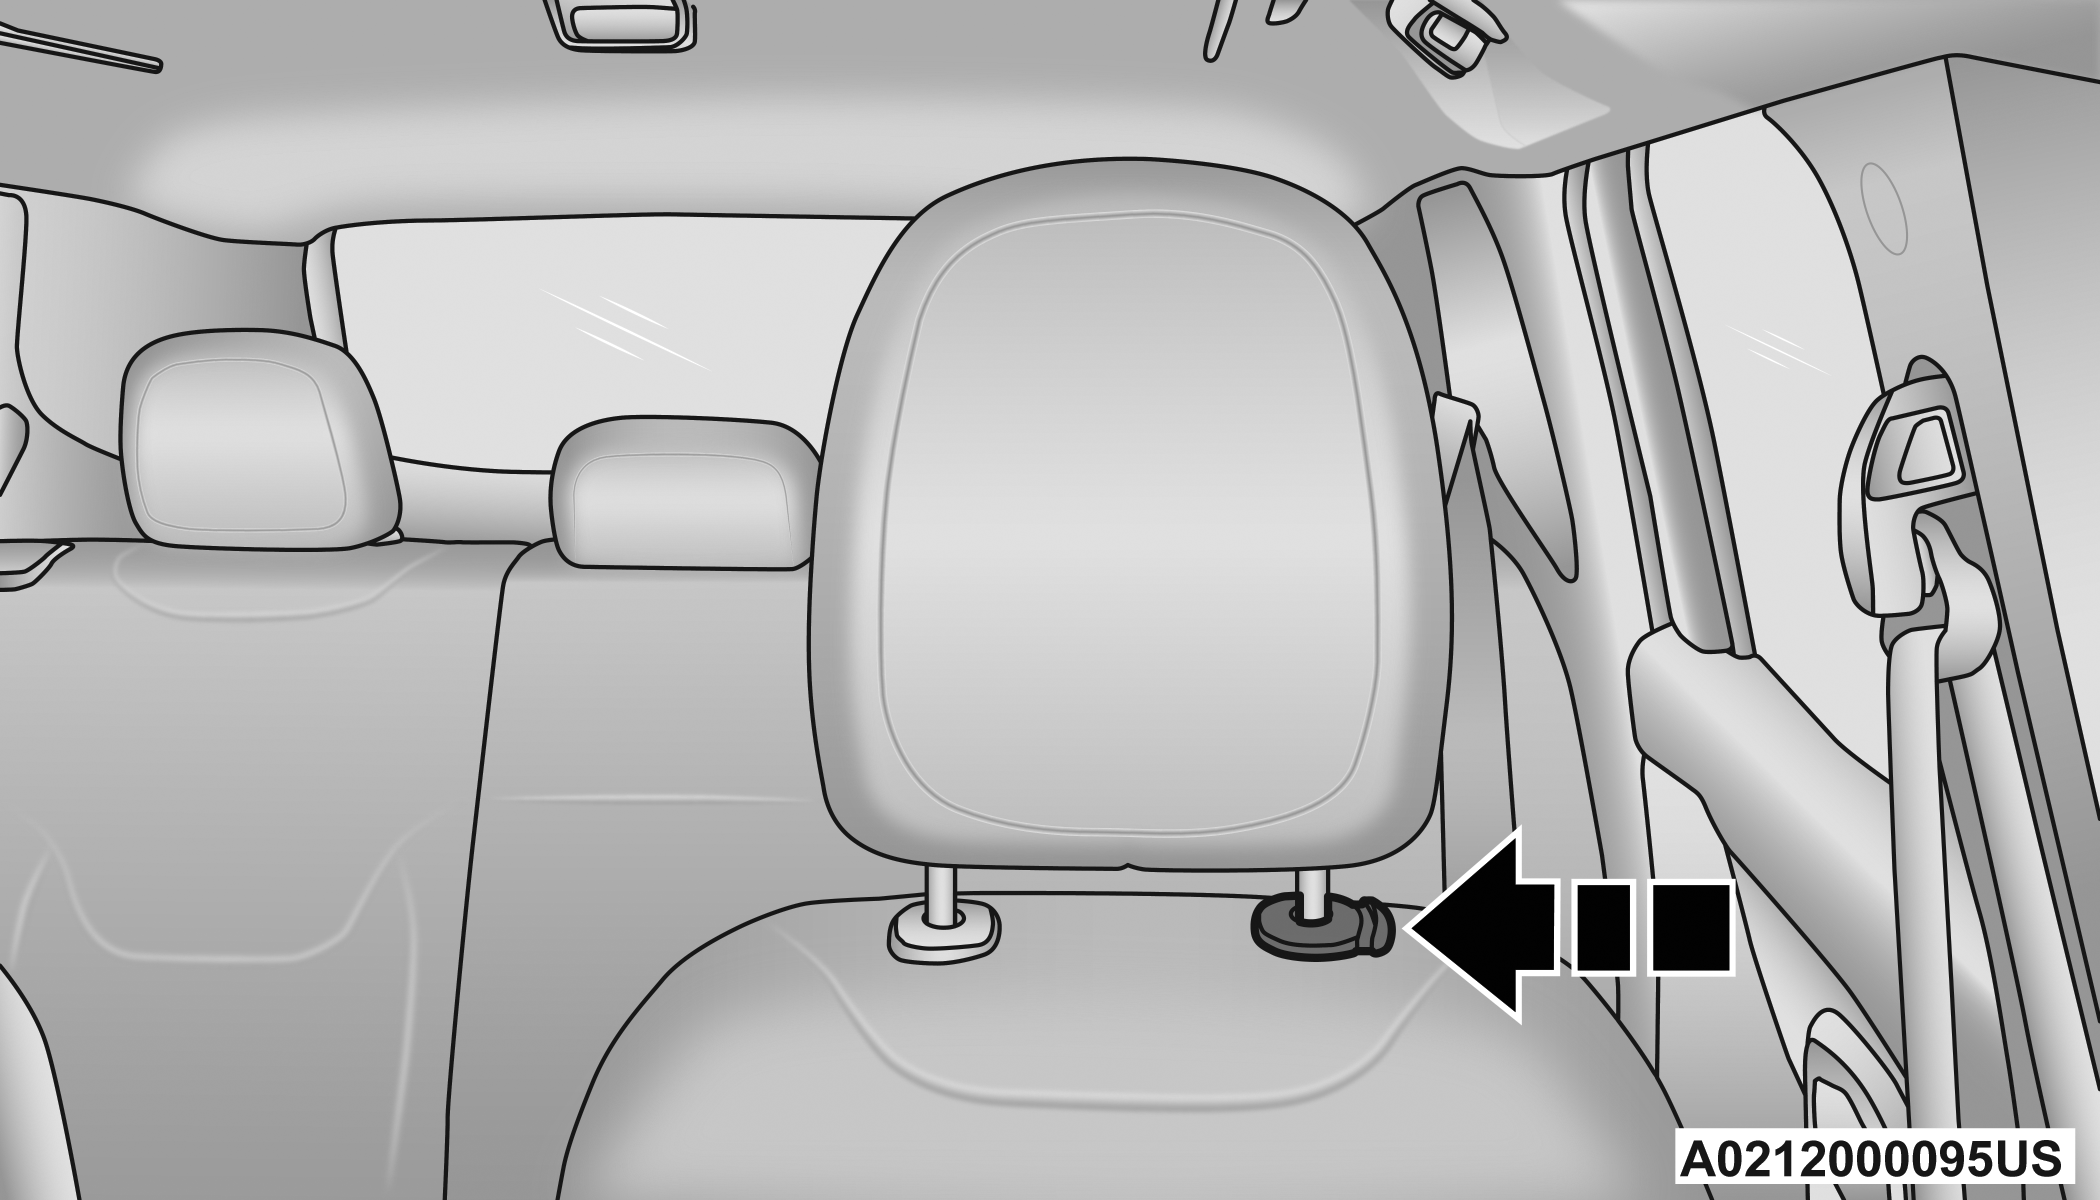
REAR HEAD RESTRAINTS
Your vehicle is equipped with two outboard head restraints and one center head restraint for its rear passengers. The rear head restraints can be raised or lowered. When the center seat is being occupied, the head restraint should be in the raised position. When there are no occupants in the center seat, the head restraint can be lowered for maximum visibility for the driver.
To raise the head restraint, pull upward on the head restraint.
To lower the head restraint, push the adjustment button, located at the base of the head restraint, and push downward on the head restraint.
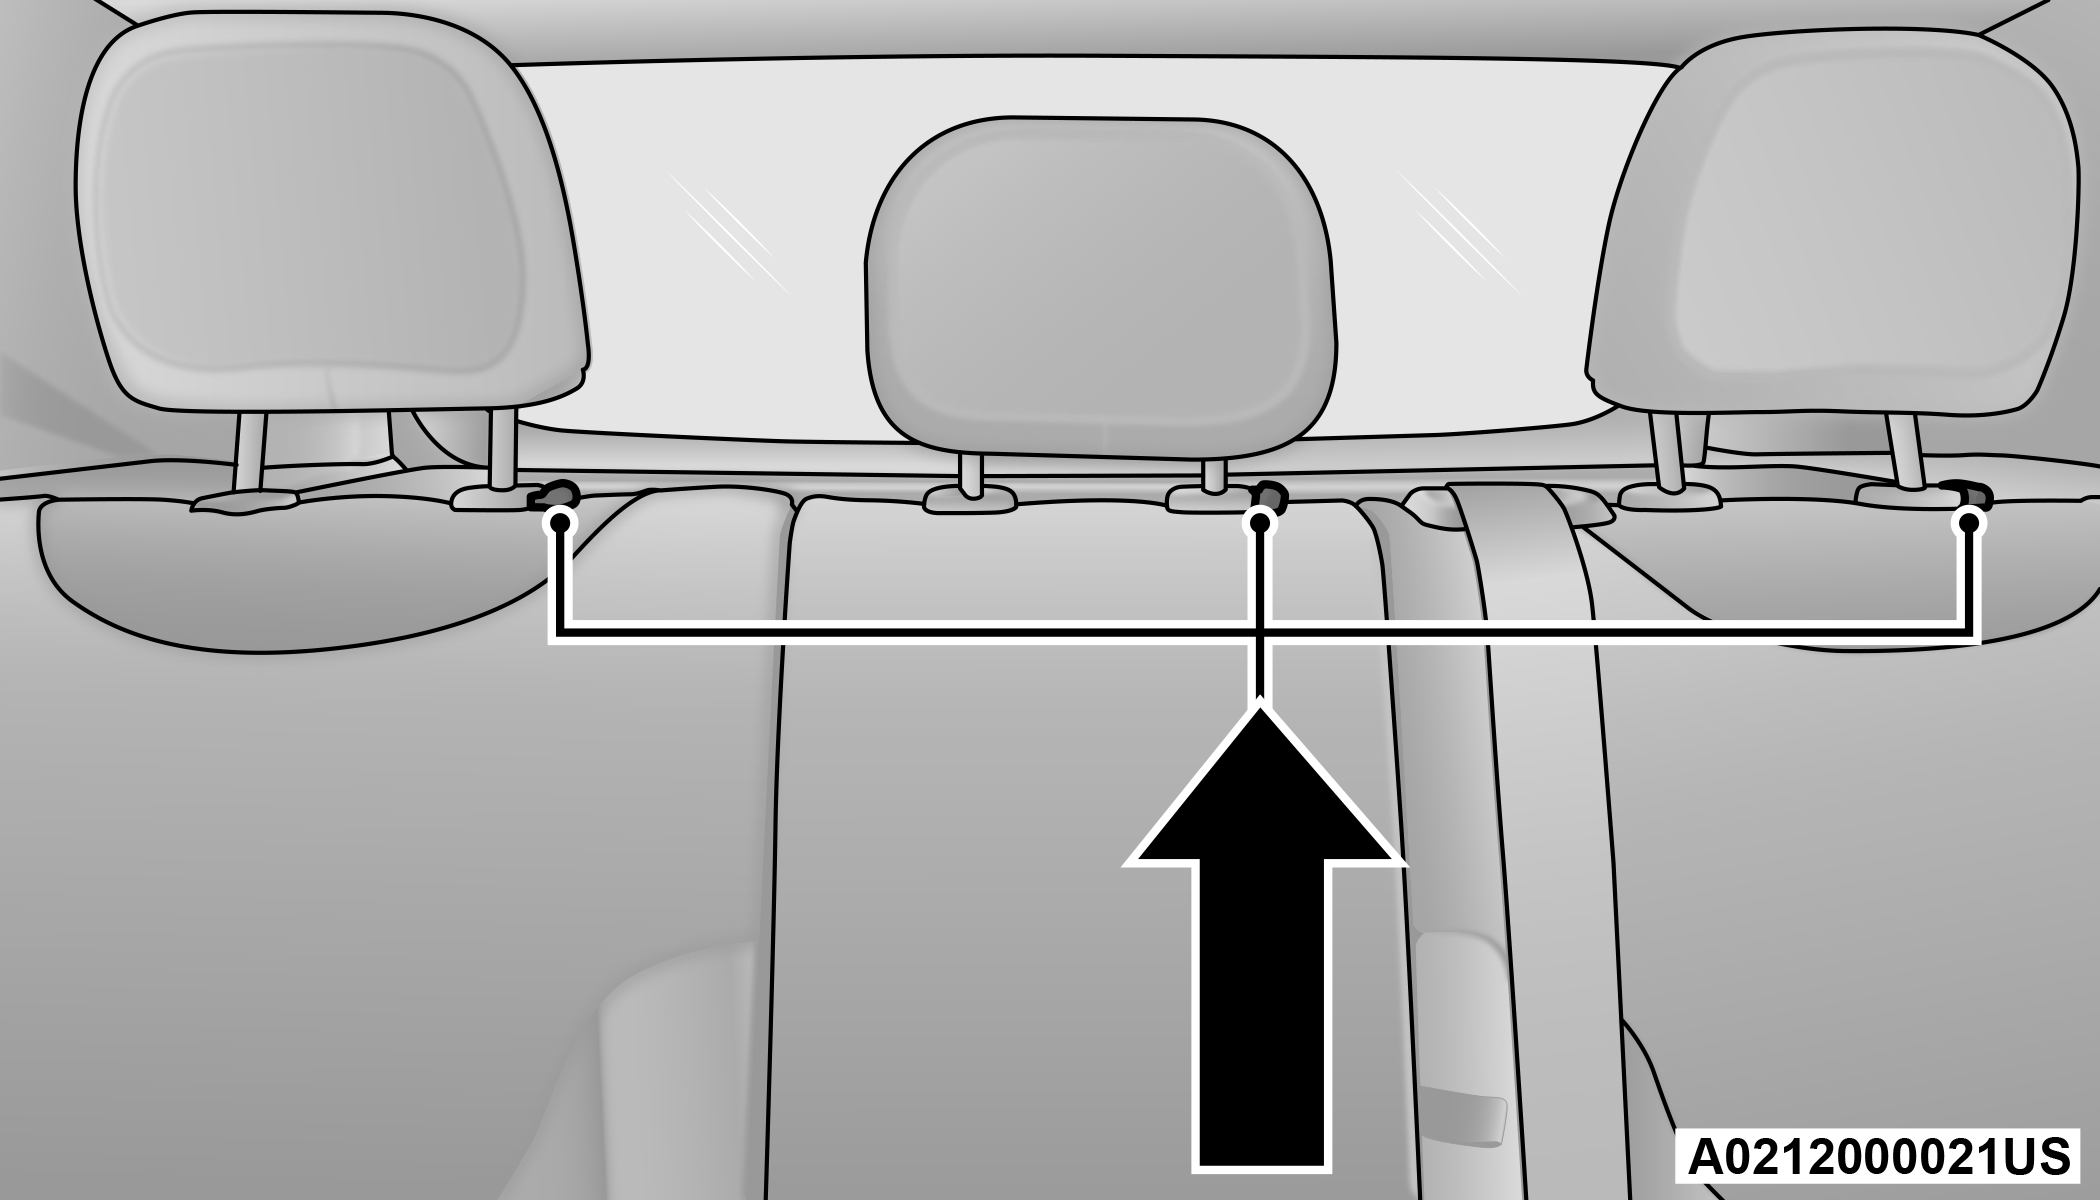
Adjustment Buttons
Note:
The head restraints should only be removed by qualified technicians, for service purposes only. If either of the head restraints require removal, see an authorized dealer.
Download Manual