Liftgate
To unlock the liftgate, use the key fob or activate the power door lock switches located on the driver door handle.
To open the liftgate, squeeze the electronic liftgate release and pull the liftgate open with one fluid motion.

Liftgate Release Handle
The Liftgate Passive Entry unlock feature is built into the electronic liftgate release. With a valid Passive Entry key fob within 5 ft (1.5 m) of the liftgate, push the electronic liftgate release to open with one fluid motion.
Emergency Opening
Proceed as follows:
-
Remove the rear shelf (if equipped).
-
Fold the rear seats forward.
-
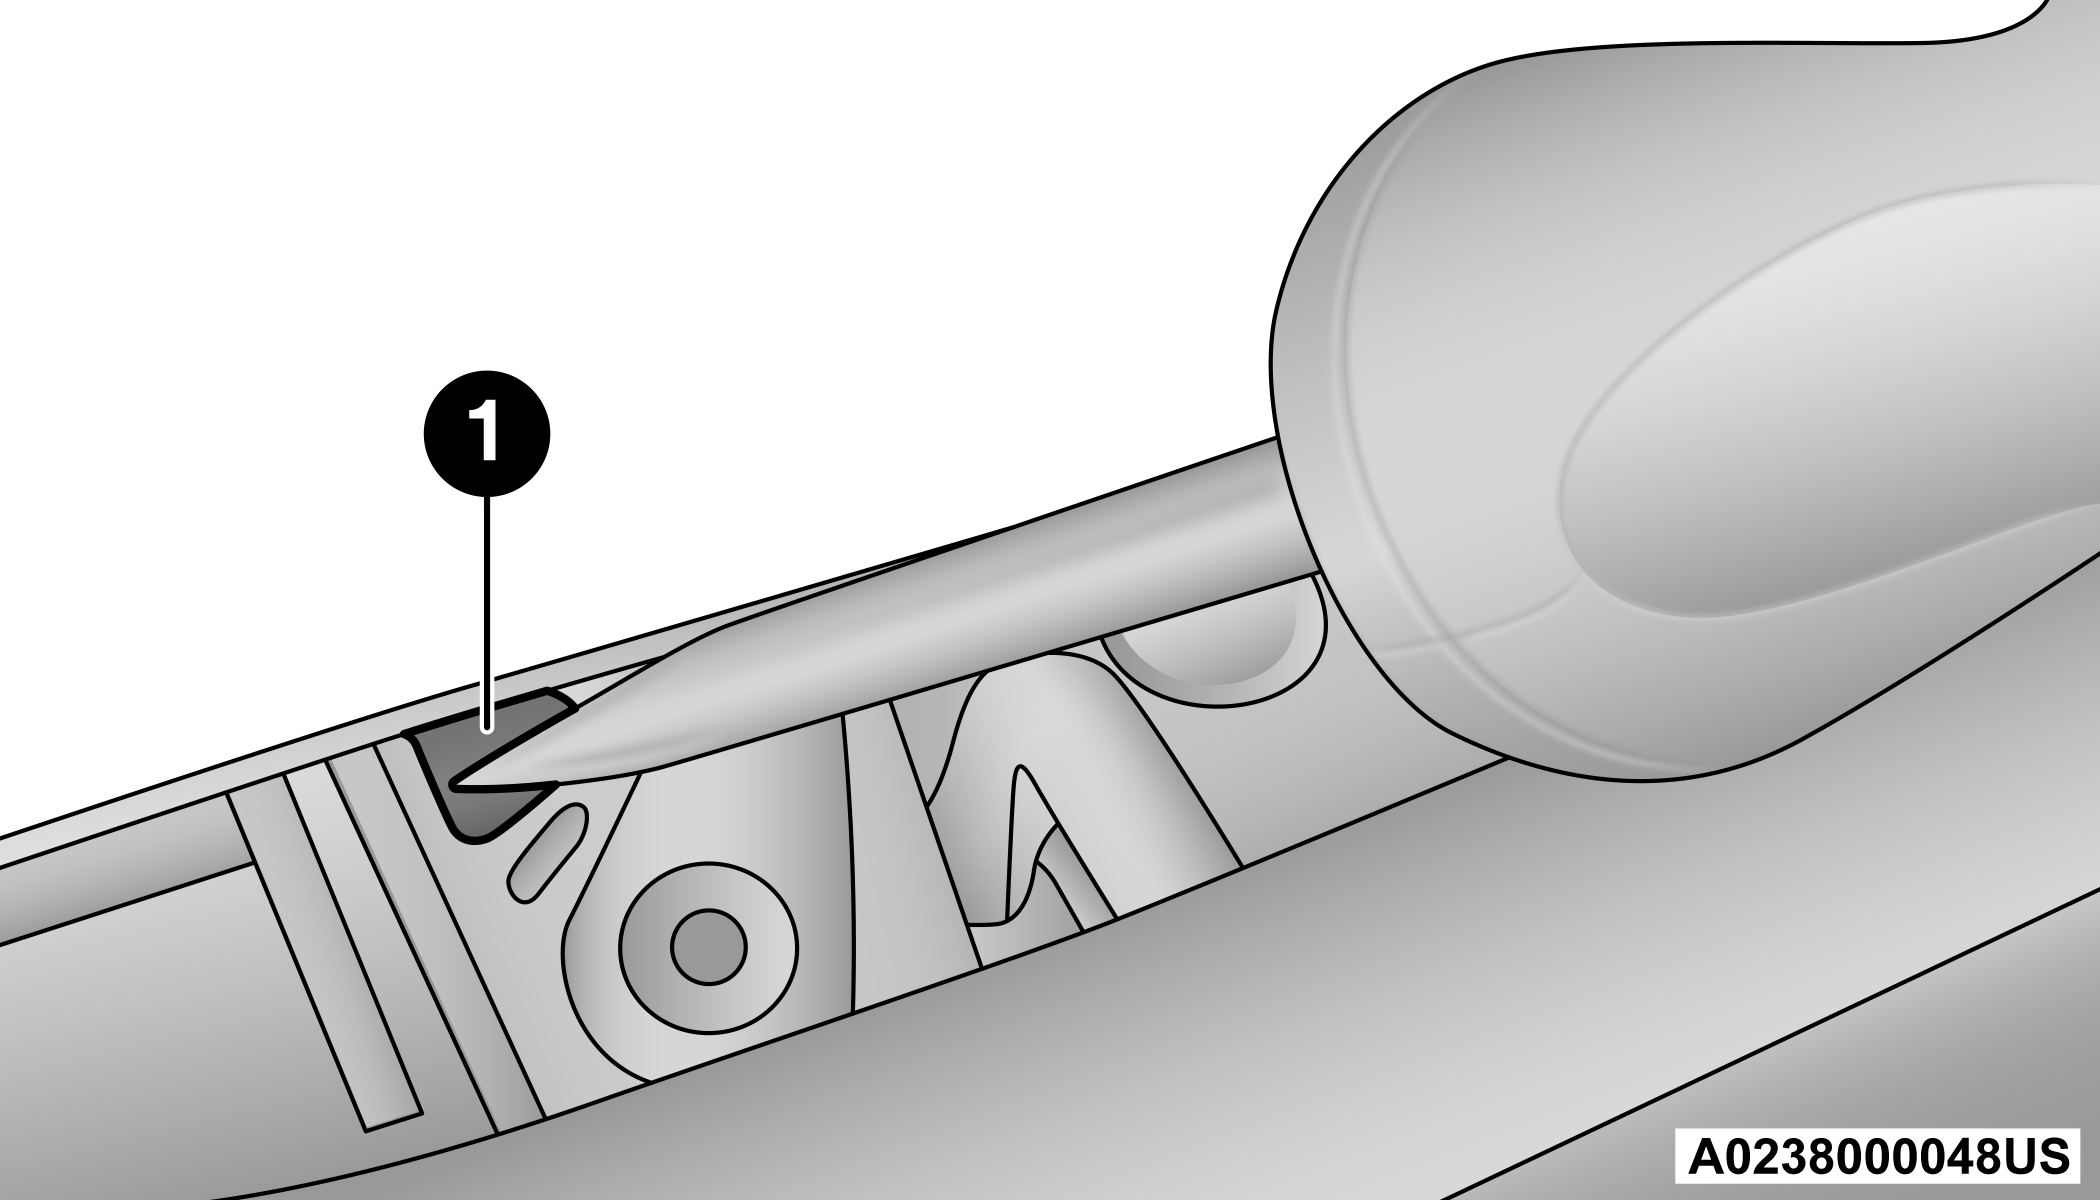
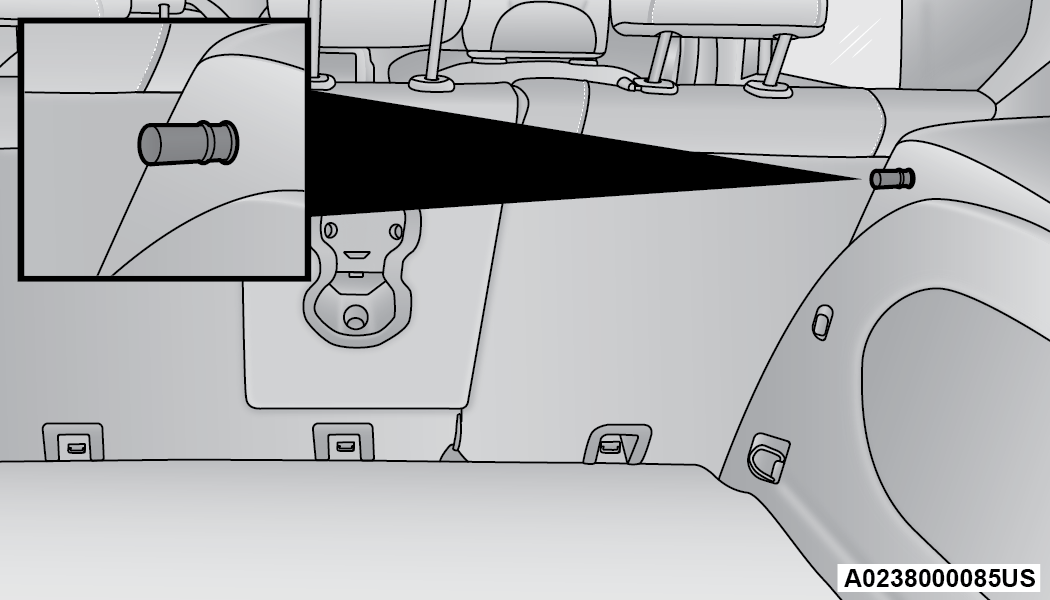
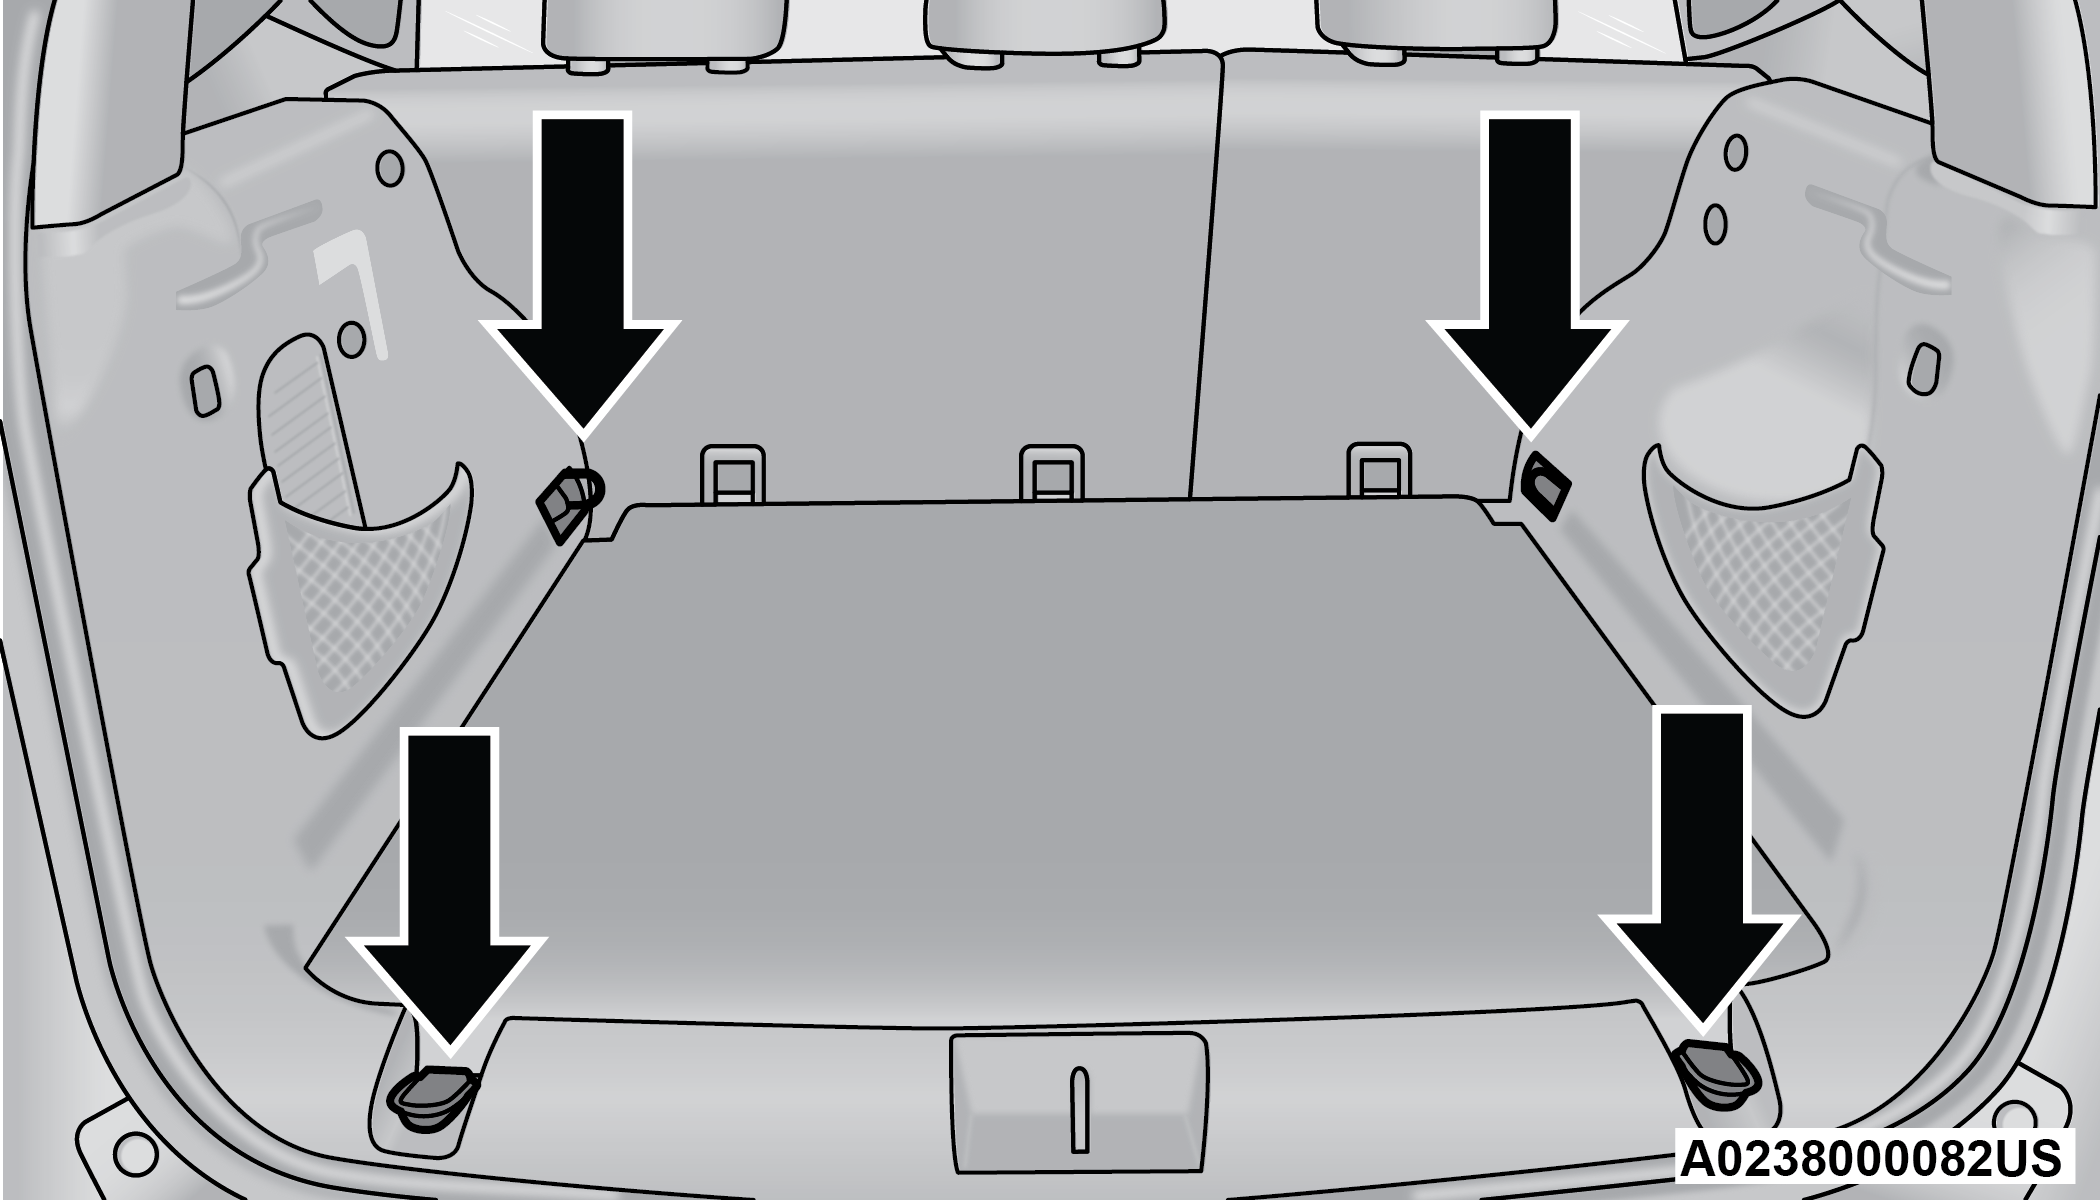
Using the supplied screwdriver (located under cargo floor in tool kit), remove the yellow tab.

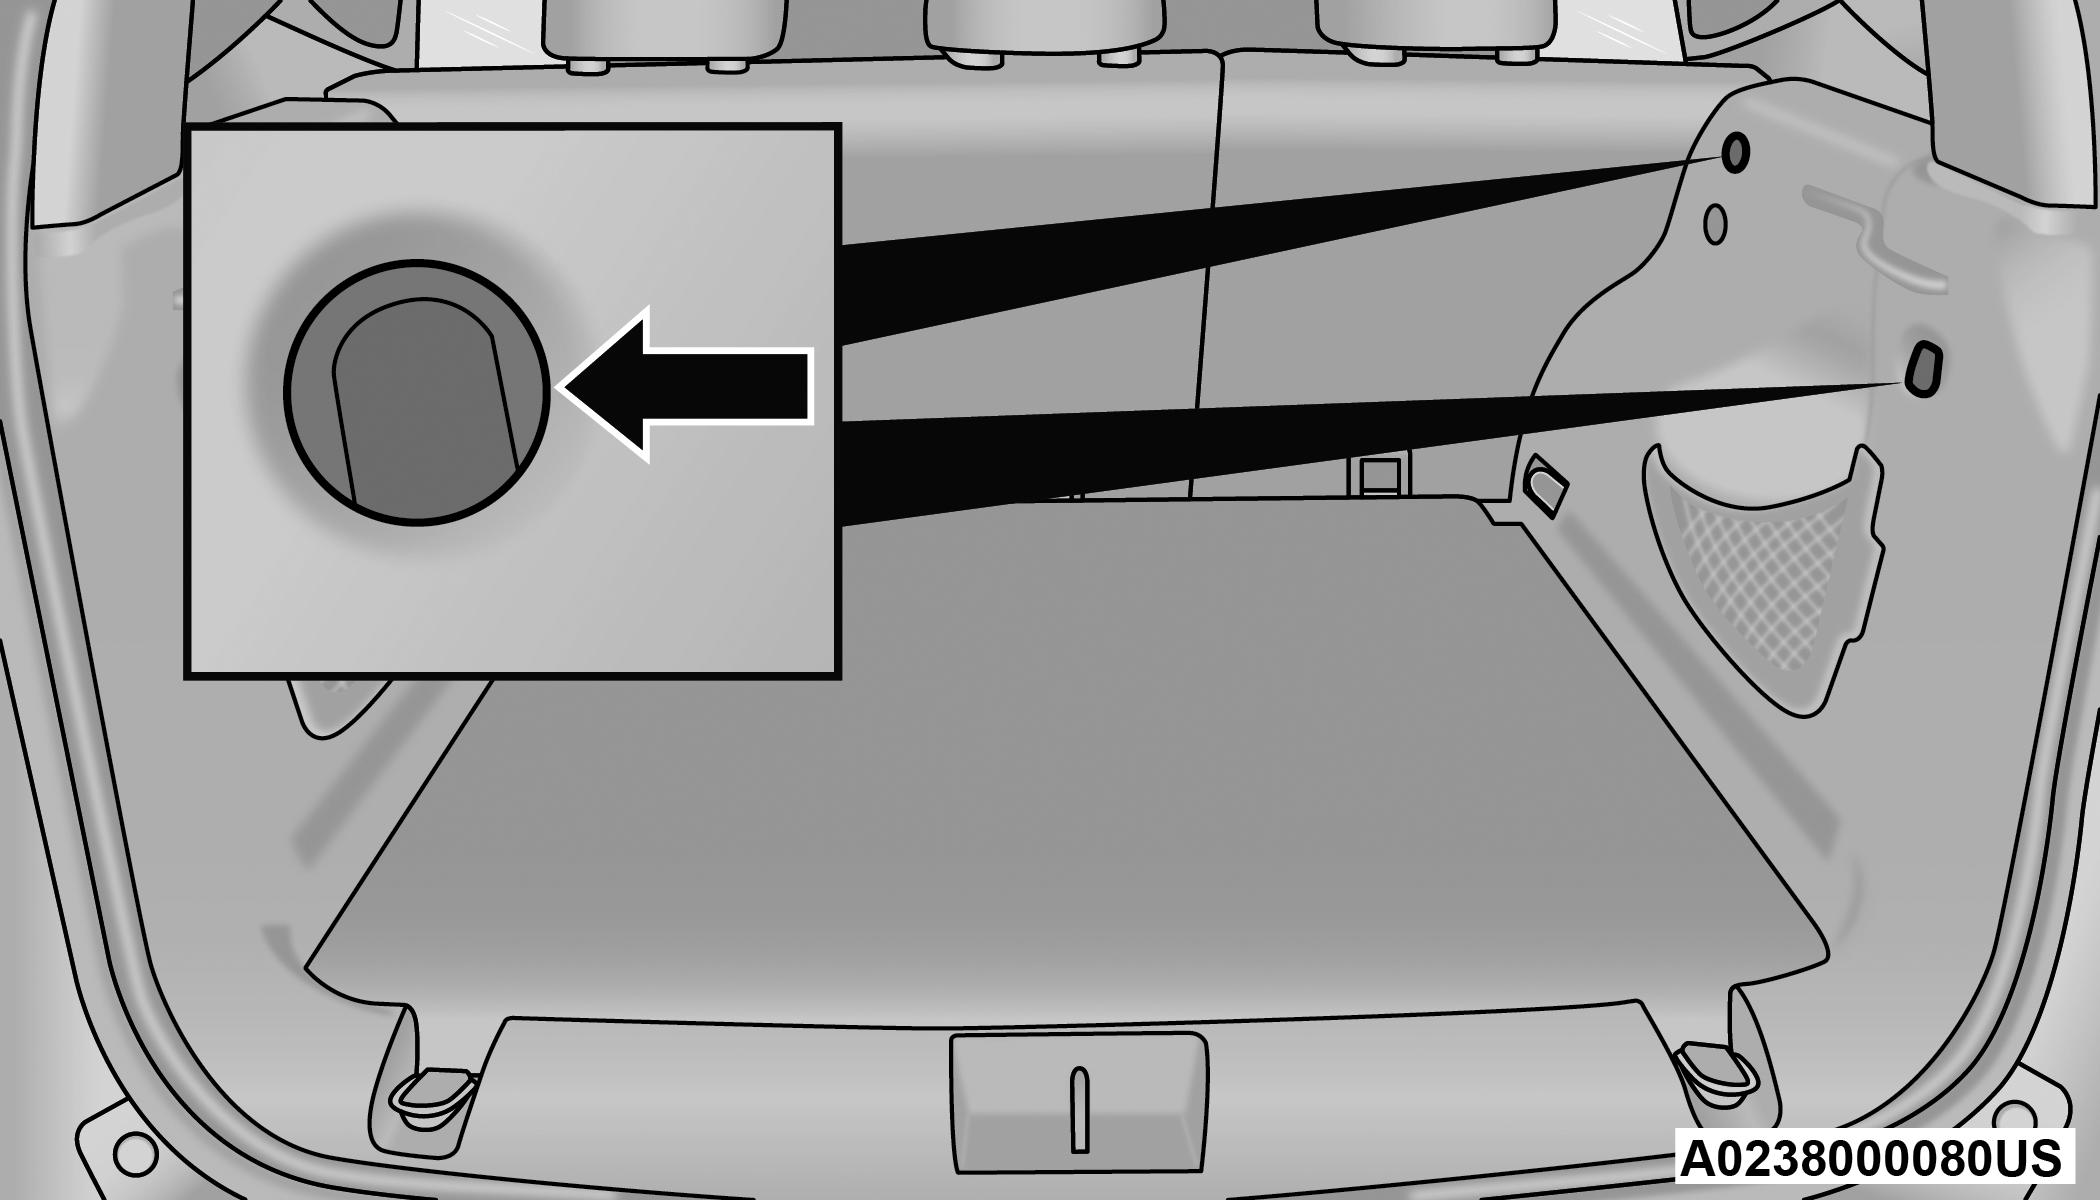
Emergency Opening Tab Location
1 — Yellow Tab
-
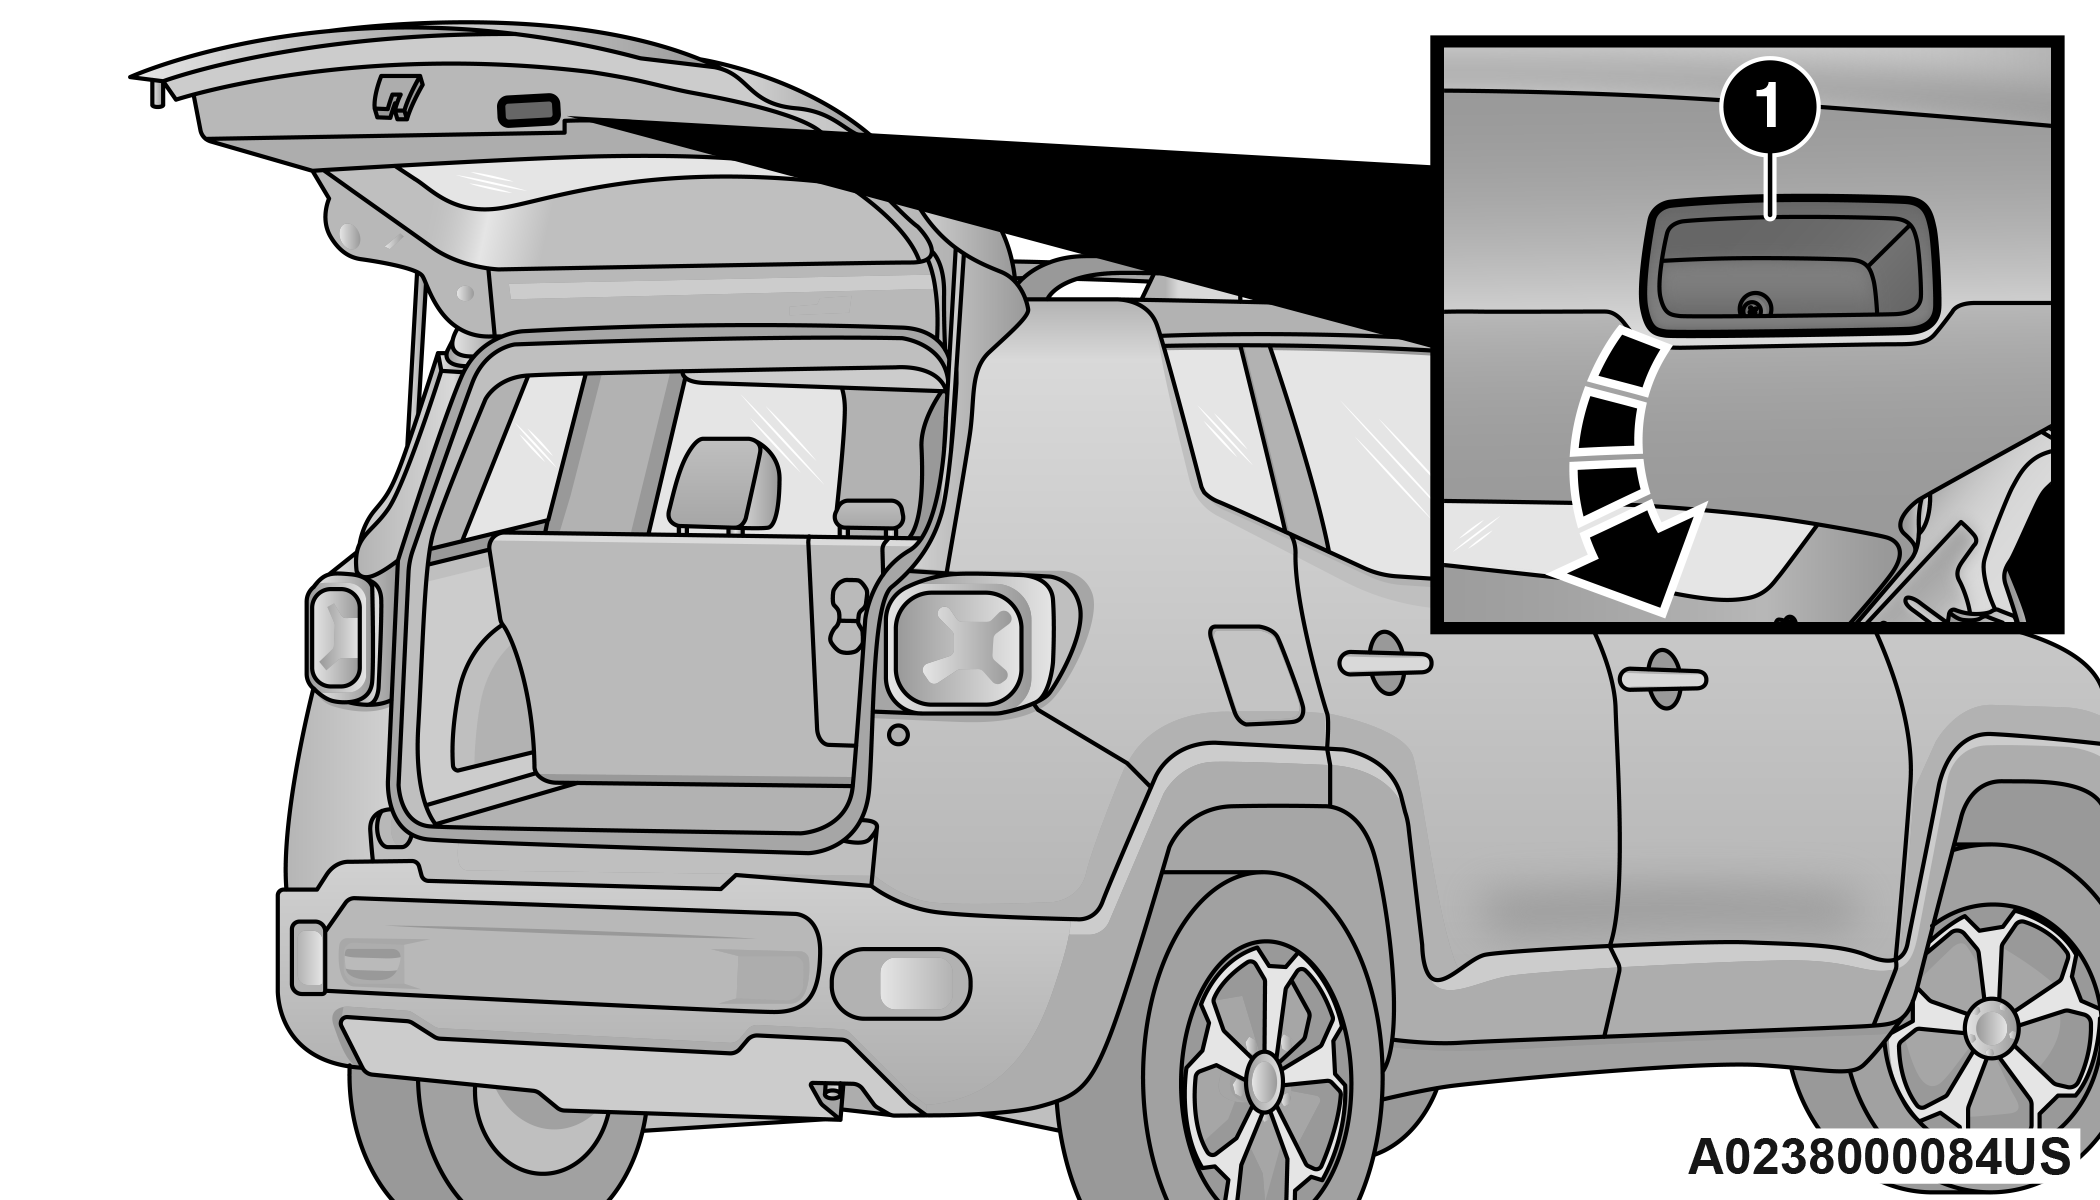
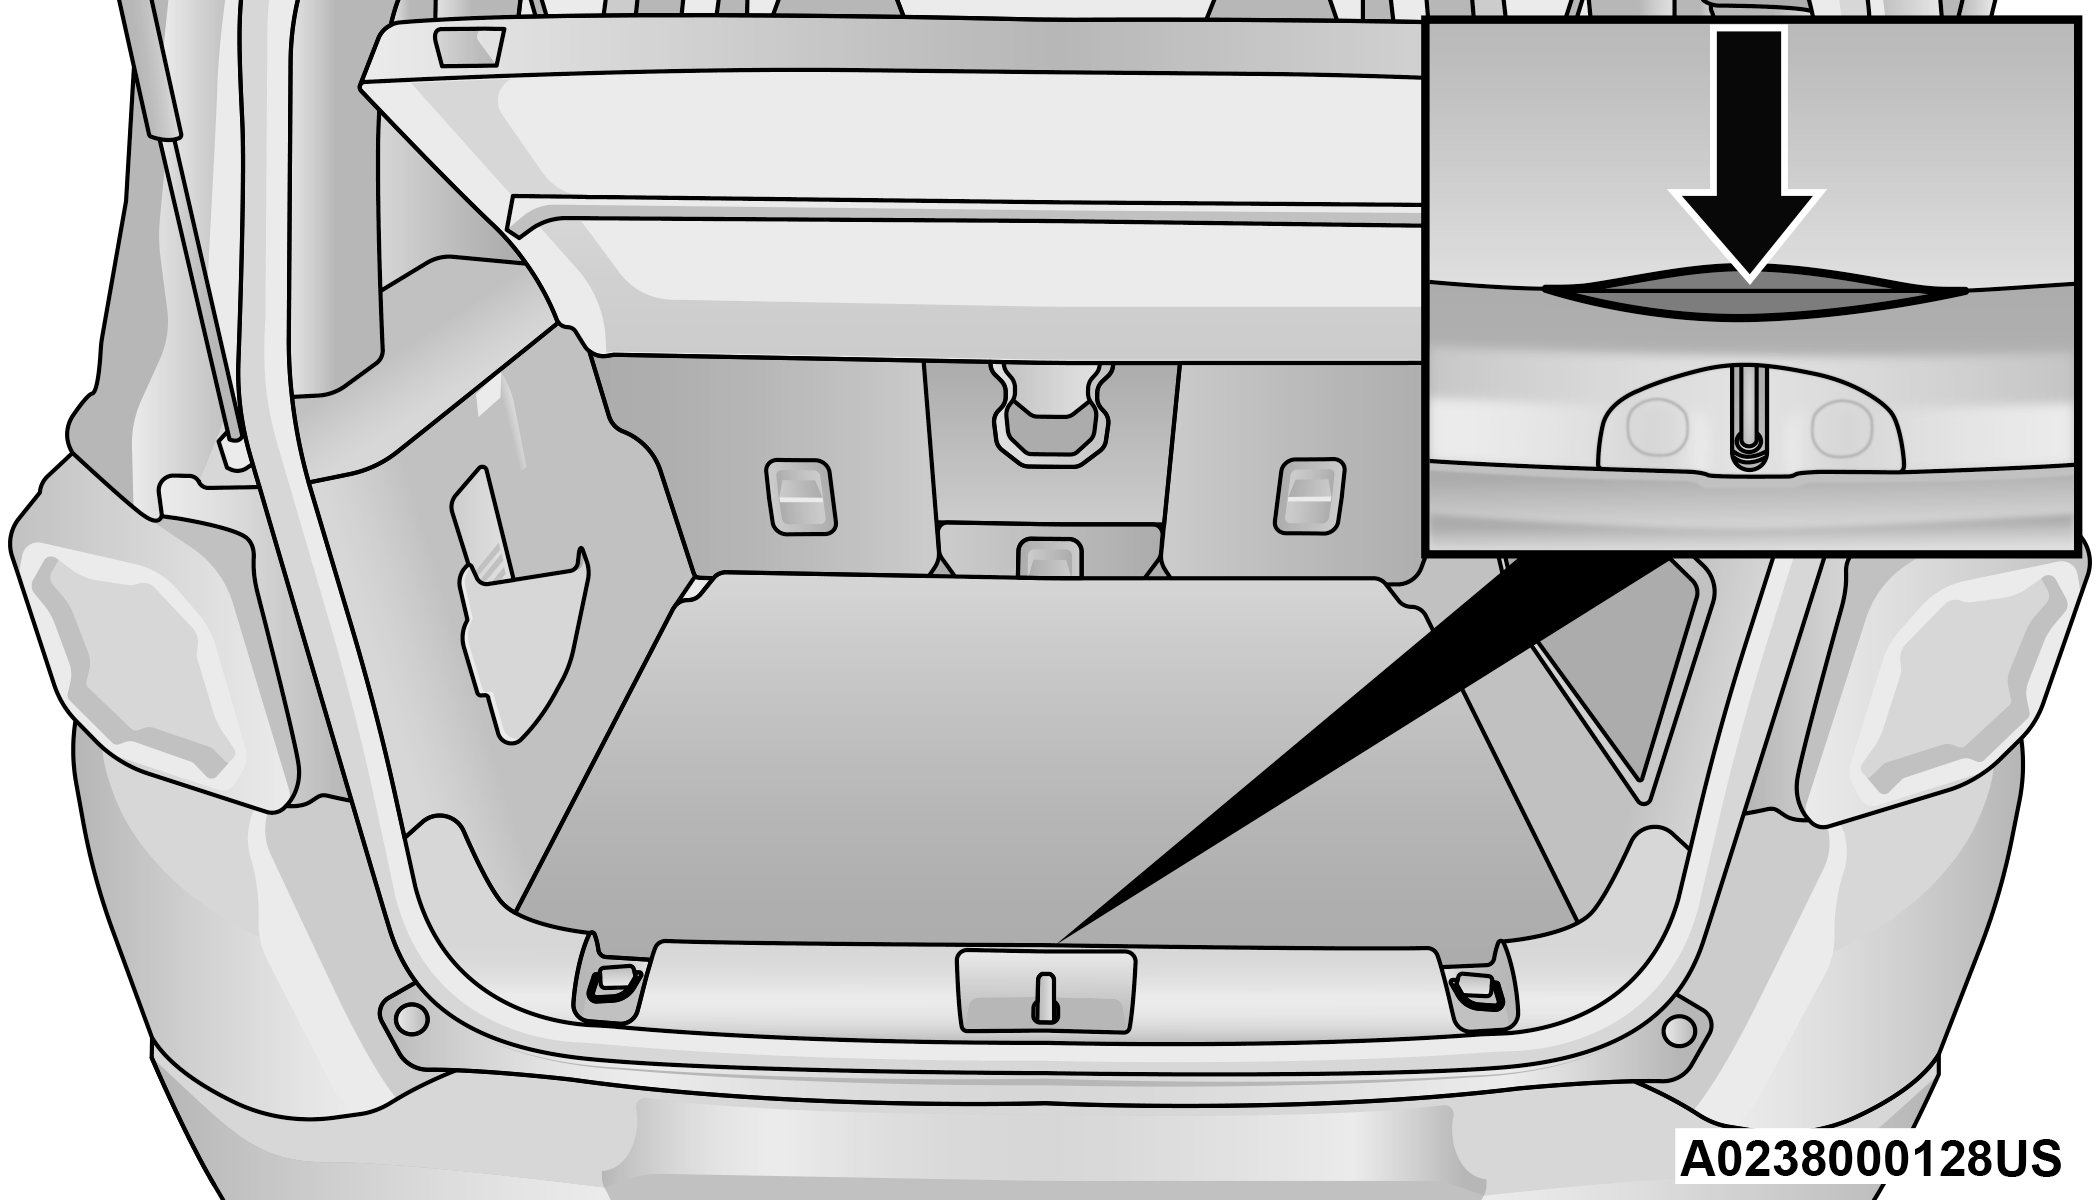
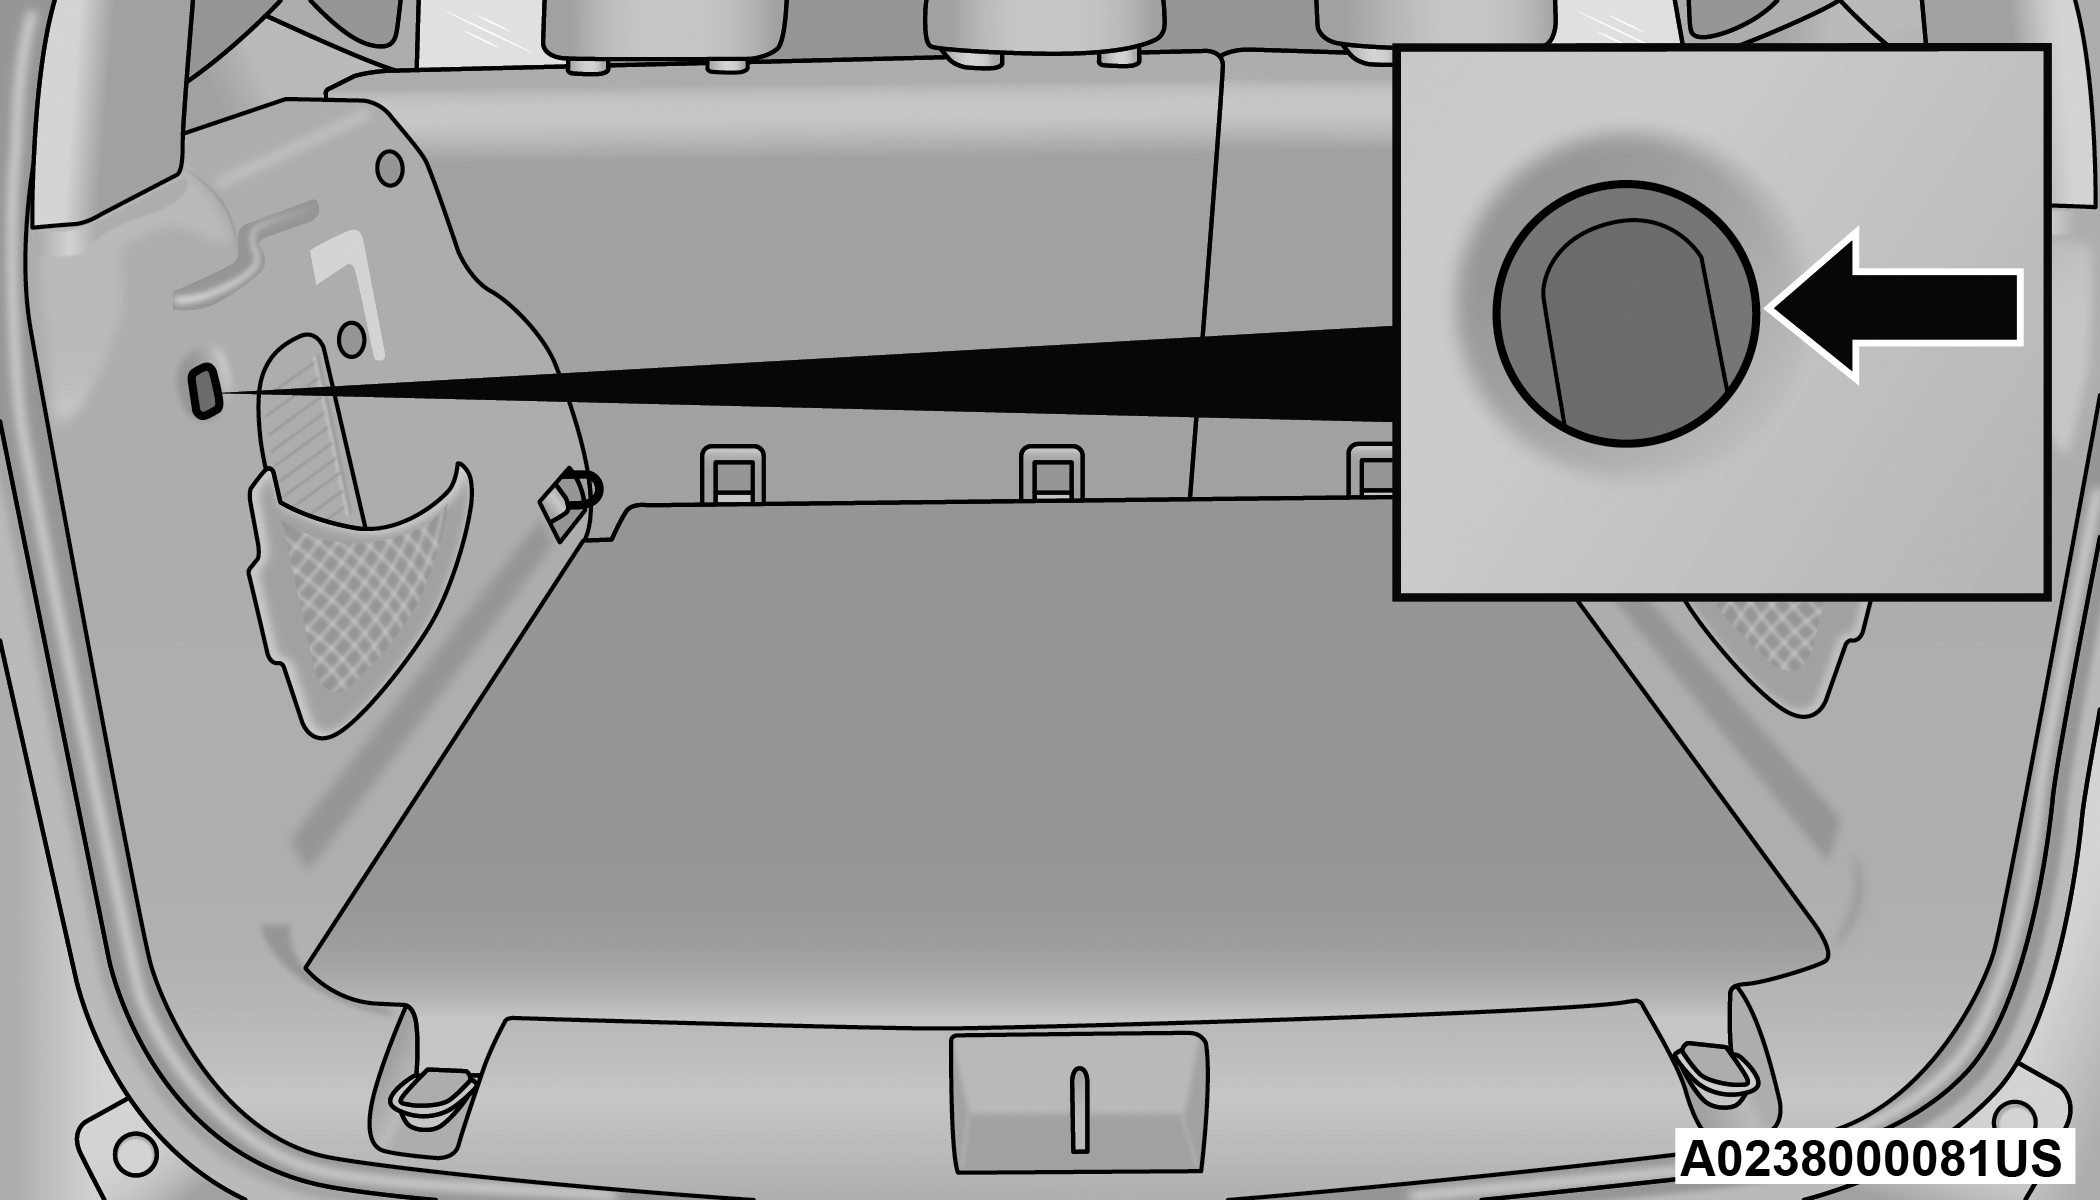
Insert the screwdriver into the release tab slot to trigger the release tab of the liftgate.
Emergency Release Tab Slot Location
1 — Release Tab Slot
LOCK/CLOSE THE LIFTGATE
To manually close the liftgate, grab the liftgate closing handle and pull in a downward motion to close the liftgate.
Closing Liftgate
|
1 — Liftgate Pull Handle |
Note:
Before closing the liftgate, make sure to be in possession of the key fob because the liftgate may be locked.
To Lock The Liftgate
If vehicle is equipped with a Passive Entry lock button: With a valid Passive Entry key fob within 5 ft (1.5 m) of the liftgate, pushing the Keyless Enter ‘n Go™ — Passive Entry lock button located to the right of the outside handle release will lock the vehicle.
Note:
The liftgate unlock feature is built into the electronic liftgate release.
CARGO AREA FEATURES
Removable Rear Shelf — If Equipped
To remove rear shelf, proceed as follows:
-
Disconnect the two links that support the shelf at the eyelets.
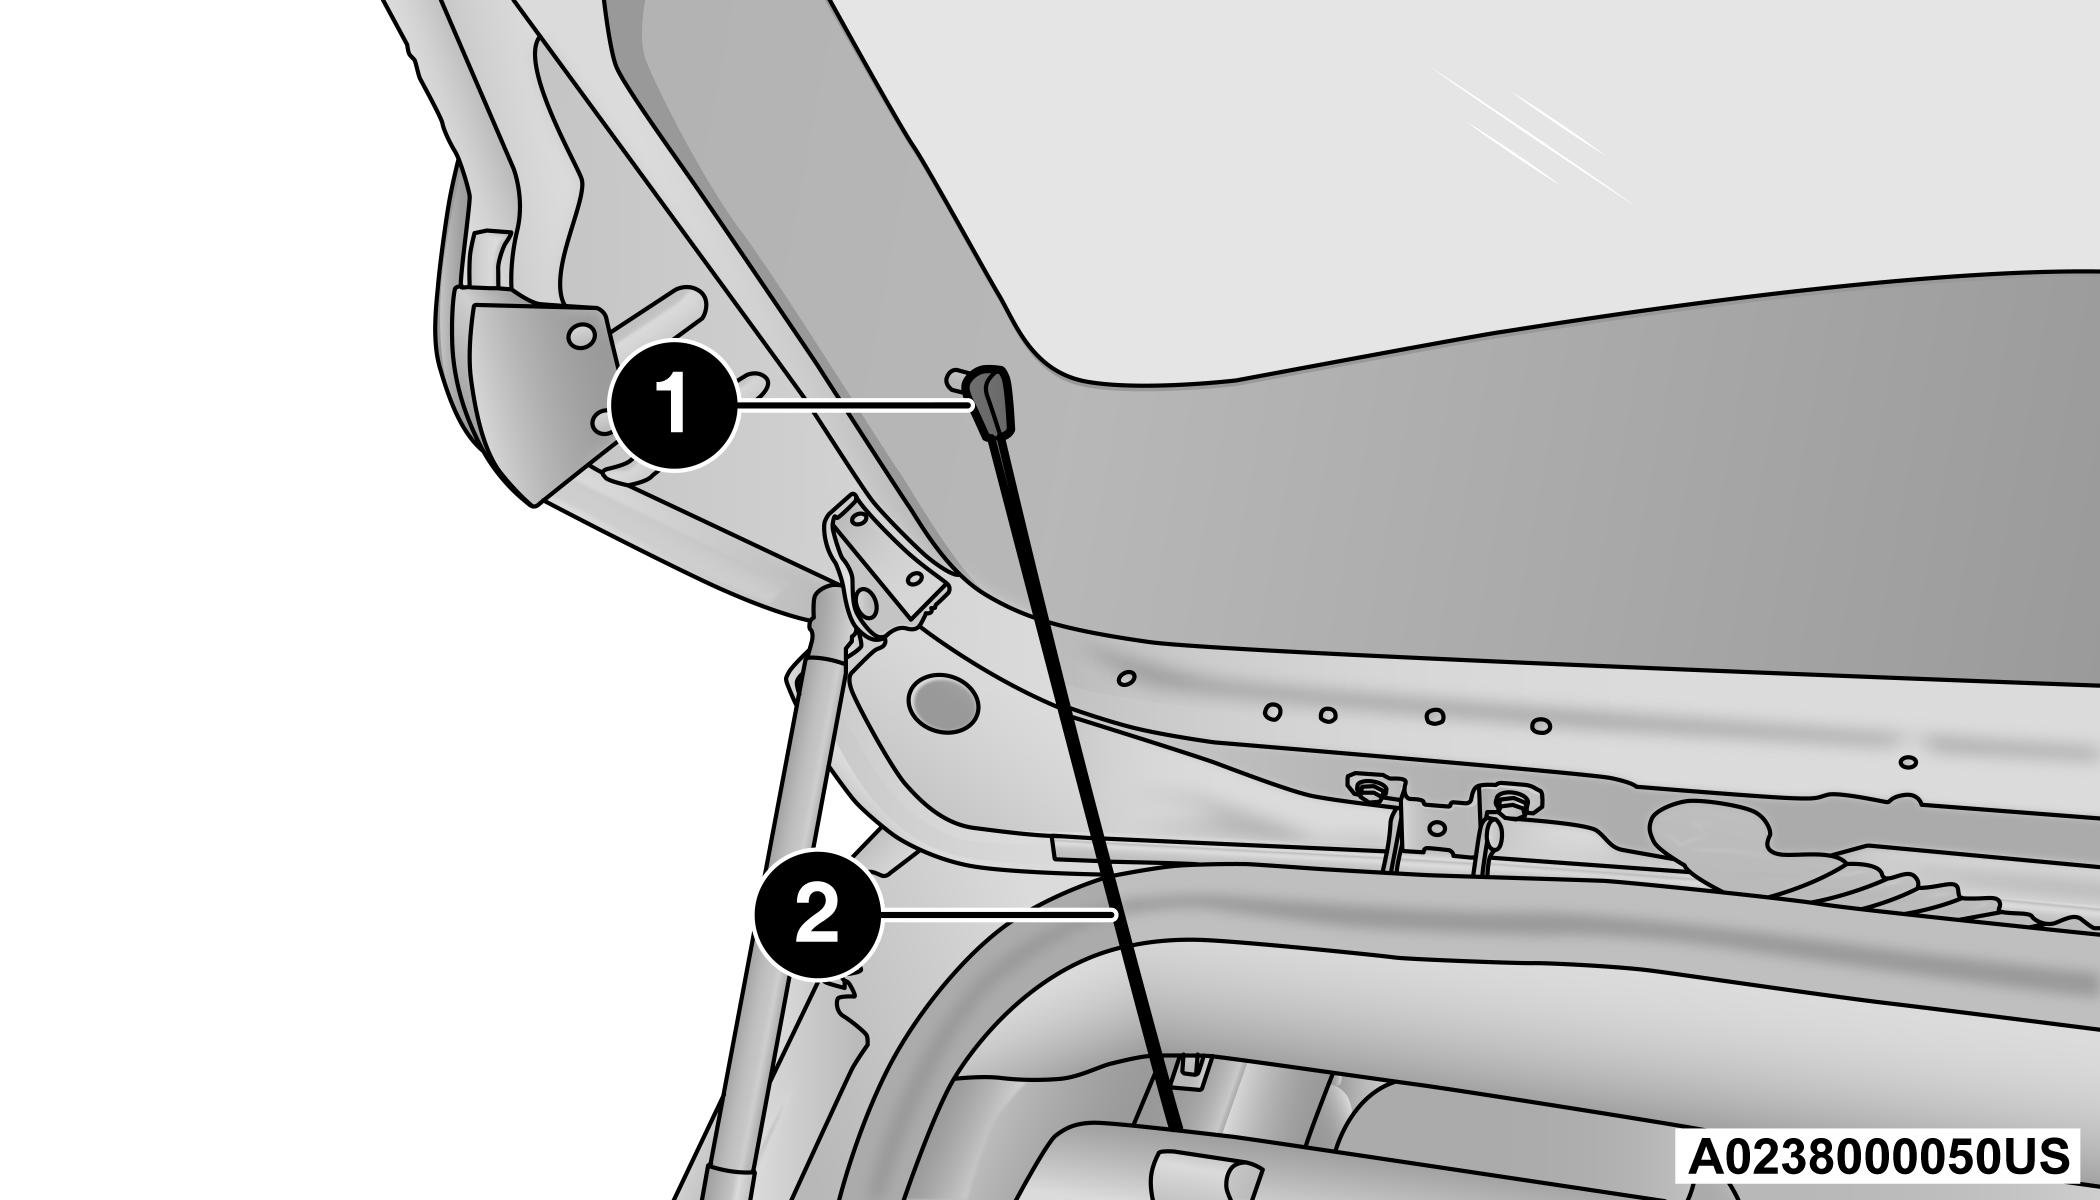
Rear Shelf Support Links
1 — Eyelets
2 — Links
-
Lift the rear part of the overhead luggage shelf.
-
Clear the pins placed outside of the shelf, and then remove the rear shelf pulling it upwards.
-
The rear shelf can be stored in the cargo area, or behind the front seatbacks.
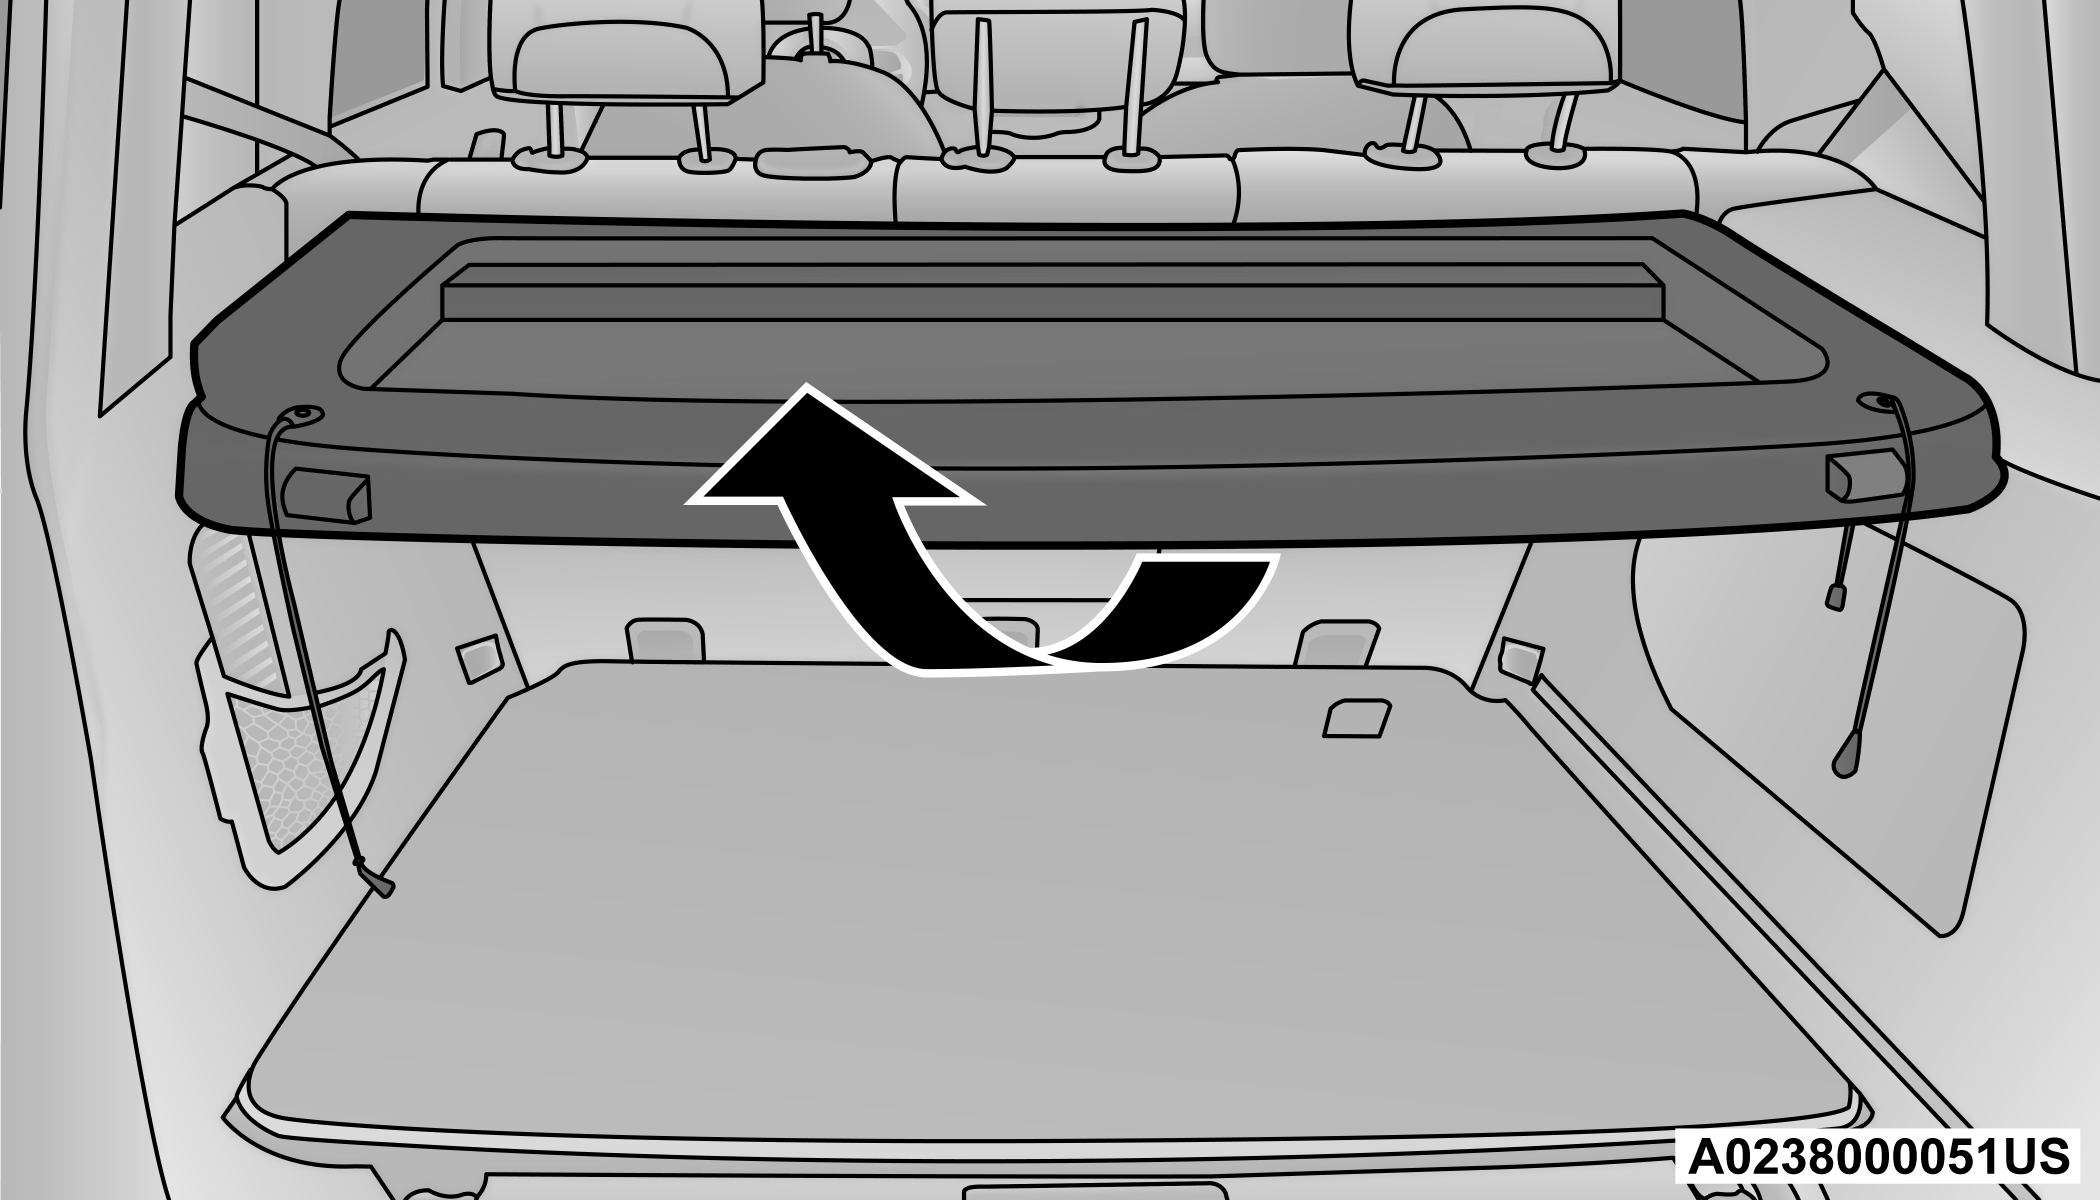
Adjusting The Rear Shelf
Rear Shelf Pin
Cargo Load Floor
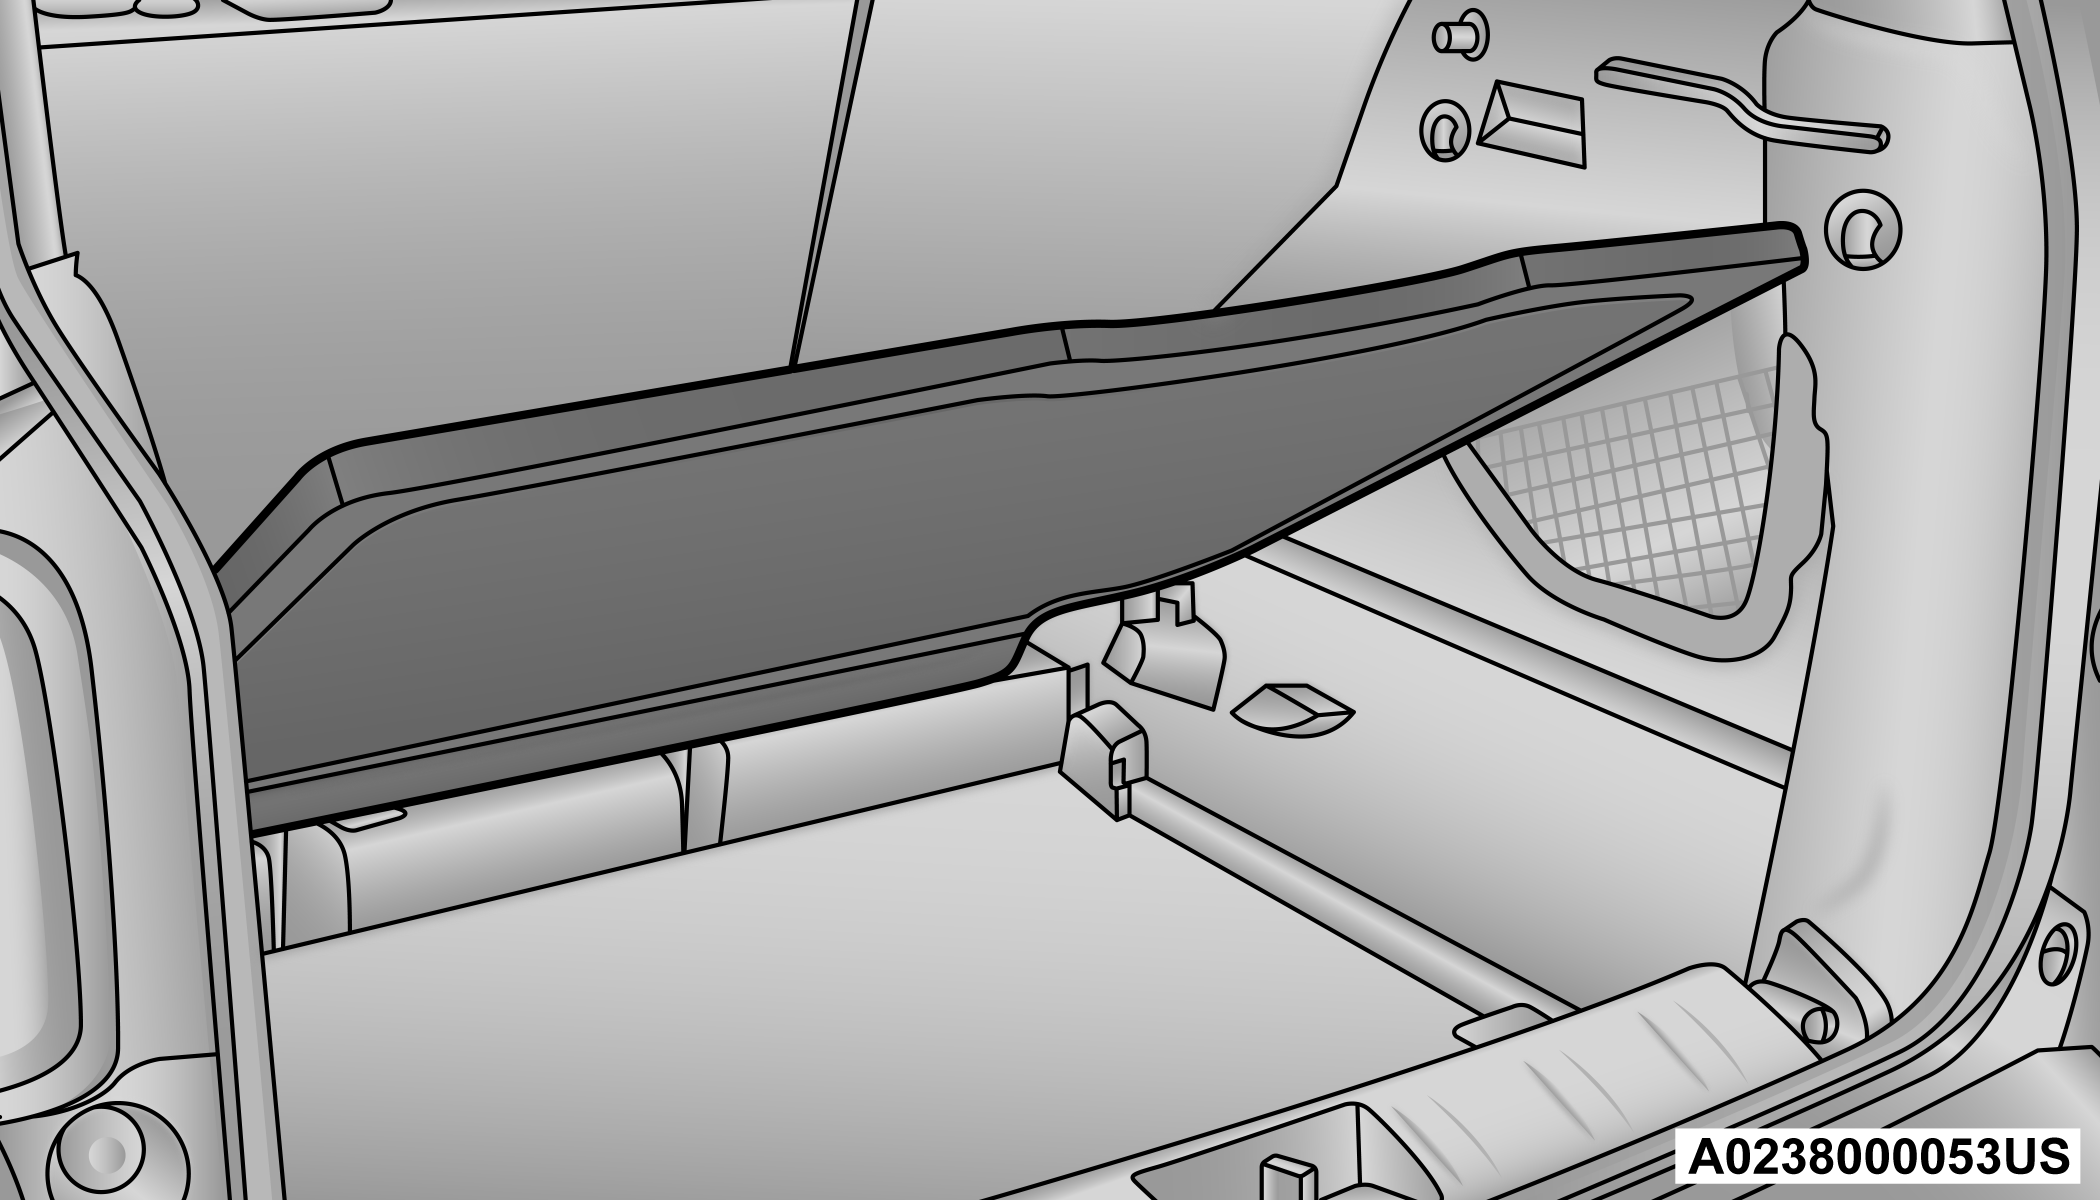
The vehicle is equipped with a load floor that can be adjusted as needed.
Position 1 (Lowered Position):
This position allows you to make the load floor flat for ease of loading/unloading objects from the cargo area. This position also makes it possible to use the space below as another compartment for storing fragile or smaller objects.
Position 2 (Elevated Position):
When the rear seatbacks and front passenger seat are folded flat, it creates space for objects of long dimensions. This position is recommended only when transporting objects, then move the load floor back to position 1.
Table Tilt Load
In addition to the two positions described previously, the load floor can also be placed in a tilted position, slanted toward the rear seatbacks as to ease the access to the underlying zone of the luggage compartment (e.g. to pick up the spare tire or the Tire Service Kit).
Place the load floor in a way that it rests at the supports 1 and 2 on the sides of the cargo area.
The load floor provides securing of any cargo inside this position, so that the cargo will not slide in the case of sudden braking.
Load Floor

Table Tilt Load Supports
|
1 — Loading Floor Support One |
|
2 — Loading Floor Support Two |
Access To The Loading Floor
To access the double load compartment, proceed as follows:
-
Lift up on the Load Floor Handle.
Load Floor Handle
-
Place the desired objects inside the compartment.
-
Reposition the load floor.
Cargo Area Storage
CAUTION:
The load floor must be arranged in a central position with respect to cargo area.
Displacement Load Floor
To position the load floor from the lower to the upper position, proceed as follows:
-
Grab the load floor handle and lift up the load floor.
-
Correctly place the load floor on the side panel guides and on the rear cross member.
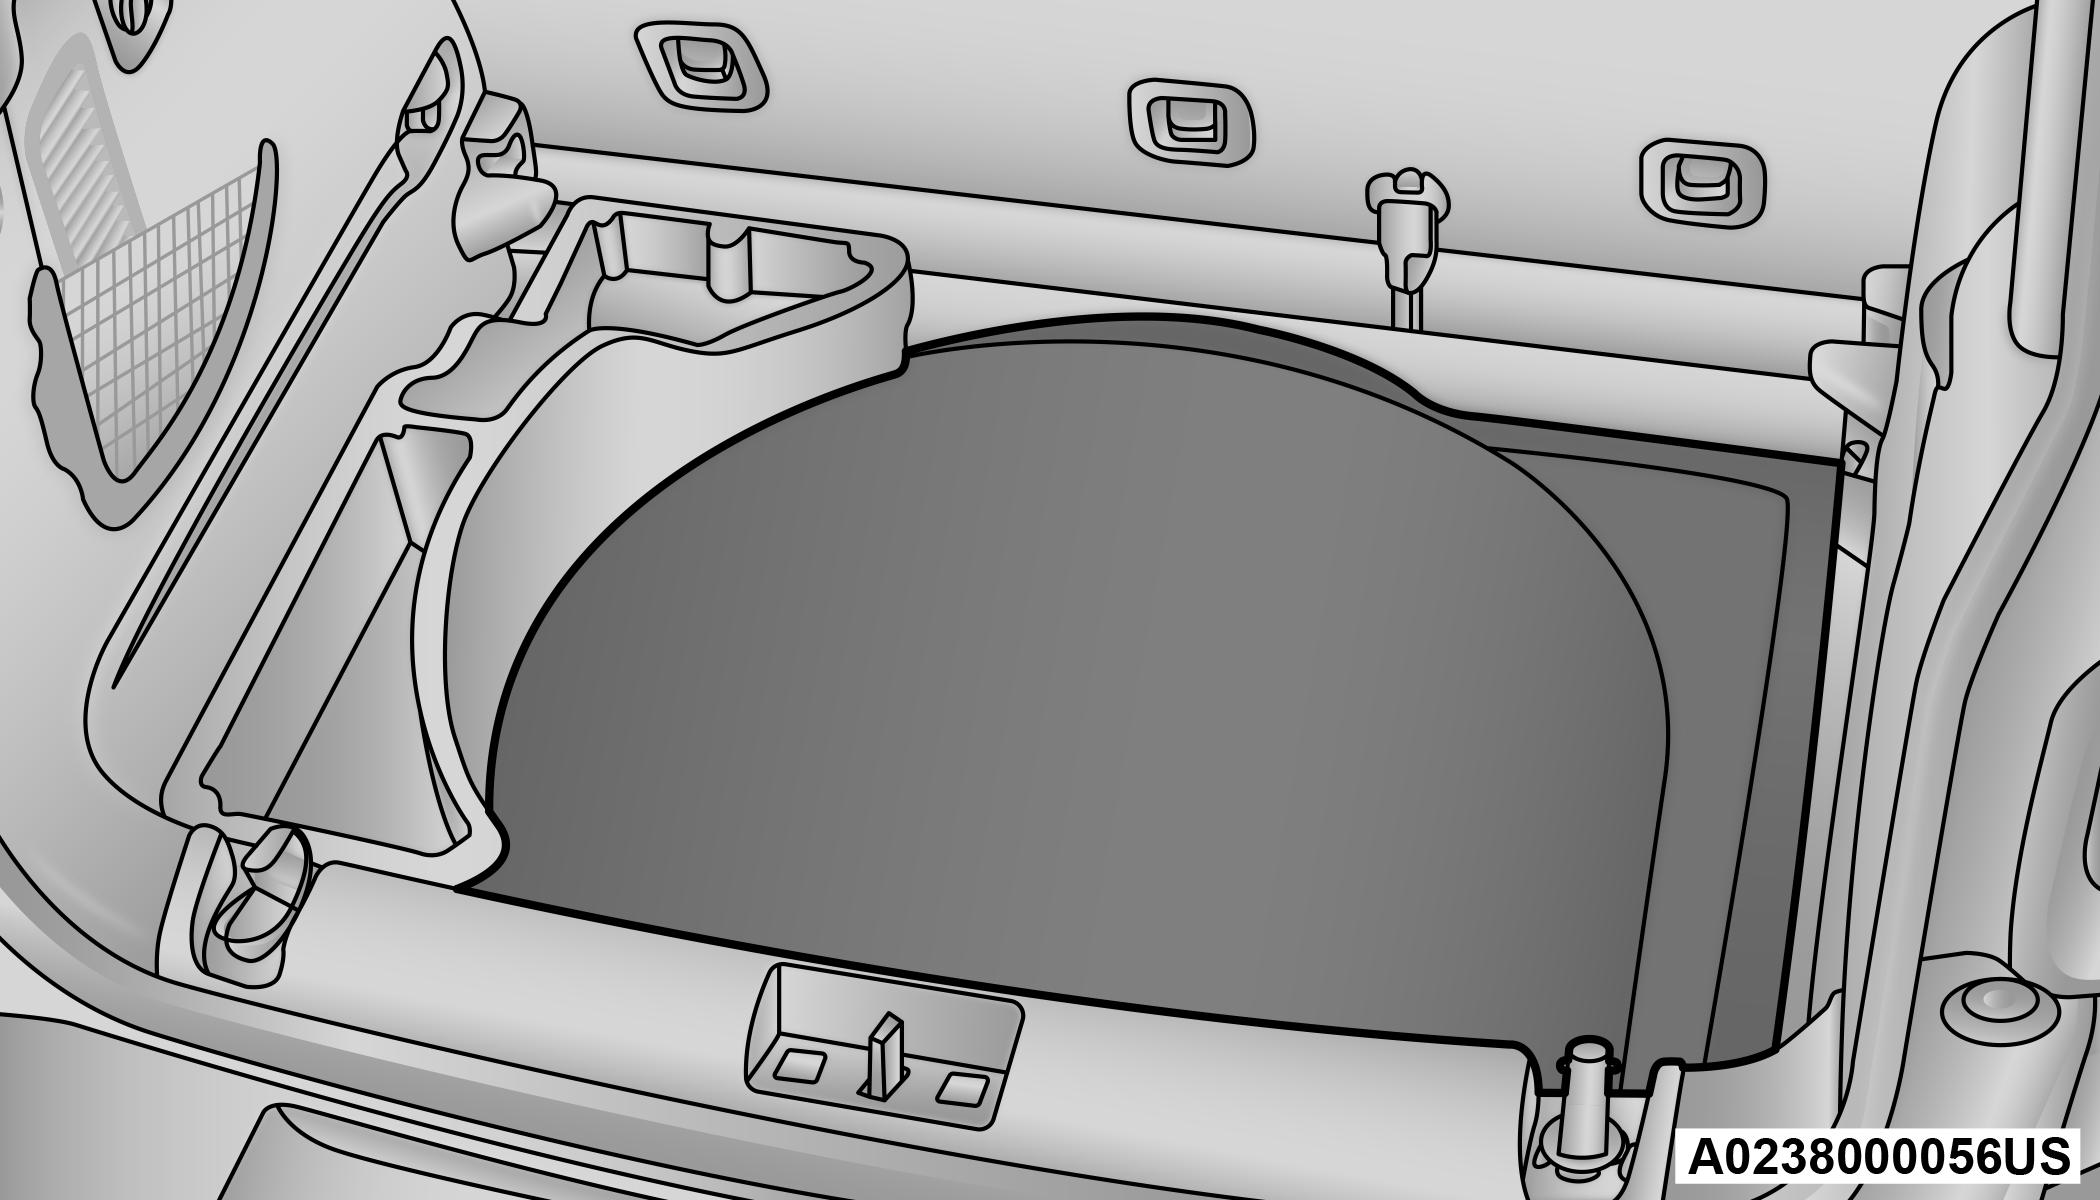
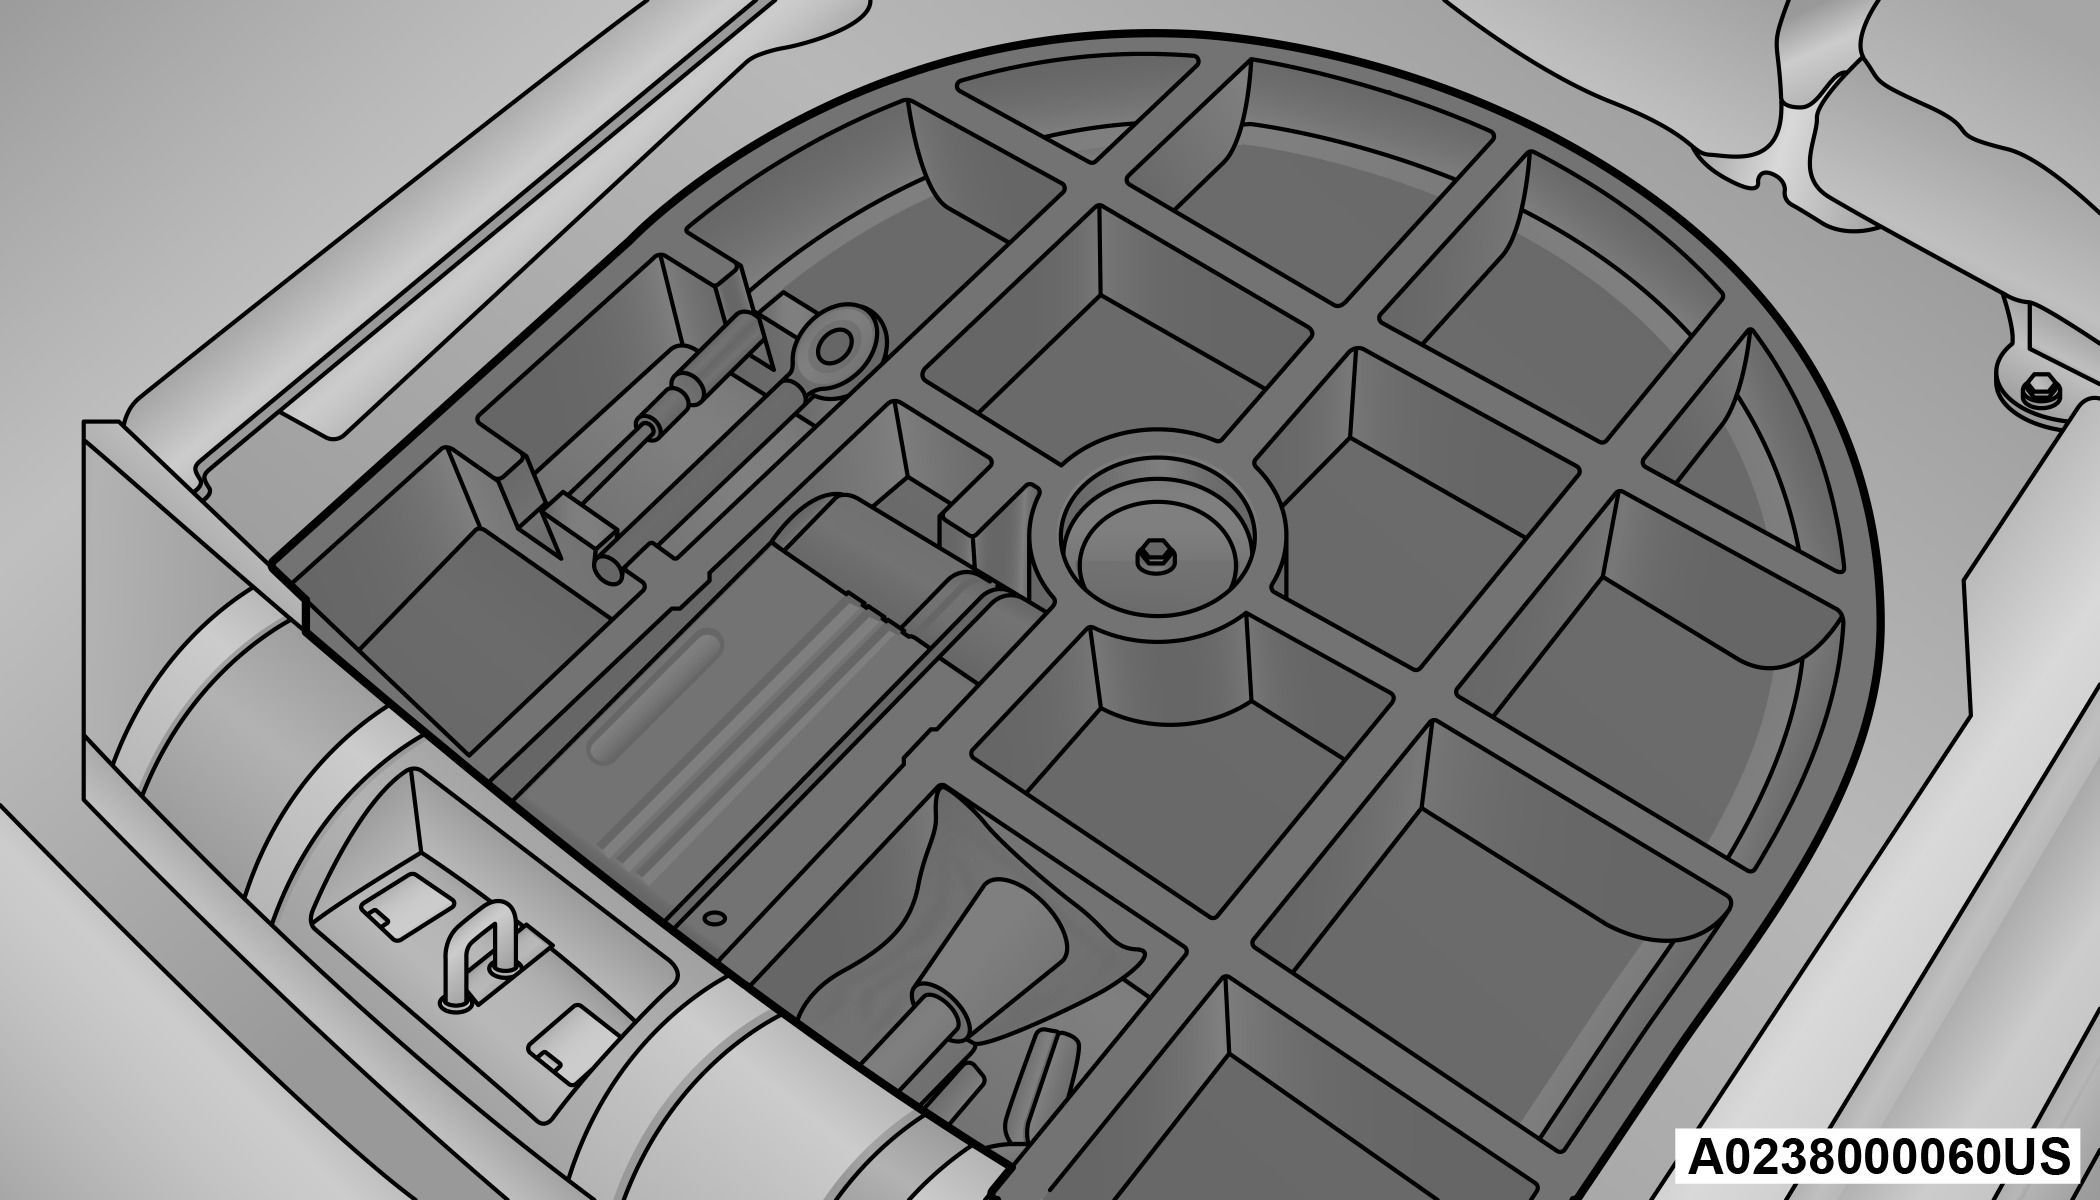
Access To Tire Service Kit Or Spare Tire
To access the Tire Service Kit or spare tire and container carrier, proceed as follows:
-
Grab the load floor handle and remove the floor.
-
Pull the tab and lift up on the carpet.
Anchoring Of The Load
The cargo tie-downs, located on the cargo area floor, should be used to safely secure loads when the vehicle is moving.
Tie-Downs
The side panels may be equipped with three grocery hooks (one on the left side and two on the right side) for securing loads that are not excessively heavy.
Grocery Hook
Grocery Hooks
CARGO BOX — IF EQUIPPED
The cargo area contains a preformed cargo box that can be used for the storage of objects that allows you to obtain a uniform level when loading.
Cargo Box
Note:
The cargo box is sized for a maximum capacity of distributed weight equal to 242 lb (110 kg).
Download Manual