Adjusting the Sats
Seats
Make seat adjustments before driving to ensure the best comfort and safety.
Adjusting the Front Seats
Adjust the driver's seat as far back as possible while allowing you to maintain full control of the vehicle. You should be able to sit upright and well back in the seat, adequately press the pedals without leaning forward, and grip the steering wheel comfortably. The passenger's seat should be adjusted so that it is as far back from the front airbag in the dashboard as possible.
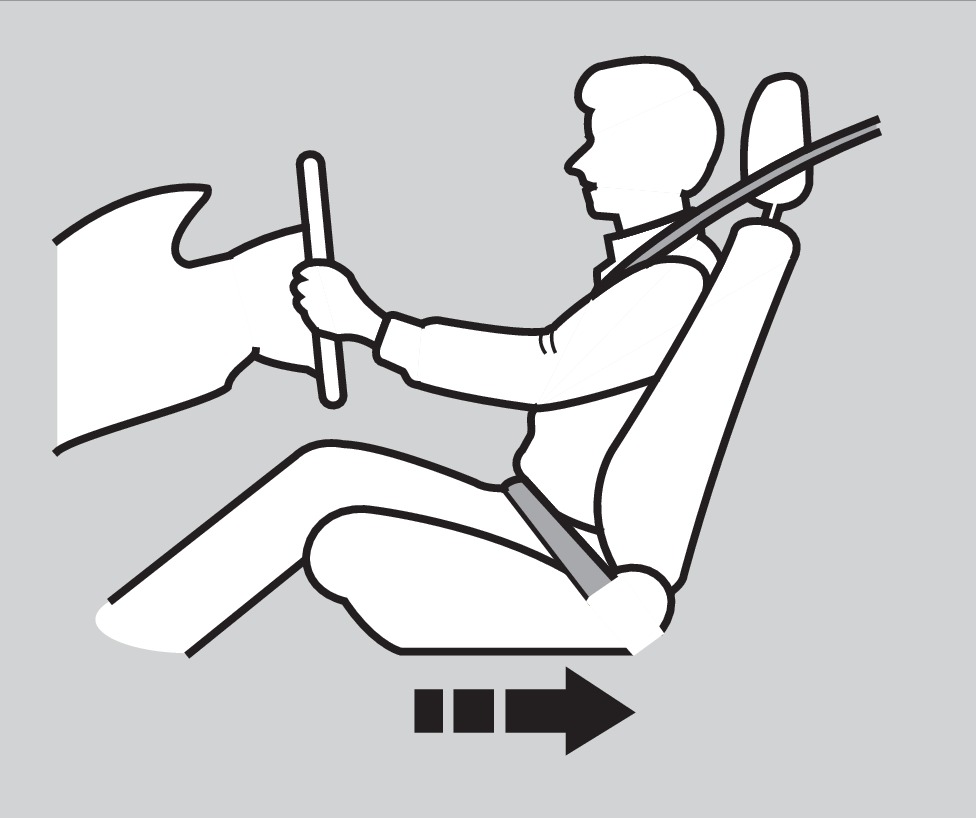
Move back and allow sufficient space.
The National Highway Traffic Safety Administration and Transport Canada recommend that drivers allow at least 10 inches (25 cm) between the center of the steering wheel and the chest.

Height adjustment (Driver's seat only) Pull up or push down the lever to raise or lower the seat.
Horizontal position adjustment Pull up on the bar to move the seat, then release the bar.
Seat-back angle adjustment Pull up the lever to change the angle.
Reclining the seat-back too far can result in serious injury or death in a crash.
Adjust the seat-back to an upright position, and sit well back in the seat.
Sitting improperly or out of position can result in serious injury or death in a crash.
Always sit upright, well back in the seat, with your feet on the floor.
Sitting too close to a front airbag can result in serious injury or death if the front airbags inflate.
Always sit as far back from the front airbags as possible while maintaining control of the vehicle.
Adjusting the Rear Seats
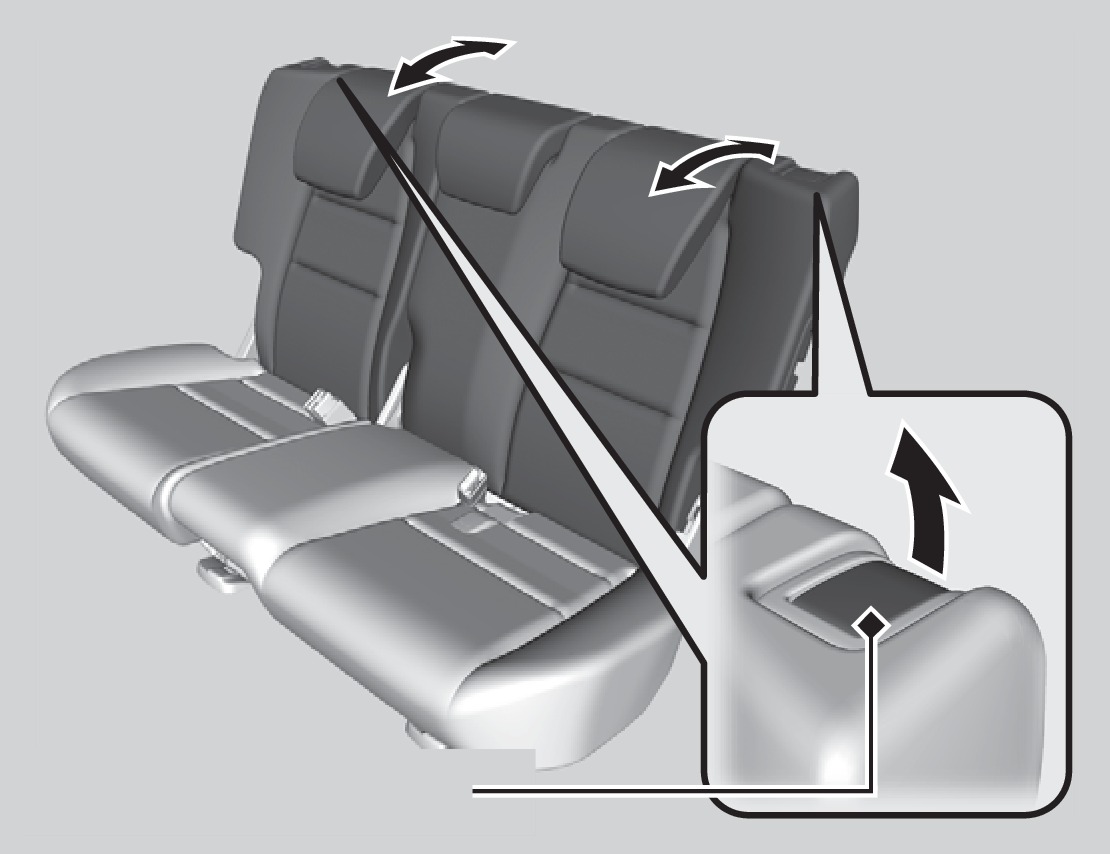
Release lever
Pull the release lever on the right to change the angle of the right half of the seat-back. Repeat for the left seat-back.
Floor Mats
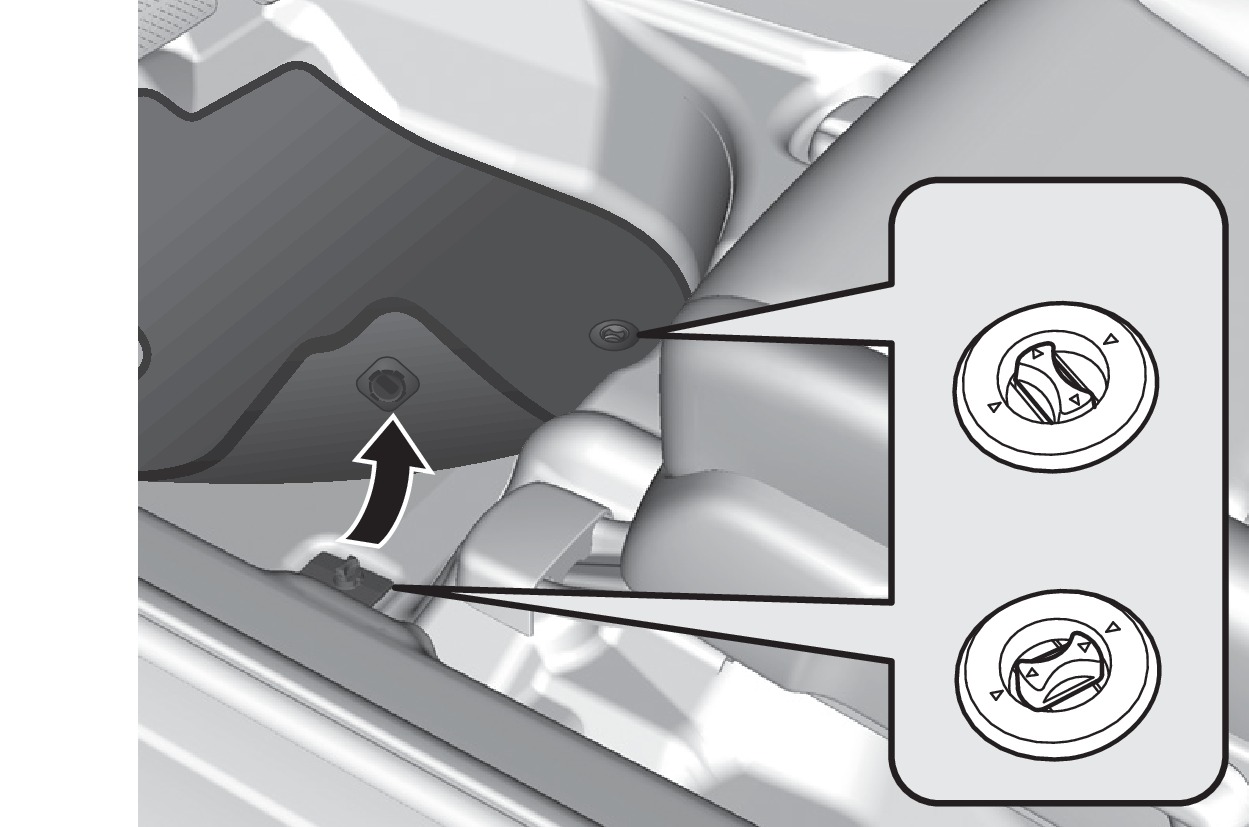
Unlock
Lock
Position the front seat floor mats properly, and anchor them. If they are not properly positioned, the floor mats can interfere with the front seat functions.
Do not put additional floor mats on top of the anchored mats.
Adjusting the Head Restraints
Your vehicle is equipped with head restraints in all seating positions. Head restraints are most effective for protection against whiplash and other rear-impact crash injuries.
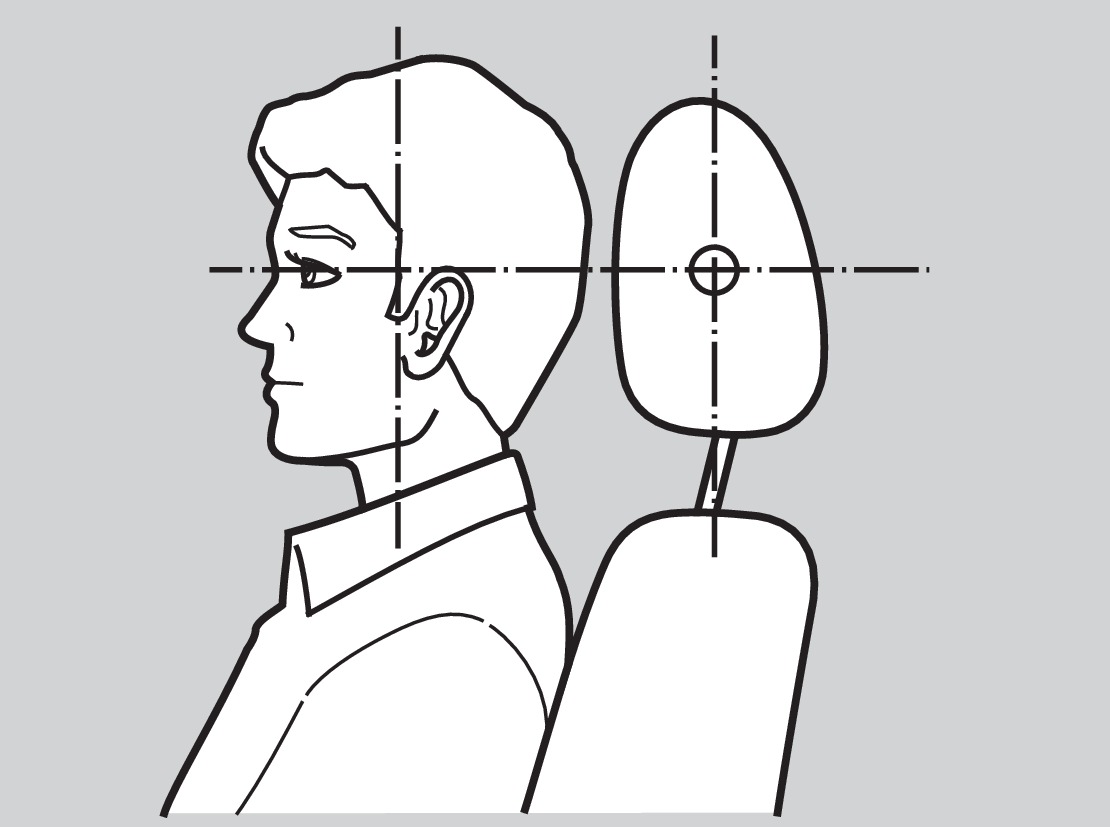
The center of the back of the occupant's head should rest against the center of the restraint. The tops of the occupant's ears should be level with the center height of the restraint.
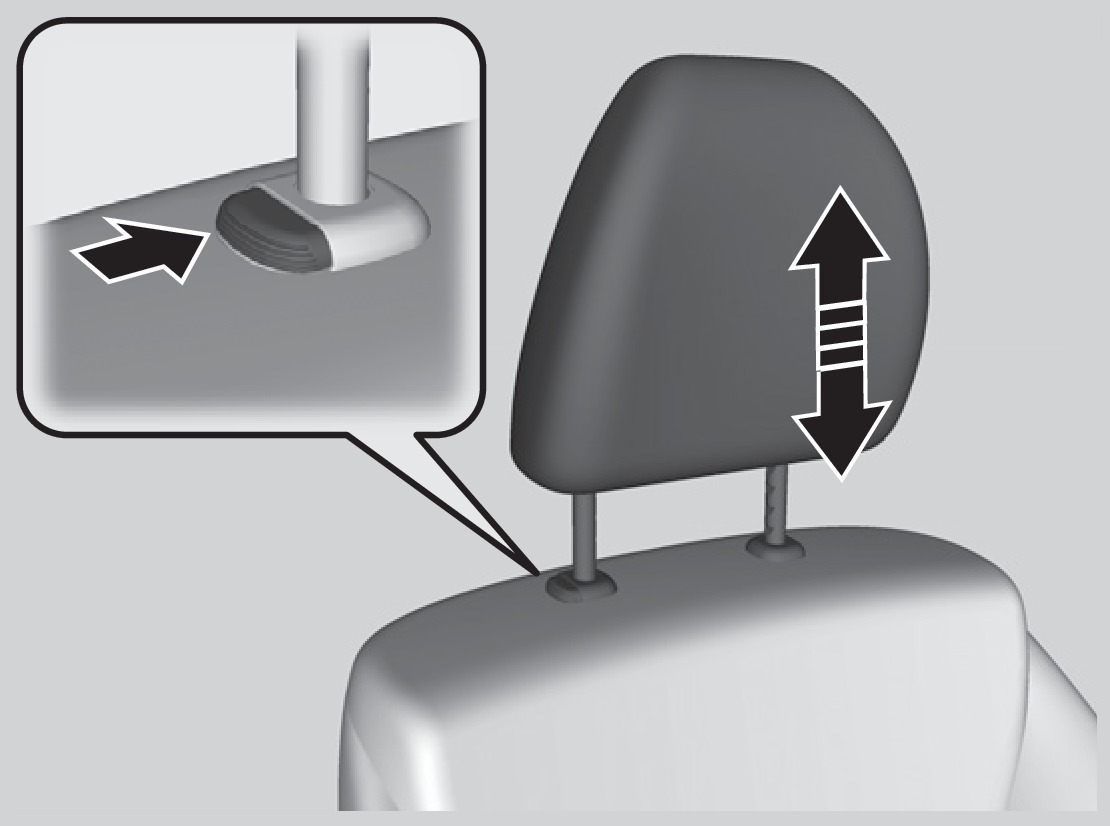
To raise the head restraint: Pull it upward.
To lower the head restraint: Push it down while pressing the release button.
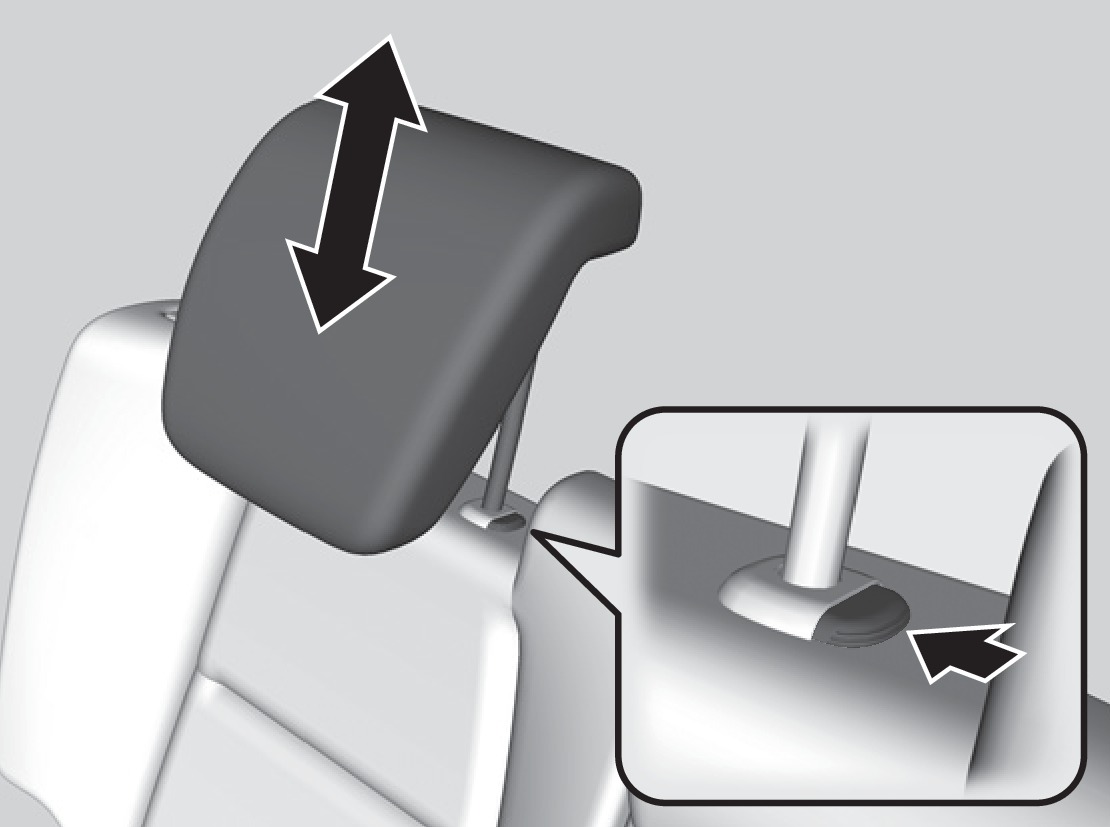
Rear outer seat shown
To remove the head restraint: Pull the restraint up as far as it will go. Then push the release button, and pull the restraint up and out.
To reinstall a head restraint: Insert the legs back in place, then adjust the head restraint to an appropriate height while pressing the release button. Pull up on the restraint to make sure it is locked in position.
For the head restraint system to work properly:
- Do not hang any items on the head restraints, or from the restraint legs.
- Do not place any object between an occupant and the seat-back.
- Install each restraint in its proper location.
Improperly positioning head restraints reduces their effectiveness and increases the likelihood of serious injury in a crash.
Make sure head restraints are in place and positioned properly before driving.
Failure to reinstall, or correctly reinstall, the head restraints can result in severe injury during a crash.
Always replace the head restraints before driving.
- Adjusting the Steering Wheel
Download Manual