Checking and replacing fuses
If any of the electrical components do not operate, a fuse may have blown. If this happens, check and replace the fuses as necessary.
STEP 1
Turn the “ENGINE START STOP” switch OFF.
STEP 2
Open the fuse box cover.
- Engine compartment (fuse box on the left side)
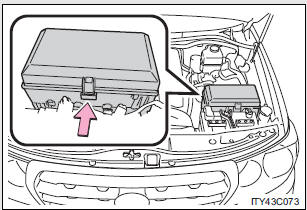
Push the tab in and lift the lid off.
- Engine compartment (fuse box on the right side)
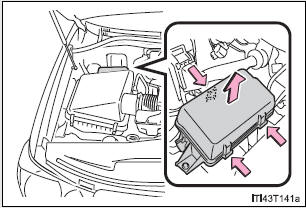
Push the tabs in and lift the lid off.
- Driver’s side instrument panel
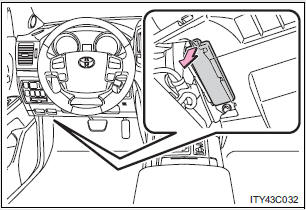
Remove the lid.
- Passenger’s side instrument panel
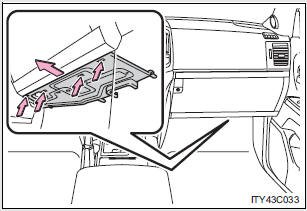
Remove the cover.
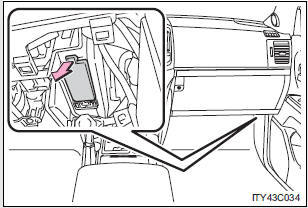
Remove the lid.
STEP 3
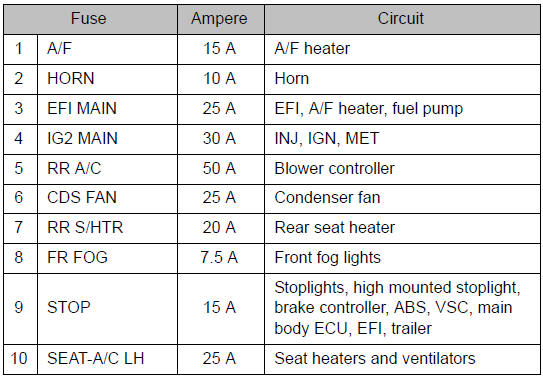
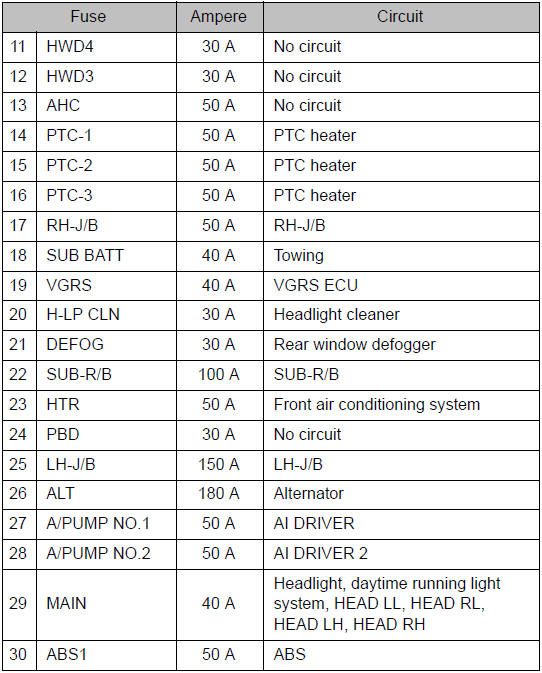
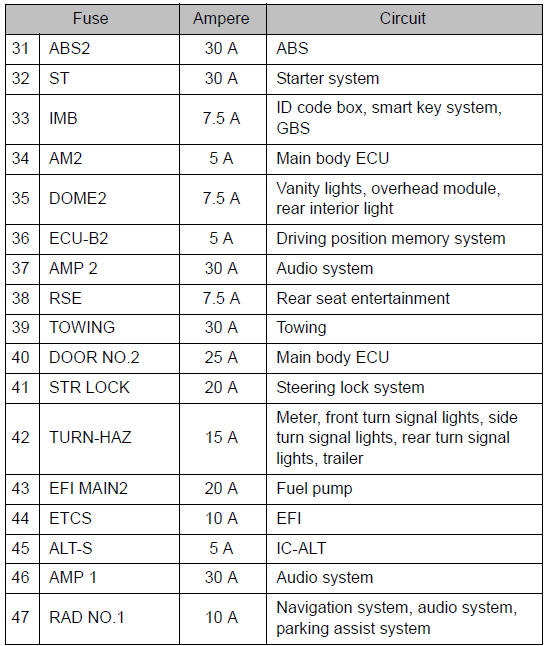
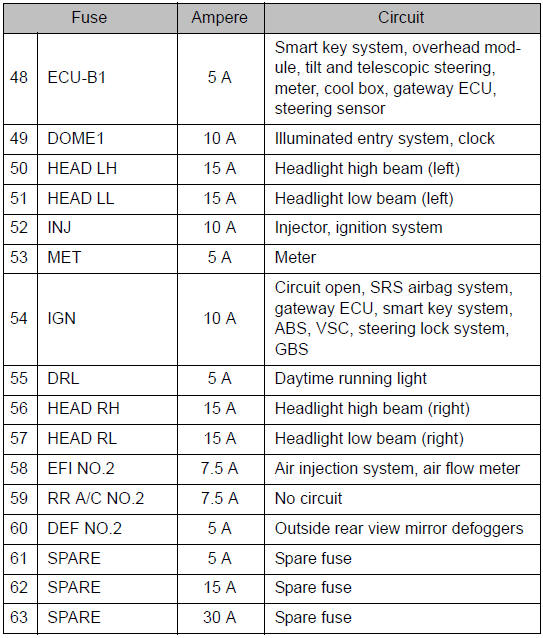
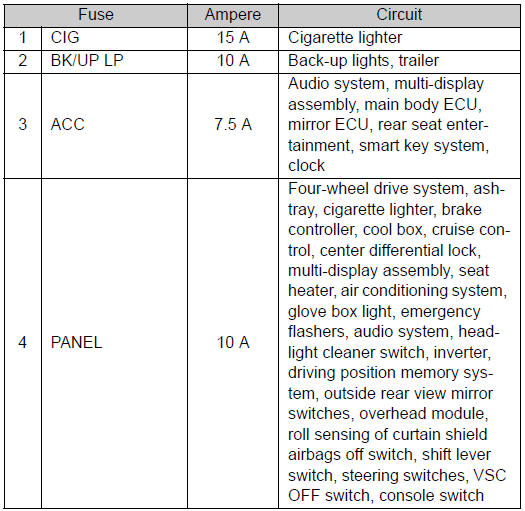
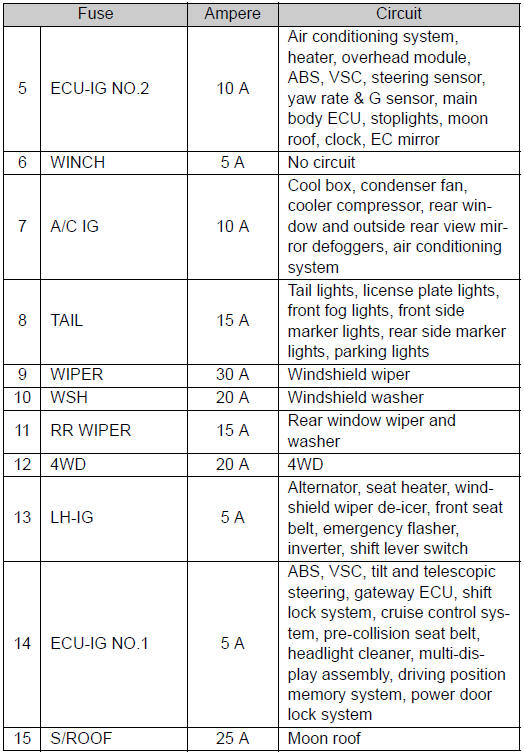
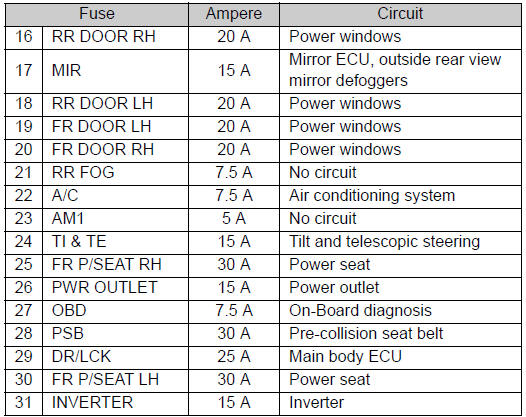
After a system failure, see “Fuse layout and amperage ratings” for details about which fuse to check.
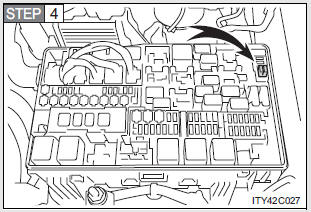
Remove the fuse with the pullout tool.
STEP 5
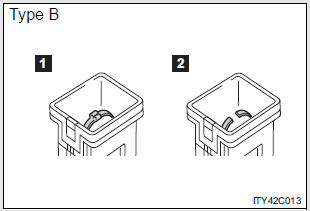
Check if the fuse has blown.
- Type A and B
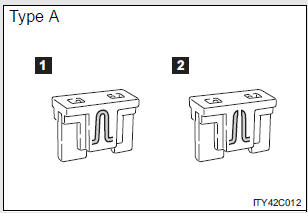
- Normal fuse
- Blown fuse
Replace it with one of an appropriate amperage rating.
The amperage rating can be found on the fuse box lid.
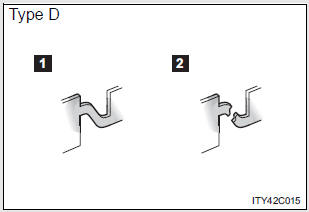
- Type C and D
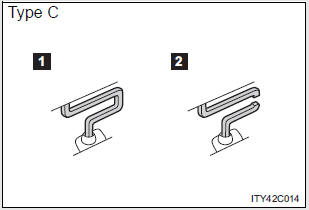
- Normal fuse
- Blown fuse
Contact your Toyota dealer.
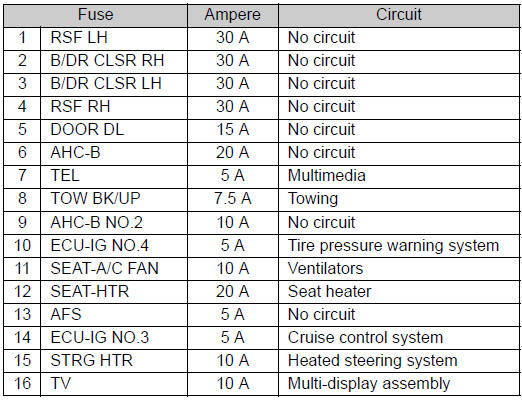
Fuse layout and amperage ratings
- Engine compartment (fuse box on the left side)
- Engine compartment (fuse box on the right side)

- Driver’s side instrument panel
- Passenger’s side instrument panel

- After a fuse is replaced
- If the lights do not turn on even after the fuse has been replaced, a bulb may need replacement.
- If the replaced fuse blows again, have the vehicle inspected by your Toyota dealer.
- If there is an overload in the circuits
The fuses are designed to blow, protecting the wiring harness from damage.
| CAUTION
Observe the following precautions. Failing to do so may cause damage to the vehicle, and possibly a fire or injury.
|
| NOTICE
Have the cause of electrical overload determined and repaired by your Toyota dealer. |
Download Manual