Interior equipment
Vehicle features and options
This chapter describes model-specific equipment, systems, and functions that are currently available, or may become available in the future, even if they are not present in the vehicle.
Additional information:
Vehicle equipment.
Integrated universal remote control
Principle
The integrated universal remote control in the interior mirror can operate remote-controlled systems such as garage door openers, alarm systems or locking systems.
General information
The integrated universal remote control replaces up to three different hand-held transmitters. To operate the remote control, the buttons on the interior mirror must be programmed with the desired functions.
Before selling the vehicle, delete the stored functions for the sake of security.
If possible, do not install the antenna of the remote-controlled system near metal objects to ensure the best possible operation.
Safety information

Keep the travel paths of remote-controlled systems unobstructed

Compatibility

If this icon is printed on the packaging or in the operating instructions of the remote-controlled system, the system is generally compatible with the integrated universal remote control.
Additional questions are answered by:
An authorized service center or another qualified service center or repair shop.
www.homelink.com on the Internet.
HomeLink is a registered trademark of Gentex Corporation.
For any additional questions, contact an authorized service center or another qualified service center or repair shop.
Control elements on the interior mirror
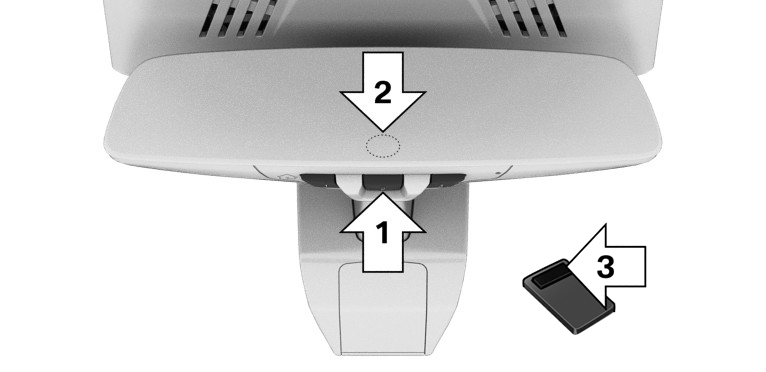
Buttons, arrow 1.
LED, arrow 2.
Hand-held transmitter of the remote-controlled system, arrow 3.
Programming the integrated universal remote control
Functional requirement
The battery of the hand-held transmitter must be fully charged at the time of programming to ensure an optimal range of the integrated universal remote control.
Programming individual buttons
Park the vehicle within range of the remote-controlled system.
Turn on standby state.
Select desired button on the interior mirror:
Program available button:
Press the button.
Program already assigned button:
Press and hold the button for approx. 20 seconds.
The LED on the interior mirror will slowly begin flashing orange.
Hold the hand-held transmitter for the remote-controlled system approx. 1 to 12 in/2.5 to 30 cm away from the buttons on the interior mirror.
The required distance depends on the hand-held transmitter.
Press and hold the button on the hand-held transmitter.
The LED can illuminate in different ways:
The LED illuminates green: programming completed.
Release button.
The LED flashes green rapidly: the hand-held transmitter was detected but programming is not complete.
Press and hold the button on the interior mirror for approx. 2 seconds. Perform this procedure three times.
If the integrated universal remote control remains nonoperational, continue with the special features for rolling code radio systems.
LED does not illuminate green after 60 seconds: programming not completed.
Repeat steps 3 to 5.
Special feature of the rolling code wireless system
For systems with a rolling code radio system, the integrated universal remote control and the system also have to be synchronized.
Refer to information on synchronization in the operating instructions of the remote-controlled system.
Program the desired button on the interior mirror.
Locate and press the synchronizing button on the remote-controlled system such as on the garage door.
You have approx. 30 seconds for the next step.
Synchronizing is easier with the aid of a second person.
Press and hold the programmed button on the interior mirror for approx. 3 seconds.
If necessary, repeat this step up to three times in order to end synchronization. Once synchronization is complete, the programmed function will be carried out.
Operation
General information
After programming, the remote-controlled system can be operated with the button on the interior mirror.
Press and hold the desired button of the remote-controlled system within range until the function is triggered.
The LED on the interior mirror is continuously illuminated green during the transmission of the radio signal.
Deleting a button assignment
The button assignment cannot be deleted individually.
Press and hold the two outer buttons on the interior mirror simultaneously for approximately 10 seconds until the LED flashes green rapidly.
All stored button assignments will be deleted.
Sun visor
Glare shield
Fold the sun visor down or up.
Glare shield from the side
Folding the sun visor out
Fold the sun visor down.
Detach it from the holder and swing it toward the side window.
Shift it back to the desired position.
Folding the sun visor in
Proceed in the reverse order to close the sun visor.
Vanity mirror
A vanity mirror is located in the sun visor behind a cover.
Sockets
Principle
The socket can be used for electronic devices when the standby or drive-ready state is switched on.
General information
The total load of all sockets must not exceed 140 watts at 12 volts.
Do not damage the socket by using unsuitable connectors.
Safety information
Keep the airbag unfolding area clear
Do not connect battery chargers to the sockets in the vehicle
Insert the cover after use again
Front center console
Press on the cover.

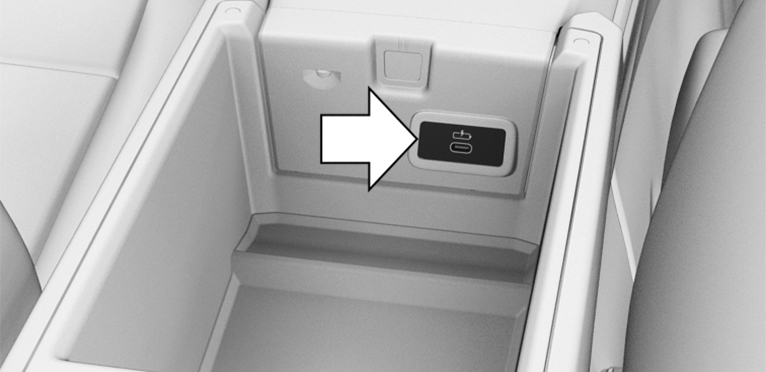
A socket is located between the cup holders. Detach the cover.
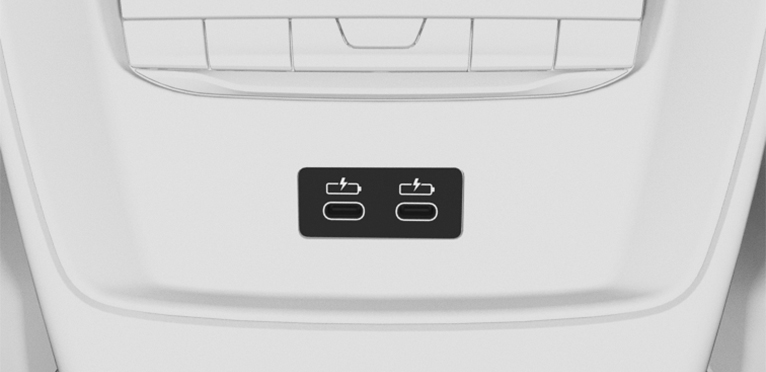
USB port
General information
Follow the information regarding the connection of mobile devices to the USB port in the section on USB connections.
Additional information:
USB connection.
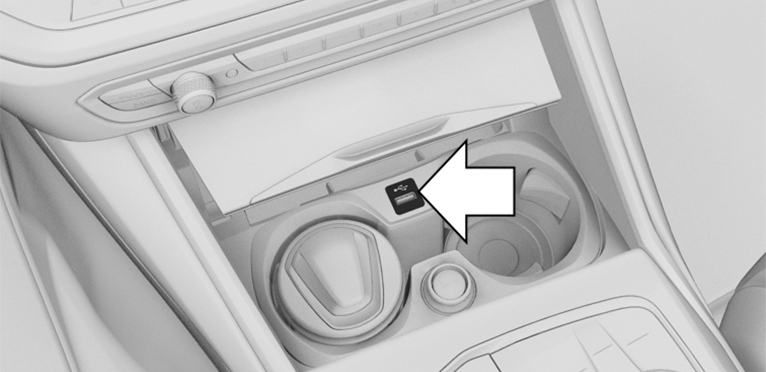
In the center armrest
A USB port is located in the center armrest.
Properties:
USB port Type C.
For charging mobile devices.
Charge current: max. 3 A.
In the front center console
Keep the movement area of the cover unobstructed
If necessary, push on the cover.
A USB port is located in the center console.
Properties:
USB port Type A.
For charging mobile devices and for data transfer.
Charge current: max. 1.5 A.
In the rear center console
Depending on the equipment, there are two USB ports in the center console in the rear.
Properties:
USB port Type C.
For charging mobile devices.
Charge current: maximum 3 A per port.
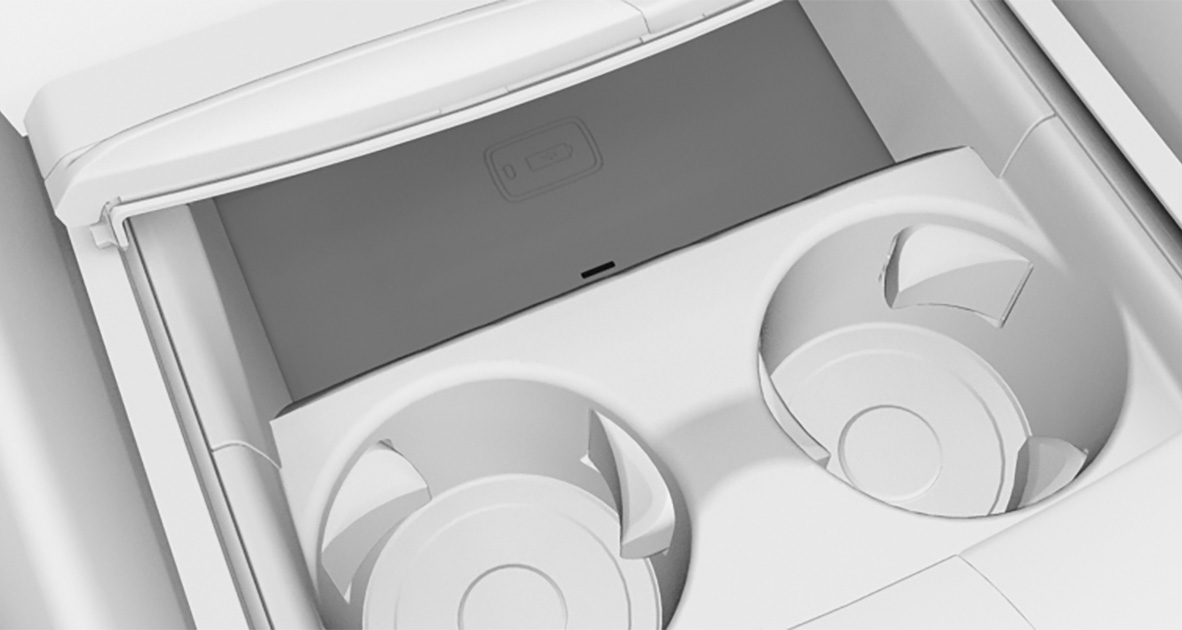
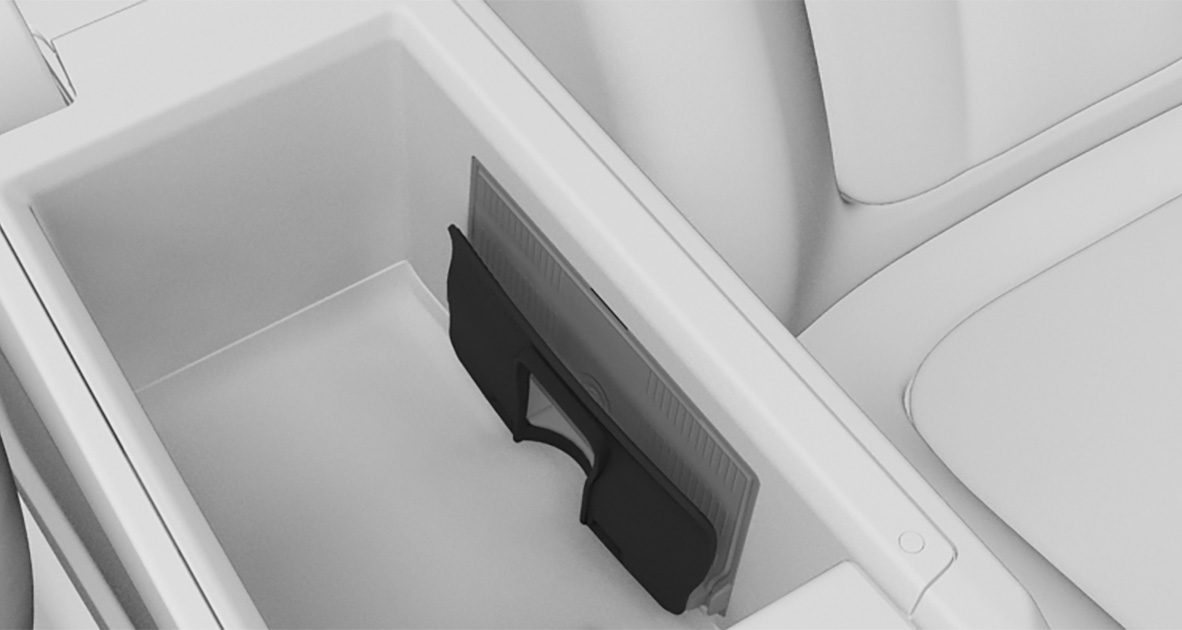
Wireless charging tray
Principle
The wireless charging tray allows wireless charging of mobile phones and other mobile devices certified according to the Qi standard.
General information
When inserting the device to be charged, make sure that there are no objects between the device to be charged and the wireless charging tray.
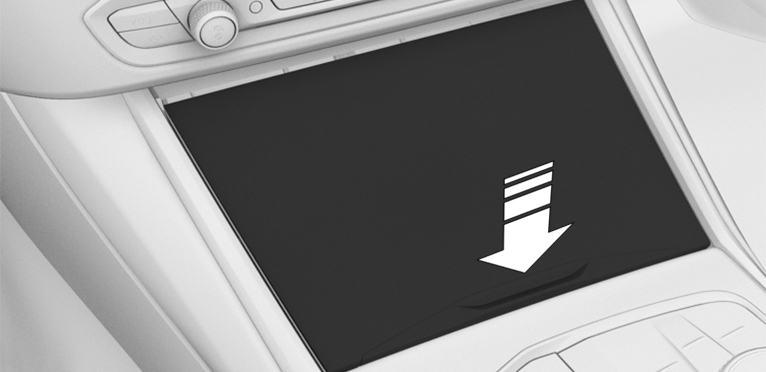
 The charging process is shown by the charge indicator on the control display.
Safety information
Observe when charging a device with Qi standard
Do not force the mobile phone into the tray
Overview
1
2
1
LED
2
Storage area
1
2
1
Car mount
2
LED
Functional requirements
The device to be charged must be certified according to the Qi standard. For more information, contact an authorized service center or another qualified service center or repair shop, or visit www.bmw.com/bluetooth.
Standby state is switched on.
Tray in center console: the mobile phone must not exceed a maximum size of approximately 6.0 x 3.1 x 0.7 in/154.5 x 80 x 18 mm.
Tray in center armrest: the mobile phone must not exceed a maximum size of approx. 5.9 x 3.6 x 0.62 in/150 x 91.5 x 16 mm.
Protective sleeves and covers must be suitable for wireless charging.
Tray in center console: the mobile phone to be charged is located in the middle of the tray. The mobile phone display is pointing upwards.
Tray in center armrest: the mobile phone to be charged is located in the middle of the tray. The mobile phone display points towards the retaining clip.
Inserting the mobile phone
Tray in the center console
If necessary, open the tray cover.
Place the mobile phone centered in the tray with the display facing up.
If necessary, close the tray cover.
Tray in the center armrest
Open the center armrest.
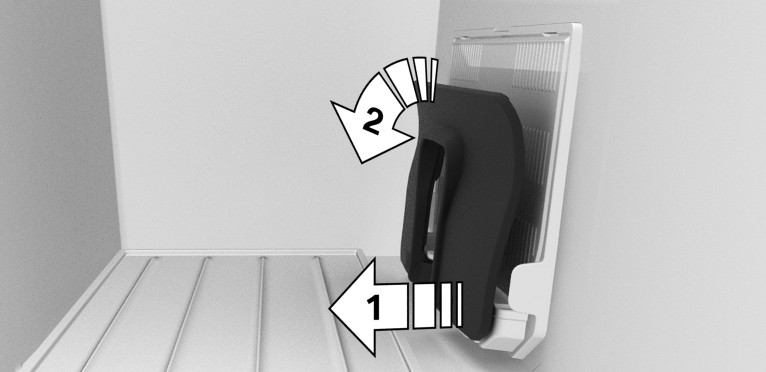
Depending on the thickness of the mobile phone, pull the car mount out on the bottom, arrow 1. If necessary, swivel out the upper edge, arrow 2.
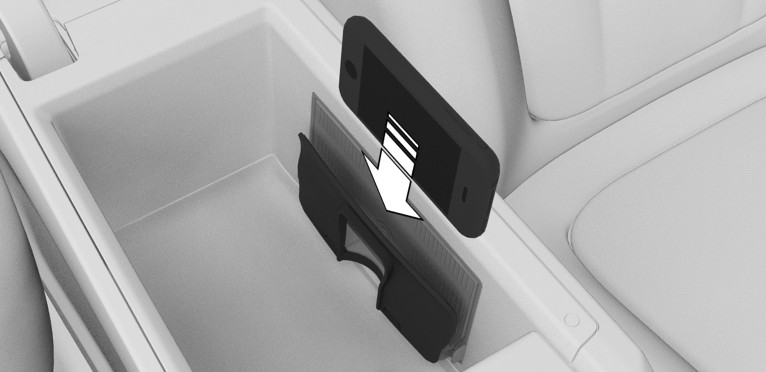
Slide the mobile phone with the display on the side of the retaining clip into the tray.
Close the center armrest.
LED displays
|
Color |
Meaning |
|---|---|
|
Blue |
The mobile phone is charging. The blue LED stays illuminated once the inserted mobile phone with Qi capability is fully charged. |
|
Orange |
The mobile phone is not charging. Temperature of the mobile phone may be too high or foreign object may be in charging tray. |
|
Red |
The mobile phone is not charging. Contact an authorized service center or another qualified service center or repair shop. |
Forgotten warning
General information
A warning can be given if a Qi-certified mobile phone was forgotten in the wireless charging tray when leaving the vehicle.
The forgotten warning is displayed in the instrument cluster.
Enable/Disable Forgotten Warning
 Apps menu
"Vehicle"
"System settings"
"Wireless charging tray"
"Mobile phone reminder"
System limits
The charge current may be reduced or charging may be temporarily interrupted in the wireless charging tray in the following situations:
Due to excessive temperatures on the surface of the tray and mobile phone.
If there are objects between the mobile phone and the wireless charging tray.
If storage media or electronic cards, e.g., chip cards, cards with magnetic stripes, or cards for signal transmission, are located between the mobile phone and wireless charging tray.
Due to protective sleeves and covers that exceed a thickness of 0.07 in/2 mm
Due to protective sleeves and covers made of unsuitable material, e.g., with magnetic parts.
Due to add-on parts for mobile phone, e.g., holders.
By settings on the mobile phone, for instance for charging. Follow the relevant instructions on the control display and in the instructions for the mobile phone, if applicable.
Download Manual