Other settings
321
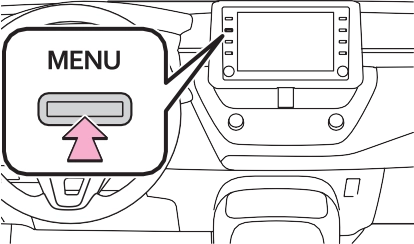
If the general settings screen is not displayed, select “General”.
Select to change the time zone and select “On” or “Off” for daylight sav- ing time, automatic adjustment of the clock, etc. (P.322)
Select to change the language. The language setting of Apple Car- Play/Android Auto can only be changed on the connected device.
Select to change the display infor- mation/area on the home screen and the home screen layout. (P.292)
Select to change the screen theme setting.
Select to turn the beep sound on/off.
Select to change the unit of mea- sure for distance/fuel consumption.
Select to change the keyboard lay- out.
Select to delete the keyboard his- tory.
Select to set the memorize key- board history on/off.
Select to turn the animations on/off.
Select to set automatic Apple Car- Play/Android Auto connection establishment on/off. (P.323)
Select to change the driver set-
tings. (P.323)
Select to delete personal data. (P.324)
Select to update software versions. For details, contact your Toyota dealer.
Select to set software update set- ting. (P.324)
Select to update Gracenote® data- base versions. For details, contact your Toyota dealer.
Select to display the software infor- mation. Notices related to third party software used in this product are enlisted. (This includes instruc- tions for obtaining such software, where applicable.)
Select to change the capacitive touch screen button sensitivity to 1 (low), 2 (medium), or 3 (high).
*1: This function is not made avail- able in some countries or areas.
*2: If equipped
Select to change the time zone. (P.322)
Select to set daylight saving time on/off.
Select to set automatic adjustment of the clock by GPS on/off.
When set to off, the clock can be manually adjusted. (P.322)
Select to set the 24 hour time format on/off.
When set to off, the clock is displayed in 12 hour time for- mat.
When “Auto Adjust by GPS” is turned off, the clock can be manually adjusted.
1 Select “Auto Adjust by GPS” to set to off.
2 Adjust the clock manually.
connection establishment on/off when a compatible
323
Select “+” to set the time for- ward one minute and “-” to set the time back one minute.
Select to round to the nearest hour.
e.g.
1:00 to 1:29 1:00
1:30 to 1:59 2:00
*: This function is not made avail- able in some countries or areas.
Select to turn Apple CarPlay
iPhone is connected to the system via USB. (P.314) Depending on the system, this setting cannot be changed when a device is connected to the system via USB. Disconnect the device before attempting to change the setting.
Select to turn Android Auto connection establishment on/off when a compatible device is connected to the system via USB. (P.315) Depending on the system, this setting cannot be changed when a device is connected to the system via USB. Disconnect the device before attempting to change the setting.
The driver settings feature will allow the system to link some preferences (such as audio pre- sets, screen theme, language, etc.) to a paired Bluetooth® phone.
3 Select “Enable This Feature”.
After a few seconds, loaded screen automatically switches to the home screen.
Examples of settings that can be returned to their default conditions:
etc.
*: This function is not made avail- able in some countries or areas.
When software update information is displayed, contact your Toyota dealer.
325
|
|

Select to adjust the volume of voice guidance.
Select to set the voice recog- nition prompts.
Select to train voice recogni- tion.
The voice command system adapts the user accent.
Select to start the voice rec- ognition tutorial.
Select to set the voice prompt interrupt on/off.
Select to reset all setup items.
|
|
The security system can be set to on by entering a security code (4-digit number).
When set to on, the system will become inoperative once the electrical power source is dis- connected until the security code is entered.
If the 4-digit personal code is forgot- ten, please contact your Toyota dealer.
Select to set valet mode. (P.326)
Enter the 4-digit personal code and select “OK”.
If an incorrect security code (4-digit number) is entered 6 times, the sys- tem will not accept another security
code (4-digit number) for 10 min- utes.
Download Manual