Liftgate
The liftgate may be released in one of several ways:
-
Key fob (if equipped with power liftgate)
-
Outside handle
-
Button on overhead console (if equipped with power liftgate)
-
Hands-Free Liftgate (if equipped)
The overhead console switch and key fob (if equipped) will release the liftgate when the liftgate is unlocked or locked. The outside handle requires the liftgate to be unlocked.
>Liftgate Entry
To Unlock The Liftgate
Use the key fob or the interior door unlock button on the door panel to unlock the liftgate. The manual door locks on the doors will not unlock the liftgate.
WARNING:
Driving with the liftgate open can allow poisonous exhaust gases into your vehicle. You and your passengers could be injured by these fumes. Keep the liftgate closed when you are operating the vehicle.
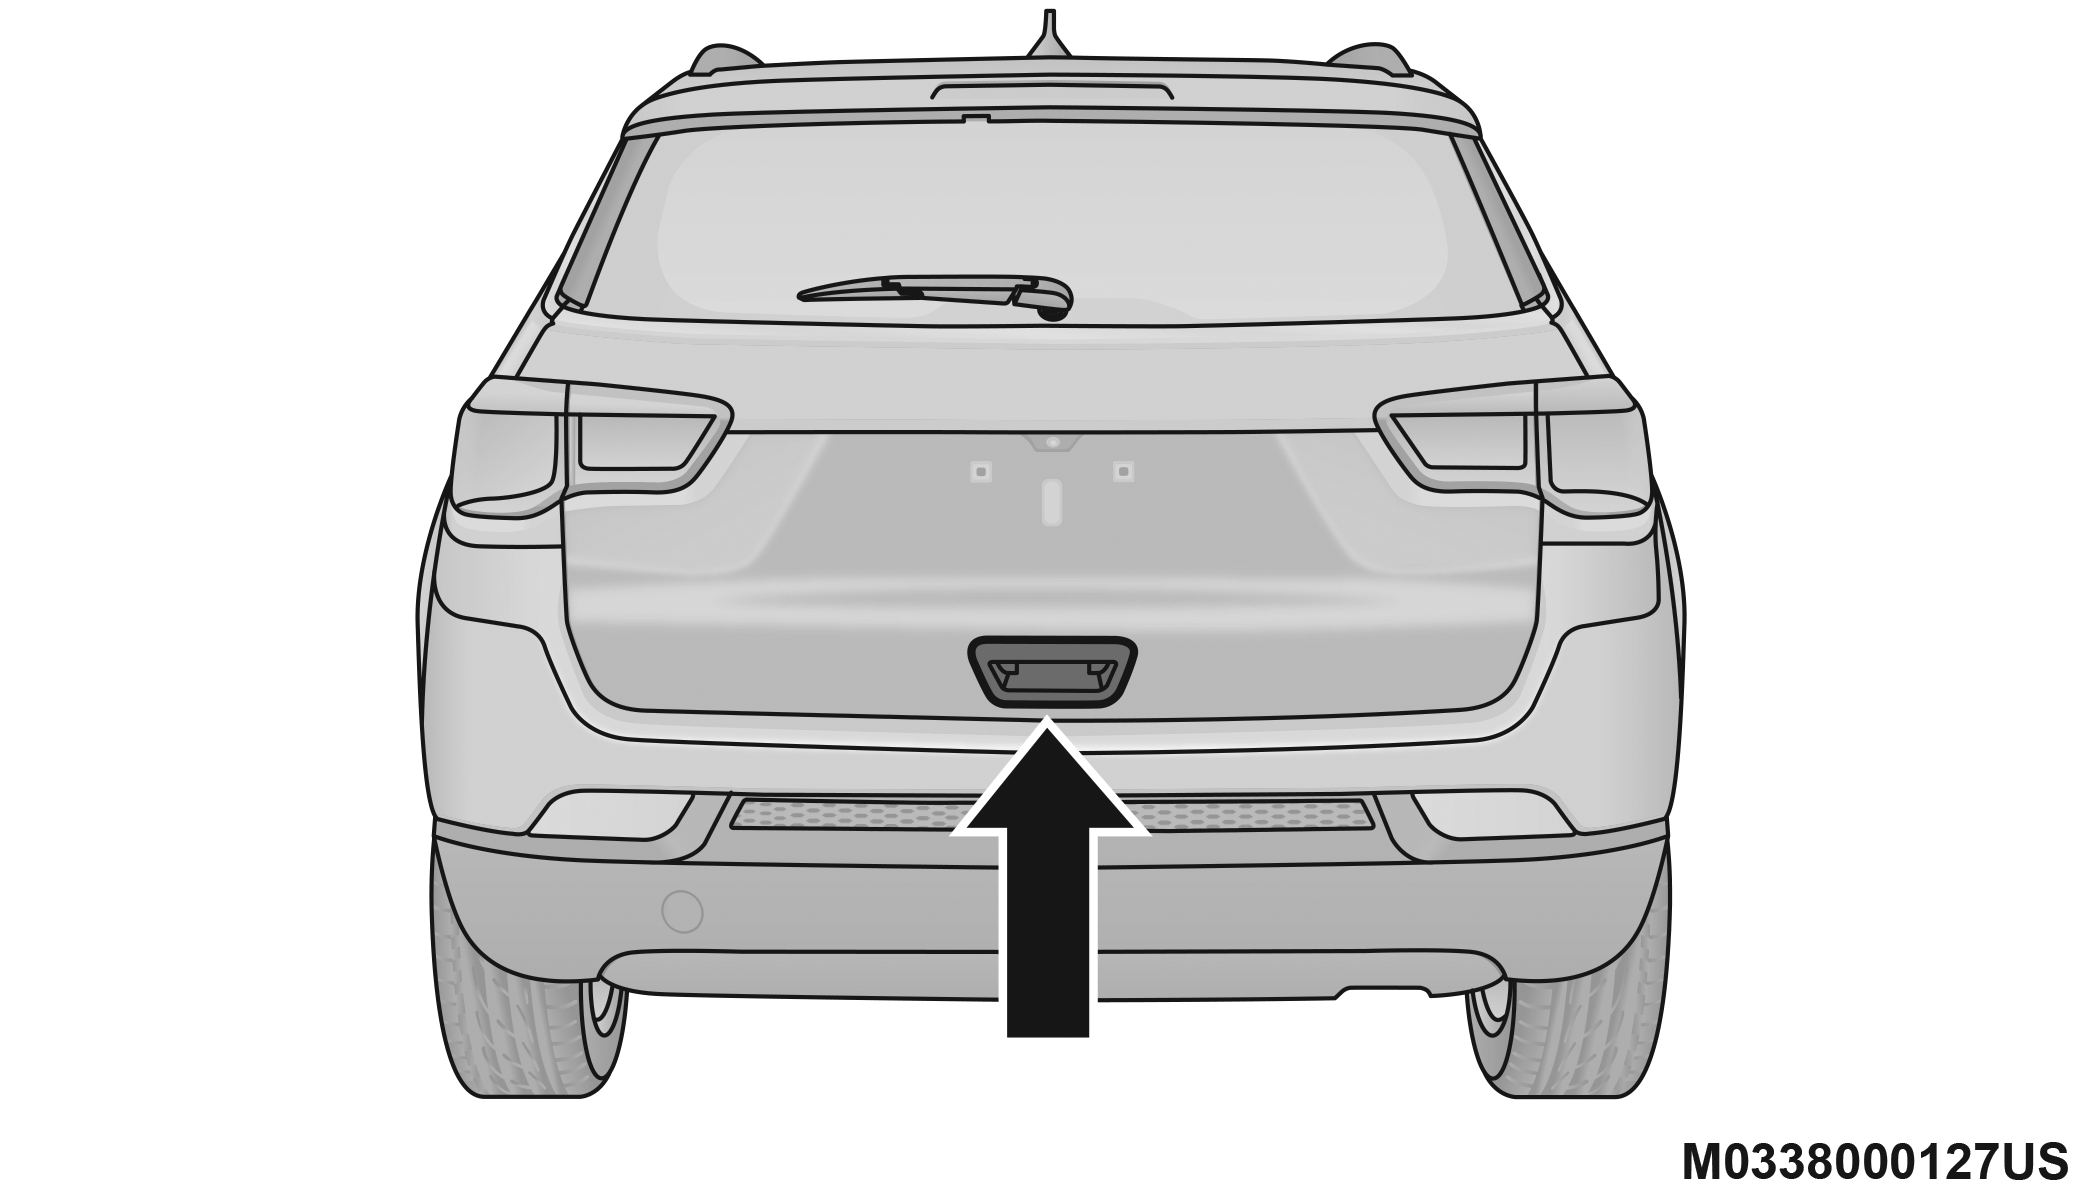
LOCK/CLOSE THE LIFTGATE
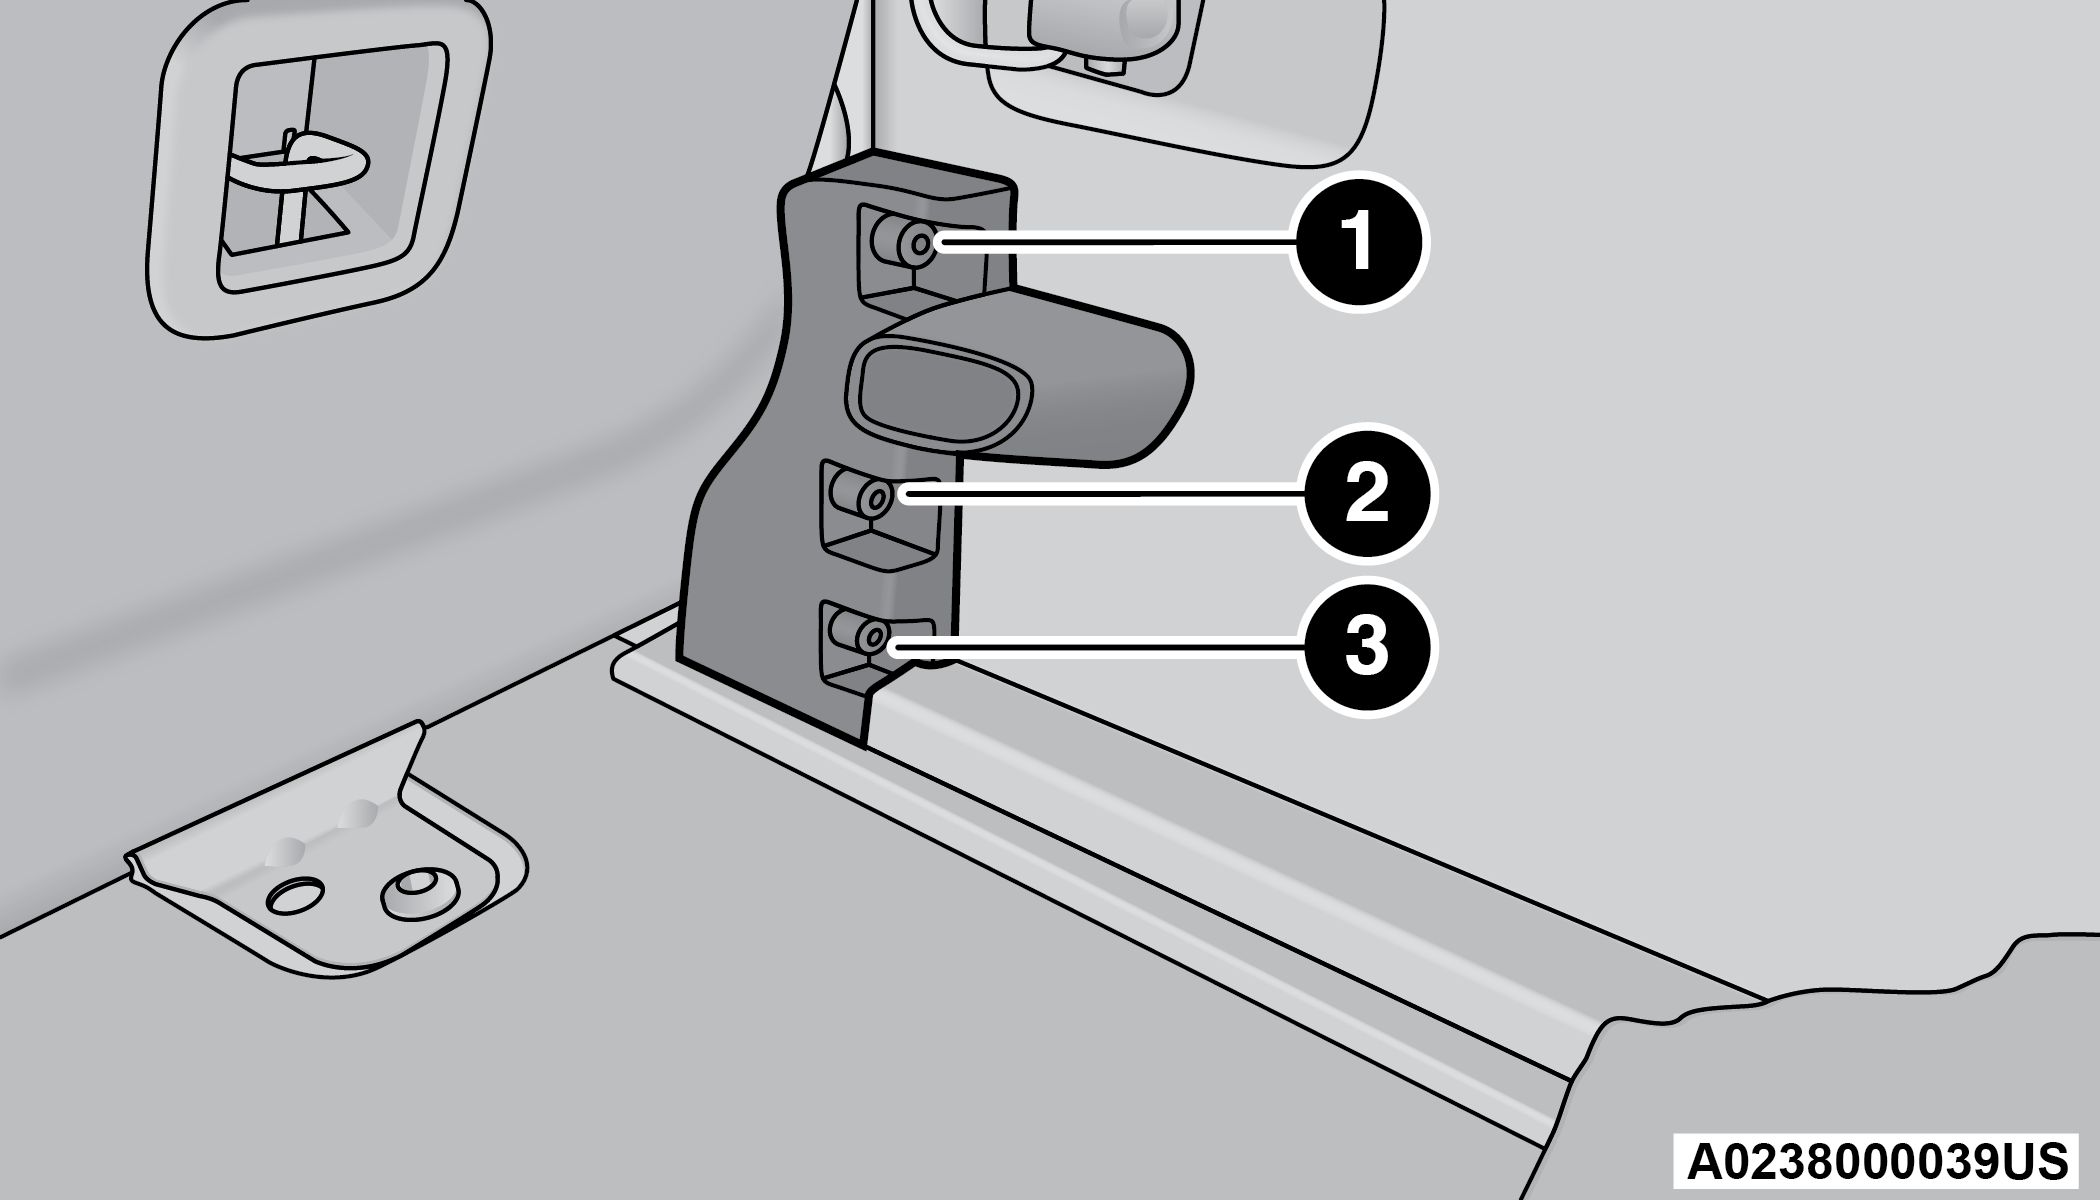
To manually close the liftgate, grab the liftgate closing handle and pull in a downward motion to close the liftgate.
>Liftgate Pull Handle/Closing Liftgate
Note:
Before closing the liftgate, make sure to be in possession of the key fob because the liftgate may be locked.
To Lock The Liftgate
Use the key fob or the interior door lock button on the door panel to lock the liftgate. The manual door locks on the doors will not lock the liftgate.
POWER LIFTGATE — IF EQUIPPED
 The power liftgate may be opened by pushing the liftgate button on the key fob. Push the liftgate button on the key fob twice within five seconds to open or close the power liftgate. You can also open the liftgate by pushing the electronic liftgate release handle "⇨Keyless Enter ‘n Go™ — Passive Entry".
Using any of the above ways:
-
When the liftgate is fully closed, the liftgate will open.
-
When the liftgate is fully open, the liftgate will close.
-
When the liftgate is moving, the liftgate will reverse.
The power liftgate may also be opened or closed by pushing the liftgate button located on the front overhead console. If the liftgate is fully open, the liftgate can be closed by pushing the liftgate button located on the left rear trim panel. If the liftgate is in motion, pushing the button again will reverse the liftgate.
When the liftgate button on the key fob is pushed two times, the turn signals will flash twice to signal that the liftgate is opening or closing, and an audible chime can be heard (if enabled in the Uconnect Settings "⇨UCONNECT SETTINGS").
The key fob and the overhead console switch will open the liftgate when the liftgate is locked. The outside handle requires the liftgate to be unlocked. If the vehicle is equipped with Passive Entry, and a valid Passive Entry key fob is within 5 ft (1.5 m) of the liftgate, pulling the outside handle will unlock and open the liftgate.
Note:
-
Before closing the liftgate, make sure to be in possession of the key fob because the liftgate may be locked.
-
Use the interior door lock/unlock button on the door panel or the key fob to lock and unlock the liftgate. The manual door locks on the doors and the exterior door lock cylinder will not lock and unlock the liftgate.
-
The liftgate will either unlock along with the vehicle doors, or it will need to be unlocked by pushing the electronic liftgate release, depending on the selected setting in the Uconnect system "⇨UCONNECT SETTINGS".
-
The power liftgate buttons will not operate if the vehicle is in gear or the vehicle speed is above 0 mph (0 km/h).
-
The power liftgate will not operate in temperatures below −22°F (−30°C) or temperatures above 150°F (65°C). Be sure to remove any buildup of snow or ice from the liftgate before pushing any of the power liftgate switches.
-
If anything obstructs the power liftgate while it is closing or opening, the liftgate will automatically reverse to the closed or open position. After multiple obstructions in the same cycle, the liftgate will automatically stop and must be opened or closed manually.
-
There are pinch sensors attached to the side of the liftgate. Light pressure anywhere along these strips will cause the liftgate to return to the open position.
-
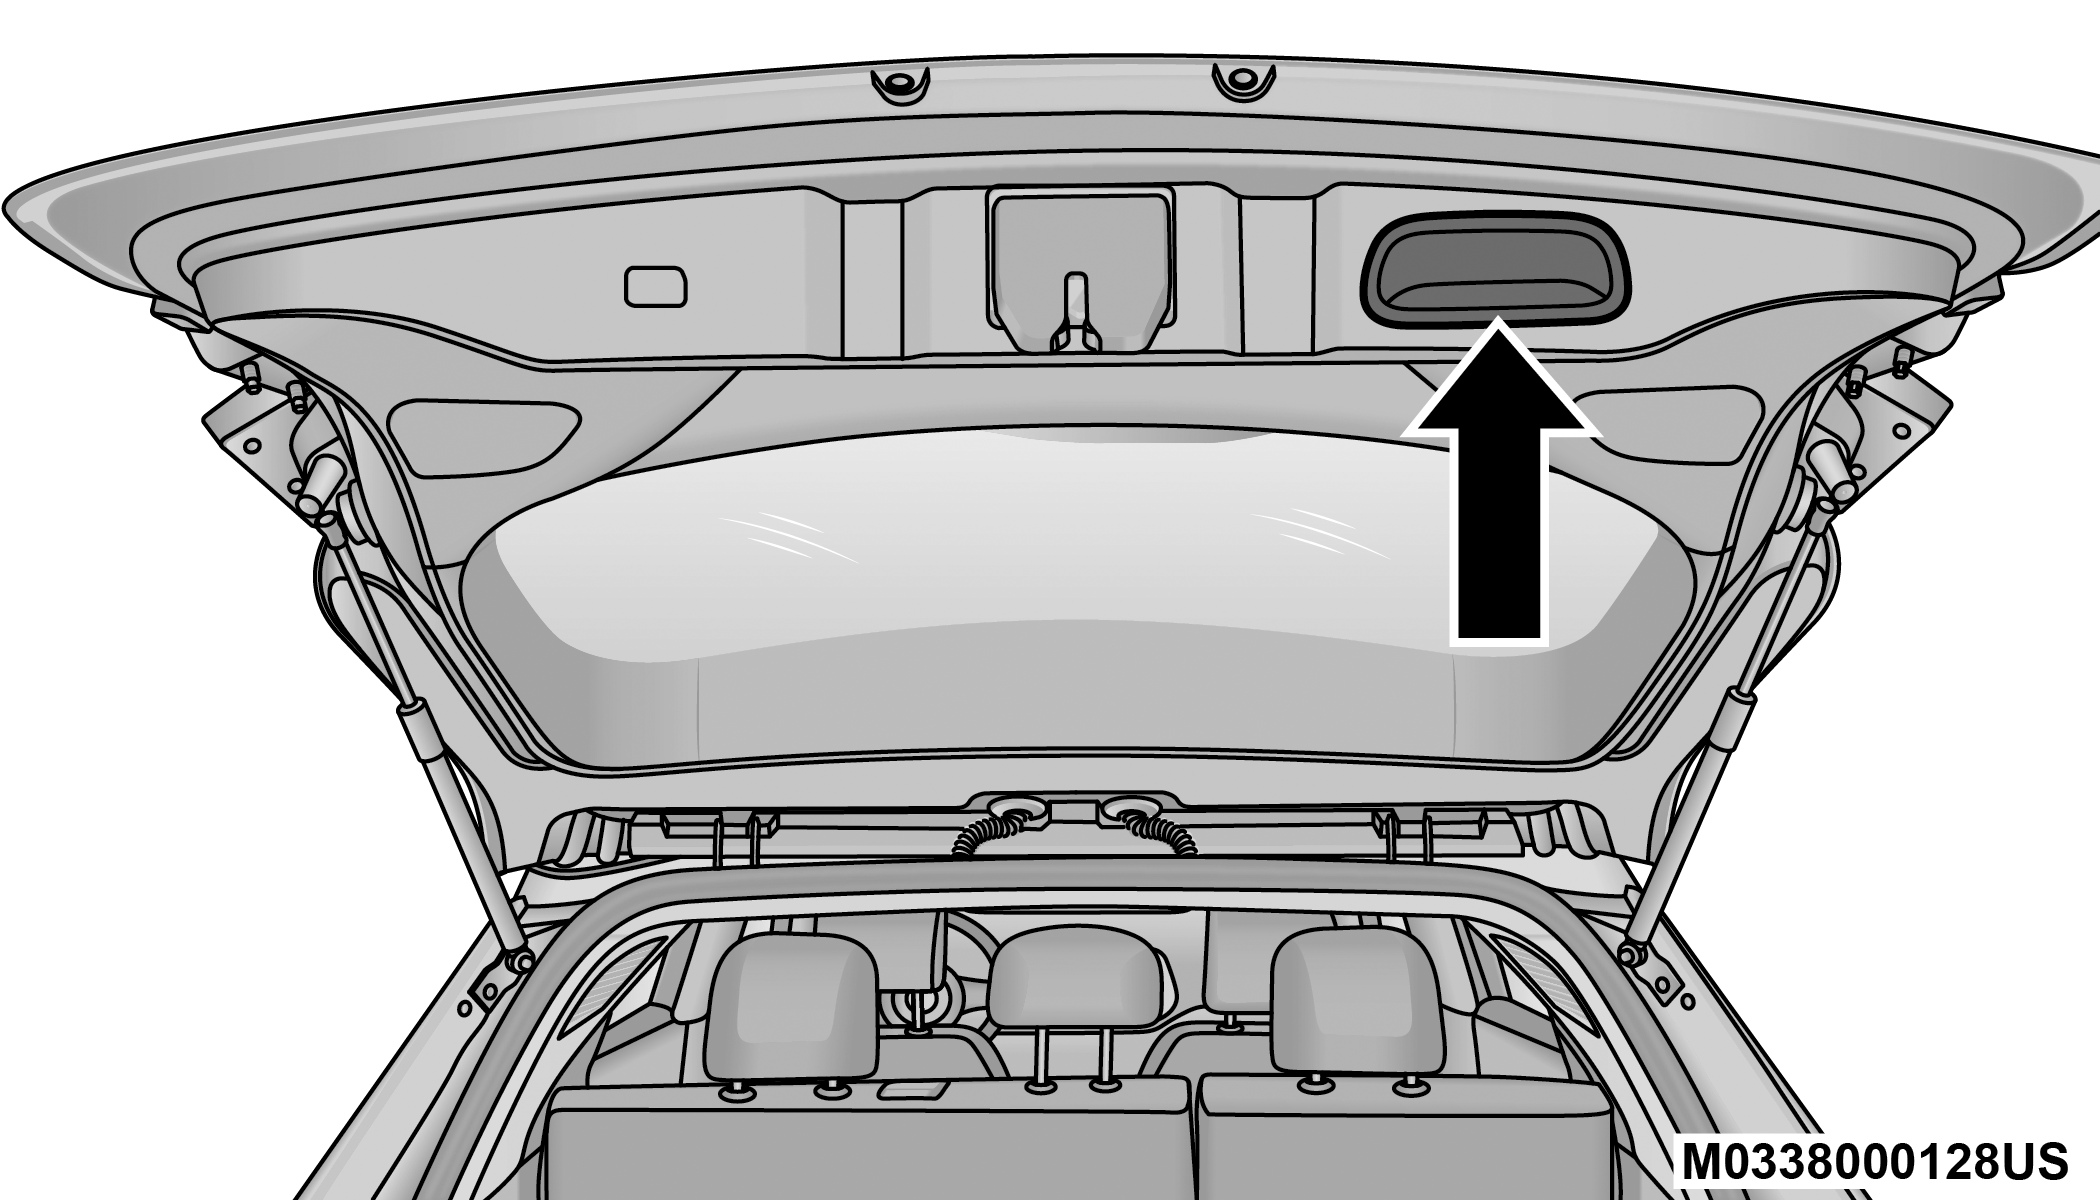
The power liftgate must be in the full open position in order for the rear liftgate close button, on the left rear trim near the liftgate opening, to operate. If the liftgate is not fully open, push the liftgate button on the key fob to fully open the liftgate and then push it again to close.
-
If the electronic liftgate release handle is pushed a second time while the power liftgate is opening, the liftgate motor will disengage to allow manual operation.
-
If your liftgate is power closing and you put the vehicle in gear, the liftgate will continue to power close. However, vehicle movement may result in the detection of an obstruction.
-
Allow the power system to open the liftgate. Manually pushing or pulling the liftgate may activate the liftgate obstacle detection feature and stop the power operation or reverse its direction.
WARNING:
-
Driving with the liftgate open can allow poisonous exhaust gases into your vehicle. You and your passengers could be injured by these fumes. Keep the liftgate closed when you are operating the vehicle.
-
If you are required to drive with the liftgate open, make sure that all windows are closed, and the climate control blower switch is set at high speed. Do not use the recirculation mode.
-
During power operation, personal injury or cargo damage may occur. Ensure the liftgate travel path is clear. Make sure the liftgate is closed and latched before driving away.
-
Personal injury or cargo damage may occur if caught in the path of the liftgate. Make sure the liftgate path is clear before activating the liftgate.
HANDS-FREE LIFTGATE — IF EQUIPPED
>Hands-Free Liftgate Activation Zone
To open or close the liftgate using hands-free activation, use a straight in and out kicking motion under the vehicle activation zone in the general location below the rear license plate. The activation zone is about 1.8 ft (0.5 m) from side to side. Do not move your foot sideways or in a sweeping motion or the sensors may not detect the motion.
Note:
Activation zone is the same for vehicles equipped with or without a trailer tow package.
When a valid kicking motion is completed, the liftgate will chime, the hazard lights will flash and the liftgate will open after approximately one second, or close after approximately three seconds. These settings can be enabled or disabled through Uconnect Settings "⇨UCONNECT SETTINGS".
Note:
-
Opening or closing the Hands-Free Liftgate requires a valid Passive Entry key fob within 5 ft (1.5 m) of the door handle. If a valid Passive Entry key fob is not within 5 ft (1.5 m), the liftgate will not respond to any kicks.
-
The Hands-Free Liftgate feature may be turned on or off through the Uconnect system "⇨UCONNECT SETTINGS".
-
The Hands-Free Liftgate feature should be turned off during jacking, tire changing, manual car wash, and vehicle service.
-
The Hands-Free Liftgate feature can be activated by any metallic object making a similar in-and-out motion under the rear fascia/bumper, such as cleaning using a metal broom.
-
The Hands-Free Liftgate will only operate when the transmission is in PARK.
-
If anything obstructs the Hands-Free Liftgate while it is opening or closing, the liftgate will automatically reverse to the closed/open position, provided it meets sufficient resistance.
-
There are pinch sensors attached to the side of the liftgate opening. Light pressure anywhere along these strips will cause the liftgate to return to the open position.
-
If the power liftgate encounters multiple obstructions within the same cycle, the system will automatically stop. If this occurs, the liftgate must be operated manually.
-
The power liftgate will release, but not power open, in temperatures below −12°F (−24°C). Be sure to remove any buildup of snow or ice from the liftgate before opening the liftgate.
-
If the liftgate is left open for an extended period of time (approximately one hour), the liftgate may need to be closed manually to reset power liftgate functionality.
WARNING:
-
Driving with the liftgate open can allow poisonous exhaust gases into your vehicle. You and your passengers could be injured by these fumes. Keep the liftgate closed when you are operating the vehicle.
-
If you are required to drive with the liftgate open, make sure that all windows are closed, and the climate control blower switch is set at high speed. Do not use the recirculation mode.
-
During power operation, personal injury or cargo damage may occur. Ensure the liftgate travel path is clear. Make sure the liftgate is closed and latched before driving away.
-
Personal injury or cargo damage may occur if caught in the path of the liftgate. Make sure the liftgate path is clear before activating the liftgate.
Gas props support the liftgate in the open position. However, because the gas pressure drops with temperature, it may be necessary to assist the props when opening the liftgate in cold weather.
Note:
Allow the power system to open the liftgate. Manually pushing or pulling the liftgate may activate the liftgate obstacle detection feature and stop the power operation or reverse its direction.
CARGO AREA FEATURES
CARGO LOAD FLOOR
The cargo load floor system has a load capacity of 400 lb (181 kg).
Cargo Load Floor Positions
The cargo load floor can be adjusted to three different levels to create more space in the cargo area. These positions are: upper, center, and lower.
Note:
The lower position is not available in vehicles equipped with either a compact spare tire, or a full size spare tire. The center position is not available in vehicles equipped with a full size spare tire.
To change the level of the load floor, pull upward on the load floor handle, pull the floor outward, and place the back of the floor into the desired position. Lower the front of the floor into place.
Cargo Load Floor Positions
| 1 — Upper Position |
| 2 — Center Position |
| 3 — Lower Position |
Raising The Load Floor
To raise the load floor for access to the Tire Service Kit, or spare tire (if equipped), pull upward on the load floor handle.
Do not raise the floor beyond the point of resistance. In vehicles equipped with a power liftgate, forcing the floor upward can damage the floor and vehicle’s trim panel.
Raised Load Floor — (Power Liftgate)
| 1 — Raised Floor Maximum Height |
| 2 — Raised Load Floor |
To fully raise the load floor, pull upward on the floor handle, pull the floor outward, then position the floor upright with the bottom fitting on top of the floor positioning brackets. Push the top of the floor down firmly to secure it in this position.
Fully Raised Load Floor Position
To provide additional storage area, each rear seat can be folded flat. This allows for extended cargo space and still maintains some rear seating room "⇨SEATS".
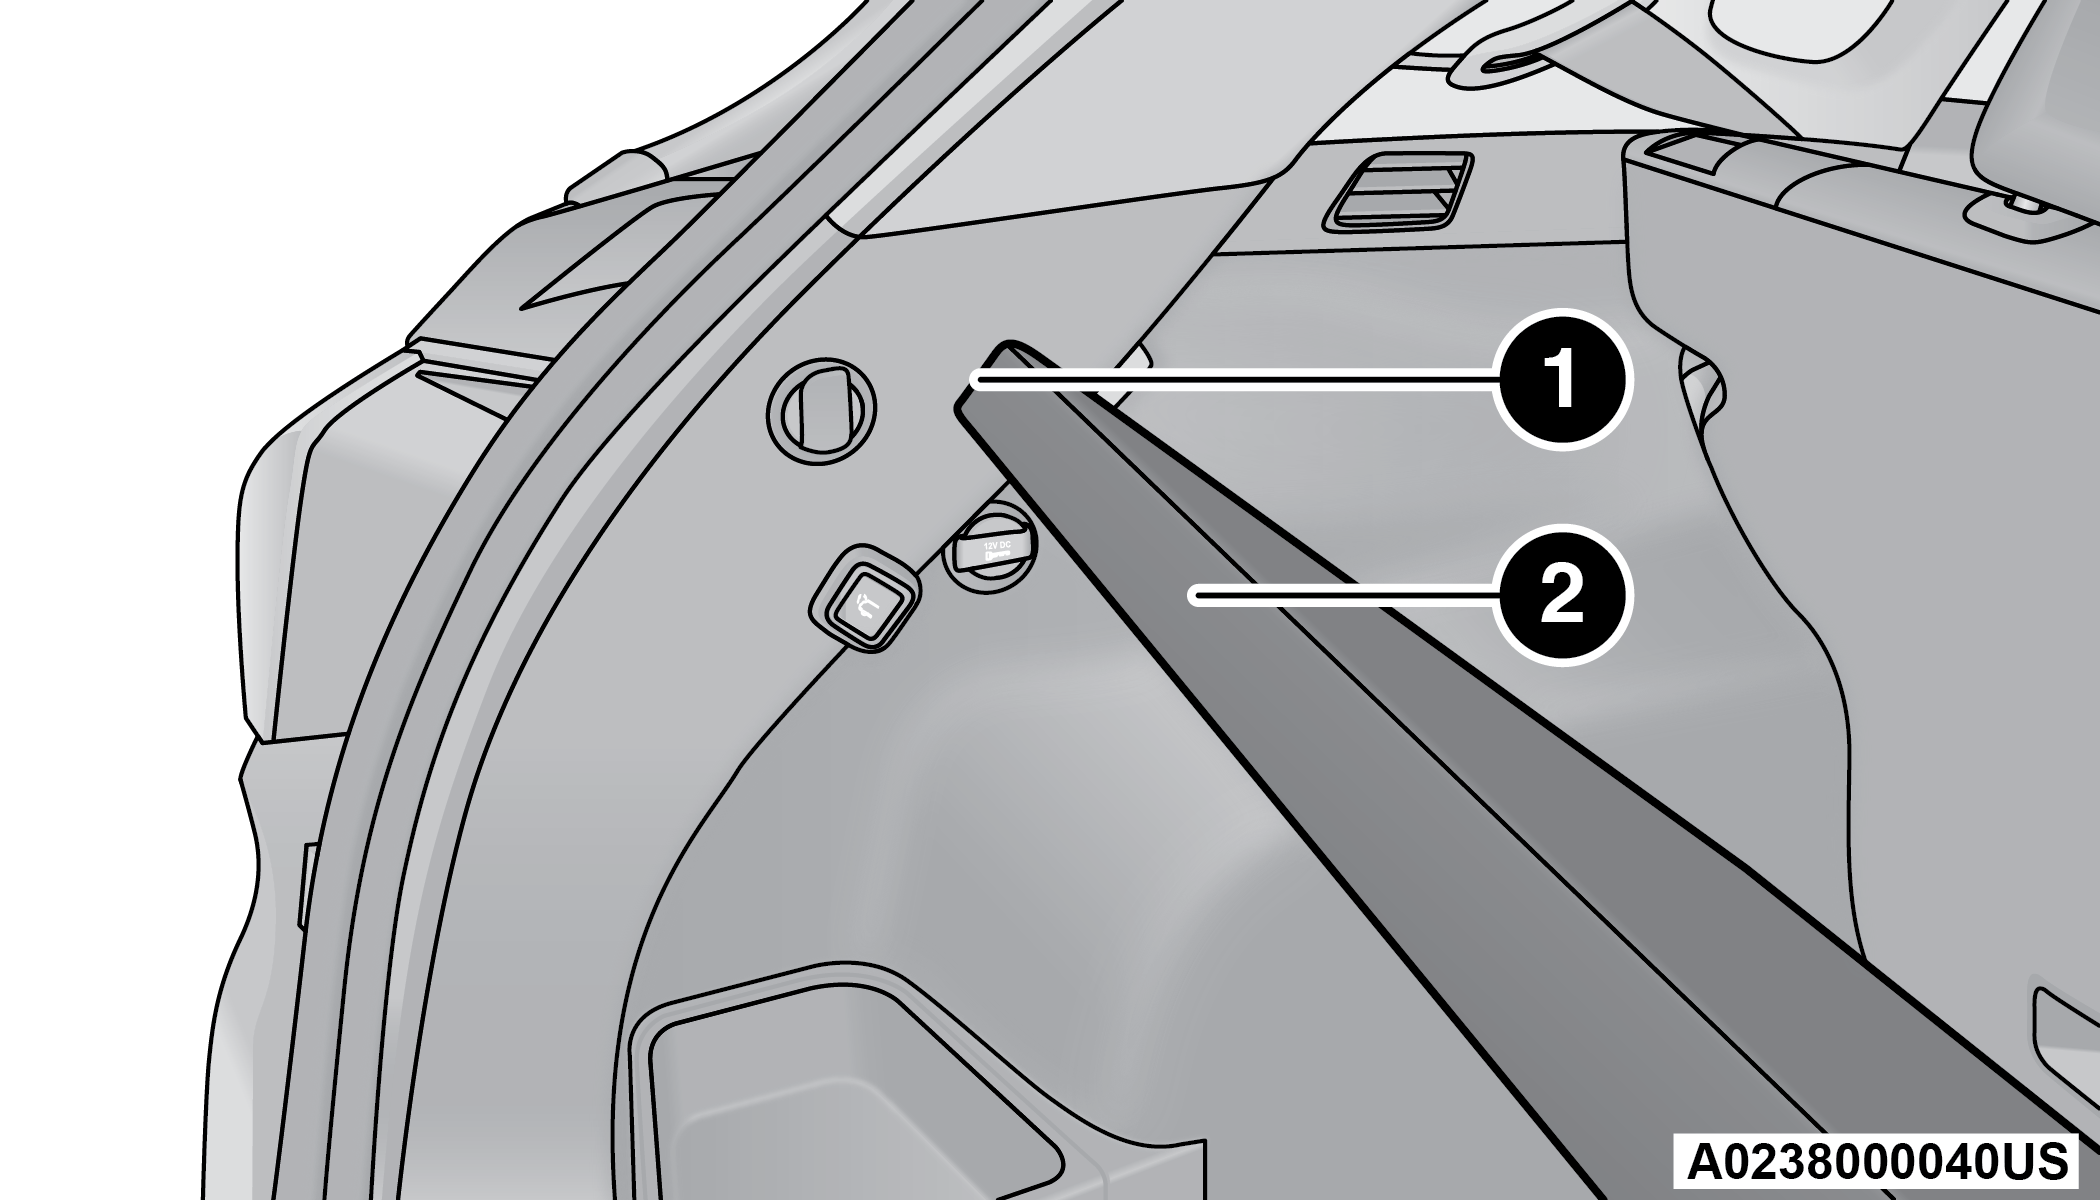
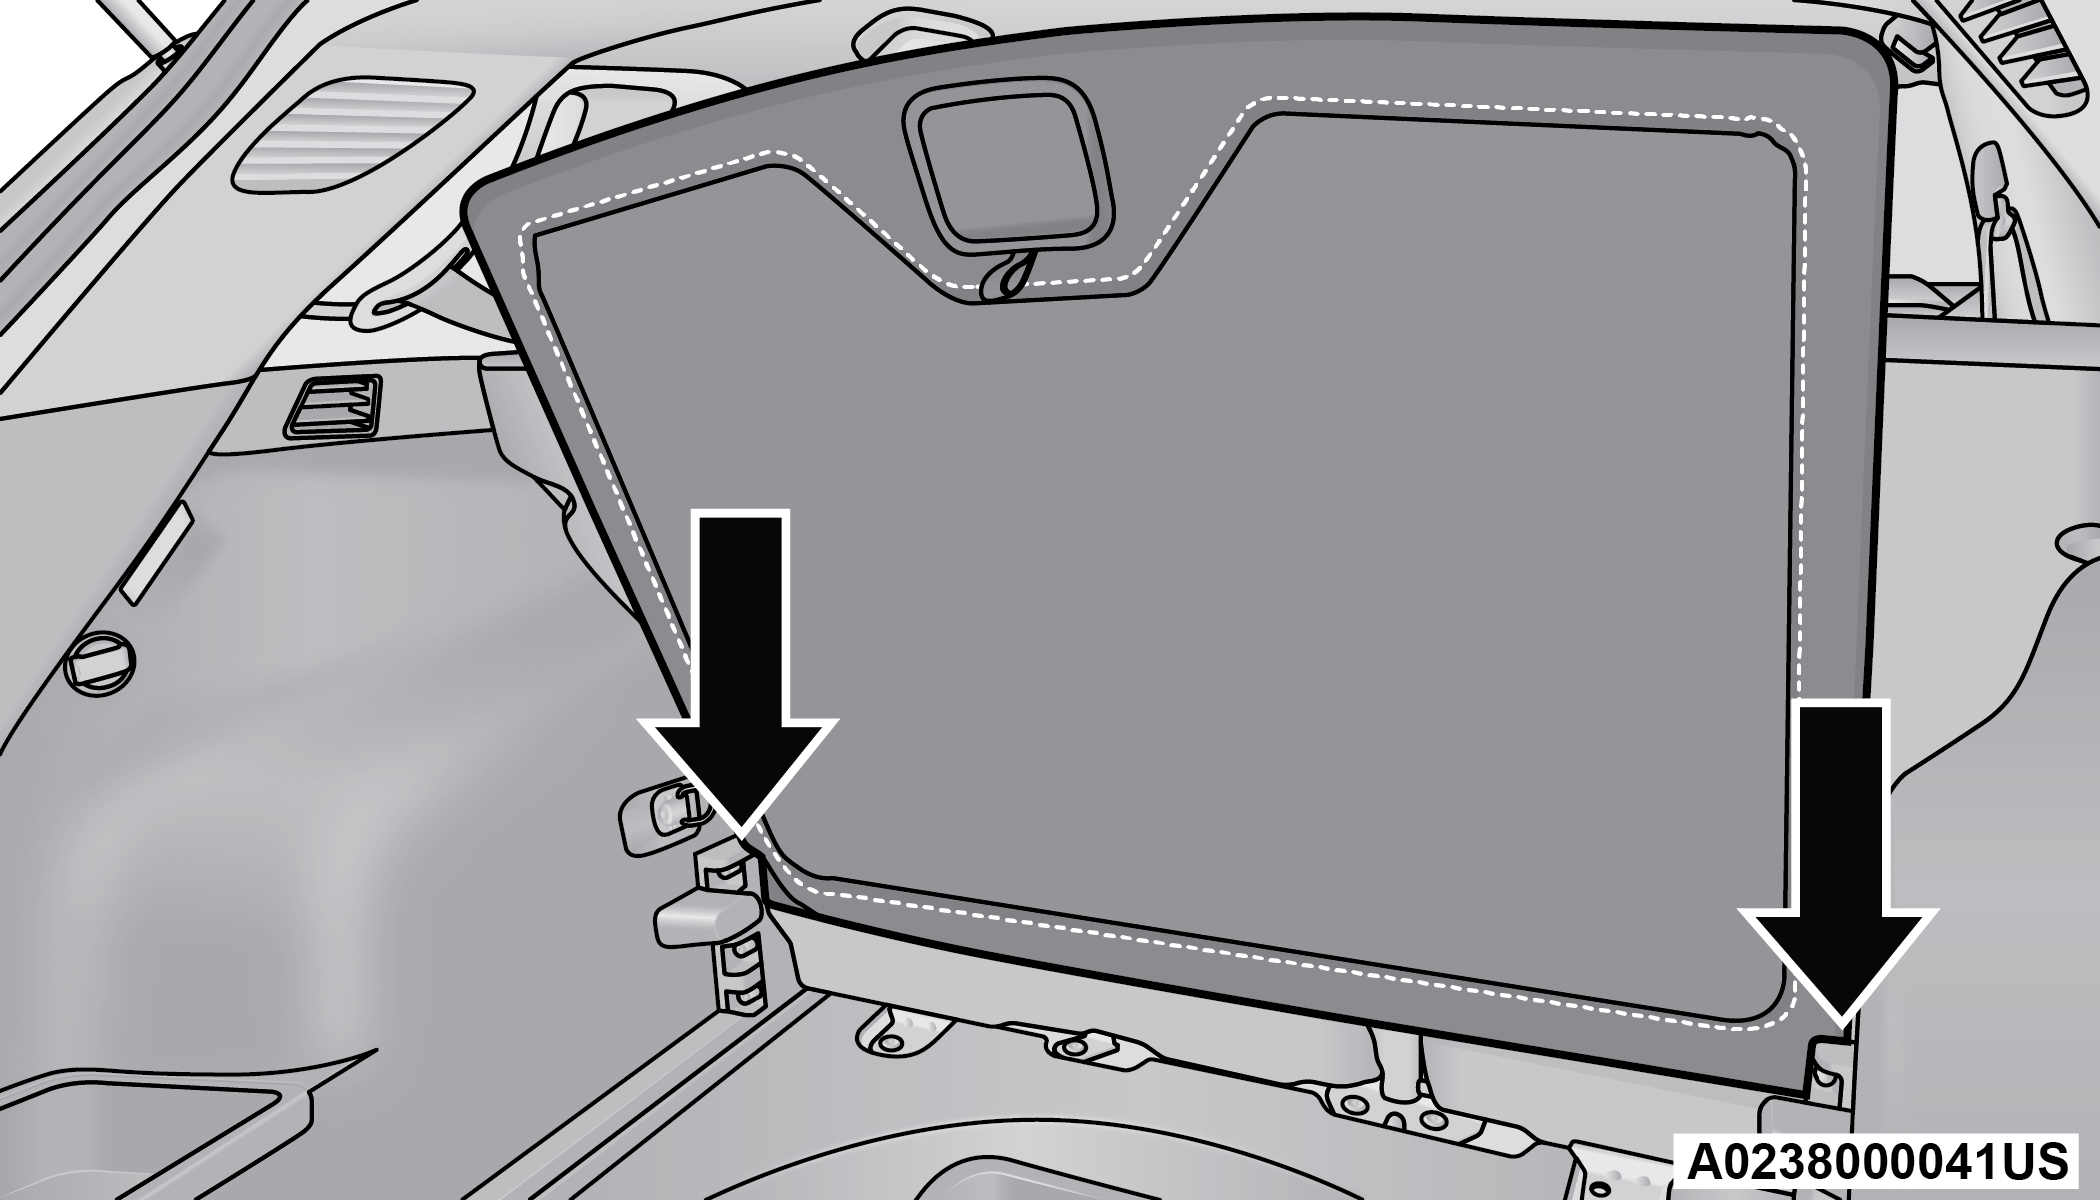
CARGO TIE-DOWN HOOKS AND LOOPS
The tie-downs located on the cargo area floor should be used to secure loads safely when the vehicle is moving.
Cargo tie-down loops are located on the trim panels.
WARNING:
-
Cargo tie-downs are not safe anchors for a child seat tether strap. In a sudden stop or accident, a tie-down could pull loose and allow the child seat to come loose. A child could be badly injured. Use only the anchors provided for child seat tethers.
-
To help protect against personal injury, passengers should not be seated in the rear cargo area. The rear cargo space is intended for load carrying purposes only, not for passengers, who should sit in seats and use seat belts.
The weight and position of cargo and passengers can change the vehicle center of gravity and vehicle handling. To avoid loss of control resulting in personal injury, follow these guidelines for loading your vehicle:
-
Do not carry loads that exceed the load limits described on the label attached to the left door or left door center pillar.
-
Always place cargo evenly on the cargo floor. Put heavier objects as low and as far forward as possible.
-
Place as much cargo as possible in front of the rear axle. Too much weight or improperly placed weight over or behind the rear axle can cause the vehicle to sway.
-
Do not pile luggage or cargo higher than the top of the seatback. This could impair visibility or become a dangerous projectile in a sudden stop or accident.
REAR STORAGE BINS
The rear storage bins are located in the rear of the vehicle on the sides of the load floor.
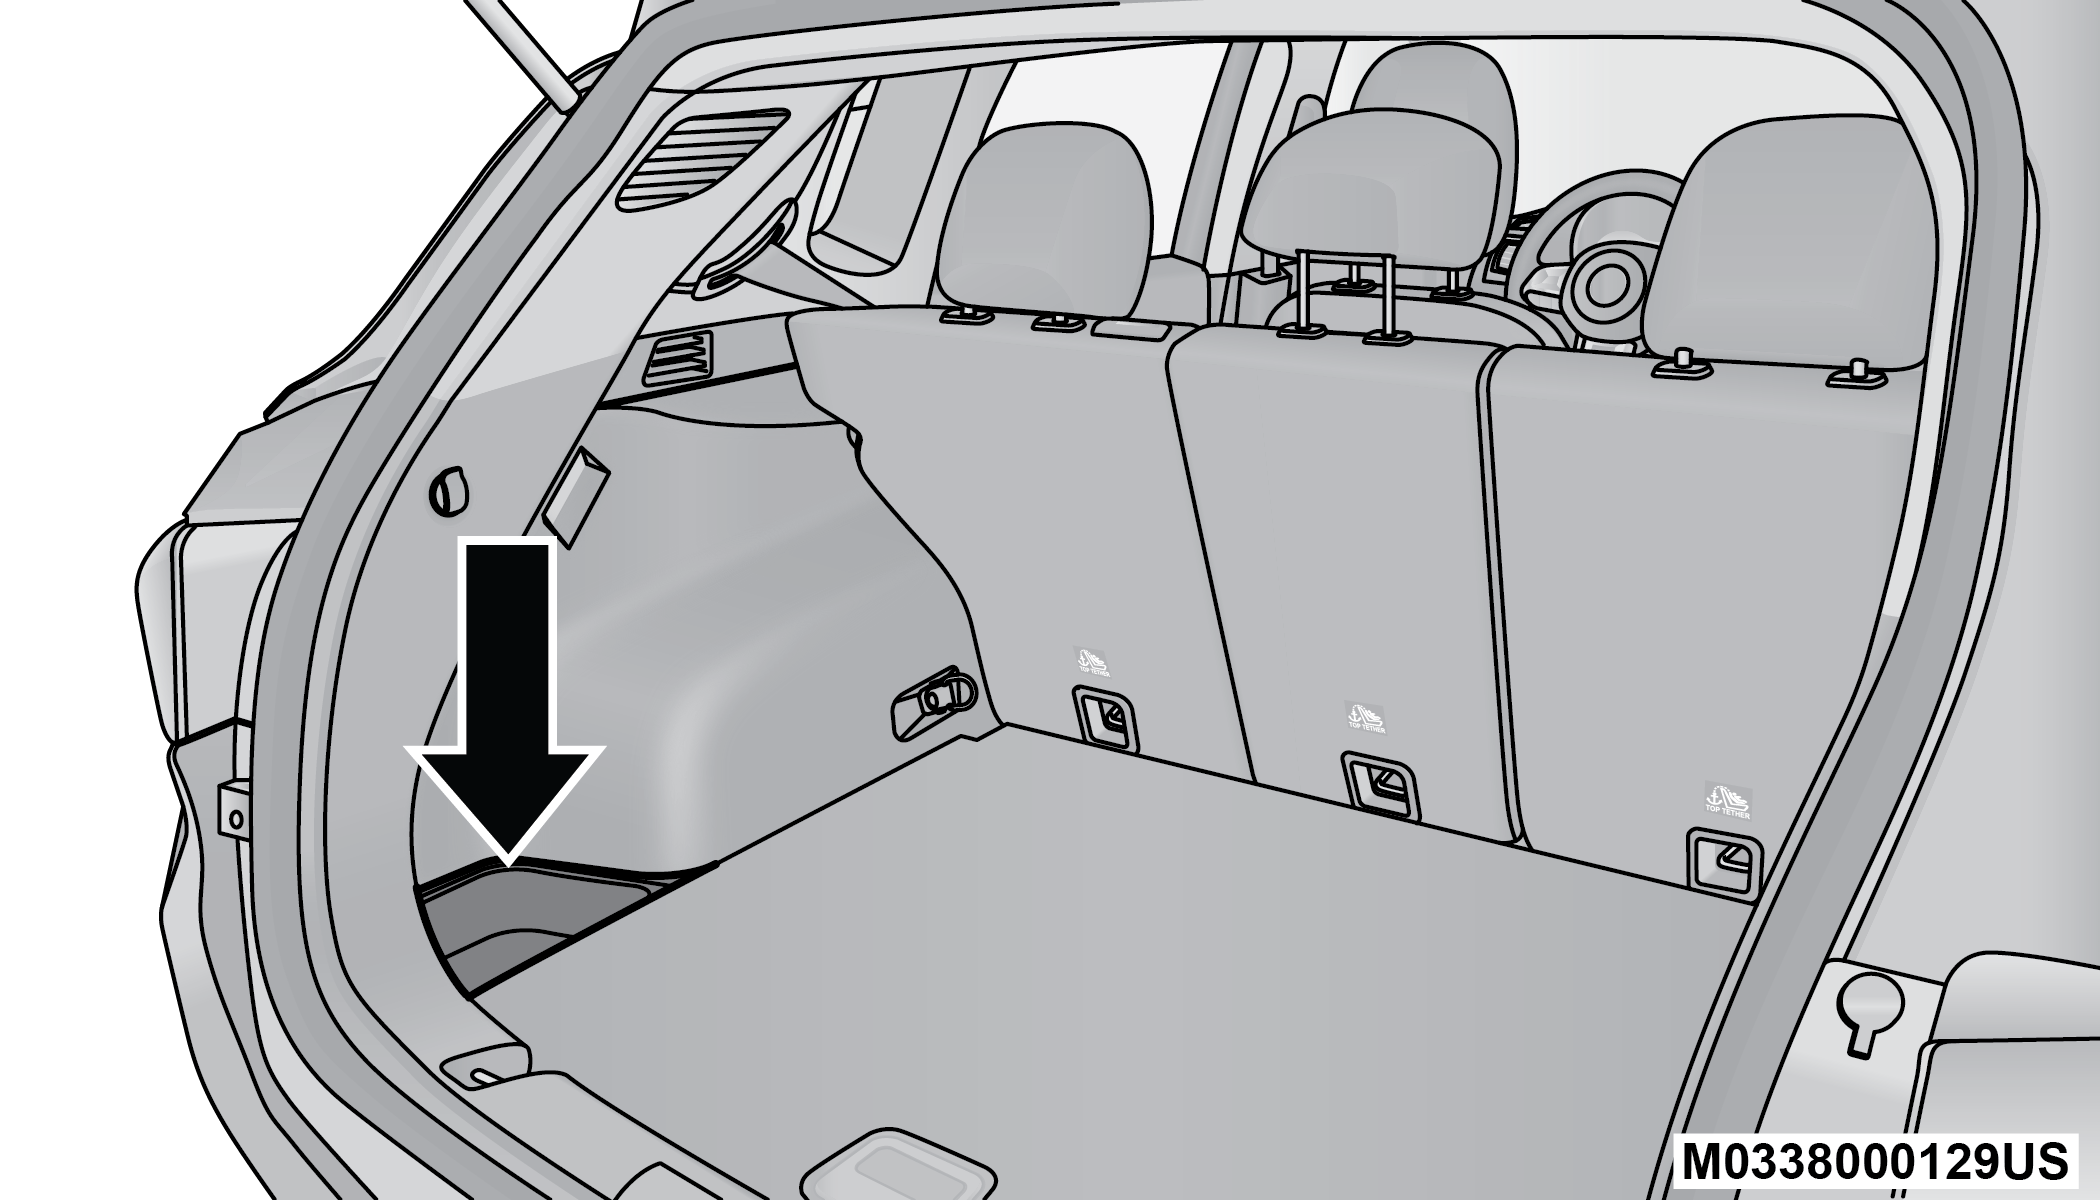
Rear Storage Bin
Download Manual