Power Moonroof Operation
Power Moonroof Operation
The moonroof can be opened and closed when the vehicle is on by using the switch on the ceiling.
Automatic Operation
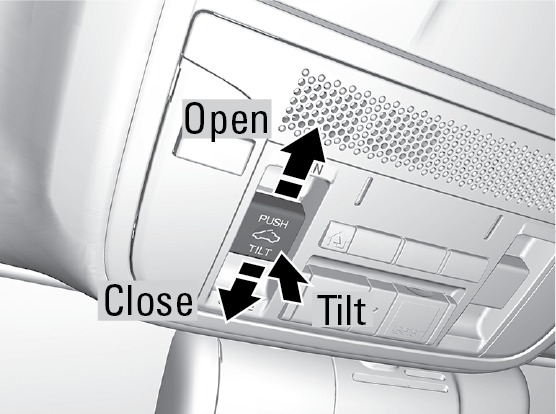
To open: Firmly push the switch back, then release.
To close: Firmly push the switch forward, then release.
The moonroof opens or closes completely. To stop the moonroof at any time, push the switch briefly.
Manual Operation
To open: Push and hold the switch until the desired position is reached.
To close: Push and hold the switch forward until the desired position is reached.
Moonroof Tilt
To tilt: Push the center of the switch.
To close: Push the switch forward firmly, then release.
Closing the moonroof on someone's hands or fingers can cause serious injury.
Make sure your passengers are away from the moonroof before closing it.
Opening the moonroof in below freezing temperatures or when it is covered with snow or ice can damage the moonroof panel or motor.
Interior and Exterior Lights
Interior and Exterior Lights
Operate interior and exterior lights when the vehicle is on or off.
Exterior Lights
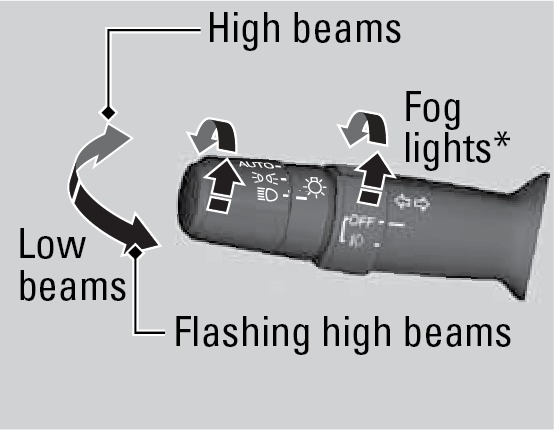
Rotate the switches on the lever to operate the exterior lights. Push the lever forward to turn on the high beams. Return the lever to its original position for low beams.
OFF All exterior lights are off.
AUTO Turn on the automatic lighting feature. Headlights turn on or off depending on ambient brightness when the vehicle is on. Headlights automatically come on after the wipers are engaged for a certain time.
 Turn on exterior lights except headlights.
 Turn on all exterior lights including headlights.
 Turn fog lights on or off.*
Brightness Control
Adjust instrument panel brightness when the vehicle is on.

To brighten: Press the + button.
To dim: Press the - button.
A beep sounds when the brightness reaches its minimum or maximum.
Interior Lights
Lights are located on the ceiling.
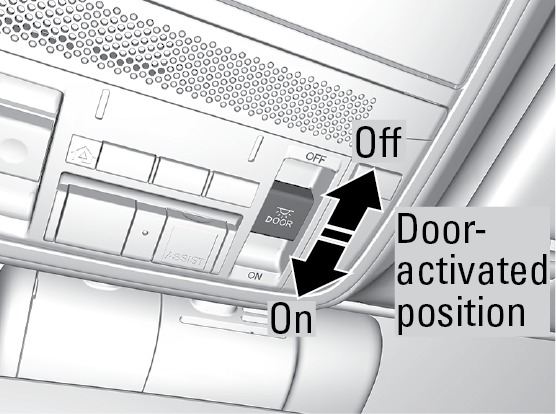
ON position: Interior lights remain on.
Door-activated position: Interior lights come on when any of the doors are opened, the driver's door is unlocked, or the vehicle is turned off.
OFF position: Interior lights remain off.
*if equipped
Auto High-Beam System*
Auto High-Beam System*
Automatically changes the low beam headlights to high beam headlights when necessary.
How It Works
When you are driving at night above 35 mph (56 km/h) and the headlight lever is in the low beam position with the switch rotated to AUTO, the system changes between low and high beams depending on the surrounding conditions.
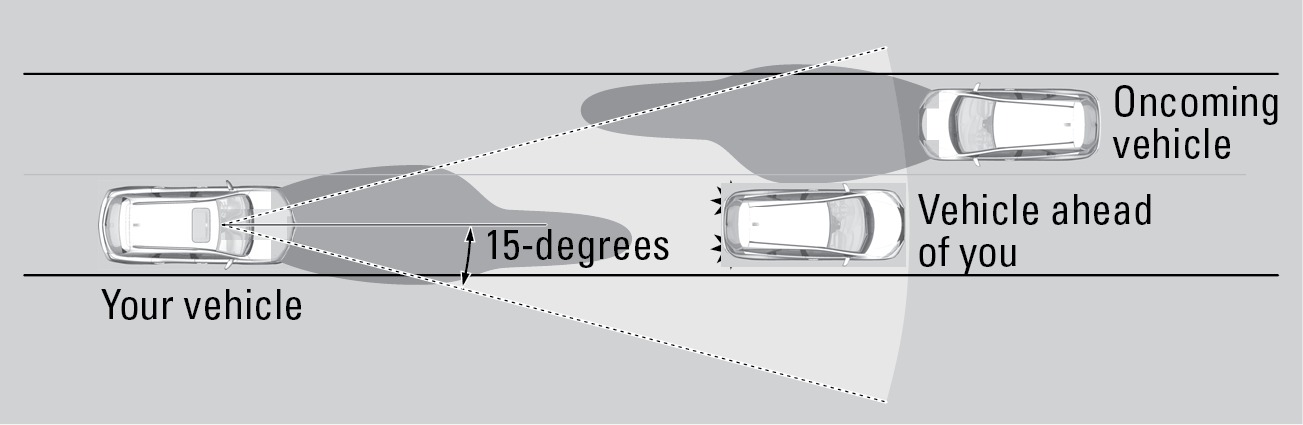
If a vehicle is detected ahead of you, the headlights stay in low beams. If the system does not detect any vehicles ahead of you, the headlights change to high beams.
Certain conditions, such as weather and brightness of other vehicles' lights, can affect system operation.
Turning the System On or Off
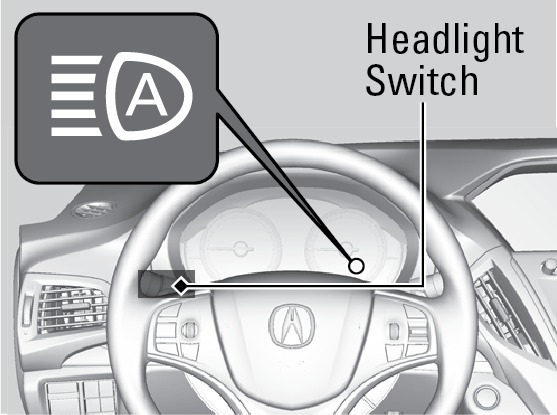
Make sure the headlight lever is in the low beam position with the switch rotated to the AUTO position. The auto high-beam system indicator appears when the system is on.
The system cancels temporarily when you drive at sustained speeds below 25 mph (40 km/h), the vehicle speed is below 15 mph (24 km/h), or the windshield wipers run at high speed for more than a few seconds.
To disable the system: When the vehicle is on and parked, pull the headlight lever towards you and hold it for 40 seconds. The auto high-beam indicator blinks twice.
To re-enable the system: When the vehicle is on and parked, pull the headlight lever towards you and hold it for 30 seconds. The auto high-beam indicator blinks once.
To temporarily cancel operation, do either of the following:
Flash the high beams by moving the lever toward you. Flash the high beams again to resume auto high beam operation.
Engage high beams by moving the lever into the high beam position. Return the lever to the low beam position to resume auto high beam operation.
If you find the timing of beam changes inconvenient for driving, change the beams manually.
For the system to work properly:
Do not place an object that reflects light on the dashboard.
Keep the windshield around the camera clean. When cleaning the windshield, be careful not to apply windshield cleanser to the camera lens.
Do not attach an object, sticker or film in the area around the camera.
Do not touch the camera lens.
If the camera receives a strong impact or requires repair, consult a dealer.
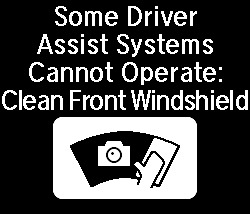
If the Cannot Operate message appears, park your vehicle in a safe place. Wipe away debris blocking the windshield, then start driving again. If the message remains on even after driving for a while with the clean windshield, have your vehicle checked by a dealer.
Download Manual