Basic Audio Operation
Basic Audio Operation
Connect audio devices and operate buttons and displays for the audio system.
USB Port
Connect a USB device, such as a flash drive, iPod® or iPhone. The USB port (2.5A) is for charging devices, playing audio, and using Apple CarPlay or Android Auto.
Open the center pocket.
Open the port cover and attach the device to the USB connector.
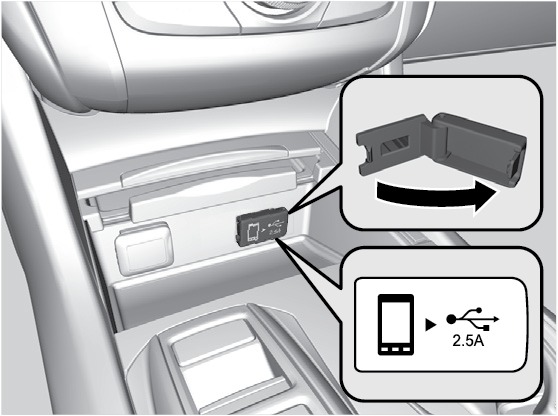
iPod and iPhone are trademarks of Apple, Inc.
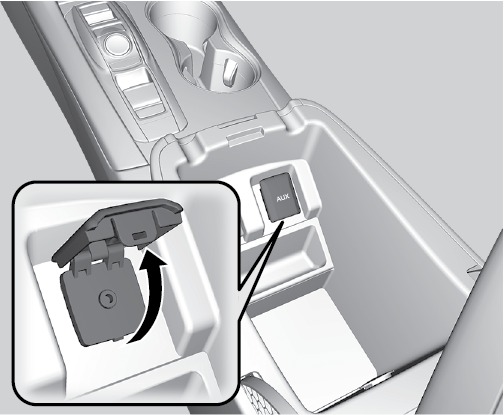
Auxiliary Input Jack
Connect standard audio devices with a 1/8-inch (3.5 mm) stereo miniplug.
Open the center console. Open the AUX cover.
Connect the device to the input jack. The system switches to AUX mode. Use the device to control the audio.
State or local laws may prohibit the operation of handheld electronic devices while operating a vehicle.
Accessory Power Socket
You can use the accessory power socket when the vehicle is on. Open the lid in the front pocket to access the socket.
An additional power socket is located in the center console.
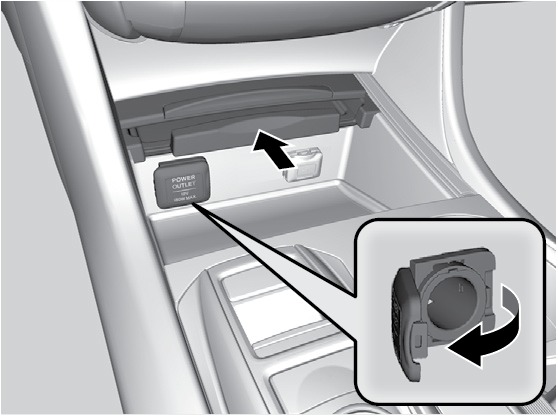
Do not insert an automotive-type cigarette lighter element. This can overheat the power socket. To prevent battery drain, use the power socket only when the engine is running.
Steering Wheel Controls
Operate certain functions of the audio system using the steering wheel controls.
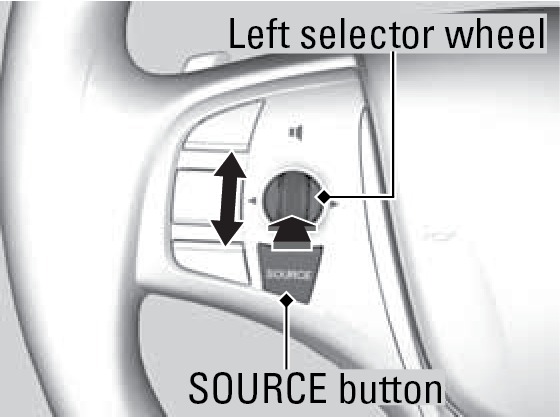
SOURCE button: Cycle through available audio modes.
Left selector wheel: Roll up or down to adjust volume. Press to mute. Move (or hold) left or right to change stations or tracks.
FM/AM/SiriusXM® Radio
Move right or left for the next or previous station. Move and hold right or left for the next or previous strong station.
CD/HDD/iPod/USB/Bluetooth® Audio
Move right or left for the next or previous track. Move and hold right or left for the next or previous folder (CD/USB).
Pandora®*
Move right for the next song. Move and hold right or left for the next or previous station.
Adjusting the Sound
Use the interface dial to select and djust various sound settings.
From the main screen, select Audio Menu.
Select Sound Settings.
Select the icons to adjust a settings option.

*U.S. models
Wireless Charger*
Charge your Qi®-compatible device when the vehicle is on.

Open the center pocket. Place the device to be charged on the charging area. A green indicator appears when the charger is on.
The green indicator turns off when charging is complete. On some devices, the the green indicator may blink when charging is complete.
Notes:
This system consumes a lot of power. It is best to charge your device when the engine is running.
If the indicator light is blinking, there may be an obstacle between the device and charging area, the device may have moved, or the charger is malfunctioning.
The device may not charge if you are near strong electromagnetic waves, such as at a gas station.
The device and charging area may get warm during charging. This is normal.
Metal objects between the charger and the device to be charged will get hot and can burn you.
Remove foreign objects from the charger before charging the device.
Do not attach a metal object to the charger.
Do not charge when the charger is covered with a towel, layer of dust, etc.
Do not allow the charger to get wet from water, beverages, etc.
Do not wipe the charger with oils, alcohol, benzine, thinners, etc. or expose it to aerosols.
Do not use the charger if it is malfunctioning. In the unlikely event the charger emits smoke, abnormal odors or unusual sounds, stop use immediately.
Do not place any magnetic devices, credit cards or watches within the charge area while charging. The data on credit cards can be lost and watches may stop working.
*if equipped. Qi is a registered trademark of the Wireless Power Consortium.
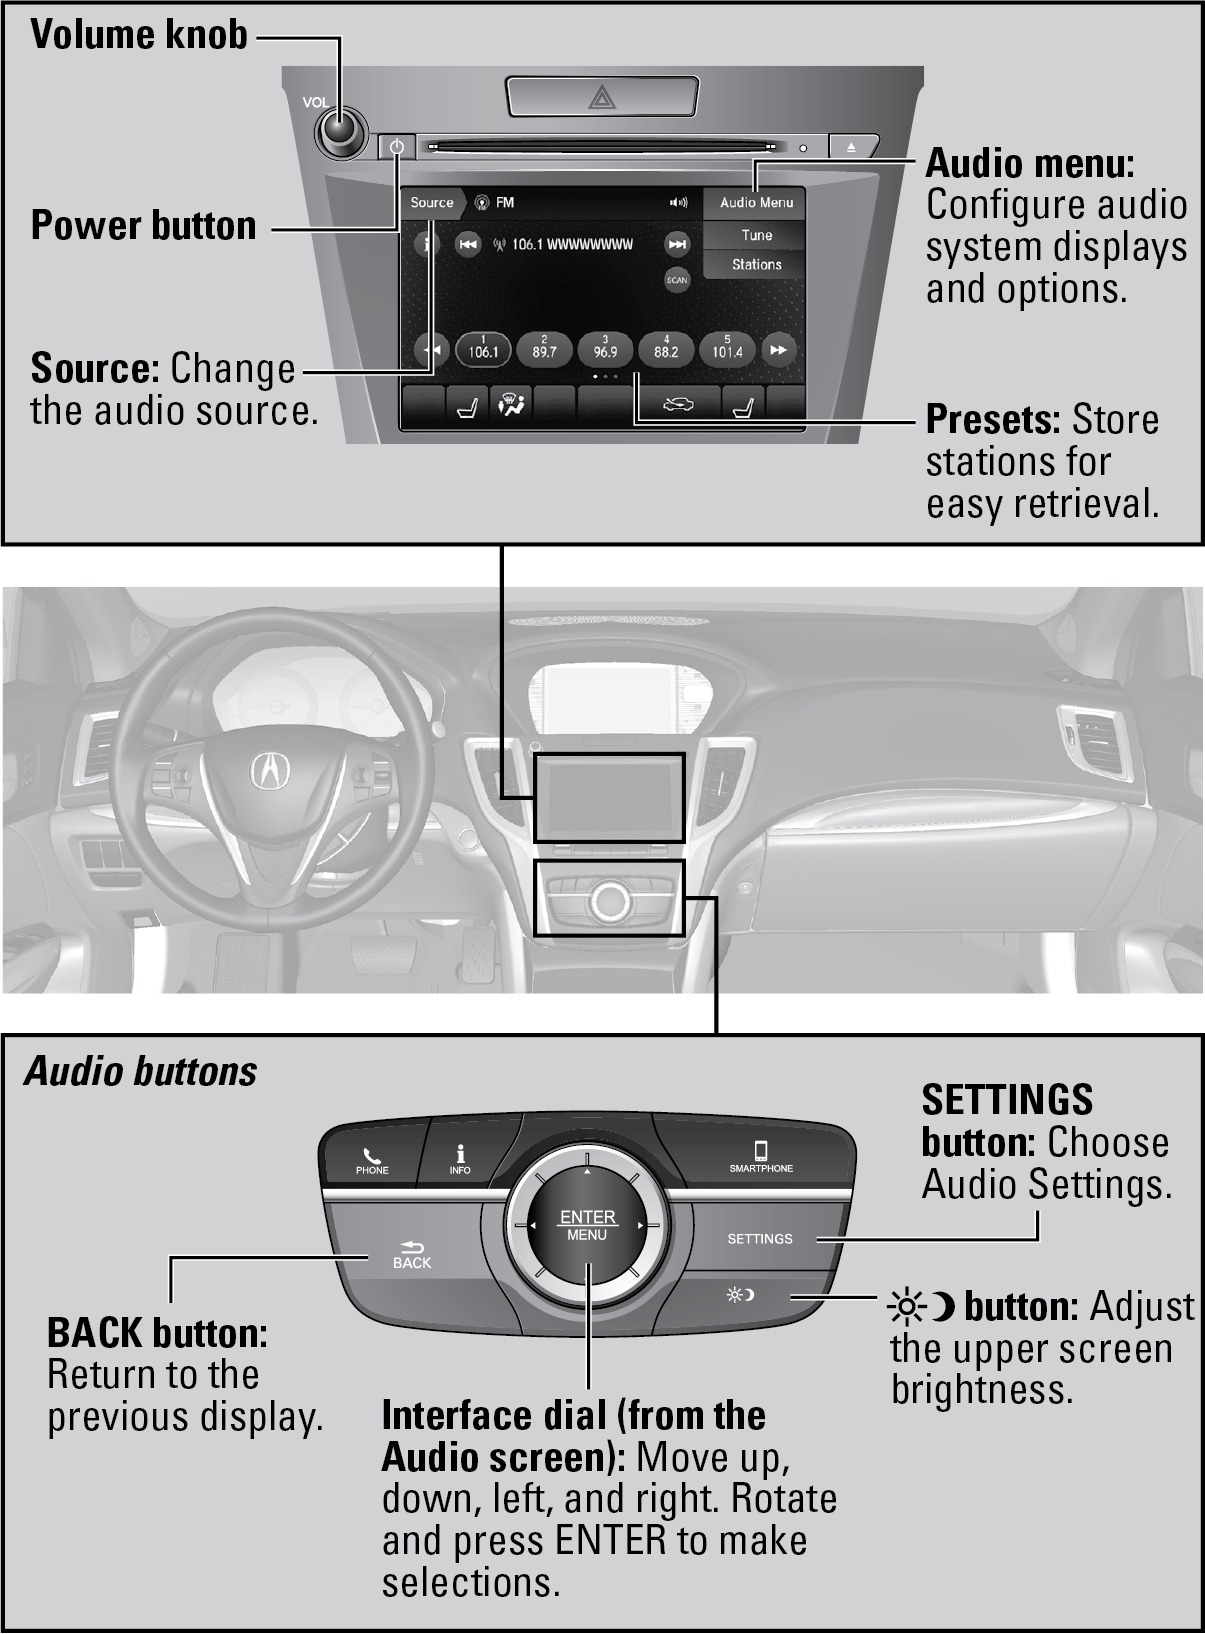
On-Demand Multi-Use Display (ODMD) and Controls
Operate the audio system using either the touchscreen or dashboard buttons.
The functions shown here can be used with most audio sources. Refer to subsequent audio pages for more specific functions. Options that appear depend on the selected audio source.
*if equipped
Download Manual