Child restraint systems
Infants and small children should always be placed in an infant or child restraint system in the rear seat while riding in the vehicle.
You should use an infant or child restraint system that meets Federal Motor Vehicle Safety Standards or Canada Motor Vehi- cle Safety Standards, is compatible with your vehicle and is appropriate for the child’s age and size.
All child restraint systems are designed to be secured in vehicle seats by lap belts or the lap belt portion of a lap/shoulder belt (except those described in “Installation of child restraint systems by use of lower and tether anchorages (LATCH)” 1-34).
Children could be endangered in an accident if their child restraints are not properly secured in the vehicle. When installing the child restraint system, care- fully follow the manufacturer’s instructions.
According to accident statistics, children are safer when properly restrained in the rear seating positions than in the front seating positions.

 All U.S. states and Canadian provinces require that infants and small children be restrained in an approved child restraint system at all times while the vehicle is moving.
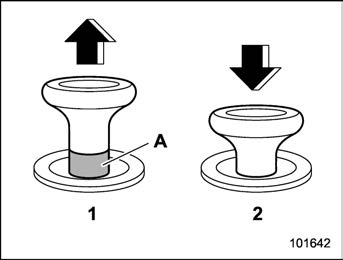
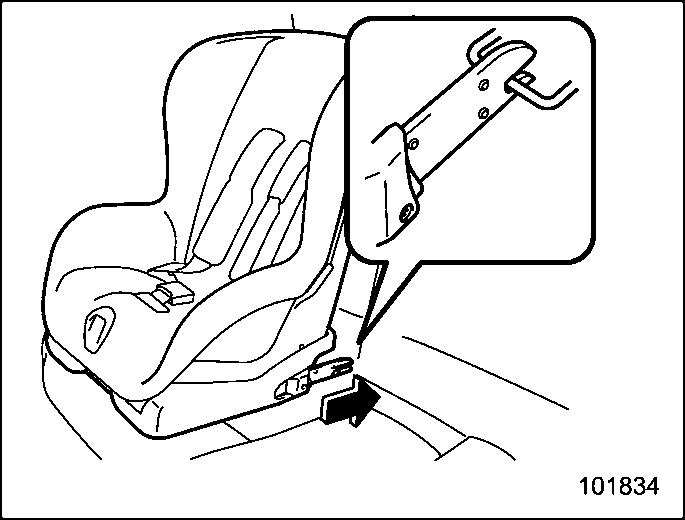
Lock release knob
The following are SUBARU’s recommen- dations on where to place a child restraint system in your vehicle.
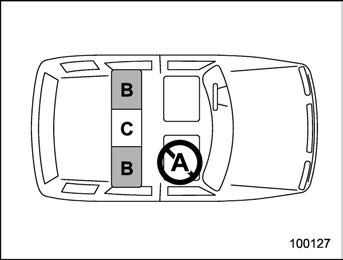
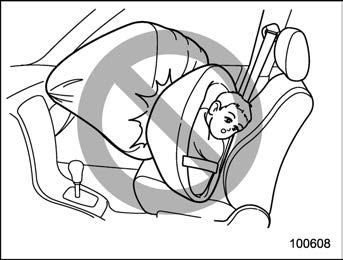
You should not install a child restraint system (including a booster seat) due to the hazard to children posed by the passenger’s airbag.
Recommended positions for all types of child restraint systems.
In these positions, the following equipment is provided for installing a child restraint
system.
Some types of child restraint systems not be able to be secured firmly due to projection of the seat cushion.
In this seating position, you should use only a child restraint system that has a bottom base that fits snugly against the contours of the seat cushion and can be securely retained using the seatbelt.
C: Rear seat, center seating position The ALR/ELR seatbelt and an upper anchorage (tether anchorage) are pro- vided in this position.
Some types of child restraint systems not be able to be secured firmly due to projection of the seat cushion.
In this seating position, you should use only a child restraint system that has a bottom base that fits snugly against the contours of the seat cushion and can be securely retained using the seatbelt.
When you install a child restraint system in the rear seat’s center seating position, raise the center head restraint.
Lower anchorages (bars) for window-side
seating positions may be used for a seat in the center seating position if a child restraint system manufacturer’s instruc- tions permit and specify using anchors as far apart as those in this vehicle.
If a child restraint system is not correctly fixed in place (for example, if a child restraint system can be moved more than 1 inch (2.5 cm) from side to side), you should install the child restraint system in a rear seat, window-side seating position.
Choose a child restraint system that is appropriate for the child’s age and size (weight and height) in order to provide the child with proper protection. The child restraint system should meet all applicable requirements of Federal Motor Vehicle Safety Standards for the United States or of Canada Motor Vehicle Safety Standards for Canada. It can be identified by looking for the label on the child restraint system or the manufacturer’s statement of compli- ance in the document attached to the system.
 Also it is important for you to make sure that the child restraint system is compa- tible with the vehicle in which it will be used.
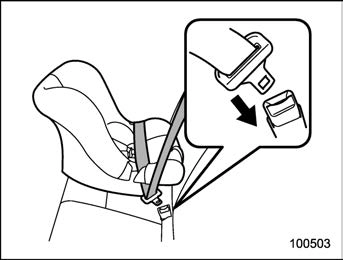
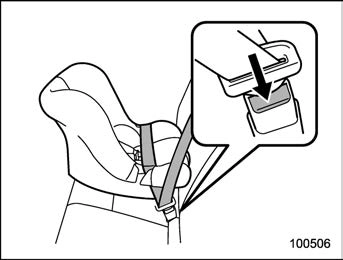
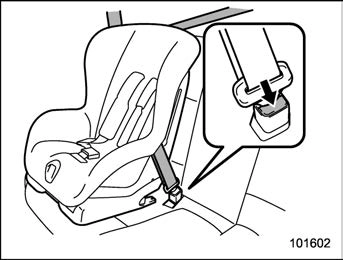
confirm that it is securely locked into place.
– Check that the red colored unlock- ing marker which is attached to the bottom of the lock release knob is not visible. For details, refer to “Folding down the rear seatback” 1-6.
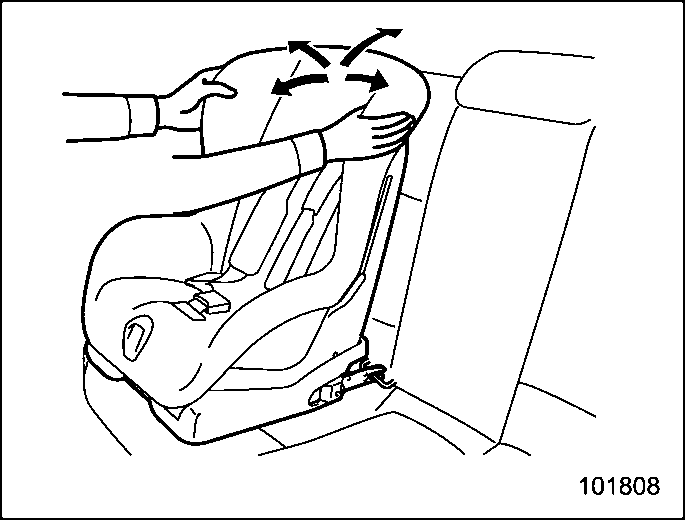
 Move the seatback back and forth to
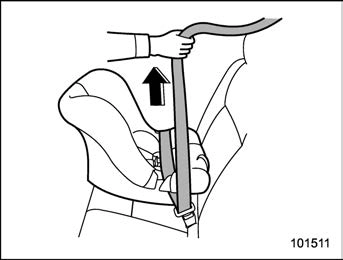
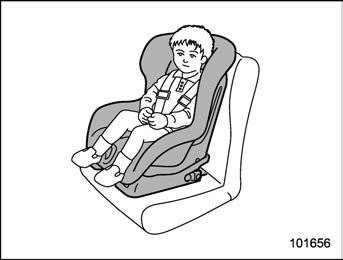
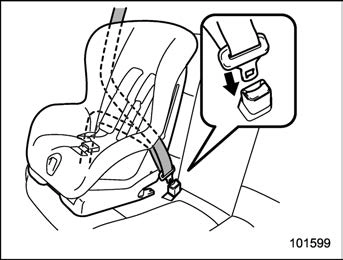
! Installing forward facing child re- straint system
position of a sedan, remove the rear seat head restraint. For details, refer to “Rear seats” 1-9.
Store the head restraint in the trunk (sedan) or cargo area (5-door models). Avoid placing the head restraint in the passenger compartment to prevent it from being thrown around in the passenger compartment in a sudden stop or a sharp turn.
– When a child restraint system is installed on the rear center seating position of a 5-door model, raise the rear seat head restraint to the ex- tended position. Do not remove the head restraint. For details, refer to “Rear seats” 1-9.

Sedan

5-door models
tether anchorages” 1-37.
If you have installed a child restraint system for the rear center seating posi- tion on a 5-door model, when you remove the child restraint system, the seatbelt may not be restored to the ELR mode even if the seatbelt is retracted. In this case, lower the head restraint to the retracted position to allow the seatbelt to retract moreover. The seatbelt will return to the ELR mode.
Remember that the head restraint is not intended to be used at the lowest position
(retracted position). Therefore, when the rear center seat is occupied (including when a child restraint system is installed) next time, be sure to raise the head restraint to the extended position.
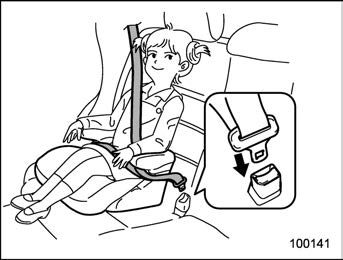
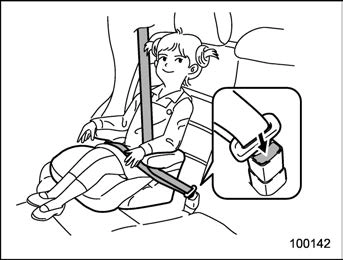
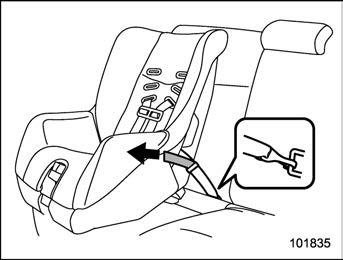
or around the booster seat and the child following the instructions provided by its manufacturer.
Make sure the shoulder belt is positioned across the center of child’s shoulder and that the lap belt is positioned as low as possible on the child’s hips.

Sedan
5-door models
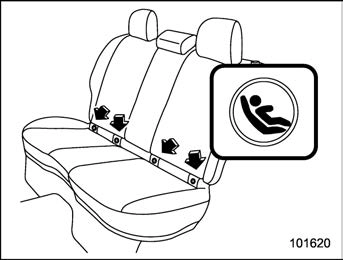
Some types of child restraint systems can be installed on the rear seat of your vehicle
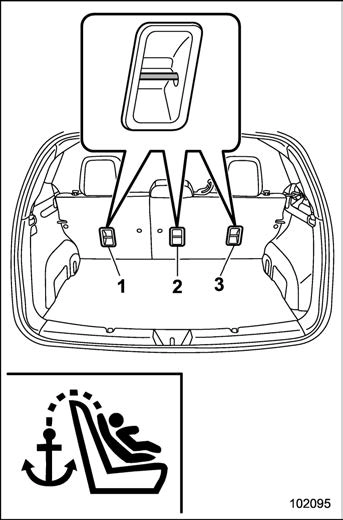
without use of the seatbelts. Such child restraint systems are secured to the designated anchorages provided on the vehicle body. The lower and tether an- chorages are sometimes referred to as the LATCH system (Lower Anchors and Tethers for CHildren).

Your vehicle is equipped with four lower anchorages (bars) and three upper an- chorages (tether anchorages) for accom- modating such child restraint systems.
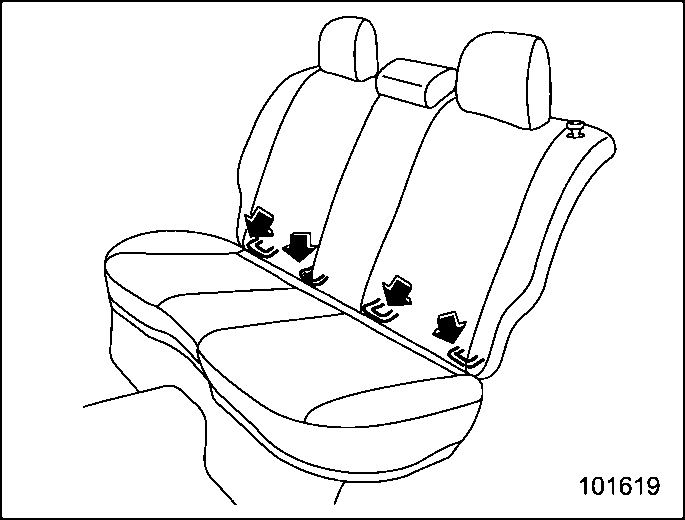
The lower anchorages (bars) are used for installing a child restraint system only on the rear seat window-side seating posi- tions. For each window-side seating posi- tion, two lower anchorages are provided.
Each lower anchorage is located where the seat cushion meets the seatback.
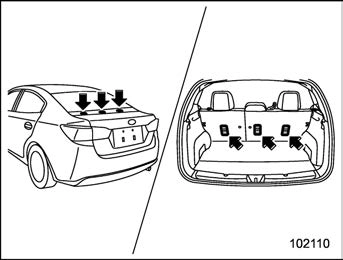
The tether anchorages (upper an- chorages) are provided at the locations shown in the above illustration. For details, refer to “Top tether anchorages” 1-37.
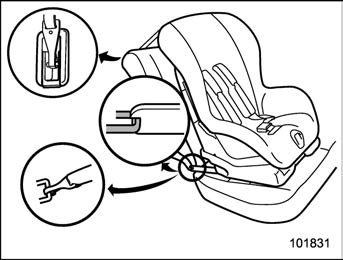
To install a child restraint system using lower and tether anchorages, perform the following procedure.
– Check that the red colored unlock- ing marker which is attached to the bottom of the lock release knob is invisible. For details, refer to “Folding down the rear seatback” 1-6.
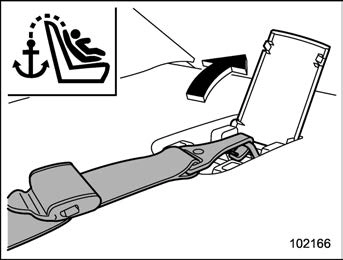
 ” at the bottom of the rear seat seatbacks. These marks indicate the positions of the lower an- chorages (bars).
Remove the covers and locate the lower anchorages (bars).
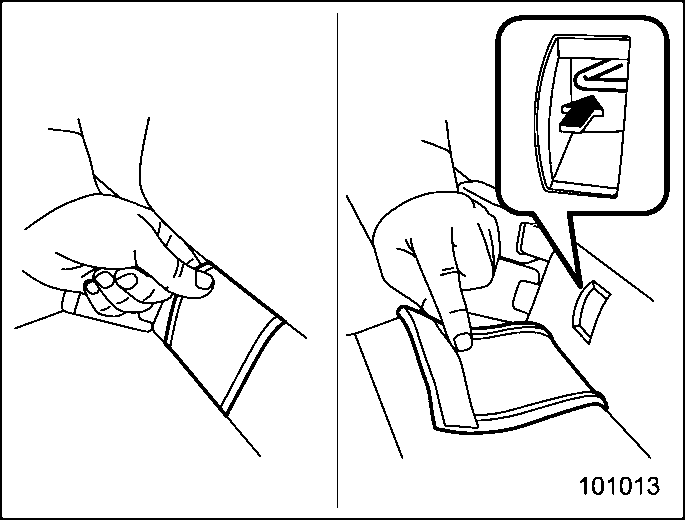 If it is hard to install the child restraint system because the anchorage cover returns to the original position, press the anchorage cover to the seat cushion until it is flat.
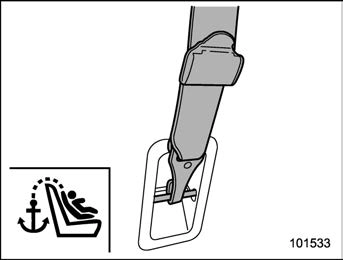
 ” marks on the bottom of the rear seatback. When the hooks are connected, make sure the adjacent seatbelts are not caught.
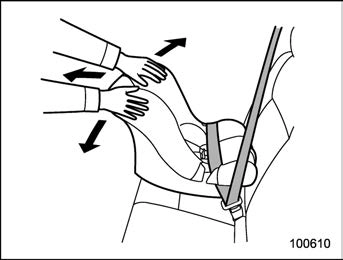
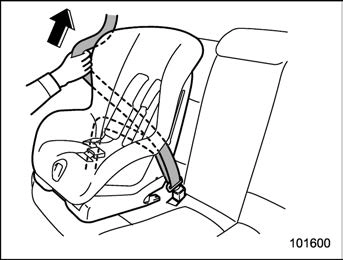
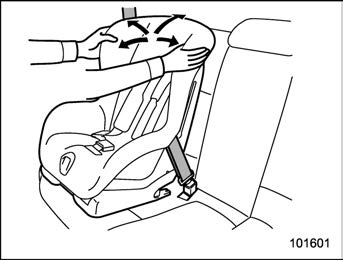
While pushing the child restraint into the seat cushion, pull both left and right lower tether belts up to secure the child restraint system firmly by taking up the slack in the belt.
If you have any question concerning this type of child restraint system, ask your SUBARU dealer.
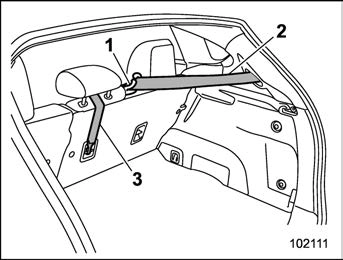
Your vehicle is equipped with three top tether anchorages so that a child restraint system having a top tether can be installed in the rear seat. When installing a child restraint system using top tether, proceed as follows, while observing the instructions by the child restraint system manufacturer.
Since a top tether can provide additional stability by offering another connection between a child restraint system and the vehicle, we recommend that you use a top tether whenever one is required or avail- able.
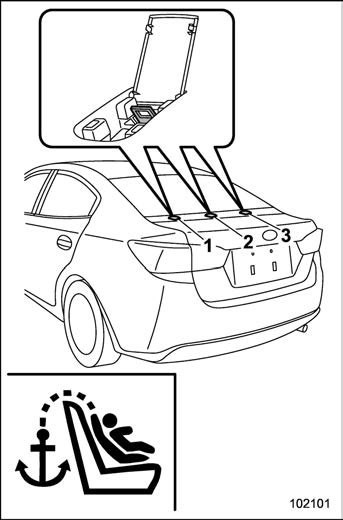
Sedan
Three upper anchorages are installed on
the rear shelf behind the rear seat.
Three upper anchorages are installed on the back side of the rear seatback.
Sedan
5-door models
For the center seating position on 5- door models, route the top tether under the head restraint as illustrated below.
Please contact your SUBARU dealer if you have any question regarding the installa- tion of a child restraint system.
Download Manual