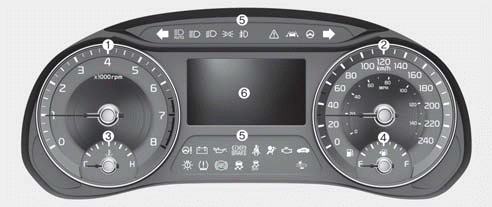
Instrument cluster
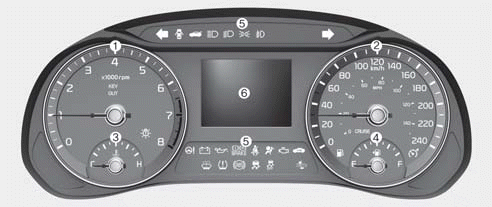
■ Type A

■ Type B
■ Type C
1. Tachometer
2. Speedometer
3. Engine coolant temperature gauge
4. Fuel gauge
5.Warning and indicator lights
6. LCD display
Instrument Cluster Control
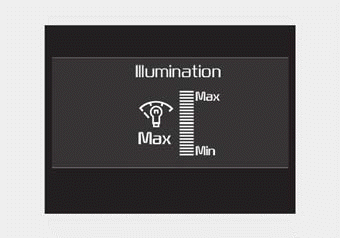
Adjusting Instrument Cluster Illumination
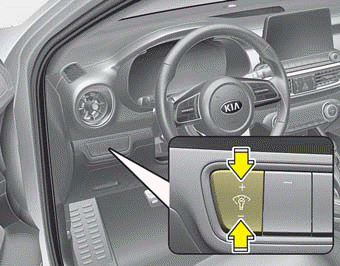
The instrument panel illumination intensity can be adjusted by pressing the control switch with the headlight switch in any position when the ignition switch is in the ON position.
The illumination intensity is shown on the instrument cluster LCD window.
■ Type A
■ Type B
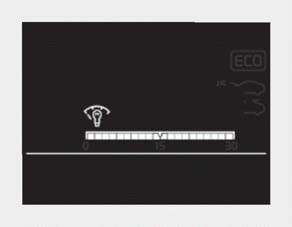
- If you hold the illumination control button (“+” or “-”), the brightness will be changed continuously.
- If the brightness reaches the maximum or minimum level, an alarm will sound.
LCD window Control
■ Type A
■ Type B
■ Type C
The LCD window modes can be changed by using the control buttons on the steering wheel.
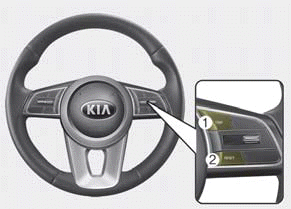
[Type A]
(1) TRIP : TRIP button for changing trip modes
(2) RESET : RESET button for resetting items
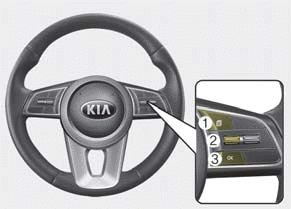
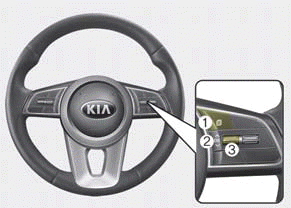
[Type B,C]
(1) : MODE button for change LCD MODES
(2) / : MOVE scroll switch to select items
(3) OK : SET/RESET button for setting or resetting items.
Gauges
Speedometer
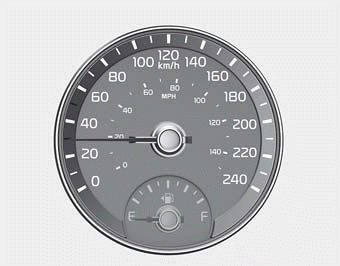
The speedometer indicates the forward speed of the vehicle.
The speedometer is calibrated in miles per hour and/or kilometers per hour.
Tachometer
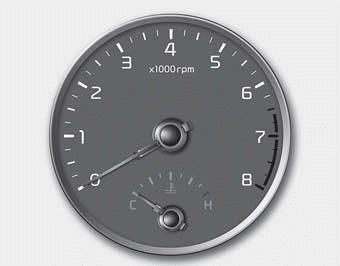
The tachometer indicates the approximate number of engine revolutions per minute (rpm).
Use the tachometer to select the correct shift points and to prevent lugging and/or over-revving the engine.
The tachometer pointer may move slightly when the ignition switch is in ACC or ON position with the engine OFF. This movement is normal and will not affect the accuracy of the tachometer once the engine is running.
CAUTION - Red zone
Do not operate the engine within the tachometer's RED ZONE. This may cause severe engine damage.
WARNING - Hot radiator
Never remove the radiator cap when the engine is hot. The engine coolant is under pressure and could cause severe burns. Wait until the engine is cool before adding coolant to the reservoir.
Engine coolant temperature gauge

This gauge shows the temperature of the engine coolant when the ignition switch is ON.
If the gauge pointer moves beyond the normal range area toward the “H” position, it indicates overheating that may damage the engine.
Do not continue driving with an overheated engine. If your vehicle overheats, refer to the “If the engine overheats” section in Chapter 6.
Fuel gauge
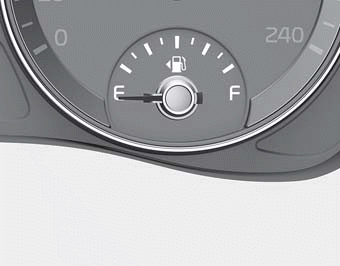
The fuel gauge indicates the approximate amount of fuel remaining in the fuel tank. The fuel tank capacity is indicated in Chapter 8. The fuel gauge is supplemented by a low fuel warning light, which will illuminate when the fuel tank is nearly empty.
On inclines or curves, the fuel gauge pointer may fluctuate or the low fuel warning light may come on earlier than usual due to the movement of fuel in the tank.
✽ NOTICE - Fuel gauge
Running out of fuel can expose vehicle occupants to danger. You must stop and obtain additional fuel as soon as possible after the warning light comes on or when the gauge indicator comes close to the “E (Empty)” level.
CAUTION - Low fuel
Avoid driving with an extremely low fuel level. Running out of fuel could cause the engine to misfire, damaging the catalytic converter.
✽ NOTICE
The fuel display may not be accurate if the vehicle is on an incline.
Odometer, Outside Temperature Gauge
Odometer
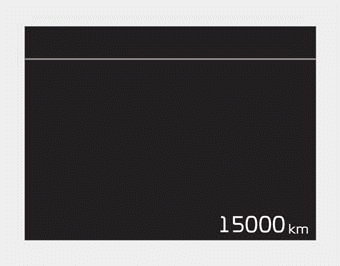
Odometer
The odometer indicates the total distance the vehicle has been driven.
You will also find the odometer useful to determine when periodic maintenance should be performed.
- Odometer range :
0 ~ 1,599,999 km or 0 ~ 999,999 miles.
Outside Temperature Gauge
This gauge indicates the current outside air temperatures by 1°C (1°F).
- Temperature range : -40°C ~ 85°C (- 40°F ~ 211°F)
The outside temperature on the display may not change immediately like a general thermometer to prevent the driver from being inattentive.
To change the temperature unit (from °C to °F or from °F to °C)
• Type A Cluster
Press the TRIP button for 5 seconds and more.
• Type B, C Cluster
The temperature unit can be changed by using the “User Settings” mode of the LCD Windows.
❈ For more details, refer to “LCD Windows” in this chapter.
Transmission Shift Indicator
Intelligent Variable Transmission

This indicator displays which intelligent variable transmission shift lever mode is selected.
- Park :P
- Reverse : R
- Neutral : N
- Drive :D
- Sports Mode : 1, 2, 3, 4, 5, 6
Manual transmission shift indicator

This indicator informs which gear is desired while driving to save fuel.
- Shifting up :▲2, ▲3, ▲4, ▲5, ▲6
- Shifting down : ▼1, ▼2, ▼3, ▼4, ▼5
For example
▲3: Indicates that shifting up to the 3rd gear is desired (currently the shift lever is in the 2nd or 1st gear).
▼4: Indicates that shifting down to the 4th gear is desired (currently the shift lever is in the 5th or 6th gear).
When the system is not working properly, the indicator is not displayed.
Dual clutch transmission shift indicator
Dual clutch transmission shift indicator
This indicator displays which shift lever mode is selected.
- Park :P
- Reverse : R
- Neutral : N
- Drive : D1, D2, D3, D4, D5, D6, D7
- Sports Mode : S1, S2, S3, S4, S5, S6, S7
Download Manual