Seats
 Seats
Seats
 ! Safety tips for head restraint
! Manual seat (if equipped)
! Forward and backward adjust- ment
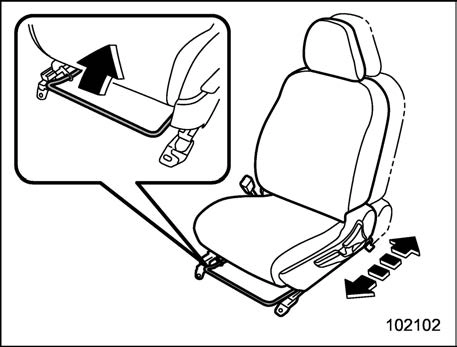
Pull the lever upward and slide the seat to the desired position. Then release the lever and try to move the seat back and forth to make sure that it is securely locked into place.
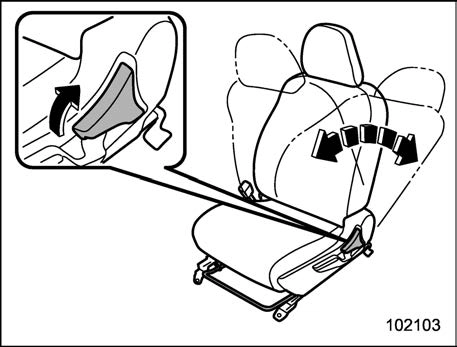
Pull the reclining lever up and adjust the seatback to the desired position. Then release the lever and make sure the seatback is securely locked into place.
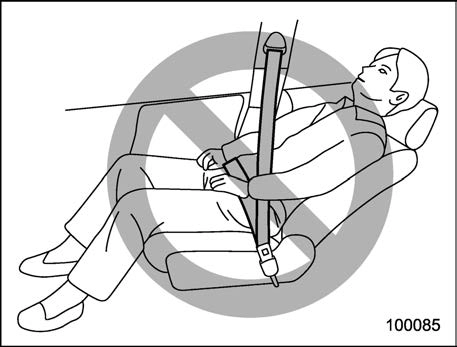
The seatback placed in a reclined position can spring back upward with force when the lever is pulled. While operating the lever to return the seatback, hold the seatback lightly so that it may be raised back gradually.
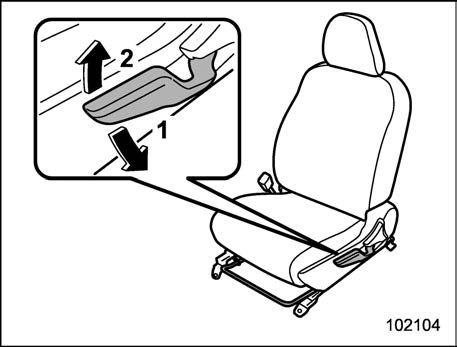
The height of the seat can be adjusted by moving the seat adjustment lever up and down.
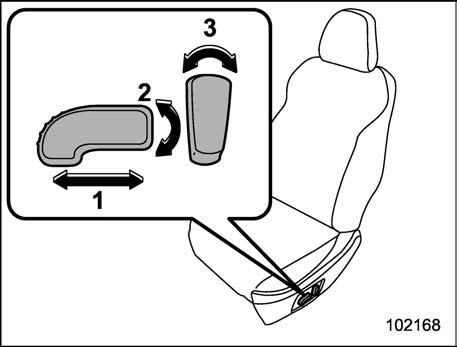
To adjust the seat forward or backward, move the control switch forward or backward. During forward/backward ad- justment of the seat, you cannot adjust the seat cushion height.
To adjust the seat height, pull up or push down the rear end of the control switch.
To adjust the angle of the seatback, move the control switch.
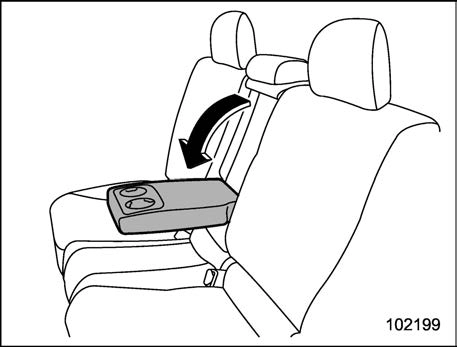
To use the armrest, pull on the top edge of the armrest.

Unlock the seatback by pulling the lock release knob and then fold the seatback
down.
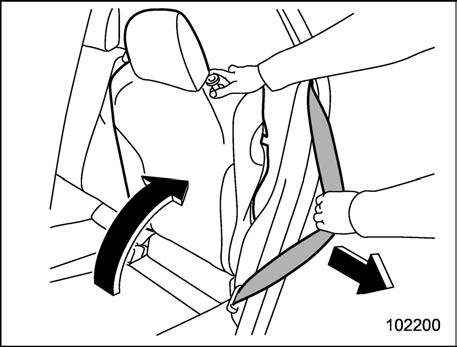
Lock release knob
To return the seatback to its original position, raise the seatback until it locks into place and make sure that the unlock- ing marker on the lock release knob is no longer visible.
NOTE
! Front seats
Both the driver’s seat and the front passenger’s seat are equipped with head restraints. Both head restraints are adjus- table in the following ways.
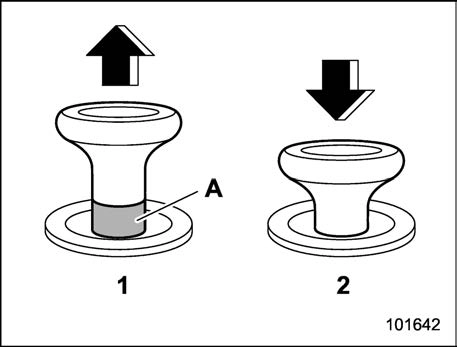
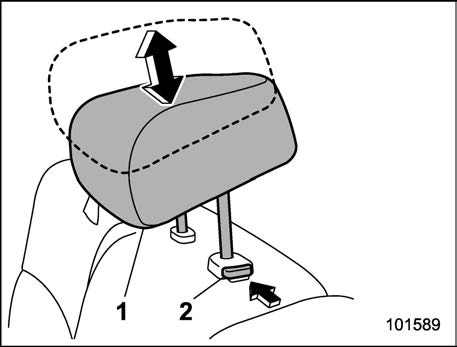
Pull the head restraint up.
Push the head restraint down while press- ing the release button on the top of the seatback.
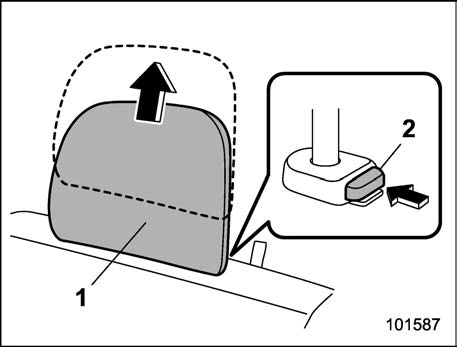
While pressing the release button, pull out the head restraint.
Install the head restraint into the holes that are located on the top of the seatback until the head restraint locks. Press and hold the release button to lower the head restraint.
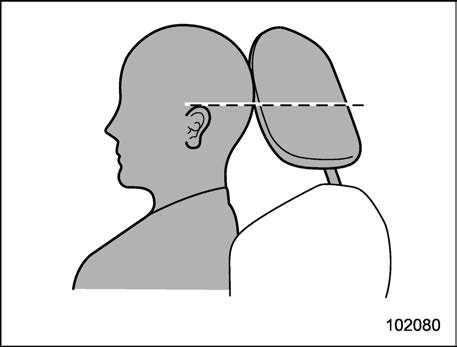
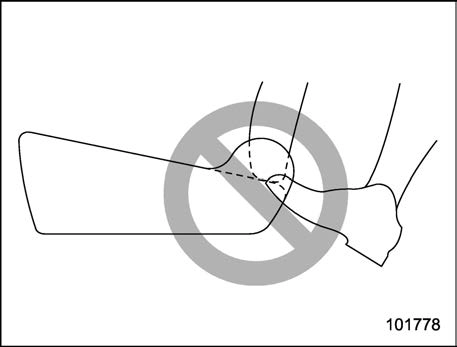
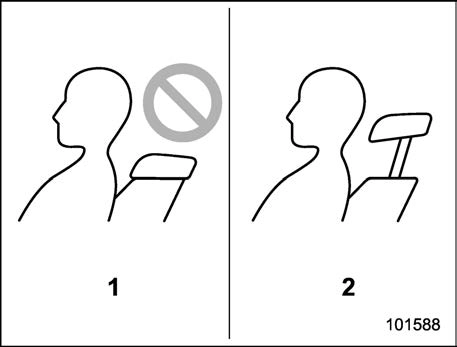
Each head restraint should be adjusted so that the center of the head restraint is closest to the top of the occupant’s ears.
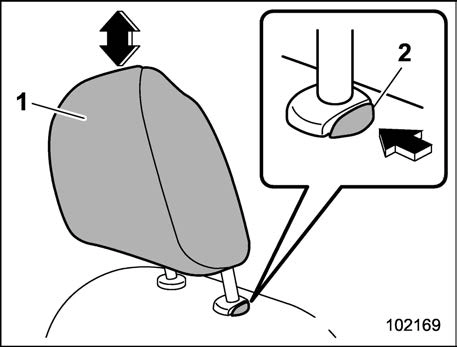
! Angle adjustment
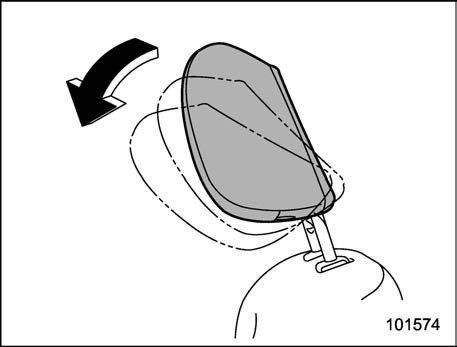
The angle of the head restraint can be adjusted in several steps. While maintain- ing a suitable driving posture, adjust the head restraint to a position where the back of your head is as close to the head restraint as possible.
Tilt the head restraint by hand to the preferred position. A click will be audible when the head restraint is locked.
Tilt the head restraint once as far forward as it can go. The head restraint will automatically return to the fully upright position. Then, adjust the head restraint again to the preferred angle.
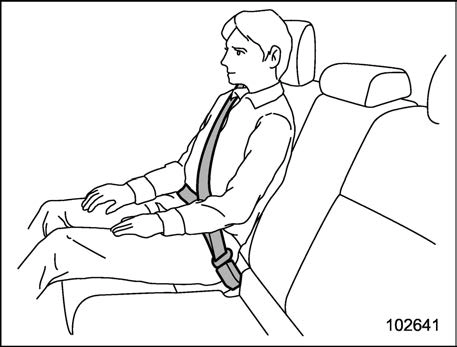
Both the rear window side seats and the rear center seat are equipped with head restraints.
While pressing the release button, pull out the head restraint.
Install the head restraint into the holes that are located on the top of the seatback until the head restraint locks. Press and hold the release button to lower the head restraint.
After installing the head restraint, make sure it is securely locked.
Pull the head restraint up.
Push the head restraint down while press- ing the release button on the top of the seatback.
While pressing the release button, pull out the head restraint.
Install the head restraint into the holes that are located on the top of the seatback until the head restraint locks. Press and hold the release button to lower the head restraint.
Download Manual