Seats
Sitting in the Correct Position
 WARNING: Sitting improperly, out of position or with the seatback reclined too far can take weight off the seat cushion and affect the decision of the passenger sensing system, resulting in serious injury or death in the event of a crash. Always sit upright against your seat back, with your feet on the floor. WARNING: Do not recline the seat backrest too far as this can cause the occupant to slide under the seatbelt, resulting in personal injury in the event of a crash. WARNING: Do not place objects higher than the top of the seat backrest. Failure to follow this instruction could result in personal injury or death in the event of a sudden stop or crash. WARNING: Sitting improperly, out of position or with the seatback reclined too far can take weight off the seat cushion and affect the decision of the passenger sensing system, resulting in serious injury or death in the event of a crash. Always sit upright against your seat back, with your feet on the floor. WARNING: Do not recline the seat backrest too far as this can cause the occupant to slide under the seatbelt, resulting in personal injury in the event of a crash. WARNING: Do not place objects higher than the top of the seat backrest. Failure to follow this instruction could result in personal injury or death in the event of a sudden stop or crash. |
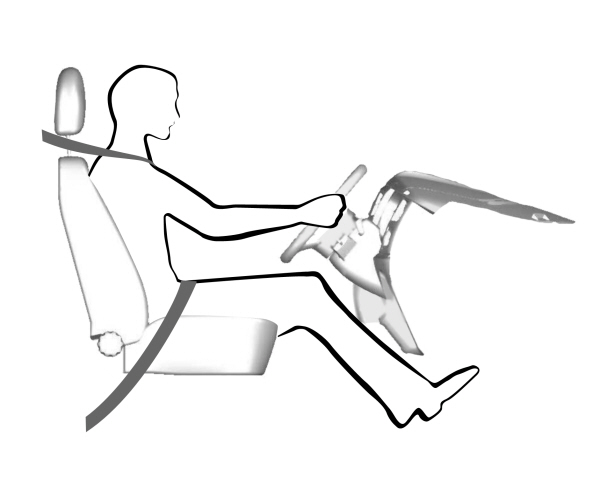
When you use them properly, the seat, head restraint, seatbelt and airbags will provide optimum protection in the event of a crash.
We recommend that you follow these guidelines:
- Sit in an upright position with the base of your spine as far back as possible.
- Do not recline the seat backrest so that your torso is more than 30 degrees from the upright position.
- Adjust the head restraint so that the top of it is level with the top of your head and as far forward as possible. Make sure that you remain comfortable.
- Keep sufficient distance between yourself and the steering wheel. We recommend a minimum of 10 in (25 cm) between your breastbone and the airbag cover.
- Hold the steering wheel with your arms slightly bent.
- Bend your legs slightly so that you can press the pedals fully.
- Position the shoulder strap of the seatbelt over the center of your shoulder and position the lap strap tightly across your hips.
Make sure that your driving position is comfortable and that you can maintain full control of your vehicle.
Head Restraints
| WARNING: Fully adjust the head restraint before you sit in or operate your vehicle. This will help minimize the risk of neck injury in the event of a crash. Do not adjust the head restraint when your vehicle is moving. WARNING: The head restraint is a safety device. Whenever possible it should be installed and properly adjusted when the seat is occupied. Failure to adjust the head restraint properly could reduce its effectiveness during certain impacts. |
Note: Adjust the seat backrest to an upright driving position before adjusting the head restraint. Adjust the head restraint so that the top of it is level with the top of your head and as far forward as possible. Make sure that you remain comfortable. If you are extremely tall, adjust the head restraint to its highest position.
Adjusting the Head Restraints
Front Seat Head Restraints
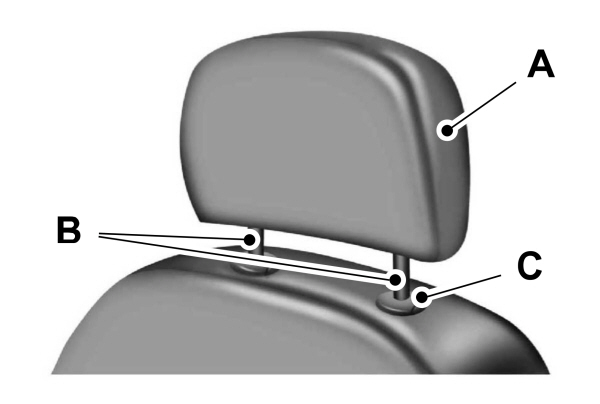
|
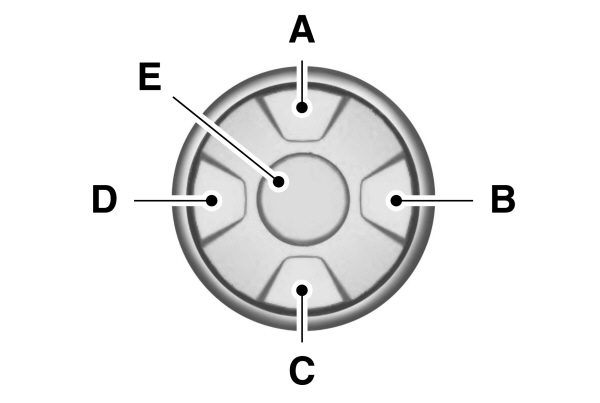
The head restraints consist of: AB C |
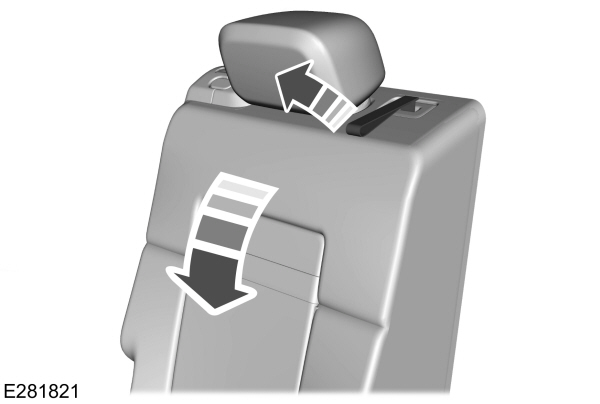
Raising the Head Restraint
Pull the head restraint up.
Lowering the Head Restraint
- Press and hold the C button.
- Push the head restraint down.
Second Row Center Seat Head Restraint (If Equipped)

|
The head restraints consist of: AB C |
Removing the Head Restraint
- Press and hold the C buttons.
- Pull the head restraint up.
Installing the Head Restraint
Align the steel stems into the guide sleeves and push the head restraint down until it locks.
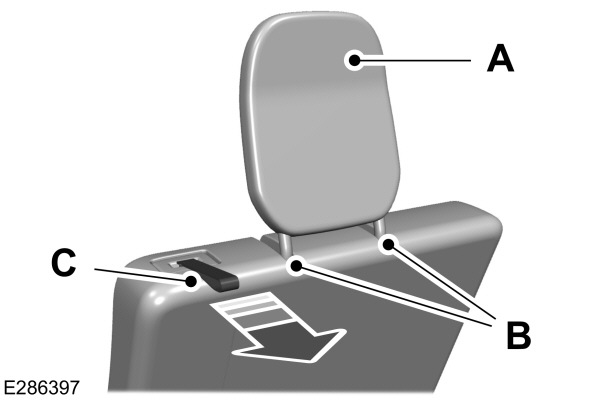
Second Row Outermost Seat Head Restraints

|
The head restraints consist of: AB C |
Removing the Head Restraint
- Press and hold the C buttons.
- Pull the head restraint up.
Installing the Head Restraint
Align the steel stems into the guide sleeves and push the head restraint down until it locks.
Third Row Seat Head Restraints
|
The head restraints consist of: AB C |
Folding the Head Restraint
Pull the fold strap (C). Pull the head restraint back up to reset.
Note: Press the stow or fold button on the power folding seats to fold the head restraint.
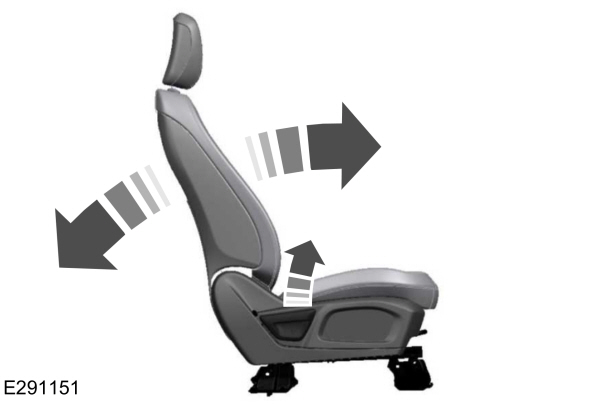
Manual Seats
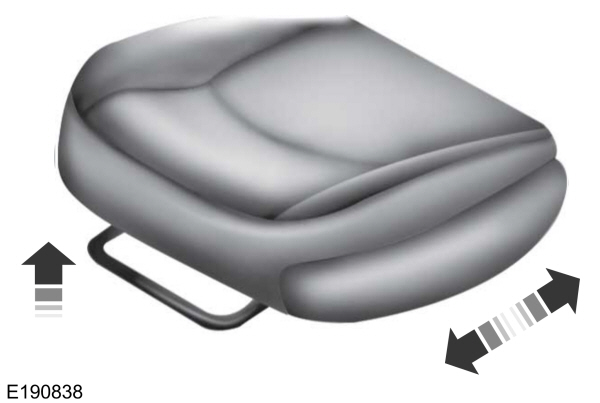
Moving the Seat Backward and Forward
| WARNING: Do not adjust the driver seat or seat backrest when your vehicle is moving. This may result in sudden seat movement, causing the loss of control of your vehicle. WARNING: Make sure the seat fully locks into place by rocking it backward and forward. Not securing the seat into the locked position can be dangerous in a crash and could cause serious personal injury or death. |
Adjusting the Seat Backrest
| WARNING: Always drive and ride with your seatback upright and the lap belt snug and low across the hips. WARNING: Do not place cargo or any objects behind the seat backrest before returning it to the original position. Pull on the seat backrest to make sure that it has fully latched after returning the seat backrest to its original position. An unlatched seat may become dangerous if you stop suddenly or have a crash. |
Power Seats
| WARNING: Do not adjust the driver seat or seat backrest when your vehicle is moving. This may result in sudden seat movement, causing the loss of control of your vehicle. WARNING: Do not place cargo or any objects behind the seatback before returning it to the original position. |
10-Way Seat Controls
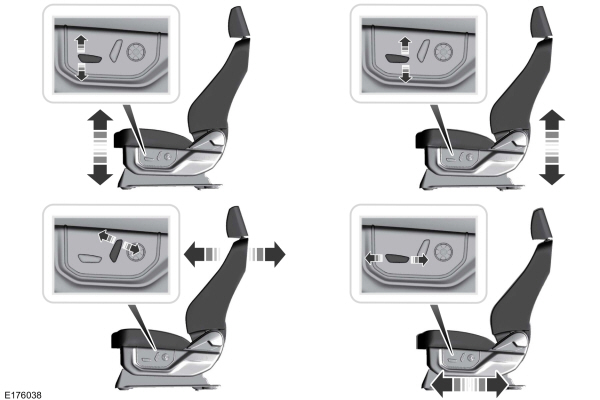
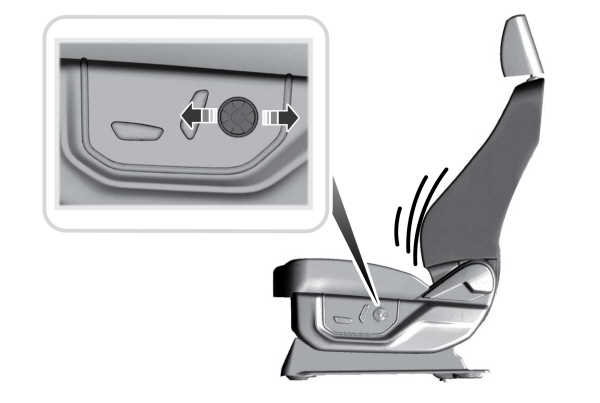
Adjusting the Lumbar Support (If Equipped)
8-Way Seat Controls
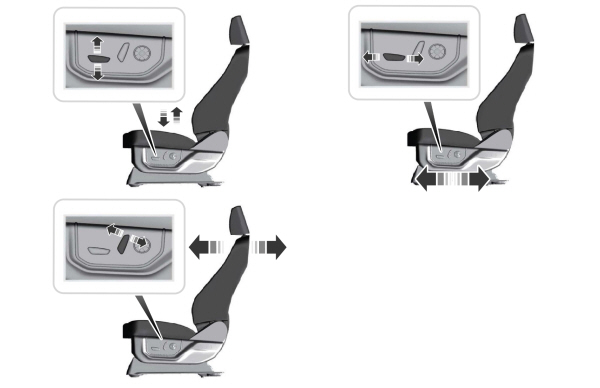
Adjusting the Multi-Contour Front Seats With Active Motion (If Equipped)
Note: The engine must be running or the vehicle must be in accessory mode to activate the seats.
Note: Allow a few seconds for any selection to activate. The seat backrest and cushion massage cannot function at the same time.
| Massage Mode | Lumbar and Bolster Mode | |
|---|---|---|
| A | Back massage intensity adjustment | Upper lumbar |
| B | Massage intensity decrease and off* | Lumbar decrease |
| C | Cushion massage intensity adjustment | Lower lumbar** |
| D | Massage intensity increase | Lumbar increase |
| E | On and off | - |
*The massage feature defaults to an alternating massage mode with back massage intensity adjustment. The lumbar and bolster feature defaults to the middle lumbar mode.
**Press C a second time to adjust the back bolster. Press C a third time to adjust the cushion bolster.
You can also adjust this feature through the touchscreen. When switched on, the system displays directions for you to adjust the lumbar settings in your seat or to set the massage function.
Memory Function
| WARNING: Before activating the memory seat, make sure that the area immediately surrounding the seat is clear of obstructions and that all occupants are clear of moving parts. WARNING: Do not use the memory function when your vehicle is moving. |
This feature recalls the position of the following:
- Driver seat.
- Power mirrors.
- Optional power steering column.
The memory control is on the driver door.
Saving a PreSet Position
- Switch the ignition on.
- Adjust the memory features to your preferred position.
- Press and hold the preferred preset button until you hear a single tone.
You can save up to three preset memory positions. You can save a memory preset at any time.
Recalling a PreSet Position
Press and release the preset button associated with your preferred driving position. The memory features move to the position stored for that preset.
Note: You can only recall a preset memory position when the ignition is off, or when the transmission is in park (P) or neutral (N) and the vehicle is not moving if the ignition is on.
You can also recall a preset memory position by:
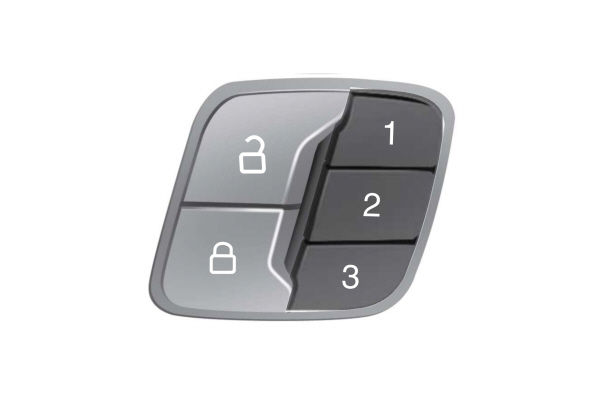
- Pressing the unlock button on your remote control if it is linked to a preset position.
- Unlocking the driver door handle if a linked remote control is present.
Note: Using a linked remote control to recall your memory position when the ignition is off moves the seat to the Easy Entry position.
Note: Pressing any active memory feature adjustment control, or any memory button during a memory recall, cancels the operation.
Linking a PreSet Position to your Remote Control
Your vehicle can save the preset memory positions for up to three remote controls.
- With the ignition on, move the memory features to the preferred positions.
- Press and hold the preferred preset button for about five seconds. A tone sounds after about two seconds. Continue holding until you hear a second tone.
- Within three seconds, press the lock button on the remote control you are linking.
To unlink a remote control, follow the same procedure – except in step 3, press the unlock button on the remote control.
Note: If more than one linked remote control or intelligent access key is in range, the memory function moves to the settings of the first key to recall a memory position.
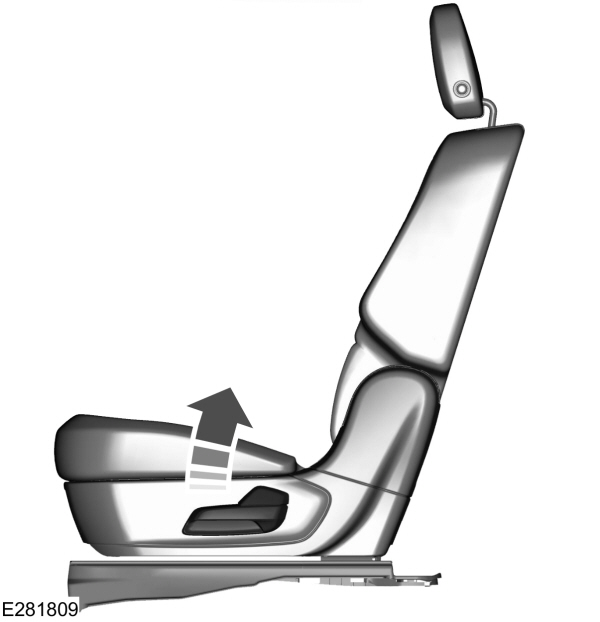
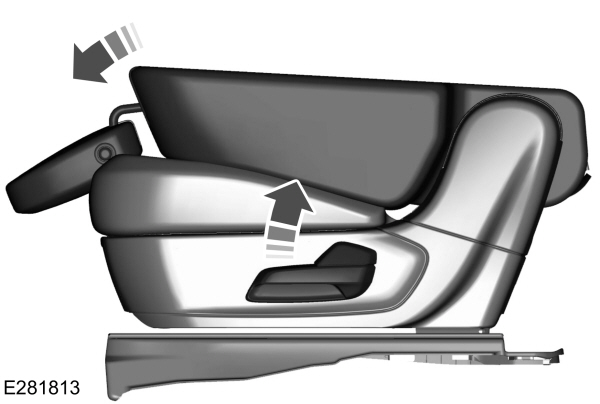
Easy Entry and Exit Feature
If you enable the easy entry and exit feature, it moves the driver seat position rearward up to 2 in (5 cm) when you switch the ignition off.
The driver seat returns to the previous position when you switch the ignition on.
You can enable or disable this feature through the touchscreen.
Rear Seats
Adjusting the Second Row Rear Seats
| WARNING: Always drive and ride with your seatback upright and the lap belt snug and low across the hips. WARNING: Do not recline the seat backrest too far as this can cause the occupant to slide under the seatbelt, resulting in personal injury in the event of a crash. |
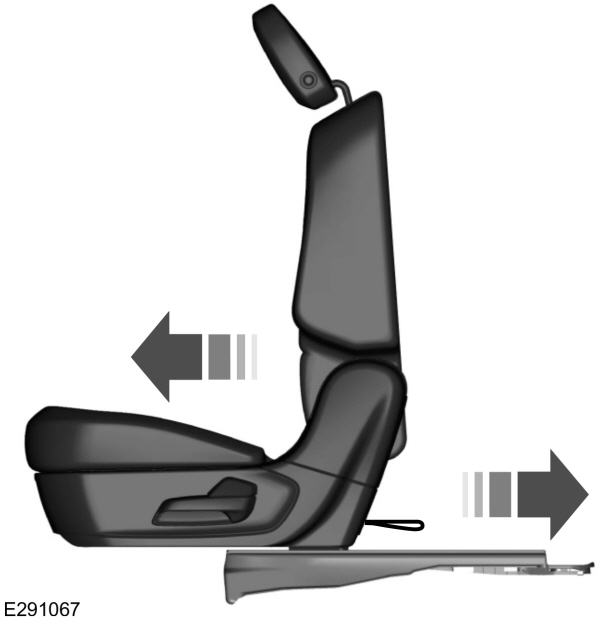
Adjusting the Seat Backrest
Lift the handle and adjust the seat backrest rearward or forward.
Folding the Seat Backrest Flat
Lift the handle and fold the seat backrest forward until it is flat.
Note: For bench seats, make sure you unbuckle the center seatbelt before folding the seat backrest.
Moving the Seat Backward and Forward (If Equipped)
Adjusting the Second Row Seats for Easy Entry
| WARNING: Do not drive your vehicle with a seat that is unlatched or in the folded position. Failure to follow this instruction could result in personal injury or death in the event of a sudden stop or crash. WARNING: Do not place cargo or any objects behind the seat backrest before returning it to the original position. Pull on the seat backrest to make sure that it has fully latched after returning the seat backrest to its original position. An unlatched seat may become dangerous if you stop suddenly or have a crash. WARNING: Do not adjust a seat or release a seat floor latch when the vehicle is moving. Failure to follow this instruction could result in personal injury or death in a sudden stop or crash. |
Note: You may have to move the front row seat forward to allow the second row seat to be fully folded.
Note: You can move the second row outermost seats forward to allow access to the third row seats.
This feature allows for easier entry and exit to and from the third row seat.

- Lift the handle on top of the seat backrest. The seat backrest folds forward and engages the seat track.

- Push the seat forward.
- To return the seat to the seating position, push the seat backrest and move the track rearward. Make sure the seat backrest locks in the upright position.
Adjusting the Second Row Seats with Power Easy Entry (If Equipped)
| WARNING: Do not fold a seat if it is occupied. Failure to follow this instruction could result in personal injury. |
The easy entry seat allows for easier entry and exit to and from the third row seat.

Press the button on top of the second row seat backrest to move the seat forward. This provides access to the third row.
Folding the Second Row Center Seat
Pull the strap to fold the seat backrest flat.
To return the seat to the upright position, rotate the seat backrest until it locks.
Adjusting the Second Row Outermost Seats
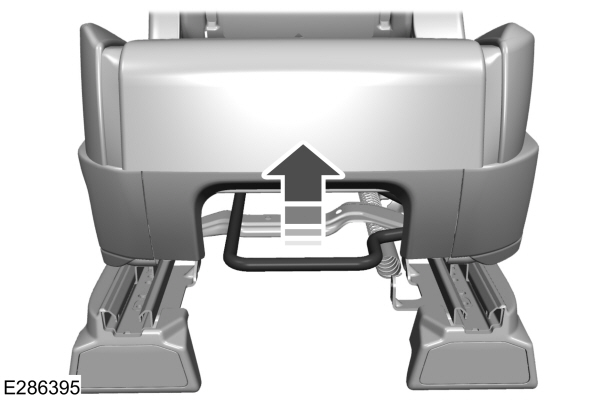
Lift the handle to move the seat forward or rearward.
Exiting the Third Row Seats
| WARNING: Do not place cargo or any objects behind the seatback before returning it to the original position. WARNING: Check under the seat cushion to make sure no cargo or objects are under the seat cushion before returning the seat cushion to its original position, and that the seat cushion locks into place. Failure to do so may prevent the seat from operating properly in the event of a crash, which could increase the risk of serious injury. WARNING: Do not adjust a seat or release a seat floor latch when the vehicle is moving. Failure to follow this instruction could result in personal injury or death in a sudden stop or crash. WARNING: Do not drive your vehicle with a seat that is unlatched or in the folded position. Failure to follow this instruction could result in personal injury or death in the event of a sudden stop or crash. |
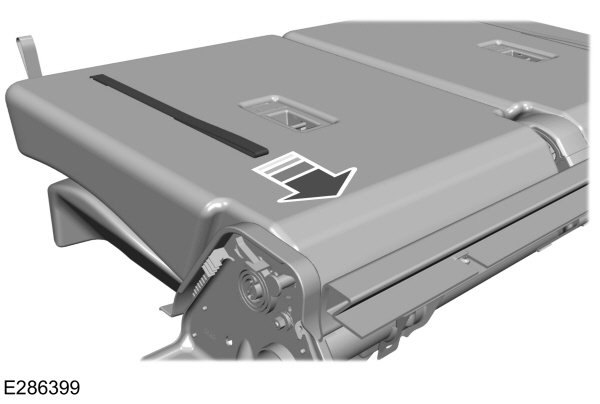
- Pull the strap on the back of the second row seat. This moves the seat forward.
- To return the seat to the seating position, push the seat backrest and move the track rearward. Make sure the seat backrest locks in the upright position.
Folding the Third Row Manual Seat
- Remove all objects from the seat.

- Fold the head restraints by pulling the head restraint release strap.
- From the rear of the vehicle, fold the seat backrest by pulling and holding the strap while pushing the seat backrest forward. Release the strap once the seat backrest starts rotating forward.
Note: Do not use the seat anchors as cargo tie downs.
Note: Make sure that the area under the seat is free of objects before stowing it.
Unfolding the Third Row Manual Seat
| WARNING: Do not place cargo or any objects behind the seat backrest before returning it to the original position. Pull on the seat backrest to make sure that it has fully latched after returning the seat backrest to its original position. An unlatched seat may become dangerous if you stop suddenly or have a crash. |
Note: Make sure that there are no objects such as books, purses or briefcases on the load floor before unstowing the seat. Failure to remove all objects from the top of the load floor prior to unstowing it may cause damage to the seat.
Note: Make sure the area under the load floor is free of objects before unstowing it.
- To return the seat backrest to the upright position, pull the long strap until the seat backrest locks.
- Pull the head restraints up to their normal positions.
Adjusting the Third Row Power Seats
Note: The power rear seat functions disable 10 minutes after you switch the ignition off. The transmission must be in park (P) and the liftgate must be open to operate the seats.
The buttons are inside the liftgate area.
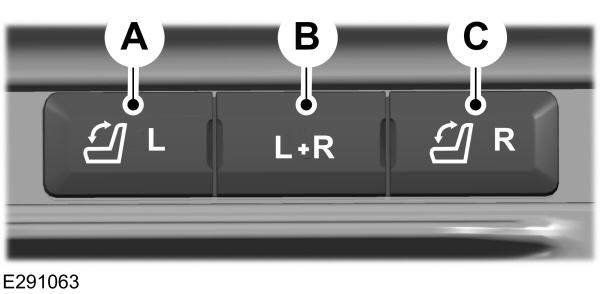
| A B C |
To return the third-row seat backrest to the original position, press the corresponding control again.
If the seats are inoperable, do the following:
- Make sure that the engine is running and the tailgate is open.
- Make sure that there are no objects on the seats that would prevent them from folding completely.
- Press and hold button B for one minute until both seats completely fold and unfold.
- Press button A and button C to confirm each seat is operational.
Note: During this procedure, the seat may appear to be fully unfolded. Continue holding the switch for a few seconds.
If the power rear seat disables after 10 minutes, you can enable the seat by:
- Opening any door.
- Pressing the unlock button on the key fob.
- Pressing any keyless entry keypad button.
- Switching the ignition on.
Heated Seats
| WARNING: Use caution when using the heated seat if you are unable to feel pain to your skin because of advanced age, chronic illness, diabetes, spinal cord injury, medication, alcohol use, exhaustion or other physical conditions. The heated seat could cause burns even at low temperatures, especially if used for long periods of time. Failure to follow this instruction could result in personal injury. WARNING: Do not poke sharp objects into the seat cushion or seat backrest. This could damage the heated seat element and cause it to overheat. Failure to follow this instruction could result in personal injury. WARNING: Do not place anything on the seat that blocks the heat, for example a seat cover or a cushion. This could cause the seat to overheat. Failure to follow this instruction could result in personal injury. |
Front Seats
Do not do the following:
- Place heavy objects on the seat.
- Operate the heated seat if water or any other liquid spills on the seat. Allow the seat to dry thoroughly.
Note: The engine must be running to use this feature.
Press the heated seat symbol to cycle through the various heat settings and off. More indicator lights indicate warmer settings.
Note: The heated seats switch on during a remote start if they are enabled.
Note: The heated seats may switch on when you start your vehicle if they were on when you previously switched your vehicle off.
Automatic Climate Controlled Seats (If Equipped)
When you switch on the auto setting, the seats switch between the heated seats and ventilated seats to match your climate control setting.
Second Row Heated Seats
The heated seat controls are on the rear of the center console.
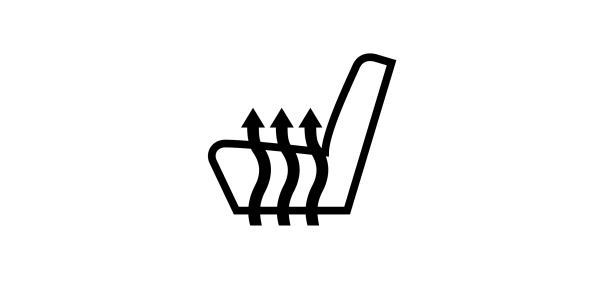
Ventilated Seats
Do not do the following:
- Spill liquid on the front seats. This may cause the air vent holes to become blocked and not work properly.
- Place cargo or objects under the seats. They may block the air intake causing the air vents to not work properly.
The engine must be running to use this feature.

Press this symbol to cycle through the various ventilation settings and off. More indicator lights indicate higher fan speeds.
Note: The ventilated seats switch on during a remote start if they are enabled.
Note: The ventilated seats may switch on when you start your vehicle if they were on when you previously switched your vehicle off.
If the engine falls below 350 RPM when the ventilated seats are on, the system turns off. You need to switch it back on.
Note: To improve comfort, use the ventilated seats along with the vehicle’s air conditioning system.
Automatic Climate Controlled Seats (If Equipped)
When you switch on the auto setting, the seats switch between the heated seats and ventilated seats to match your climate control setting.
Download Manual