Initial Drive Information
This section provides a brief overview about some of the important features that may or may not be on your specific vehicle.
For more detailed information, refer to each of the features which can be found later in this owner's manual.
The Remote Keyless Entry (RKE) transmitter functions may work from up to 60 m (197 ft) away from the vehicle.
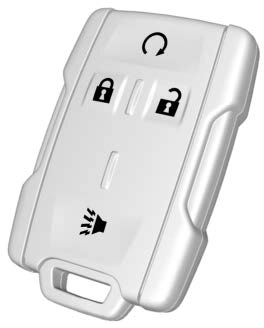
K : Press to unlock the driver door. Press K again within three seconds to unlock all remaining doors.
Q : Press to lock all doors. Lock and unlock feedback can be personalized. See Vehicle
Personalization 0 136.
7 : Press and release one time to initiate vehicle locator. Press 7 and hold for at least three seconds to sound the panic alarm. Press 7 again to cancel the panic alarm.
See Keys 0 25 and Remote Keyless Entry (RKE) System Operation 0 28.
If equipped, the engine can be started from outside of the vehicle.
Start the vehicle normally after entering.
When the vehicle starts, the parking lamps will turn on.
Remote start can be extended.
To cancel a remote start, do one of the following:
To lock or unlock a door from the outside press Q or K on the Remote Keyless Entry (RKE) transmitter or use the key in the driver door.
To lock a door from the inside, push down on the door lock knob. To unlock, pull the door handle once to unlock the door and again to unlatch it.
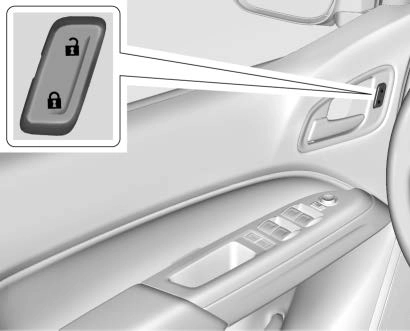
Crew Cab Shown, Extended Cab Similar
If equipped with power door locks:
Q : Press to lock the doors.
K : Press to unlock the doors.
See Door Locks 0 31 and Power Door Locks 0 32.
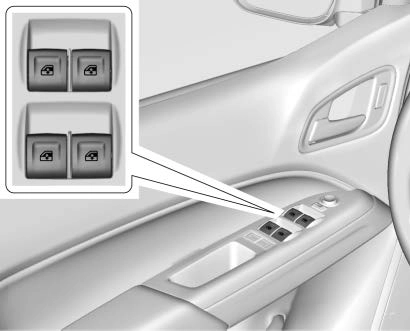
Crew Cab Shown, Extended Cab Similar
Power windows work when the ignition is on, in ACC/ACCESSORY, or when Retained Accessory Power (RAP) is active. See Retained Accessory Power (RAP) 0 179.
Using the window switch, press to open or pull to close the window.
The windows may be temporarily disabled if they are used repeatedly within a short time.
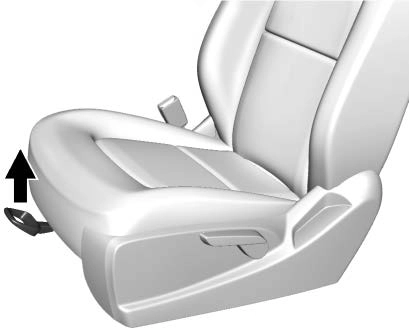
To adjust a manual seat:
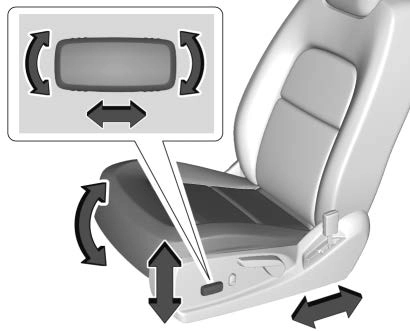
To adjust a power driver seat, if equipped:
See Power Seat Adjustment 0 46
and Reclining Seatbacks 0 47.
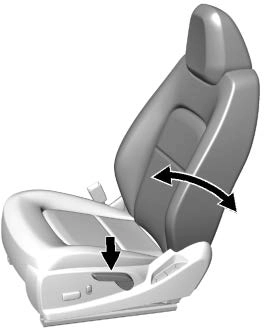
To recline:
To return the seatback to the upright position:
See Reclining Seatbacks 0 47.
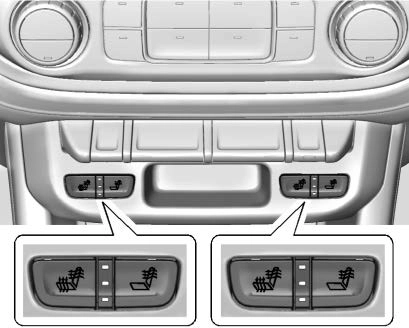
If equipped, the buttons are on the center stack. To operate, the engine must be running.
Press + to heat the driver or passenger seatback only.
Press z to heat the driver or passenger cushion and seatback.
The indicator light comes on when this feature is on.
See Heated Front Seats 0 48.
Do not drive until the head restraints for all occupants are installed and adjusted properly.
To achieve a comfortable seating position, change the seatback recline angle as little as necessary while keeping the seat and the head restraint height in the proper position.
See Head Restraints 0 44 and Seat Adjustment 0 45.
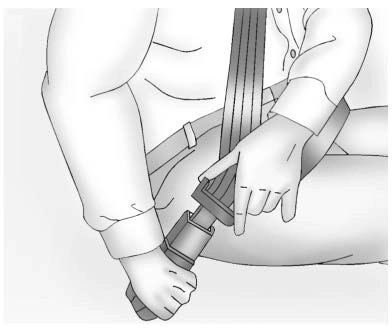
Refer to the following sections for important information on how to use seat belts properly:
0 53
United States
Canada and Mexico
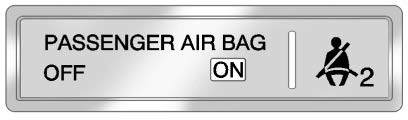
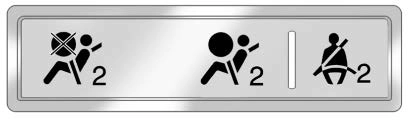
The passenger sensing system will turn off the front outboard passenger frontal airbag under certain conditions. No other airbag is affected by the passenger sensing system. See Passenger Sensing System 0 65.
The passenger airbag status indicator lights on the overhead console are visible when the vehicle is started. See Passenger Airbag Status Indicator 0 119.
Using hood-mounted air deflectors and add-on convex mirror attachments could decrease mirror performance.
Manual Mirrors
If equipped, adjust the manual mirror by moving it up and down or left to right to see a little of the side of the vehicle and to have a clear view behind the vehicle.
See Manual Mirrors 0 36.
Power Mirrors
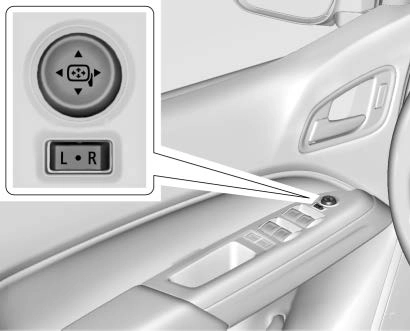
If equipped, adjust the power mirrors:
See Power Mirrors 0 37.
Adjustment
Adjust the mirror for a clear view of the area behind the vehicle.
Manual Dimming Rearview Mirror
If equipped, push the tab forward for daytime use and pull it rearward for nighttime use to avoid the glare of headlamps from behind.
Automatic Dimming Rearview Mirror
If equipped, the rearview mirror dims automatically to reduce the glare of the headlamps from behind. The dimming feature comes on when the vehicle is started.
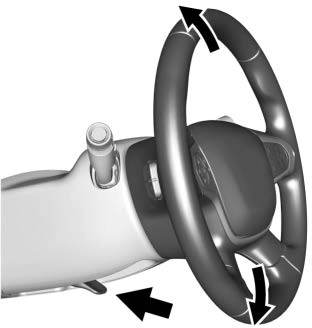
To adjust the steering wheel:
Tilt and Telescoping Steering Wheel
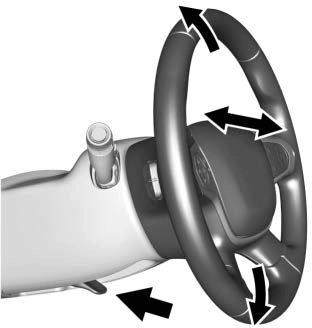
To adjust the tilt and telescoping steering wheel, if equipped:
Do not adjust the steering wheel while driving.
Dome Lamps
The interior lamps control in the overhead console controls both the front and rear interior lamps.
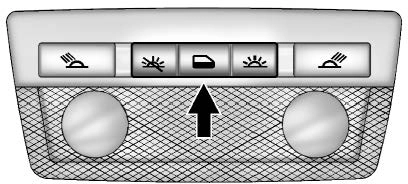
( : Turns the lamps off.
H : Turns the lamps on when any door is opened.
' : Keeps the lamps on all the time.
Reading Lamps (If Equipped)
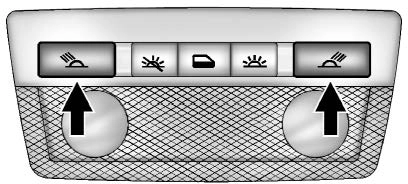
The front reading lamps are in the overhead console.
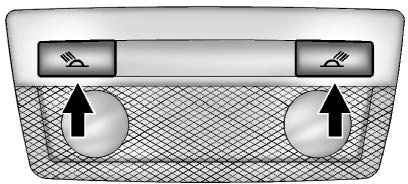
The rear reading lamps are in the headliner.
# or $ : Press to turn each lamp on or off.
For more information, see Dome Lamps 0 144.
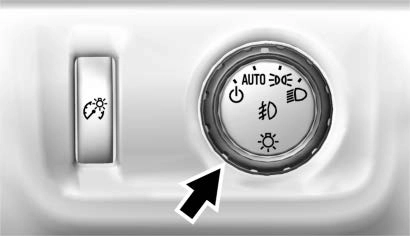
The exterior lamp control is on the instrument panel to the left of the steering wheel.
O : Turns off the automatic headlamps and Daytime Running Lamps (DRL). Turn the headlamp control to O again to turn the automatic headlamps or DRL back on.
For vehicles first sold in Canada, off will only work when the vehicle is in P (Park).
AUTO : Automatically turns on the headlamps at normal brightness, together with the following:
; : Turns on the parking lamps including all lamps, except the headlamps.
5 : Turns on the headlamps together with the parking lamps and instrument panel lights.
See:
0 141.
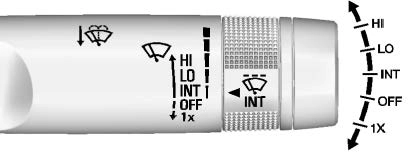
The windshield wiper/washer lever is on the right side of the steering column. With the ignition on or in ACC/ACCESSORY, move the windshield wiper lever to select the wiper speed.
HI : Use for fast wipes.
LO : Use for slow wipes.
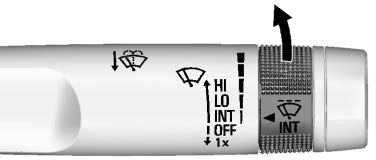
INT : Move the lever up to INT for intermittent wipes, then turn
the x INT band up for more
frequent wipes or down for less frequent wipes.
OFF : Use to turn the wipers off.
1X : For a single wipe, briefly move the wiper lever down. For several wipes, hold the wiper lever down.
n L : Pull the windshield wiper lever toward you to spray windshield washer fluid and activate the wipers.
See Windshield Wiper/Washer
0 107.
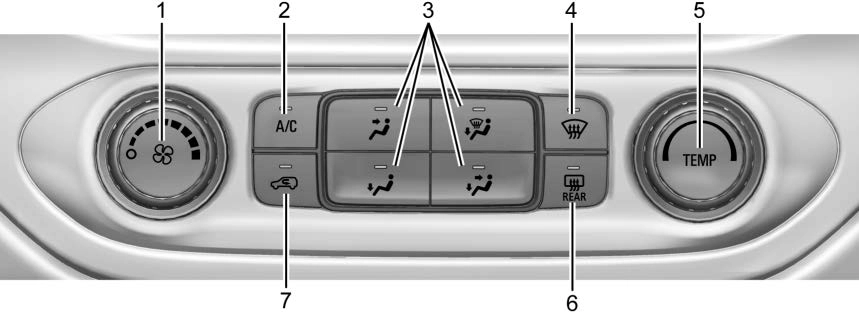
These systems control the heating, cooling, and ventilation.
Transmission
Range Selection Mode
See Climate Control Systems 0 148 or Automatic Climate Control System 0 150 (If Equipped).
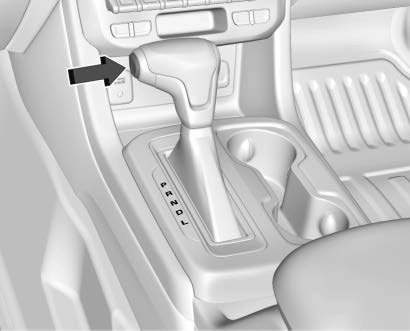 Range Selection Mode helps control the vehicle's transmission and vehicle speed while driving downhill or towing a trailer by letting you select a desired range of gears.
To enable:
when 5 (Fifth) gear is selected, 1 (First) through 5 (Fifth) gears are available.
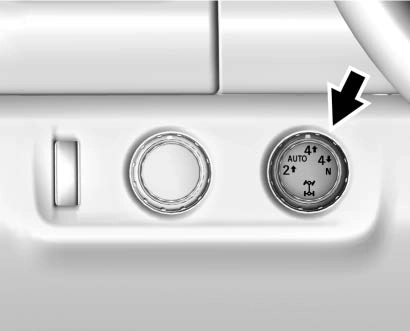
If the vehicle has four-wheel drive, the engine's driving power can be sent to all four wheels for extra traction.
Automatic Transfer Case
Except ZR2
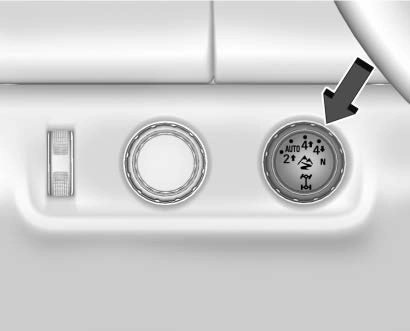
ZR2 Only
The transfer case knob is to the left of the steering column. Use it to shift into and out of the different four-wheel drive modes.
The different drive options that may be available are described following.
2 m (Two-Wheel Drive High) : This setting is used for driving in most street and highway situations.
AUTO (Automatic Four-Wheel Drive) : This setting is ideal for use when road surface traction conditions are variable.
4 m (Four-Wheel Drive High) : Use this setting when extra traction is
needed, such as on snowy or icy roads or in most off-road situations.
N (Neutral) : Shift to this setting only when towing the vehicle.
See Recreational Vehicle Towing
0 315 or Trailer Towing 0 224.
4 n (Four-Wheel Drive Low) : Choose 4 n when driving in deep sand, mud, or snow, and while
climbing or descending steep hills. See Four-Wheel Drive 0 190.
For ZR2 locking axle information, see Locking Rear Axle 0 204 and Locking Front Axle 0 205.
For ZR2 Off-Road Mode information, see Driver Mode Control 0 203.
Download Manual