Roof luggage rack — if equipped
The crossbars and side rails are designed to carry weight on vehicles equipped with a luggage rack. The load must not exceed 150 lb (68 kg), and should be uniformly distributed over the luggage rack crossbars.
The crossbars on your vehicle are delivered stowed in the rear cargo bin. Crossbars should always be used whenever cargo is placed on the roof rack. Check the straps frequently to be sure that the load remains securely attached.
The roof rack does not increase the total load carrying capacity of the vehicle. Be sure the total load of cargo inside the vehicle plus that on the external rack does not exceed the maximum vehicle load capacity.
INSTALLING THE CROSSBARS
There are two crossbars equipped with your vehicle. They are located in the rear cargo bin, stored in foam blocks.
There is also a packet of fastener screws and a Torx wrench provided in the foam blocks. You can find the packet of fastener screws in the left foam block and the Torx wrench in the right foam block.
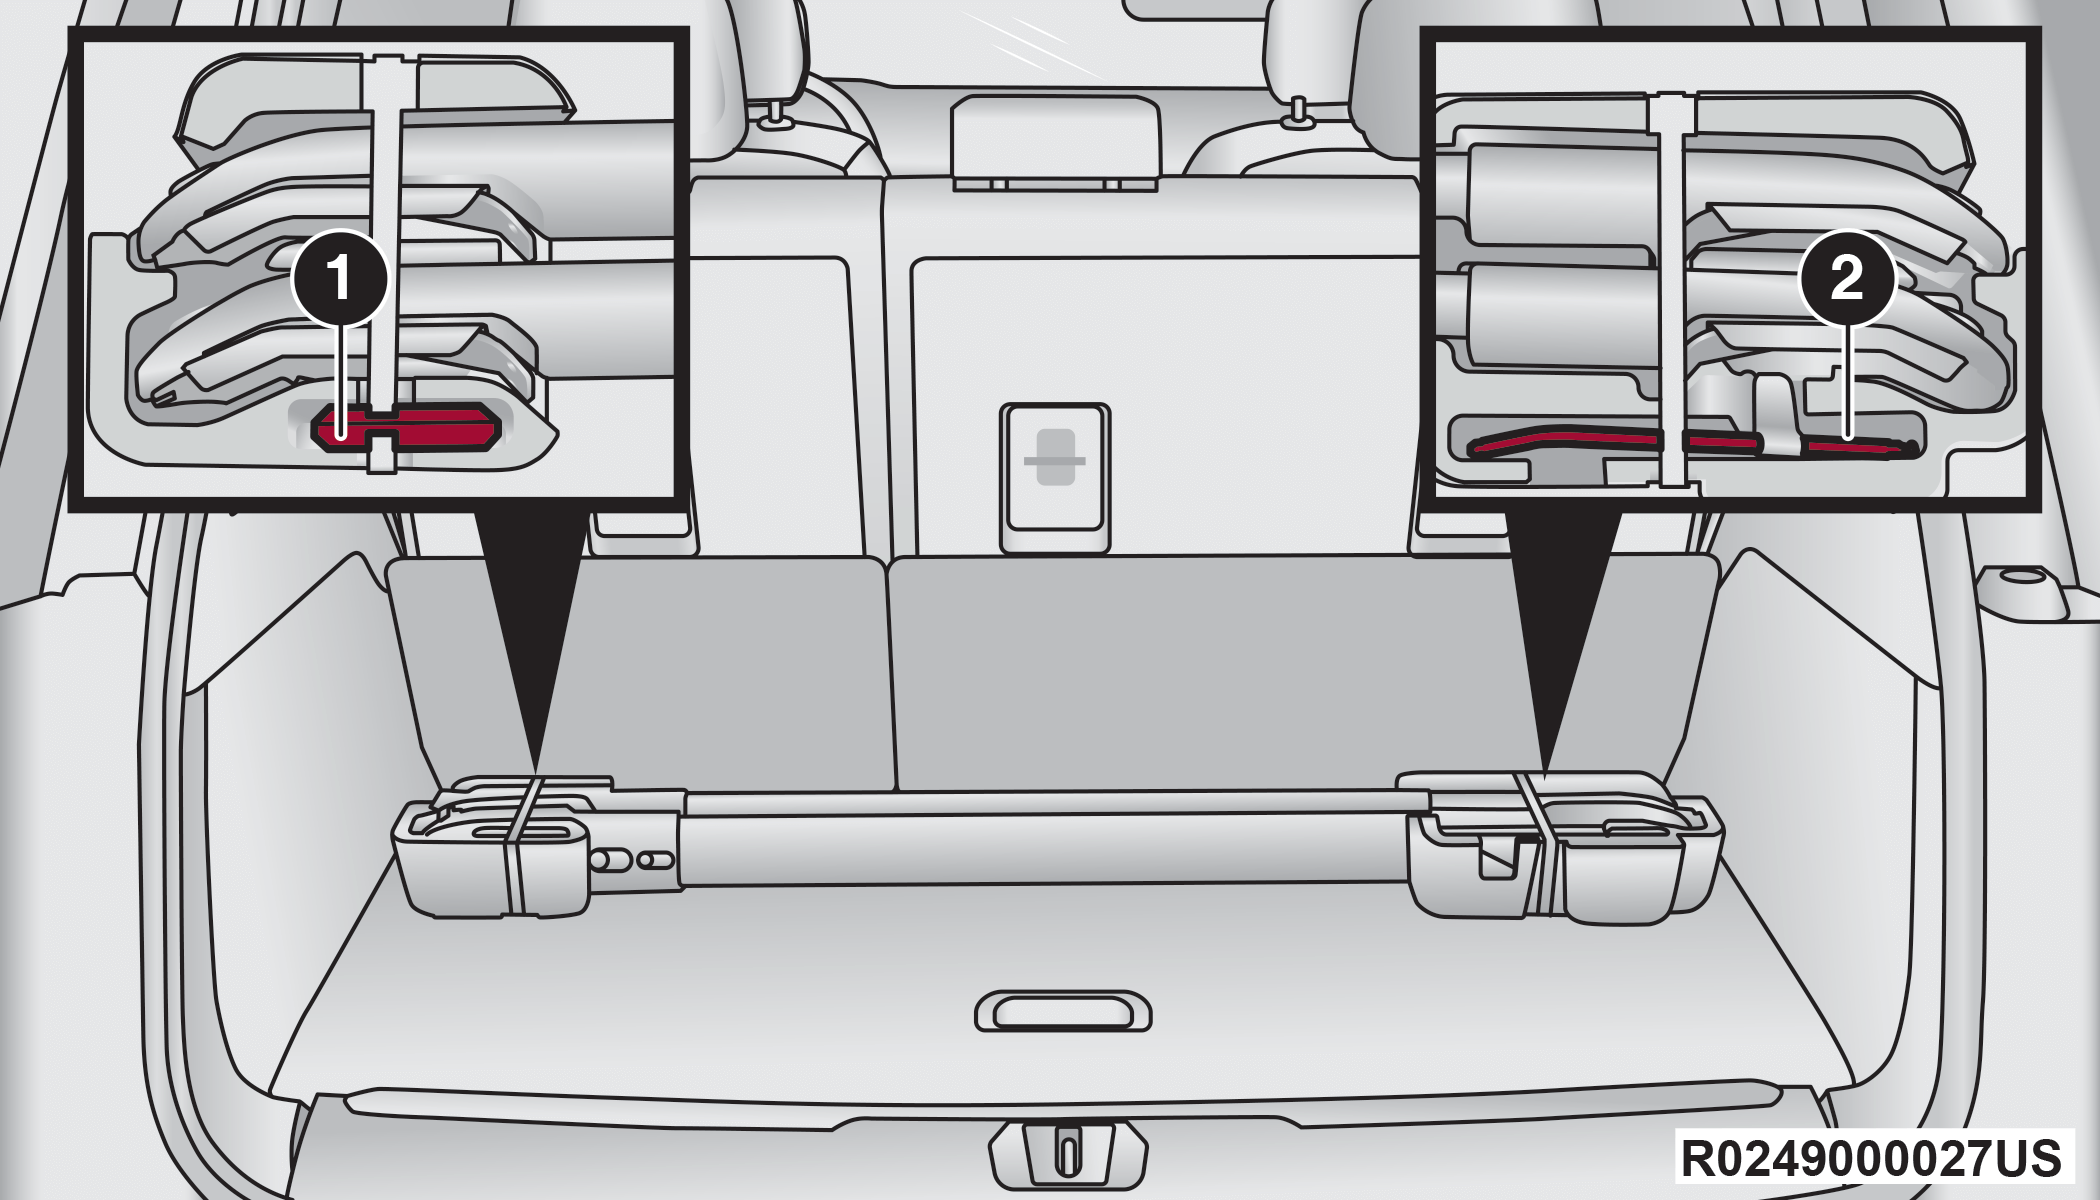
Stowed Crossbars
|
1 — Fastener Screws |
|
2 — Torx Wrench |
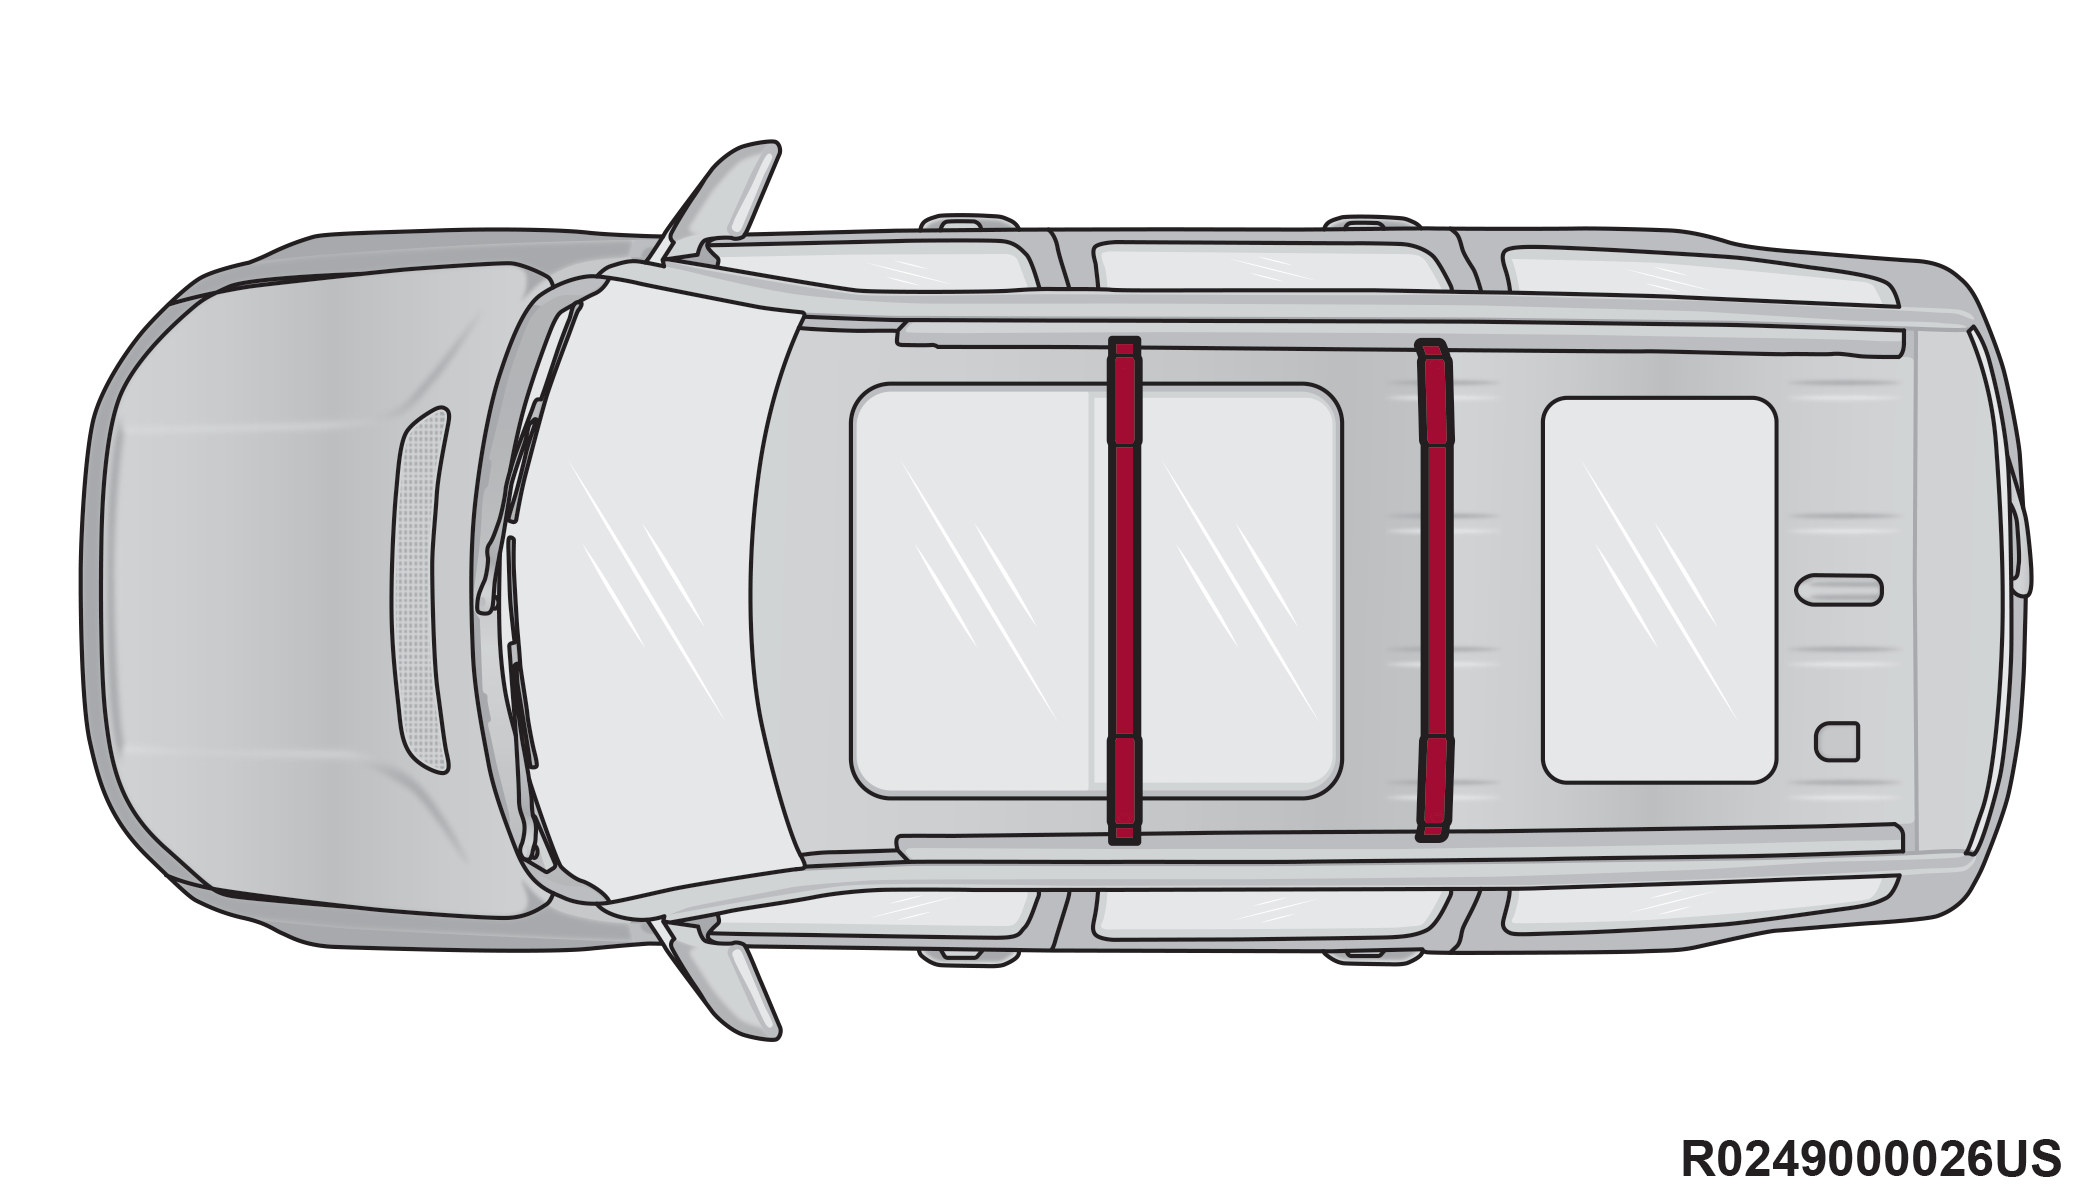
There are three positions that the crossbars can be installed in. There are also tie-down loops next to each crossbar location on both sides of the roof.
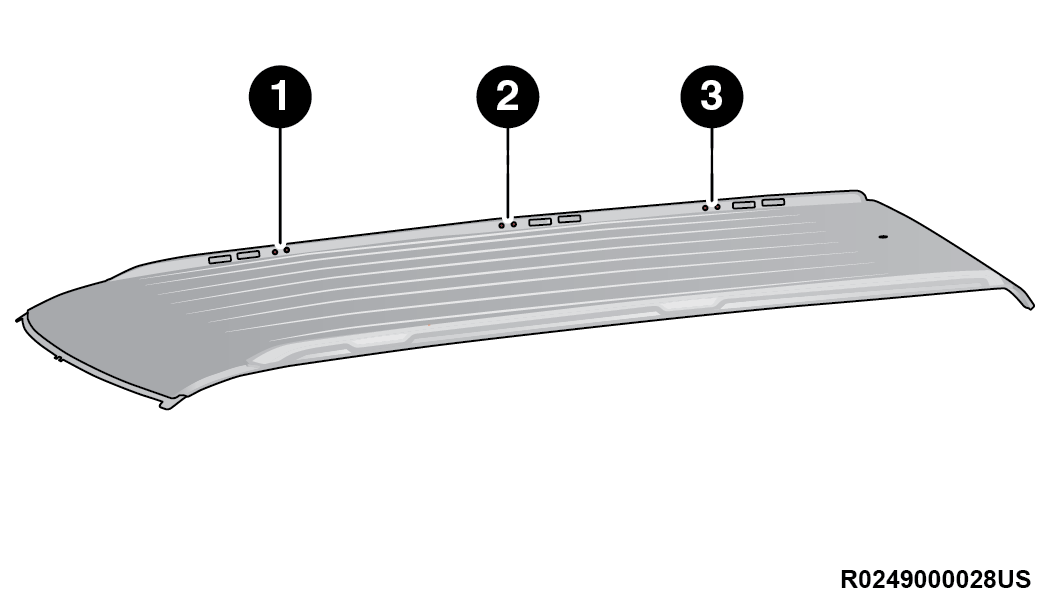
Crossbar Locations
|
1 — Position 1 |
|
2 — Position 2 |
|
3 — Position 3 |
Note:
The crossbars should only be used in positions 1 and 2 or positions 1 and 3. They are not designed to be used in positions 2 and 3.
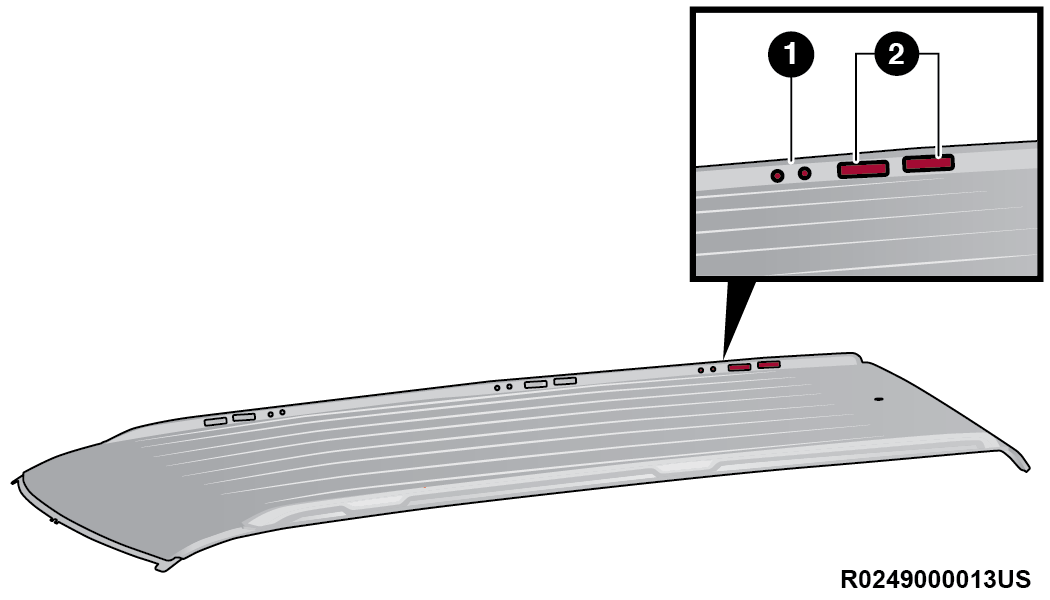
Crossbar and Tie Down Loop Locations
|
1 — Crossbar Installation Location |
|
2 — Tie-Down Loop Locations |
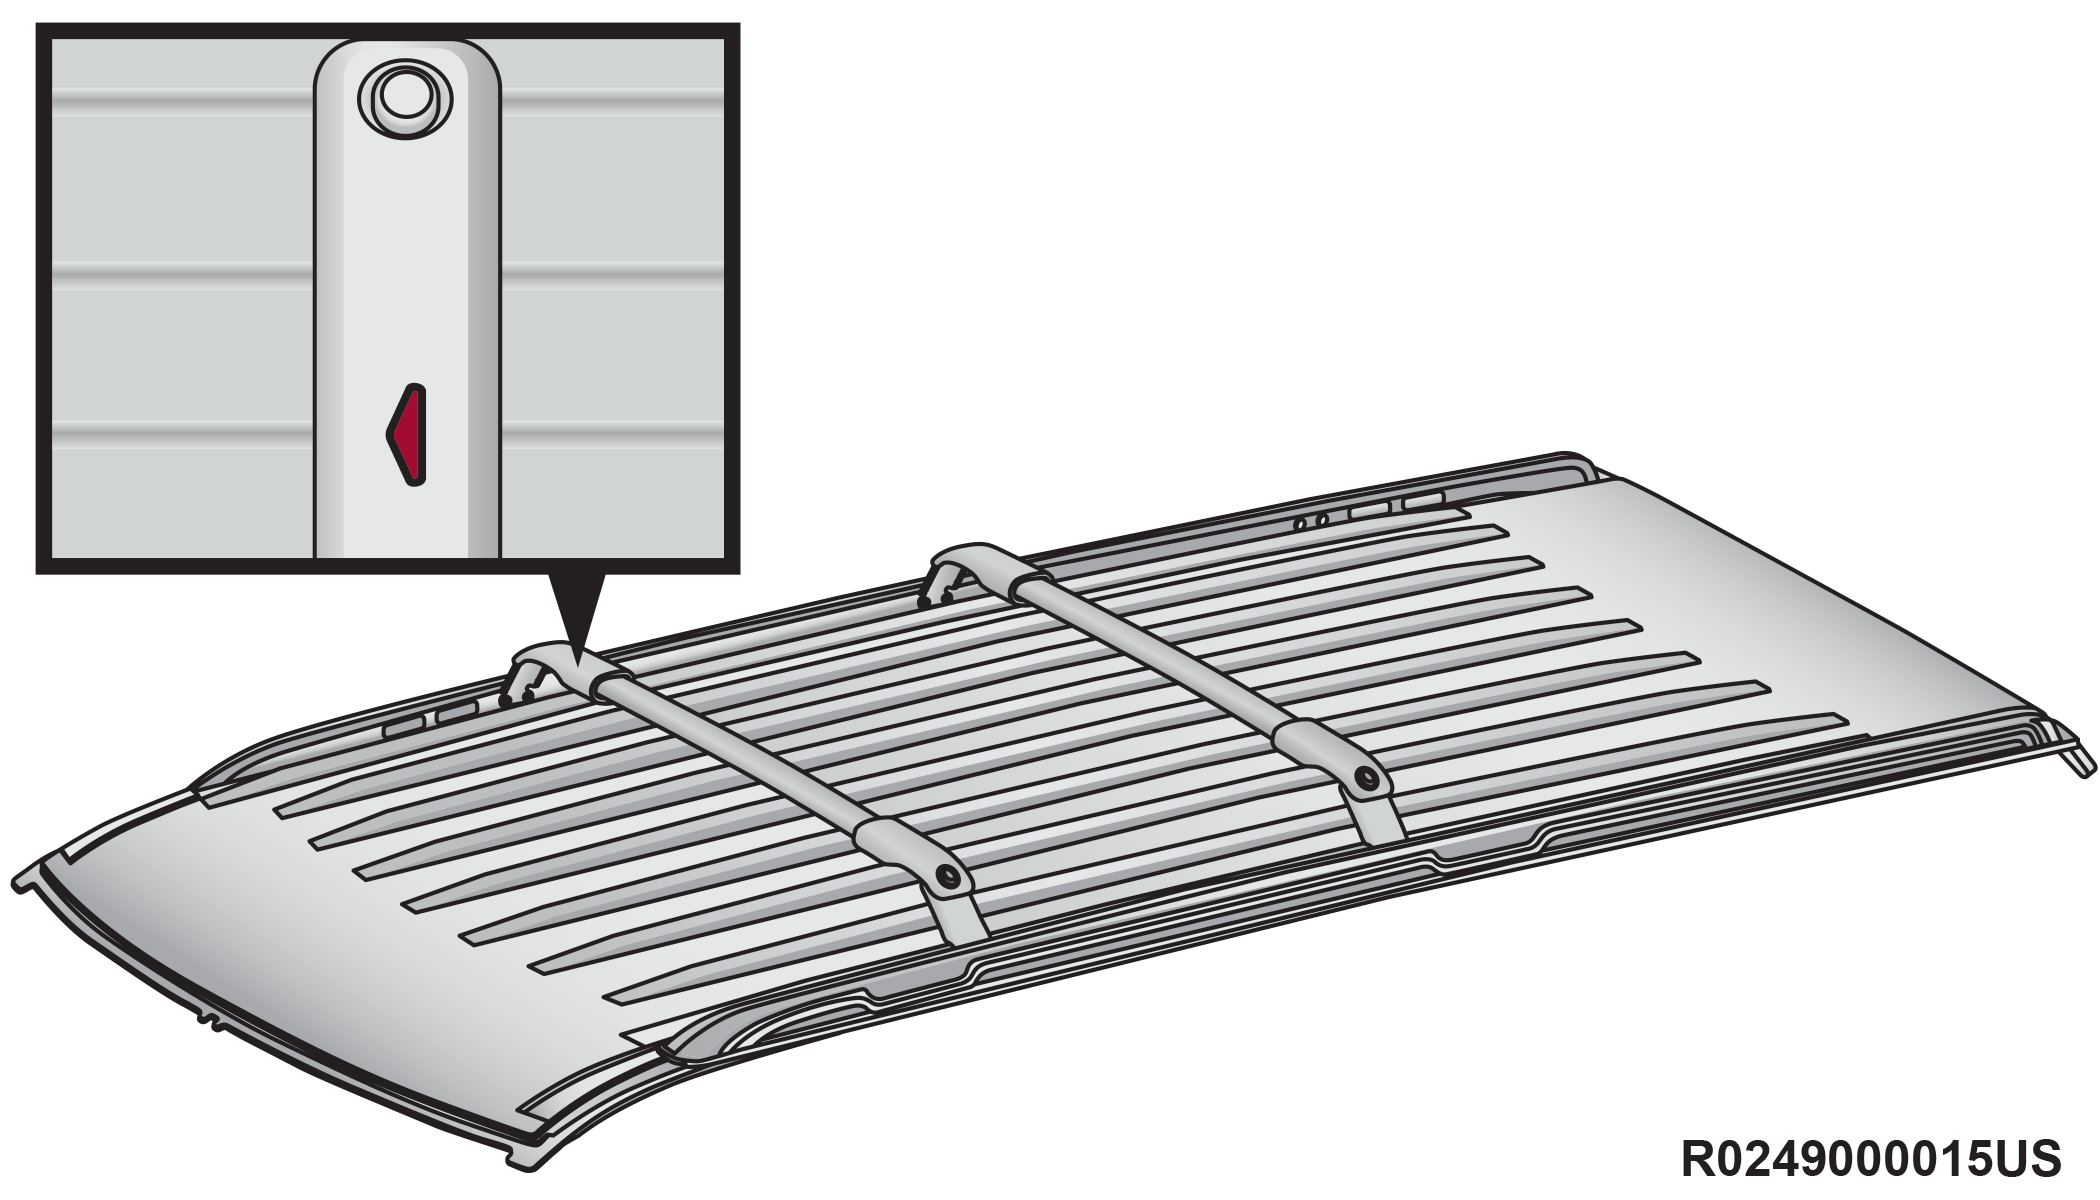
Crossbar Directional Arrow
Note:
There are arrows on top of the crossbars that indicate the direction that they should be installed. The arrows should point forward toward the front of the vehicle.
To install the crossbars, refer to the following procedure:
-
Remove the crossbars from the foam blocks.
-
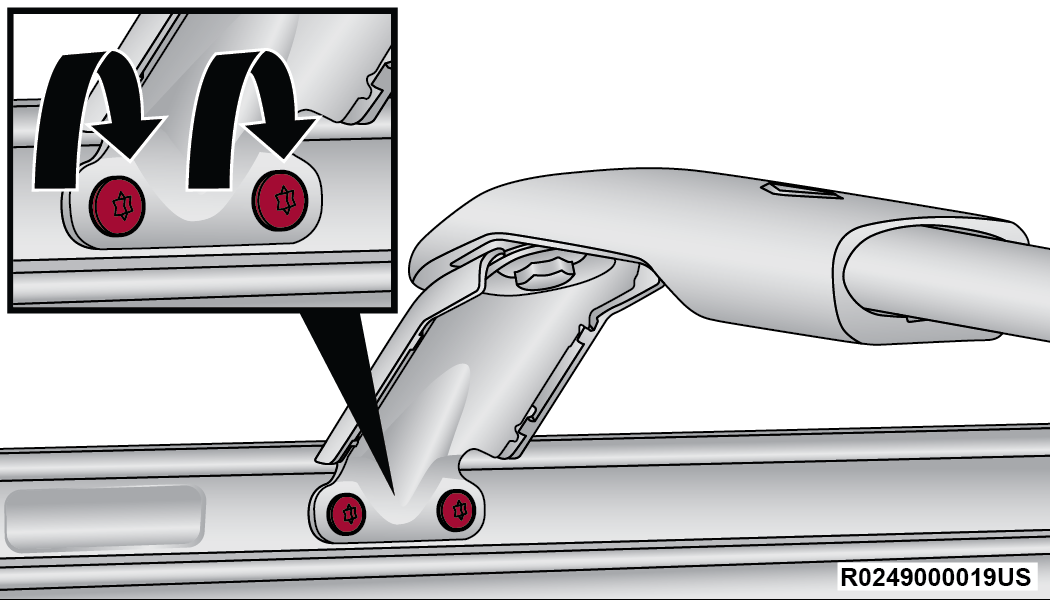
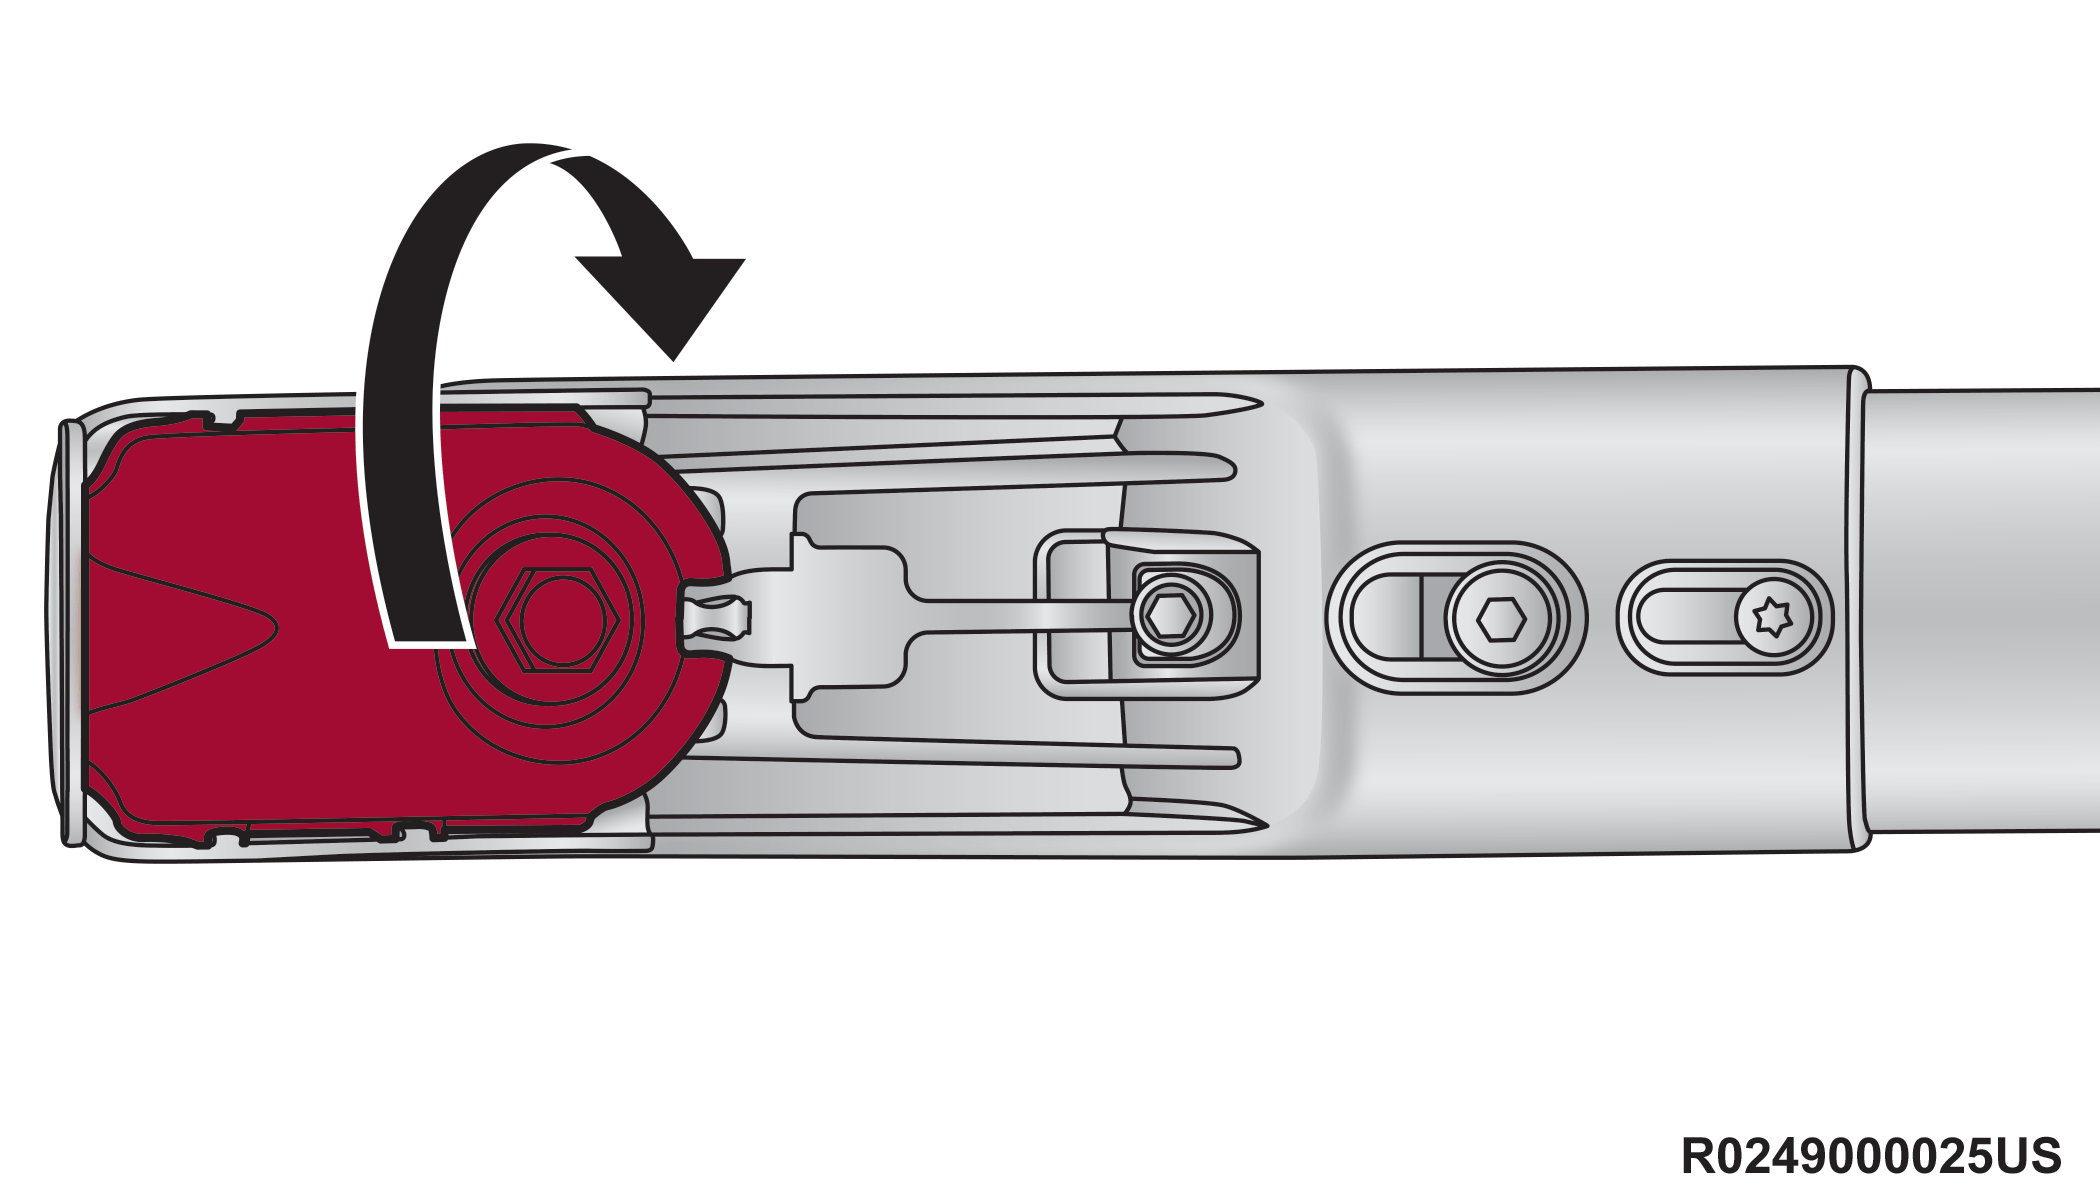
Swivel the outboard stanchion on the crossbar and rotate it 180 degrees around the bolt to the open position. Open the outboard stanchion on the opposite end of the crossbar as well.
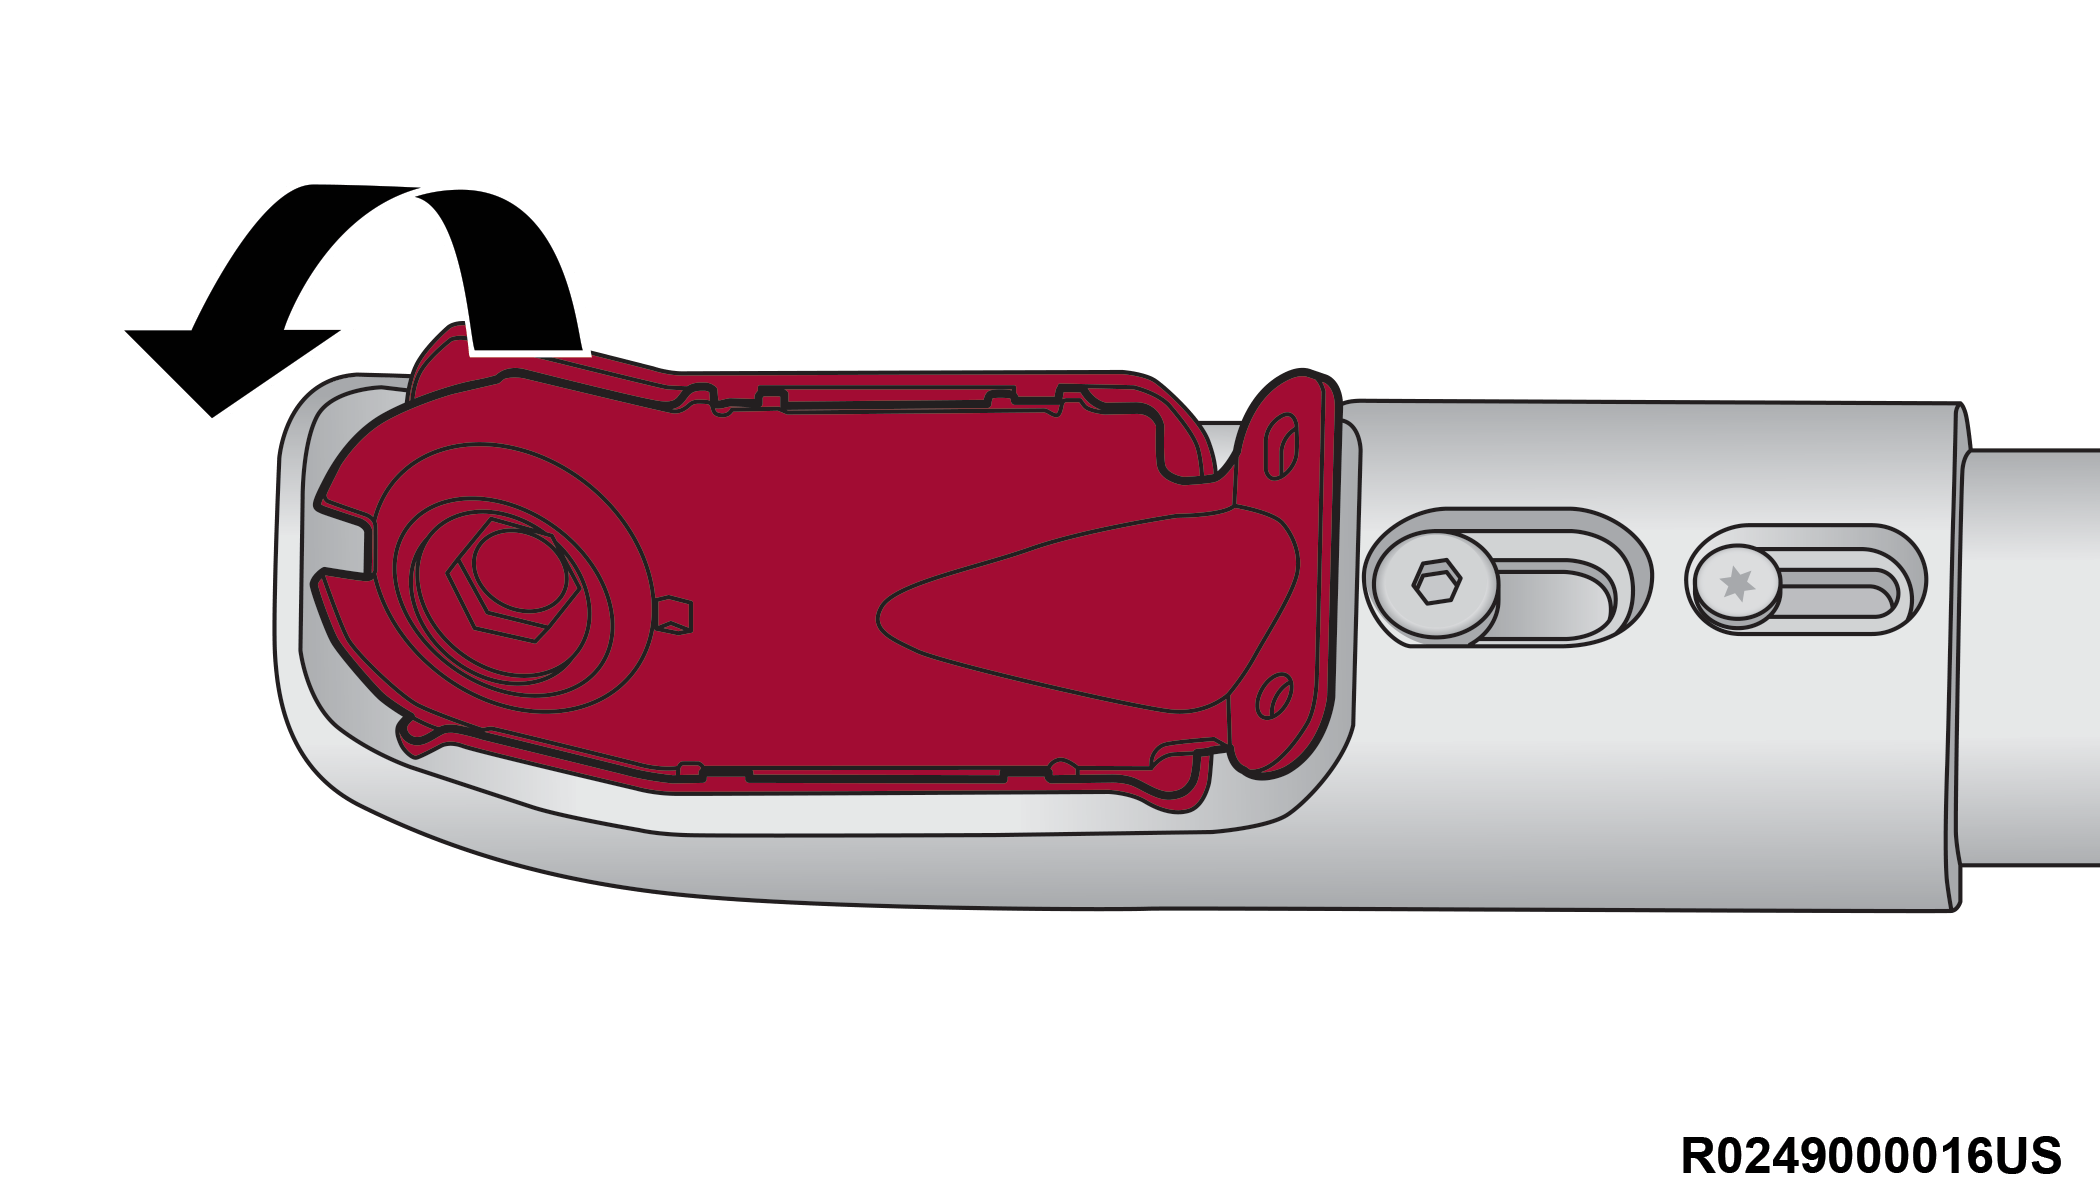
Step 2
Open Outboard Stanchion (Underside Shown)
-
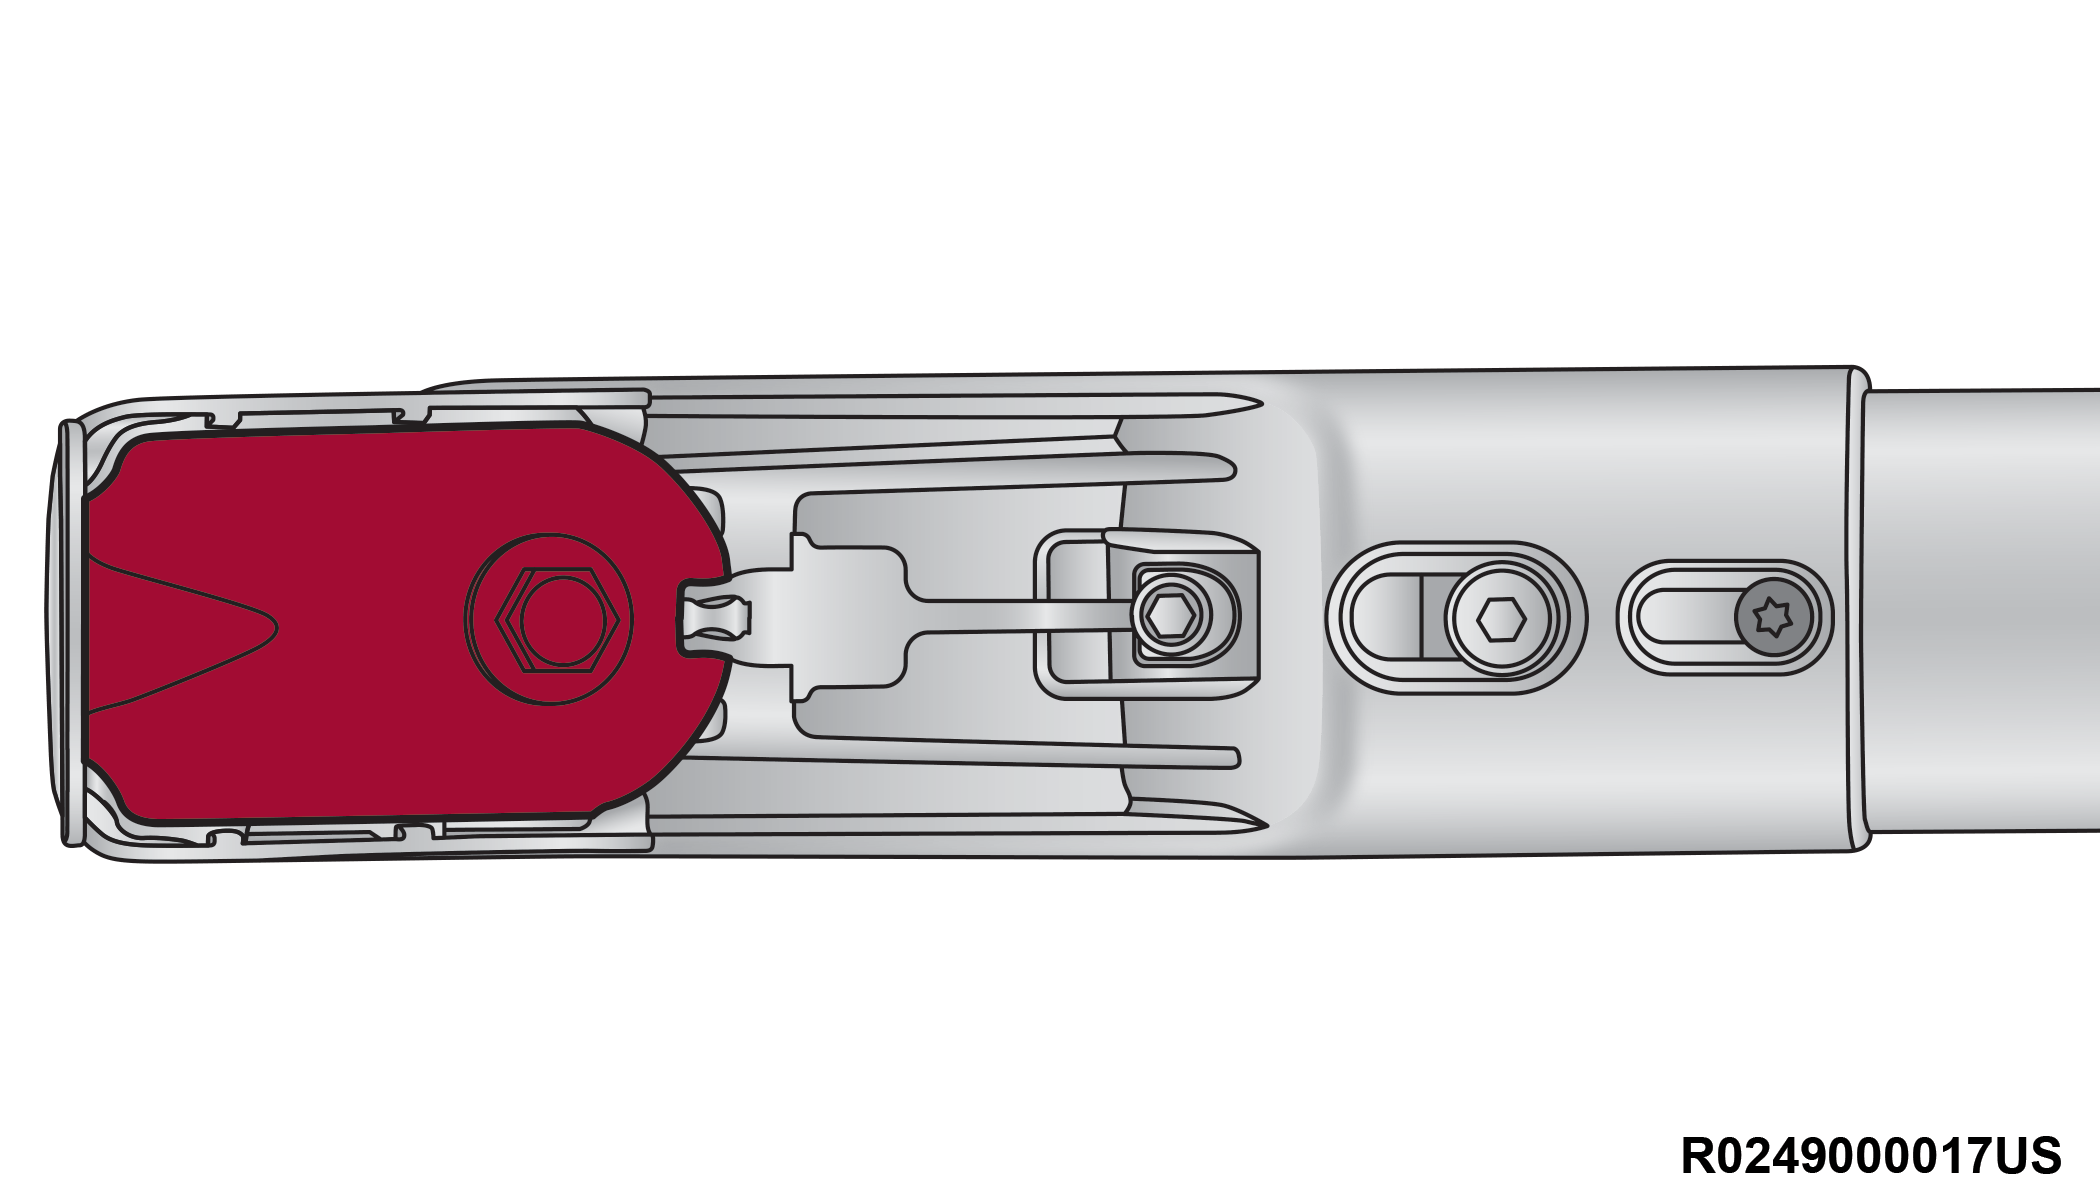
Using the provided torx wrench, loosen the torx bolts on both ends of the crossbar.
Step 3
-
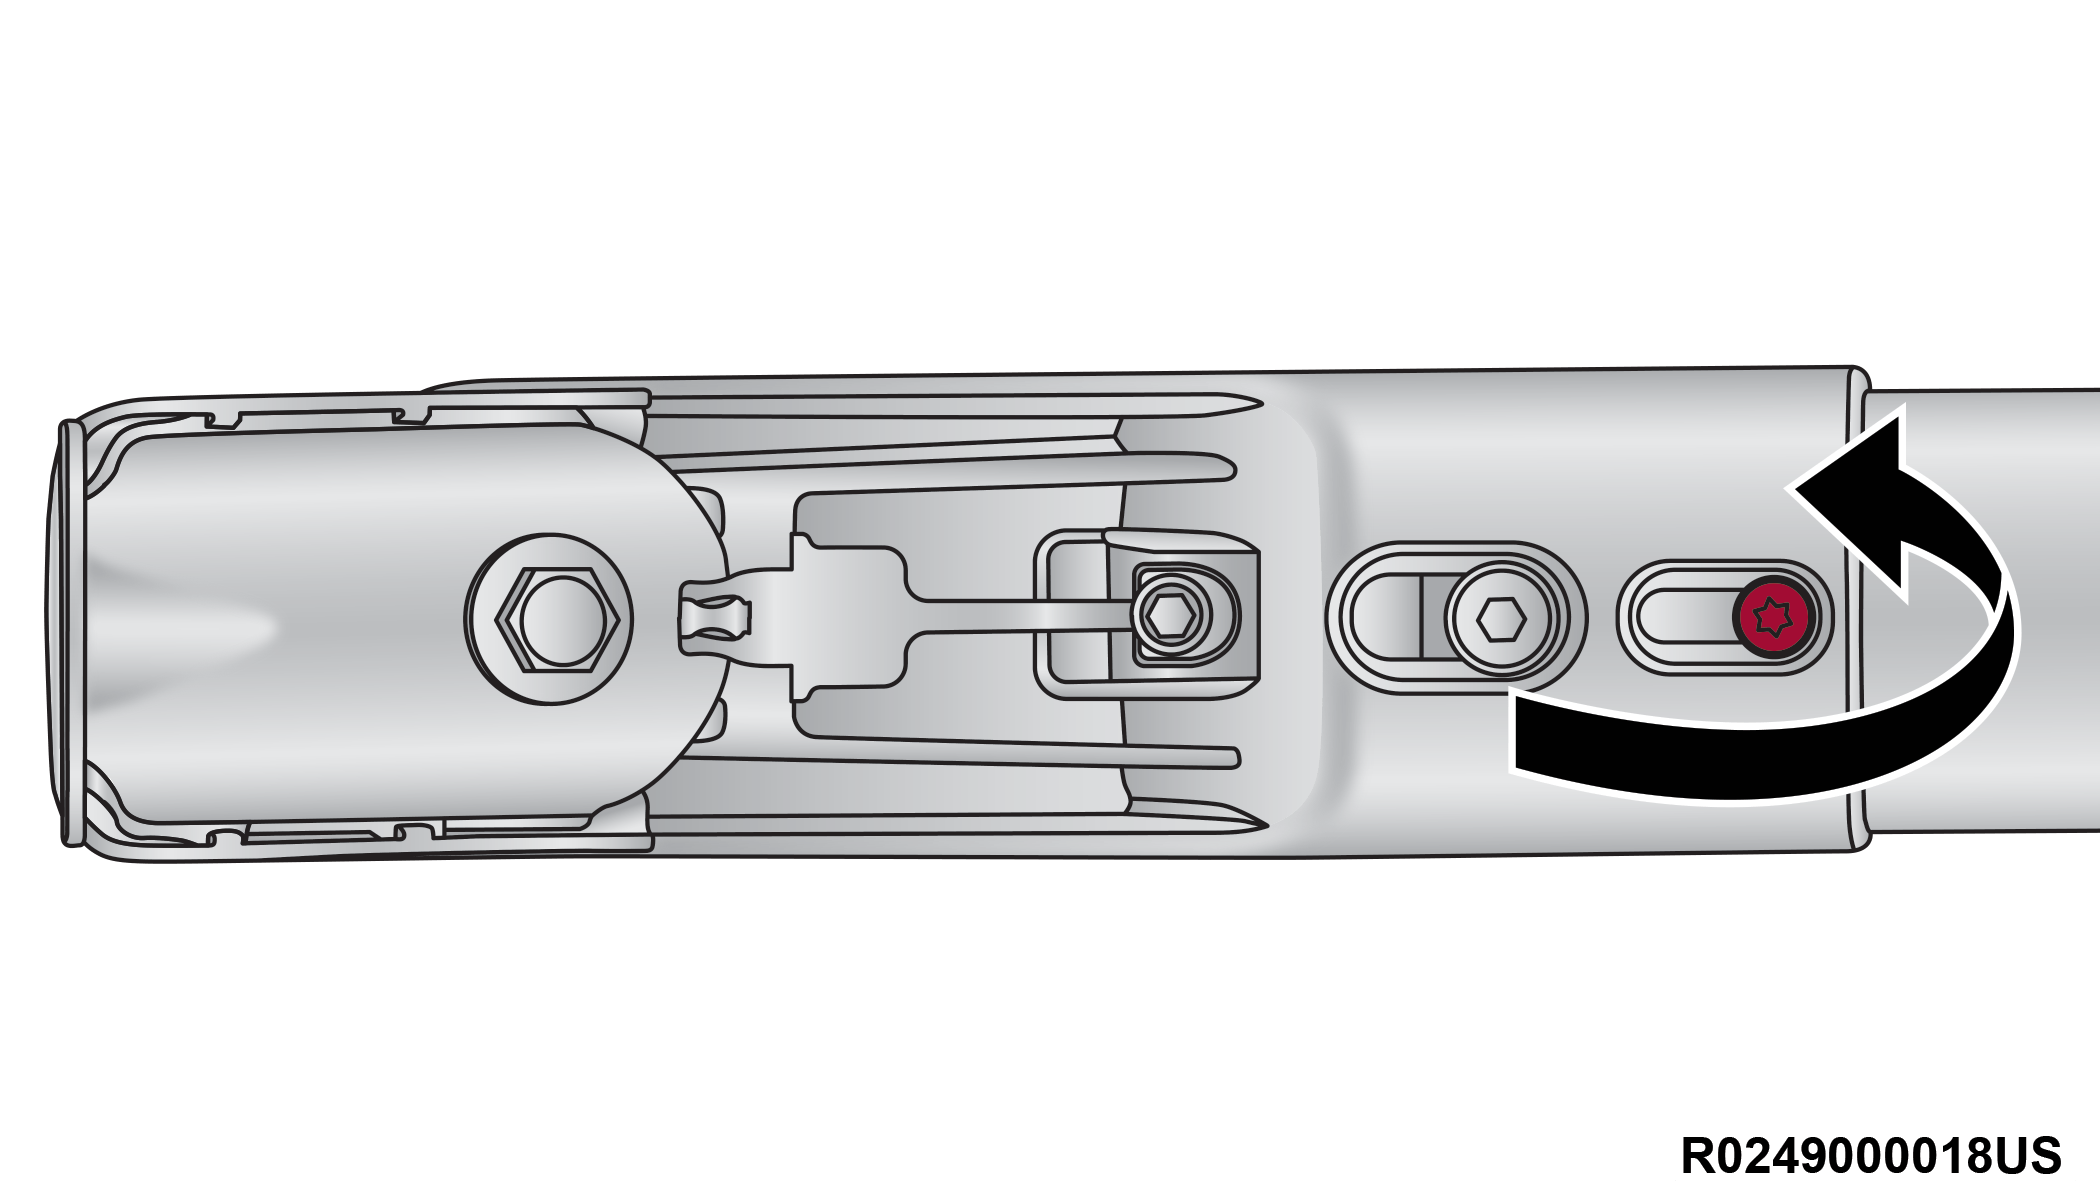
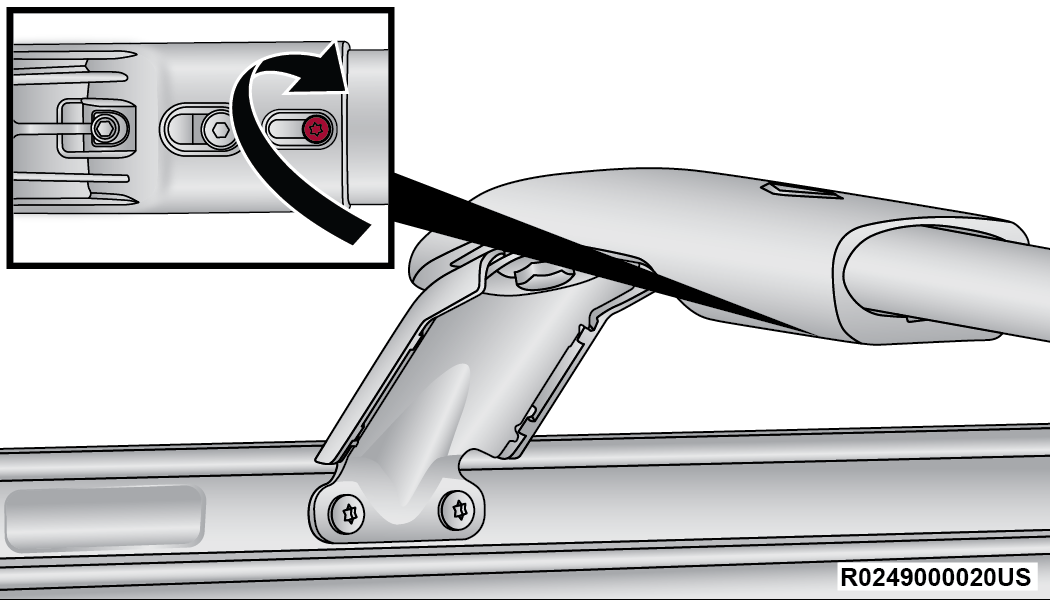
Using the provided wrench and fasteners, bolt the fasteners to the side rail.
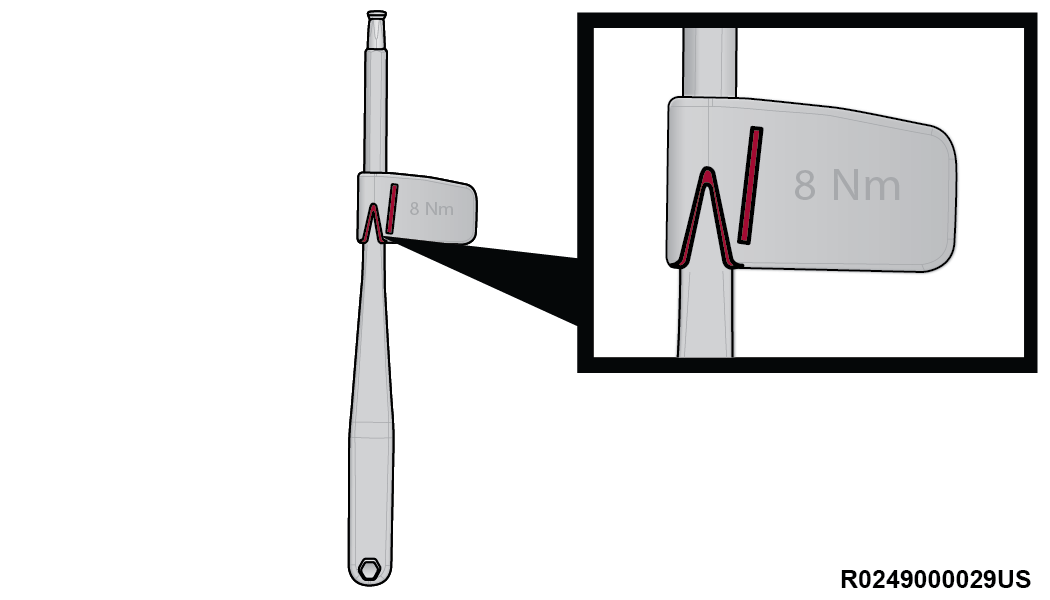
Torque Wrench Indicator
Note:An indicator on the wrench will show when the fastener is tightened to the indicated torque specification. The slanted line will line up with arrow when torquing.
Step 4
-
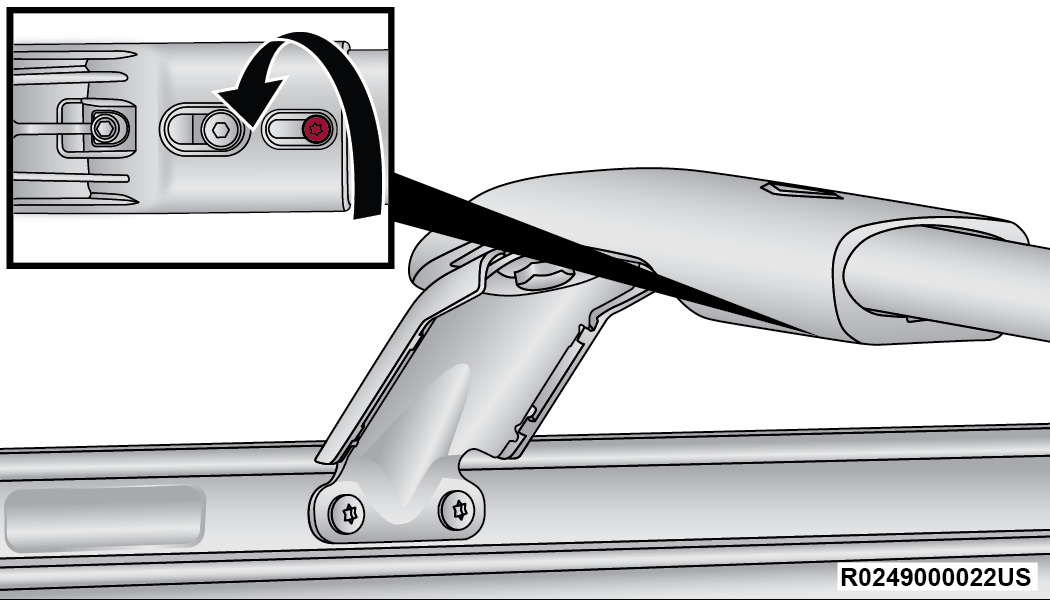
Tighten down the torx head bolts on the inboard stanchion.
Step 5
Note:It is important that the screws are left loose until both sides of the crossbar are secured to the rail.
-
Repeat steps 2-5 for the second crossbar in the desired position.
Installed Crossbars
Warning:
Cargo must be securely tied down before driving your vehicle. Improperly secured loads can fly off the vehicle, particularly at high speeds, resulting in personal injury or property damage. Follow the roof rack cautions when carrying cargo on your roof rack.
CAUTION:
-
To prevent damage to the roof of your vehicle, DO NOT carry any loads on the roof rack without the crossbars installed. The load should be secured and placed on top of the crossbars, not directly on the roof. If it is necessary to place the load on the roof, place a blanket or other protective layer between the load and the roof surface.
-
To avoid damage to the roof rack and vehicle, do not exceed the maximum roof rack load capacity of 150 lb (68 kg). Always distribute heavy loads as evenly as possible and secure the load appropriately.
-
Load should always be secured to crossbars first, with tie down loops used as additional securing points if needed. Tie loops are intended as supplementary tie down points only. Do not use ratcheting mechanisms with the tie loops. Check the straps and thumb wheels frequently to be sure that the load remains securely attached.
-
Long loads that extend over the windshield, such as wood panels or surfboards, or loads with large frontal area should be secured to both the front and rear of the vehicle.
-
Travel at reduced speeds and turn corners carefully when carrying large or heavy loads on the roof rack. Wind forces, due to natural causes or nearby truck traffic, can add sudden upward lift to a load. This is especially true on large flat loads and may result in damage to the cargo or your vehicle.
REMOVING THE CROSSBARS
To remove the crossbars, refer to the following procedure:
-
Using the provided torx wrench, loosen the torx head bolts on the stanchion. Do this on both ends of the crossbar.
Step 1
-
Using the provided wrench, remove the bolts that secure the crossbar to the roof rail. Repeat this on the other end of the crossbar.
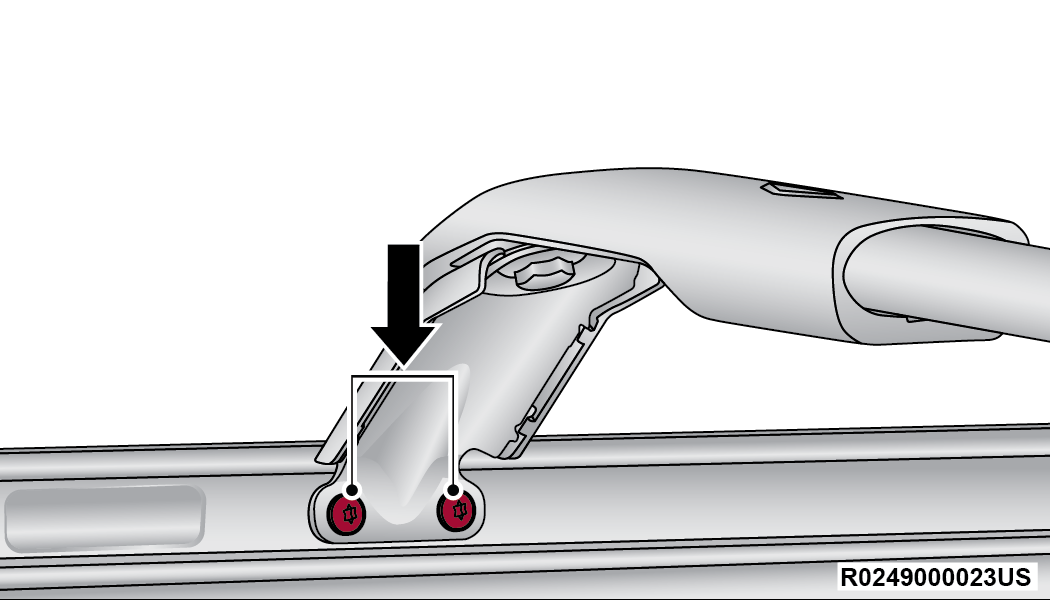
Bolt Location
-
Depress the swing key, and swivel the outboard stanchion 180 degrees back to the stowed position.
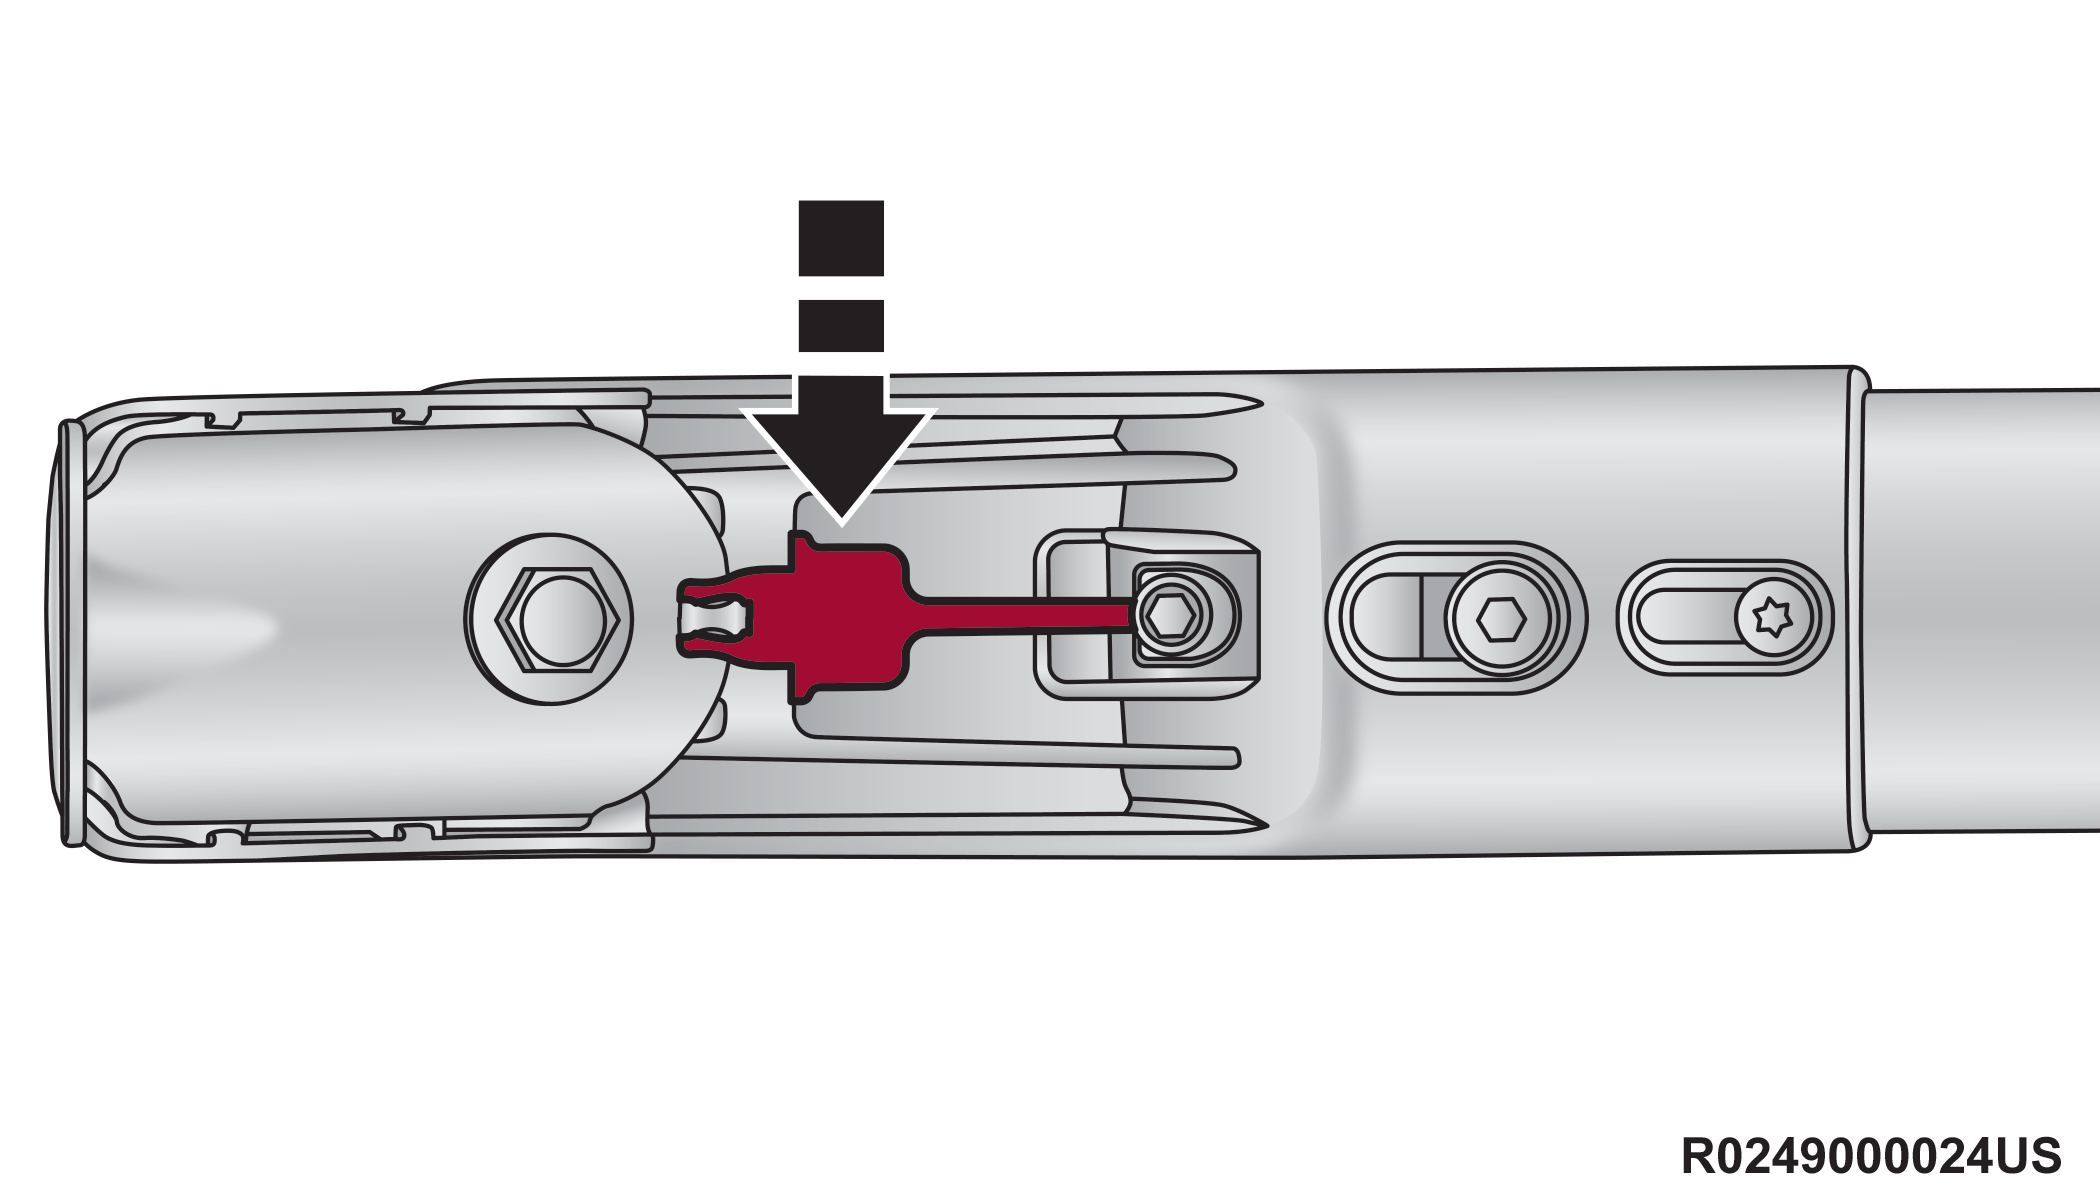
Depress The Swing Key
Step 3
-
Repeat steps 1-3 for the second crossbar.
-
Place the crossbars back into the foam blocks in the rear cargo storage bin.
Download Manual