Bulb Replacement
|
Interior Bulbs |
|
|
** Bulbs only available from an authorized dealer. |
|
|
Bulb Name |
Bulb Number |
|
Automatic Transmission Indicator Lamp |
658 |
|
Heater Control Lamps (2) |
194 |
|
Rocker Switch Indicator Lamp (Rear Window Defogger |
** |
|
Soundbar Dome Lamp |
912 |
|
Exterior Bulbs |
|
|
Bulb Name |
Bulb Number |
|
Headlamps (2) |
H13 |
|
Premium Head Lamps |
LED – (Serviced at an Authorized Dealer) |
|
Sport Front Park/Turn Signal Lamps (2) |
7442NALL |
|
Premium Front Park/Turn Signal Lamps (2) |
LED – (Serviced at an Authorized Dealer) |
|
Base (Overland/Rubicon) Turn Lamp |
7440NA |
|
Base (Overland/Rubicon) Park DRL Lamp |
7443 |
|
Front Side Marker Lamps (2) |
LED – (Serviced at an Authorized Dealer) |
|
Base Fog Lamps |
PSX24W |
|
Premium Fog Lamps |
LED – (Serviced at an Authorized Dealer) |
|
Rear Premium LED Tail Lamps |
LED – (Serviced at an Authorized Dealer) |
|
Rear Base Tail Lamp Stop/Tail/Turn Bulb |
3157 |
|
Rear Base Tail Lamp Backup Bulb |
7440 |
|
Rear Base Tail Lamp Side Marker |
LED – (Serviced at an Authorized Dealer) |
|
Center High Mounted Stop Lamp |
LED – (Serviced at an Authorized Dealer) |
|
License Lamp |
LED – (Serviced at an Authorized Dealer) |
|
Note: Numbers refer to commercial bulb types that can be purchased from an authorized dealer. If a bulb needs to be replaced, visit an authorized dealer or refer to the applicable Service Manual. |
|
BULB REPLACEMENT
Note:
Lens fogging can occur under certain atmospheric conditions. This will usually clear as atmospheric conditions occur to allow the condensation to change back into a vapor. Turning the lamps on will usually accelerate the clearing process.
HALOGEN HEADLAMPS
Note:
We advise referring to an authorized dealer for service.
-
Open hood and support using prop rod.
-
Remove the front grille. Turn the retainers along the top a quarter turn counterclockwise and remove.
-
Pull the bottom of the grille away, starting at one side and working toward the other.
-
Remove the three screws holding the headlamp to the vehicle.
-
Remove lamp from the vehicle.
-
Remove the lamp from the collar.
-
Grasp the bulb and turn a quarter turn counterclockwise.
-
Pull the bulb from the housing.
-
Push connector locking tab to the unlock position.
-
Remove connector from bulb.
-
Push connector onto new bulb base, and push the connector locking tab to the lock position.
CAUTION:
Do not touch the new bulb with your fingers. Oil contamination will severely shorten bulb life. If the bulb comes in contact with any oily surface, clean the bulb with rubbing alcohol.
-
Reinstall bulb housing. Rotate the bulb a quarter turn clockwise.
FRONT PARK/TURN SIGNAL
Note:
We advise referring to an authorized dealer for service.
-
Remove the front wheel liner fasteners to access bulb sockets.
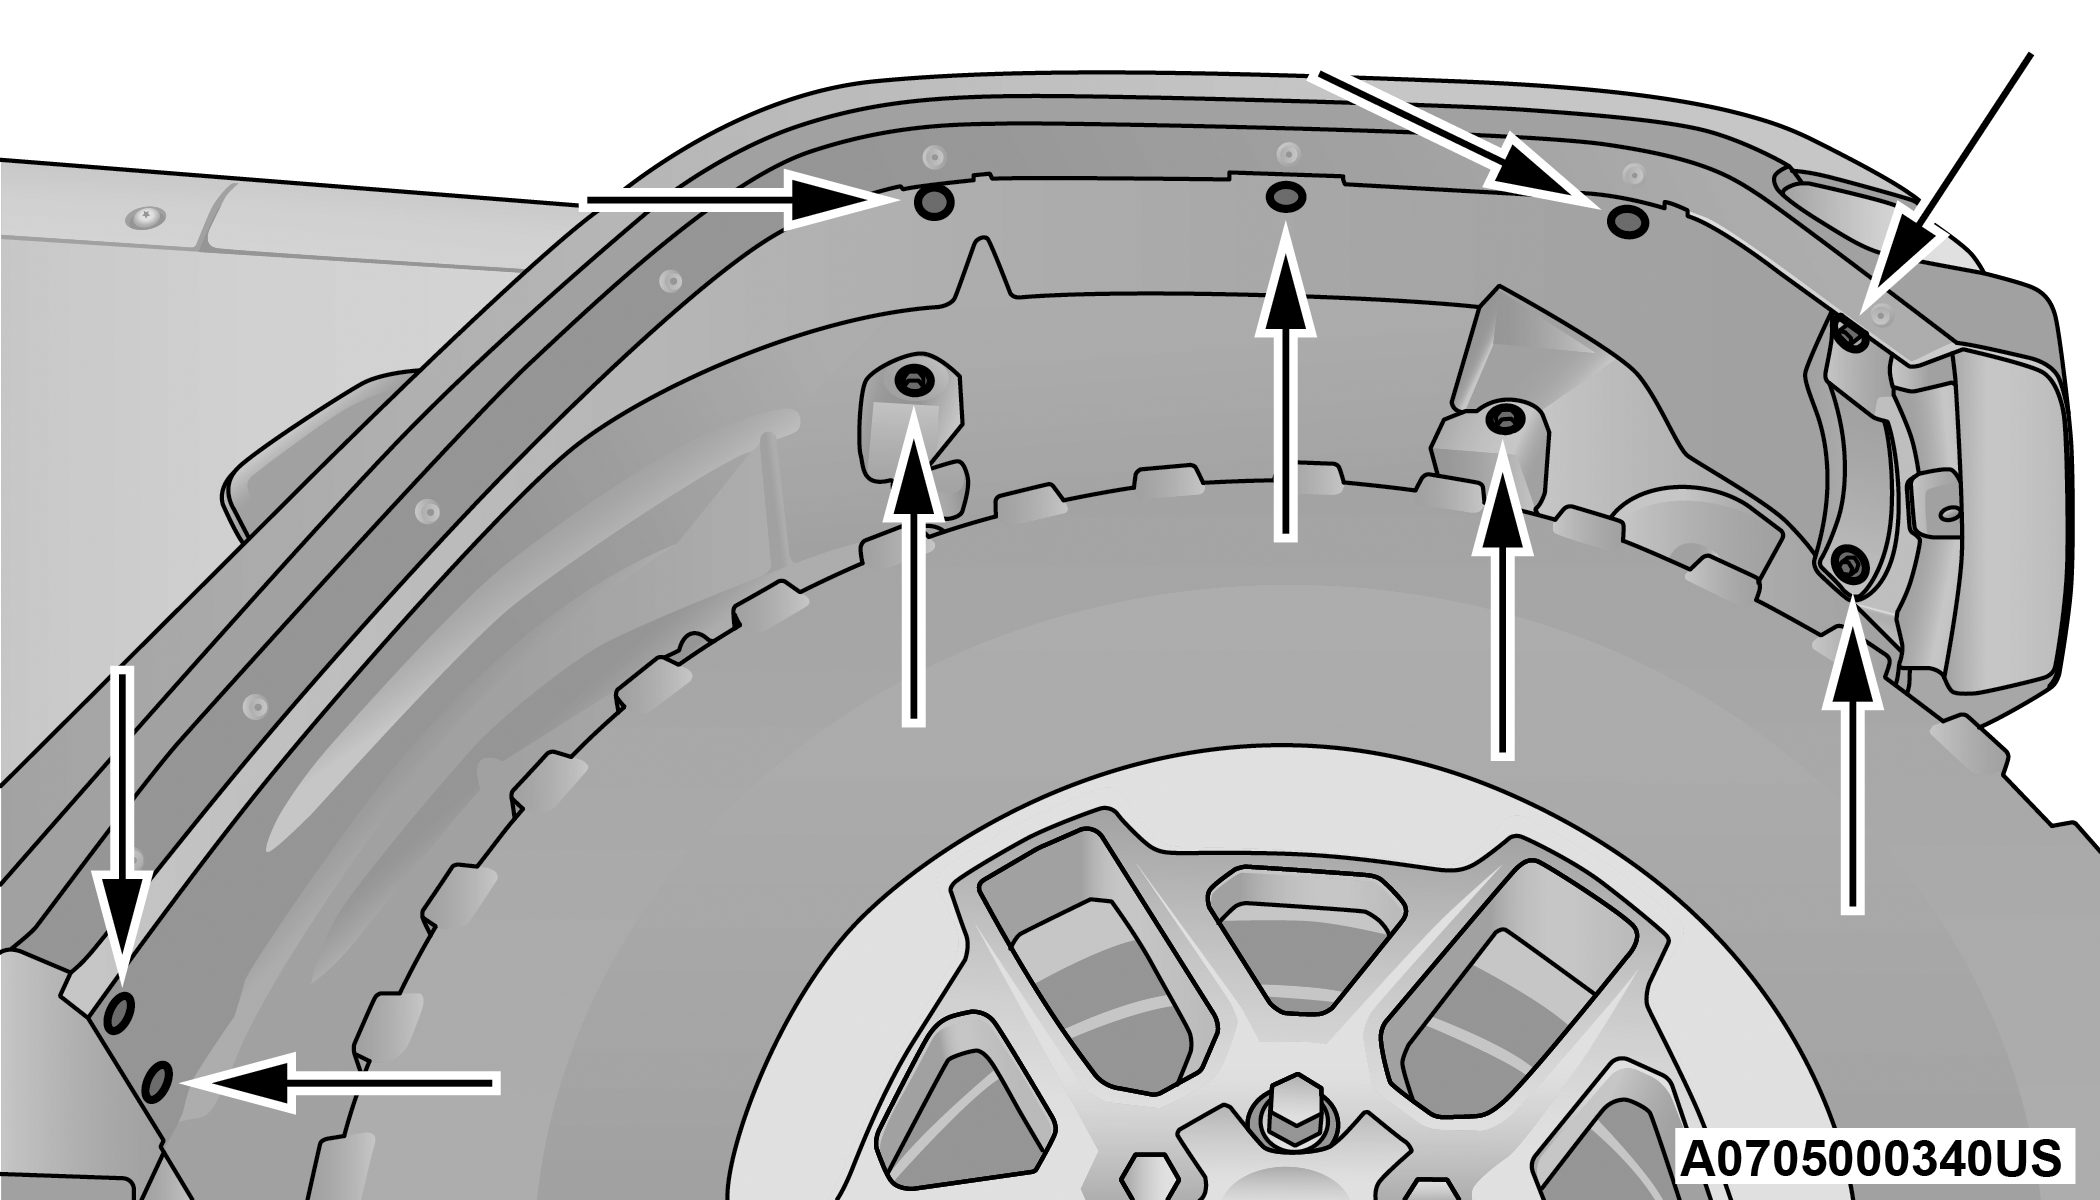
Wheel Liner
-
Turn the socket assembly a quarter turn counterclockwise and remove from housing. Pull the bulb straight from the socket to replace.
LED FRONT SIDE MARKER
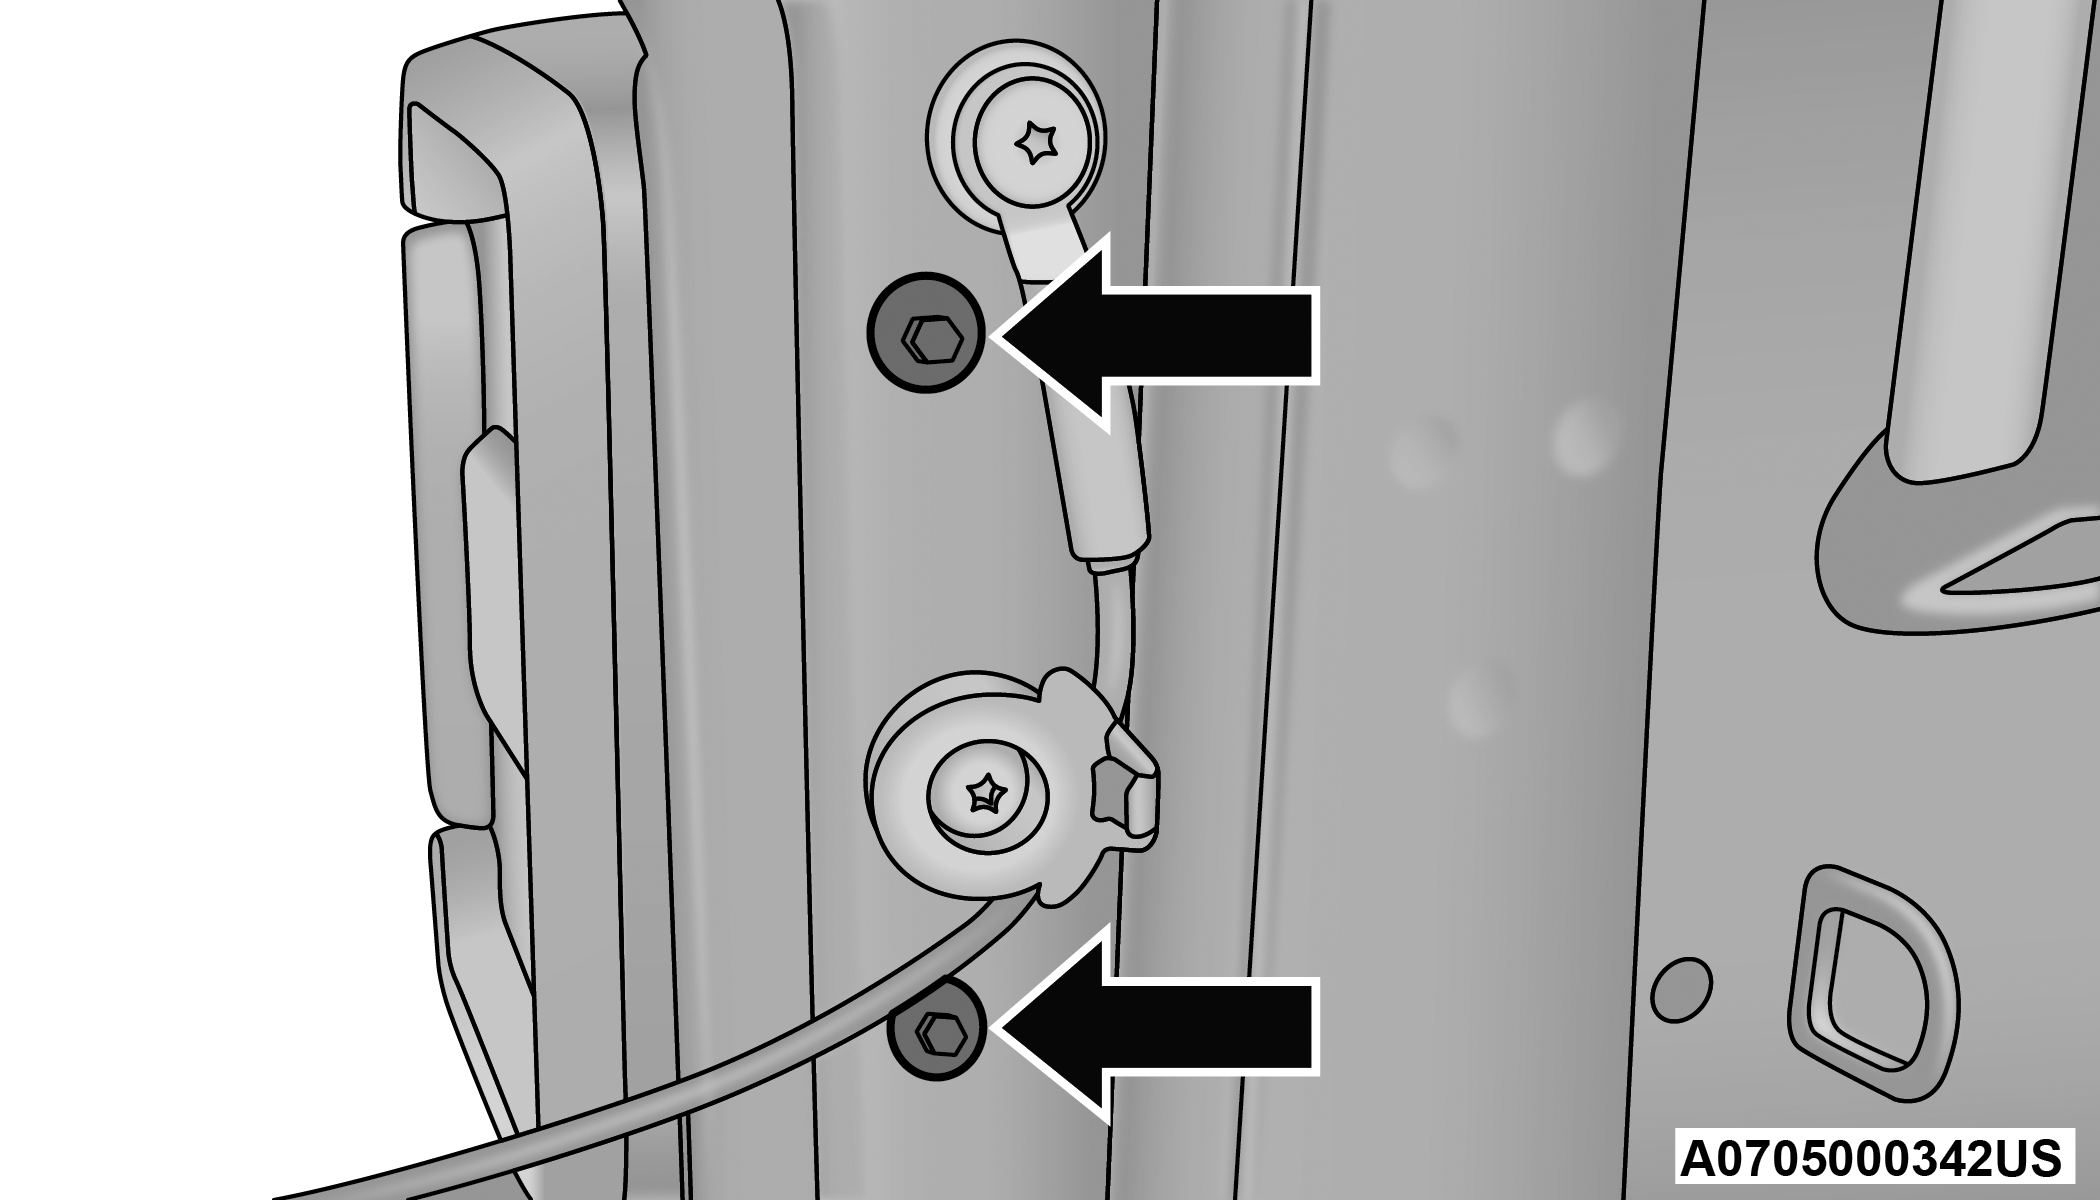
-
Remove the front wheel liner fasteners to access side maker screw and electrical connector.
-
Remove fastening screw in the back of the front side maker assembly and disconnect electrical connector.
-
Remove and replace LED front side marker light assembly.
HALOGEN FRONT FOG LAMP
Note:
We advise referring to an authorized dealer for service.
-
Reach under the vehicle to access the back of the front fog lamp.
-
Disconnect the wire harness connector from the front fog lamp connector receptacle.
-
Firmly grasp the bulb by the two latch features and squeeze them together to unlock the bulb from the back of the front fog lamp housing.
-
Pull the bulb straight out from the keyed opening in the housing and then connect the replacement bulb.
CAUTION:
Do not touch the new bulb with your fingers. Oil contamination will severely shorten bulb life. If the bulb comes in contact with any oily surface, clean the bulb with rubbing alcohol.
LED Front Fog Lamp
If your vehicle is equipped with LED fog lamps they are replaced as an assembly.
REAR TAIL, STOP, TURN SIGNAL, AND BACKUP LAMP
-
Remove the two screws that pass through the bed sheet metal.
Tail Lamp Screws
-
Pull the outboard side of the lamp rearward, far enough to unsnap the two receptacles on the outboard side of the lamp housing, from the two plastic snap post retainers in the outer box side panel.
-
Remove the screws from assembly bracket to access the three bulb sockets.
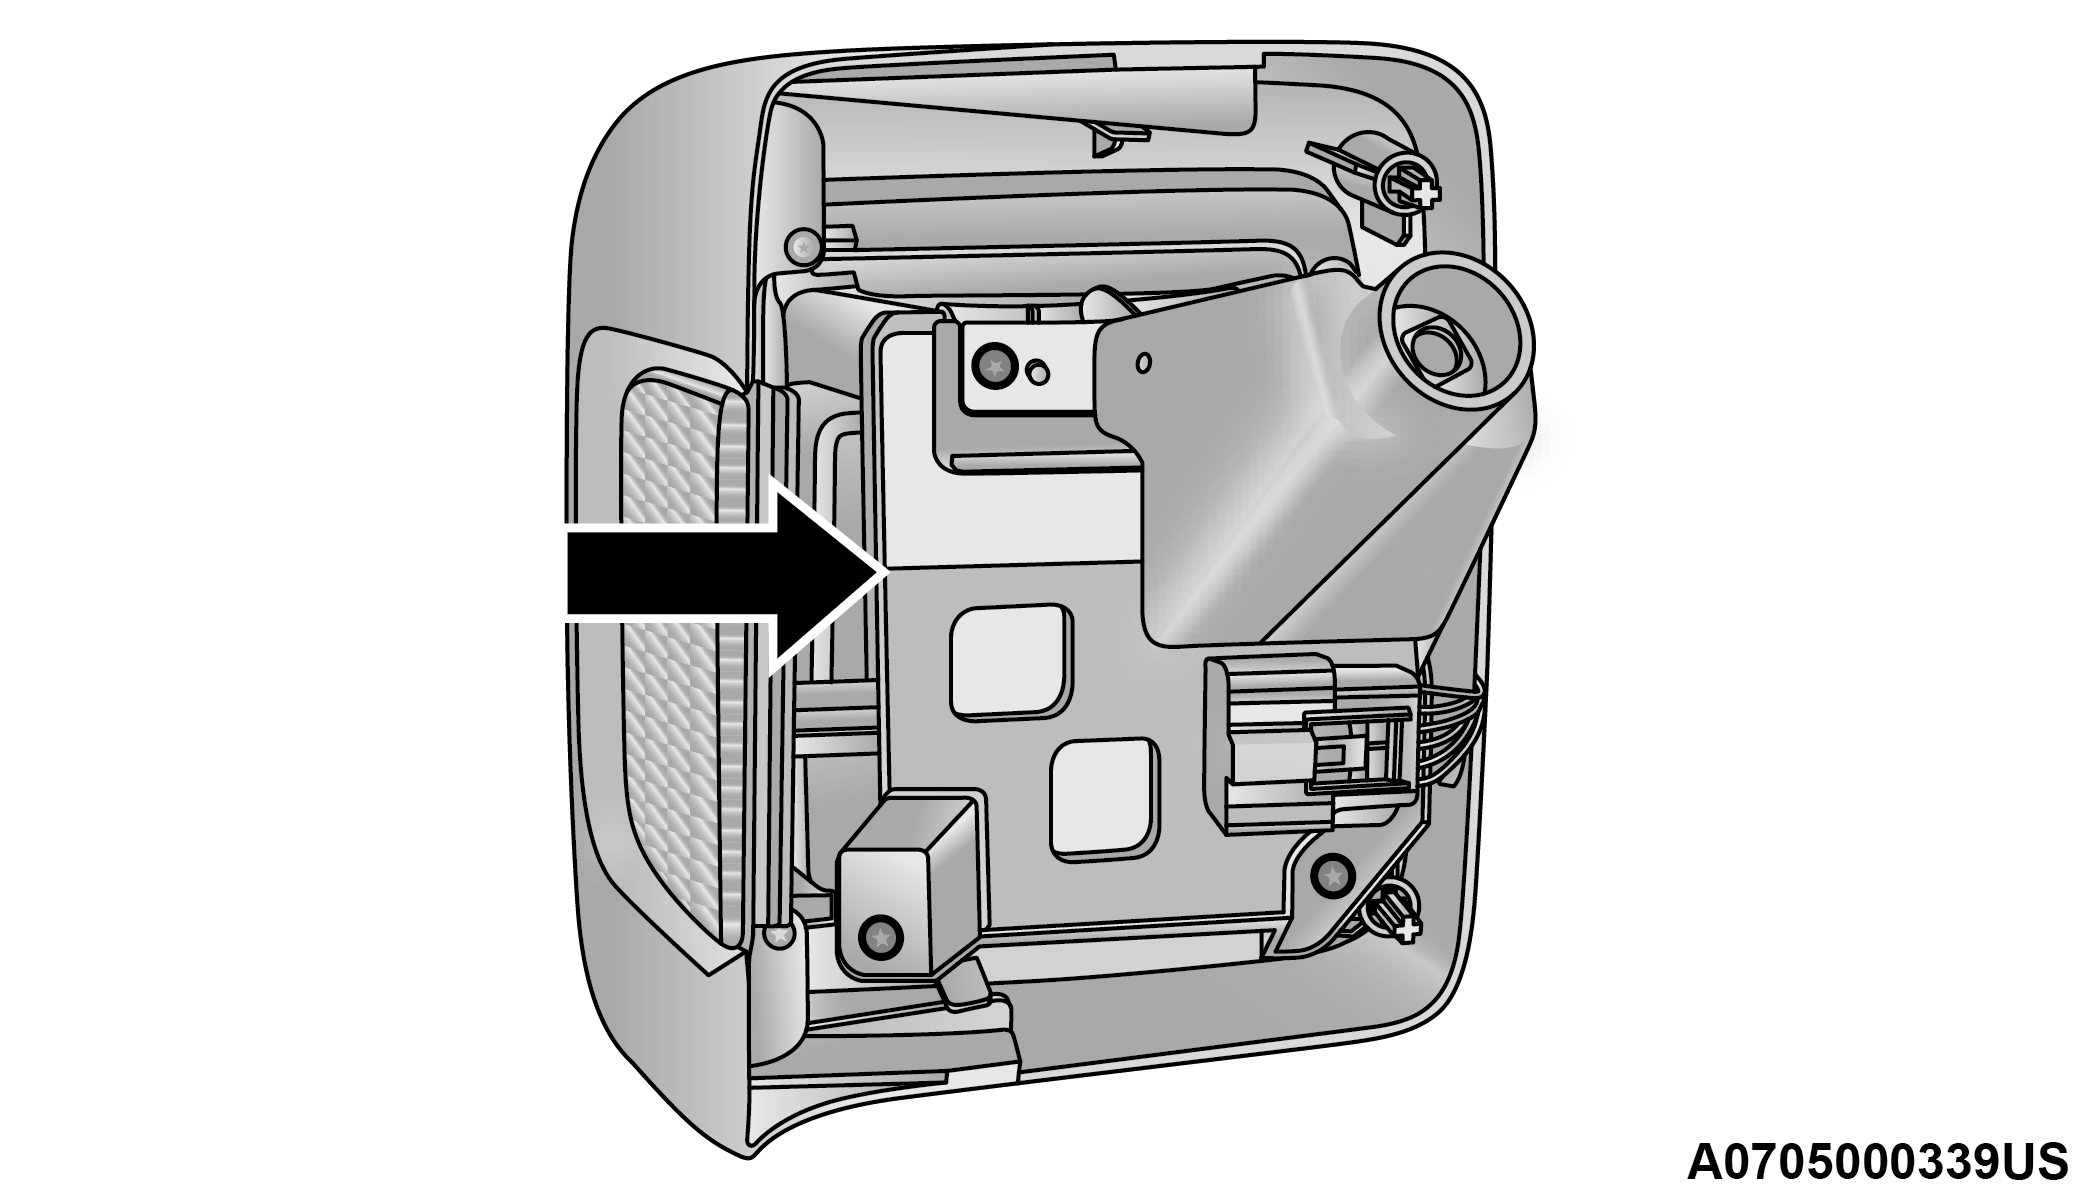
Assembly Bracket
-
Rotate the appropriate socket a quarter turn counterclockwise, then remove it from the housing.
-
Pull the bulb straight from the socket to replace.
CENTER HIGH MOUNTED STOP LAMP (CHMSL)
The stop lamp is mounted on the tailgate. If service is needed, obtain the LED assembly from an authorized dealer.
LICENSE PLATE LAMPS
See an authorized dealer to replace these LED assemblies.