To simplify mounting of a camper unit with an overhang, the tailgate can be removed.
The electric connector at the bottom of the tail- gate must be disconnected prior to removing the tailgate.
Disconnecting The Rear Camera And Remote Keyless Entry
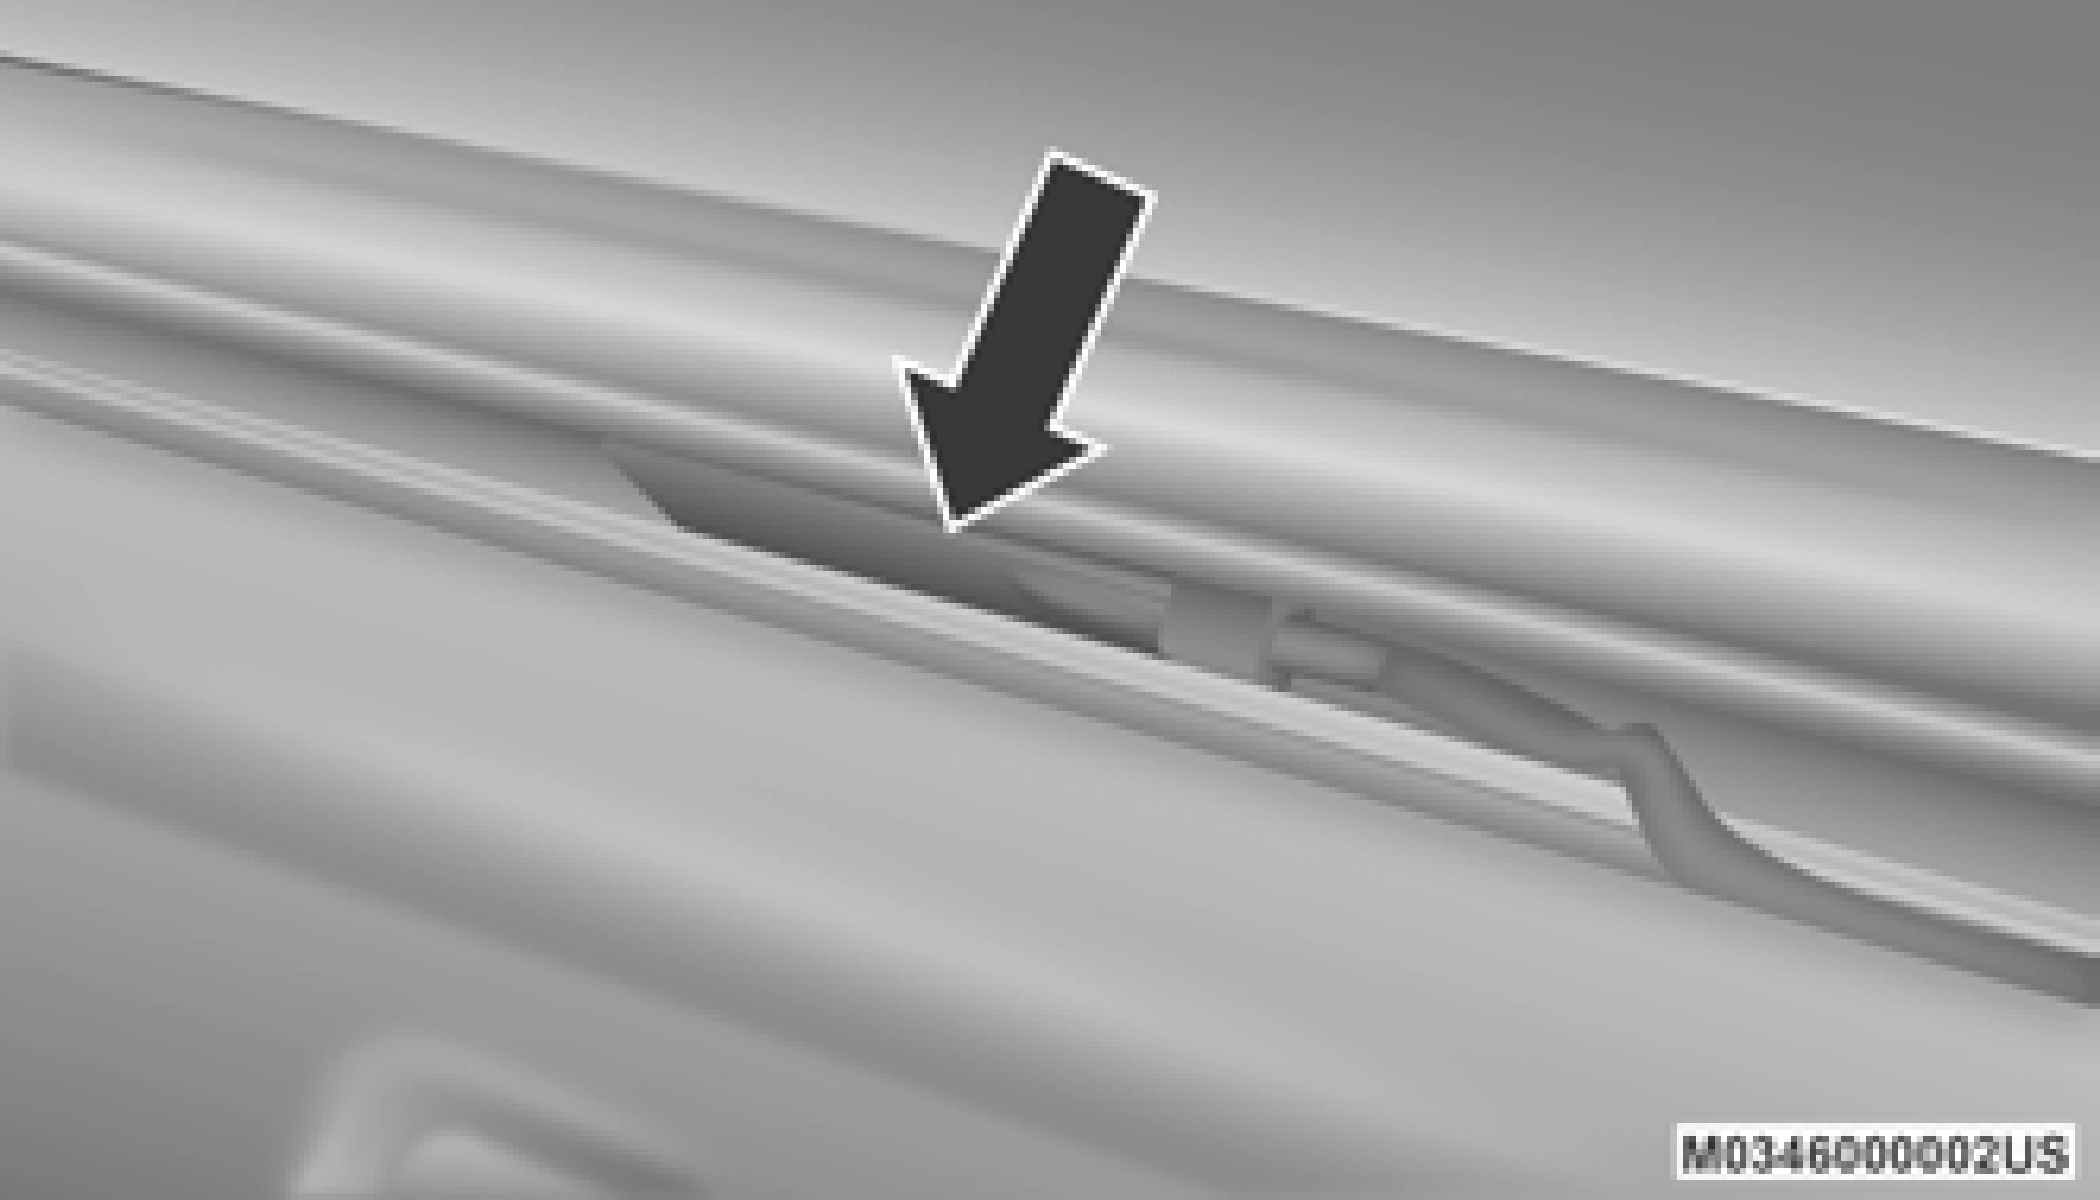
Open the tailgate to access the rear camera or Remote Keyless Entry connector bracket located on the rear sill.
Connector Bracket
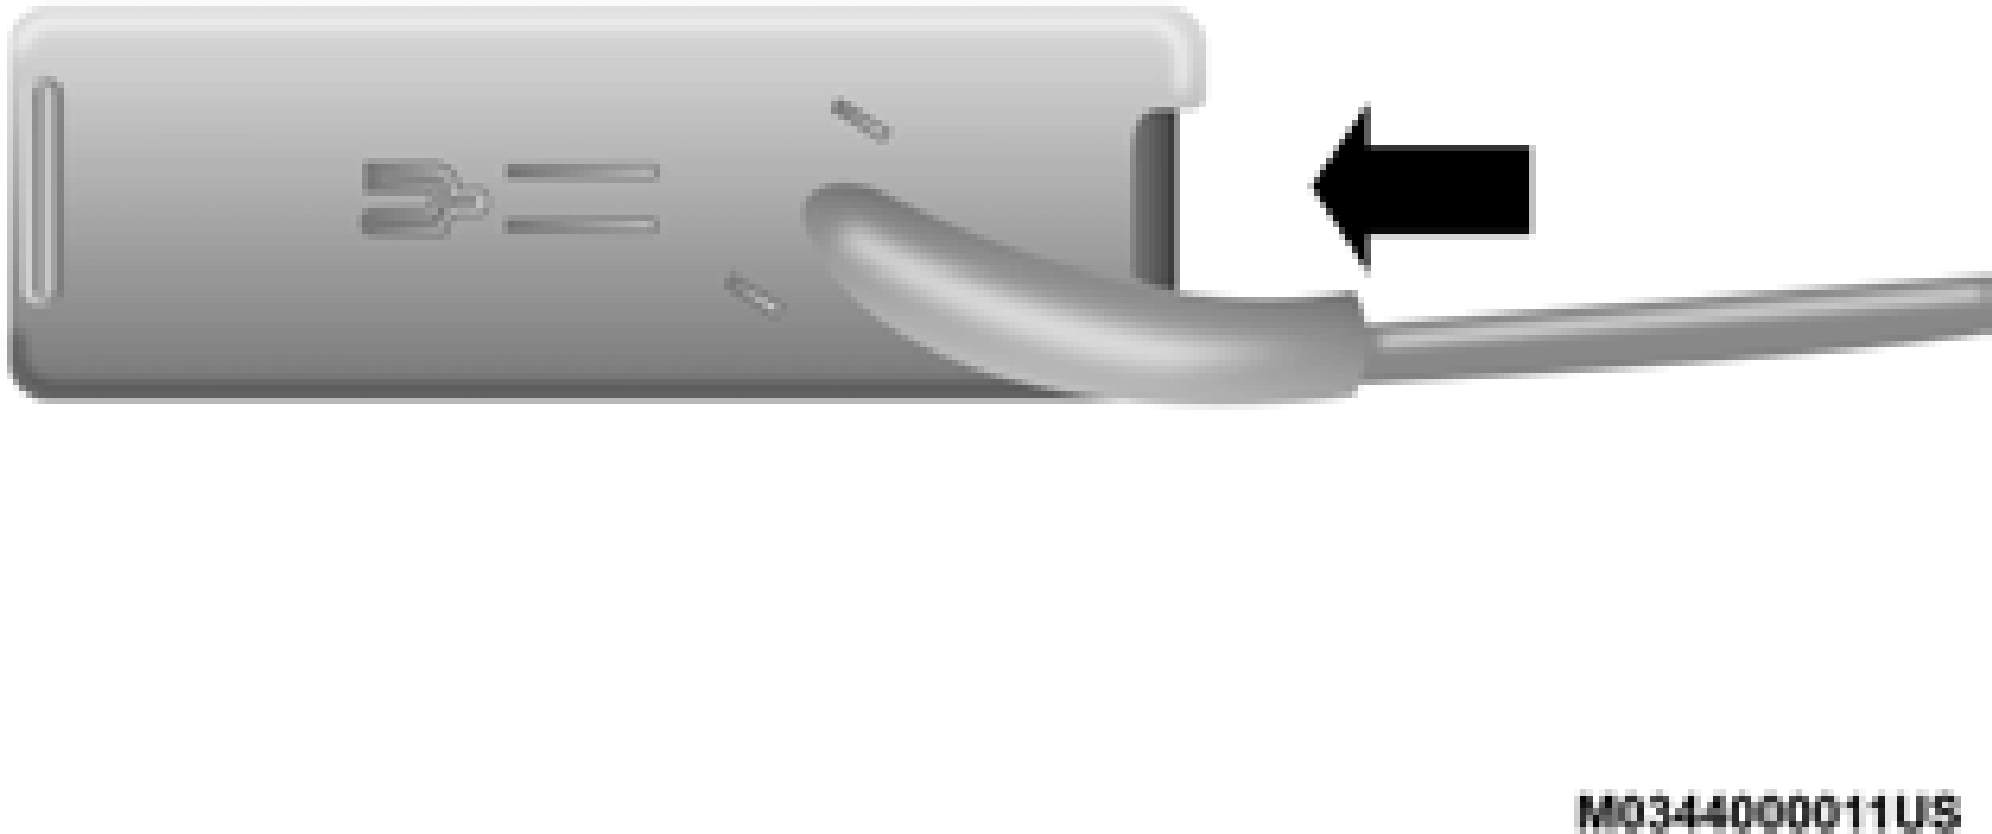
Remove the connector bracket from the sill by pushing inward in the locking tab.
Locking Tab
Disconnect the chassis wiring harness, ensuring the connector bracket does not fall into the sill.
Connect the chassis plug and bracket (provided in the glove compartment) to the chassis wiring harness and insert the bracket back into the sill.
Connect the tailgate plug (provided in the glove compartment) to the tailgate wiring harness to ensure that the terminals do not corrode.
Tape the tailgate harness and bracket against the forward-facing surface of the tailgate. This will prevent damaging the connector and bracket when storing or rein- stalling the tailgate.
Disconnect the wiring harness for the rear camera and or power locks (if equipped).
Refer to “Disconnecting The Rear Camera And Remote Keyless Entry” in this section.
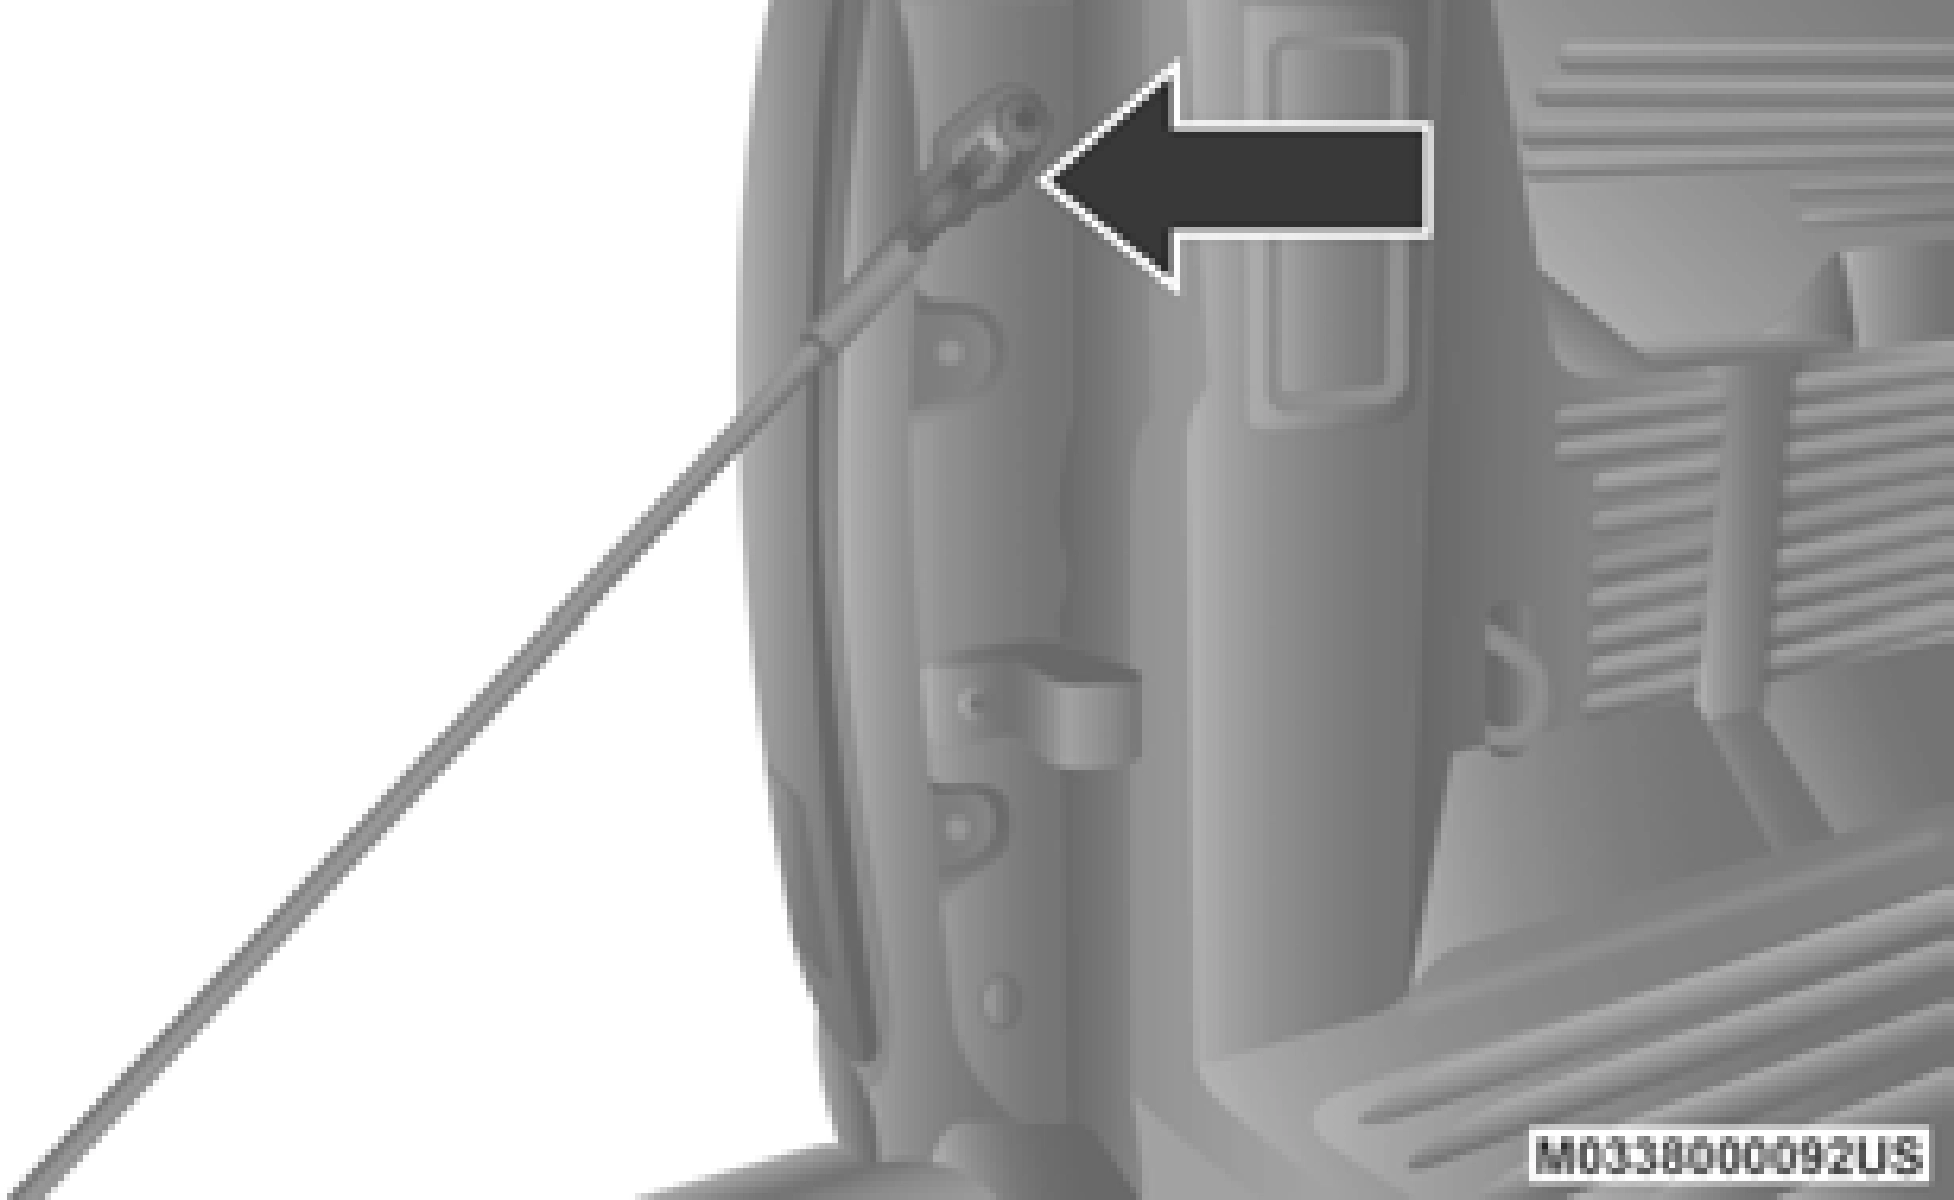
Unlatch the tailgate and remove the support cables by releasing the lock tang from the pivot.
Make sure tailgate is supported when removing support cables.
Locking Tang
Position the tailgate on a 45 degree angle.
Raise the right side of the tailgate until the right side pivot clears the hanger bracket.
Slide the entire tailgate to the right to free the left side pivot.
Remove the tailgate from the vehicle.
Do not carry the tailgate loose in the truck pickup box.
WARNING!
To avoid inhaling carbon monoxide, which is deadly, the exhaust system on vehicles equipped with “Cap or Slide-In Campers” should extend beyond the overhanging camper compartment and be free of leaks.
The tailgate can be locked using the key fob lock button.