BULB REPLACEMENT
Replacement Bulbs
All of the inside bulbs are brass or glass-wedge base. Aluminum base bulbs are not approved.
Interior Bulbs
|
Bulb Number |
|
|
Overhead Console Lamps |
TS 212–9 |
|
Dome Lamp |
7679 |
|
For lighted switches, see your authorized dealer for replacement instructions. |
Exterior Bulbs (Sheet 1 of 2)
|
Bulb Number |
|
|
Low Beam (Halogen Reflector Headlamp) |
H11LL |
|
High Beam (Halogen Reflector Headlamp) |
9005LL |
|
Low & High Beam (LED Reflector Headlamp) |
LED (Serviced At An Authorized Dealer) |
|
Low & High Beam (LED Projector Headlamp) |
LED (Serviced At An Authorized Dealer) |
|
Turn Signal / Front Position (Halogen Reflector Headlamp) |
7444NA |
|
Turn Signal / Front Position (LED Headlamps) |
LED (Serviced at authorized dealer) |
|
Front Side Marker (Halogen Reflector Headlamp) |
W5W |
|
Front Side Marker (LED Headlamps) |
LED (Serviced At An Authorized Dealer) |
Exterior Bulbs (Continued) (Sheet 2 of 2)
6
Low Beam

1 — Access Cover 2 — Fastener
Splash Shield Access Cover
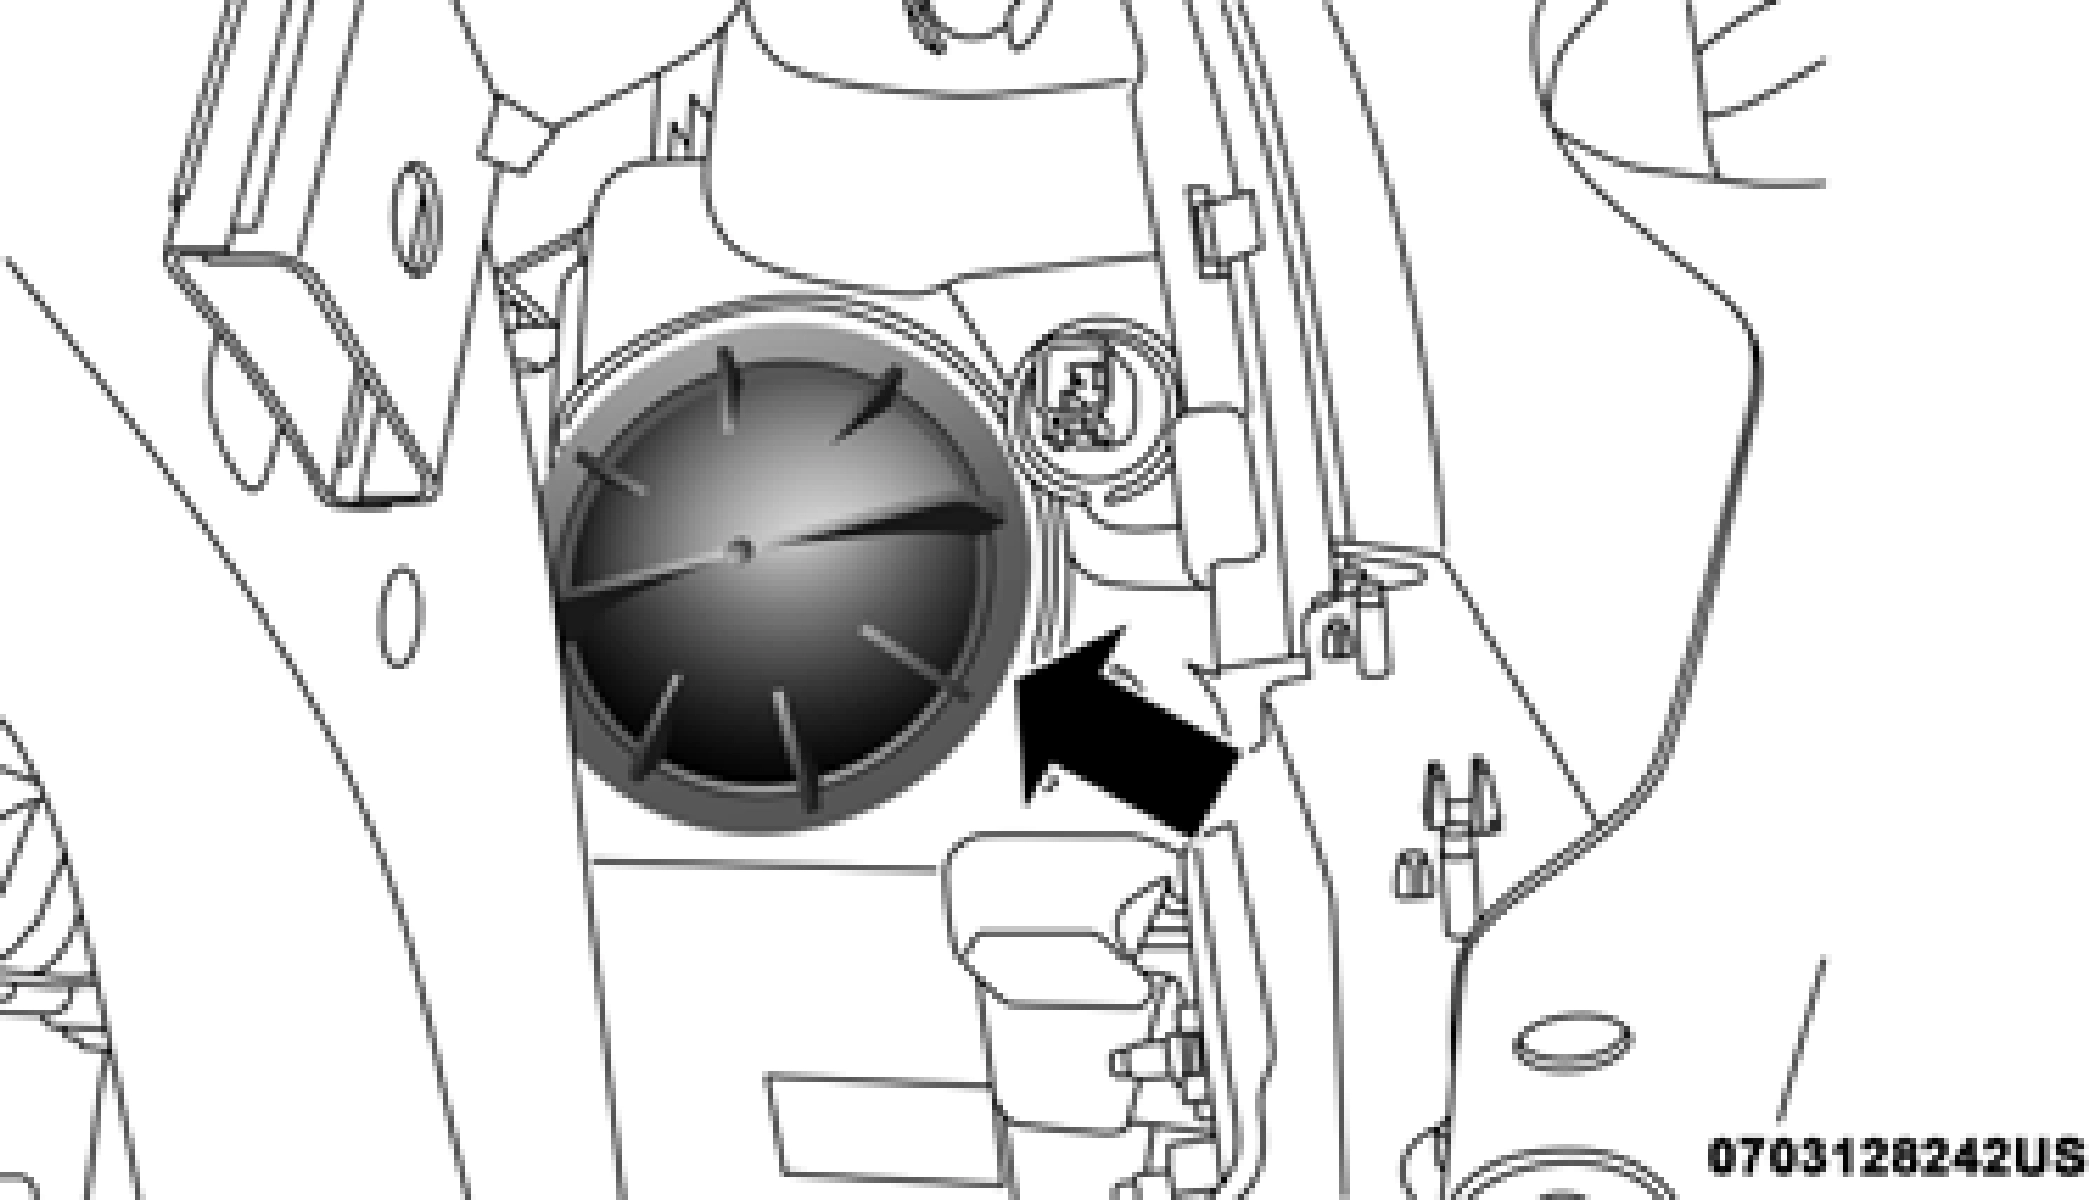
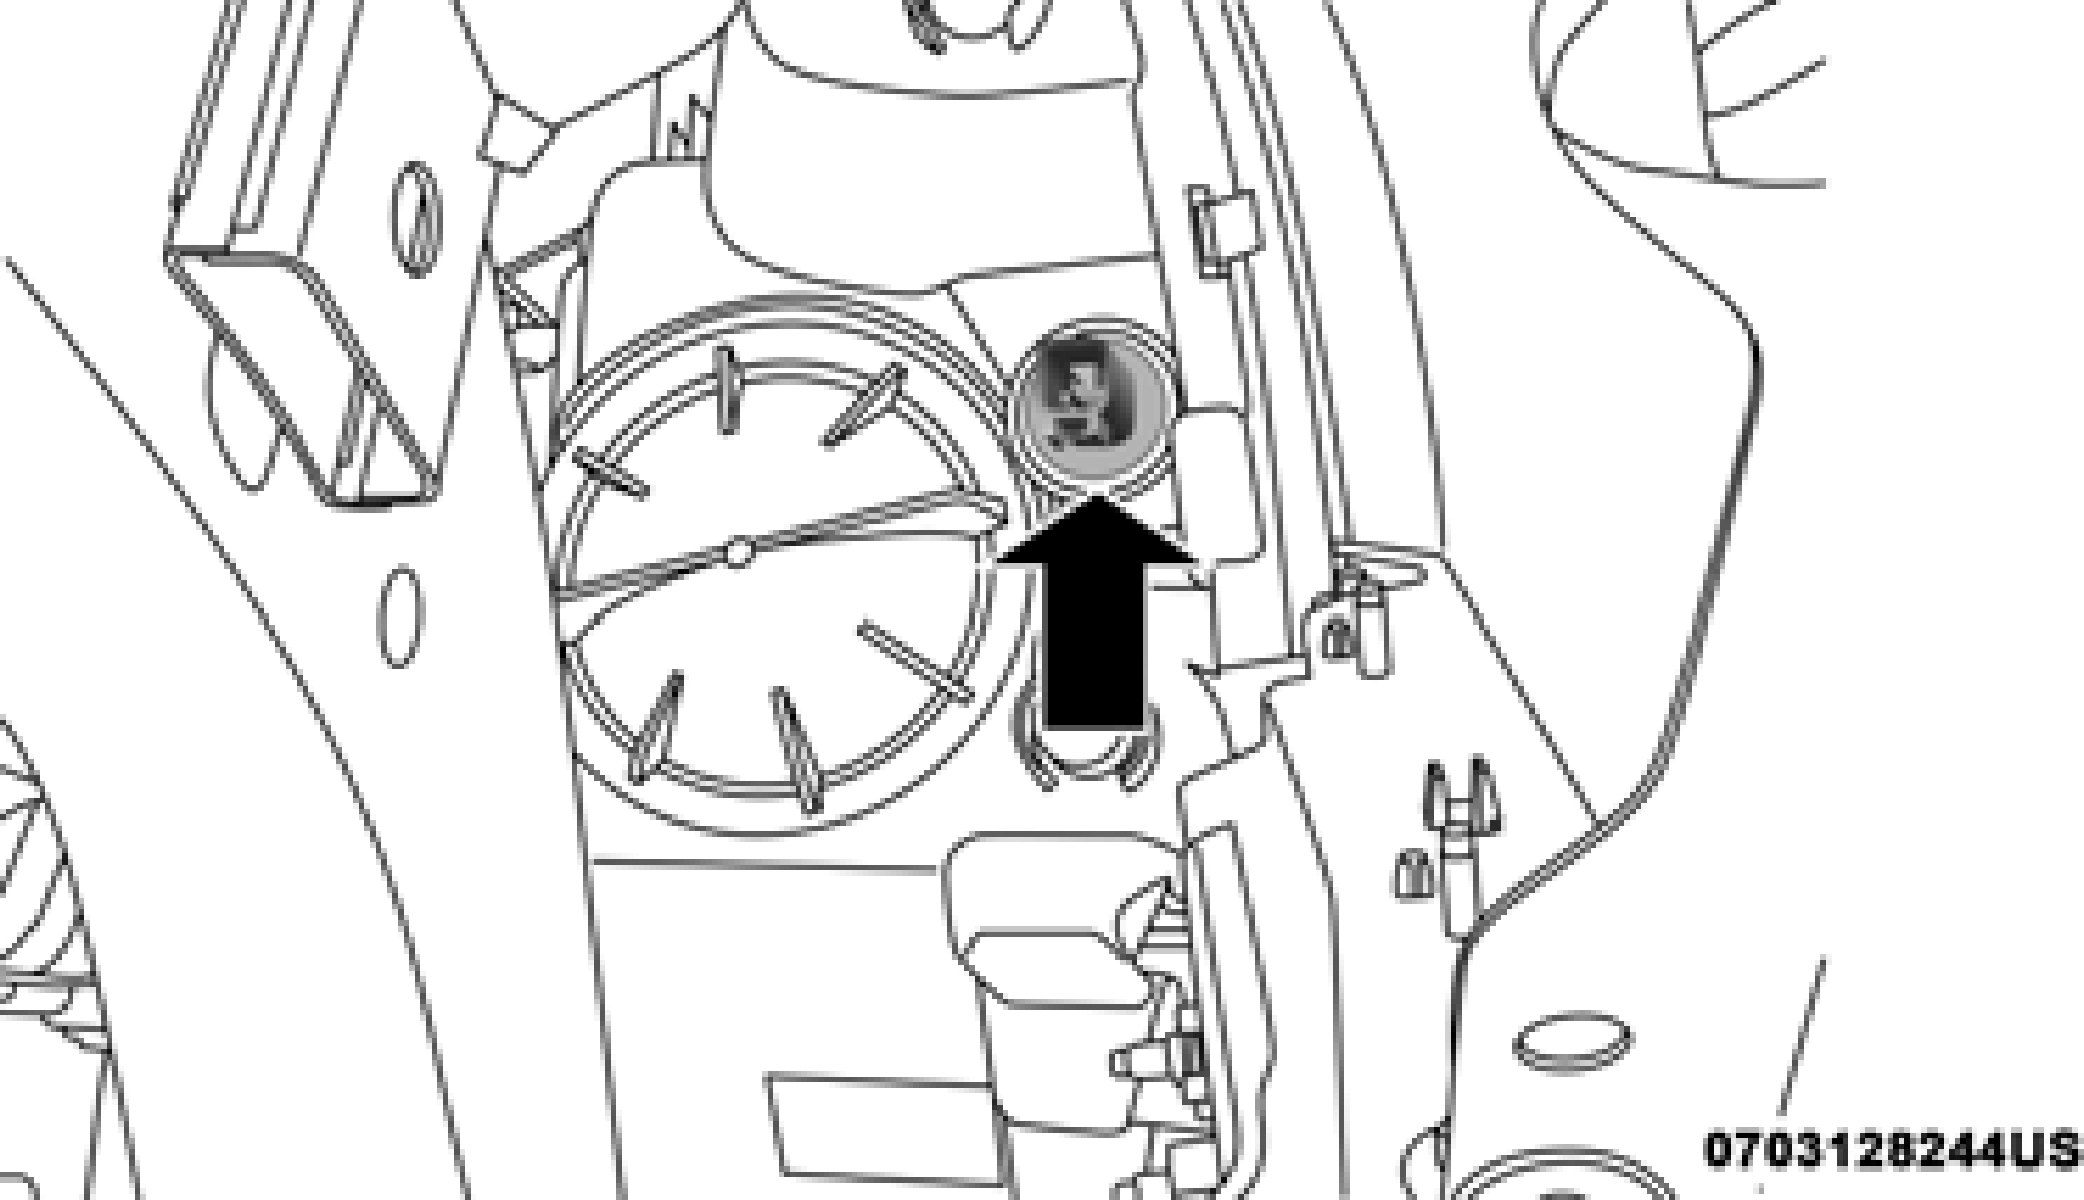
Bulb Access Cover
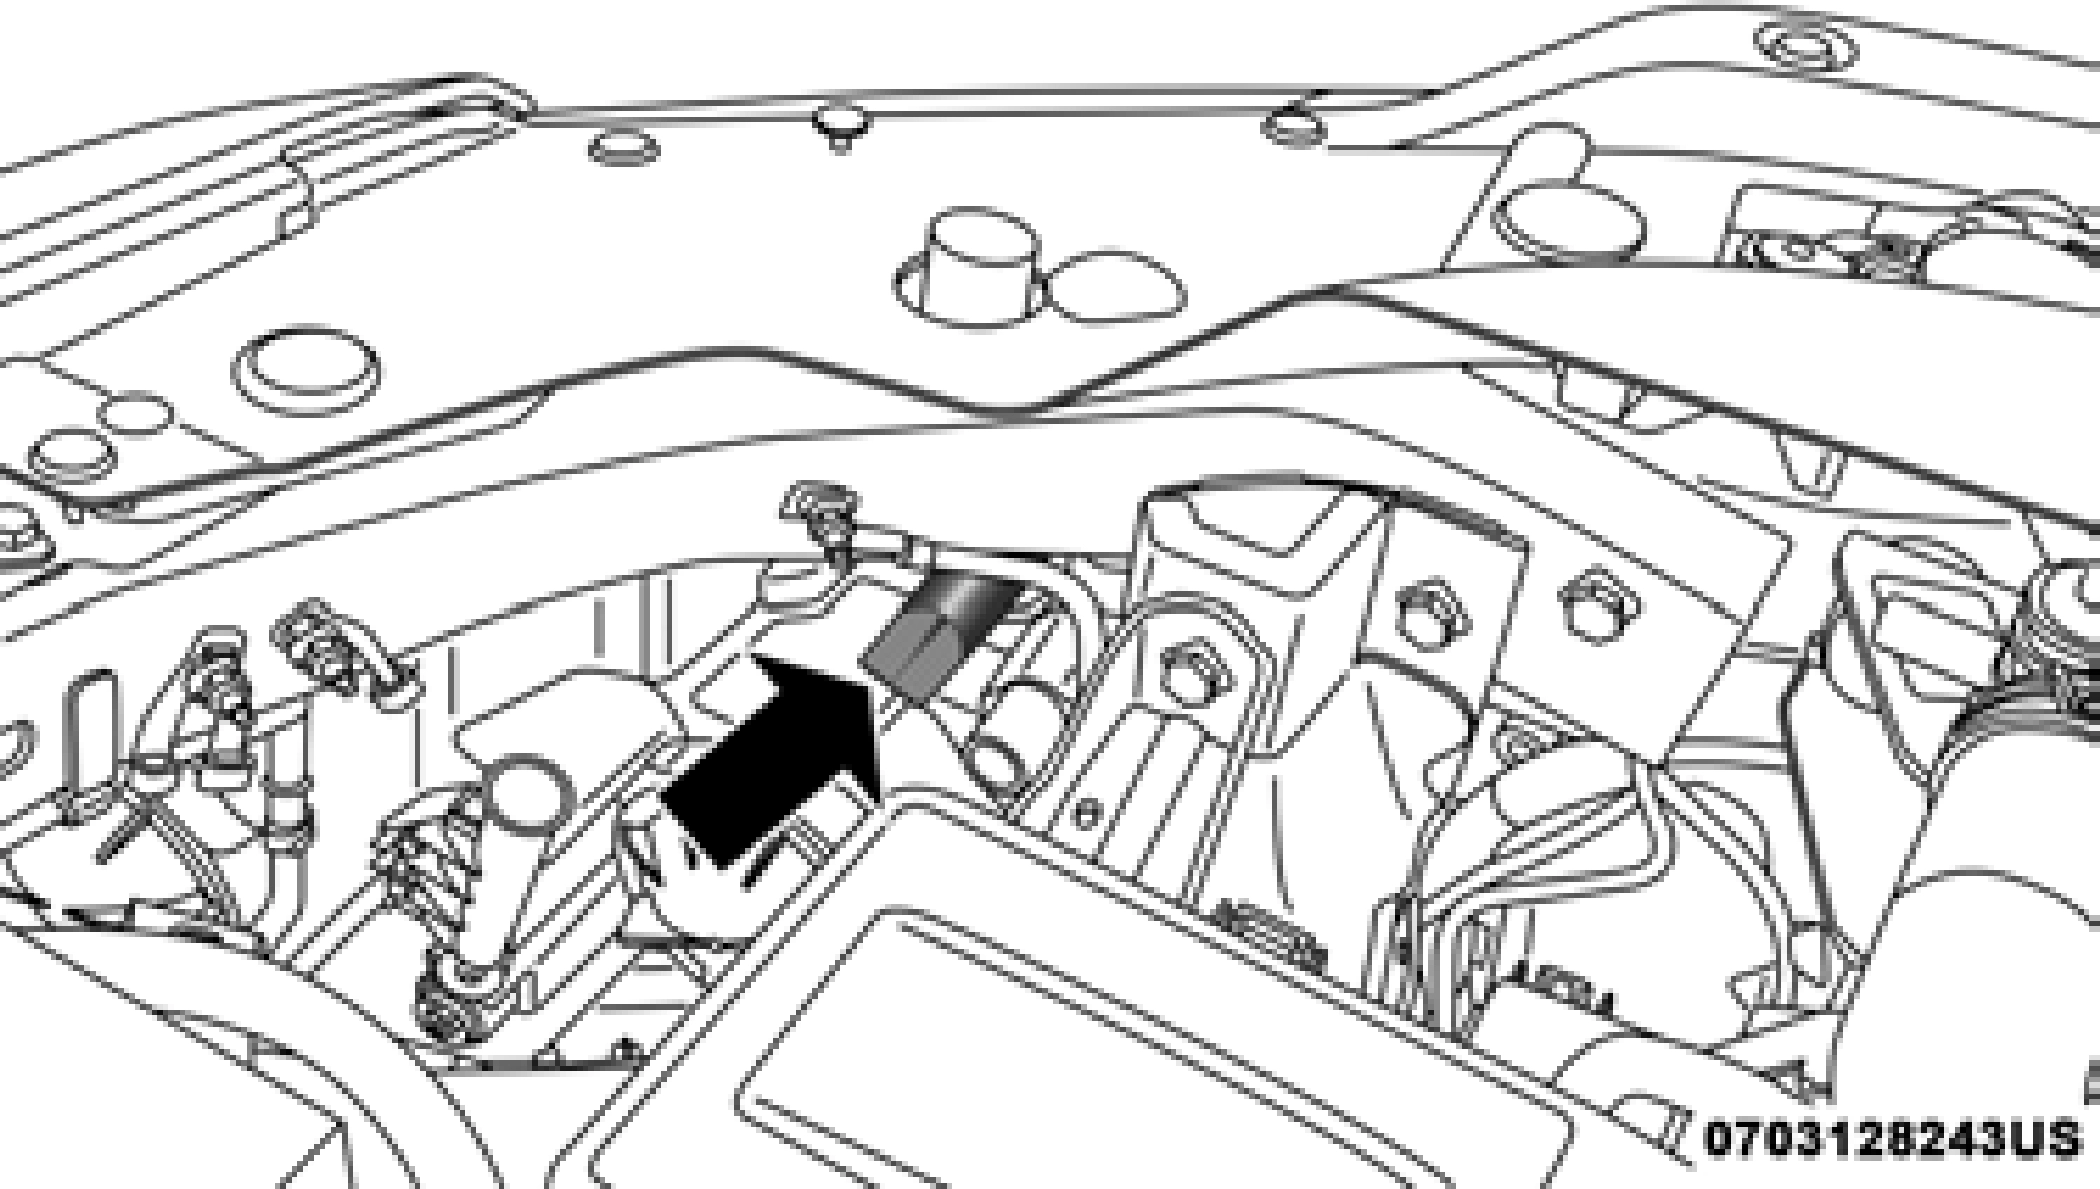
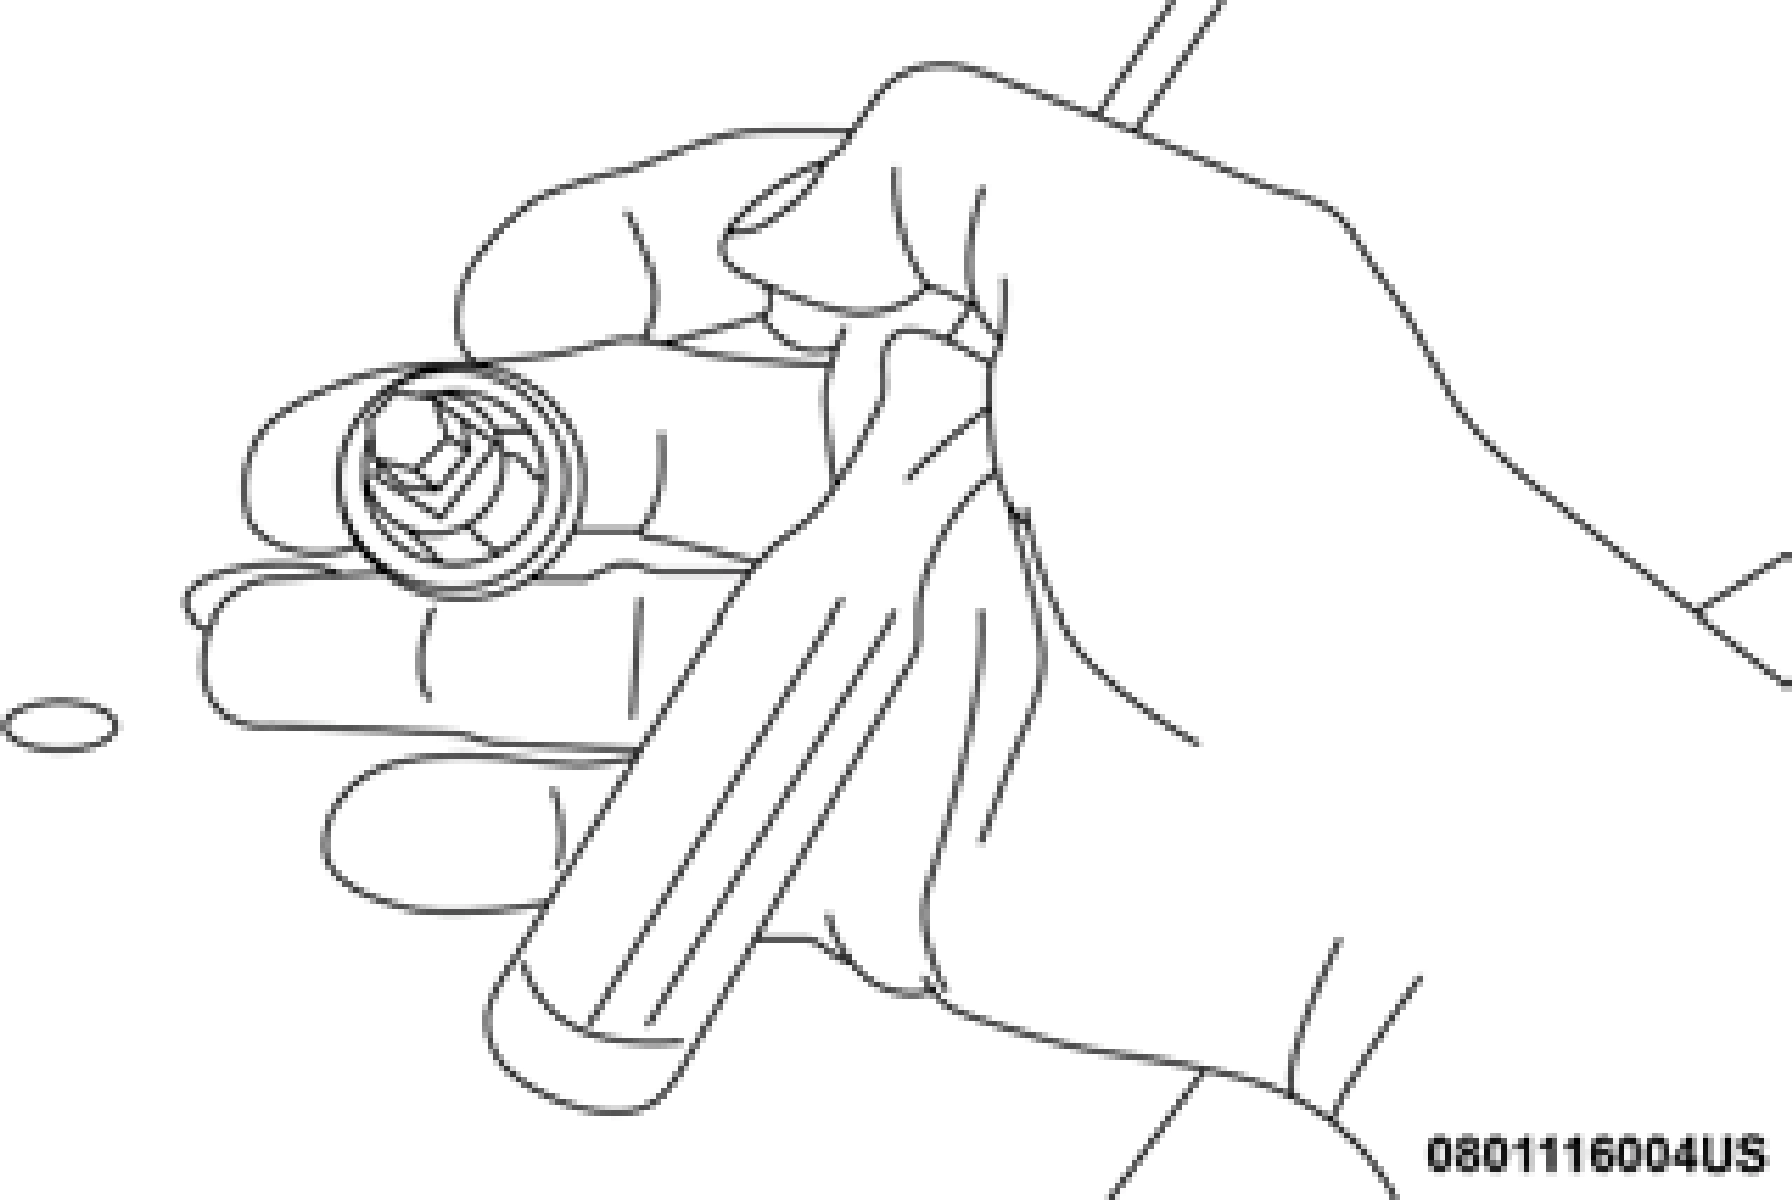
5. Disconnect the internal lamp wiring harness connector from the low beam bulb.
4. Reach through the access hole of the wheel house splash shield and disengage the bulb access cover by rotating counterclockwise.
High Beam
covers.
6
the high beam bulb access cover.
Front Park And Turn
(Continued)
 Side Marker Lamp
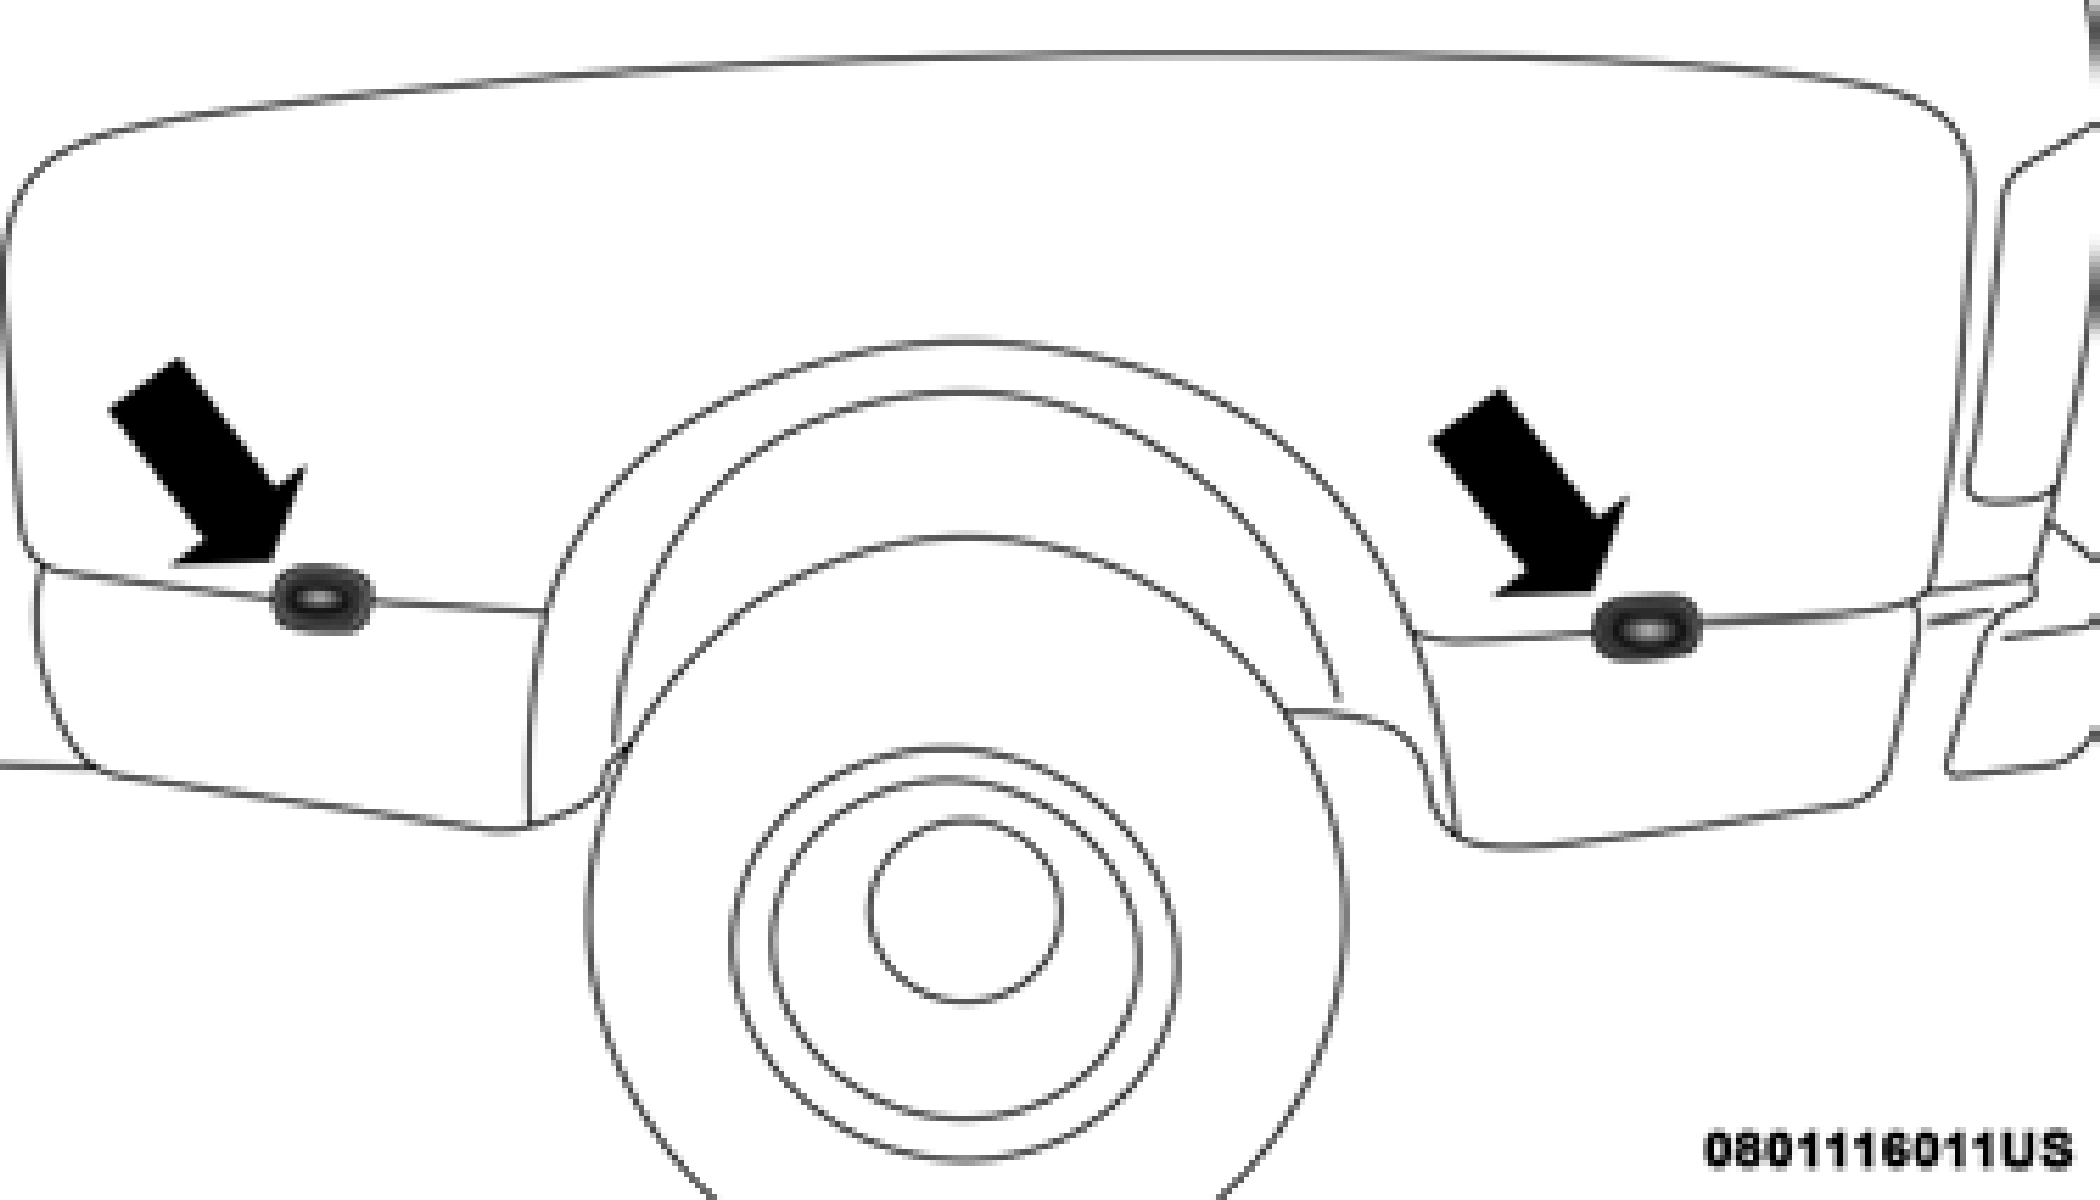
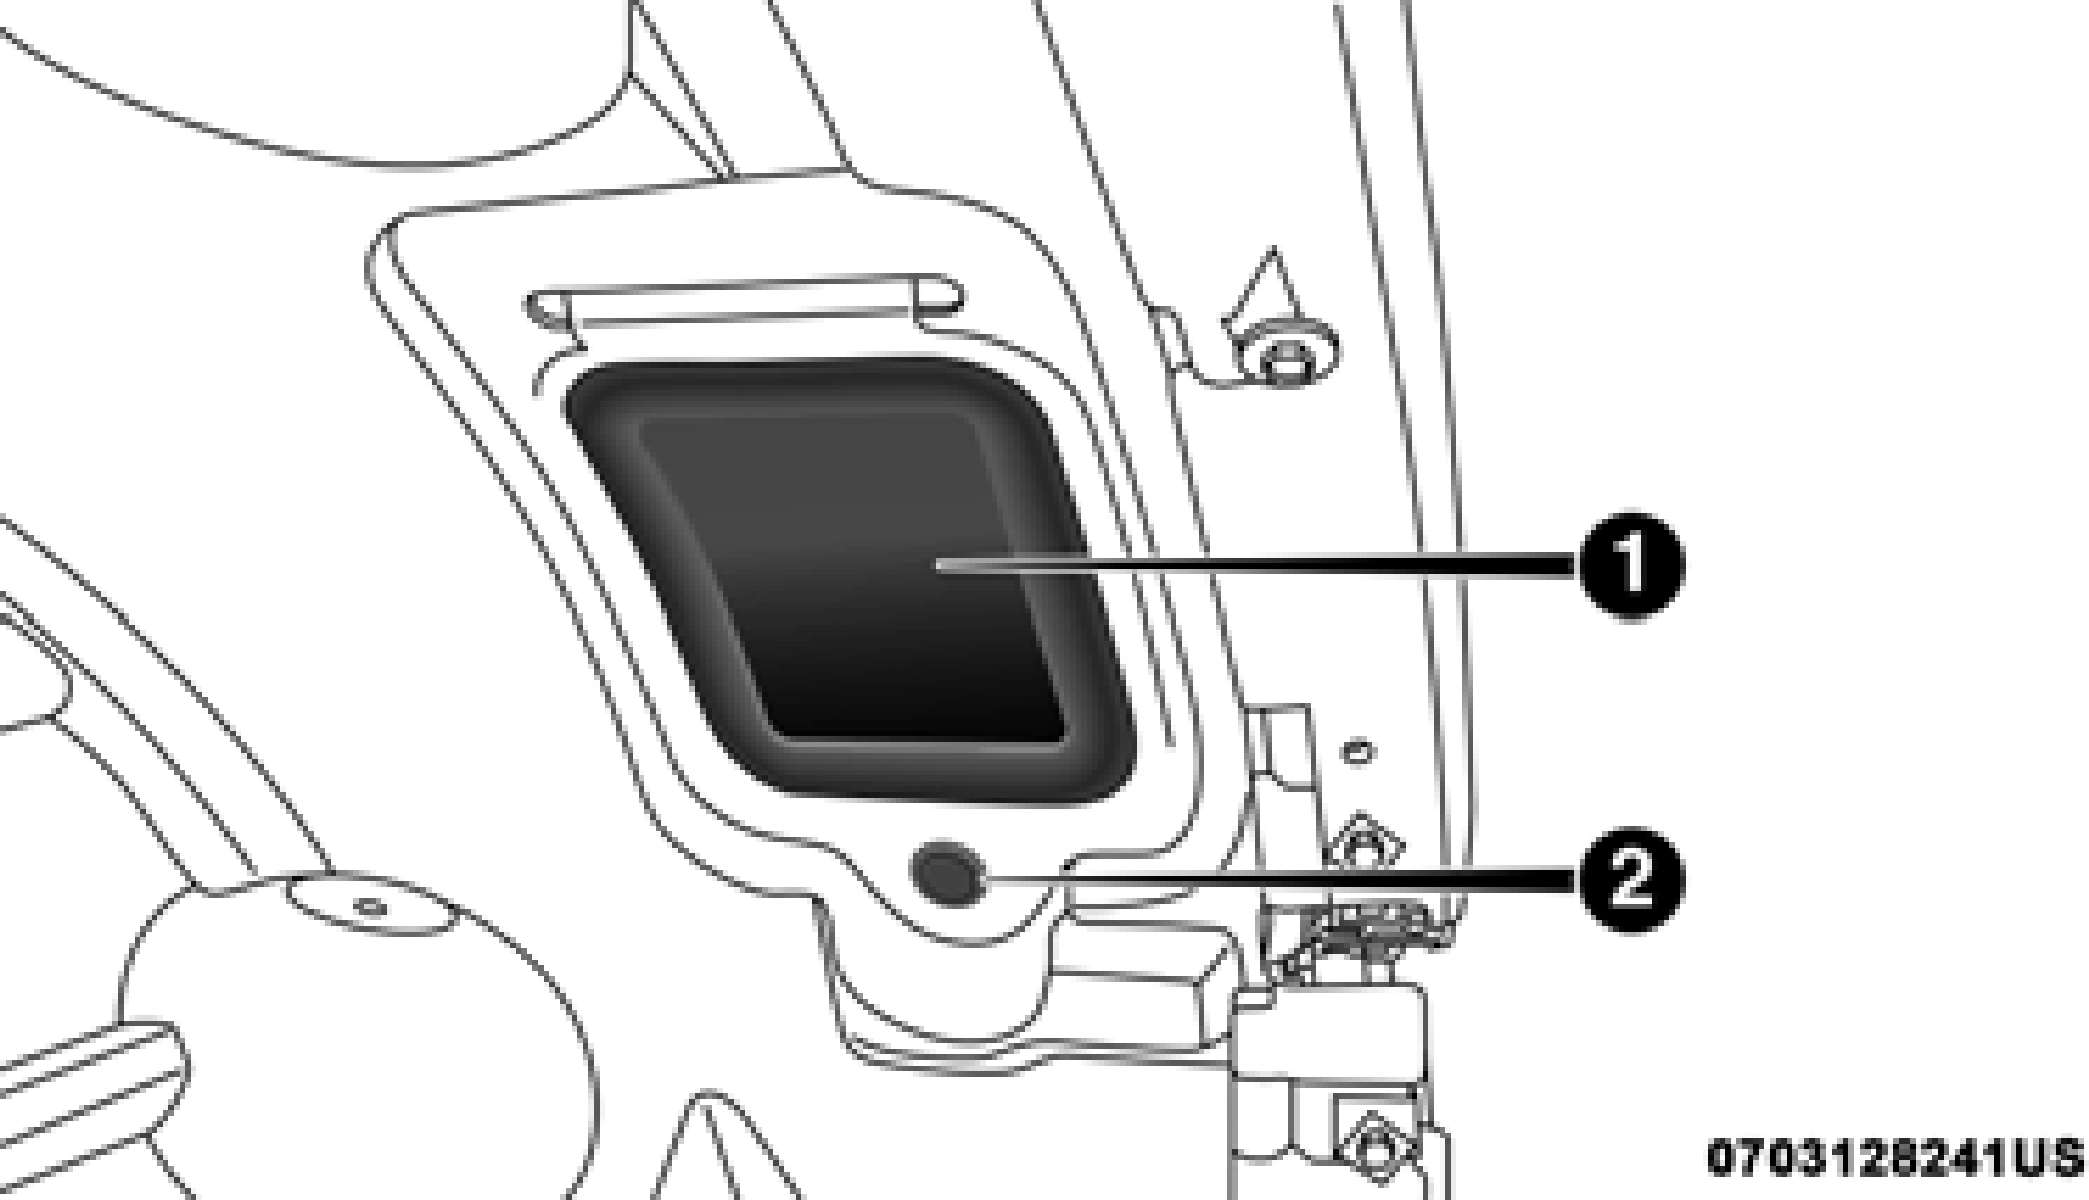 Reach into the front wheel house ahead of the front wheel, remove the fastener, and lift the cover over the access hole in the front of the wheel house splash shield. Access to the rear of the lamp can be gained through this access hole.
Park And Turn Socket
1 — Access Cover 2 — Fastener
Splash Shield Access Cover
Side Marker Socket
6
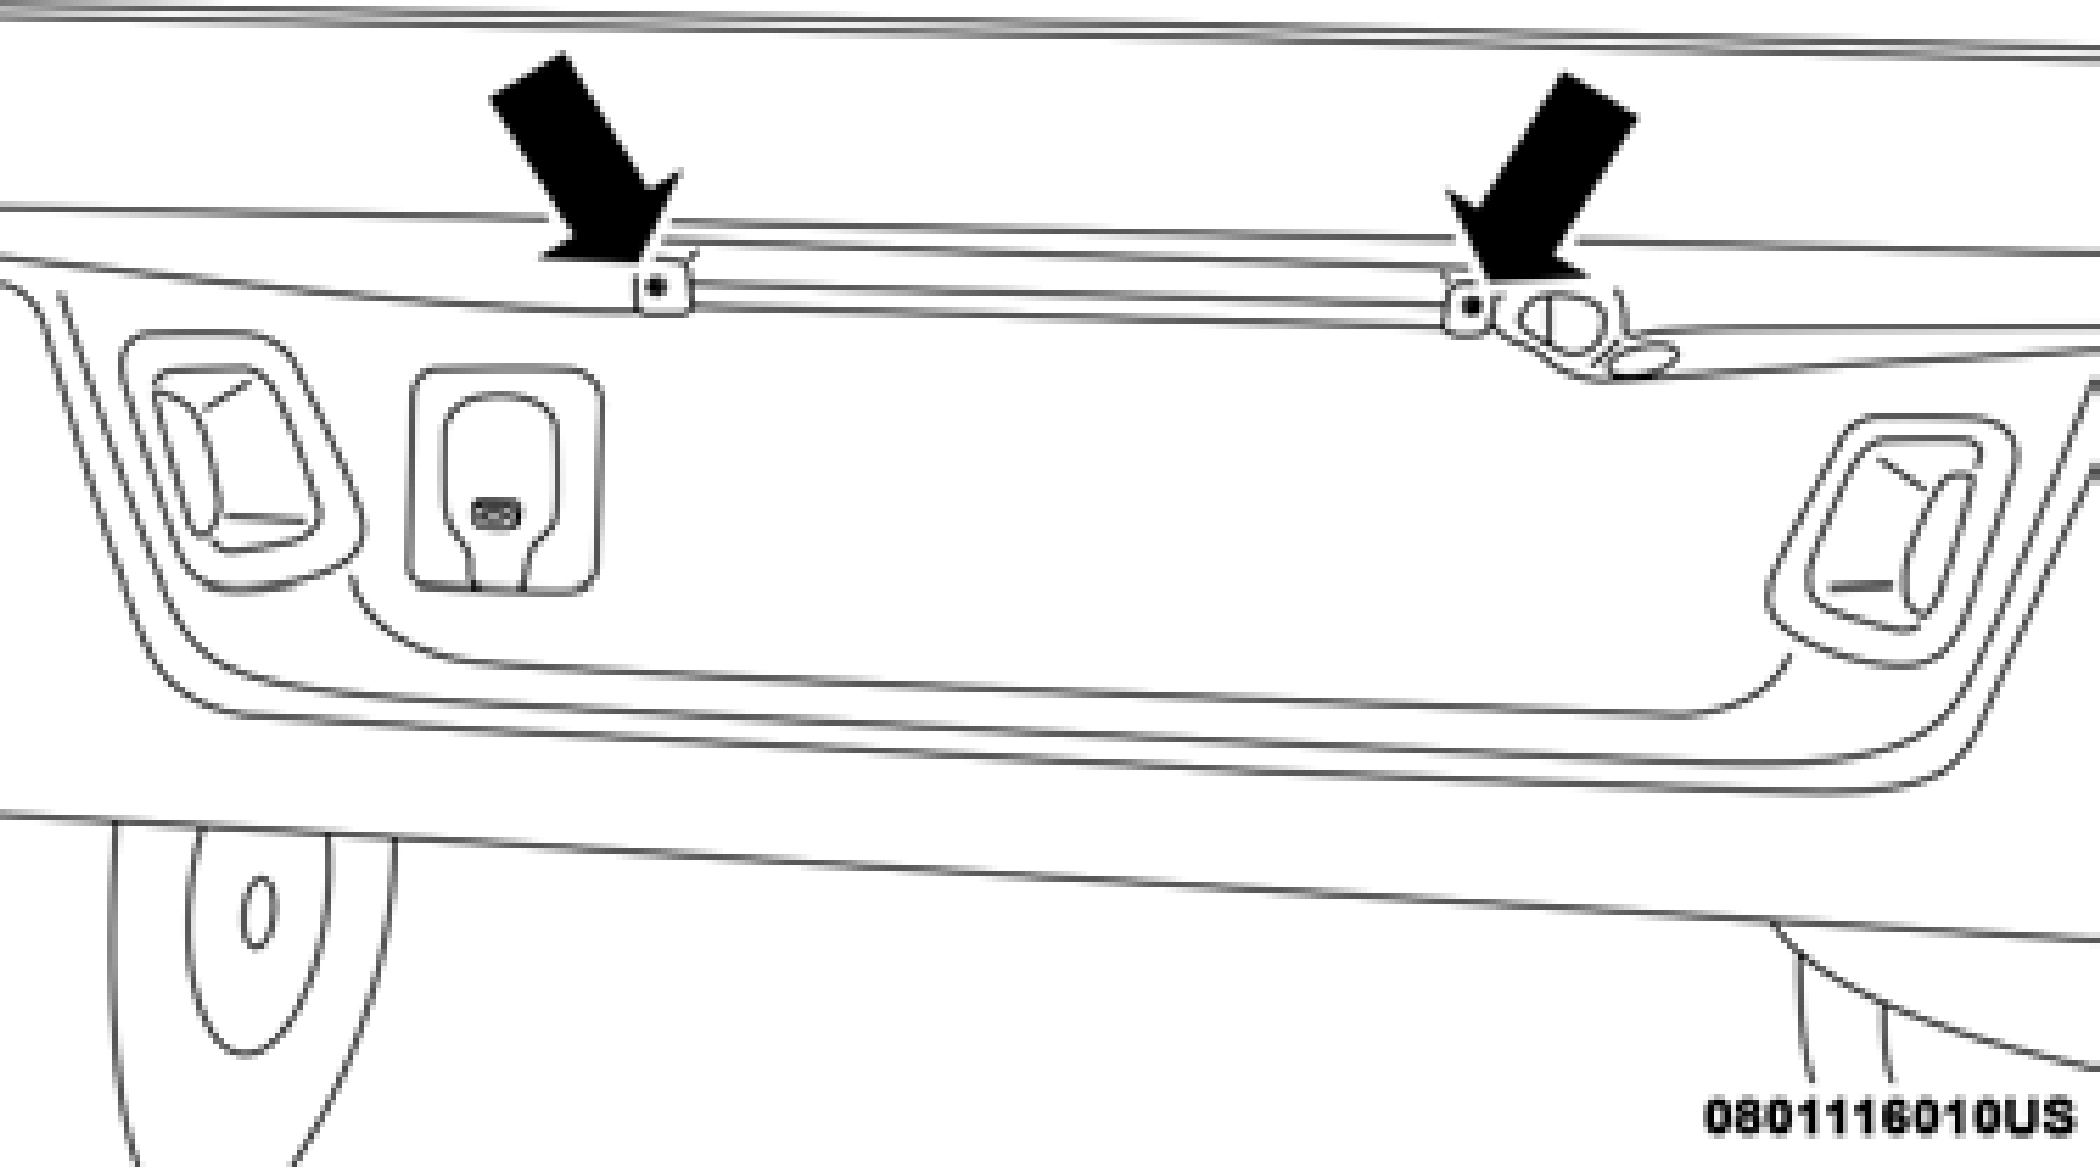
1 — Tail Lamp 2 — Fasteners
Tail Lamp Locations
Tail Lamp Removed
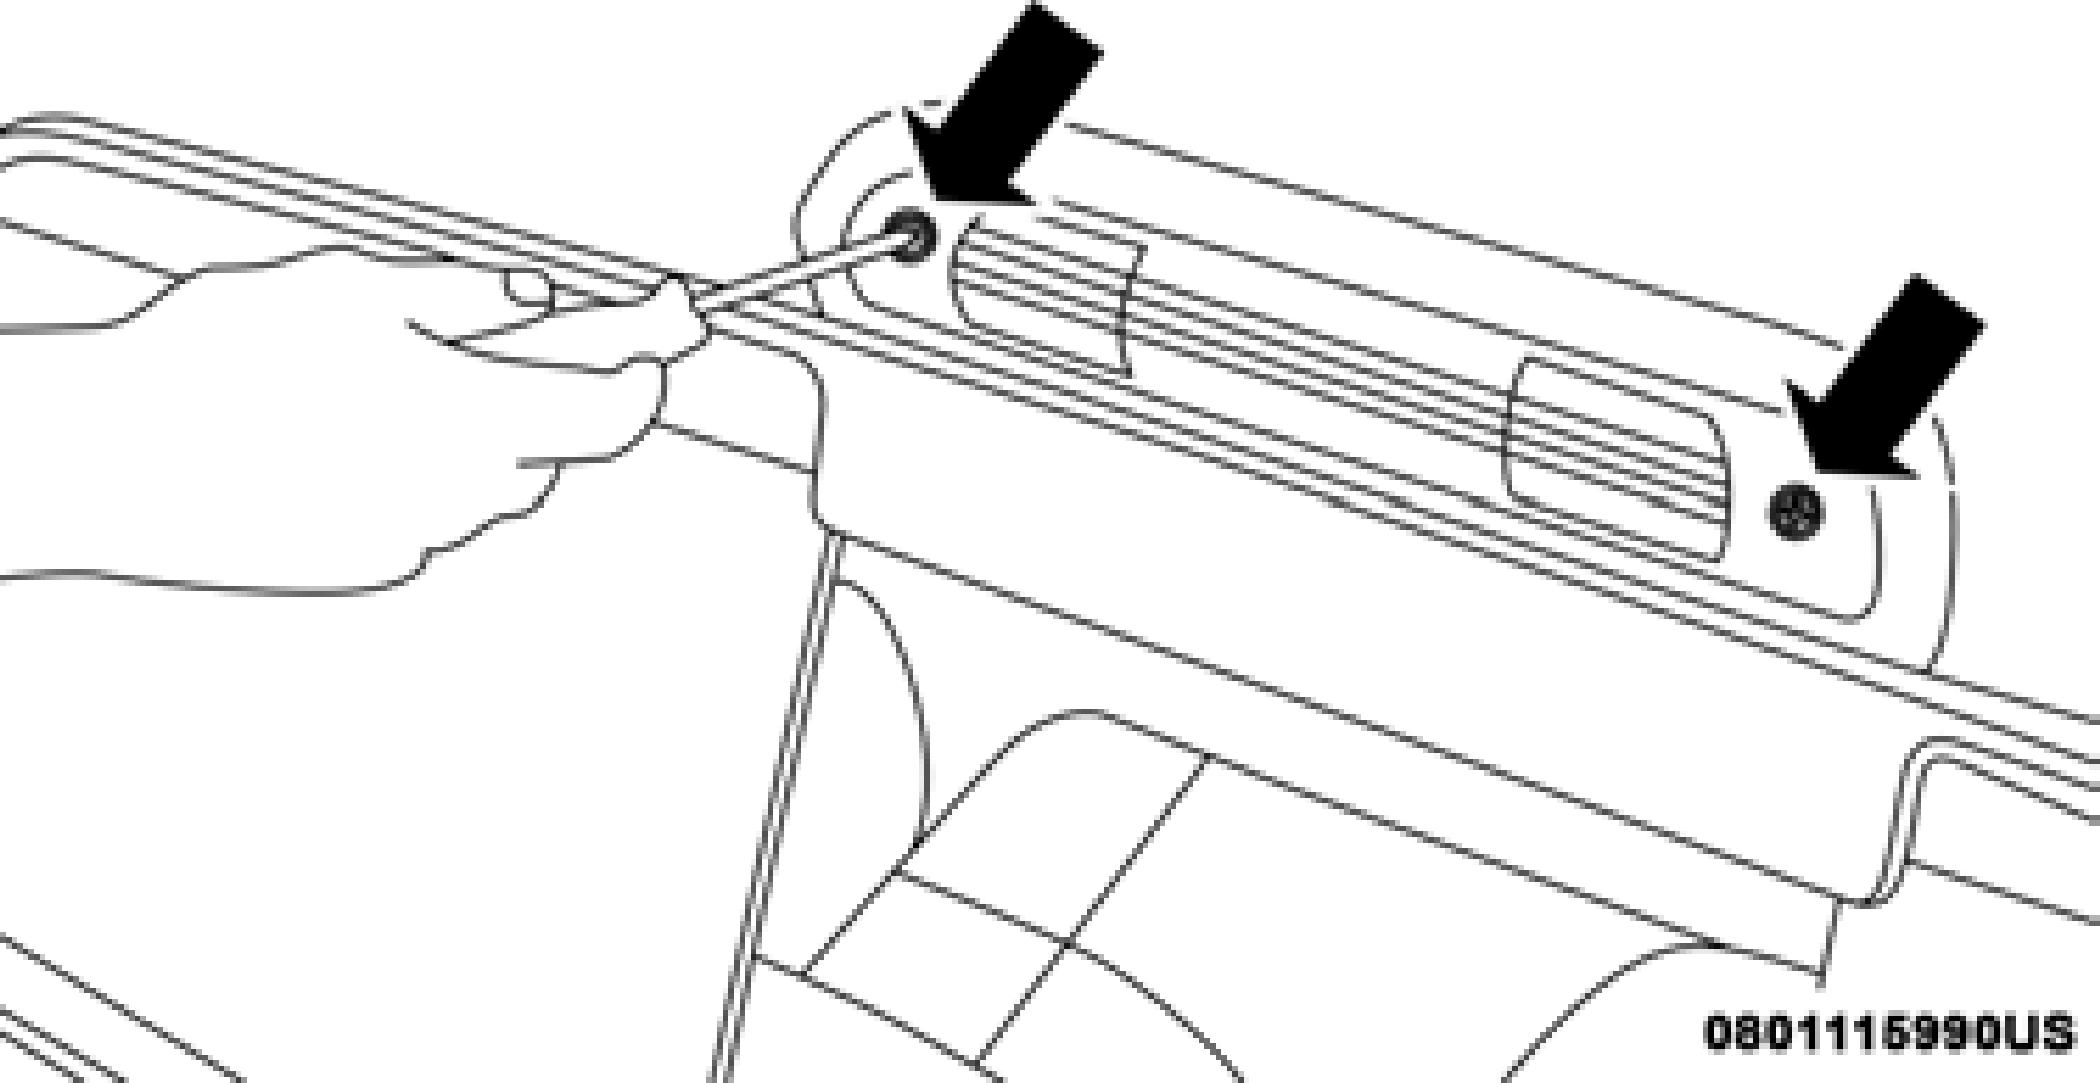 Remove the two screws holding the housing/lens to the body as shown.
6
CHMSL Mounting Screw Locations
CHMSL Connector Location
CHMSL Bulb And Socket
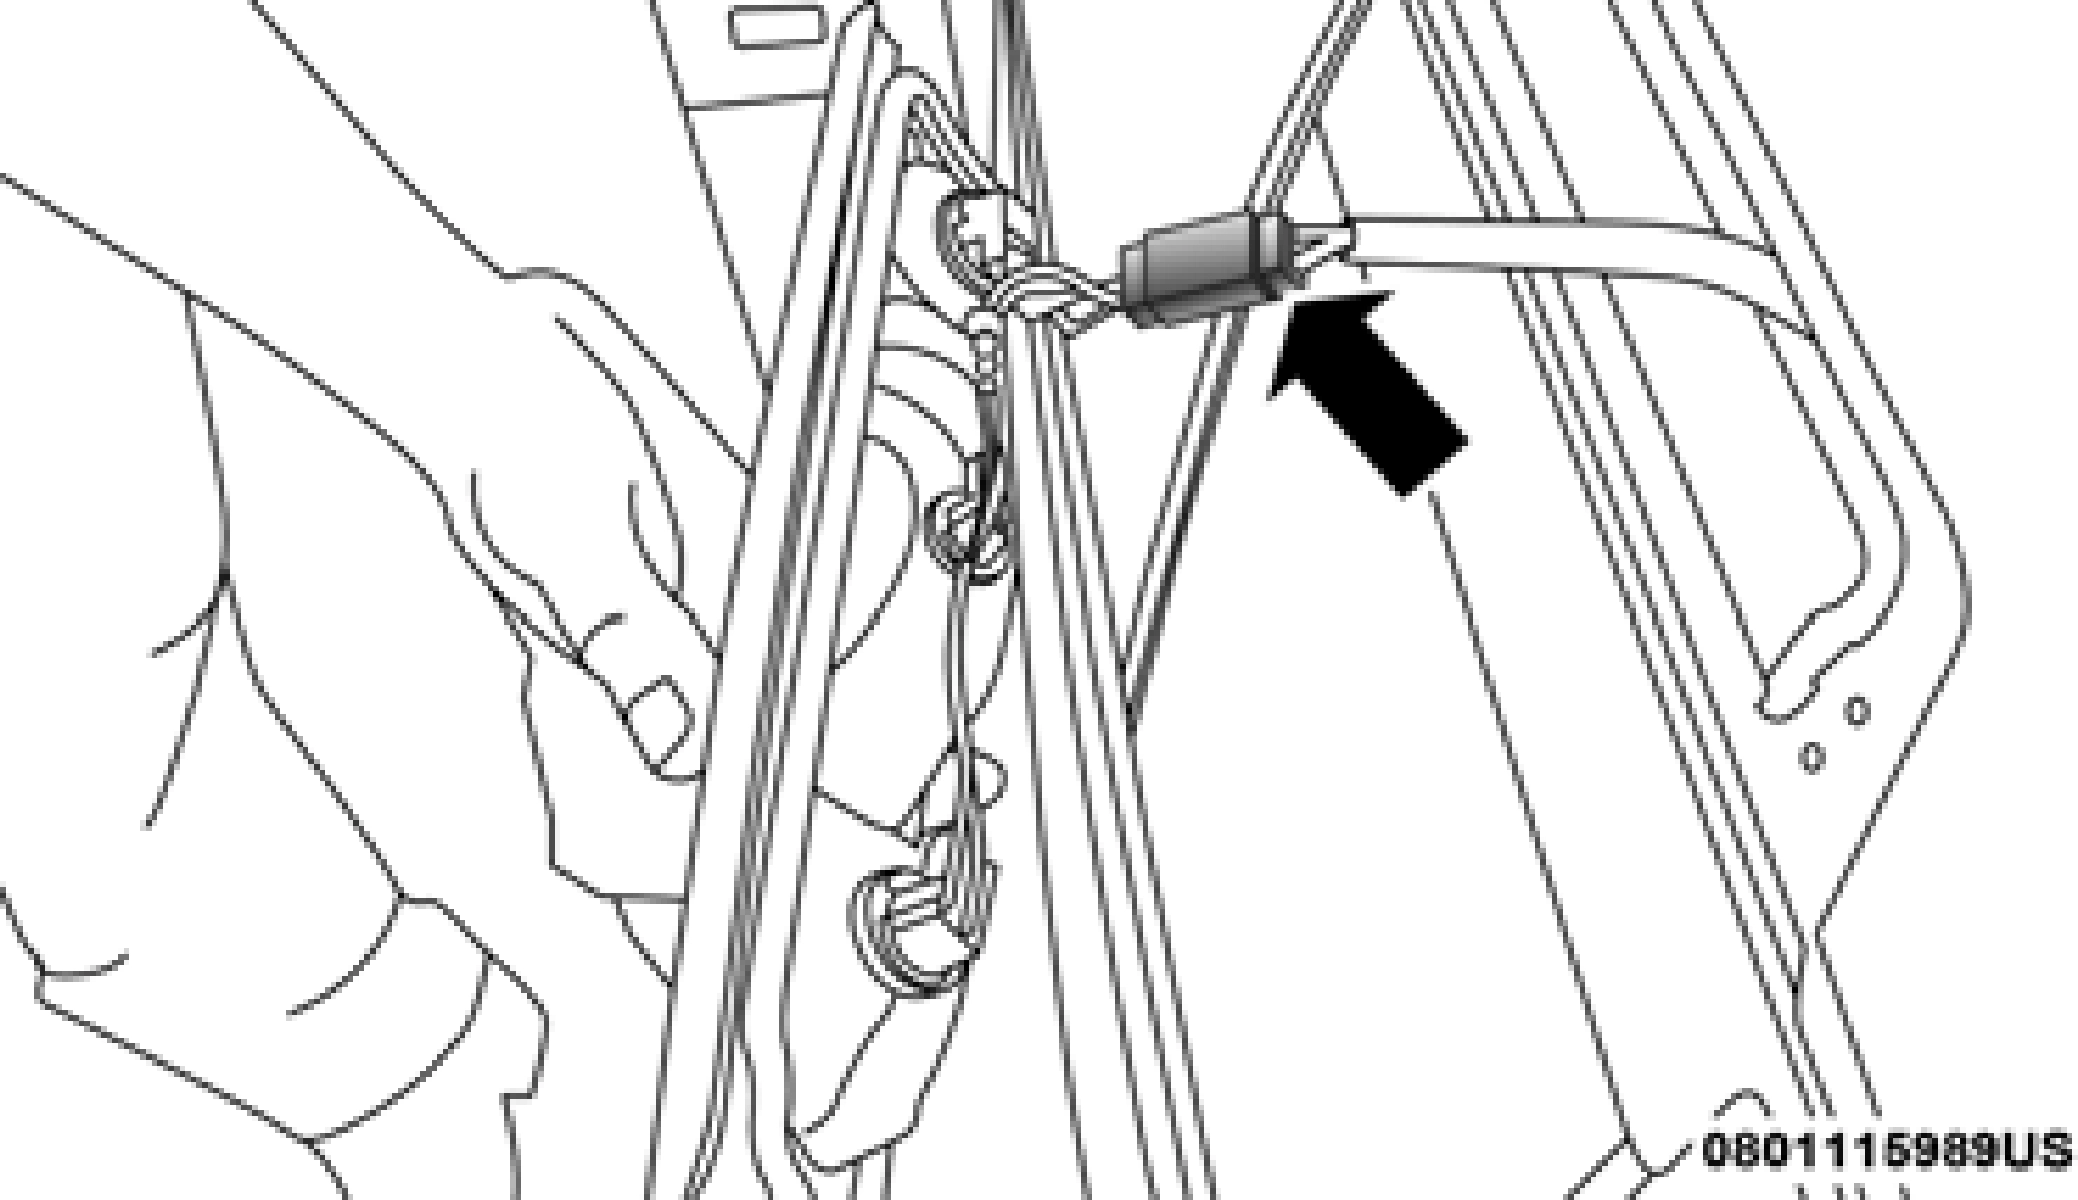
Removing Rear Screw From Clearance Lamp
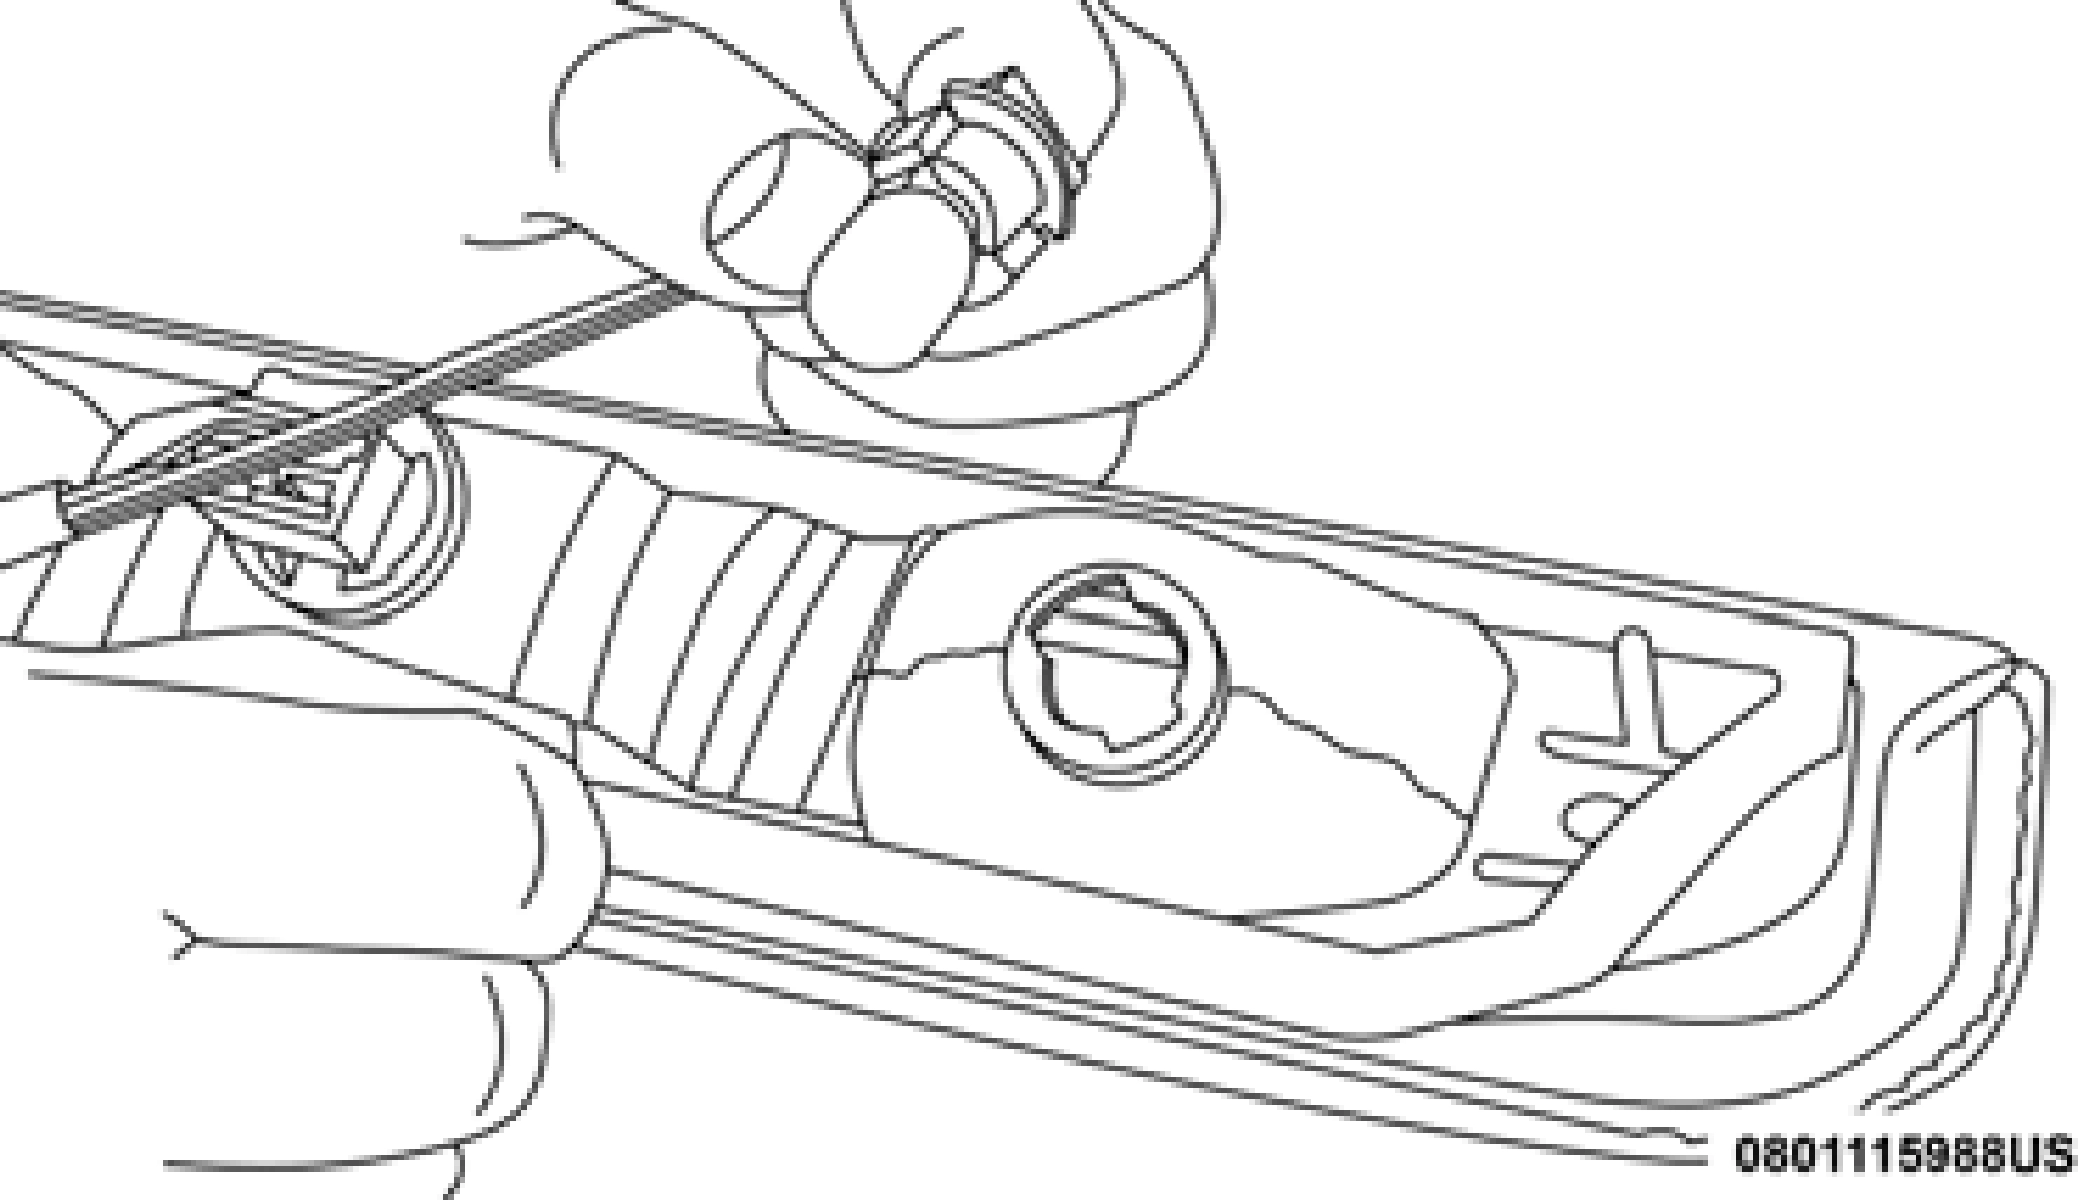
Removing Bulb Socket From Clearance Lamp
Removing The Bulb From The Bulb Socket
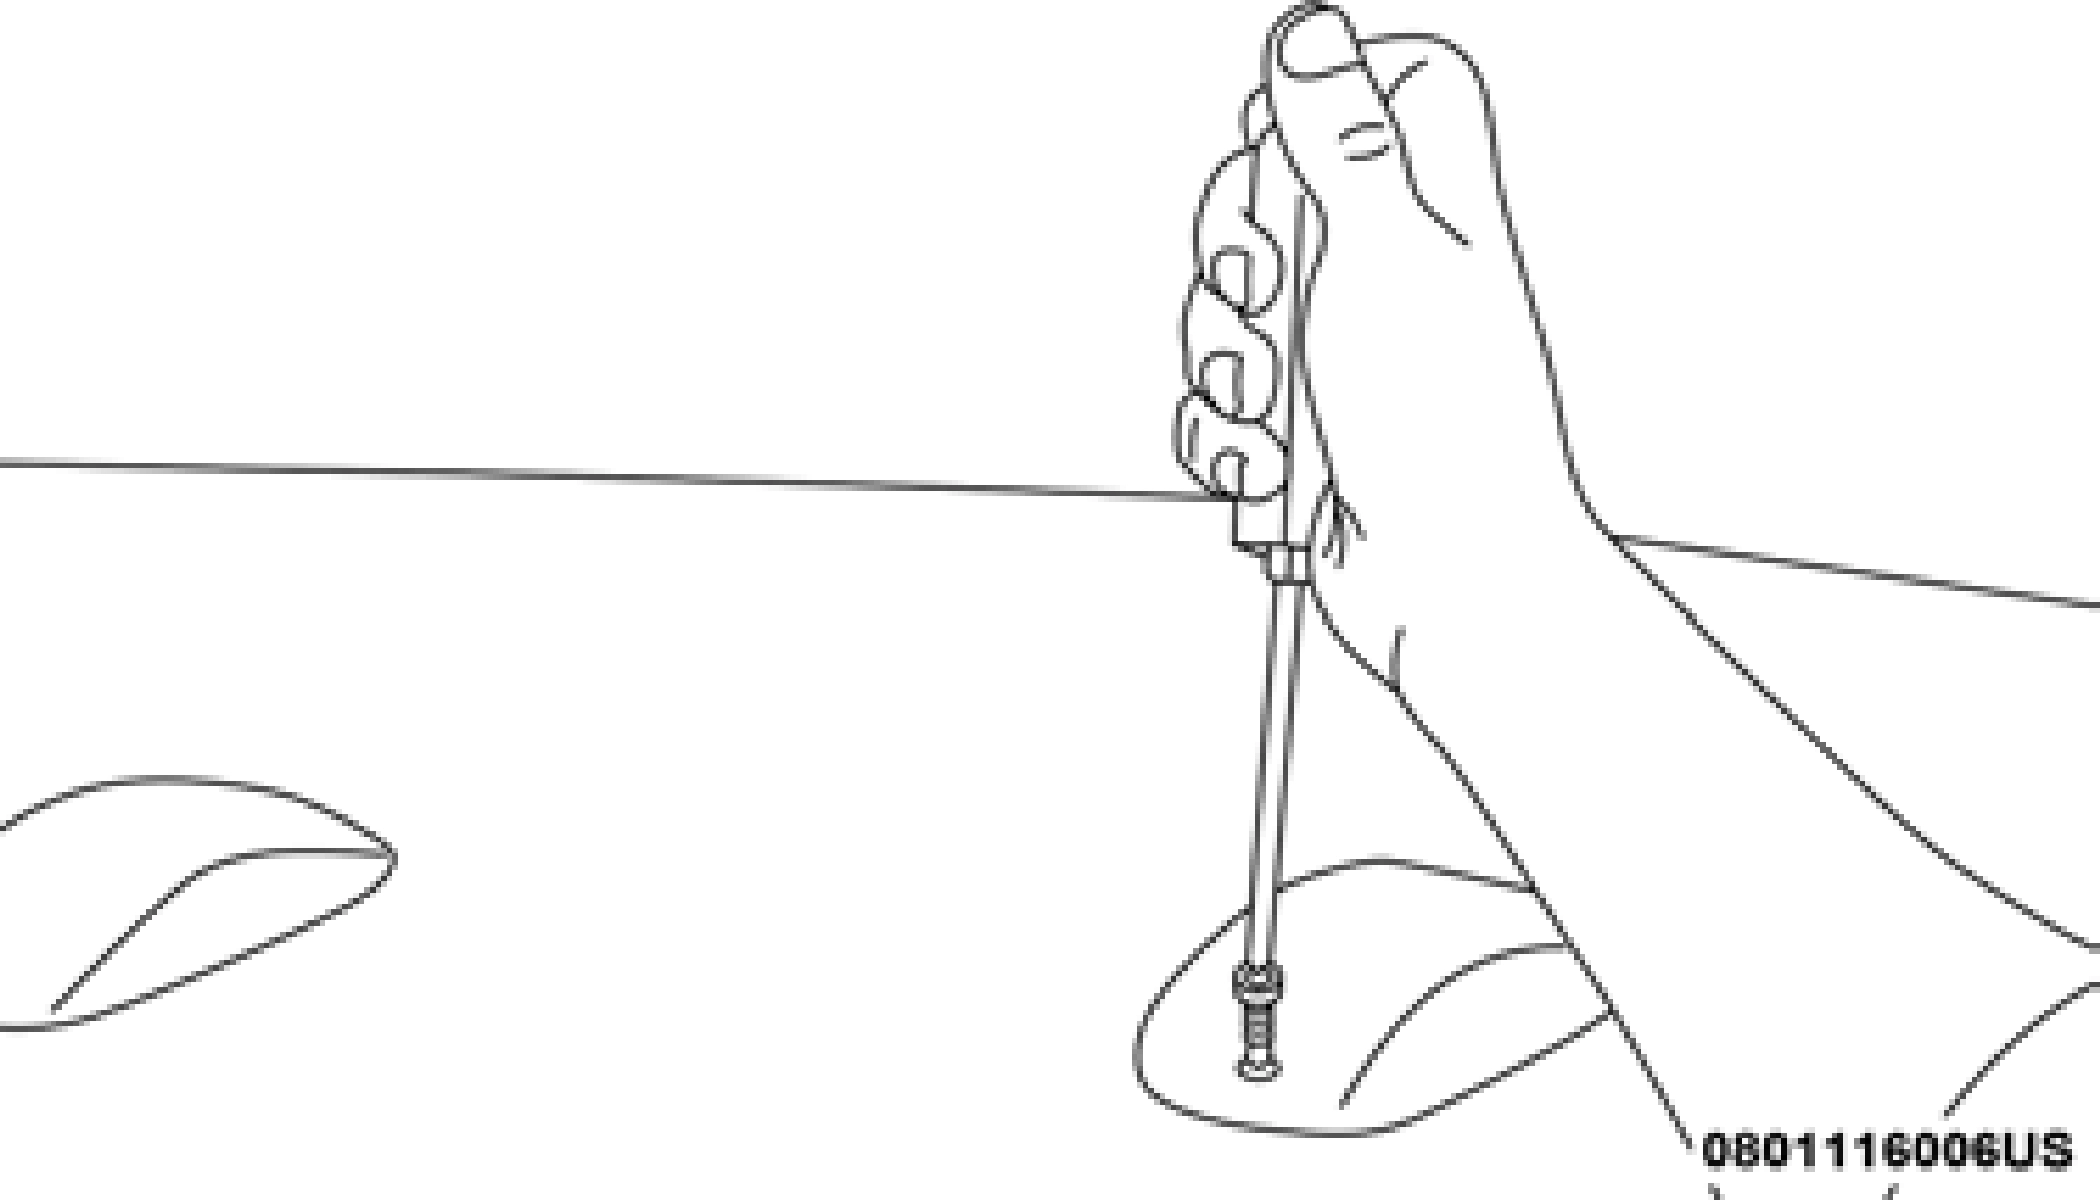
Screw Locations
Download Manual