Changing a Flat Tire - Excluding: Raptor
Note: You should only use tire sealants in roadside emergencies as they may cause damage to the tire pressure monitoring system sensor.
Note: The tire pressure monitoring system indicator light illuminates when the spare tire is in use. To restore the full function of the monitoring system, all road wheels equipped with tire pressure monitoring sensors must be mounted on the vehicle.
If you get a flat tire when driving, do not apply the brake heavily. Instead, gradually decrease your speed, hold the steering wheel firmly, and slowly move to a safe place on the side of the road.
Have your flat serviced by an authorized dealer in order to prevent damage to the tire pressure monitoring system sensors. Replace the spare tire with a road tire as soon as possible. During repairing or replacing of the flat tire, have the authorized dealer inspect the tire pressure monitoring system sensor for damage.
Tire Change Procedure
 WARNING: Failure to follow these guidelines could result in an increased risk of loss of vehicle control, injury or death. WARNING: Do not get under a vehicle that is supported by a jack. WARNING: The jack supplied with this vehicle is only intended for changing a flat tire in an emergency. Do not attempt to do any other work on your vehicle when it is supported by the jack, as your vehicle could slip off the jack. Failure to follow this instruction could result in personal injury or death. WARNING: To help prevent your vehicle from moving when changing a wheel, shift the transmission into park (P), set the parking brake and use an appropriate block or wheel chock to secure the wheel diagonally opposite to the wheel being changed. For example, when changing the front left wheel, place an appropriate block or wheel chock on the right rear wheel. WARNING: Only use the jack provided as original equipment with your vehicle. WARNING: Only use the specified jacking points. If you use any other locations you could damage vehicle components, such as brake lines. WARNING: Never place anything between the vehicle jack and your vehicle. WARNING: Never place anything between the vehicle jack and the ground. WARNING: Do not attempt to change a tire on the side of the vehicle close to moving traffic. Pull far enough off the road to not obstruct the flow of traffic and avoid the danger of being hit when operating the jack or changing the wheel. WARNING: Always fully apply the parking brake. Failure to follow this instruction could result in personal injury or death. WARNING: The jack should be used on level firm ground wherever possible. WARNING: It is recommended that the wheels of the vehicle be chocked, and that no person should remain in a vehicle that is being jacked. WARNING: Failure to follow these guidelines could result in an increased risk of loss of vehicle control, injury or death. WARNING: Do not get under a vehicle that is supported by a jack. WARNING: The jack supplied with this vehicle is only intended for changing a flat tire in an emergency. Do not attempt to do any other work on your vehicle when it is supported by the jack, as your vehicle could slip off the jack. Failure to follow this instruction could result in personal injury or death. WARNING: To help prevent your vehicle from moving when changing a wheel, shift the transmission into park (P), set the parking brake and use an appropriate block or wheel chock to secure the wheel diagonally opposite to the wheel being changed. For example, when changing the front left wheel, place an appropriate block or wheel chock on the right rear wheel. WARNING: Only use the jack provided as original equipment with your vehicle. WARNING: Only use the specified jacking points. If you use any other locations you could damage vehicle components, such as brake lines. WARNING: Never place anything between the vehicle jack and your vehicle. WARNING: Never place anything between the vehicle jack and the ground. WARNING: Do not attempt to change a tire on the side of the vehicle close to moving traffic. Pull far enough off the road to not obstruct the flow of traffic and avoid the danger of being hit when operating the jack or changing the wheel. WARNING: Always fully apply the parking brake. Failure to follow this instruction could result in personal injury or death. WARNING: The jack should be used on level firm ground wherever possible. WARNING: It is recommended that the wheels of the vehicle be chocked, and that no person should remain in a vehicle that is being jacked. |
Note: Make sure all passengers are out of your vehicle.
Note: Jack at the specified locations to avoid damage to the vehicle.
Note: No maintenance or additional lubrication of your jack is required over the service life of your vehicle.

- Park the vehicle on a level, firm surface and activate the hazard flashers.
- Apply the parking brake, and place the transmission in park (P) for an automatic transmission or reverse (R) for a manual transmission and turn the engine off.
- Block the wheel diagonally opposite of the flat tire. For example, if the left front is flat, block the right rear wheel.
- Find the jack and tool kit in the rear trunk of the vehicle. Turn the jack retainer counterclockwise to remove the jack and jack extension block.

- Remove the tool bag.

- Remove the lug wrench from the tool bag. Turn the spare tire fasteners counterclockwise starting with the lowest first, and remove the spare tire from the rear of the vehicle.
Note: Insert the wheel lock key into the wheel lock nut before using the lug wrench to loosen the lock nut.

Note: Do not lay the wheel face down on the ground, as there is a risk of scratching or marring the wheel if laid down on an uneven surface.
- Loosen each road wheel nut a half a turn counterclockwise, do not remove them until the flat tire is raised off the ground.

- When you are changing a flat front tire, connect the extension block to the jack loadrest using the wing bolt as shown. Connect the jack handle to the jack, and use the lug nut wrench to operate the jack.

- Do not use the extension block when you are changing a flat tire on the rear axle of the vehicle. Assemble the jack handle using the extensions as shown to operate the jack when placing under the rear axle.

- The front jacking point location is indicated by an arrow-shaped mark on the frame.

- Use the rear axle tube for the rear jacking point.

Note: Only use the jack on the specified jacking points and as close to the affected wheel as possible.
- Place the jack at the jacking point closest to the flat tire you are changing. Turn the lug wrench handle clockwise until the flat tire is completely off the ground.
- Remove the wheel nuts with the wheel nut wrench.
- Replace the flat tire with the spare wheel. Make sure the wheel is on with the valve stem facing outward.
- Install the wheel nuts snug against the hub. Do not fully tighten the wheel nuts until the vehicle is lowered back onto the ground.
- Turn the wrench handle counterclockwise to lower the jack.
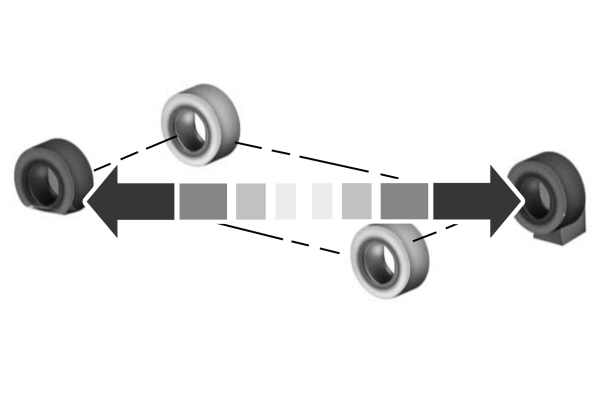
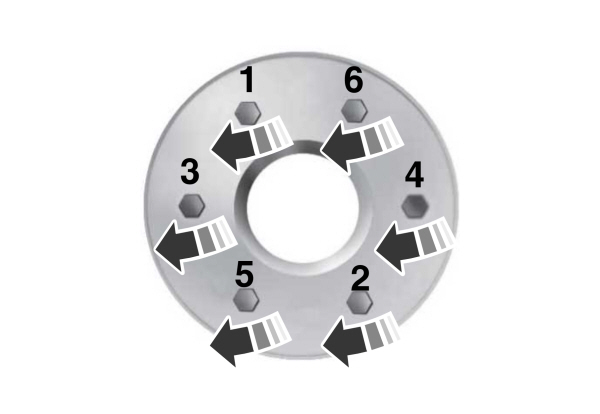
- Remove the jack and fully tighten the lug nuts in the order shown below.
- Stow the flat tire on the rear of the vehicle and fully tighten the securing nuts.

Note: We recommend that you use a torque wrench to make sure you tighten all the securing wheel nuts on the spare wheel carrier to the required 55 Nm (41 lb.ft) specification.
- Remove the wheel blocks.
- Stow the jack and tools in the original locations shown in the removal section and tighten the retaining screws by turning clockwise.
Download Manual