MIRRORS
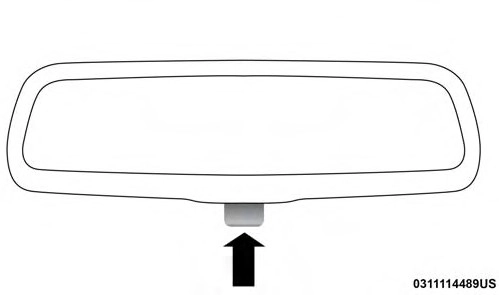
A single ball joint mirror is provided in the vehicle. It is a twist on mirror that has a fixed position at the windshield. The mirror installs on the windshield button with a coun- terclockwise rotation and requires no tools for mounting. The mirror head can be adjusted up, down, left, and right for various drivers. The mirror should be adjusted to center on the view through the rear window.
Headlight glare from vehicles behind you can be reduced by moving the small control under the mirror to the night position (toward the rear of the vehicle). The mirror should be adjusted while the small control under the mirror is set in the day position (toward the windshield).
Adjusting Rearview Mirror
The mirror head can be adjusted up, down, left, and right for various drivers. The mirror should be adjusted to center on the view through the rear window.
This mirror automatically adjusts for headlight glare from vehicles behind you.
NOTE: The Automatic Dimming feature is disabled when the vehicle is in REVERSE to improve rear view viewing.
The Automatic Dimming feature can be turned on or off through the touchscreen.
Press the mirror dimmer button once to turn the feature on.
3
Press the mirror dimmer button a second time to turn the feature off.
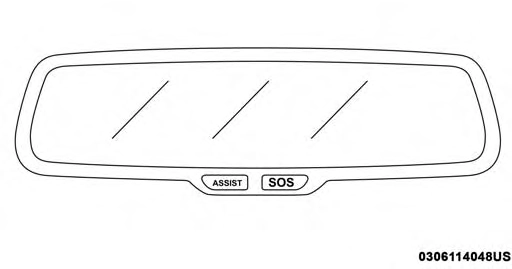
Automatic Dimming Mirror
Refer to “Uconnect Settings” in “Multimedia” for further information.
To receive maximum benefit, adjust the outside mirror(s) to center on the adjacent lane of traffic and a slight overlap of the view obtained from the inside mirror.
NOTE: The passenger side convex outside mirror will give a much wider view to the rear, and especially of the lane next to your vehicle.
The driver’s outside mirror will automatically adjust for glare from vehicles behind you. This feature is controlled by the inside automatic dimming mirror and will automati- cally adjust for headlight glare when the inside mirror adjusts.
Driver and passenger outside mirrors equipped with ap- proach lighting contain one LED, which is located in the upper outboard mirror glass corner. The approach light supplies illuminated entry lighting, which turns on in both mirrors when you use the remote keyless entry key fob or open any door. This LED shines outward to illuminate the front and rear door handles. It also shines downward to illuminate the area in front of the doors.
The power mirror controls are located on the driver’s door trim panel.
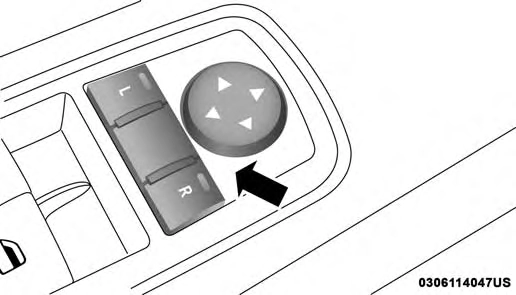
Power Mirror Control
The power mirror controls consist of mirror select buttons and a four-way mirror control switch. To adjust a mirror, push either the L (left) or R (right) button to select the mirror that you want to adjust.
NOTE: A light in the select button will illuminate indicat- ing the mirror is activated and can be adjusted.
Using the mirror control switch, push on any of the four arrows for the direction that you want the mirror to move.
 These mirrors are heated to melt frost or ice. This
feature will be activated whenever you turn on the
An illuminated vanity mirror is located on the sun visor. To use the mirror, rotate the sun visor downward and
rear window defroster (if equipped). Refer to “Climate
swing the mirror cover upward. The light turns on auto-
3
Controls” in “Getting To Know Your Vehicle” for further information.
Tilt Side Mirrors In Reverse provides automatic outside mirror positioning which will aid the driver’s view of the ground rearward of the front doors. The outside mirrors will move slightly downward from the present position when the vehicle is shifted into REVERSE. The outside mirrors will then return to the original position when the vehicle is shifted out of the REVERSE position. Each stored memory setting will have an associated Tilt Side Mirrors In Reverse position.
NOTE: The Tilt Side Mirrors In Reverse feature is not turned on when delivered from the factory. The Tilt Side Mirrors In Reverse feature can be turned on and off using the Uconnect System. Refer to “Uconnect Settings” in “Multimedia” for further information.
matically. Closing the mirror cover turns off the light.
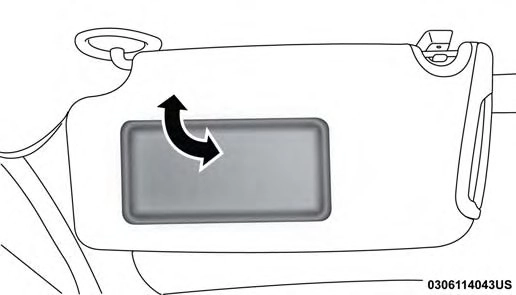
Illuminated Vanity Mirror
“Slide-On-Rod” And Extender Features Of Sun Visor
To use the “Slide-On-Rod” feature of the sun visor, rotate the sun visor downward and swing the sun visor so it is parallel to the side window, grab the sun visor and pull rearwards until the sun visor is in the desired position. To use the extender feature of the sun visor, grab the extender which is located at the rear of the visor and pull rearward.
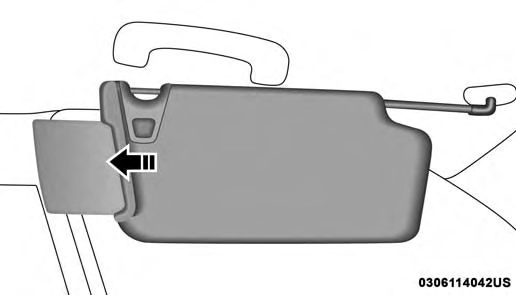
Slide-On-Rod Feature
Download Manual