INTERNAL EQUIPMENT
Storage
Glove Compartment
This device complies with Part 15 of the FCC Rules and
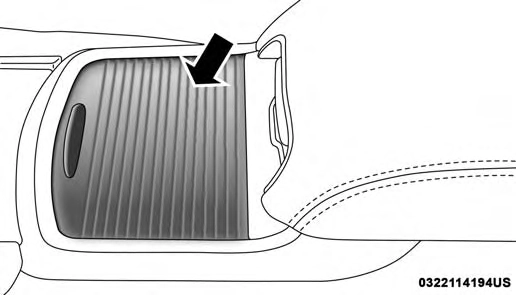
The glove compartment is located on the passenger side of 3
with Innovation, Science and Economic Development Canada license-exempt RSS standard(s). Operation is sub- ject to the following two conditions:
NOTE: Changes or modifications not expressly approved by the party responsible for compliance could void the user’s authority to operate the equipment.
the instrument panel.
To open the glove compartment, pull the release handle.
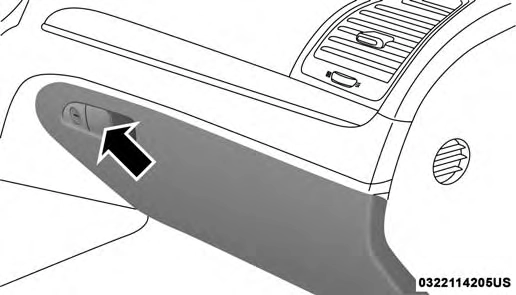
Glove Compartment
Console Features
There is an open cubby bin located forward of the gear selector.
Two separate storage compartments are also located un- derneath the center console armrest.
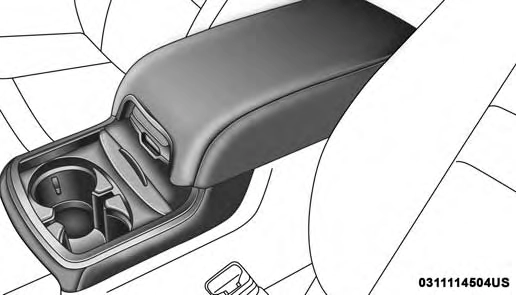
Center Console
Inside the center console armrest, there is a removable upper storage tray that can be slid forward/rearward on rails for access to the lower storage area. This tray has an integrated coin holder, along with additional area for small items and handheld devices. Below the upper tray, the
lower storage compartment is made for larger items, like tissue boxes. In addition, the 12 volt power outlet, USB and Aux jack are located here.
Upper Storage Tray
Door Storage
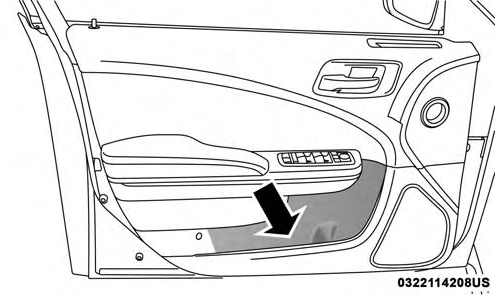
The door panels contain storage areas.
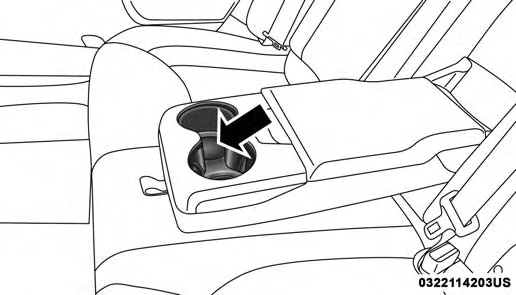
The cupholders are located in the forward edge of the center console.
Front Door Trim Storage
Retractable Cover
Front Cupholders
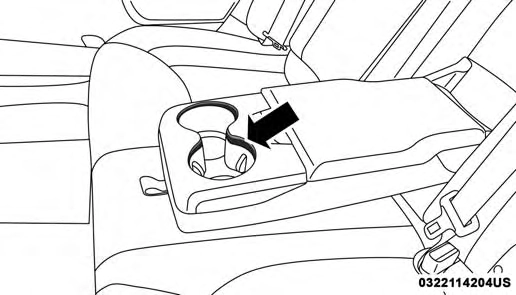
If equipped, the rear seat cupholders are located in the center armrest between the rear seats. The cupholders are positioned forward in the armrest and side-by-side to provide convenient access to beverage cans or bottles while maintaining a resting place for the rear occupant’s elbows.
Rear Seat Cupholders
Lighted Cupholders — If Equipped
On some vehicles the rear cupholders are equipped with a light ring that illuminates the cupholders for the rear passengers. The light ring is controlled by the Dimmer Control. Refer to “Interior Lights” in “Getting To Know Your Vehicle” for further information.
Light Ring In Rear Cupholder
Your vehicle is equipped with one 12 Volt (13 Amp) power outlet on the instrument panel and one 12 Volt (13 Amp) power outlet in the center console that can be used to
power cellular phones, small electronics and other low 3
powered electrical accessories. The power outlets are la- beled with either a “key” or a “battery” symbol to indicate how the outlet is powered. Power outlets labeled with a “key” are powered when the ignition switch is in the ON or ACC position, while the outlets labeled with a “battery” are connected directly to the battery and powered at all times.
NOTE:
All accessories connected to the “battery” powered outlets should be removed or turned off when the vehicle is not in use to protect the battery against discharge.
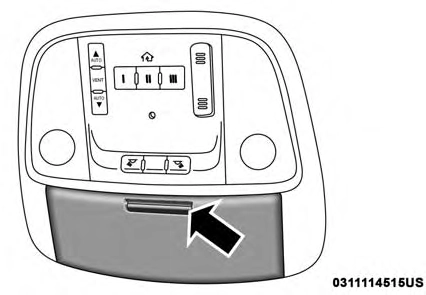
The front power outlet is located inside the storage area on the center stack of the instrument panel.
In addition to the front power outlet, there is also a power outlet located in the storage area of the center console.

Front Power Outlet Center Console Power Outlet
NOTE: If the Media Hub is in use, do not exceed the maximum power of 100 Watts (8 Amps) for the center console power outlet. When the Media Hub is not in use, the outlet can deliver up to 160 Watts (13 Amps). If the power rating is exceeded, the fuse protecting the system needs to be replaced.
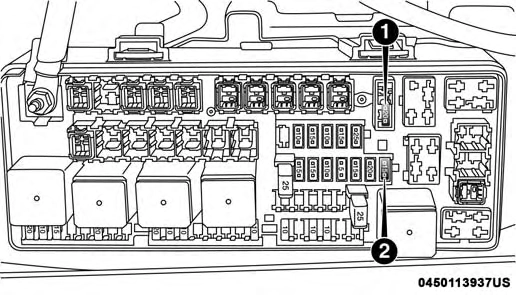
Power Outlet Fuse Locations
NOTE: The instrument panel power outlet and dual rear console USB ports can be changed to “battery” powered all the time by moving the #12 20 Amp fuse from “IGN” to “B+”. Refer to “Fuses” in “In Case Of Emergency” for further information.
(Continued)

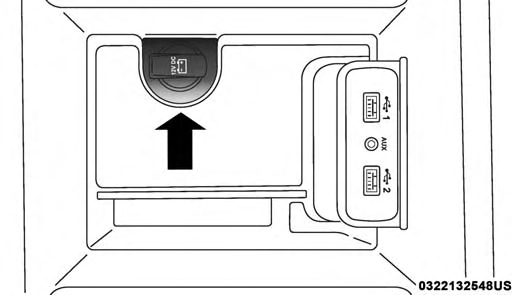
Your vehicle may be equipped with an Open Dots compat- ible wire-free phone charging surface located in the center console. The wireless charger features continuous wireless charging during vehicle operation and allows for uninter- rupted Bluetooth streaming to properly equipped vehicle audio systems.
Wireless Charging Pad
In order to enjoy the convenience of Open Dots wire-free charging, you must obtain an aftermarket wireless-enabled case and then install the case on your phone. Set the phone on the wireless charging pad face up. The charging indi- cator on your phone will light up indicating that your phone is charging.
NOTE: The charging pad is safe to the touch. However, if metallic items are placed on the charging surface while in use, the device will turn off. Clean all spills immediately and allow to dry before using.
For phones that already have built-in wireless charging capability (Samsung, Apple iPhone 8, 8 Plus and X Phones), a Qi Adapter is available to charge your phone using the Open Dot wire-free phone charging surface. Simply place the Qi Adapter (dot side down) on the charging surface and then place your built-in charging capable phone face up on top of the Qi Adapter. This product may not be compatible with all vehicle/Open Dots compatible wire-free phone charging surface combinations.
To get your free aftermarket phone case or Qi Adapter, go to http://invehiclewirelesscharging.com. You will need your vehicle/voucher identification number (located in your vehicle’s glove box). If you have any questions or are not sure if you need a phone case or the Qi Adapter, please call our customer support line for assistance: 877–360–7702
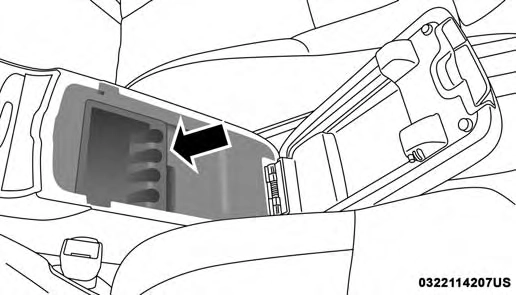
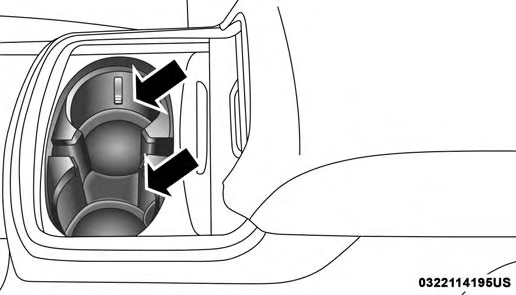
At the front of the console a compartment is provided for the storage of a pair of sunglasses. The storage compart- ment access is a “push/push” design. Push the chrome pad
on the door to open. Push the chrome pad on the door to 3 close.
Download Manual