Bulb Replacement
|
Interior Bulbs |
|
|
Lamps |
Bulb Number |
|
Center & Rear Dome Lamp |
LED (Serviced At An Authorized Dealer) |
|
Center & Rear Reading Lamps |
LED (Serviced At An Authorized Dealer) |
|
Front Door Courtesy Lamp |
LED (Serviced At An Authorized Dealer) |
|
Front Header Reading Lamps – If Equipped |
LED (Serviced At An Authorized Dealer) |
|
Instrument Cluster Lamps |
LED (Serviced At An Authorized Dealer) |
|
Liftgate Lamp(s) |
LED (Serviced At An Authorized Dealer) |
|
Overhead Console Reading Lamps |
LED (Serviced At An Authorized Dealer) |
|
Removable Console Lamp – If Equipped |
LED (Serviced At An Authorized Dealer) |
|
Visor Vanity Lamps |
6501966 |
|
Exterior Bulbs |
|
|
Lamps |
Bulb Number |
|
High Intensity Discharge Headlamp |
Low Beam - D3S High Beam - 9005LL |
|
Halogen Headlamp |
Reflector Low Beam - H11LL Projector Halogen Low Beam - 9005HL+ All High Beams - 9005LL |
|
Dedicated Daytime Running Lamp (If Equipped) |
LED (Serviced At An Authorized Dealer) |
|
Front Turn Signal Lamp |
PWY24WNA (If Halogen Headlamp Equipped) PWY24WSV (If HID Headlamp Equipped) |
|
Side Marker Lamp |
W3W |
|
Front Park Lamp |
PWY24WNA (If Bulb Equipped) LED (Serviced At An Authorized Dealer) |
|
Front Fog Lamp |
H11LL |
|
LED Front Fog Lamp |
LED (Serviced At An Authorized Dealer) |
|
Center High Mounted Stop Lamp (CHMSL) |
LED (Serviced At An Authorized Dealer) |
|
Stop/Turn Signal Lamp |
W21/5WLL |
|
Rear Tail/Side Marker Lamp |
Rear Tail - Body Side - W21/5WLL (If Bulb Equipped); LED (Serviced At An Authorized Dealer) Rear Tail - Liftgate - W5WLL (If Bulb Equipped); LED (Serviced At An Authorized Dealer) Rear Side Marker: W3W |
|
Backup Lamp |
W21W |
|
License Lamp |
LED (Serviced At An Authorized Dealer) |
REPLACING EXTERIOR BULBS
HIGH INTENSITY DISCHARGE (HID) HEADLAMPS — IF EQUIPPED
The headlamps contain a type of high voltage discharge light source. High voltage can remain in the circuit even with the headlamp switch off. Because of this, you should not attempt to service a HID headlamp light source yourself. If an HID headlamp light source fails, take your vehicle to an authorized dealer for service.
Note:
On vehicles equipped with HID headlamps, when the headlamps are turned on, there is a blue hue to the lights. This diminishes and becomes more white after approximately 10 seconds, as the system charges.
WARNING:
A transient high voltage occurs at the bulb sockets of HID headlamps when the headlamp switch is turned ON. It may cause serious electrical shock or electrocution if not serviced properly. See an authorized dealer for service.
HALOGEN HEADLAMPS
-
Reach behind the headlamp housing to access the headlamp bulb cap.
-
Firmly grasp the headlamp bulb cap and rotate it counterclockwise to unlock it.
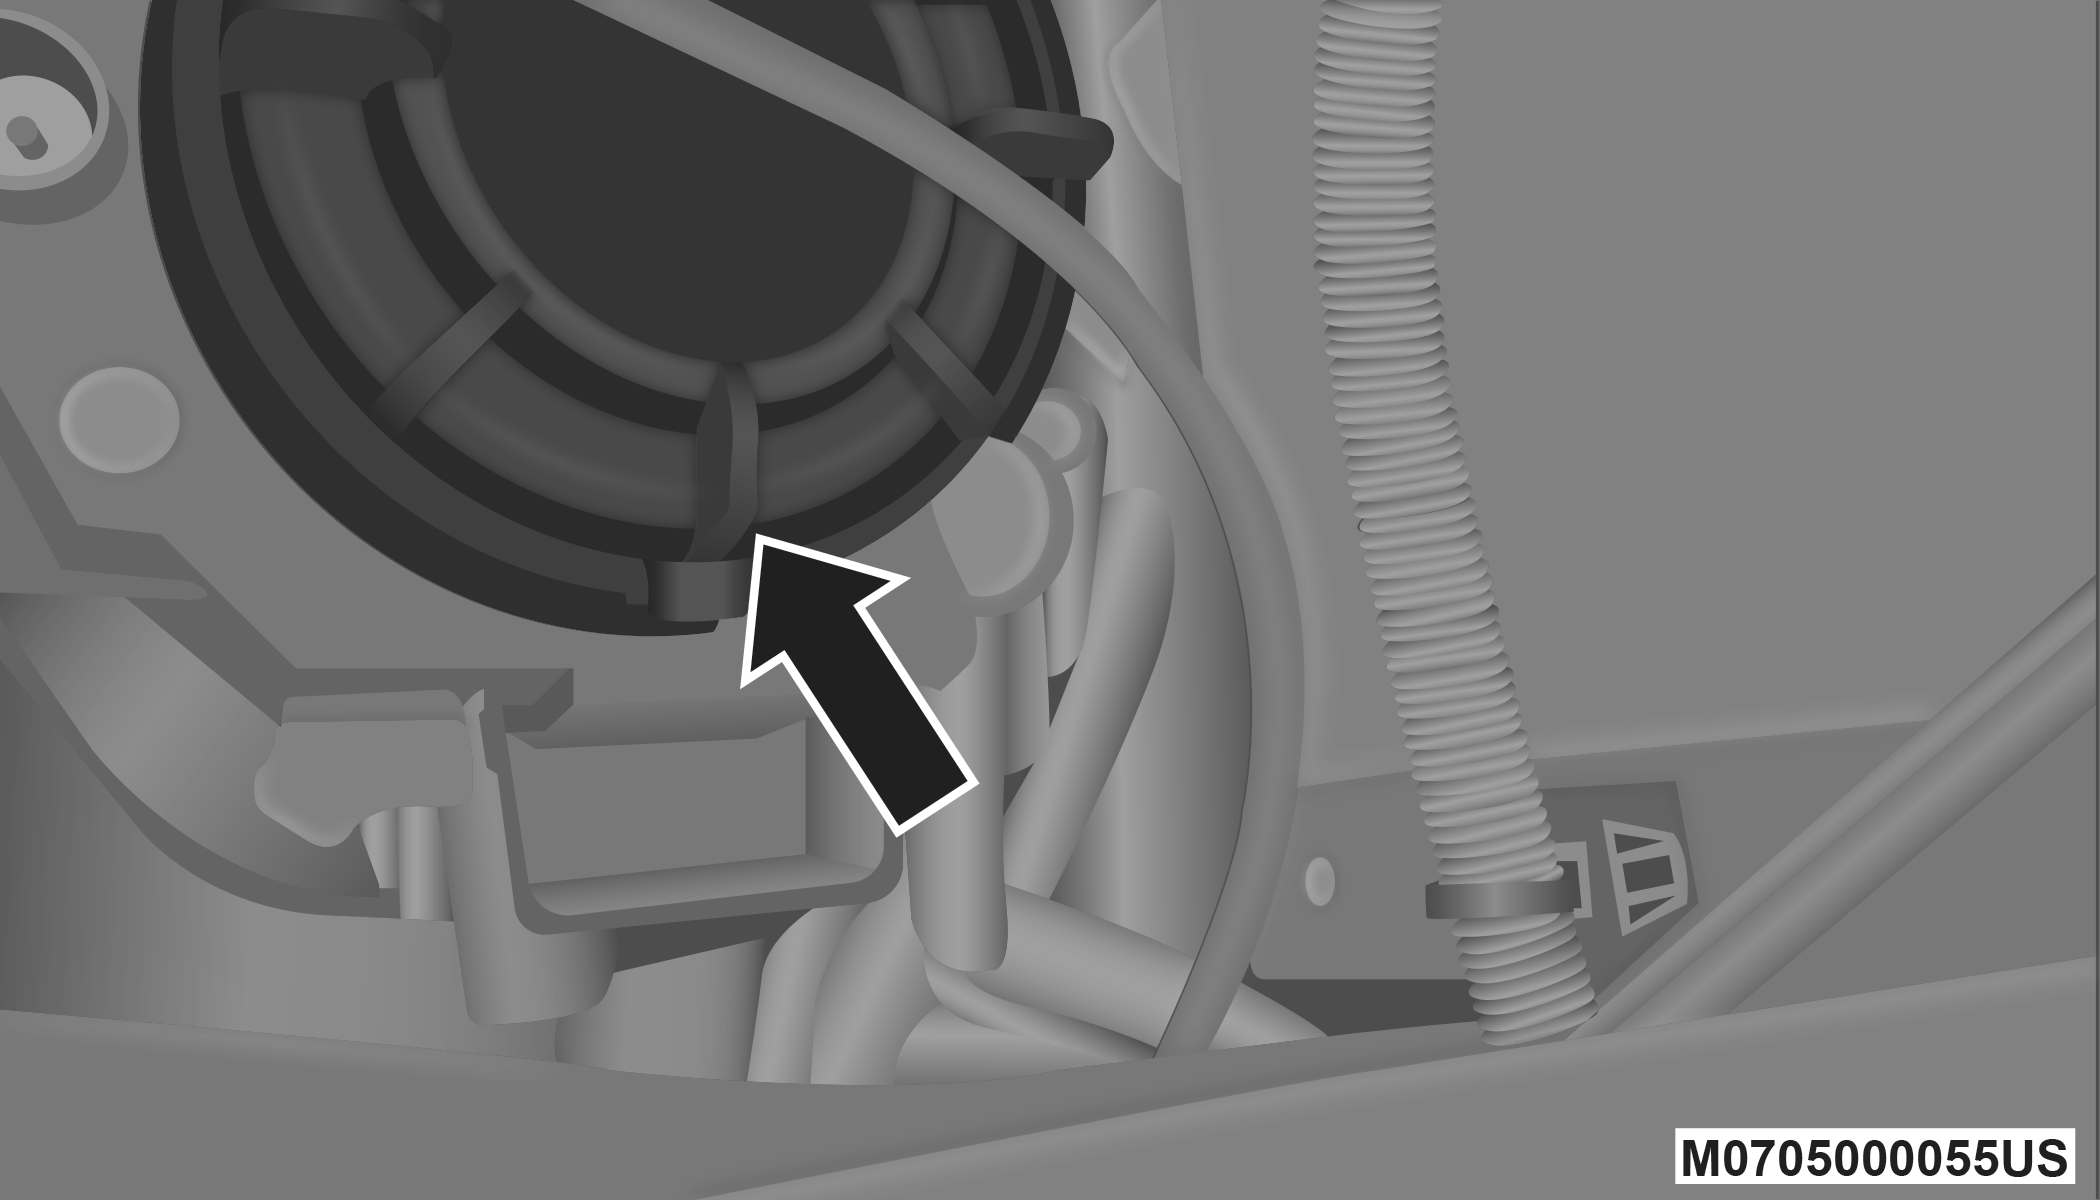
Headlamp Bulb Cap
-
Firmly grasp the headlamp bulb socket assembly and rotate counterclockwise to remove from the housing.
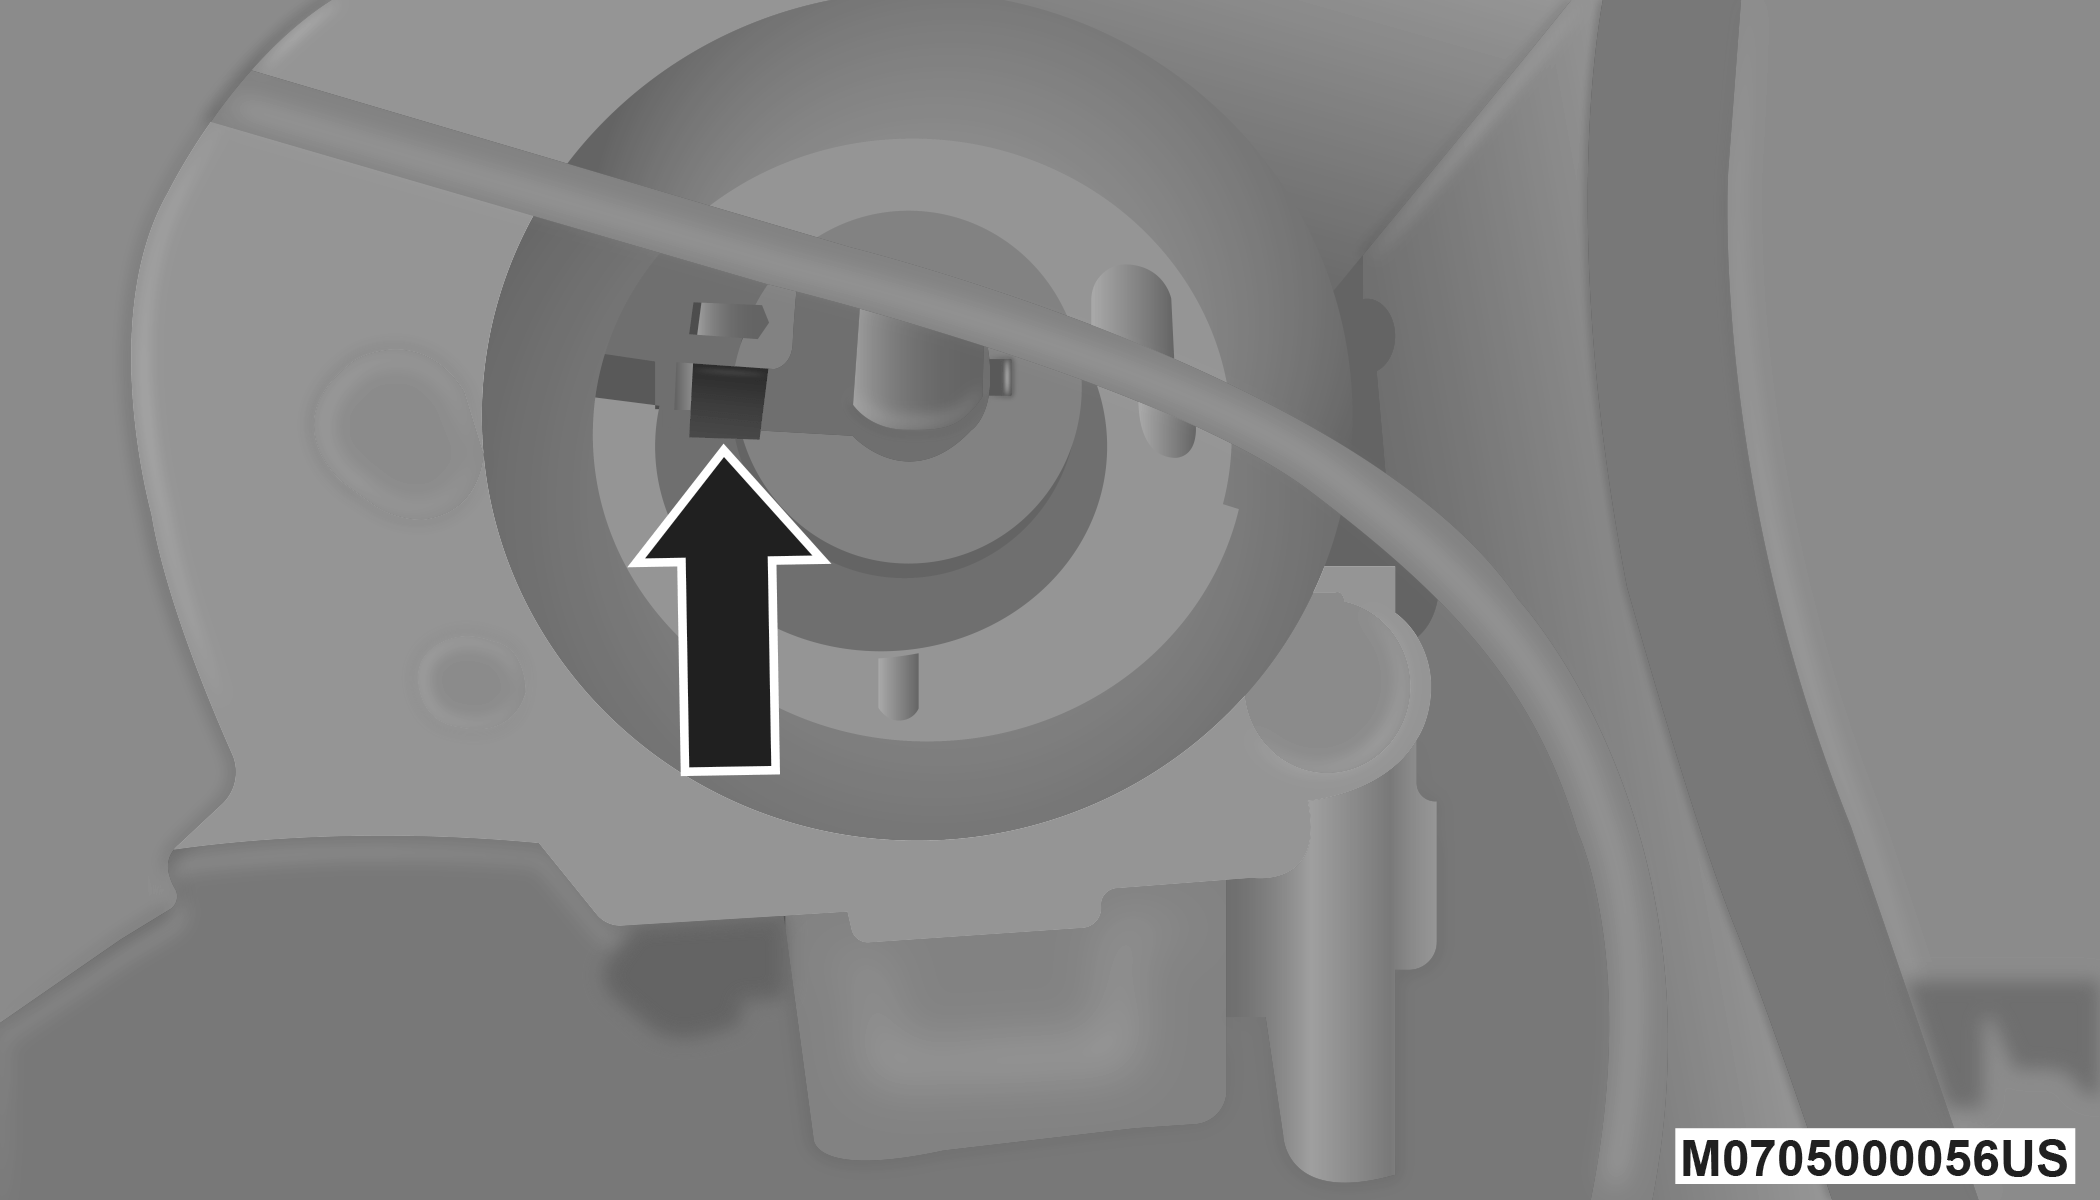
Headlamp Bulb Socket
-
Disconnect the bulb from the electrical connector and then connect the replacement bulb.
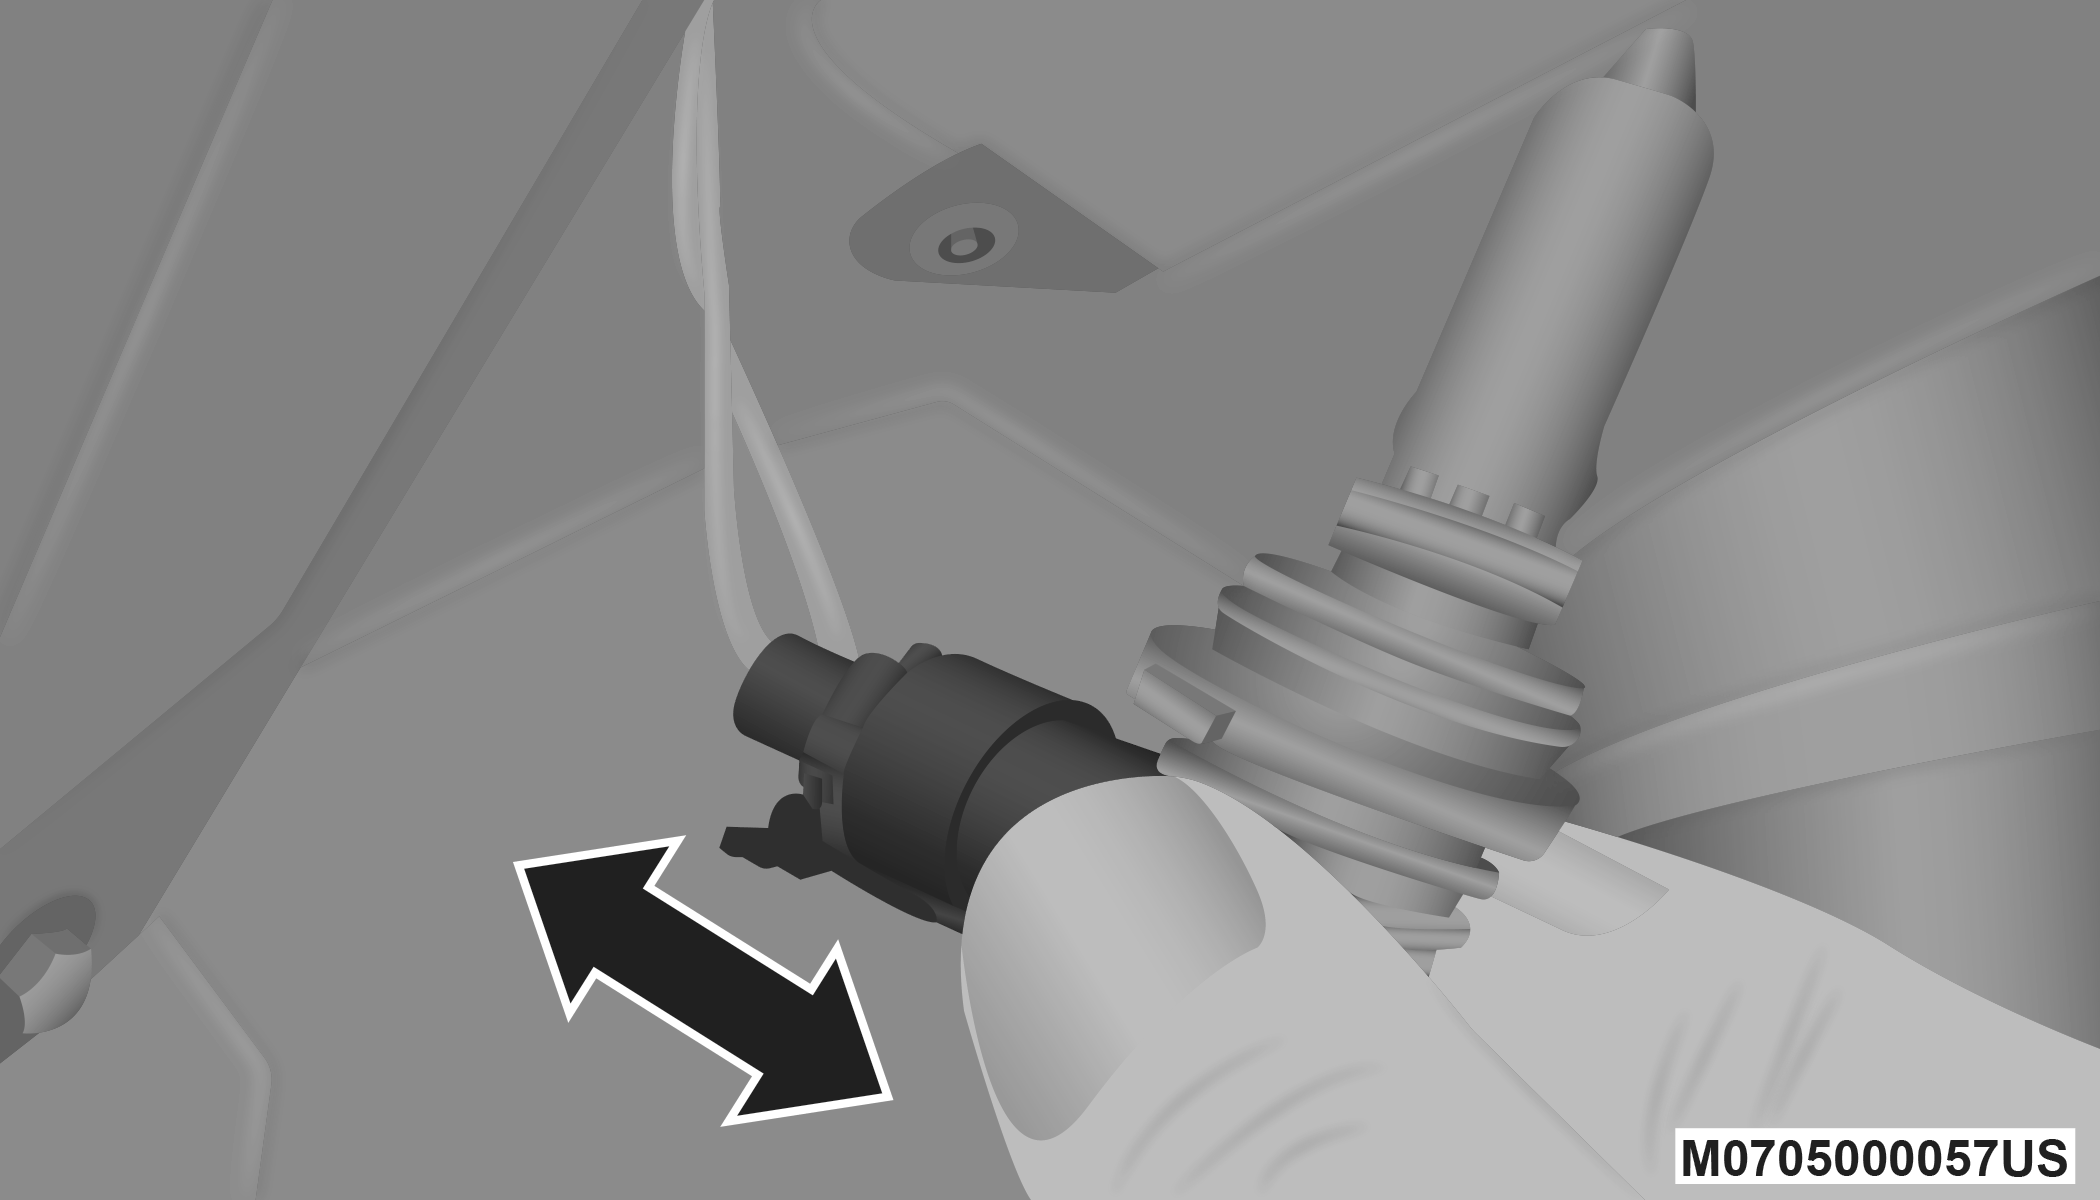
Headlamp Bulb
CAUTION:
Do not touch the new bulb with your fingers. Oil contamination will severely shorten bulb life. If the bulb comes in contact with any oily surface, clean the bulb with rubbing alcohol.
-
Install the bulb and connector assembly into the headlamp housing and rotate clockwise to lock it in place.
-
Install the headlamp bulb cap in the headlamp housing and rotate clockwise to lock it in place.
FRONT TURN SIGNAL LAMP
-
Open the hood.
-
Twist the front turn signal lamp socket assembly counterclockwise, and then remove the front turn signal lamp assembly from the lamp housing.
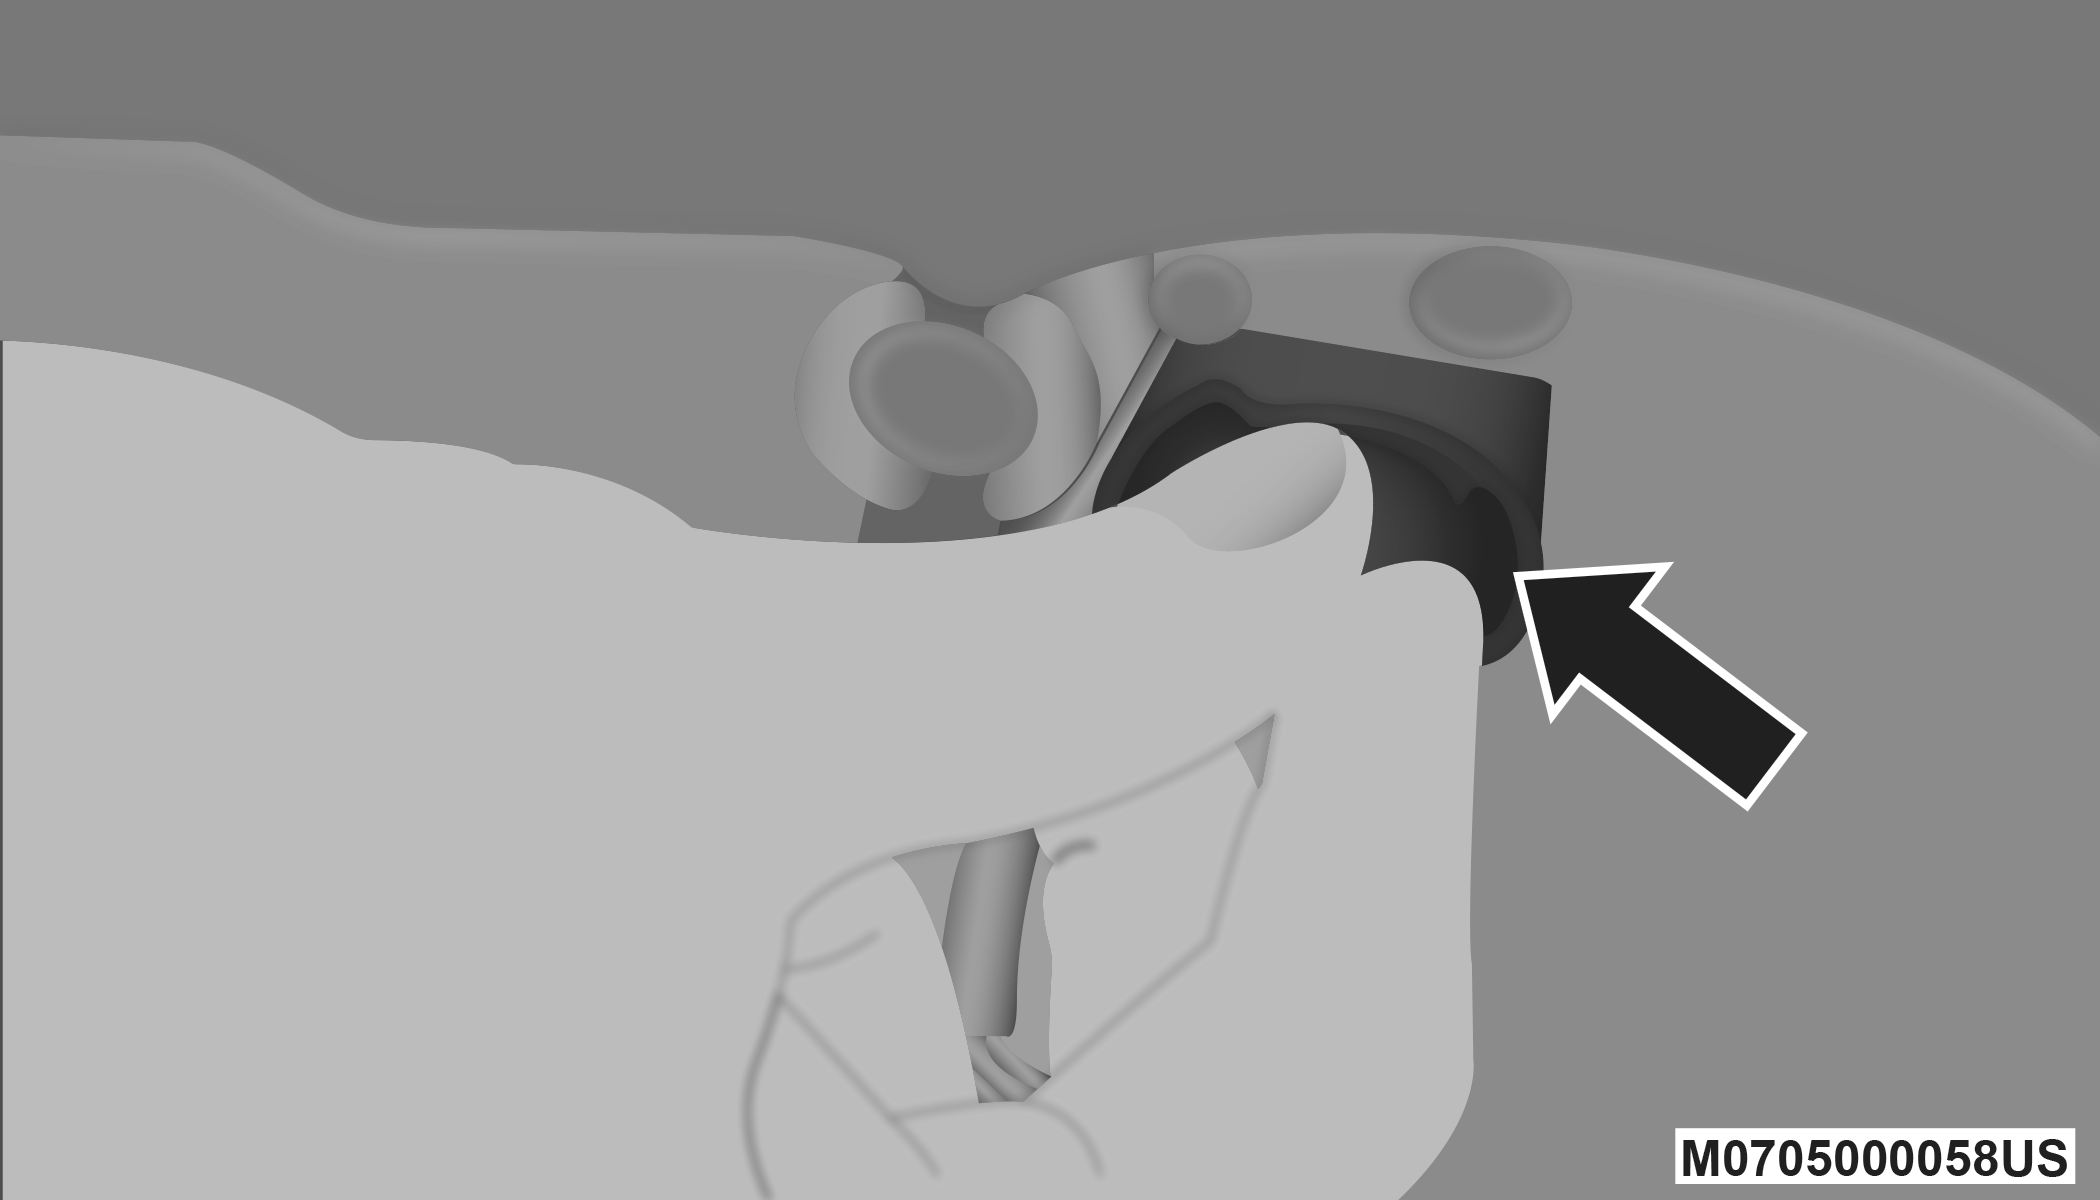
Front Turn Signal Lamp Socket
-
Pull the bulb out of the socket and insert the replacement bulb.
-
Install the front turn signal lamp socket assembly into the housing, and rotate the front turn signal lamp socket clockwise to lock it in place.
FRONT AND REAR SIDE MARKER LAMPS
-
Remove the three fasteners from the inner wheel liner and carefully peel back liner for access.
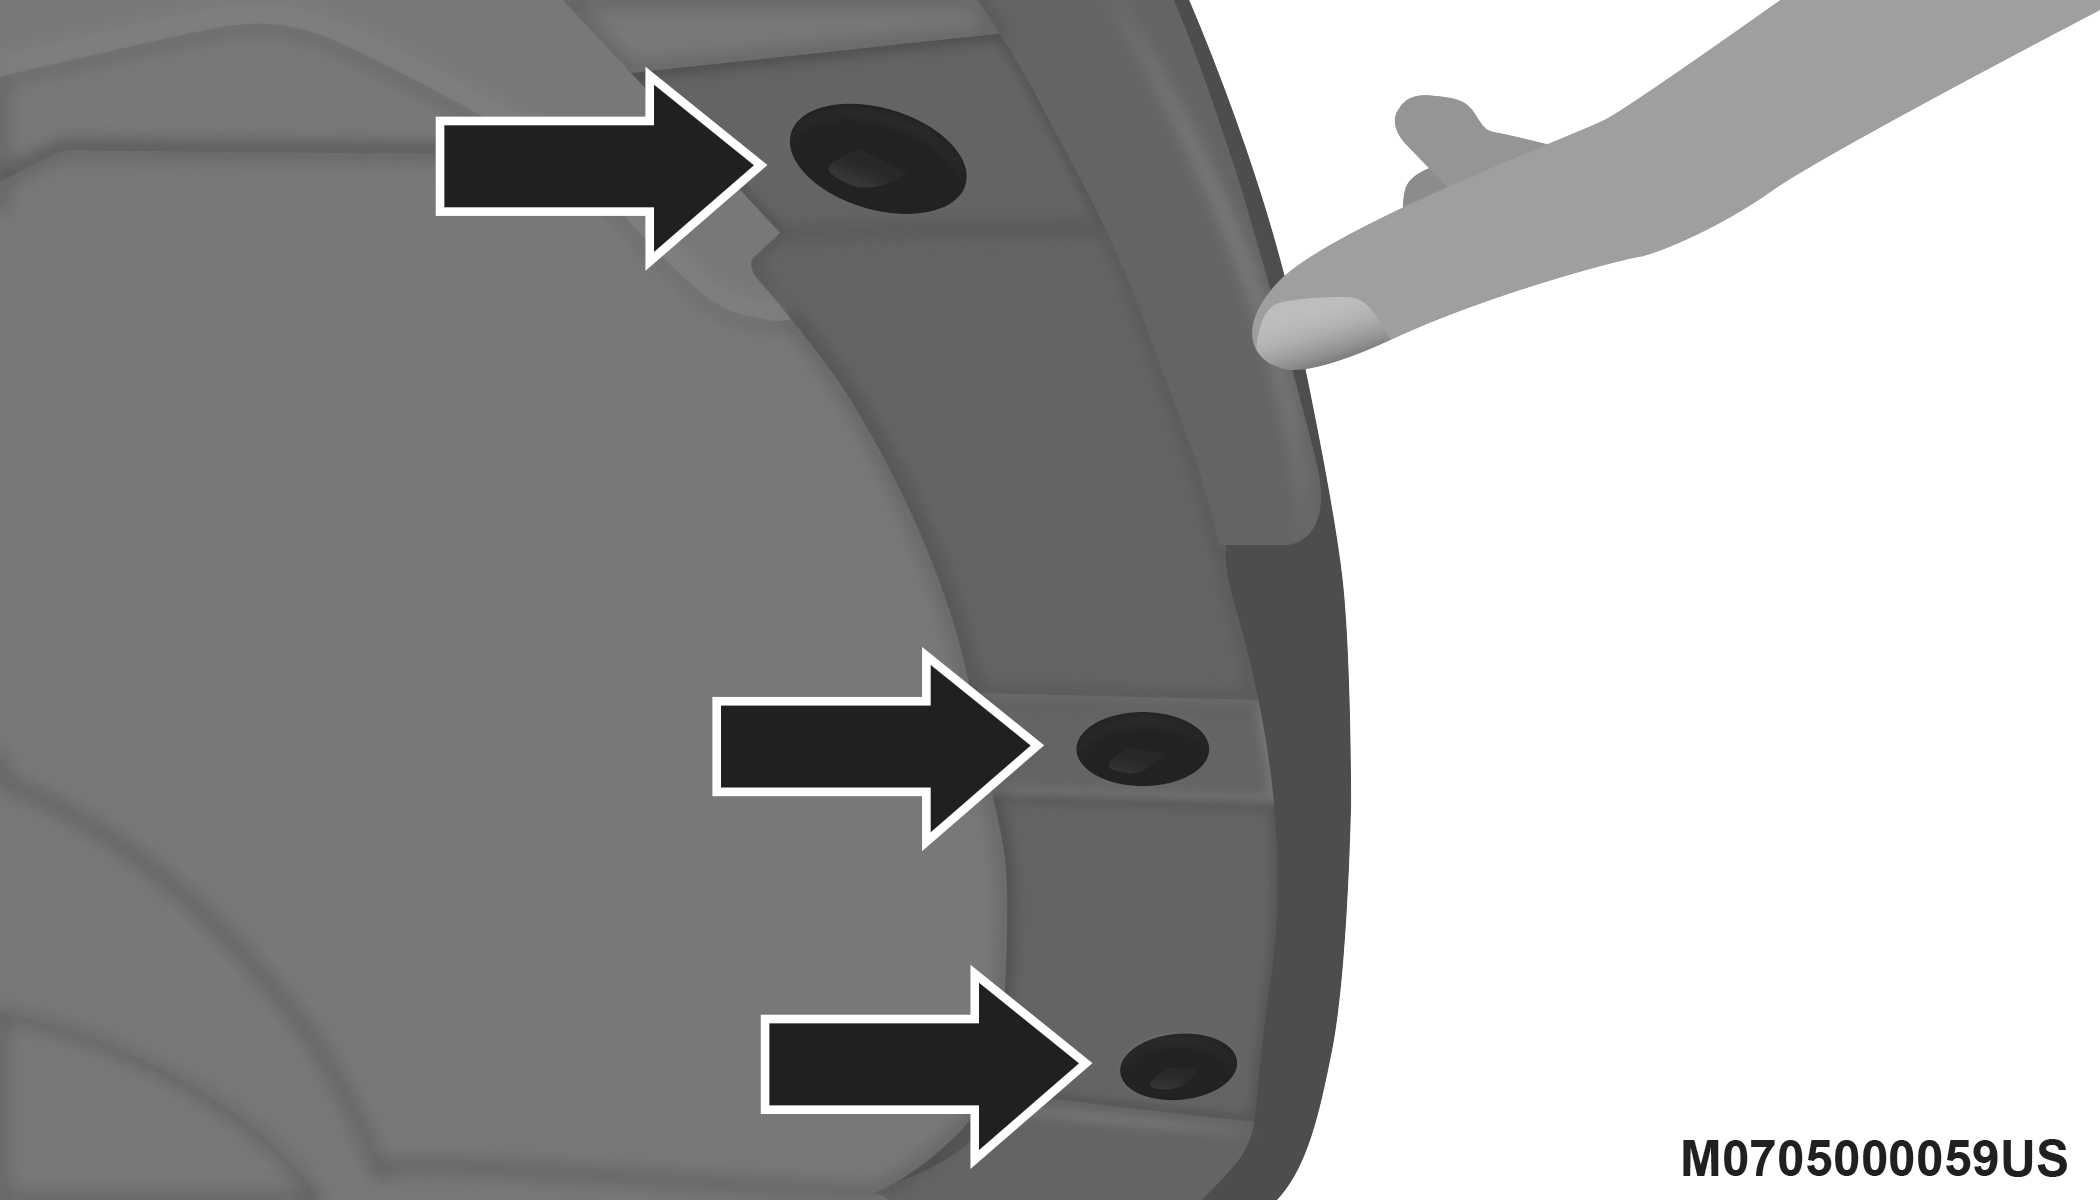
Inner Wheel Liner Fasteners
-
Firmly grasp the front side marker lamp socket and rotate a quarter turn counterclockwise to remove it from the lamp assembly.
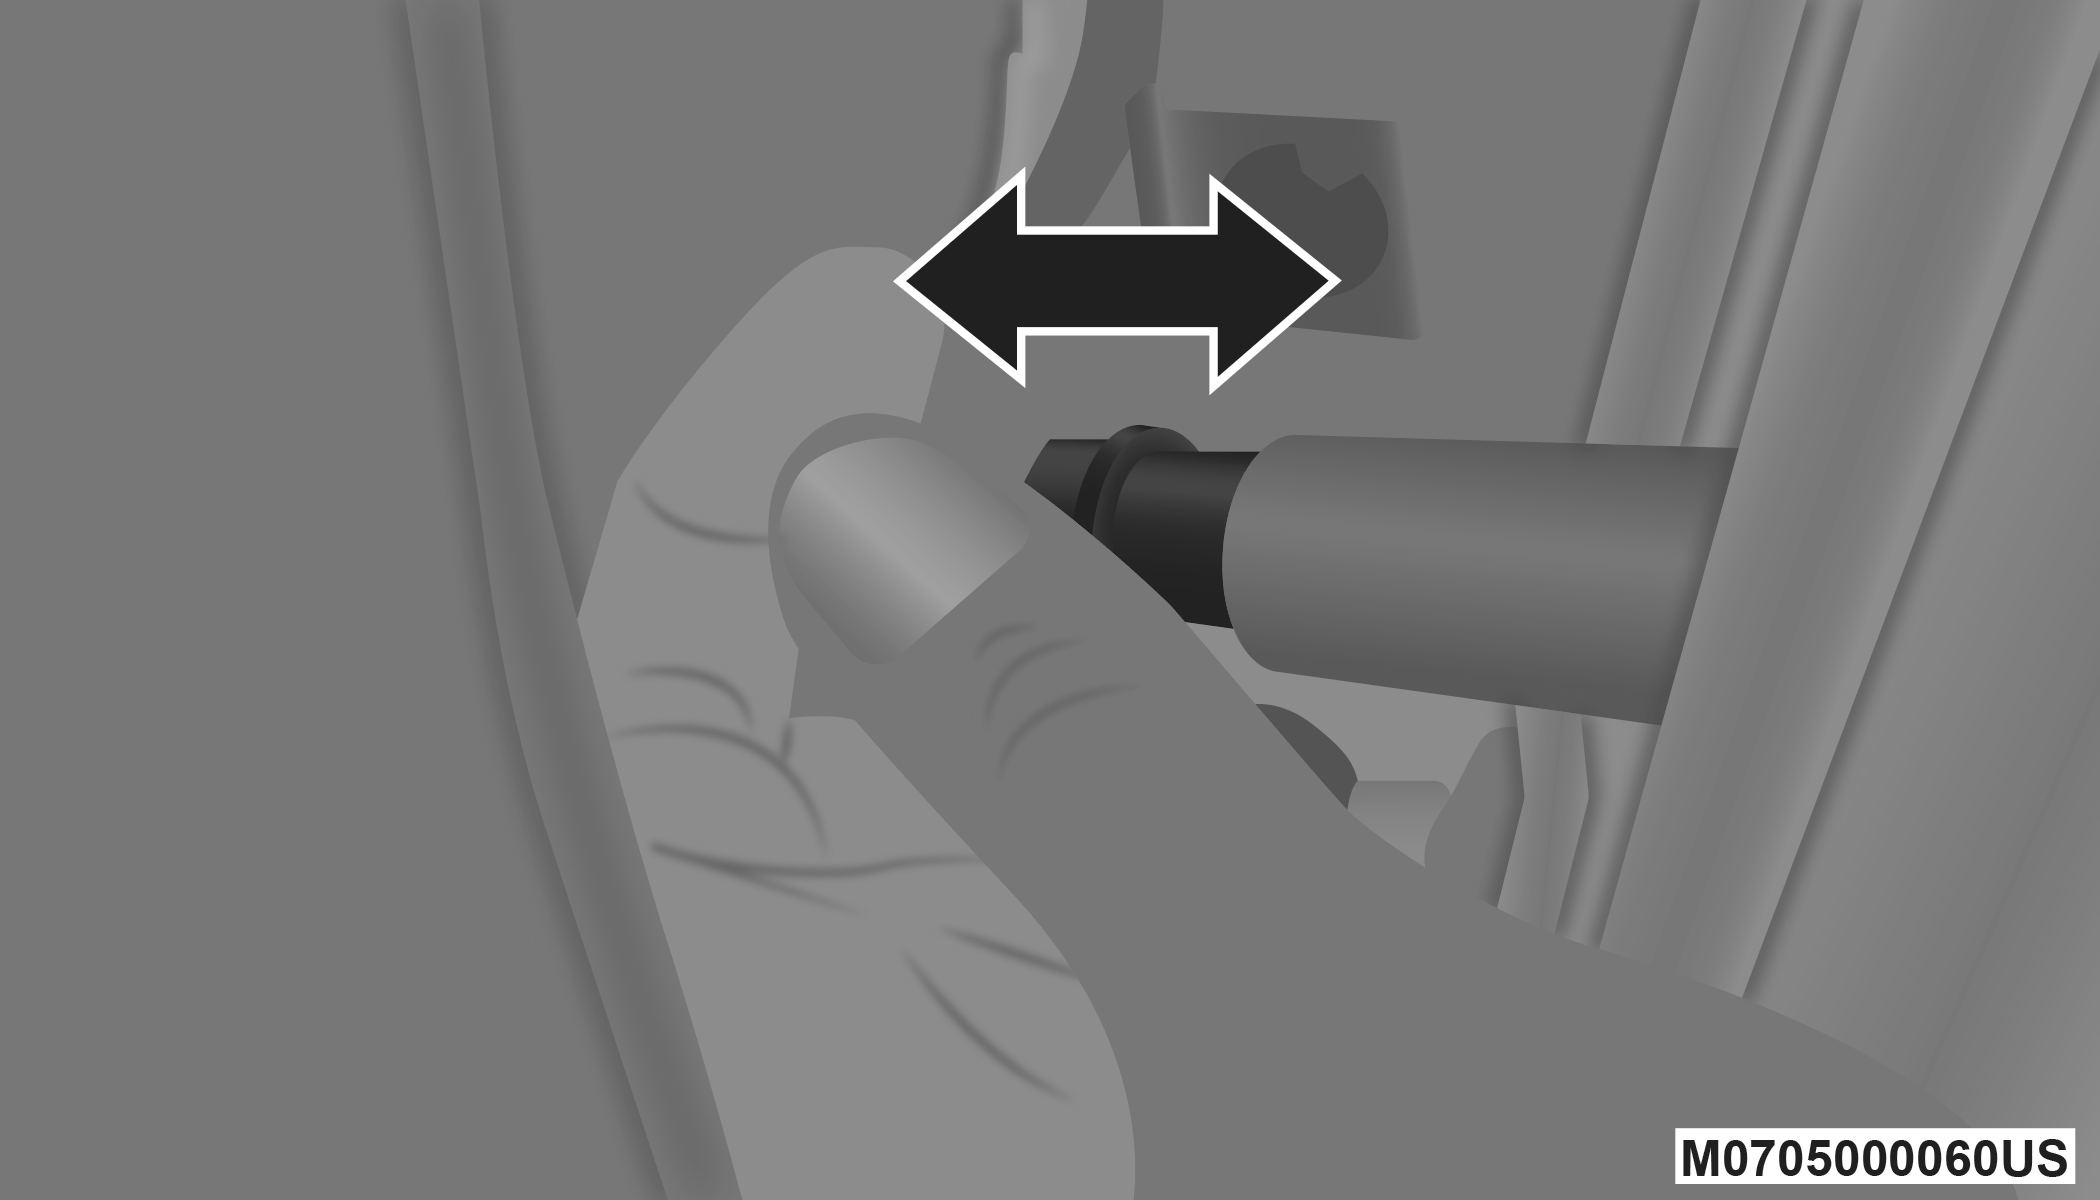
Front Side Marker Lamp Bulb Removal
-
Remove bulb from the front side marker lamp socket and replace with a new bulb.
-
Install front side marker lamp socket in lamp assembly and rotate a quarter turn clockwise to lock into place.
-
Position the inner wheel liner in place and install the three fasteners.
FRONT FOG LAMP — HALOGEN
-
Remove fasteners from inner wheel liner and carefully peel back liner for access.
-
Reach through the front fascia to the fog lamp housing to access the bulb.
-
Rotate the front fog lamp bulb counterclockwise, and remove the bulb from the front fog lamp housing.
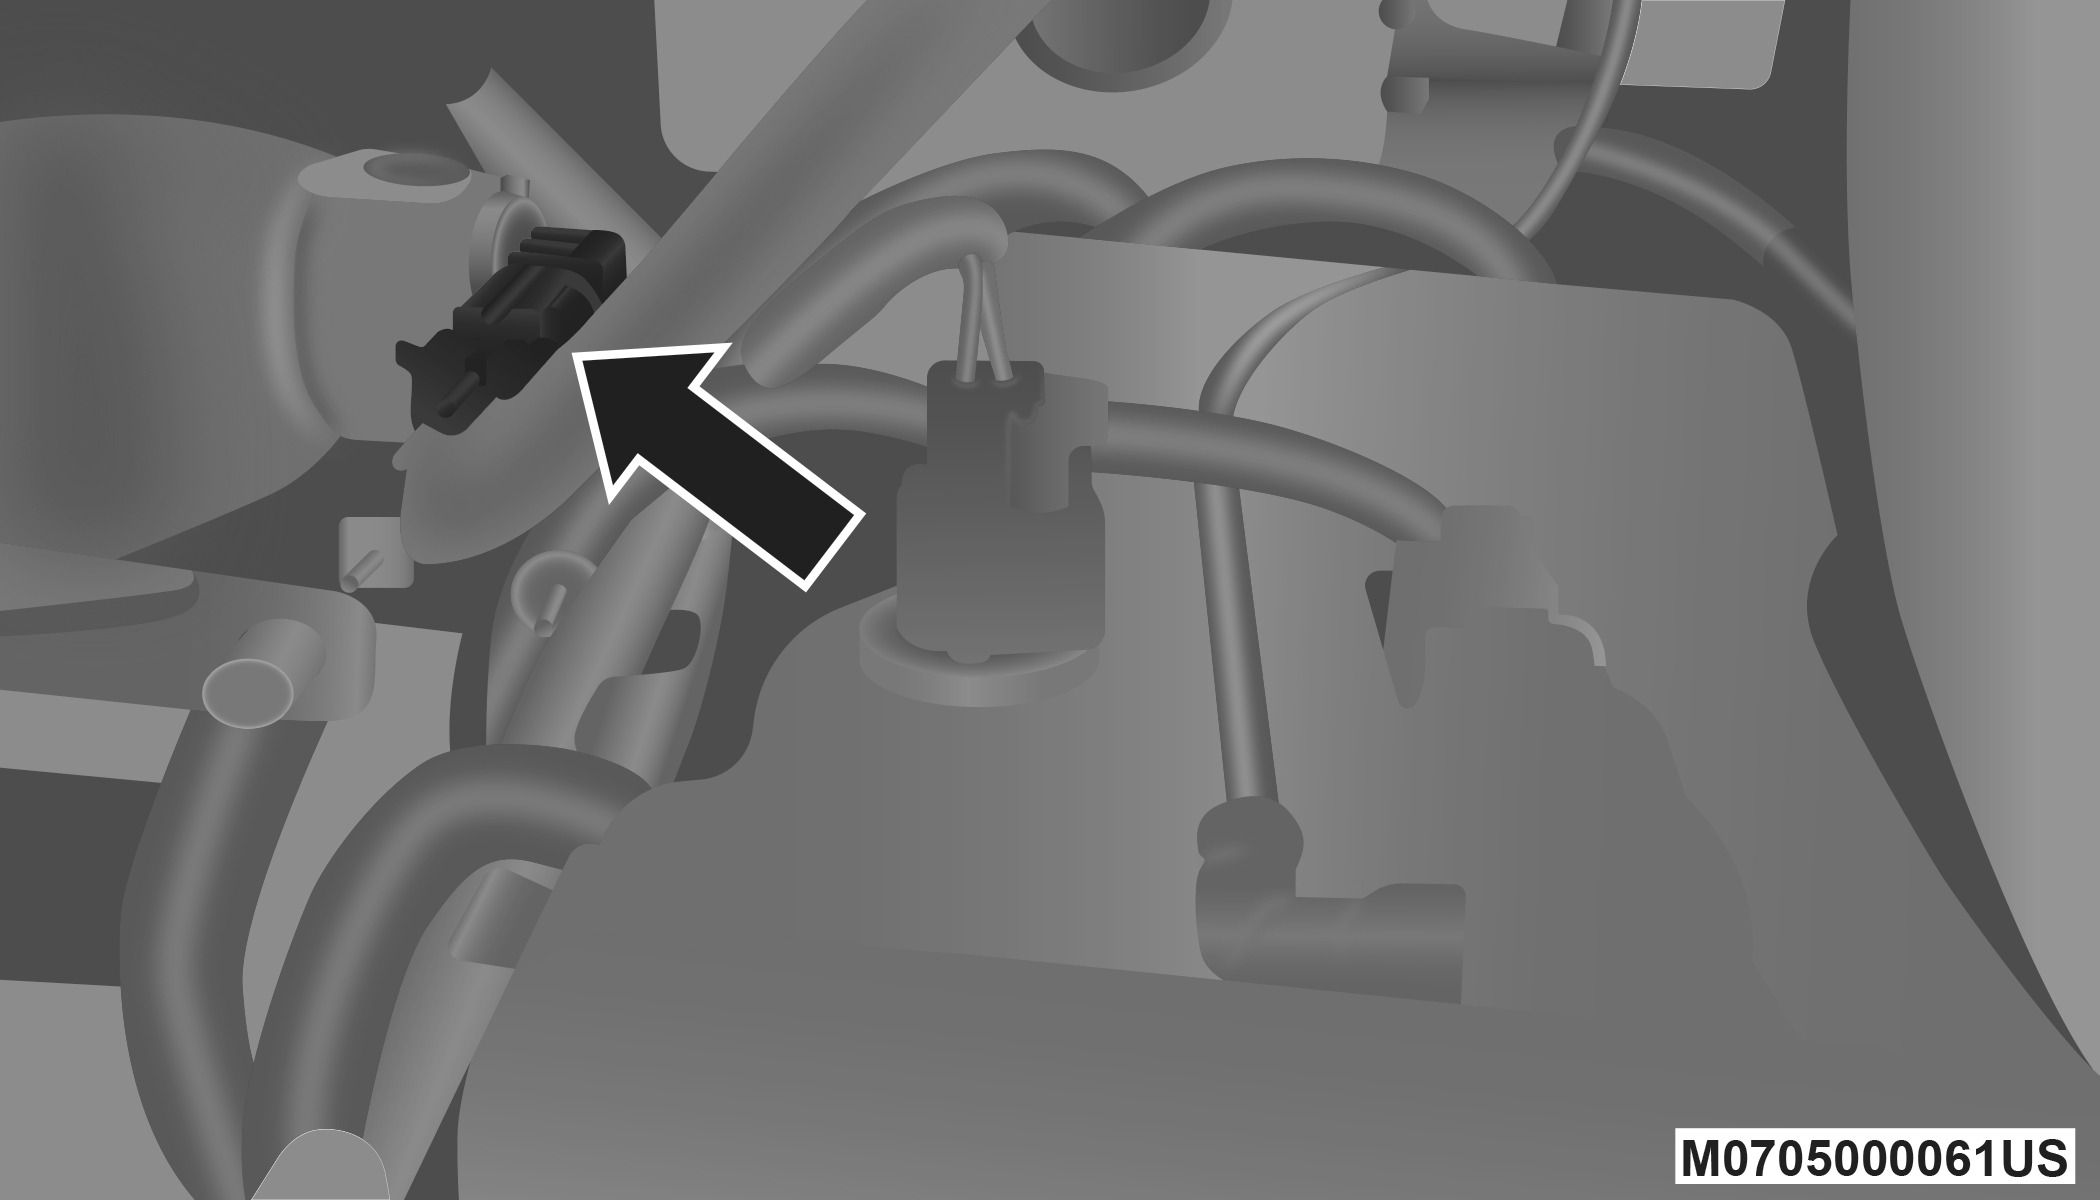
Front Fog Lamp Socket
-
Disconnect the bulb from the electrical connector and then connect the replacement bulb.
CAUTION:
Do not touch the new bulb with your fingers. Oil contamination will severely shorten bulb life. If the bulb comes in contact with any oily surface, clean the bulb with rubbing alcohol.
-
Install the front fog lamp bulb into the front fog lamp housing, and rotate the bulb clockwise to lock it in place.
-
Position the inner wheel liner in place and install fasteners.
REAR LIFTGATE MOUNTED BACK-UP LAMPS AND TAIL LAMPS (IF BULB EQUIPPED)
-
Raise the liftgate.
-
Use a fiber stick or flat blade screw driver to pry off the bulb access cover on the lower liftgate trim.
-
Back-up lamps/tail lamp (if bulb equipped) are now visible. Rotate socket(s) counterclockwise.
-
Remove/replace bulb(s).
-
Reinstall the socket(s).
-
Reverse process to reinstall the liftgate trim.
REAR BODYSIDE MOUNTED TAILLAMPS
-
Raise the liftgate.
-
Remove two torx head screws on the bodyside lamp using a T30 screwdriver.
-
Remove lamp from vehicle body and locate bulb socket on rear of lamp. Rotate socket counterclockwise.
-
Remove/replace bulb(s).
-
Reinstall the socket(s).
-
Reverse process to reinstall the lamp onto vehicle.
CENTER HIGH MOUNTED STOP LAMP (CHMSL)
The center high-mounted stop lamp is an LED assembly. See an authorized dealer for replacement.
REAR LICENSE LAMP
The rear license lamps are LED. See an authorized dealer for replacement.