Multi-function display (color LCD)
& Features
The multi-function display (color LCD) has the following functions.
|
Description |
Page |
|
Displays useful messages, such as notification, etc. |
210 |
|
Displays basic screens (e.g. fuel consumption screen, etc.) |
211 |
|
Sets and adjusts maintenance notification |
229 |
Also, the multi-function display (color LCD) can also be used to set and initialize the multi-function display (color LCD) itself.
When the driver’s door is opened and closed, the welcome screen will appear for a short time.
When the setting is “On”, the self-
check screen appears. For details about this setting, refer to “On/Off setting” P230.
When the ignition switch is turned to the “ON” position, the vehicle self-check will be performed. The screens corresponding to the following items will appear one after another for several seconds each.
When the checks are performed, the color
of the icon corresponding to the checked item will change.
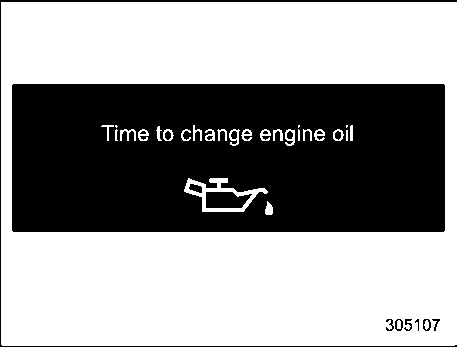
If there is a notification, the message will be displayed. Take the appropriate actions based on the message indicated.
After the self-check is completed, today’s date, the stored birthday or the stored anniversary is displayed.
approximately 311 miles (500 km) or more.
Example
Useful messages, such as reminder in- formation, weather information (if equipped) and traffic information (if equipped) may interrupt the current screen and appear on the display accompanied by a beep. Take proper action according to the message.
The interruption screen will return to the original screen after a few seconds. Also, you can press the INFO button to skip the interruption screen.

Control switch
tton
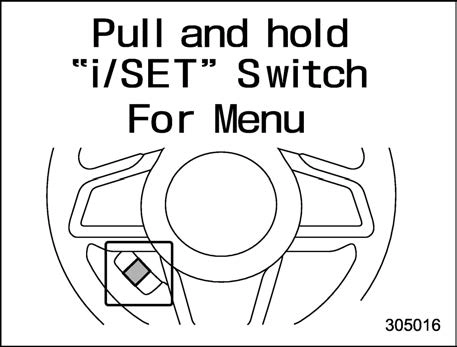
 Press the INFO button on the steering wheel to switch the item displayed on the basic screen. You can operate the items on the setting screen by using the “
  ”, “
”, “  ” and “ /SET” switches.
*: This is not displayed on the multi-function display (color LCD) when the ignition switch
is in the “ACC” position.
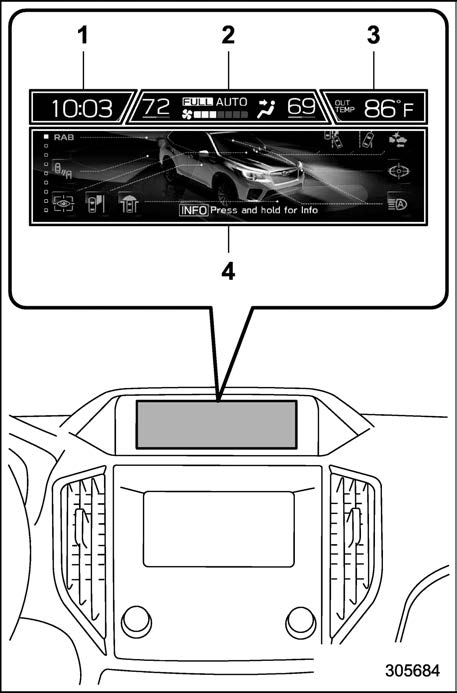
While the ignition switch is in the “ACC” or “ON” position, the basic screen will be displayed.
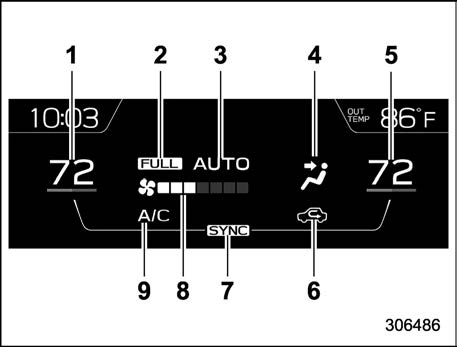
The outside temperature is displayed on the multi-function display (color LCD).
! Climate control screen
The climate control status is displayed on the multi-function display (color LCD).
Climate control screen
*1: Models with the SYNC function only
When operating the climate control sys- tem, the basic screen switches to the climate control screen. For details about climate control operation, refer to “Climate
control panel” P265.
! Clock
The clock can be displayed in either 12- hour display or 24-hour display. For details about the setting, refer to “Clock” P232.
Press the INFO button on the steering wheel to switch the item displayed on the information screen.
|
Content |
Description |
Page |
|
Electric components operating status screen*1 |
Displays the operating status of the electric components and equipment. |
214 |
|
Prevention safety screen |
Displays the status of your vehicle. |
214 |
|
EyeSight screen |
Displays the operating status of EyeSight. |
215 |
|
Favorite screen |
Displays up to 3 optional items. |
215 |
|
Weather information screen*2 |
Displays weather information. |
216 |
|
Traffic information*2/Navigation*3 screen |
Displays information linked with the navigation system. |
216 |
|
Audio screen*3 |
Displays audio system information. |
217 |
|
Fuel consumption screen |
Displays fuel consumption information. |
217 |
|
Clock/date screen |
Displays the clock. |
217 |
|
Guidance screen |
Moves to the setting screen. |
218 |
*1: If equipped
*2: Models with SiriusXM Satellite Radio
*3: Models with navigation system
*: If equipped
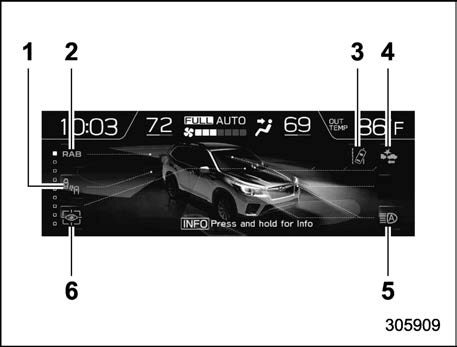
This screen displays the electric compo- nents operation status of the vehicle.
 ” or “
  ” button to select the preferred item.
 /SET” switch to enter the selected item.
! Prevention safety screen
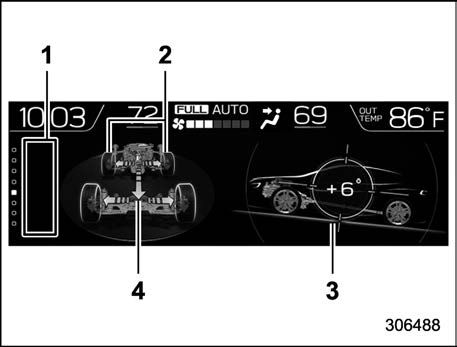
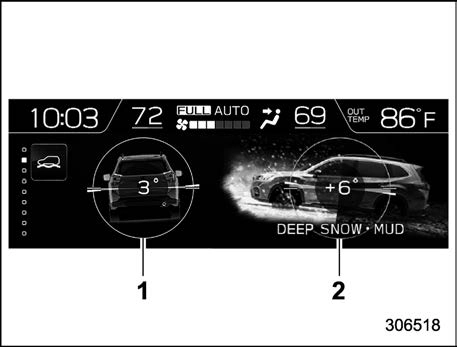
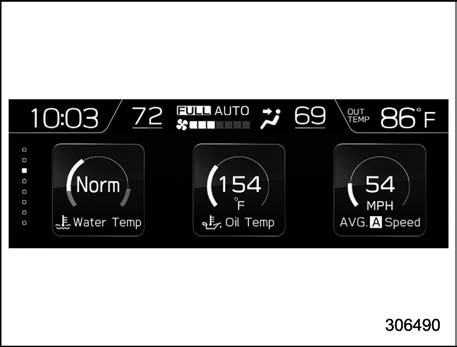
X-MODE screen
This screen displays the driving status of the vehicle and the operation status func- tions. For functions that are operating, the indicator will illuminate or flash.
acceleration or deceleration.
! EyeSight screen
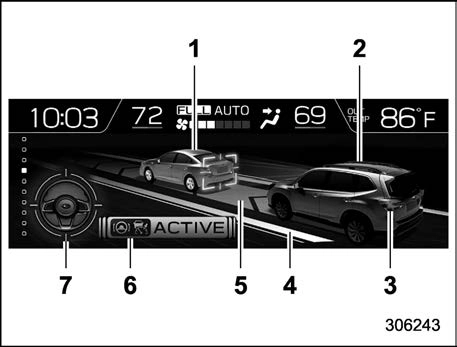
EyeSight system. The lead vehicle indica- tor moves forward and backward depend- ing on the distance with the vehicle in front. For details, refer to the Owner’s Manual supplement for the EyeSight system.
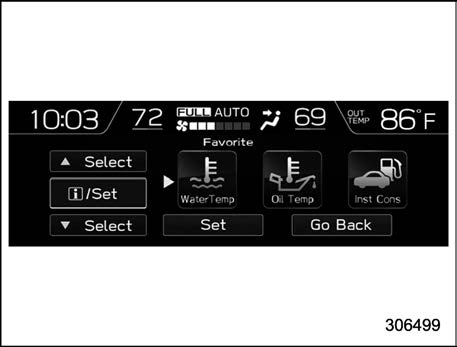
Favorite screen (display example)
This screen displays up to three optional pieces of information that can be selected from the following items.
|
Item |
Details |
|
|
The posted speed limit of the road you are currently driving on is displayed.*1 |
|
|
The calendar is displayed. |
|
|
Driver Monitoring System infor- mation is displayed.*1 |
|
|
Nothing is displayed. |


*1: If equipped
*2: Models with SiriusXM Satellite Radio
The items shown in the favorite screen can be changed. For details, refer to “Favorite setting” P228.

*: Only when a destination is set in the navigation system
The weather information is displayed on the screen.
! Navigation screen (models with navigation system)
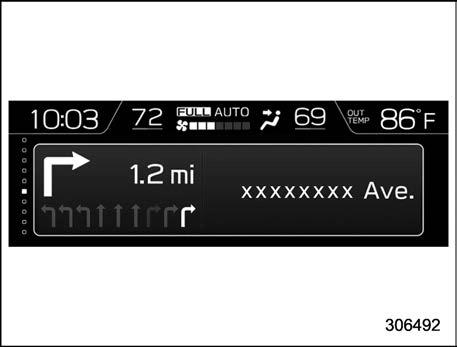
The navigation system information to the destination is displayed on the screen.
! Audio screen
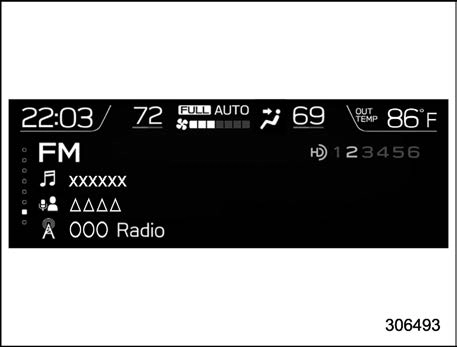
The screen of the currently selected audio source is displayed.
For details about how to use the audio set, refer to the separate navigation/audio Owner’s Manual.
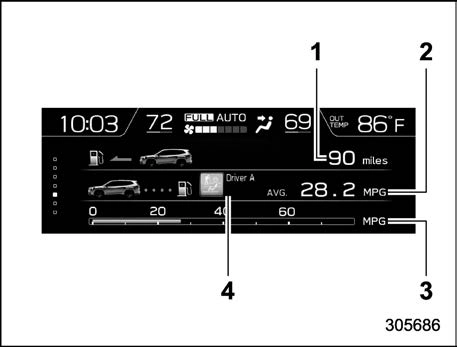
The fuel consumption information is dis- played on the screen.
If the driver is recognized by the Driver Monitoring System, average fuel con- sumption for the driver will be displayed.
warning light illuminates.
! Clock/date screen
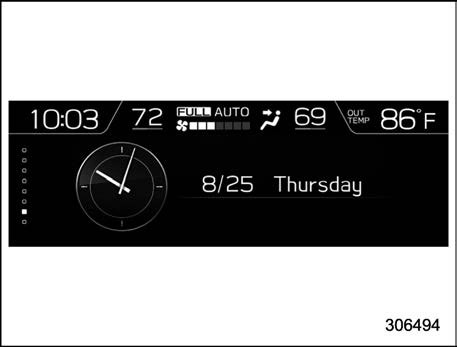
The time and date are displayed.
You can adjust the time and date. For details, refer to “Clock” P232.
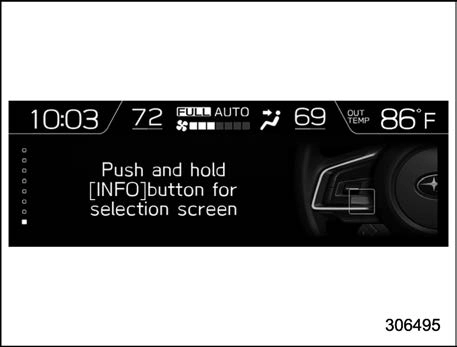
When the INFO button on the steering wheel is pressed and held on this screen, the setting screen can be displayed.
For details, refer to “Setting screen”
P218.
 ” or “
  ” switch to select the preferred menu from the top menu.
 /SET” switch to enter the selected menu.
 ” or “
  ” switch to select the preferred menu from the 2nd menu.
 /SET” switch to enter the selected menu.
The menu lists are as follows.
Items that can be set when stopped:
|
Top menu |
2nd menu |
Description |
Page |
|
|
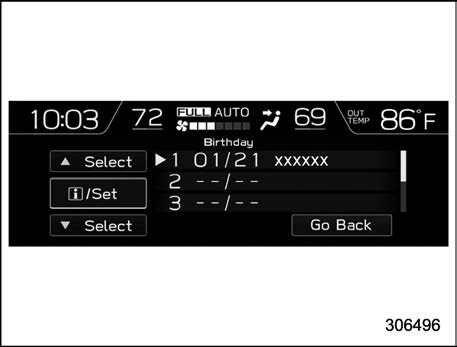
Date |
Birthday |
Set a birthday. |
221 |
|
|
Anniversary |
Set an anniversary day. |
221 |
||
|
Go Back |
Return to the 1st menu. |
— |
||
|
Driver Moni- toring System |
Repeat facial scan |
Perform the user recognition. |
221 |
|
|
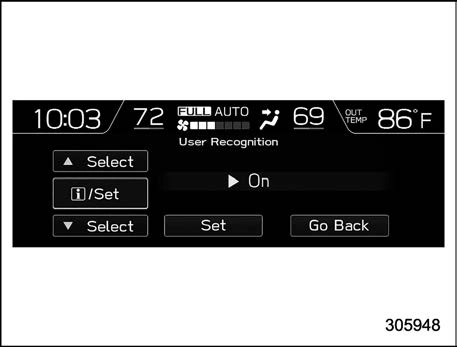
User Recognition |
Turn the user recognition settings on or off. |
On or Off |
227 |
|
|
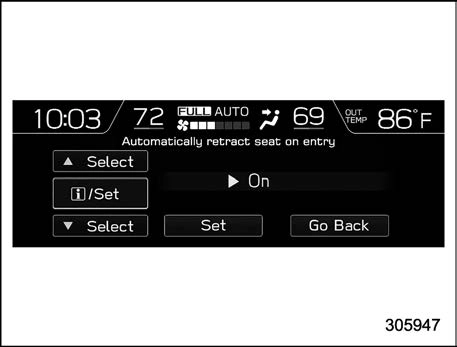
Automatically retract seat on entry |
Turn the automatically retract seat on entry function on or off. |
On or Off |
226 |
|
|
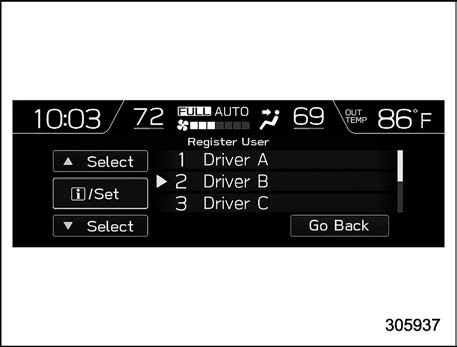
Register User |
Register the user. |
222 |
||
|
Update User Settings |
Re-register the driver’s position. |
225 |
||
|
Delete Driver Position |
Delete the registered driver’s position. |
226 |
||
|
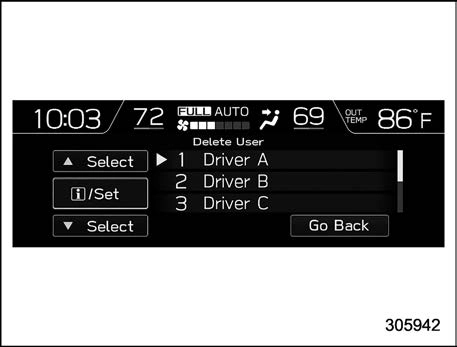
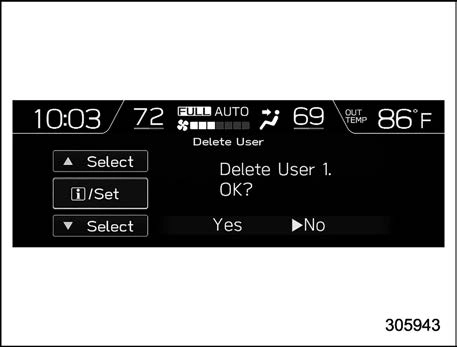
Delete User |
Delete the registered user. |
224 |
||
|
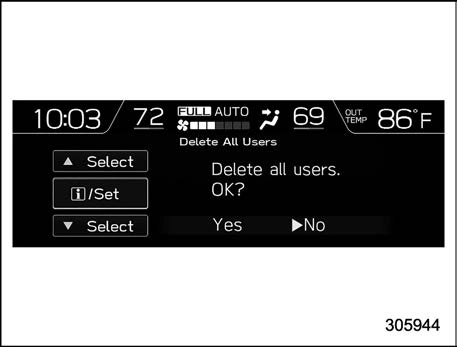
Delete All Users |
Delete the registered all user. |
225 |
||
|
Go Back |
Return to the 1st menu. |
— |
||
|
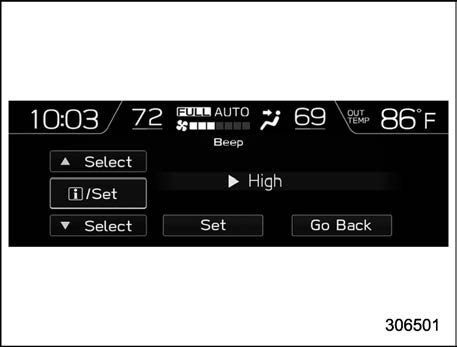
Display/Beep |
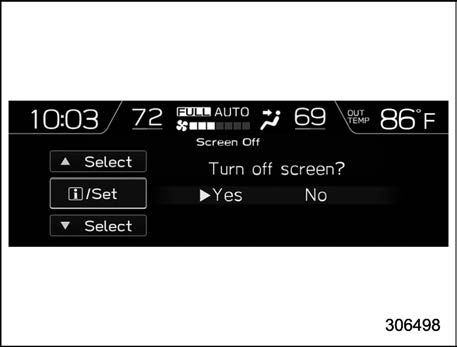
Screen Off* |
Turn the screen off. |
Yes or No |
227 |
|
Favorite |
Set and customize the triple meter. |
228 |
||
|
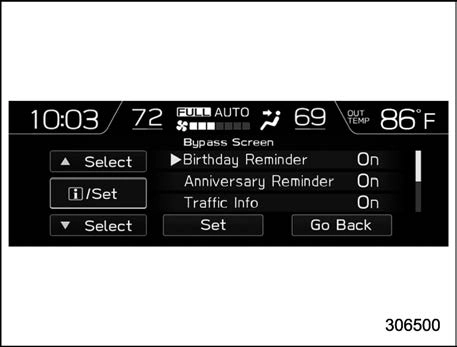
Bypass Screen |
Set the bypass screen for each item. |
On or Off |
228 |
|
|
Beep |
Adjust the beep sound volume. |
High, Low or Off |
228 |
|
|
Go Back |
Return to the 1st menu. |
— |
||
|
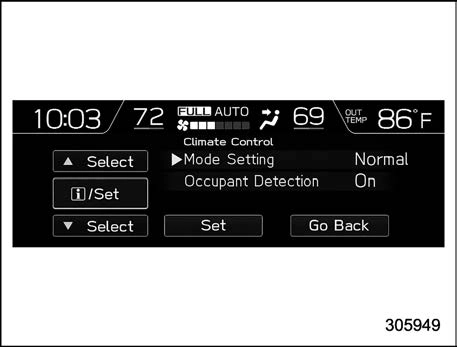
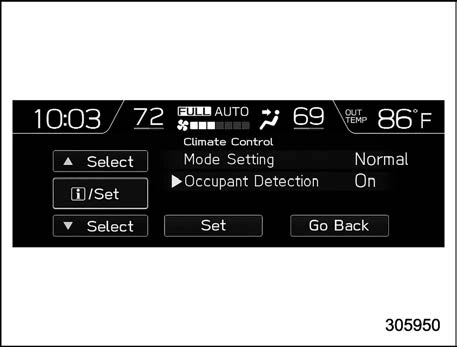
Climate con- trol |
Mode Setting |
Set the operation of the automatic climate control. |
Normal, Mild, ECO or Power |
229 |
|
Occupant Detection |
Set the operation of the climate control depend- ing on passenger. |
On or Off |
229 |
|
|
Go Back |
Return to the 1st menu. |
— |
|
Top menu |
2nd menu |
Description |
Page |
|
|
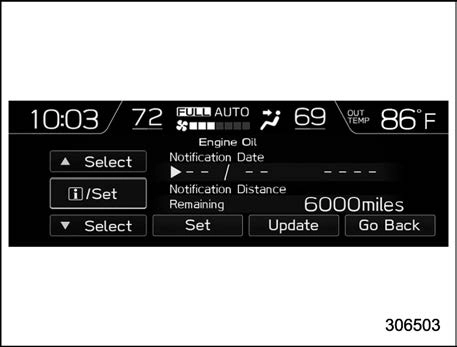
Maintenance |
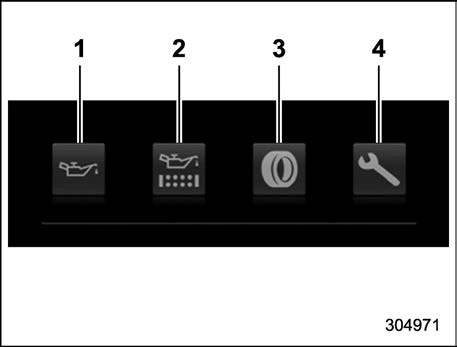
Engine Oil |
Set and adjust the oil maintenance notification date. |
229 |
|
|
Oil Filter |
Set and adjust the oil filter maintenance notification date. |
230 |
||
|
Tires |
Set and adjust the tire maintenance notification date. |
230 |
||
|
Maintenance Schedule |
Set and adjust the vehicle maintenance notification date. |
230 |
||
|
ON/OFF |
Turn on or off the self-check screen that is activated when the ignition switch is turned to the “ON” position. |
On or Off |
230 |
|
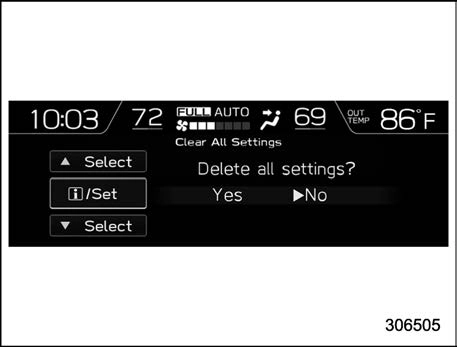
|
Clear All Settings |
Clear all settings for maintenance items. |
Yes or No |
231 |
|
|
Go Back |
Return to the 1st menu. |
— |
||
|
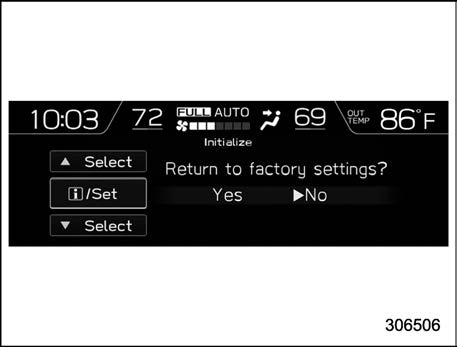
Initialize |
— |
Reset all settings to the default settings. |
Yes or No |
231 |
|
Go Back |
— |
Return to the setting screen. |
— |
*: You can also set this while driving.
Items that can be set while driving:
|
Menu |
Description |
Page |
|
|
Screen Off |
Turn the screen off. |
Yes or No |
227 |
|
Go Back |
Return to the settings screen. |
— |
For safety reasons, we recommend stopping the vehicle in a safe location while setting.
You can set the date, time and 12h or 24h format settings.
For details about clock setting, refer to “Clock” P232.
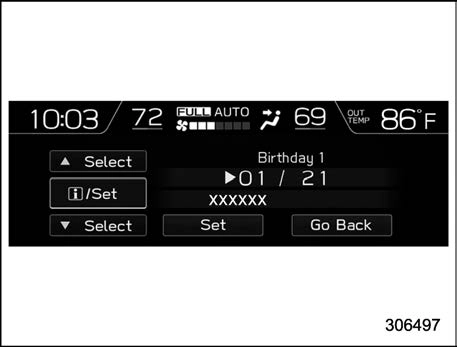
If a birthday or anniversary is approaching, a message will be displayed when the ignition switch is turned to the “ON” position. This function can be set to on or off. For details, refer to “Bypass screen setting” P228.
without applying the setting changes.
! Anniversary setting
1. The procedure for setting an anniver- sary is the same as “Birthday setting”
P221, except that in step 1 “Anniversary” is selected.
! Driver Monitoring System settings
You can set the Driver Monitoring System settings.

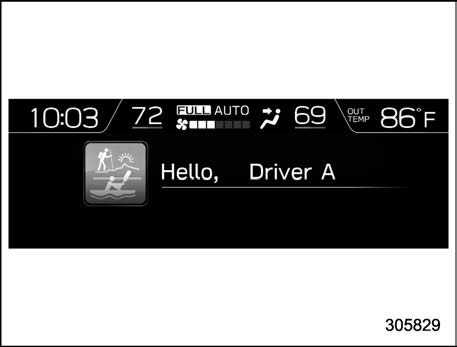
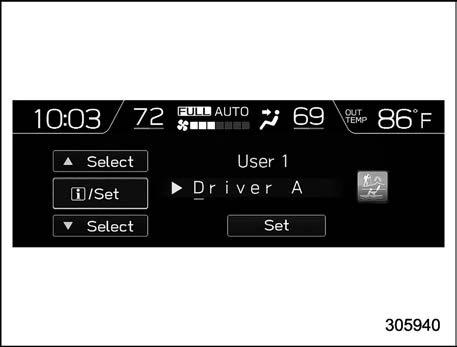
When user recognition is completed, the Hello screen appears and the screen then switches to the basic screen associated with the user information.
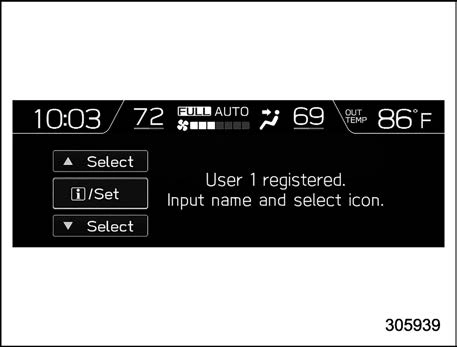
When the screen changes, the registration facial scan is completed.
*: Display
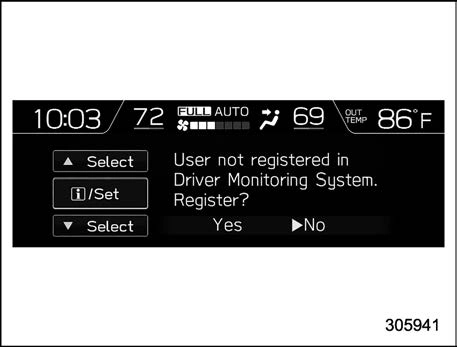
Operate the control switch and select “Yes” to display the screen in step 3. Then follow the registra- tion procedure to complete user registration.
! Delete User
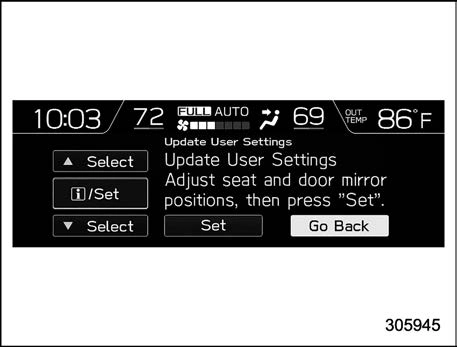
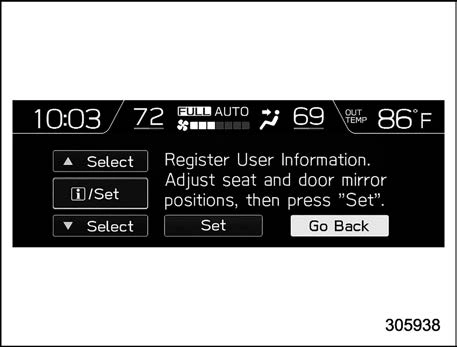
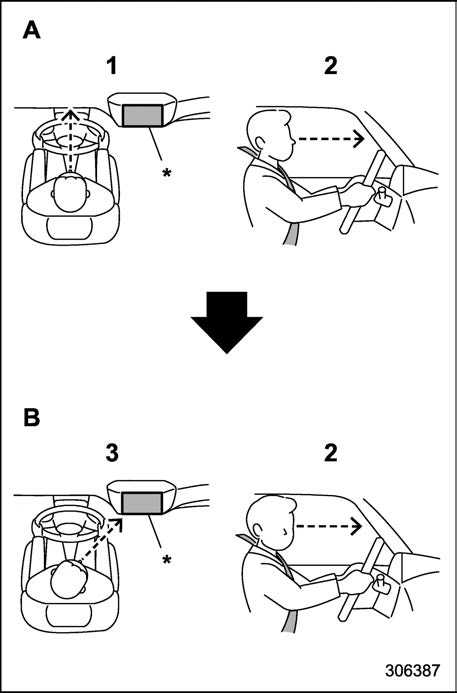
. If the ignition switch is turned to the “OFF” position before user registration is complete, the information of the adjusted seat position, outside mirror angle, and reverse tilt-down outside mirror angle will not be saved.
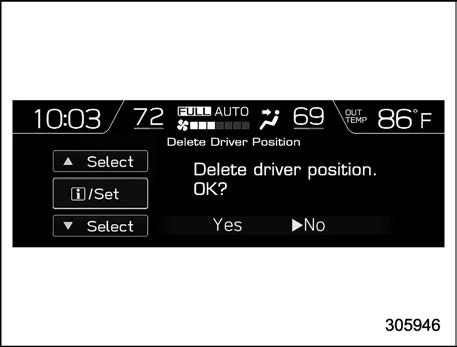
! Delete Driver Position
You can set the display settings and volume settings.
P218.
When the INFO button is operated after the ignition switch is turned to the “ON” or “ACC” position, the screen will be restored. The screen will be restored with the basic screen that was displayed when the screen was turned off.
! Favorite setting
P218.
! Bypass screen setting
! Beep setting
P218.
You can set the climate control settings.
You can set maintenance reminders.
! Oil filter setting
The setting procedure is the same as “Engine oil setting” P229, but select the “Oil Filter” item in step 1.
The setting procedure is the same as “Engine oil setting” P229, but select the “Tires” item in step 1.
The setting procedure is the same as “Engine oil setting” P229, but select the “Maintenance Schedule” item in step 1.

! Initialize
You can initialize the items that have been set to your preference.
Free/Open Source Software Information
This product contains Free/Open Source Software (FOSS).
The license information and/or the source code of such FOSS can be found at the following URL.
http://www.globaldenso.com/en/open- source/ivi/subaru/
Download Manual